
Richies 77 Corvette build starts now.
 09-25-2013, 02:41 PM
#1
Drifting

Thread Starter
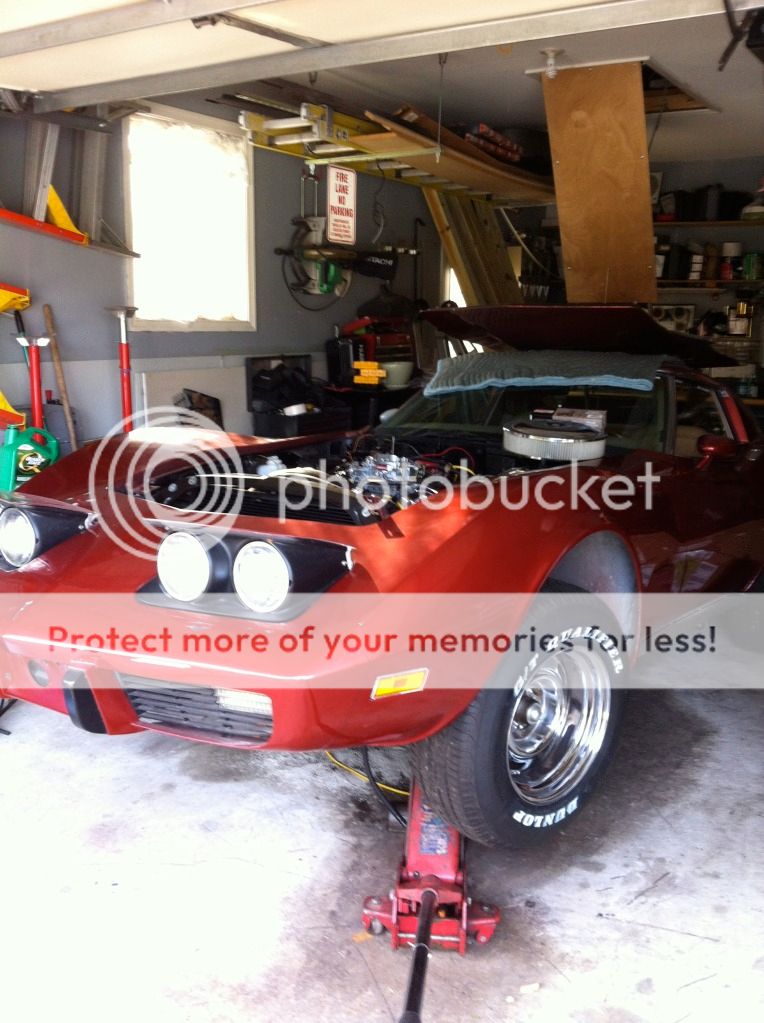
I am starting this thread to document the journey of my newly acquired 1977 Corvette. She is my very first and maybe even my last. I plan on building it into the car that I have always imagined my first Vette would be. I will be incorporating things from the various years that I like into it.
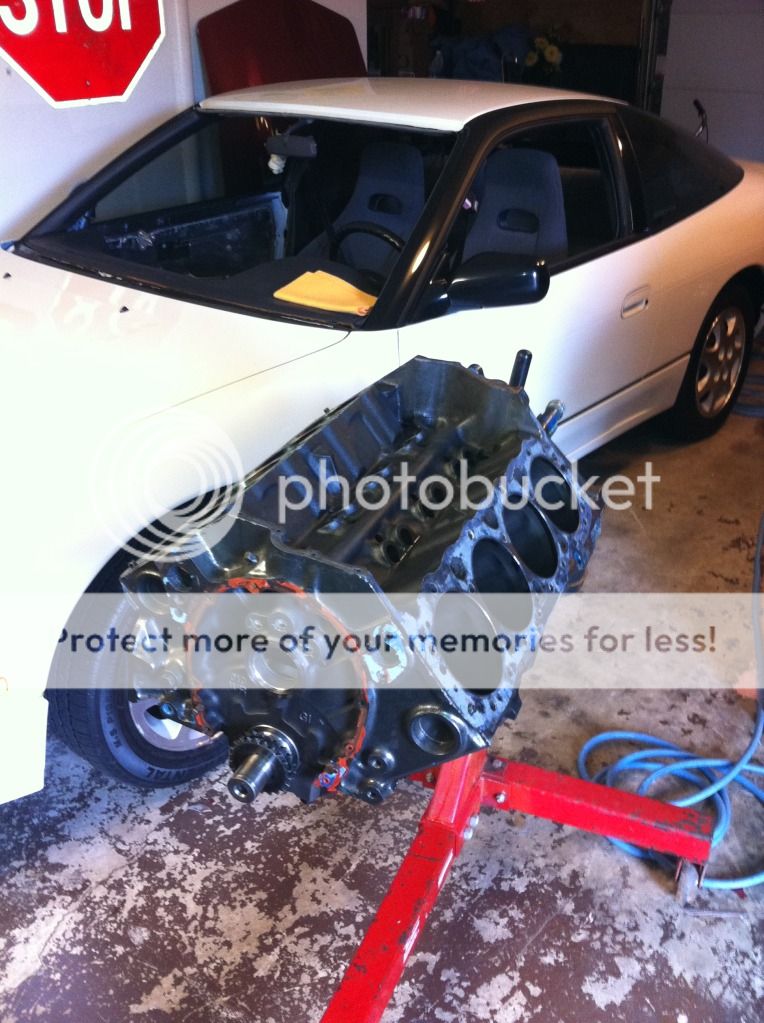
These are a few pictures of my 77. I just bought the car from a guy who spent a ton of money replacing all the suspension,brake calipers,rotors,all bushings, steering linkage, exhaust and on and on. He had a nice engine with good parts built too, but he wiped the cam during break in and the car languished for 2 years till he decided he lost interest and now I have it.
First thing I did is pulled the motor for a complete tear down. And after consulting with a few of you here I have decided That its off to the machine shop for a thorough cleaning and a once over. In the meantime I have decided to redo the engine bay and replace or rebuild everything that I can get off. I took out the column and the gear box for rebuilding. All the wiring will be replaced. And the headlight assemblies will both be redone also. Finally while I am there I will replace both the header bars and cut off the poorly blended in front bumper to do a 80-82 conversion using the two repair panels that are available.It is going to be a frame on project. Also she is really spotless underneath as everything is like I said new or redone. I will keep posting as many pictures as I can to document my progress. I welcome all feedback, advice, ideas, and even criticism�.Rich
Here she is as I first saw her sitting in the POs garage.
Really nice engine build according to the machine shop documentation. The only thing they cheesed out on was the crappy intake manifold from professional products. The valve covers they put on are nice, But do not fit the theme I'm going for. So they, The intake and the cheap Ebay chrome water pump and crappy aluminum pulleys that the PO put on are all coming off and going on Craigslist. The carb and dist are all thats staying.
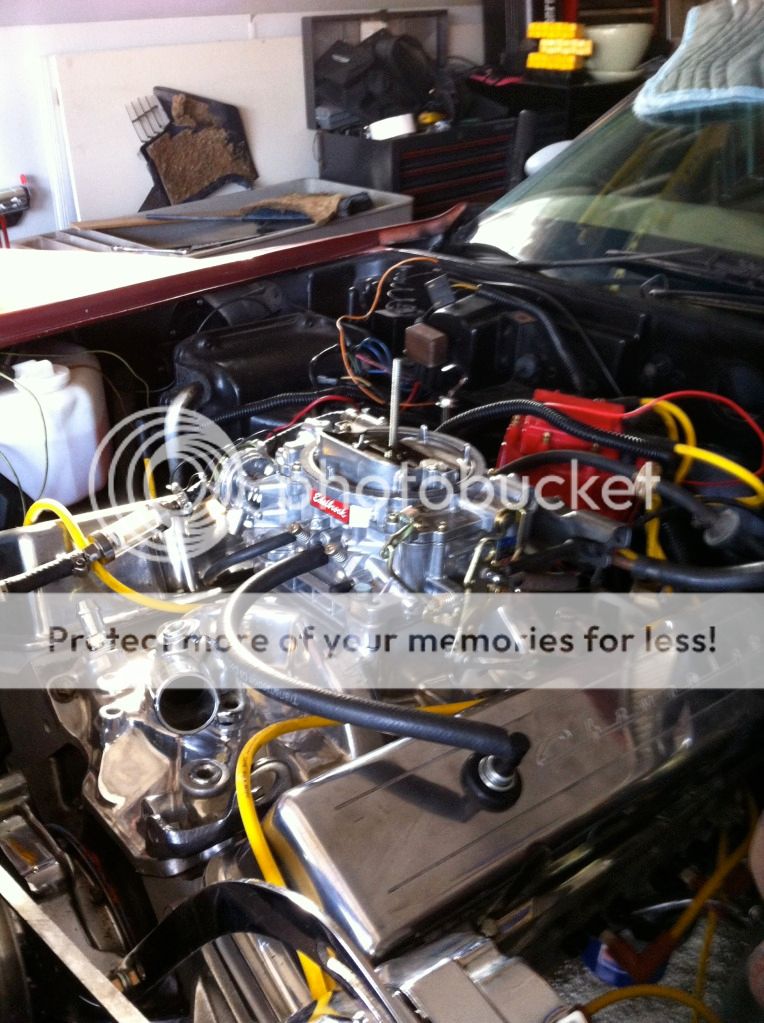
All new interior But the guy never cleaned and detailed the floorpan or firewall. No sound deadener, No paint, Nothing, Just a lot of new stuff on top of 36 years of dirt.

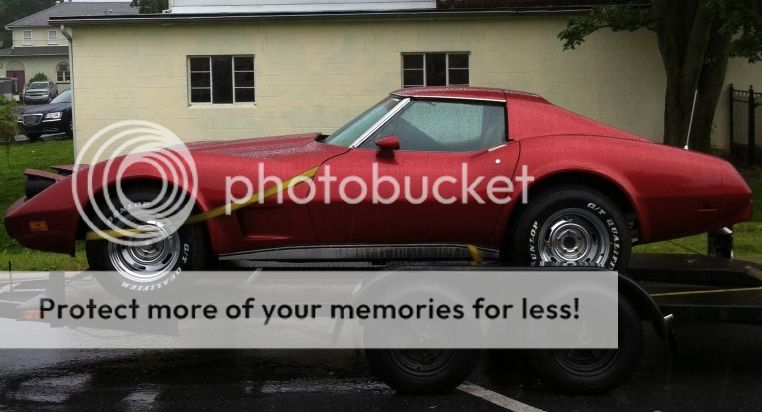
On the trailer for its ride to it's new home.

These are a few pictures of my 77. I just bought the car from a guy who spent a ton of money replacing all the suspension,brake calipers,rotors,all bushings, steering linkage, exhaust and on and on. He had a nice engine with good parts built too, but he wiped the cam during break in and the car languished for 2 years till he decided he lost interest and now I have it.
First thing I did is pulled the motor for a complete tear down. And after consulting with a few of you here I have decided That its off to the machine shop for a thorough cleaning and a once over. In the meantime I have decided to redo the engine bay and replace or rebuild everything that I can get off. I took out the column and the gear box for rebuilding. All the wiring will be replaced. And the headlight assemblies will both be redone also. Finally while I am there I will replace both the header bars and cut off the poorly blended in front bumper to do a 80-82 conversion using the two repair panels that are available.It is going to be a frame on project. Also she is really spotless underneath as everything is like I said new or redone. I will keep posting as many pictures as I can to document my progress. I welcome all feedback, advice, ideas, and even criticism�.Rich
Here she is as I first saw her sitting in the POs garage.

Really nice engine build according to the machine shop documentation. The only thing they cheesed out on was the crappy intake manifold from professional products. The valve covers they put on are nice, But do not fit the theme I'm going for. So they, The intake and the cheap Ebay chrome water pump and crappy aluminum pulleys that the PO put on are all coming off and going on Craigslist. The carb and dist are all thats staying.

All new interior But the guy never cleaned and detailed the floorpan or firewall. No sound deadener, No paint, Nothing, Just a lot of new stuff on top of 36 years of dirt.

On the trailer for its ride to it's new home.


Last edited by persuader; 03-02-2015 at 10:18 PM.
 09-25-2013, 03:02 PM
#2
Drifting
Thread Starter
Out came the radiator and radiator support which are both brand new and put away till resurrection day.
Here is the engine ready for tear down and to check if all is well. Will be thrashing the ebay water pump and crank pulley and painting engine the proper Chevy orange which was the engine color on early 77s.
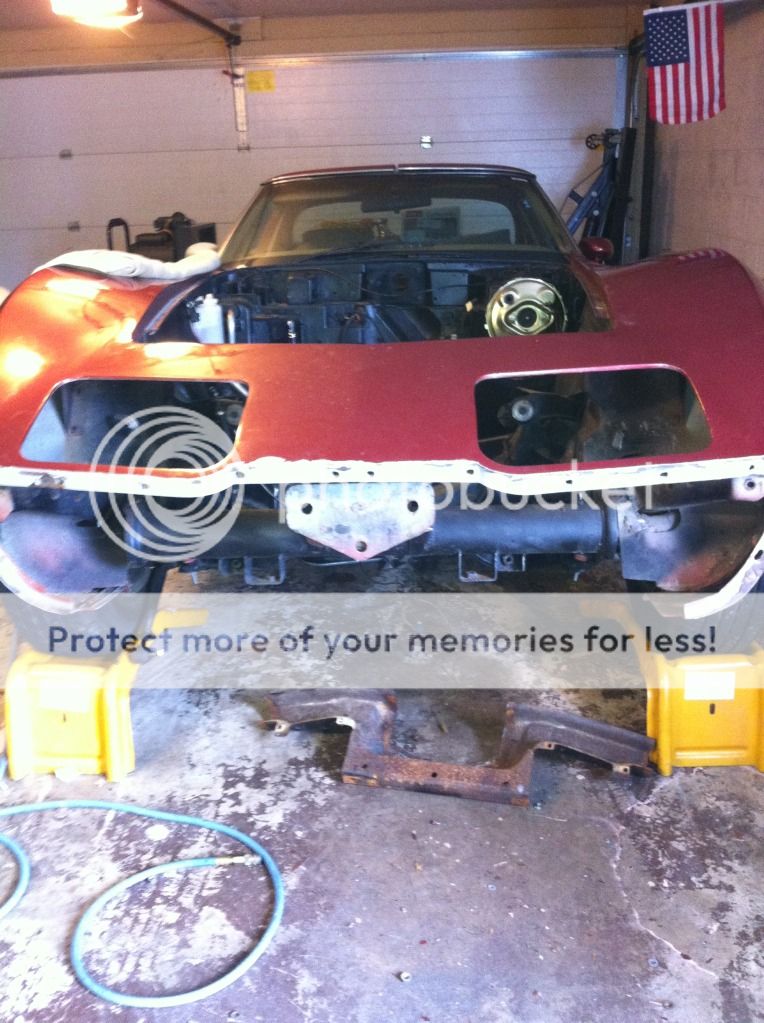
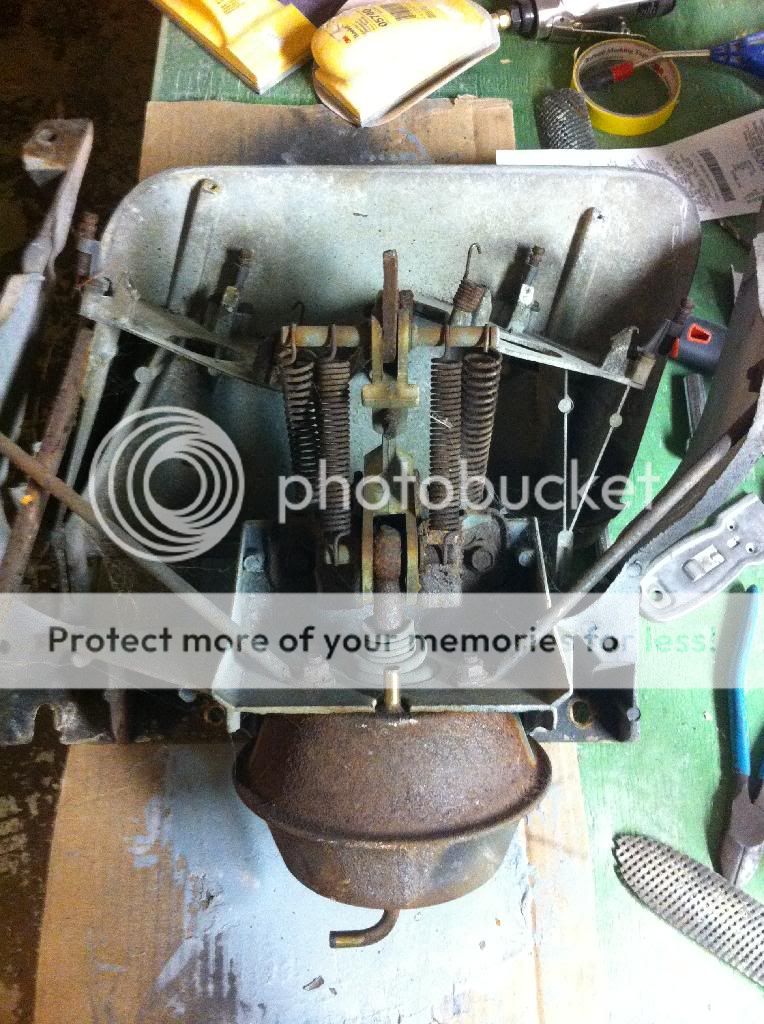
All of tis stuff is coming out so I can replace the header bar and the nose bar.
Off came the bumper to make way for a 80-82 style bumper.
These headlight door assemblies are pretty nasty. Complete rebuild is in order. Later on though, To much to do right now.

Here is the engine ready for tear down and to check if all is well. Will be thrashing the ebay water pump and crank pulley and painting engine the proper Chevy orange which was the engine color on early 77s.

All of tis stuff is coming out so I can replace the header bar and the nose bar.

Off came the bumper to make way for a 80-82 style bumper.

These headlight door assemblies are pretty nasty. Complete rebuild is in order. Later on though, To much to do right now.

Last edited by persuader; 05-26-2014 at 10:19 PM.

 ... another '77 build to checkout. Looks like fun, and a pretty solid starting point. Have fun!

 09-28-2013, 08:42 AM
#6
Drifting
Thread Starter
Thanks guys. I am exited. Been waiting 32 years to work on a Vette that I own, Not a customers car.
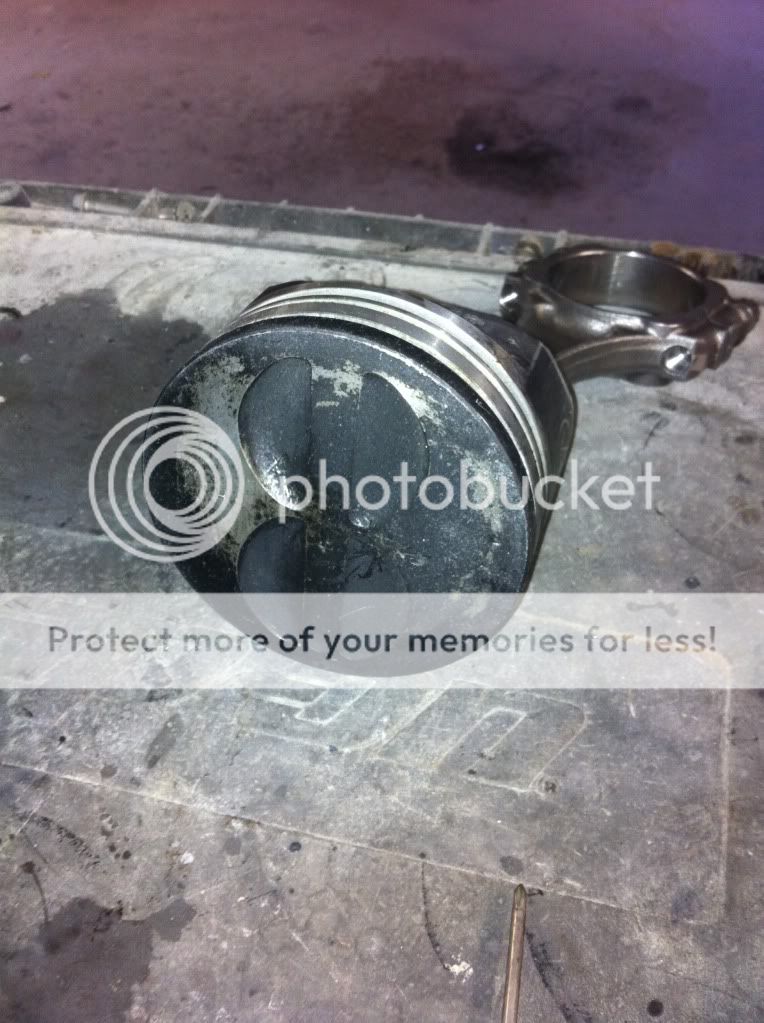
Anyways, Frank. The engine is the original small block l-48 that has been bored 30 over. Eagle crank and connecting rods with sealed power flat top hyper-so and so pistons with a mild comp cams camshaft. Double roller chain and dart 165, 67cc iron eagle heads,Which are not a big deal but much better than the crappy heads it came with,Comp cams 152 roller tipped rockers, edelbrock intake and carb.
I had to take out the engine when I got the car because the PO wiped the cam during start -up. He did replace everything again but never cleaned it out or replaced the bearings he destroyed. Good thing he didn't attempt to start it because if he had started it up, this time he would have done a lot more damage. All the parts are ok and set aside till I can get the block and crank check out and cleaned at the machine shop.
I am told she should have 300 -350 or so hp. which is fine by me. Im a cruiser not a traffic light warrior.
Brand new roller tipped rockers. Comp Cams 1.5
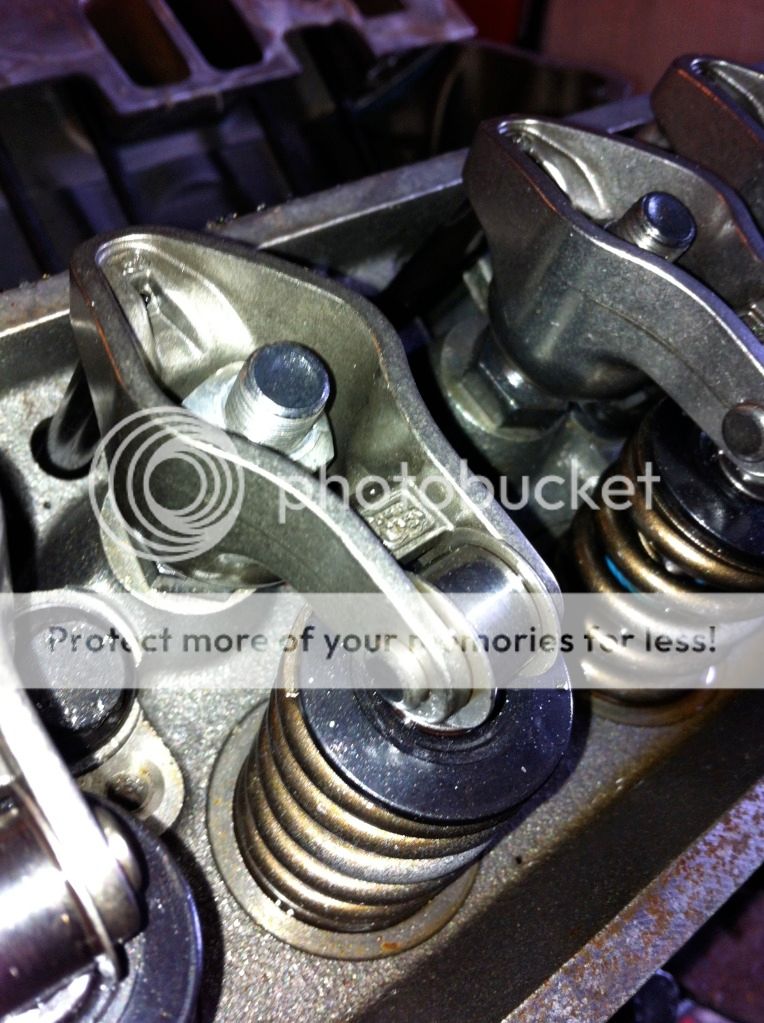
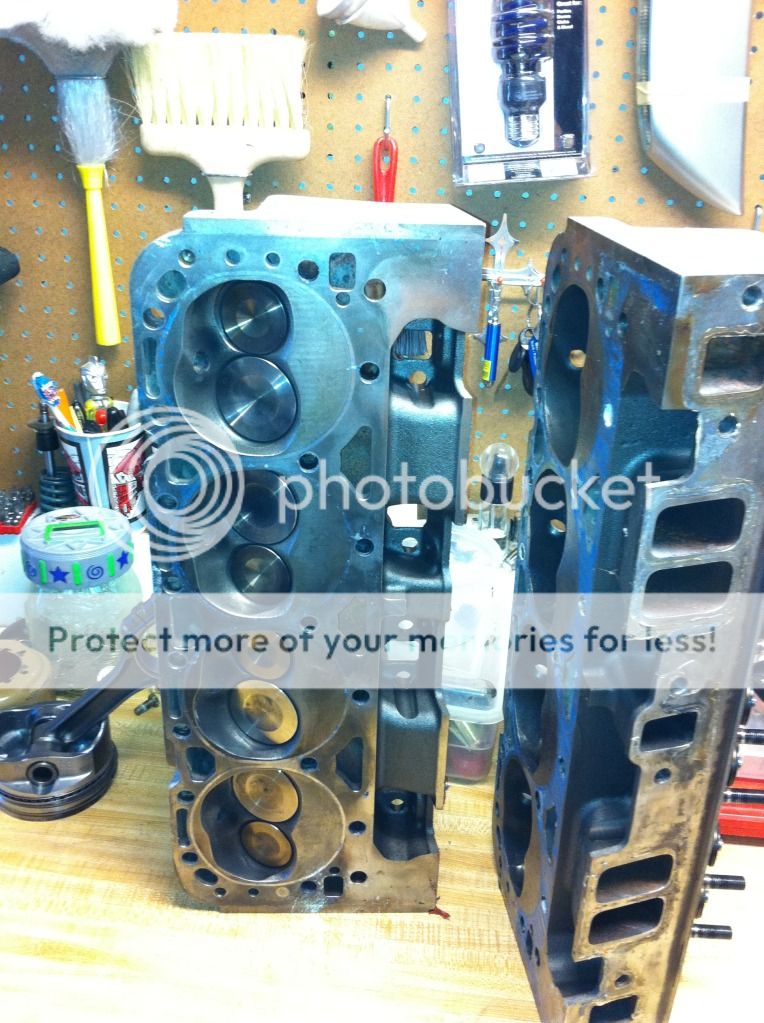
Dart Iron Eagles. Still new but lots of residue on them from the wiped cam. A good cleaning and some paint should suffice.
Eagle crank and rods. Lots more of the dreaded silver stuff from the wiped cam everywhere. I'm no Pro engine builder but some people should not be allowed near an engine.
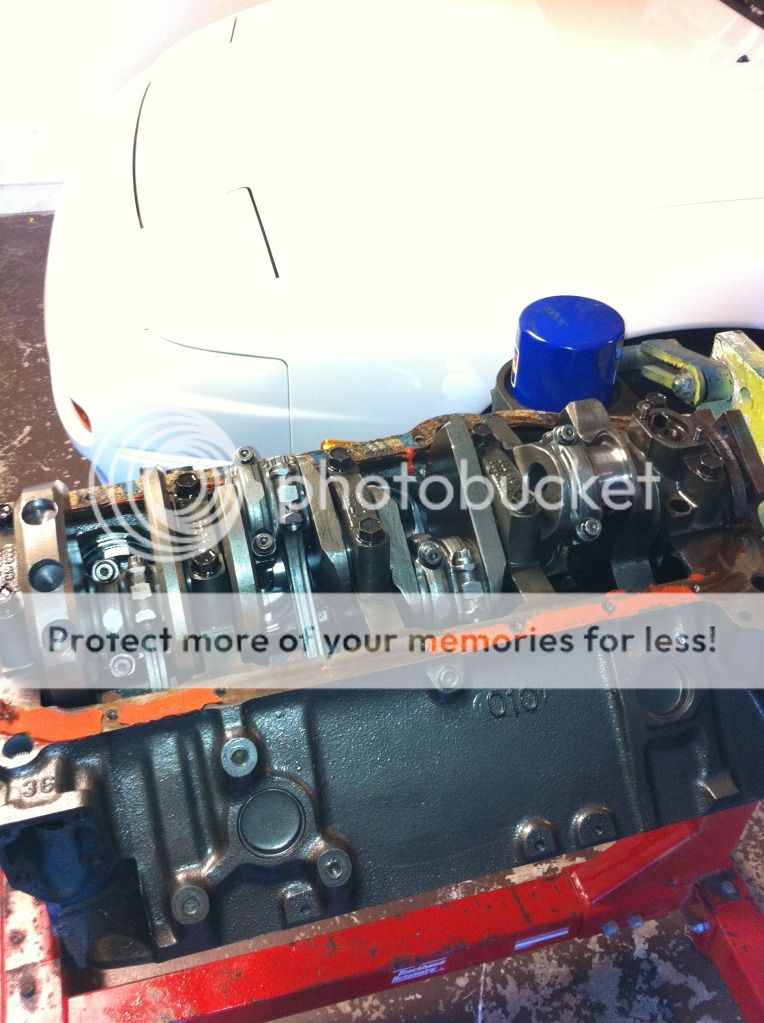
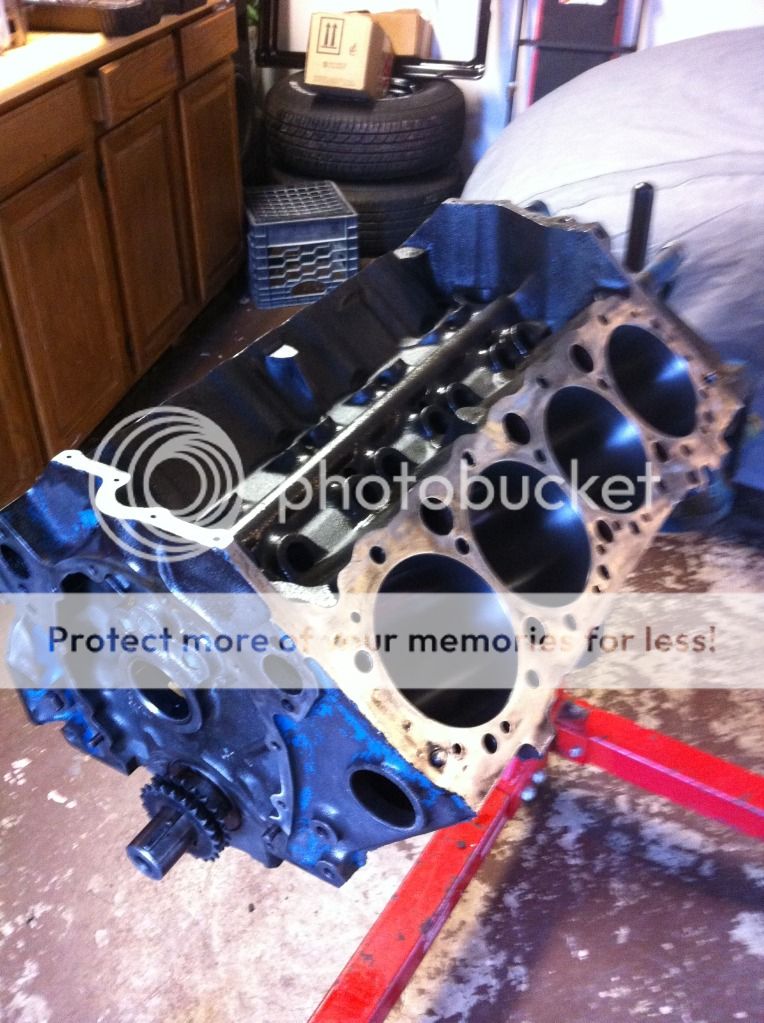
Block and crank ready for a trip to the machine shop to be checked and thoroughly cleaned.
Anyways, Frank. The engine is the original small block l-48 that has been bored 30 over. Eagle crank and connecting rods with sealed power flat top hyper-so and so pistons with a mild comp cams camshaft. Double roller chain and dart 165, 67cc iron eagle heads,Which are not a big deal but much better than the crappy heads it came with,Comp cams 152 roller tipped rockers, edelbrock intake and carb.
I had to take out the engine when I got the car because the PO wiped the cam during start -up. He did replace everything again but never cleaned it out or replaced the bearings he destroyed. Good thing he didn't attempt to start it because if he had started it up, this time he would have done a lot more damage. All the parts are ok and set aside till I can get the block and crank check out and cleaned at the machine shop.
I am told she should have 300 -350 or so hp. which is fine by me. Im a cruiser not a traffic light warrior.
Brand new roller tipped rockers. Comp Cams 1.5

Dart Iron Eagles. Still new but lots of residue on them from the wiped cam. A good cleaning and some paint should suffice.

Eagle crank and rods. Lots more of the dreaded silver stuff from the wiped cam everywhere. I'm no Pro engine builder but some people should not be allowed near an engine.

Block and crank ready for a trip to the machine shop to be checked and thoroughly cleaned.

Last edited by persuader; 12-26-2014 at 08:44 AM.
09-29-2013, 11:09 PM
#7
Drifting
Member Since: Jun 2011
Location: iowa city iowa
Posts: 1,540
Received 253 Likes
on
139 Posts
2020 Corvette of the Year Finalist (appearance mods)
C3 of Year Winner (appearance mods) 2019

Looks like a pretty nice car to start with. Keep us posted on your progress and take lots of pictures
10-23-2013, 06:04 PM
#8
Drifting
Thread Starter
Just got the block back from the machine shop. And now can start going forward with this thing instead of backwards due to the PO's missteps. I have already started ordering parts and have decided to abandon my next spring target date for the engine redo and the front end conversion and engine bay refurb, There is just to much to do and I am extremely **** plus even though a lot of money was spent by the PO, As we all know there is always more that can be spent.
Im going to reassemble the motor and put it aside while I do the front end conversion and the engine bay.
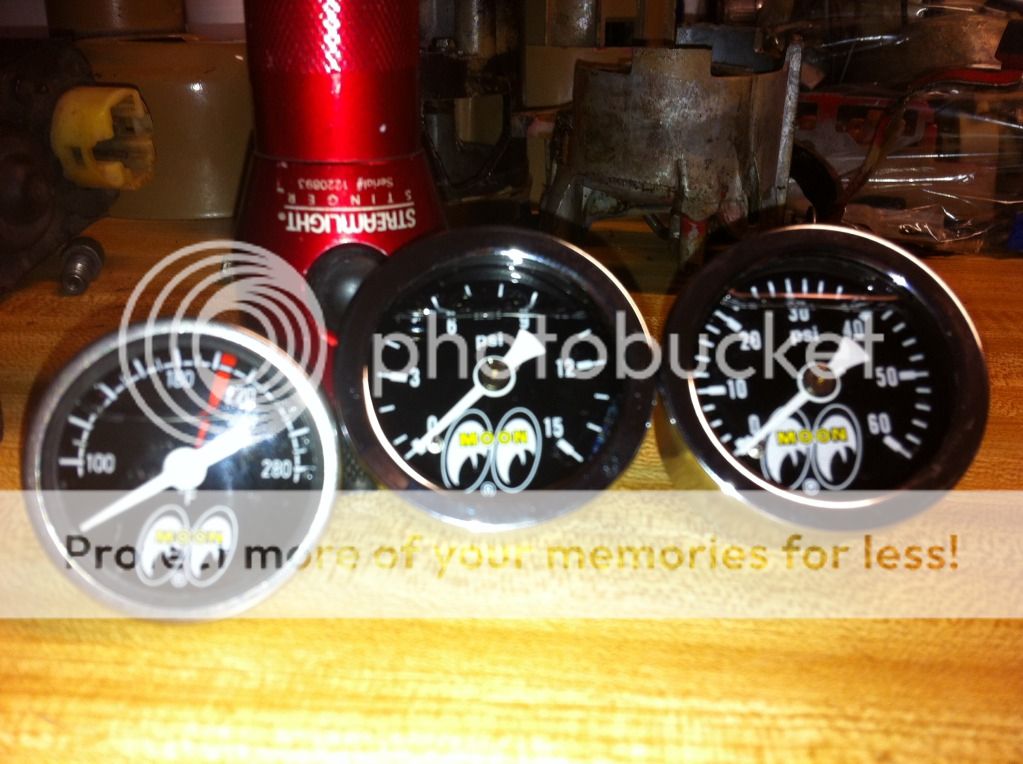
I just also received my Moon direct read guages which I will install on the engine for that nostalgic look I am shooting for. Along with all the old school accessories I can get my hands on. Good examples of what I mean is like a pair of old cal custom or Edelbrock aluminum finned valve covers.
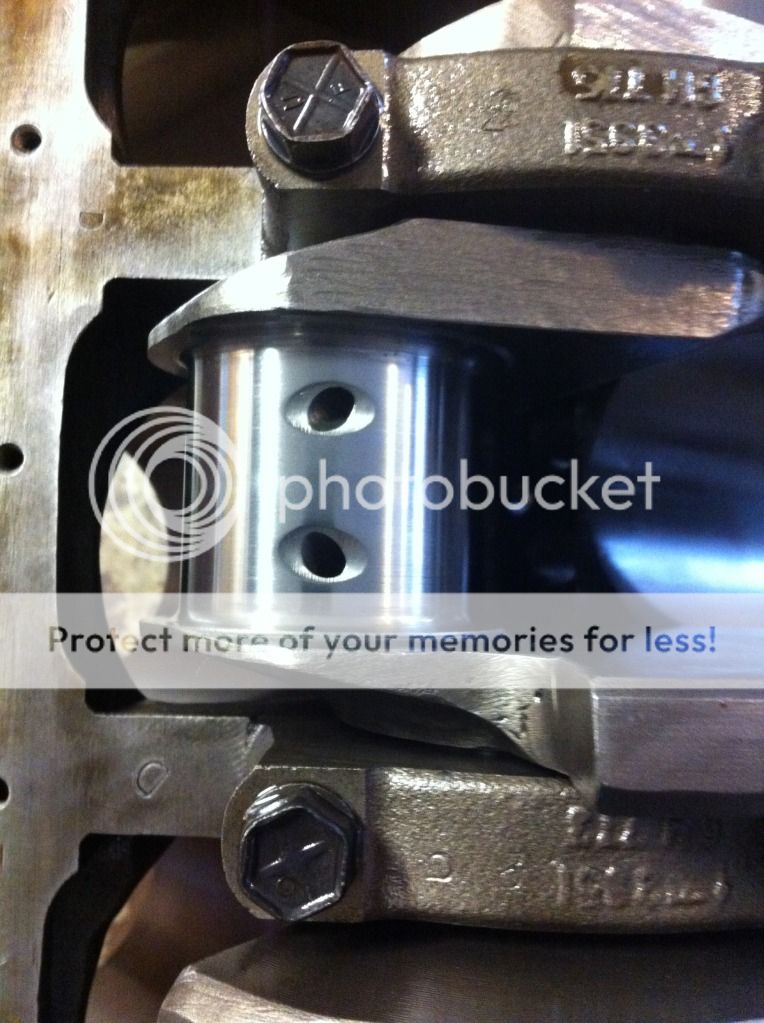
I don't know what I did with the pictures of the crank and rod journals after the tear down. Believe me all the bearing had been worn and pitted right down to their bases because of the silver soup running through the lubrication system. Luckily the crank journals were undamaged and required just a polish and new bearings.
One of the journals. Looks A- OK after a quick micro polishing by the machine shop.
Thought I would show off my new Moon direct read gages. These will help me with my old school nostalgic look in the engine bay. And they are useful when working under the hood too. One for temp, One for oil pressure and one for fuel pressure.
Im going to reassemble the motor and put it aside while I do the front end conversion and the engine bay.
I just also received my Moon direct read guages which I will install on the engine for that nostalgic look I am shooting for. Along with all the old school accessories I can get my hands on. Good examples of what I mean is like a pair of old cal custom or Edelbrock aluminum finned valve covers.
I don't know what I did with the pictures of the crank and rod journals after the tear down. Believe me all the bearing had been worn and pitted right down to their bases because of the silver soup running through the lubrication system. Luckily the crank journals were undamaged and required just a polish and new bearings.

One of the journals. Looks A- OK after a quick micro polishing by the machine shop.

Thought I would show off my new Moon direct read gages. These will help me with my old school nostalgic look in the engine bay. And they are useful when working under the hood too. One for temp, One for oil pressure and one for fuel pressure.

Last edited by persuader; 05-31-2014 at 10:11 PM.
11-03-2013, 05:54 PM
#9
Drifting
Thread Starter
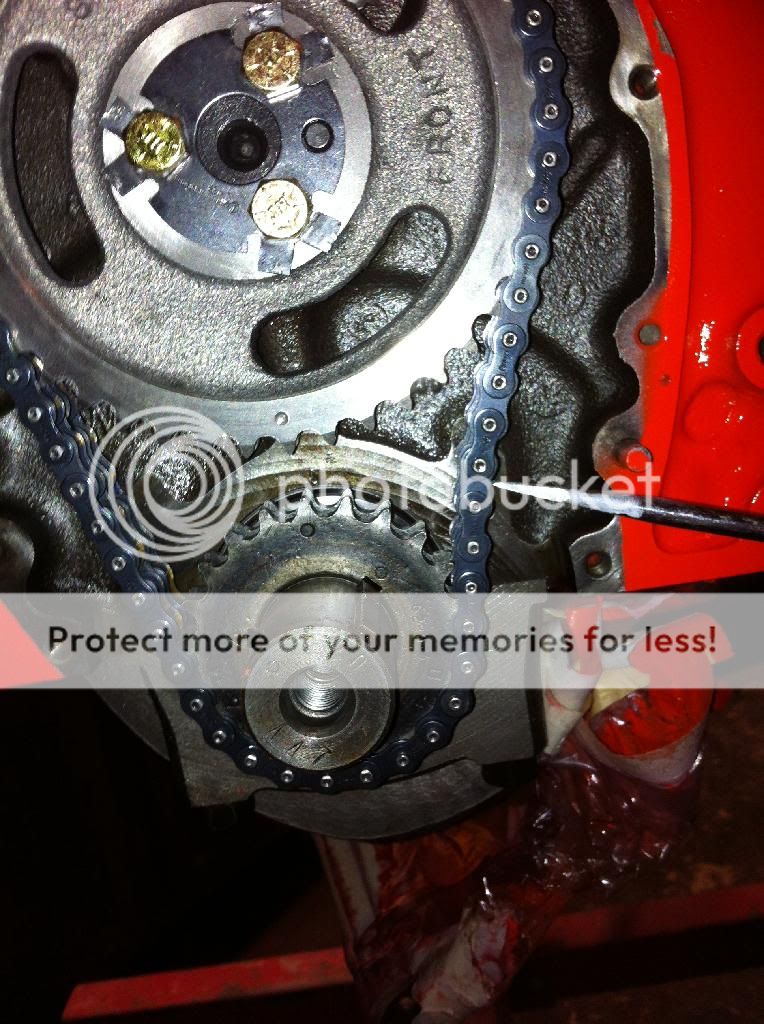
I am reassembling my engine and I remember when I took off the timing chain. Even though it was brand new and the engine was just run for the break-in the chain did have some play, Very little though. Any who I am still replacing it but I was just wondering what you guys recommend. I usually go with a Cloyes, But that is allegedly What I have now. I say allegedly because it has a rolon chain not an iwis chain. I thought that Cloyes uses the iwis chain. And isn't the iwis better? Whatever the case this chain should not have stretched so easily.
So what brand do you guys recommend I use and one that will clear the cover?
So what brand do you guys recommend I use and one that will clear the cover?

Last edited by persuader; 05-05-2014 at 08:19 PM.
11-03-2013, 06:53 PM
#10
TheCorvetteBen


You wanted some feedback and here it is, your plan is excellent except for one thing. Any C3 pre 1980, that has a 80-82 nose on it (IMHO) to me looks like something that got wrecked and then thrown together to make it look "newer". Believe it or not they did this back in the day, I would run the 77 front bumper and add the 78 lower ground effects to give it the look you are after.
11-03-2013, 07:34 PM
#11
Drifting
Thread Starter
I hear what you are saying'. But it does not matter to me. I like the look of the 80-82s front and rear bumpers best of all, but don't really like the bubble window and that cheap looking plastic fender vent that is screwed on to them either. I prefer the sugar scoop rear and the open fender vents on my 77. Also I plan on adding the vent on the rear of the hood that the earlier ones had. Looks better to me. And also a pop out rear window. So you see I am adding to my car a lot of the things that I like of the various years. I am not concerned with numbers matching although the engine is the original, Well the block is. And I know that i will be criticized by the Corvette Gestapo, But it is what I have always dreamed that my first Vette would look like.
Although, I suspect that most people will like what the final product will look like.
Although, I suspect that most people will like what the final product will look like.
Last edited by persuader; 03-02-2015 at 10:31 PM.
11-03-2013, 09:17 PM
#12
Nam Labrat


Member Since: Sep 2013
Location: New Orleans Loo-z-anna
Posts: 33,881
Received 4,153 Likes
on
2,726 Posts
Knock yourself out........just be sure to post pics!
And don't throw that brace away.....I may need it

And don't throw that brace away.....I may need it
Last edited by doorgunner; 11-03-2013 at 09:20 PM.
11-03-2013, 10:06 PM
#13
TheCorvetteBen
I hear what you are saying'. But it does not matter to me. I like the 80-82 front bumper best of all, but don't like the bubble window and the plastic fender vent either. I prefer the sugar scoop rear and the fender vent on my 77. Also I plan on adding the vent on the rear of the hood that the earlier ones had. Looks better to me. And also a pop out rear window. So you see I am adding to my car a lot of the things that I like of the various years. I am not a numbers matching car kind of guy. And I know that i will be criticized by the purist but it is what I like.
11-03-2013, 10:15 PM
#14
Safety Car

Thats a lot of work so far, and good documentation with the photos. I like your list of changes to the car to make it what you want. Those are some good sounding additions that should work together.
kdf
kdf
11-04-2013, 12:59 AM
#15
Drifting
Thread Starter
[QUOTE=kdf1986;1585340236]Thats a lot of work so far, and good documentation with the photos. I like your list of changes to the car to make it what you want. Those are some good sounding additions that should work together.
Thank You! I think so also.
Thank You! I think so also.
Last edited by persuader; 05-31-2014 at 10:14 PM.
11-04-2013, 01:29 AM
#16
Drifting
Thread Starter
Out came the header bar and the nose bar. Both had still been solidly attached but were covered in rust and the header bar had a couple of broken screws in it so out they went.

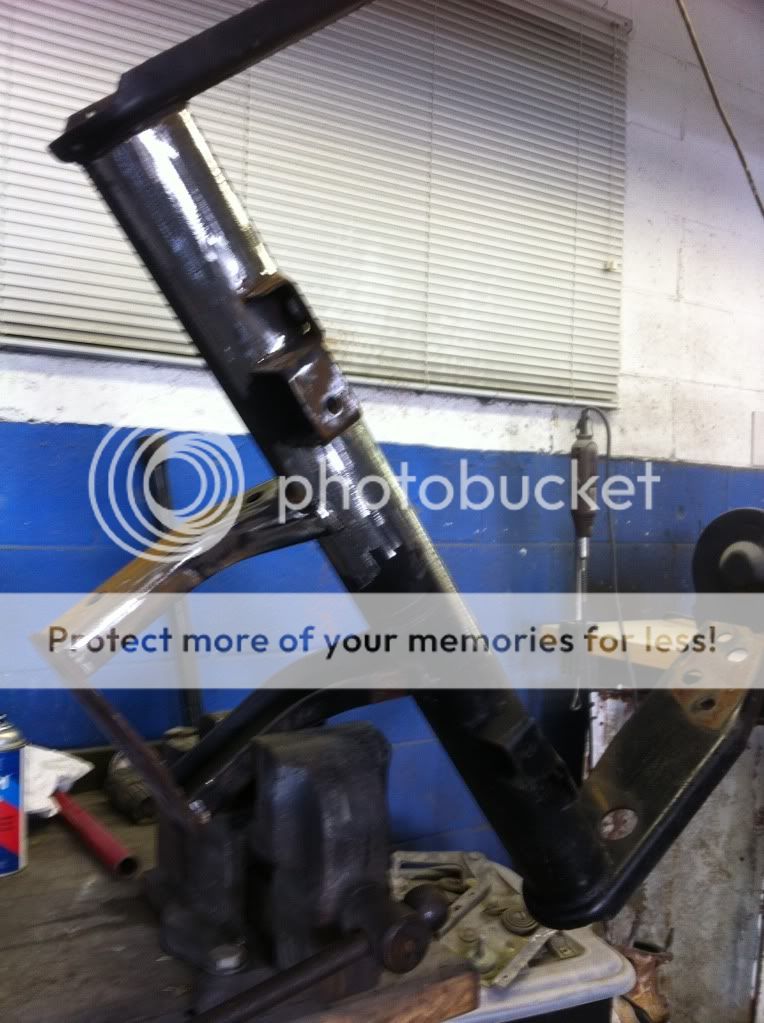
I removed the bumper reinforcement to clean it up. I first ground down all the welding scag and sandblasted the entire thing. I will be painting it using some epoxy primer and some black single stage with a matting agent in it to give me a nice factory semi gloss.
At this point I also started stripping the front end with razor blades and discovered that at least the front end of this car had been stripped of all old paint prior to it being painted the current color.

I removed the bumper reinforcement to clean it up. I first ground down all the welding scag and sandblasted the entire thing. I will be painting it using some epoxy primer and some black single stage with a matting agent in it to give me a nice factory semi gloss.

At this point I also started stripping the front end with razor blades and discovered that at least the front end of this car had been stripped of all old paint prior to it being painted the current color.
Last edited by persuader; 07-13-2014 at 10:08 PM.
11-04-2013, 01:46 AM
#17
Drifting
Thread Starter
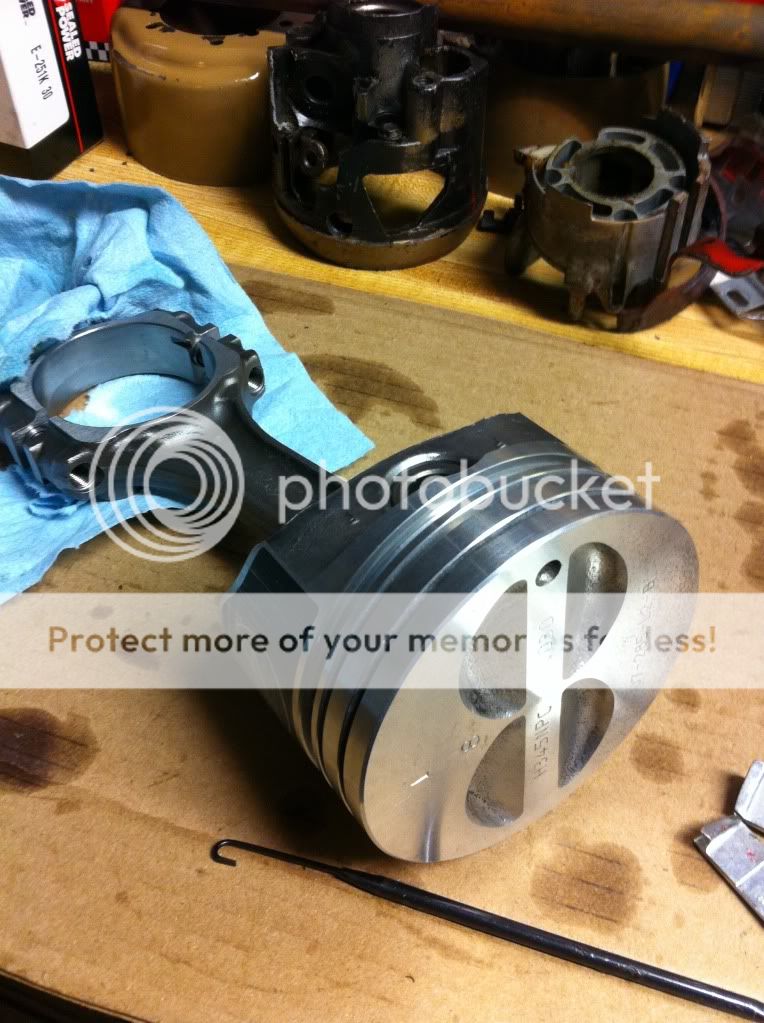
Hard to believe these are brand new and only used for initial break-in.
A quick wipe with laquer thinner and ready for new bearings and install.
The rad support was installed new back in 08 and was still new obviously. But even so I still blasted and primed and painted it since the paint on these things suck to begin with.

No more rusted header and nose piece.

After razor stripping most of the nose.

I will have to eventually break out the paint remover to take it the rest of the way down. Thats all for now. Rich

A quick wipe with laquer thinner and ready for new bearings and install.

The rad support was installed new back in 08 and was still new obviously. But even so I still blasted and primed and painted it since the paint on these things suck to begin with.

No more rusted header and nose piece.

After razor stripping most of the nose.

I will have to eventually break out the paint remover to take it the rest of the way down. Thats all for now. Rich
Last edited by persuader; 07-13-2014 at 10:14 PM.

 [/UR
[/UR

