
My 1973 Frame off Follow along the Restration

 10-07-2013, 08:39 PM
#22


 10-07-2013, 09:09 PM
#23
Burning Brakes

Thread Starter
I spent about 30 days reading all the vette forums on this subject, it seems about 50% say (lord fuser) and the other 50% say the bonding adhesive. Most agree what I decided to use is more like the original bonding adhesive. It has lasted 40 years so I went with it. I have 2 tubes of the (Lord Fuser) in the shop as it is not the price.

 10-07-2013, 09:40 PM
#27
Burning Brakes
Thread Starter
March 10 2013:
I went to Austin, TX and picked up the transmission. I have decided to use a 4L60E. It was a vital step as I have to modify my headers to fit the LS block. The Transmission will get to the transmission shop later to be rebuilt. Found a box at the door step it was the side pipes. So after installing the Trans I went on to cutting up a brand new set of hooker headers..
Got headers tacked up on new flanges
10-07-2013, 09:55 PM
#28
Burning Brakes
Thread Starter
March 29 2013:
a week prior I took Western rims off they look so bed, took them to the powder coaters and go them back... Wow
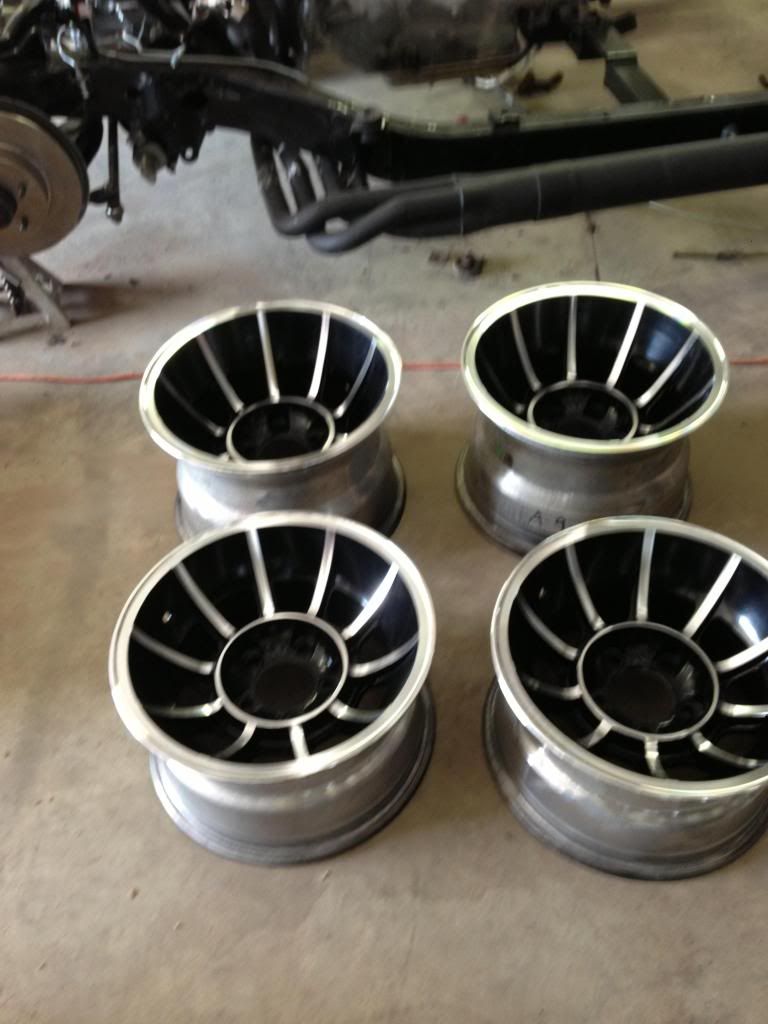
I ordered some vette center caps but needed to modified them to fit the wheels. I added the lip on the bottom.
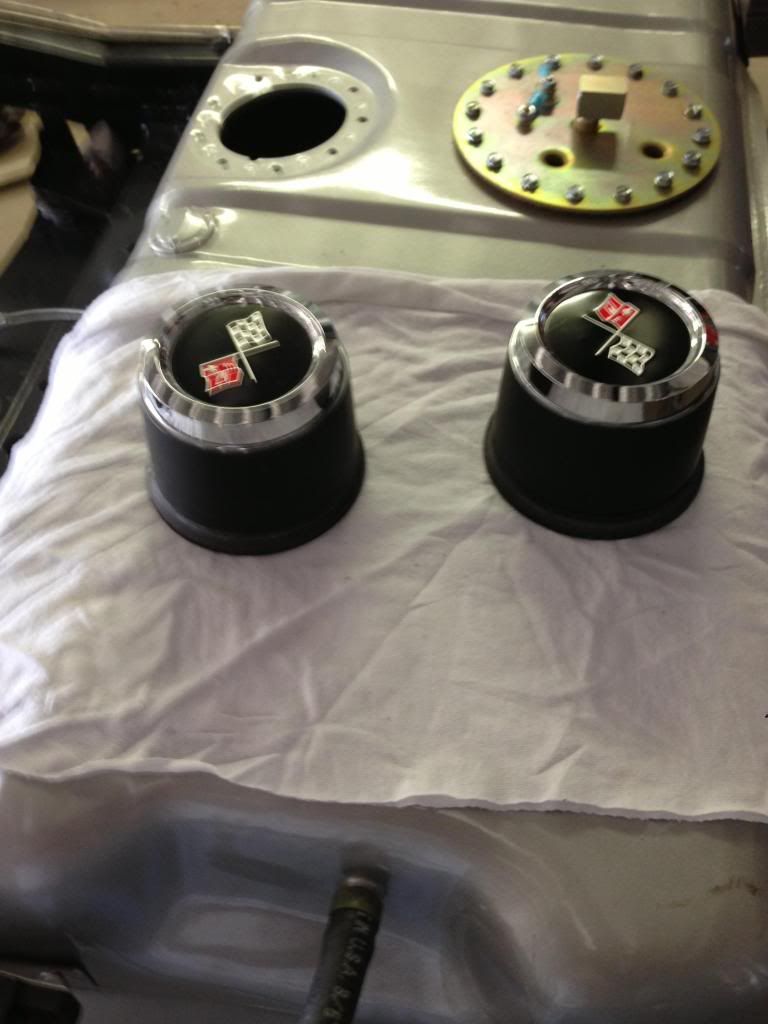
I then dropped them off at the tire shop to put some rubber on them.
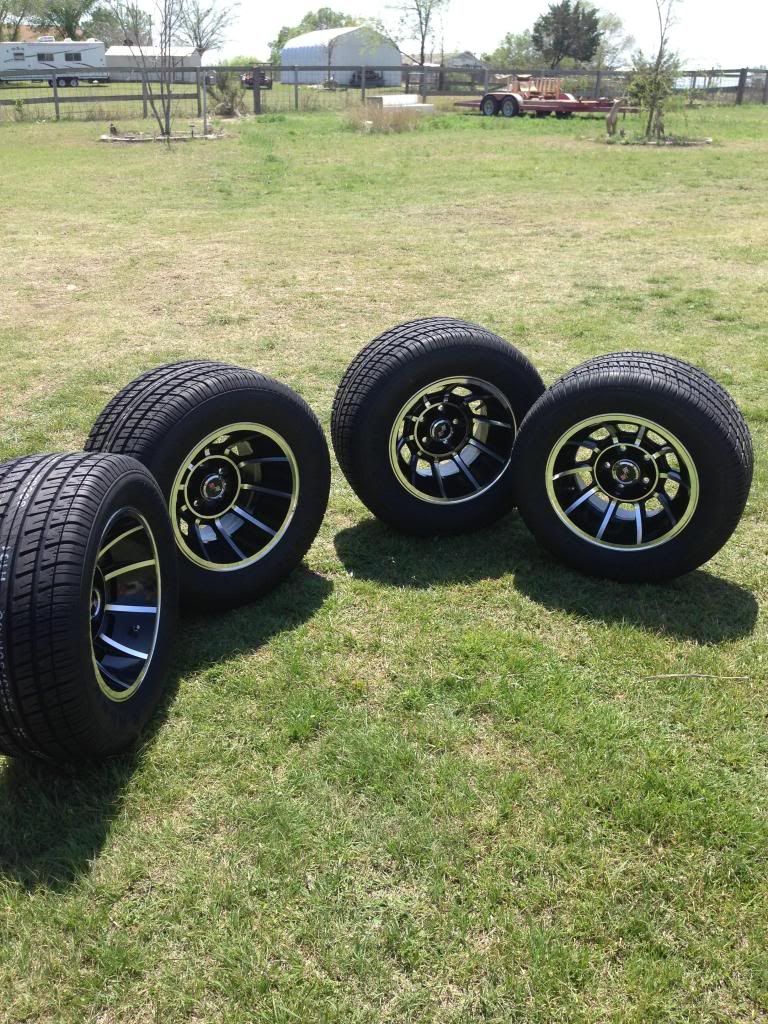
a week prior I took Western rims off they look so bed, took them to the powder coaters and go them back... Wow
I ordered some vette center caps but needed to modified them to fit the wheels. I added the lip on the bottom.
I then dropped them off at the tire shop to put some rubber on them.
10-07-2013, 10:11 PM
#29
Burning Brakes
Thread Starter
March 31 2013:
I spent Hours with a drill and wire brush DA sander cleaning up the under dash. Removing the rust from the metal that was uncoated from factory. I primed and painted it to give the metal and fiberglass some protection and look better.
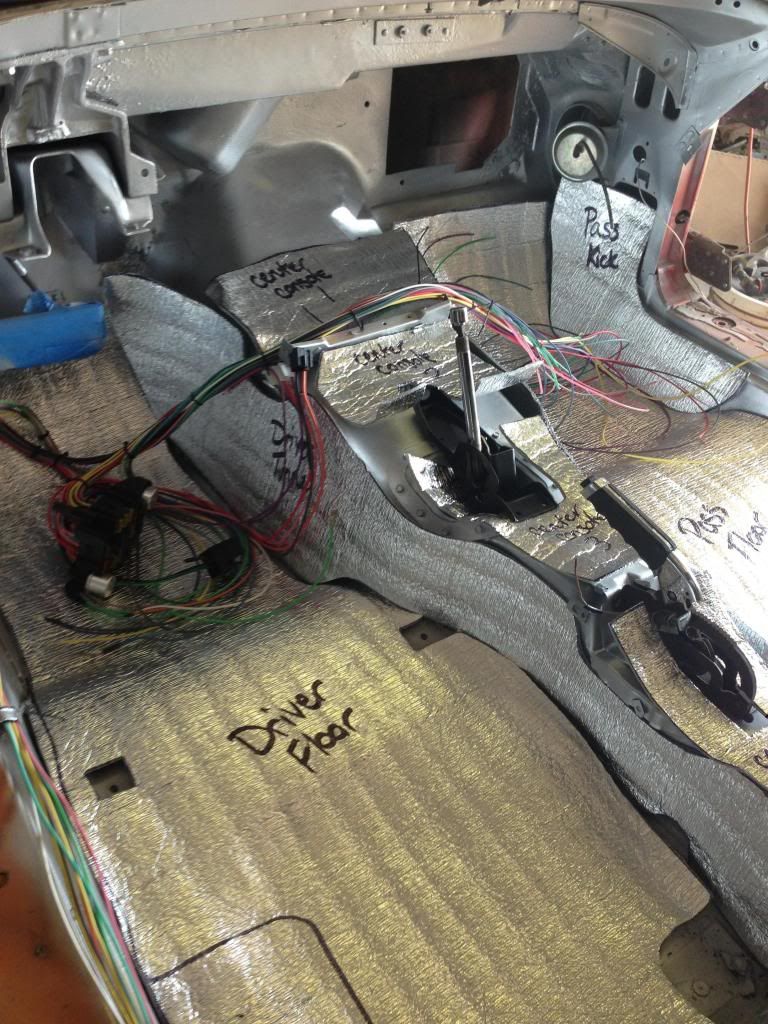
I then started fitting in the sound insulation
Another item I will be doing is before putting body on frame for the last time the body will go to the local Rino Liner dealer, they are going to spray the underside to give it a better insulation and strengthen the underside. I did this on my 37 PU and sure helped with road noise and AC.
I spent Hours with a drill and wire brush DA sander cleaning up the under dash. Removing the rust from the metal that was uncoated from factory. I primed and painted it to give the metal and fiberglass some protection and look better.
I then started fitting in the sound insulation
Another item I will be doing is before putting body on frame for the last time the body will go to the local Rino Liner dealer, they are going to spray the underside to give it a better insulation and strengthen the underside. I did this on my 37 PU and sure helped with road noise and AC.
10-07-2013, 10:35 PM
#30
Burning Brakes
Thread Starter
April 7 2013,
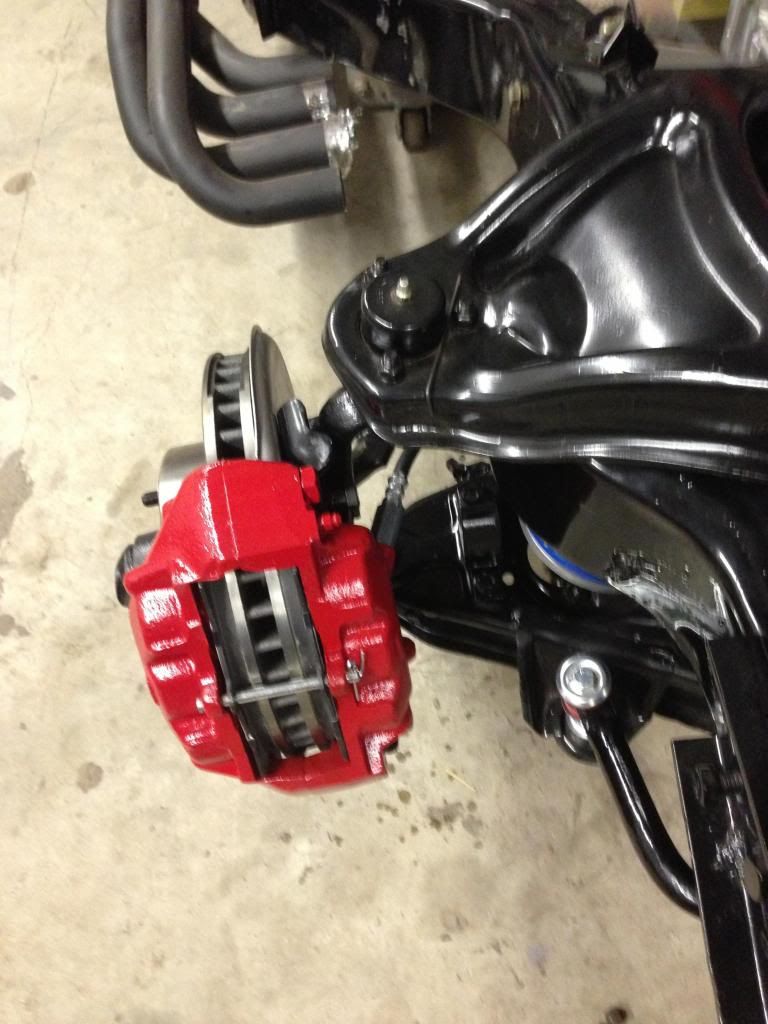
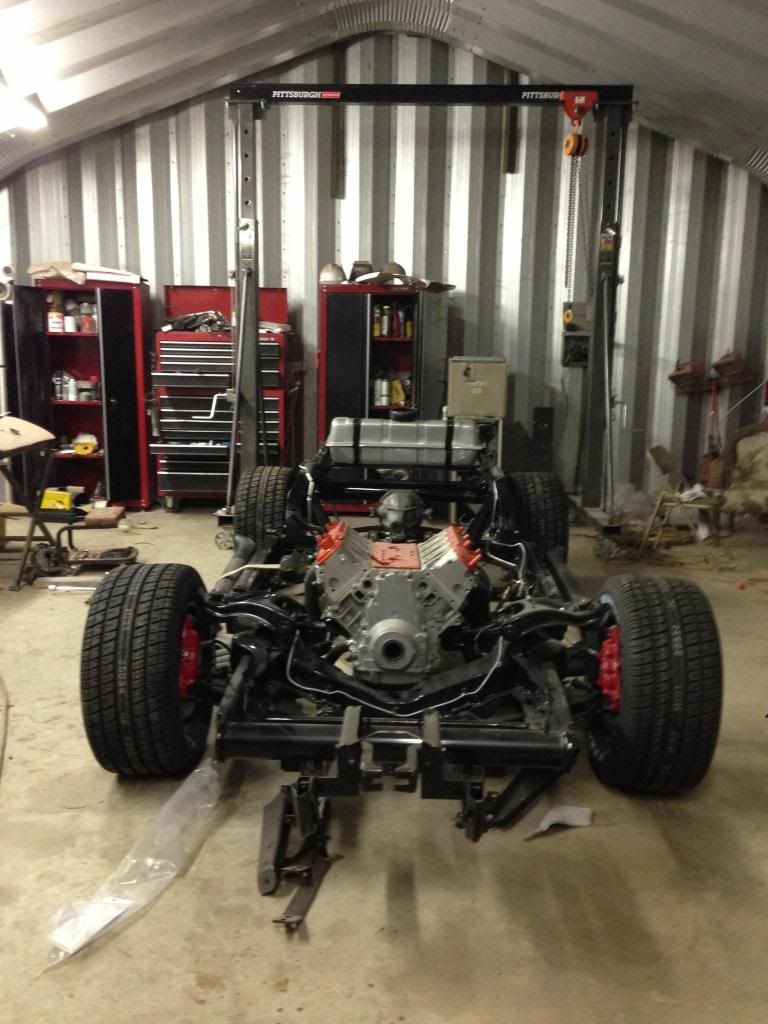
I received the Trailing arms back from Vansteel.
I also received the rear spring from VBP. I chose to go with adjusting struts so I had everything to put the rear back together and have a rolling frame
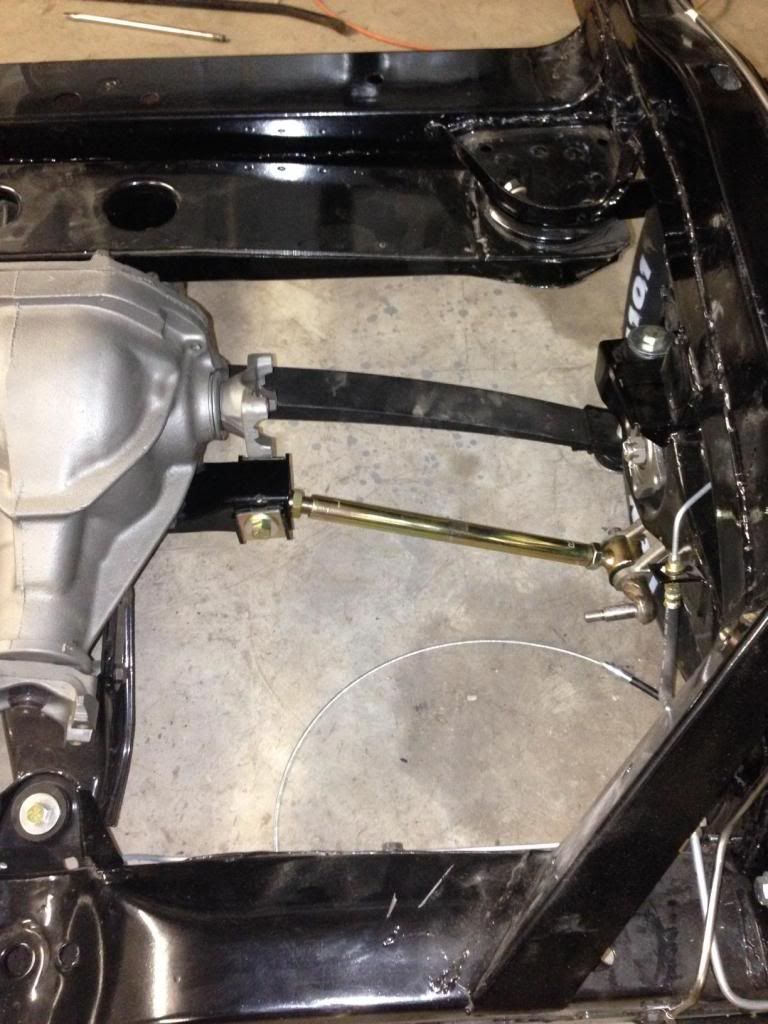
I received the Trailing arms back from Vansteel.
I also received the rear spring from VBP. I chose to go with adjusting struts so I had everything to put the rear back together and have a rolling frame
10-08-2013, 01:15 AM
#31
Burning Brakes
Thread Starter
April 11 2013:
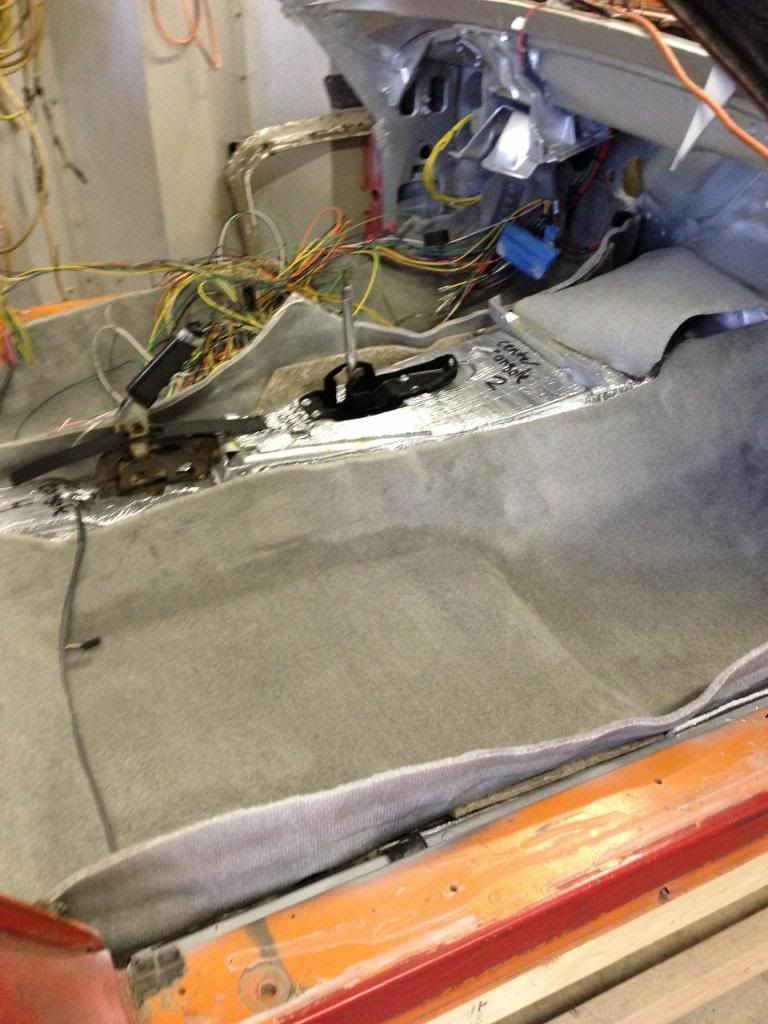
I started running the wiring Harness, I'm using a painless, I also put the carpet in so I can put the wiring where it needs to be. I will likely remove some of it before the painting starts but that's a ways out.
I decided it was time to redo the headlights, I'm doing away with the vacuum system so I needed to convert the headlights to electric.
Finished both assembly's and put aside
10-08-2013, 01:28 AM
#32
Burning Brakes
Thread Starter
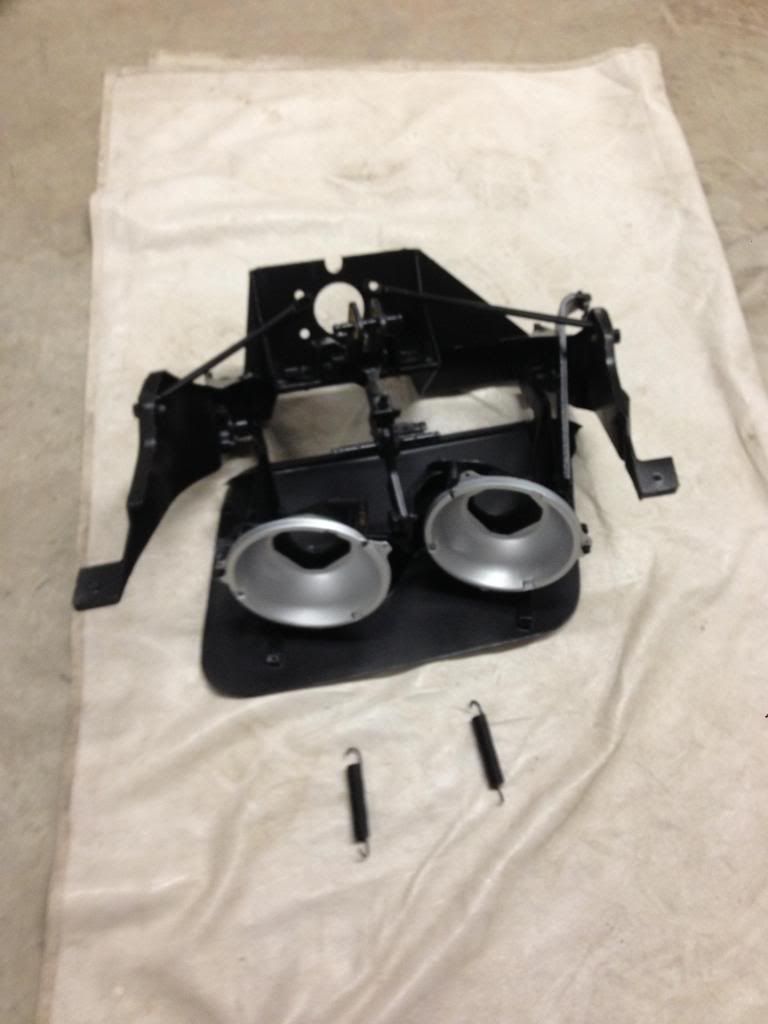
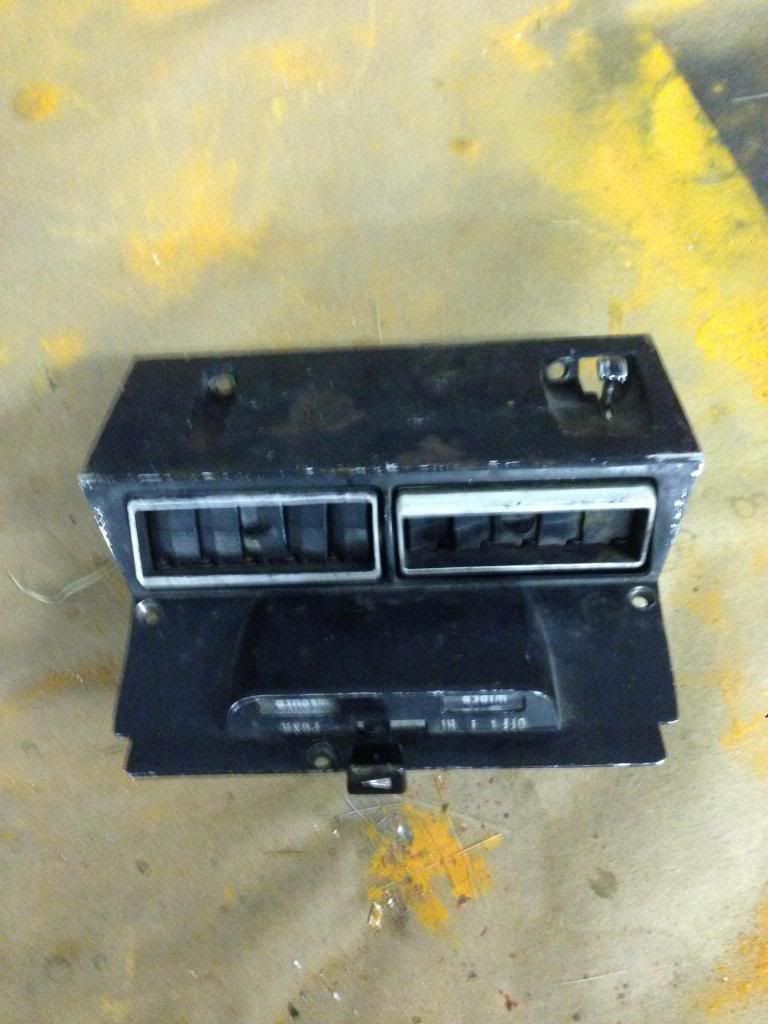
I took a few months away from the project. I lost my government Contract due to the sequester and cuts.
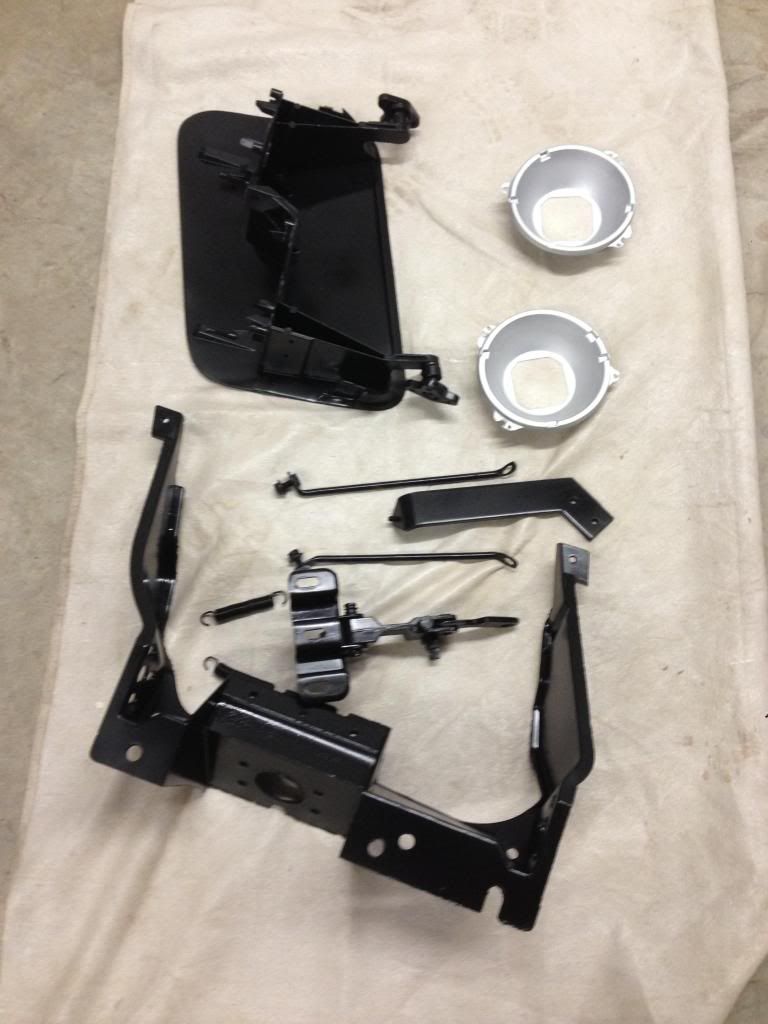
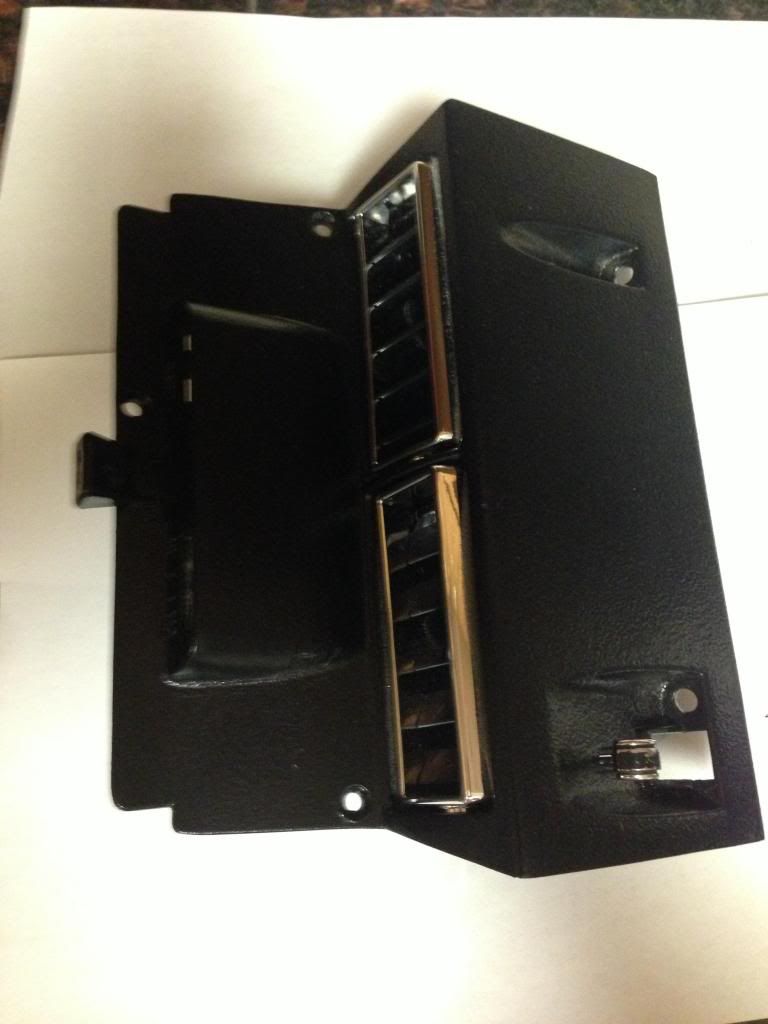
10 Aug I started doing work on the Vette again. I had all the parts in to redo the bracket where the winshield wiper switch mounts.
I blasted the assembly and powder coated. I have a small oven where I can do my own coating on smaller items.
Before
After
10 Aug I started doing work on the Vette again. I had all the parts in to redo the bracket where the winshield wiper switch mounts.
I blasted the assembly and powder coated. I have a small oven where I can do my own coating on smaller items.
Before
After
10-08-2013, 01:43 AM
#33
Burning Brakes
Thread Starter
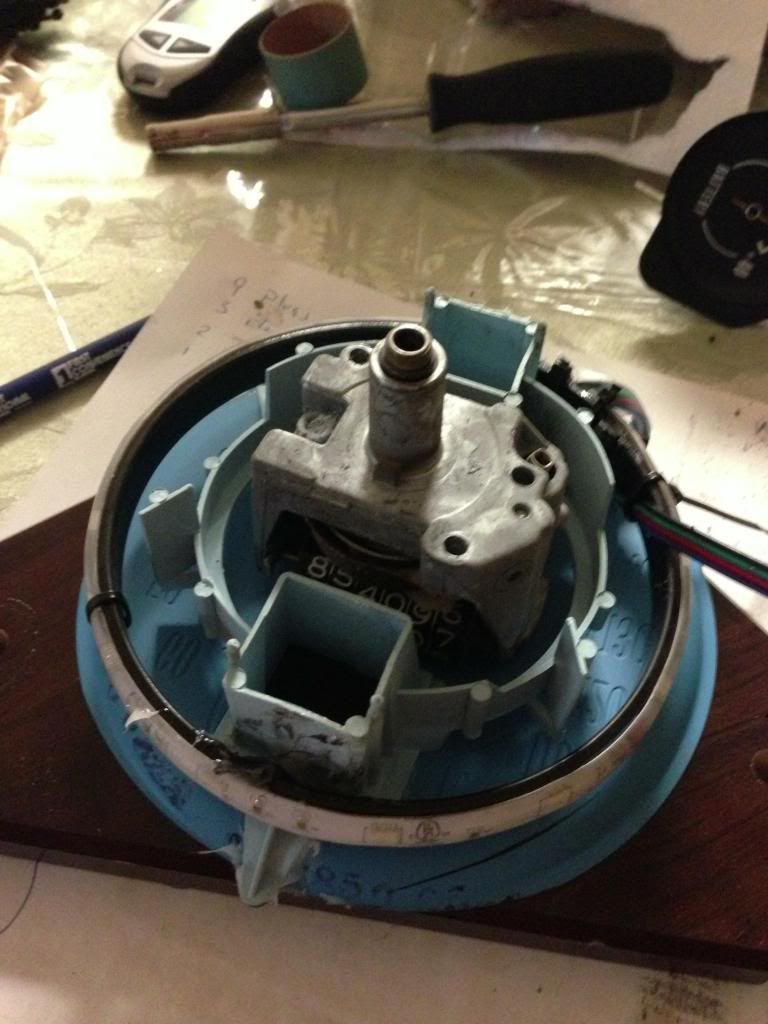
10 Aug 2013
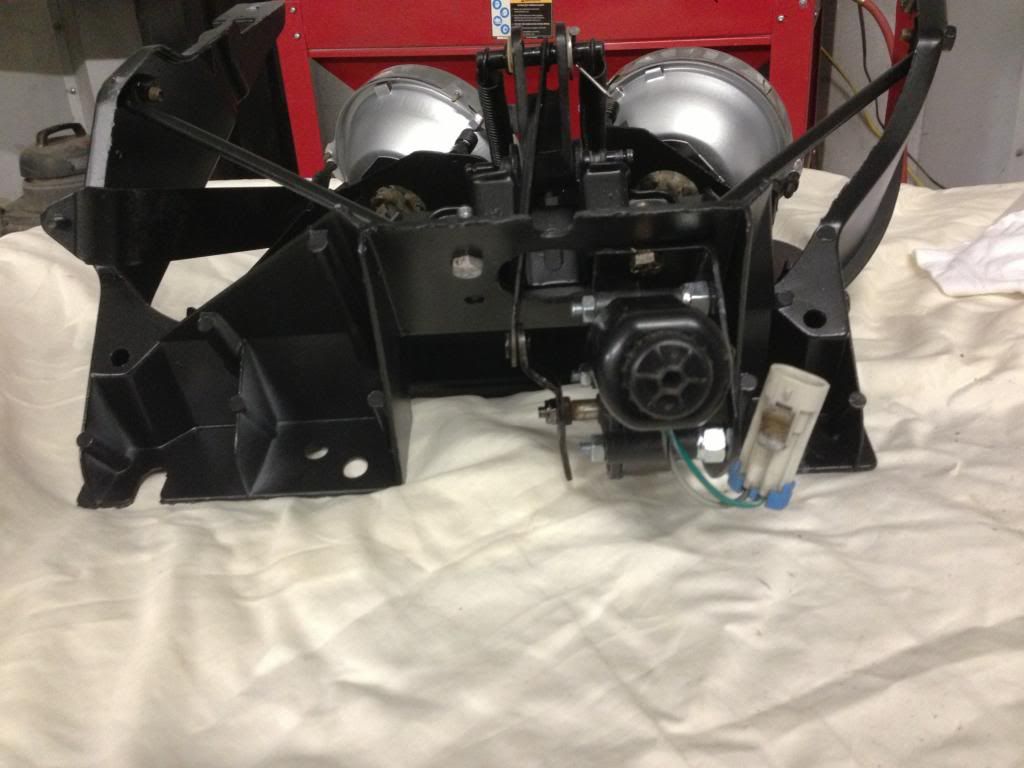
I needed to get the dash panels wired so I made a decision a few months earlier that I wanted the ability to change the dash light color.
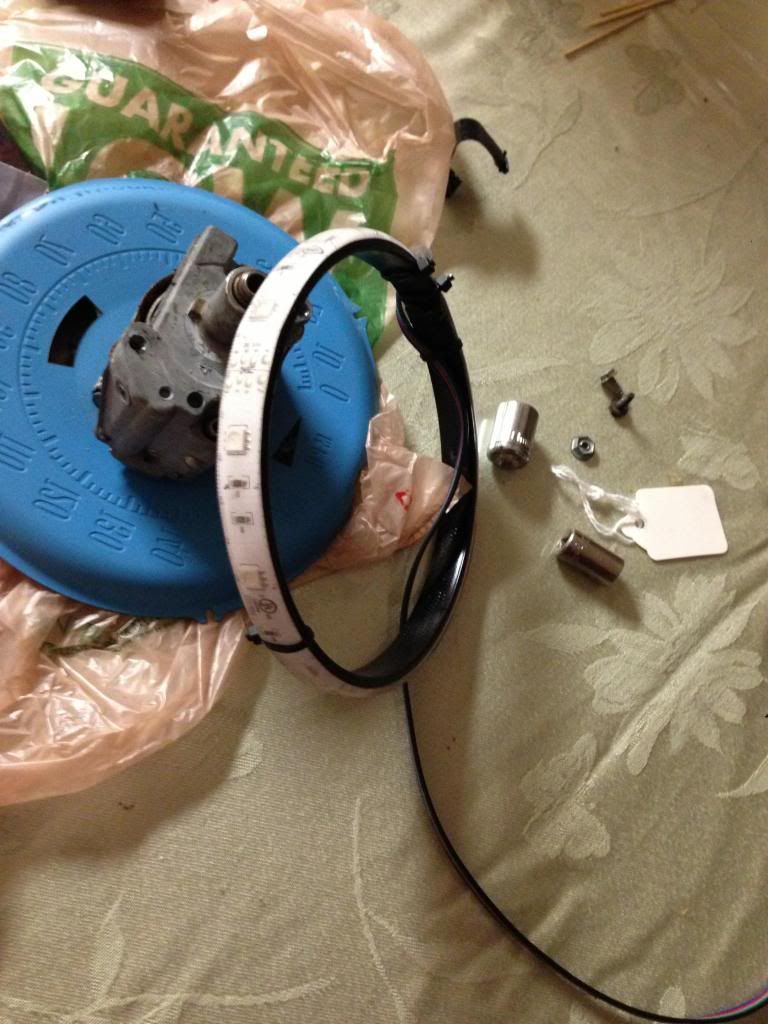
I ordered the LED and controller I needed to make this work. First to make a way to mount the lights to Tach and Speedometer.
I started by bending a ring
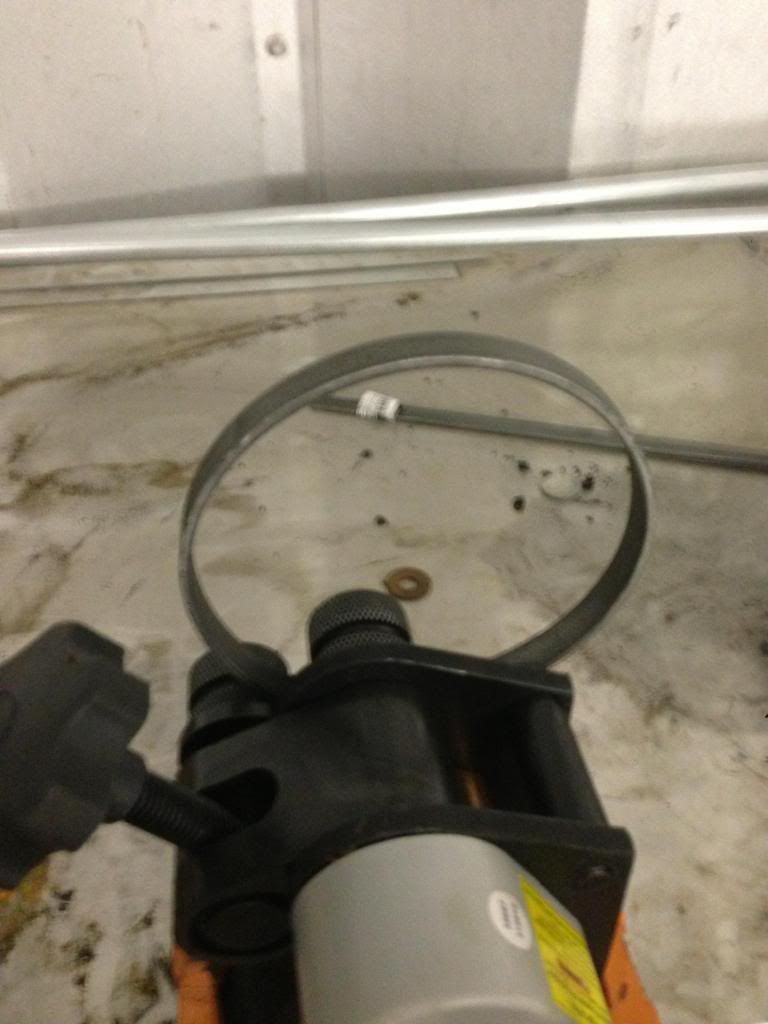
Then welding the ends together and painting the 2 rings.
On the ring I put the led multi color strip.
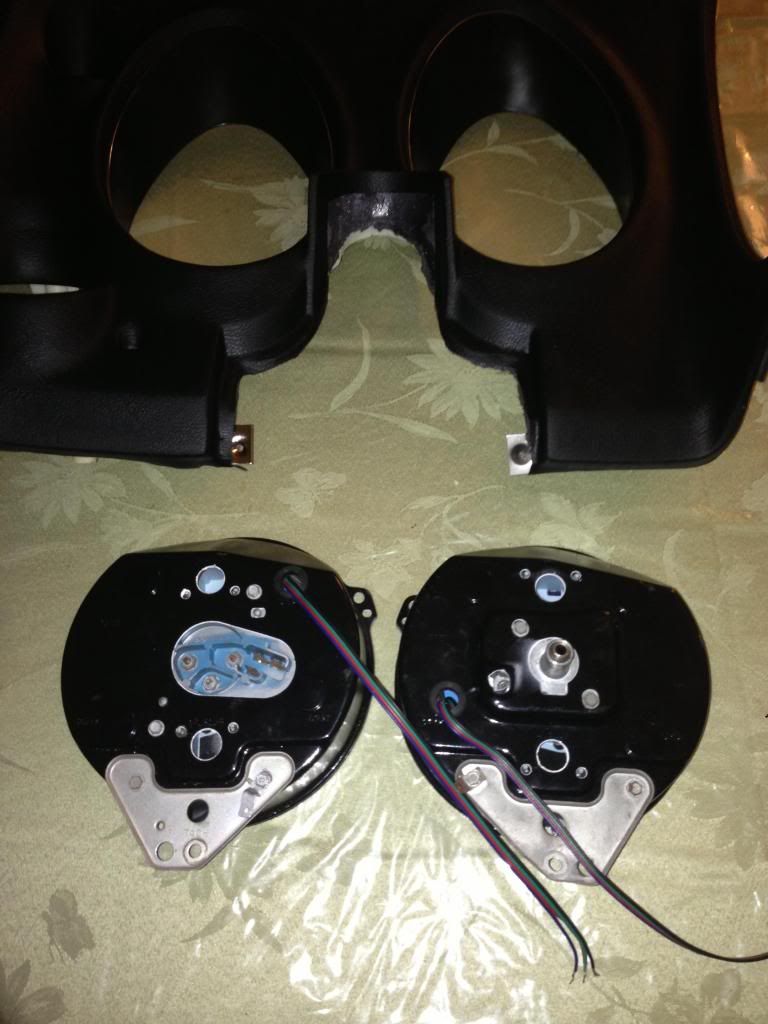
After putting gaged back together
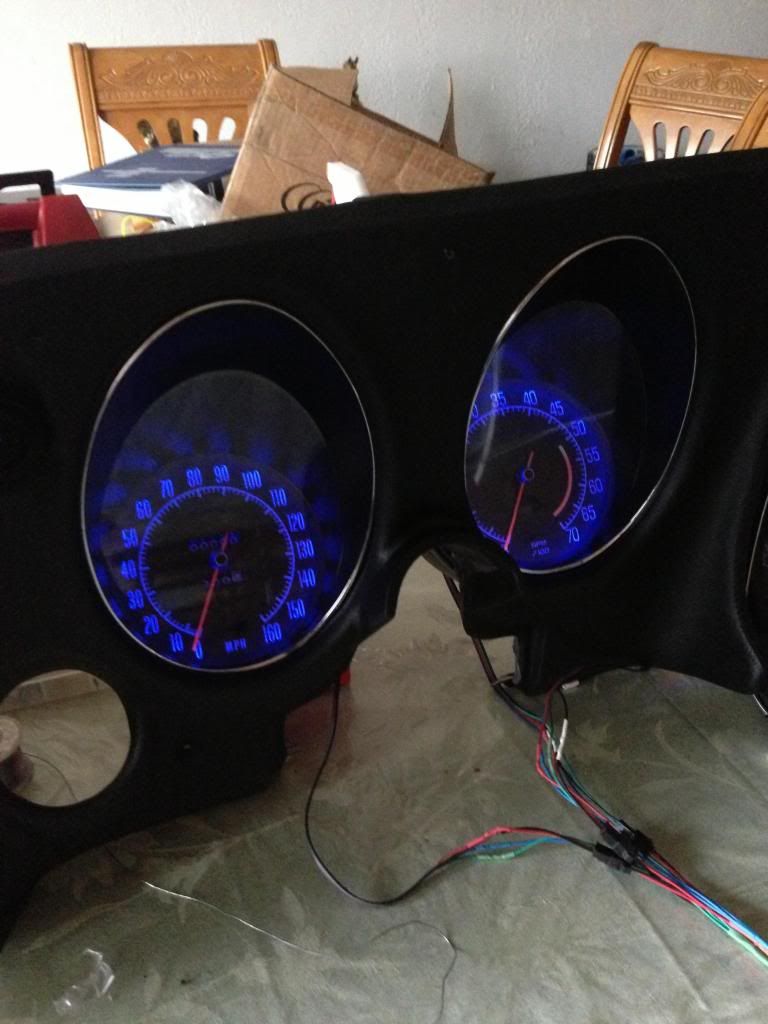
I can make the dash any color I want with a selection from a remote.
I needed to get the dash panels wired so I made a decision a few months earlier that I wanted the ability to change the dash light color.
I ordered the LED and controller I needed to make this work. First to make a way to mount the lights to Tach and Speedometer.
I started by bending a ring
Then welding the ends together and painting the 2 rings.
On the ring I put the led multi color strip.
After putting gaged back together
I can make the dash any color I want with a selection from a remote.
10-08-2013, 01:46 AM
#34
Drifting


I took a few months away from the project. I lost my government Contract due to the sequester and cuts.
10 Aug I started doing work on the Vette again. I had all the parts in to redo the bracket where the winshield wiper switch mounts.
I blasted the assembly and powder coated. I have a small oven where I can do my own coating on smaller items.
Before
After
10 Aug I started doing work on the Vette again. I had all the parts in to redo the bracket where the winshield wiper switch mounts.
I blasted the assembly and powder coated. I have a small oven where I can do my own coating on smaller items.
Before
After
 10-08-2013, 01:57 AM
#35
Burning Brakes
Thread Starter
24 Sept 2013
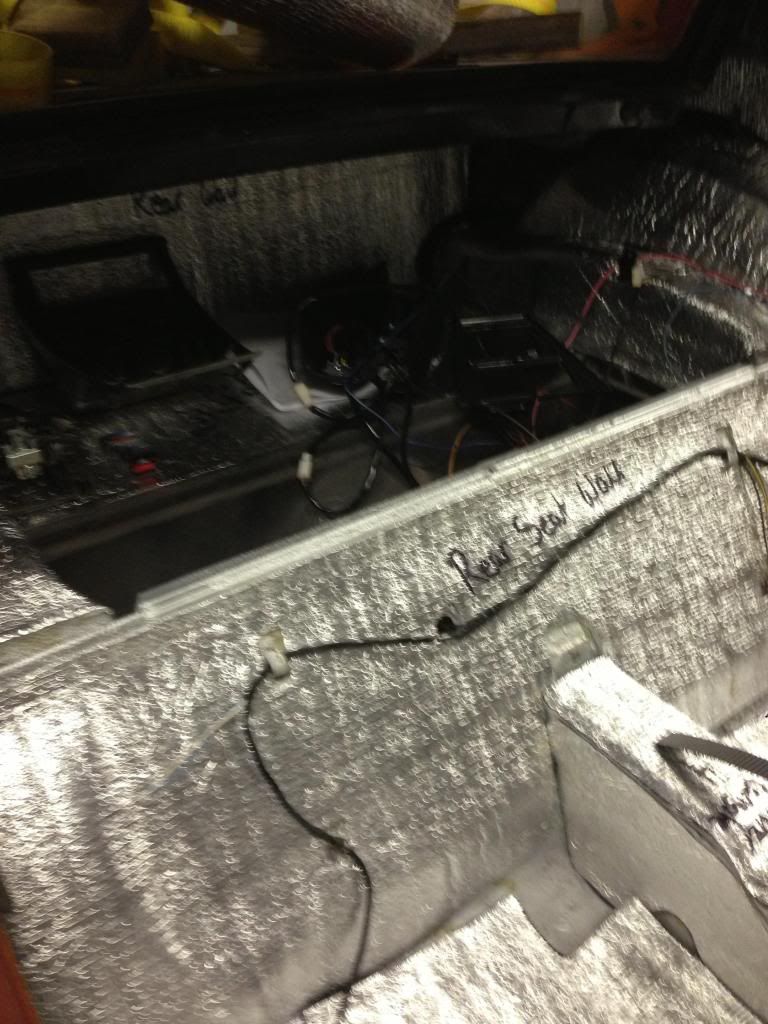
I ran all the wires in the cockpit, ran the wires through to the taillight section. Finished getting the wiring routed through the console to the window switches. Got the seat warmers wired up. Started on the alarm, wired in the radio off delay. Wired the rear vehicle backup sensors, Mounted lower left dash , steering Colum and center console so I could route and fasten wirers.
Lots more to do!
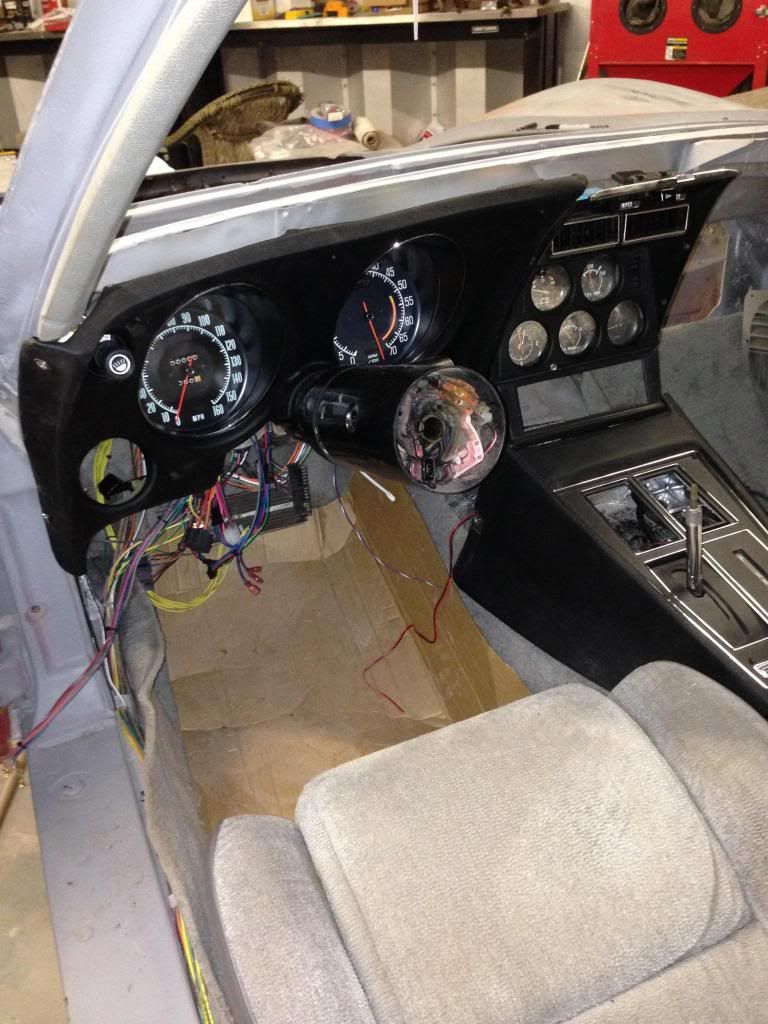
 10-08-2013, 02:08 AM
#37
Burning Brakes
Thread Starter
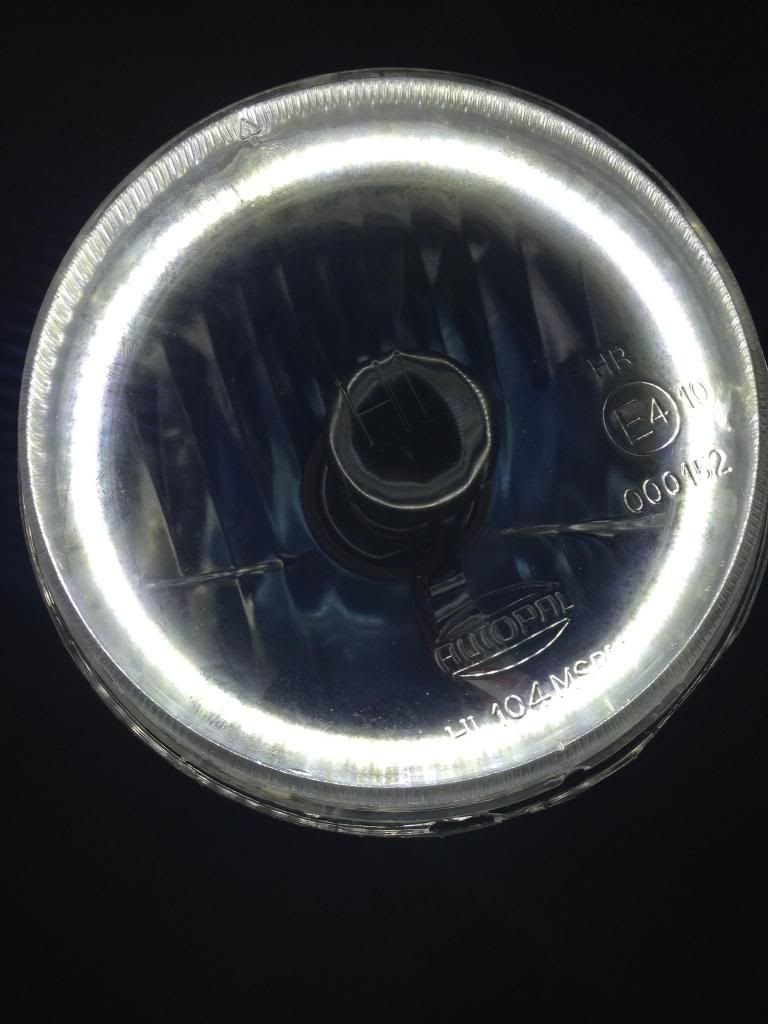
Last week I got all the pieces in to Put halo's in my H4 headlights.
After removing the lens using a heat gun I installed the Halo in all 4 lights.

Then reinstalled lens
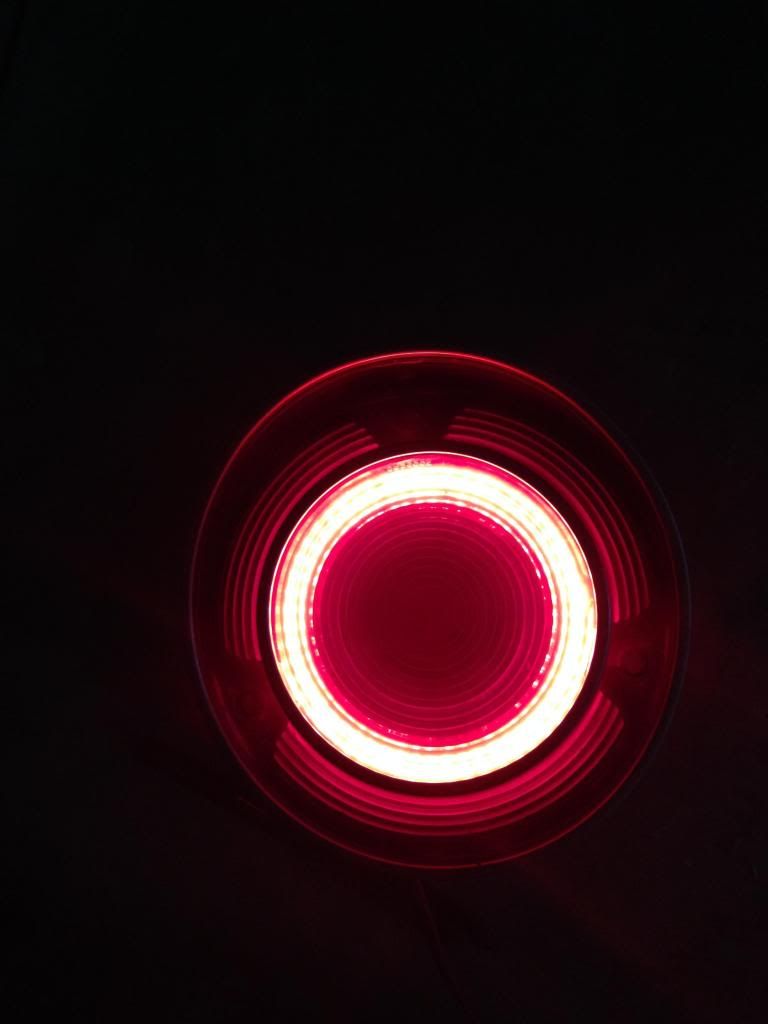
Then on the halo for the rear lights.
After removing the lens using a heat gun I installed the Halo in all 4 lights.
Then reinstalled lens
Then on the halo for the rear lights.


