
Fiberglass repair technique.
 03-23-2014, 08:15 PM
#21
Melting Slicks

Awesome info, thank you. I may never attempt this type of work; but it definitely gives me more insight into pricing paint/bodywork in the years to come. 
 03-23-2014, 08:35 PM
#22
Drifting

Member Since: Nov 2004
Posts: 1,624
Received 286 Likes
on
128 Posts
2020 C3 of the Year Finalist - Modified

Good info, I knew I was forgetting to add something. Good catch.
Heres a shot of what I use. I cut a large sheet of scotch brite into smaller pieces. I have a little dawn dish detergent mixed with water in the spray bottle, and this is the filler I like. I bought 1 gallon, I/2 of it is still in the can, the rest is mostly on the ground after sanding. Try and m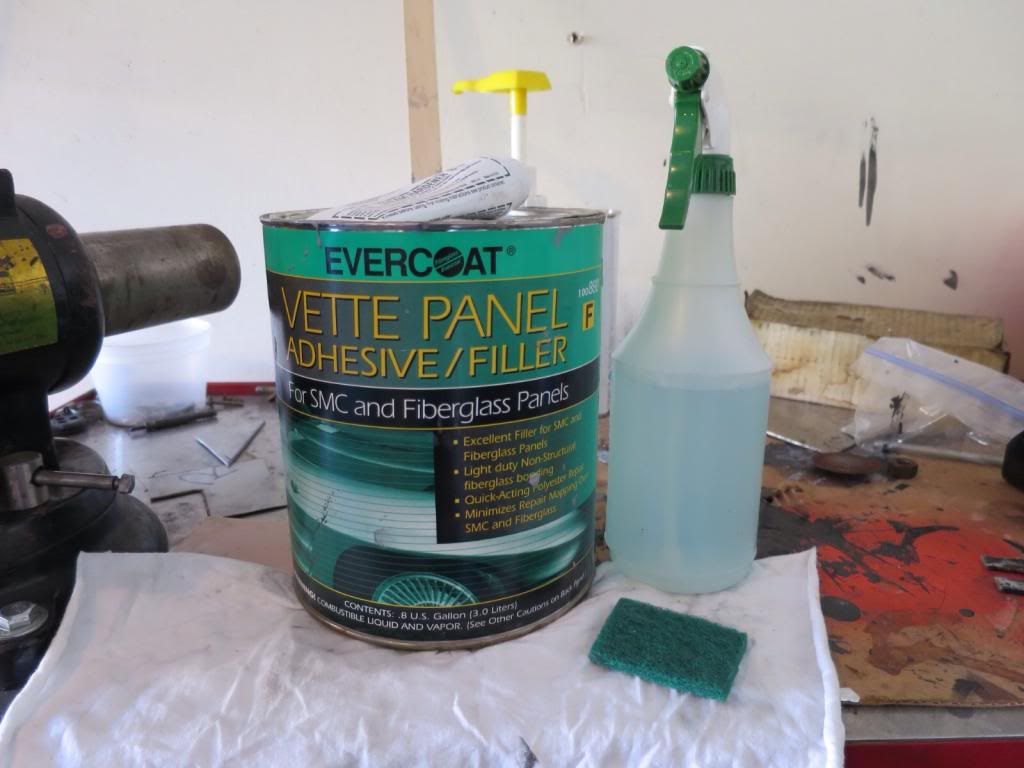 ake the glass and resin the primary repair material.
Heres a shot of what I use. I cut a large sheet of scotch brite into smaller pieces. I have a little dawn dish detergent mixed with water in the spray bottle, and this is the filler I like. I bought 1 gallon, I/2 of it is still in the can, the rest is mostly on the ground after sanding. Try and m
 ake the glass and resin the primary repair material.
03-24-2014, 12:58 AM
ake the glass and resin the primary repair material.
03-24-2014, 12:58 AM
#23
Melting Slicks

Thanks for the great write up!  More details on the tape please.
Edit: OK I just noticed the "Scotch 425" printed on the inside of the roll. Looks like it is this stuff.
 More details on the tape please.
Edit: OK I just noticed the "Scotch 425" printed on the inside of the roll. Looks like it is this stuff.
Last edited by Kid Vette; 03-24-2014 at 01:02 AM.
10-22-2014, 03:51 PM
#24
Nam Labrat


Member Since: Sep 2013
Location: New Orleans Loo-z-anna
Posts: 33,881
Received 4,153 Likes
on
2,726 Posts

I dug this out of the "archives" for anyone who is doing some fiberglass repairs................(like me, hopefully!)
10-22-2014, 07:43 PM
#25
Racer


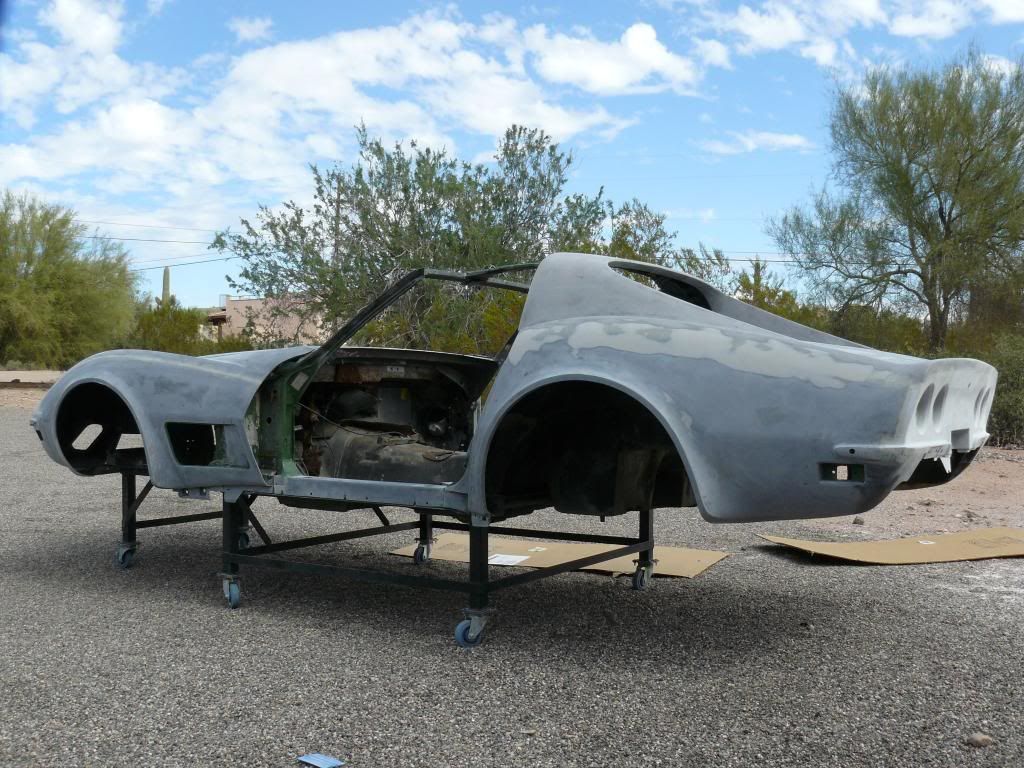
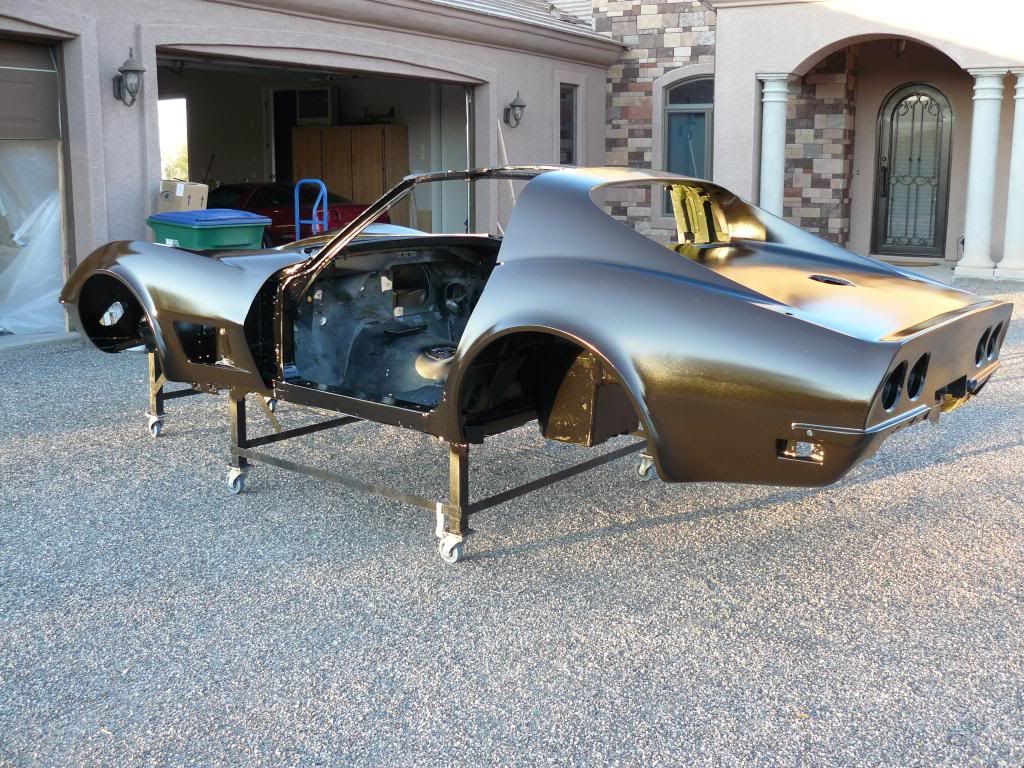
Here is the car in black epoxy primer. I painted it black so I could visualize the car in its final color coat. Yup, screw the green. Black it will be.
Before. Note: I'm still working on the front end so you see no filler in the front fender seams. Again it is used just as a skim coat to smooth and fill any minor imperfections.
After.
Before. Note: I'm still working on the front end so you see no filler in the front fender seams. Again it is used just as a skim coat to smooth and fill any minor imperfections.
After.

 10-22-2014, 10:19 PM
#27
http://www.westsystem.com/ss/filler-selection-guide/
10-30-2015, 01:16 PM
#28
Burning Brakes

This thread has been helpful to me but I'm still not sure about one thing:
I'm in the middle of doing some fiber-glassing on my '77 SMC vette with epoxy resin and mat. These days, we have about 50 degrees F during the night and 60 F during the day. If I want to lay more fiberglass 24 hours after the last application, what is the best prep?
- no prep, just add more resin and mat?
- wash with soap and warm water, then dry?
- wash with soap and warm water, dry and then sand?
- sand?
I applied the first layer yesterday evening and I'm not sure the resin will be totally hardened this evening, after 24 hours in these temperatures.
Thanks for the help.
10-30-2015, 02:02 PM
#29
Nam Labrat
Member Since: Sep 2013
Location: New Orleans Loo-z-anna
Posts: 33,881
Received 4,153 Likes
on
2,726 Posts
RBIRD........thanks for "re-finding" this thread.....I forgot to subscribe to it last year. I've gotten lots of help from DUB and the threads of other Members in the PAINT & BODY FORUM.
Being a rookie I can guess that the curing time will be hours longer/it might be best to clean the "wax" according to info in this thread/then add more fiberglass.
Being a rookie I can guess that the curing time will be hours longer/it might be best to clean the "wax" according to info in this thread/then add more fiberglass.
10-30-2015, 06:37 PM
#30
Race Director


This thread has been helpful to me but I'm still not sure about one thing:
I'm in the middle of doing some fiber-glassing on my '77 SMC vette with epoxy resin and mat. These days, we have about 50 degrees F during the night and 60 F during the day. If I want to lay more fiberglass 24 hours after the last application, what is the best prep?
- no prep, just add more resin and mat?
- wash with soap and warm water, then dry?
- wash with soap and warm water, dry and then sand?
- sand?
I applied the first layer yesterday evening and I'm not sure the resin will be totally hardened this evening, after 24 hours in these temperatures.
Thanks for the help.
I'm in the middle of doing some fiber-glassing on my '77 SMC vette with epoxy resin and mat. These days, we have about 50 degrees F during the night and 60 F during the day. If I want to lay more fiberglass 24 hours after the last application, what is the best prep?
- no prep, just add more resin and mat?
- wash with soap and warm water, then dry?
- wash with soap and warm water, dry and then sand?
- sand?
I applied the first layer yesterday evening and I'm not sure the resin will be totally hardened this evening, after 24 hours in these temperatures.
Thanks for the help.
Read this.
http://www.westsystem.com/ss/cold-temperature-bonding/
In the future.....WHEN in DOUBT...contact the manufacture DIRECTLY and ask their tech dept. I do it from time to time with the products I use JUST to make sure what I know about the product in question has not changed due to a re-formulation that is not public knowledge,
DUB
10-30-2015, 07:01 PM
#31
Burning Brakes
Because you did not specify EXACTLY what product and part numbers of those products you used....which...make a difference to some degree.
Read this.
http://www.westsystem.com/ss/cold-temperature-bonding/
In the future.....WHEN in DOUBT...contact the manufacture DIRECTLY and ask their tech dept. I do it from time to time with the products I use JUST to make sure what I know about the product in question has not changed due to a re-formulation that is not public knowledge,
DUB
RBIRD........thanks for "re-finding" this thread.....I forgot to subscribe to it last year. I've gotten lots of help from DUB and the threads of other Members in the PAINT & BODY FORUM.
Being a rookie I can guess that the curing time will be hours longer/it might be best to clean the "wax" according to info in this thread/then add more fiberglass.
Being a rookie I can guess that the curing time will be hours longer/it might be best to clean the "wax" according to info in this thread/then add more fiberglass.
10-30-2015, 07:08 PM
#32
Race Director
I use the same stuff also....GOOD STUFF!All I know is what when it starts getting cold....I warm up the resin and also heat of the repair area. If you use it when it is cold....and you also used it when it was hot out....you can IMMEDIATELY tell how much thicker the resin is when it is cold and it is really hard to get an even full pump out of the pump. AND as you might know...cold resin effects your ability to get a good flow of the resin so it soak into the mat easily.
DUB
10-31-2015, 03:23 PM
#33
Burning Brakes
Good tips DUB, and that linked page was worth reading. My second application went much better. First I prepared the previous layer:
- scrub with warm water and dish soap
- dry with paper towel
- dry with heat gun
- sand
- blow with compressed air
- wipe with acetone
For the second application:
- warm up the resin and hardener
- warm up the work area before and after application
The resin+hardener mix had less air bubbles and was more fluid.
- scrub with warm water and dish soap
- dry with paper towel
- dry with heat gun
- sand
- blow with compressed air
- wipe with acetone
For the second application:
- warm up the resin and hardener
- warm up the work area before and after application
The resin+hardener mix had less air bubbles and was more fluid
.
10-31-2015, 06:15 PM
#34
Race Director
Good tips DUB, and that linked page was worth reading. My second application went much better. First I prepared the previous layer:
- scrub with warm water and dish soap
- dry with paper towel
- dry with heat gun
- sand
- blow with compressed air
- wipe with acetone
For the second application:
- warm up the resin and hardener
- warm up the work area before and after application
The resin+hardener mix had less air bubbles and was more fluid.
- scrub with warm water and dish soap
- dry with paper towel
- dry with heat gun
- sand
- blow with compressed air
- wipe with acetone
For the second application:
- warm up the resin and hardener
- warm up the work area before and after application
The resin+hardener mix had less air bubbles and was more fluid
. Glad that the information provided helped you out.DUB
The following users liked this post:
chucksingh (11-01-2015)
10-31-2015, 06:31 PM
#35
Race Director

Laser printer toner has polyester resin in it. The 400 degree heat and pressure in the fuser section of the printer fiberglasses the image to the paper. Probably not enough resin to mess with your mix, so probably useless info, but...edit; didnt see the date on that post.
Last edited by derekderek; 10-31-2015 at 06:49 PM.
 11-01-2015, 06:12 PM
#37
Race Director
**** PROFESSIONAL 'TRICK' *****
I KNOW I am NOT the only one who does this but it is what I HAVE to do from time to time.
When tape, clamps and any other methods just will not hold a part where I need it due to its shape or extent of damage.
AFTER I have prepped it. I will mix up some Vette Panel Adhesive and apply it in the area I an wanting to hold together. I apply it and will sit there holding it still and wait for the VPA to harden...and BECAUSE I ahve added MORE hardener to it....it usually does not take too long. Then I will keep doing this to the part ( IF I CAN)....until it is back in the shape that I want.
The I will carefully grind down the VPA so I can laminate the repair...of...I will keep applying the VPA in the cracks to fill them in and make the part more structurally rigid. Then I will prep the VPA and surrounding panel and then diamante it up.
In some cases I may bond a section back correct with the VPA...and then laminate that...and then the next day go to the next area. SO...every repair done in this method/manner is NOT the same.
Now so I do not have to type for hours...thinking about how this is going to be done and how much VPA to apply and how to prep the area where the VPA has been applied is where is can be 'tricky...and what side to laminate on and so on and so on. So..trying to do too much a one time can prove to be a waste of time.
DUB
 11-12-2015, 12:58 PM
#40
Nam Labrat
Member Since: Sep 2013
Location: New Orleans Loo-z-anna
Posts: 33,881
Received 4,153 Likes
on
2,726 Posts
Rbird........thanks for reminding me....I need to read this thread once a week!

