Roger's 78 basket case


 08-24-2015, 10:37 PM
#102
Instructor

Thread Starter
Sorry for the delay guys, had to take some time away to deal with life. 
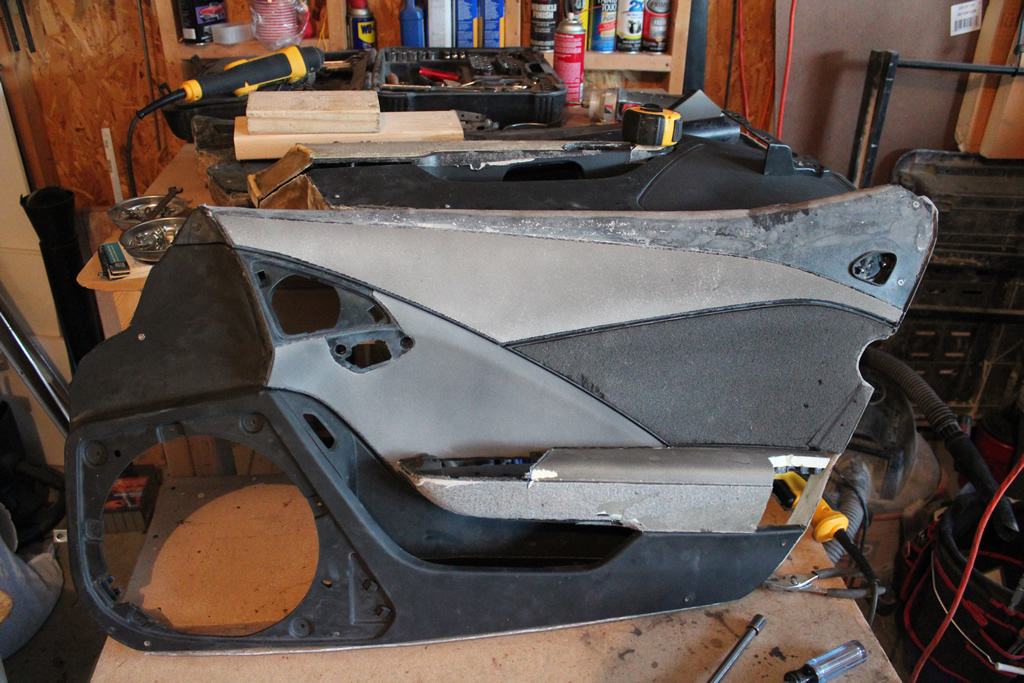
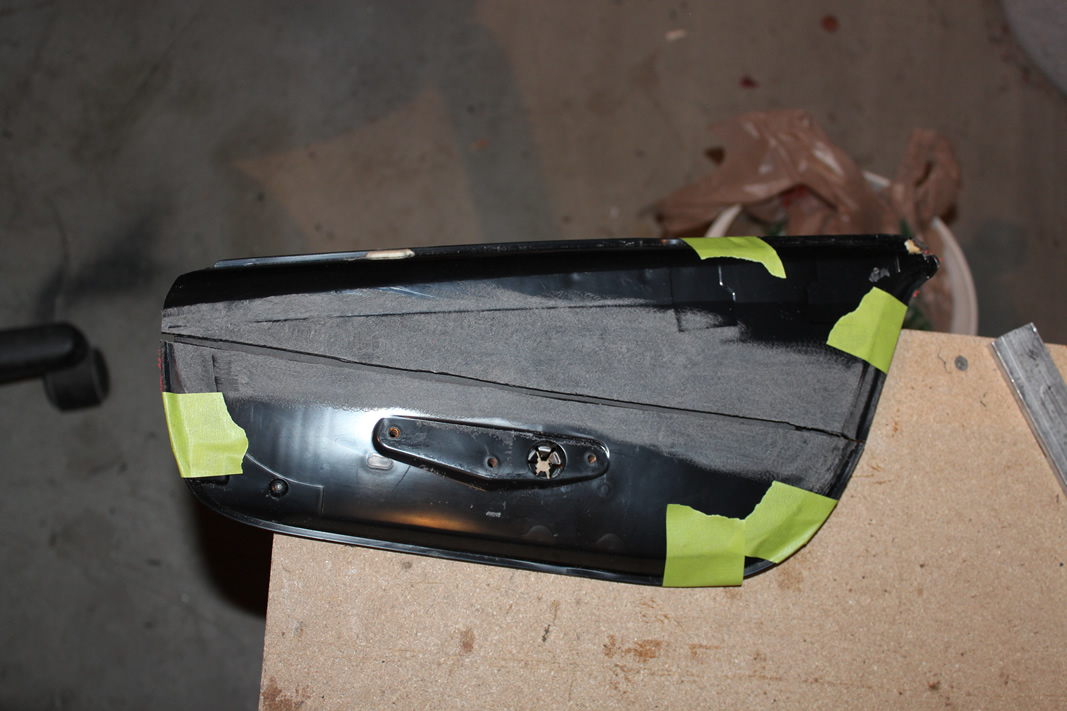
Finished fabricating the pasenger's door panel, still have to put the regulator, latch, etc. inside the door.
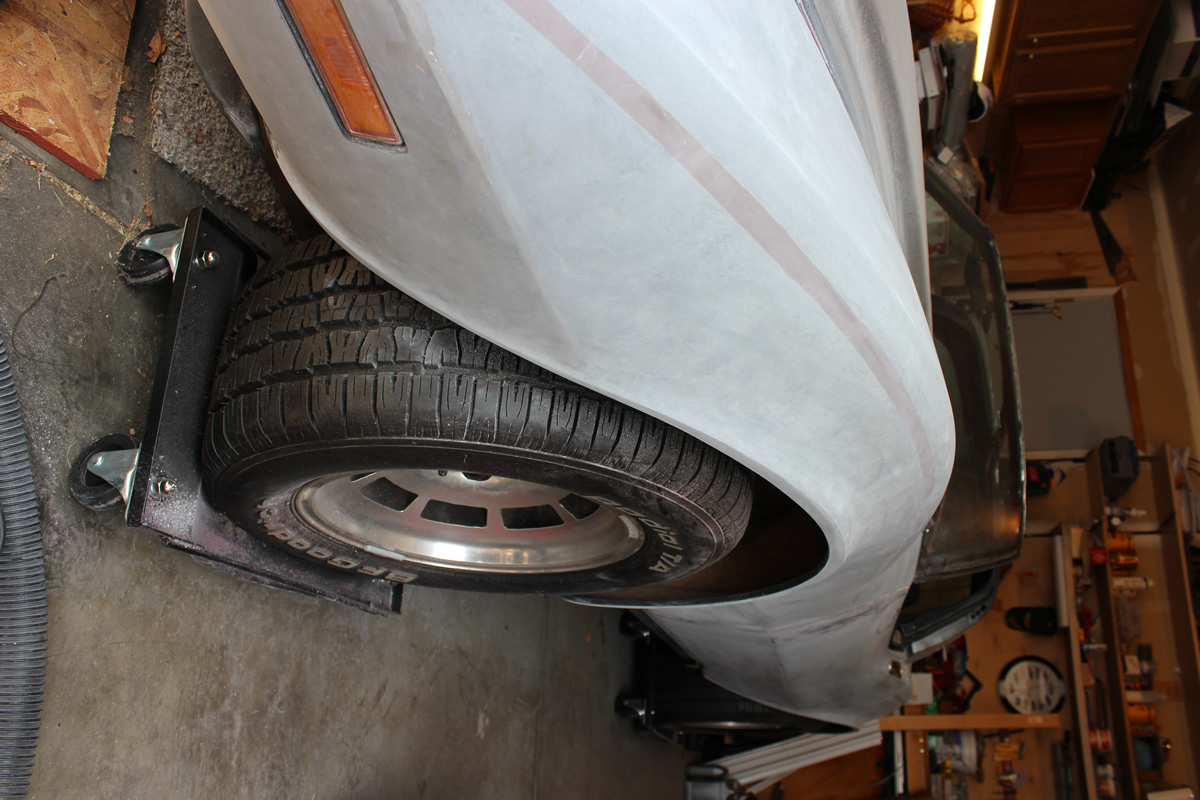
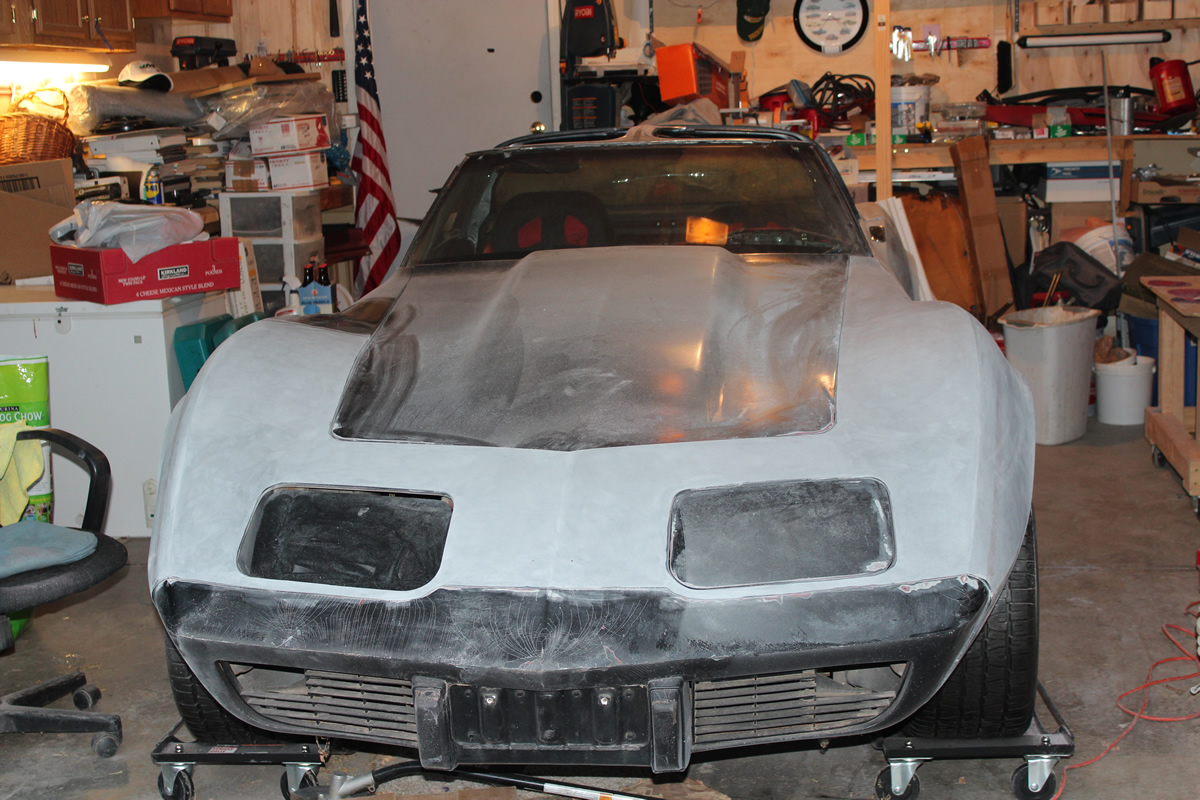
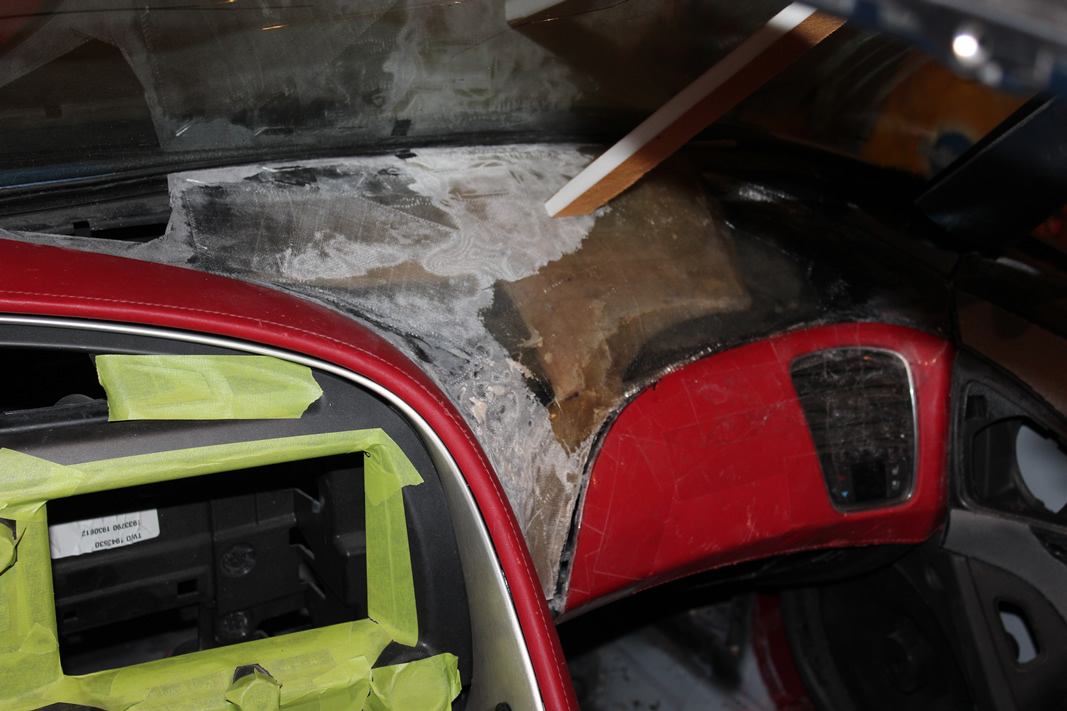
Started stripping paint off the body because it's something I can do for 45 minutes at a time just to get SOMETHING done. Making some progress, although it's slow going.
Have the passenger's fender, halo and hood left for paint, then I'll get the door back together and in. Once that happens I can begin fine-tuning the rest of the dash, get the center console fitted and all that good stuff.
I'll try to keep up some regular posting, didn't realize it had been so long since I had.
Before

After
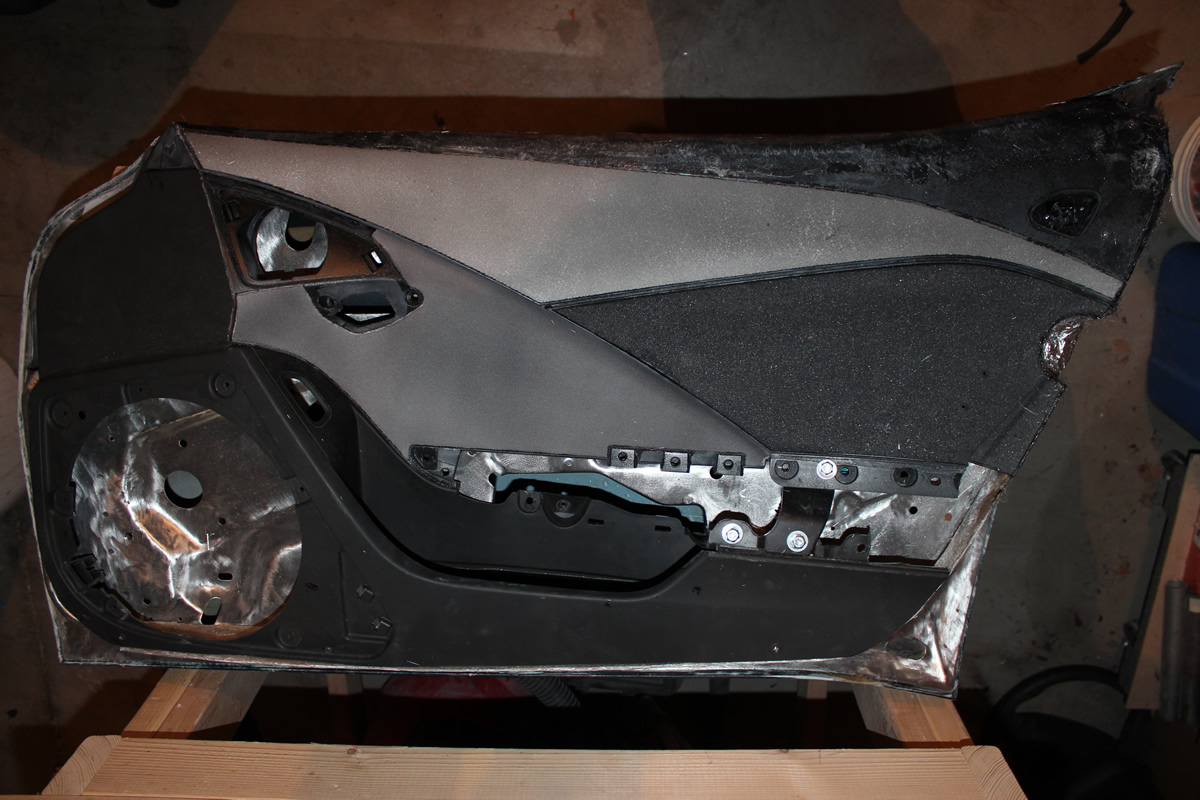
Finished fabricating the pasenger's door panel, still have to put the regulator, latch, etc. inside the door.
Started stripping paint off the body because it's something I can do for 45 minutes at a time just to get SOMETHING done. Making some progress, although it's slow going.
Have the passenger's fender, halo and hood left for paint, then I'll get the door back together and in. Once that happens I can begin fine-tuning the rest of the dash, get the center console fitted and all that good stuff.
I'll try to keep up some regular posting, didn't realize it had been so long since I had.
Before
After
08-30-2015, 12:12 AM
#103
Instructor
Thread Starter
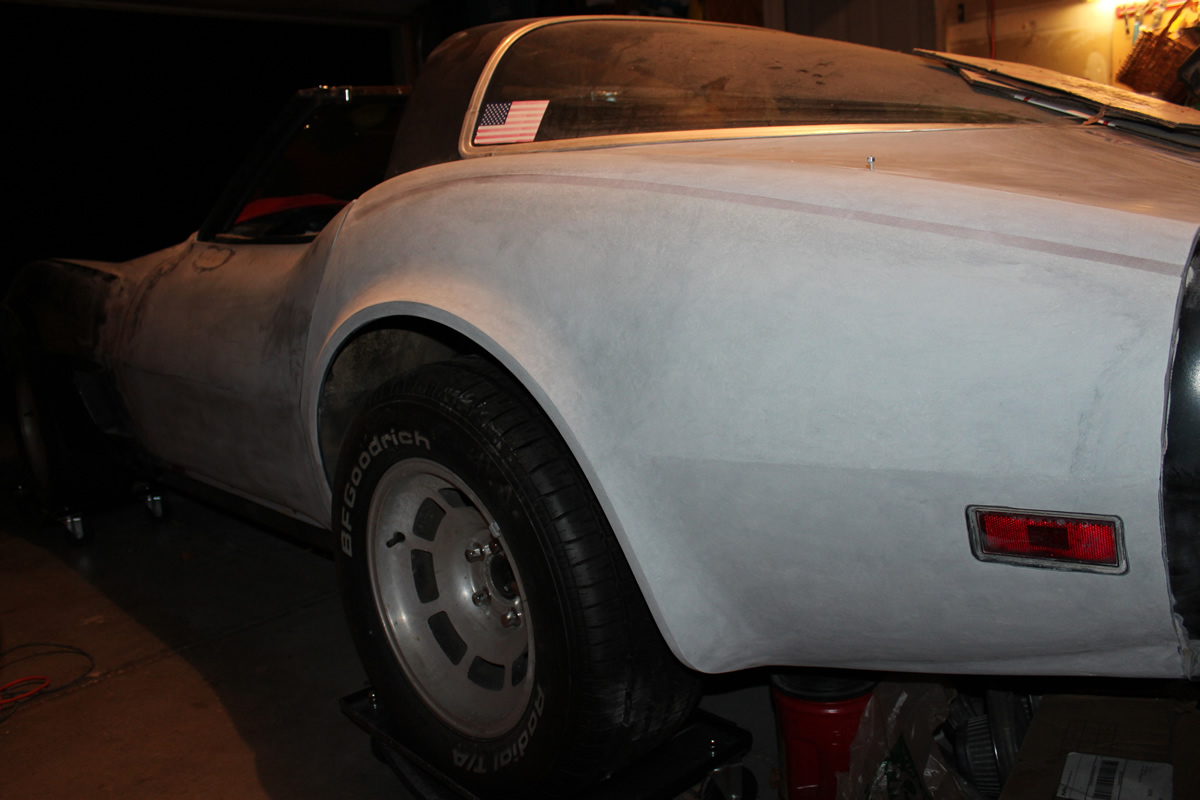
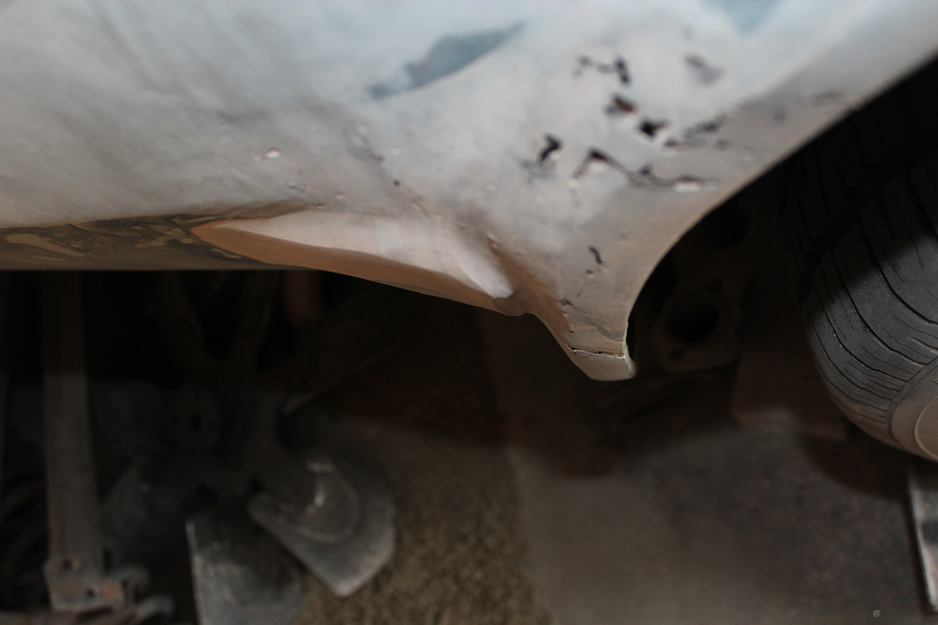
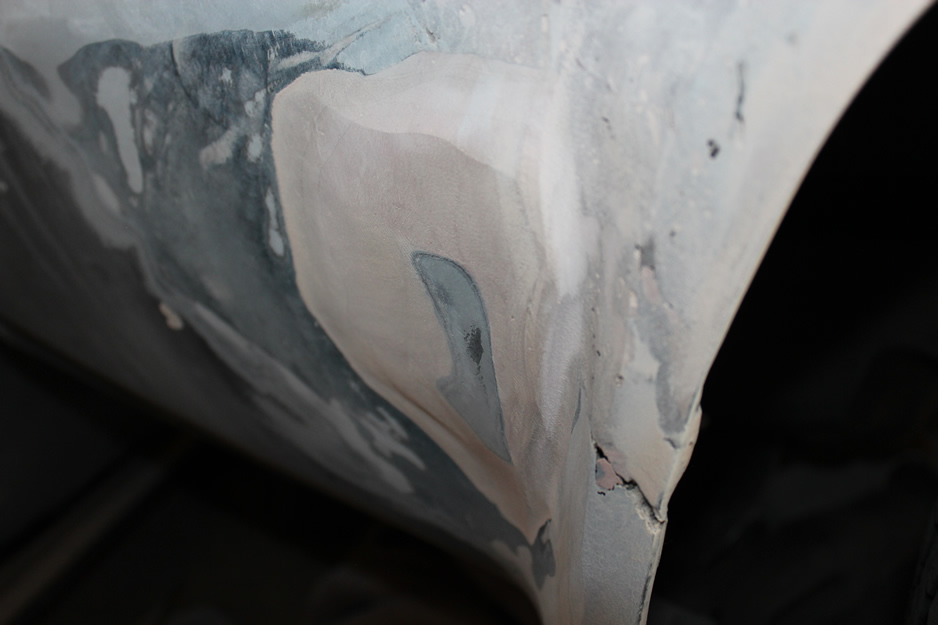
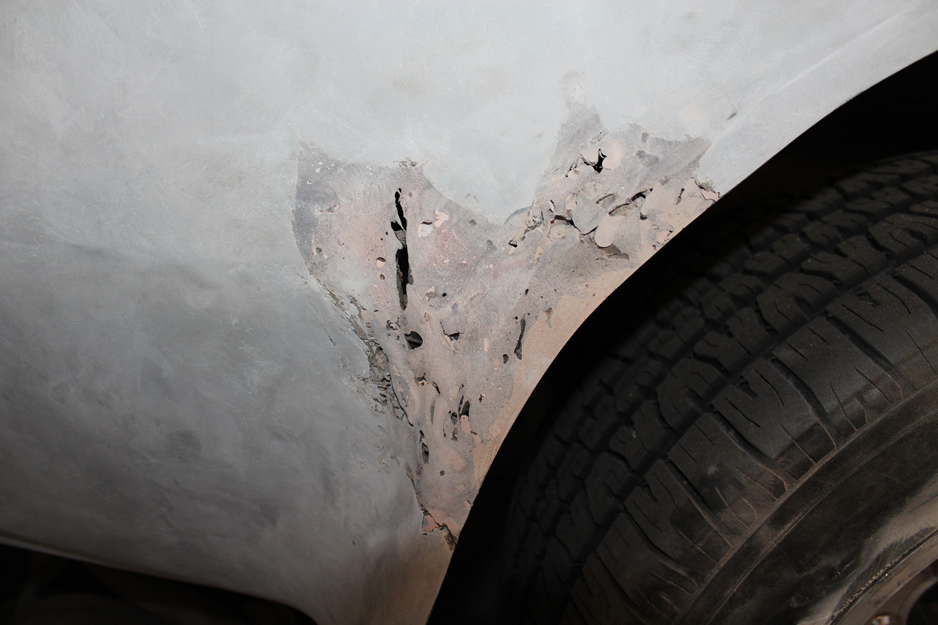
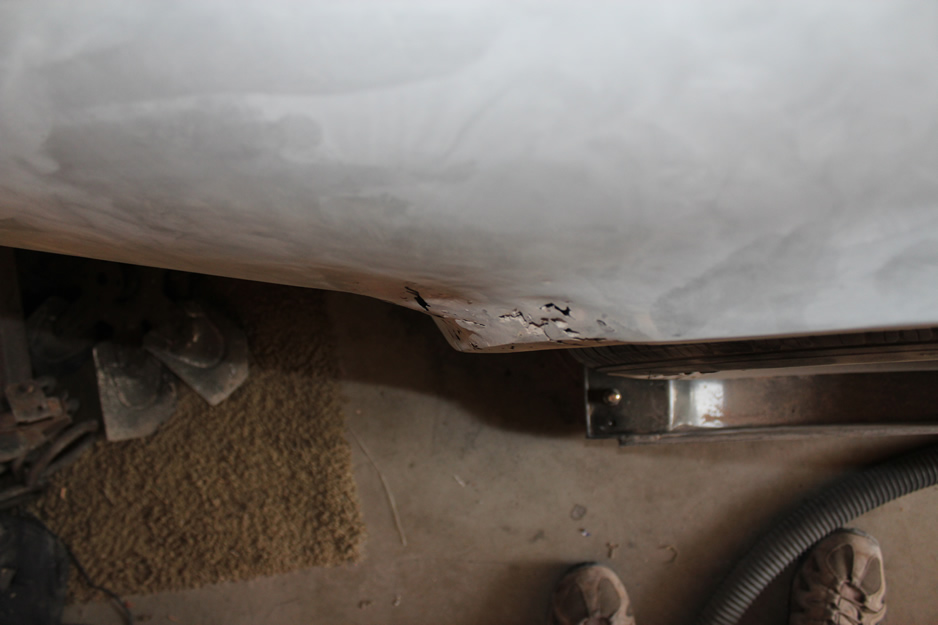
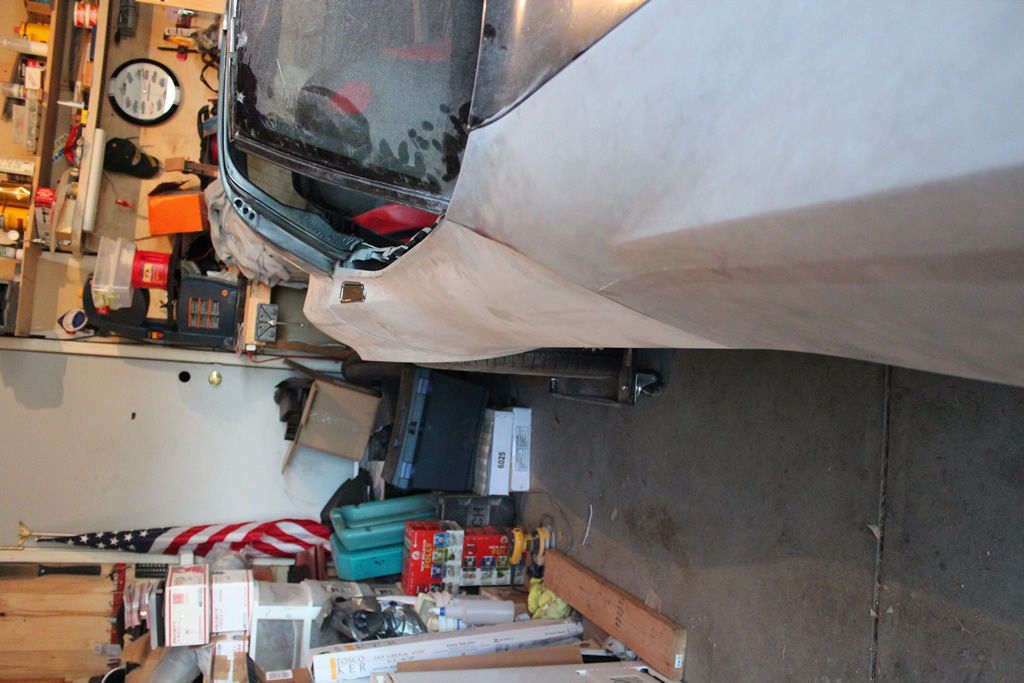
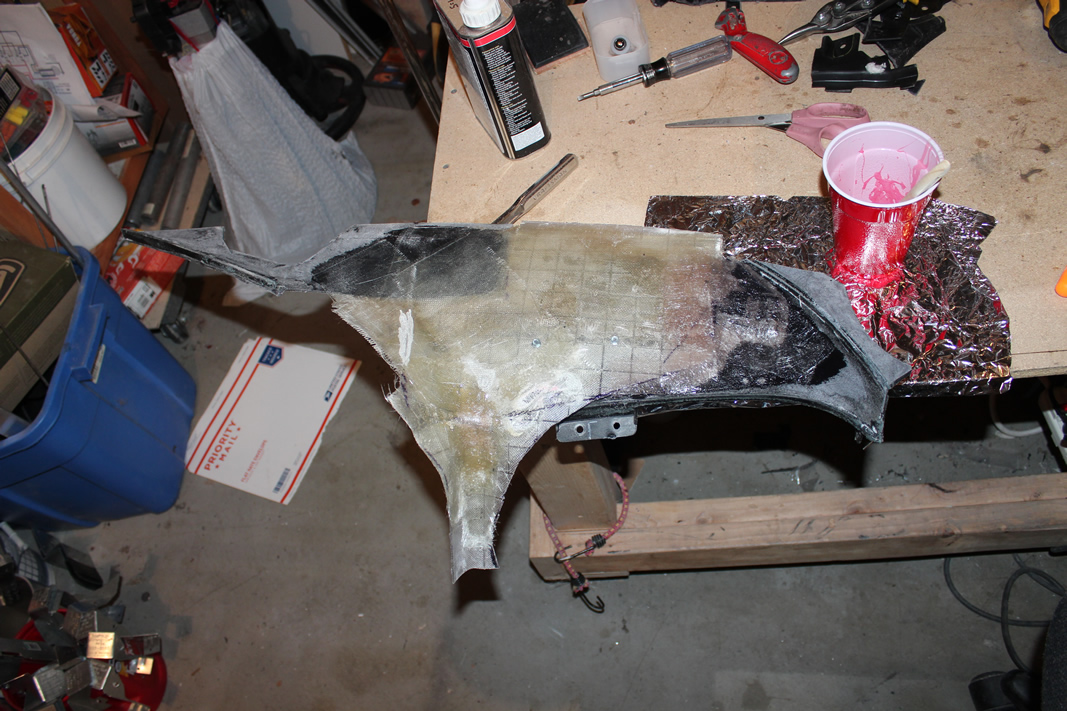
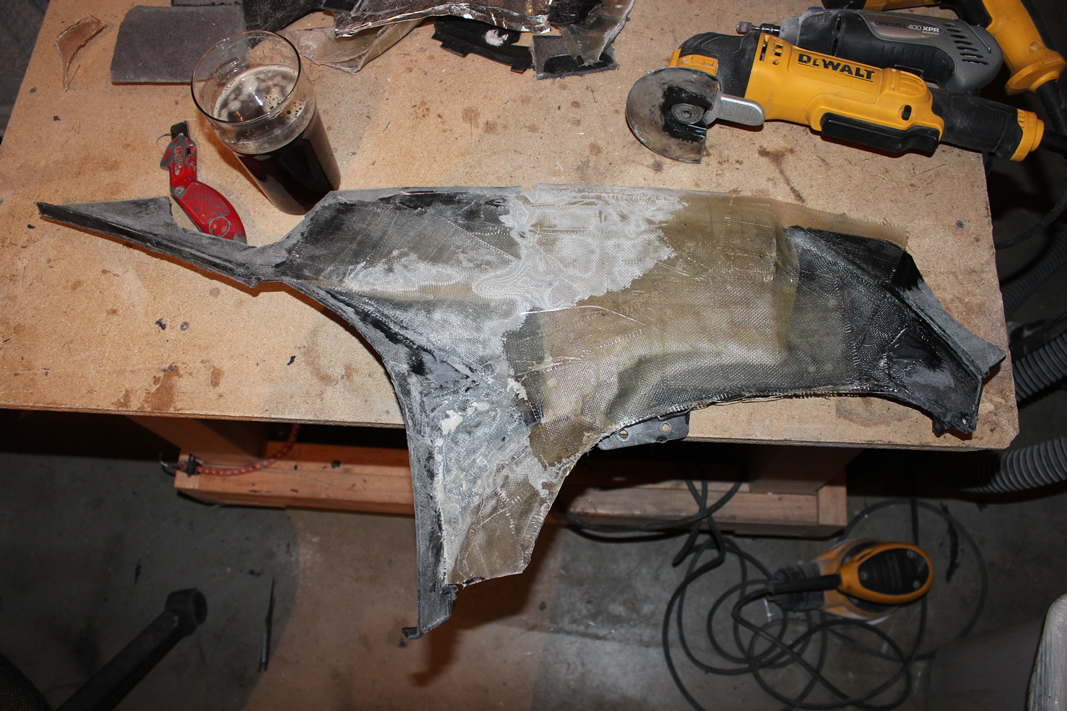
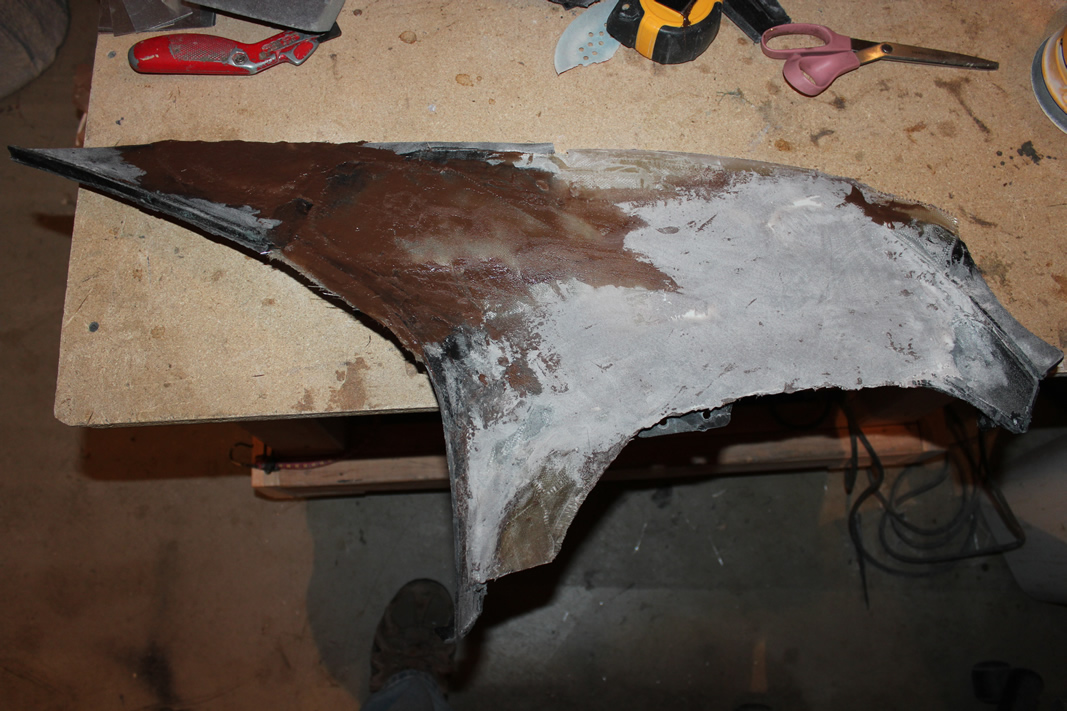
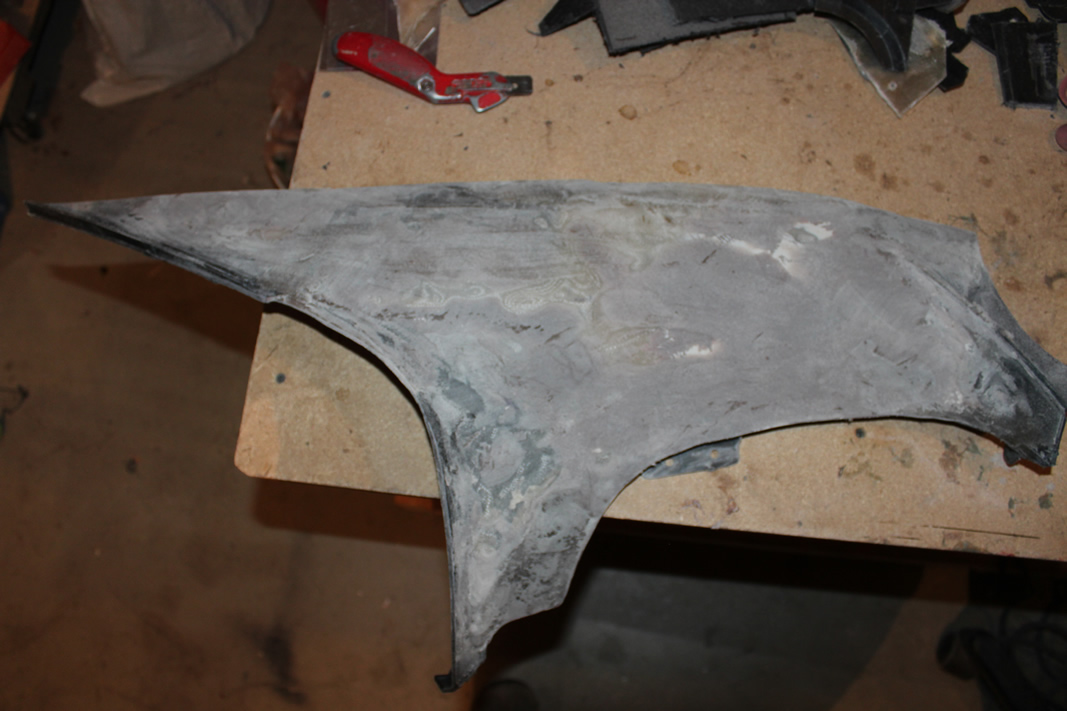
So I get around to the passenger's fender today and find A LOT of bondo around the wheel well. Almost 3/4" thick over the entire repair area. The first couple of pics are after about an hour. The last two is what I ended up with when I got down to the original fiberglass.
Can anyone let me know the best way to repair this? Would it be easier to try to get most of the old 'repair' out and build up from there, or just cut out the entire damaged area and redo it?
Can anyone let me know the best way to repair this? Would it be easier to try to get most of the old 'repair' out and build up from there, or just cut out the entire damaged area and redo it?
 09-17-2015, 09:36 PM
#105
Instructor
Thread Starter
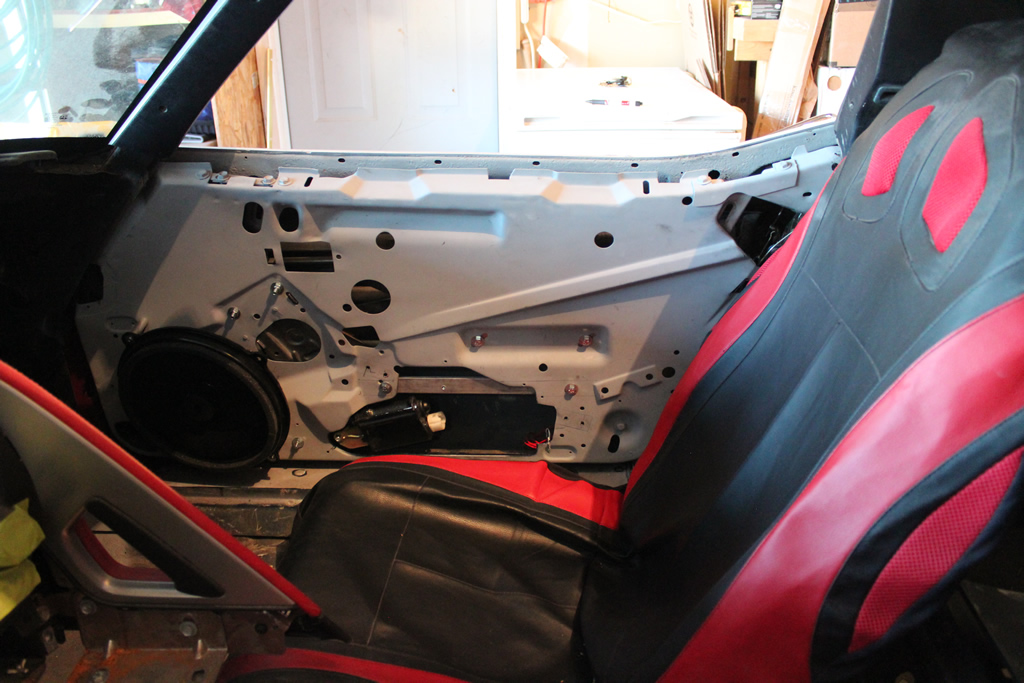
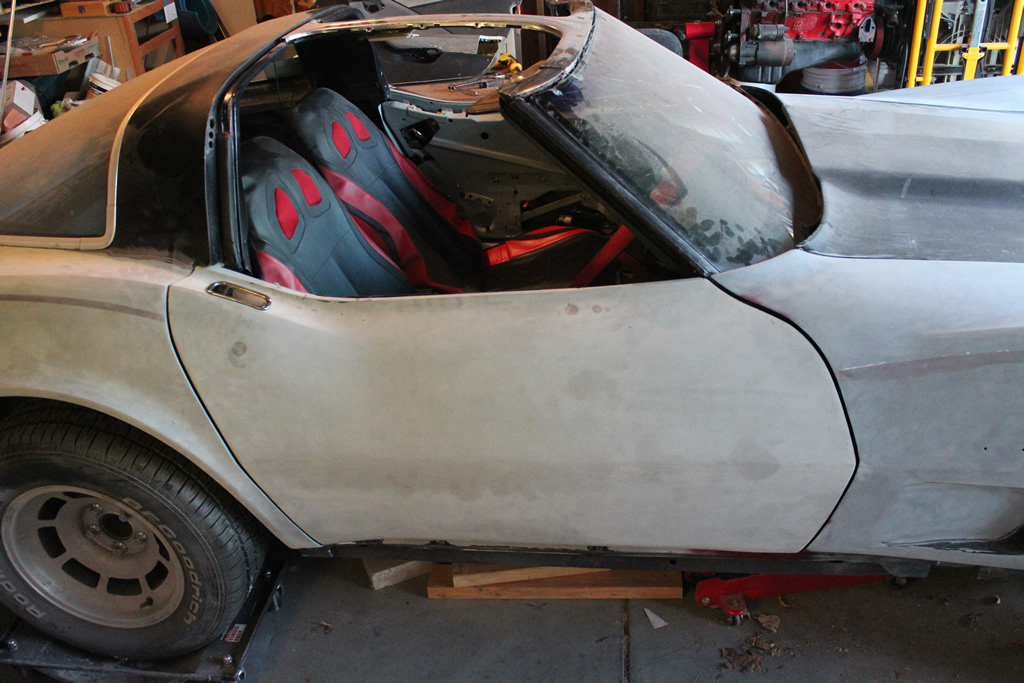
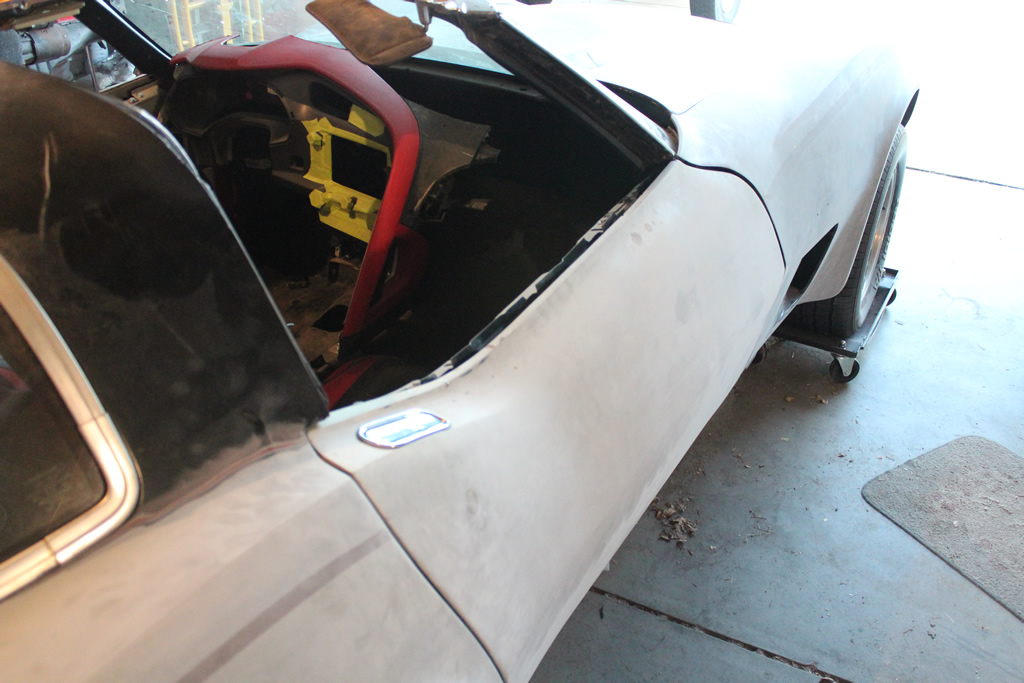
Got the door inner workings back in and got the door back on this week. Lined up nicely and everything fits really well - not sure why. 
Now I'll start fine-tuning the fit of the dash and get the passenger's half put together and fitted as well as the center console.
For some reason I don't have a photo of the door on with the door panel. I'll get one tomorrow.
Now I'll start fine-tuning the fit of the dash and get the passenger's half put together and fitted as well as the center console.
For some reason I don't have a photo of the door on with the door panel. I'll get one tomorrow.
09-21-2015, 02:53 PM
#106
Definitly subscribing to this thread. I'm I a similar boat. First corvette chose a C3. Mine isn't a basket case but pretty close. Still excited to see how it turns out. I wish you luck and great success on your project. It is going to be awesome.
11-28-2015, 10:31 PM
#107
Instructor
Thread Starter
I pulled out the dash again and shortened the driver's side by about another inch. Just way too tight, the door panel was directly against the left side of the dash when I closed the door. No room for anything, leather on the dash included. So I just bit the bullet, tore it apart again and redid it.
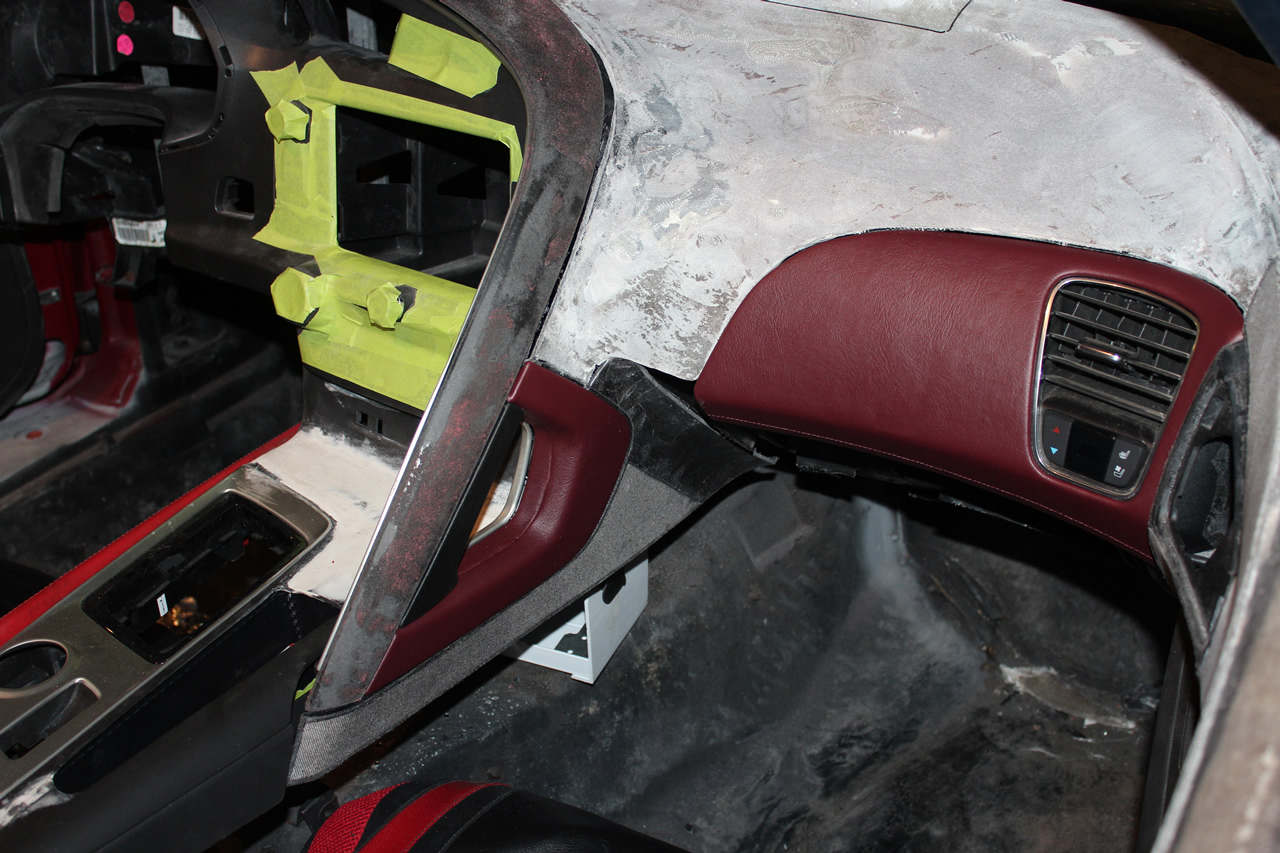
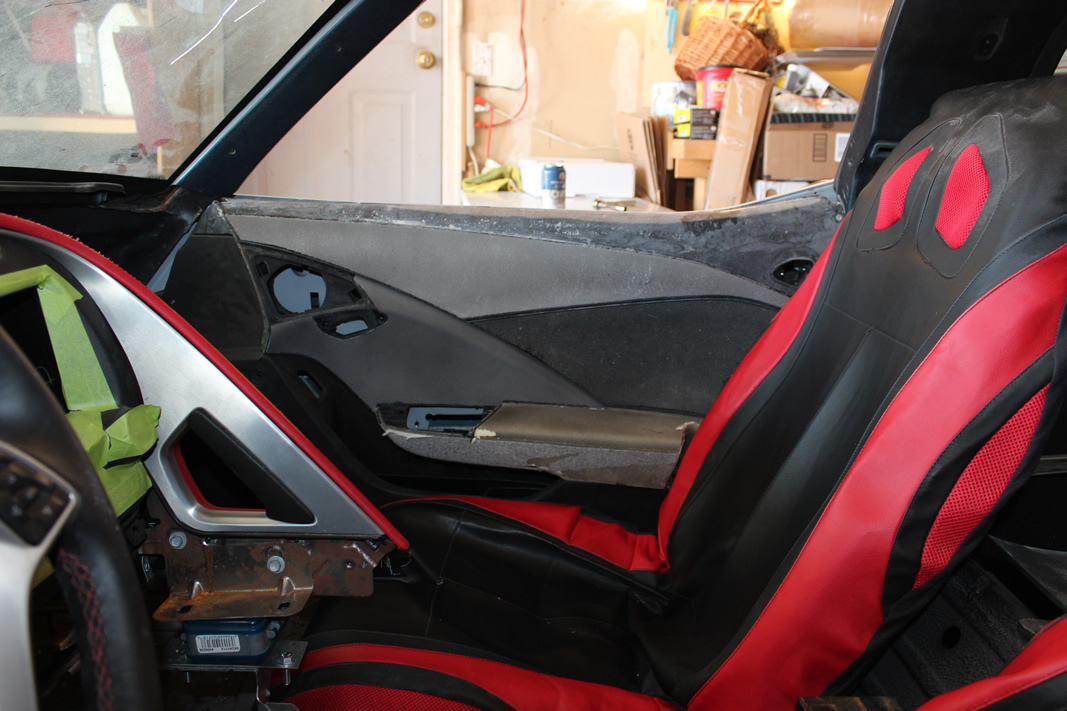
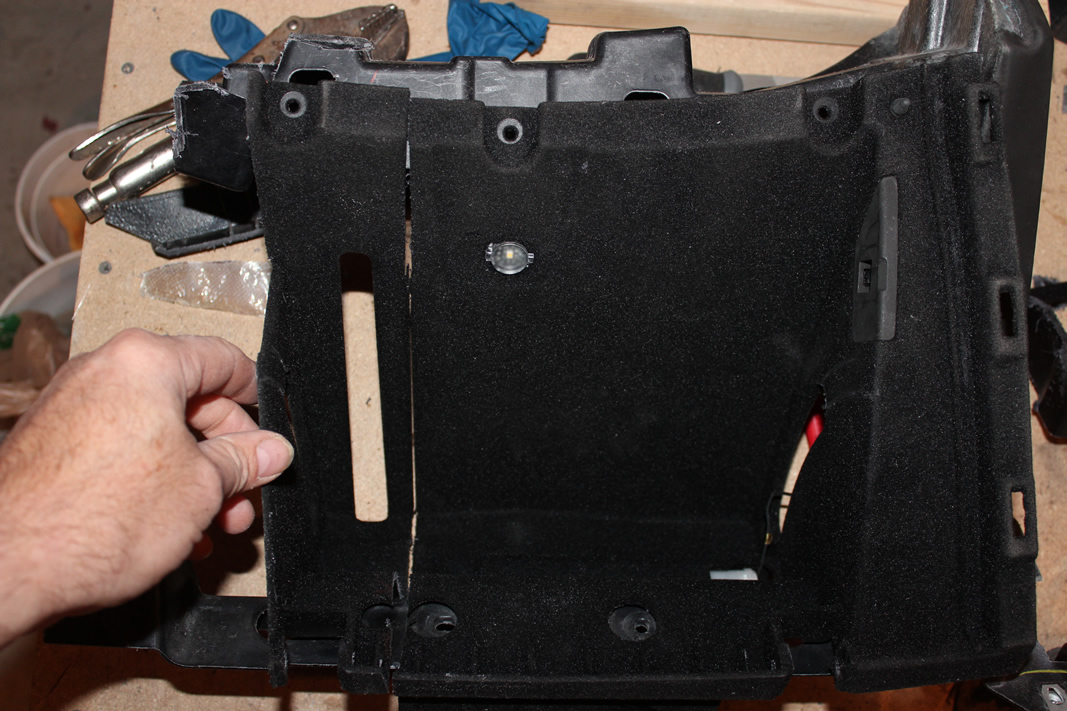
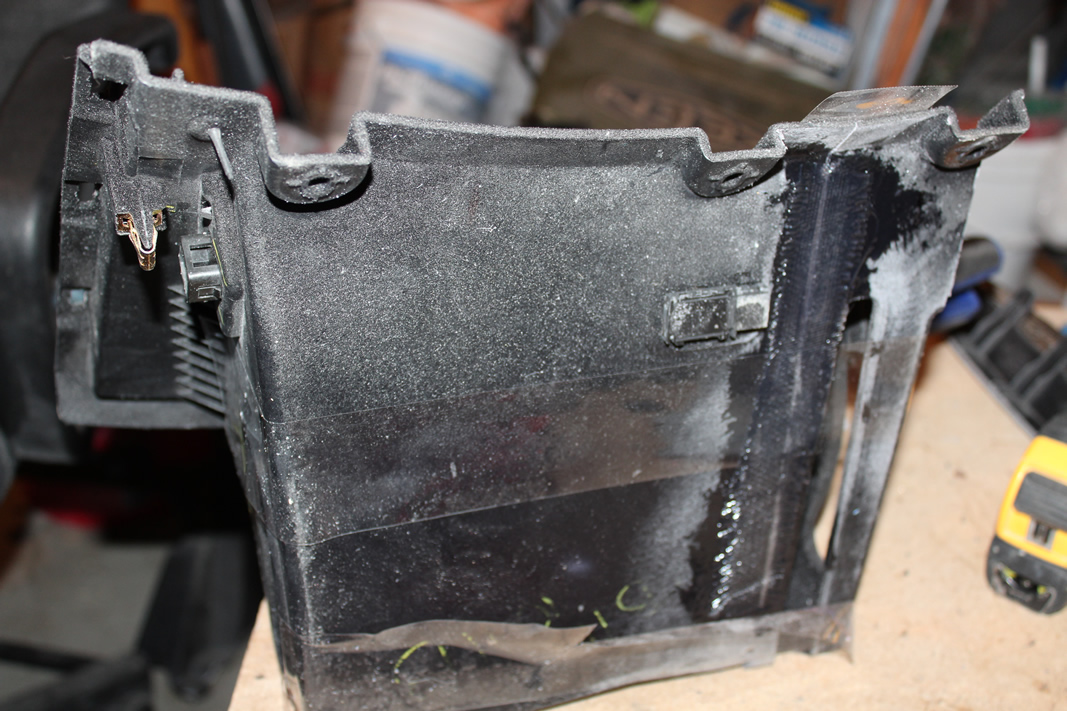
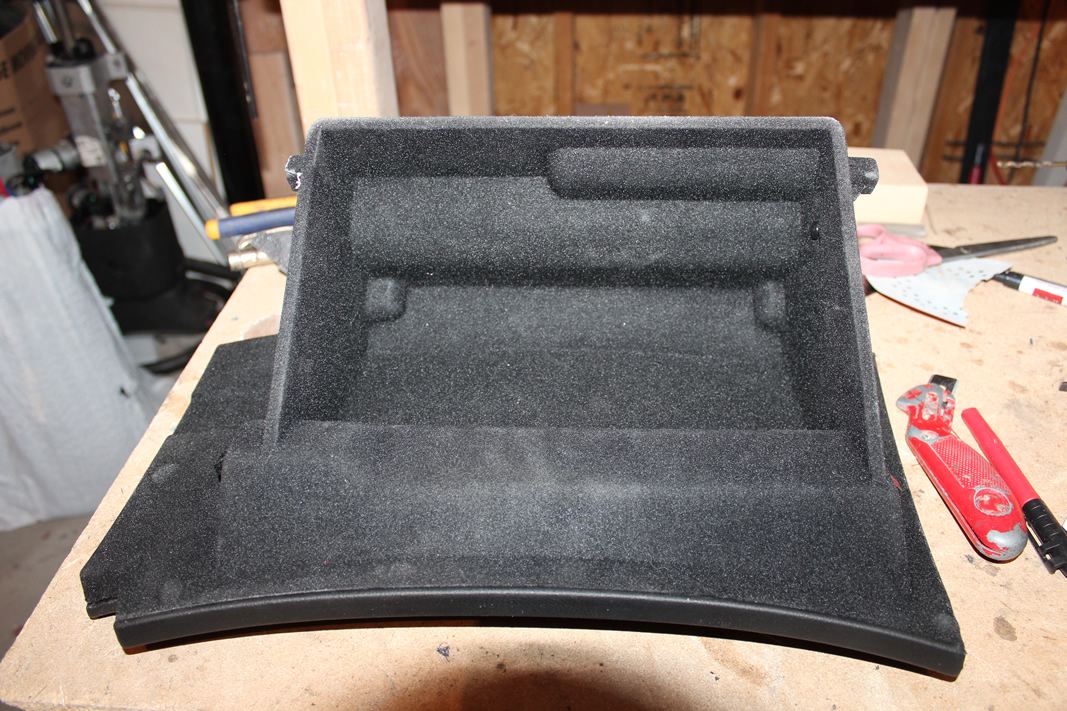
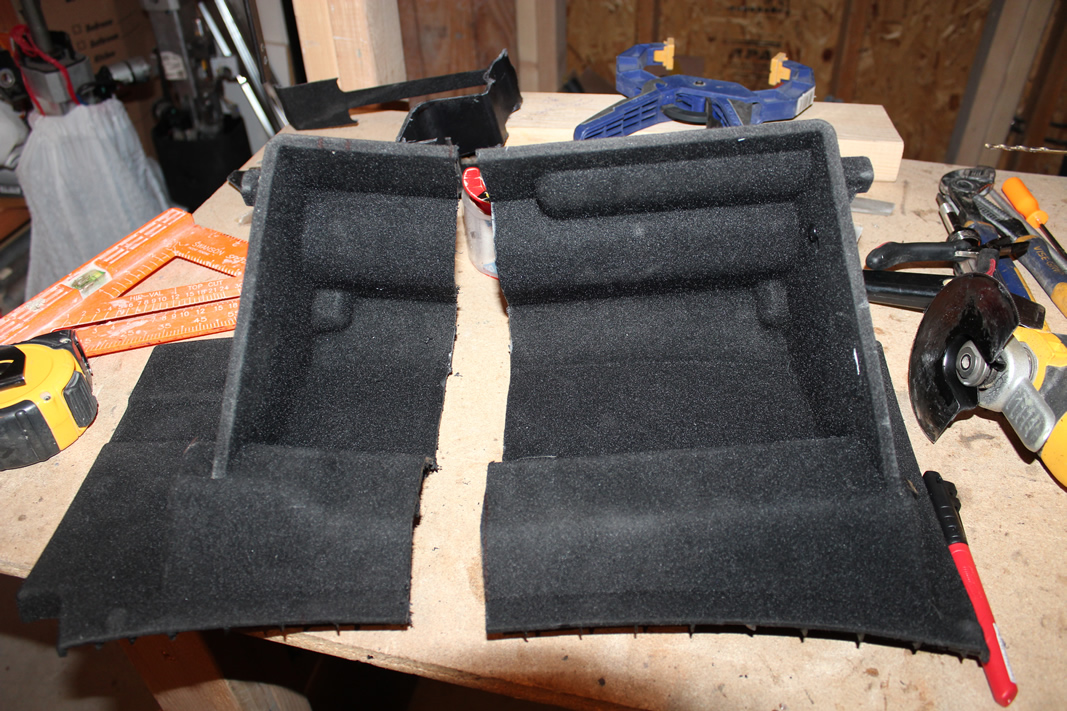
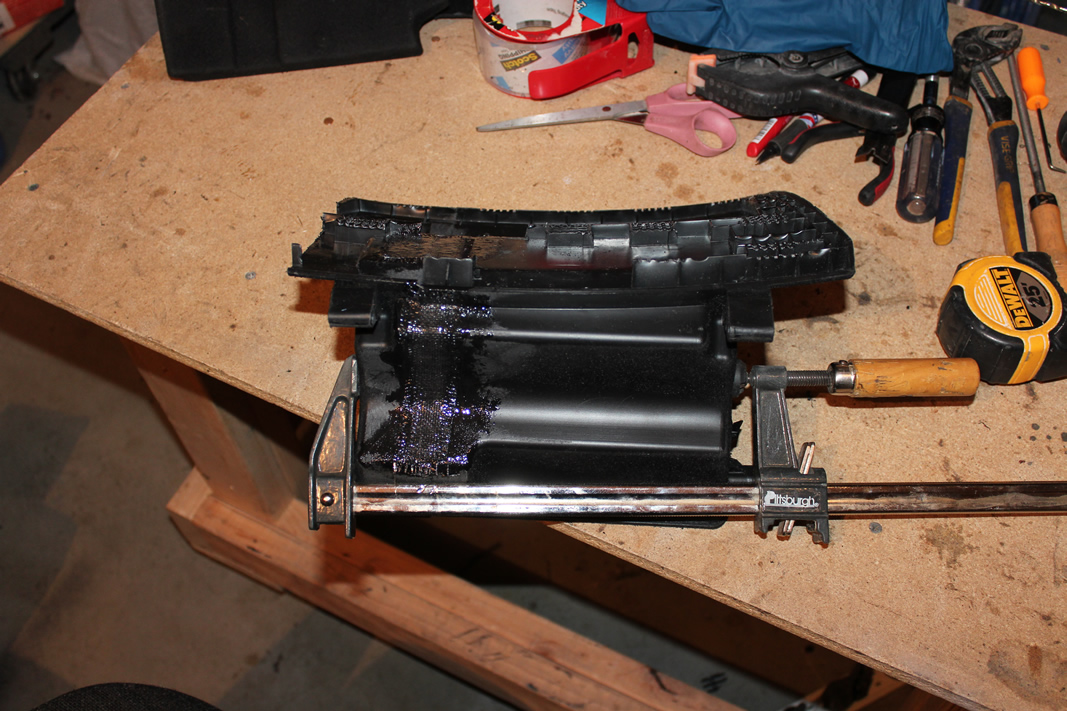
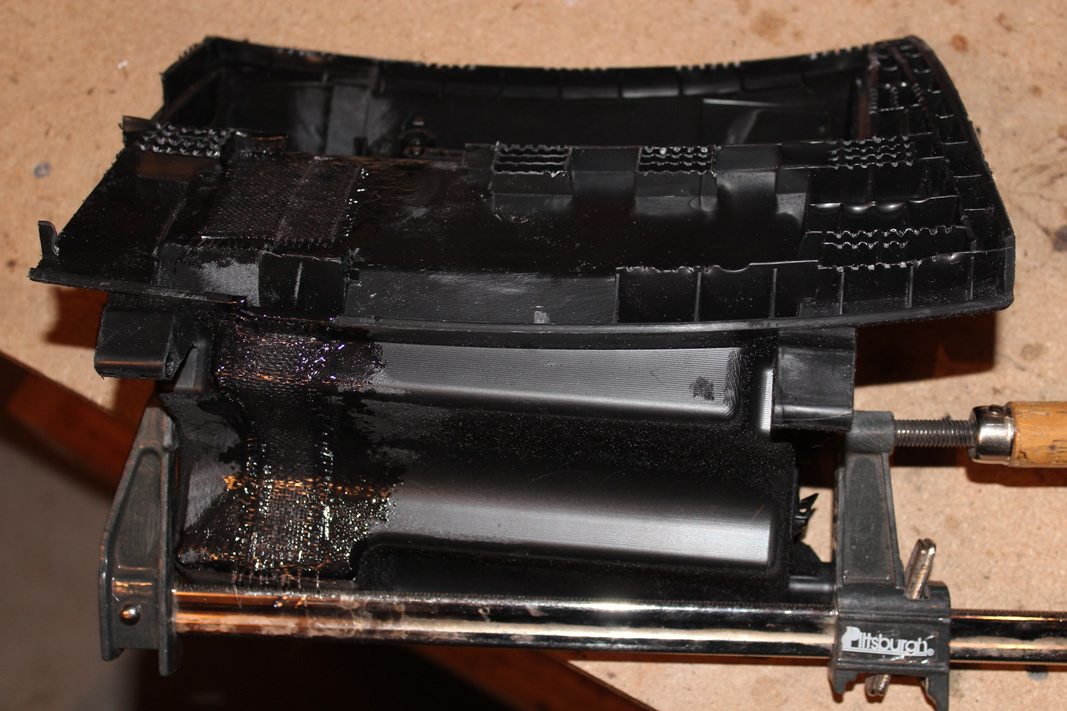
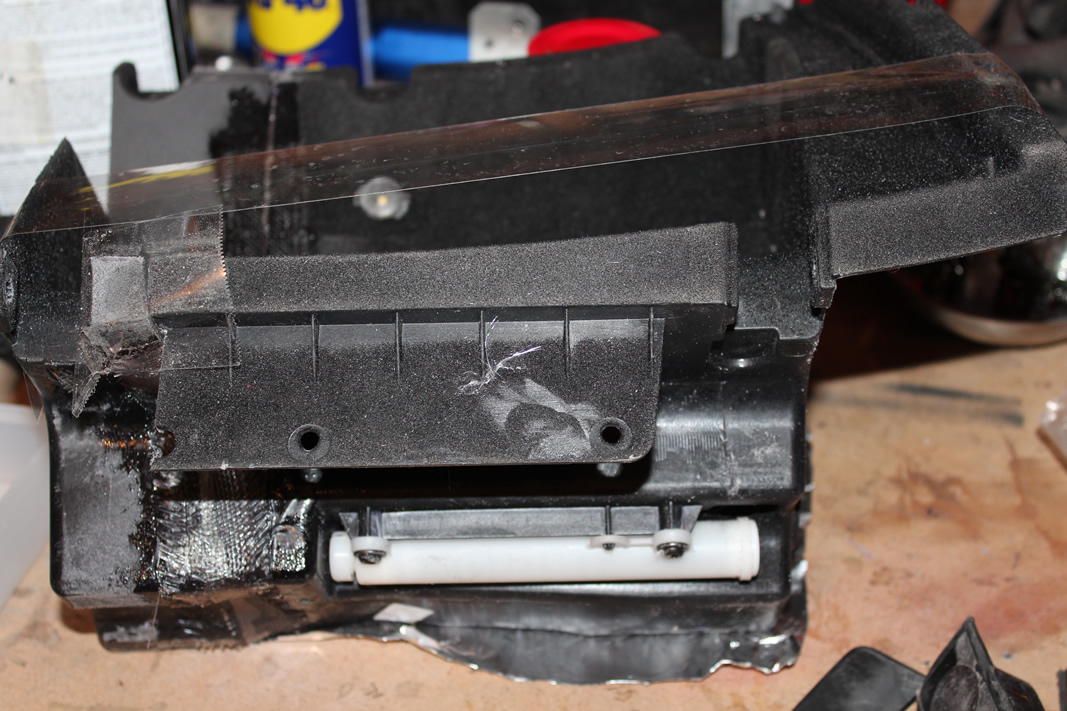
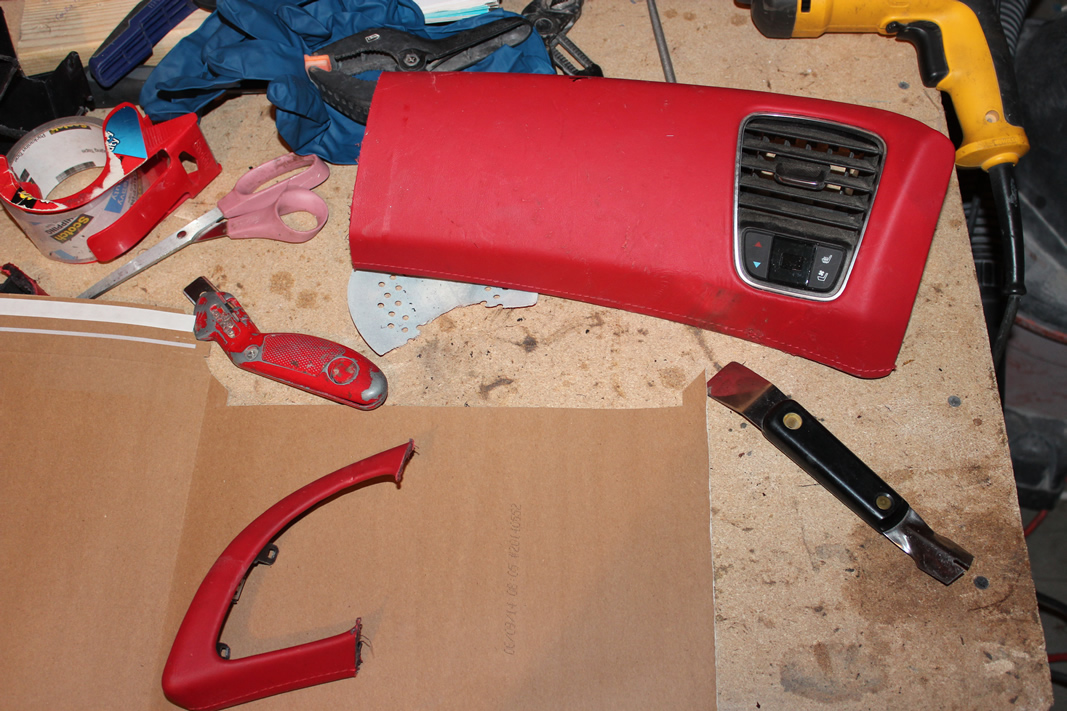
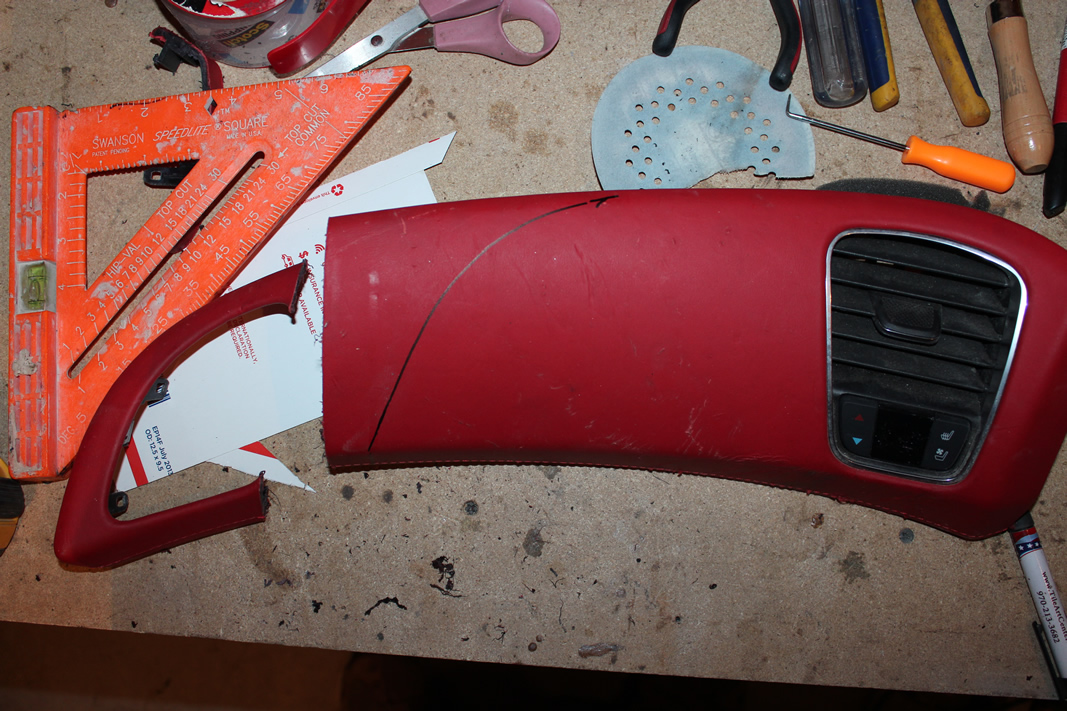
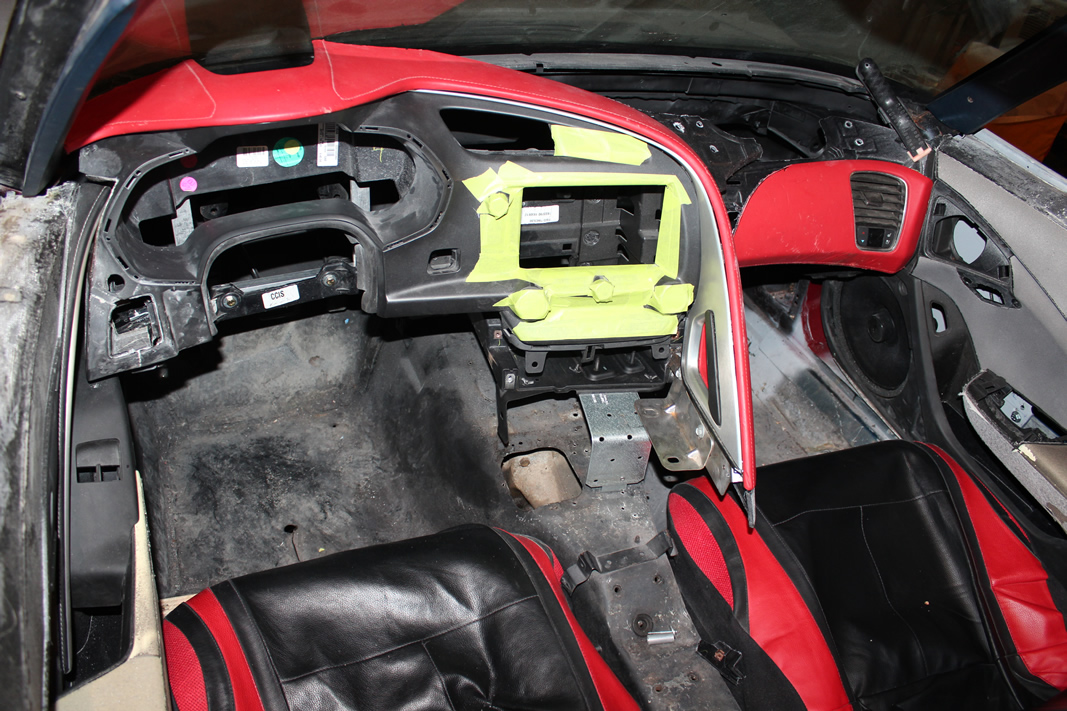
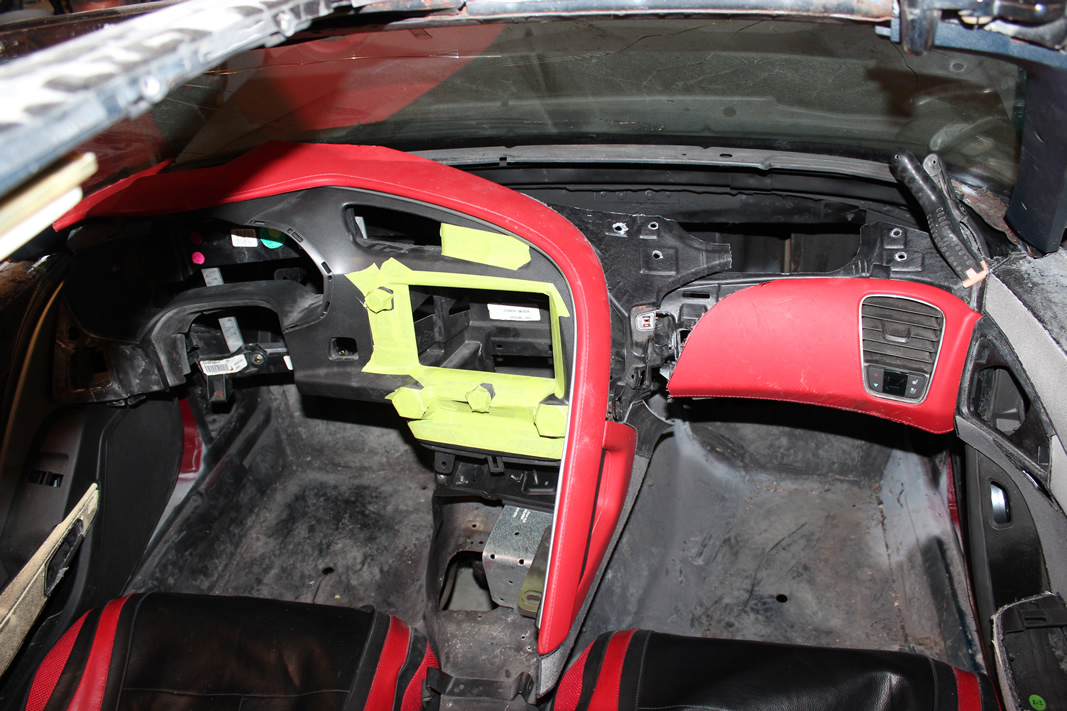
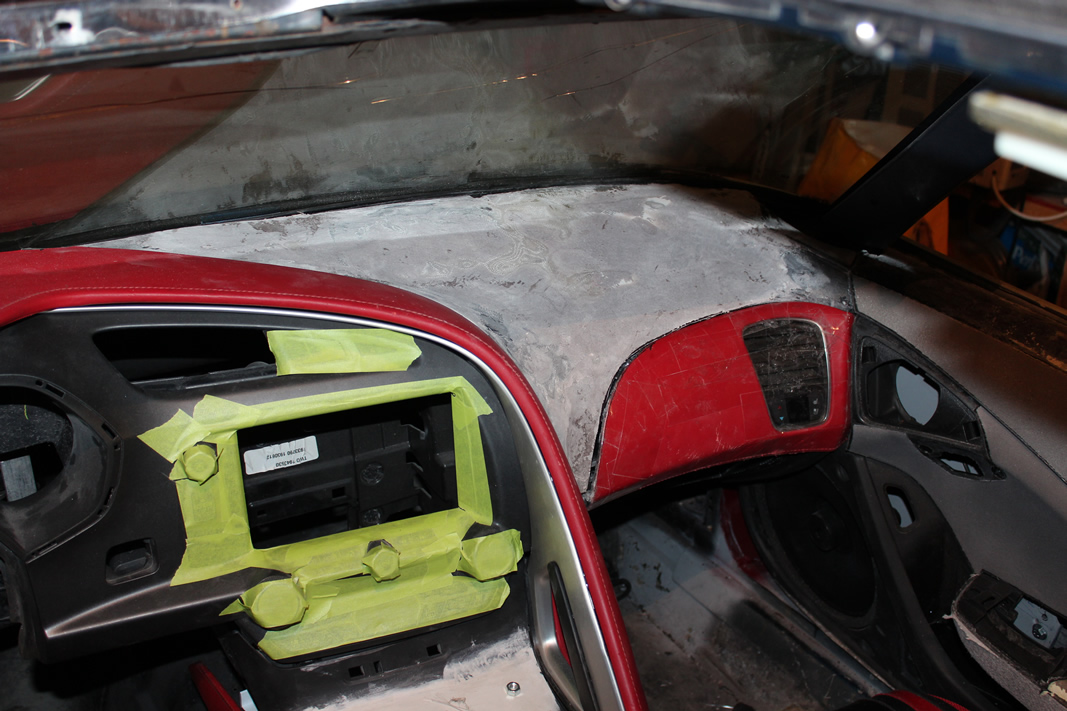
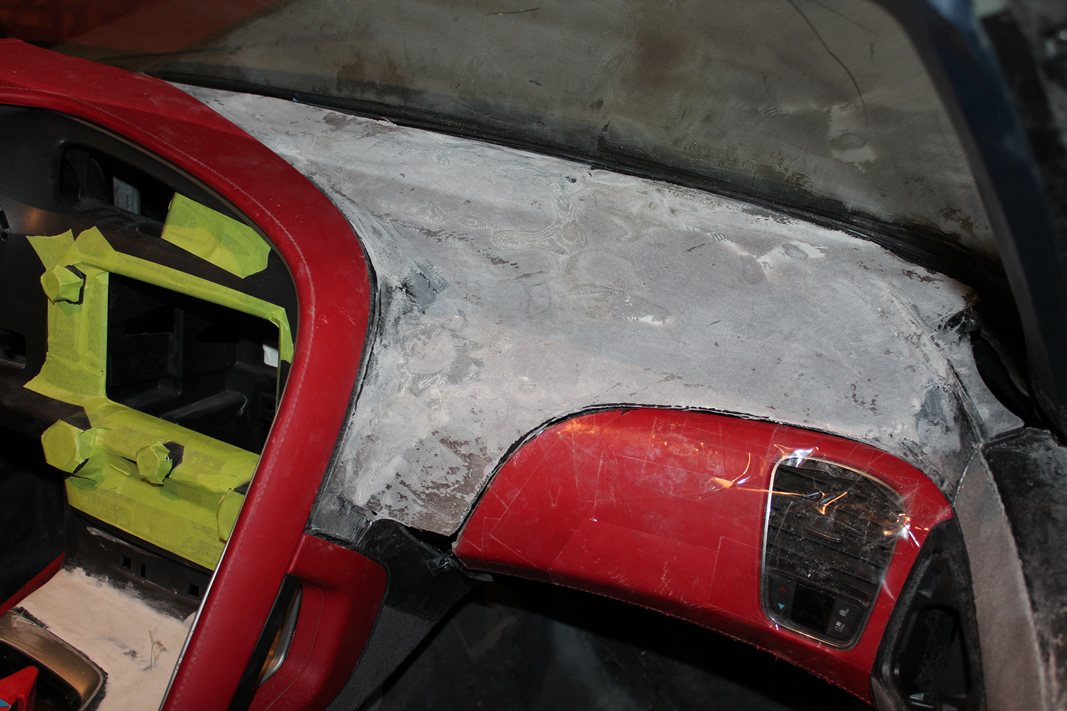
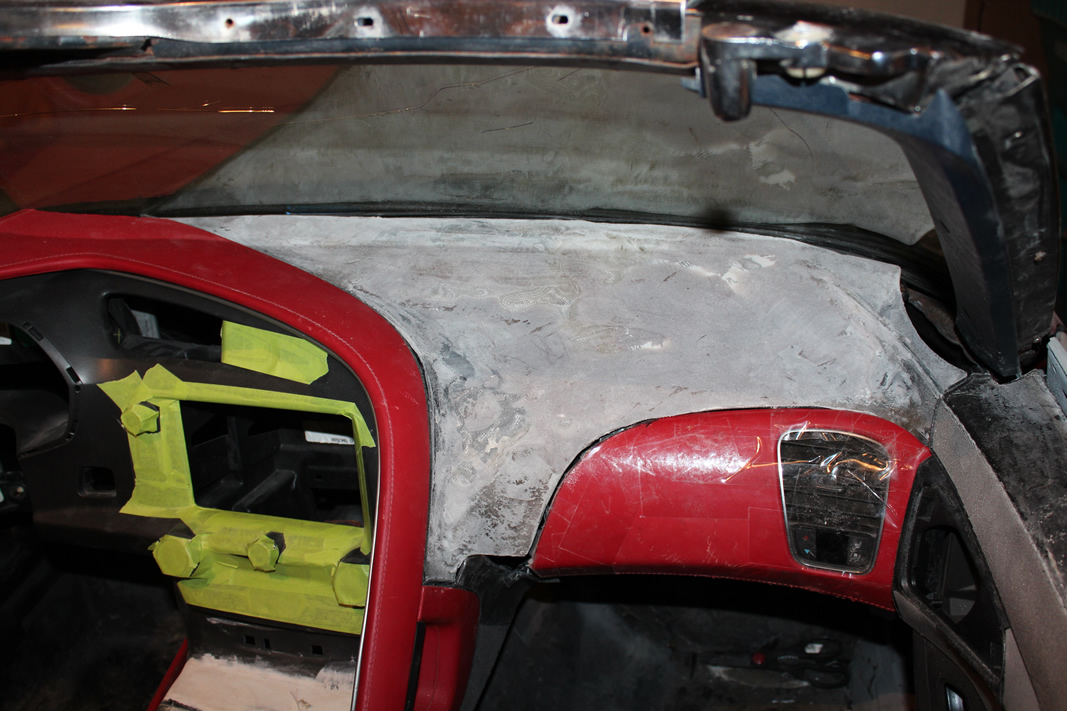
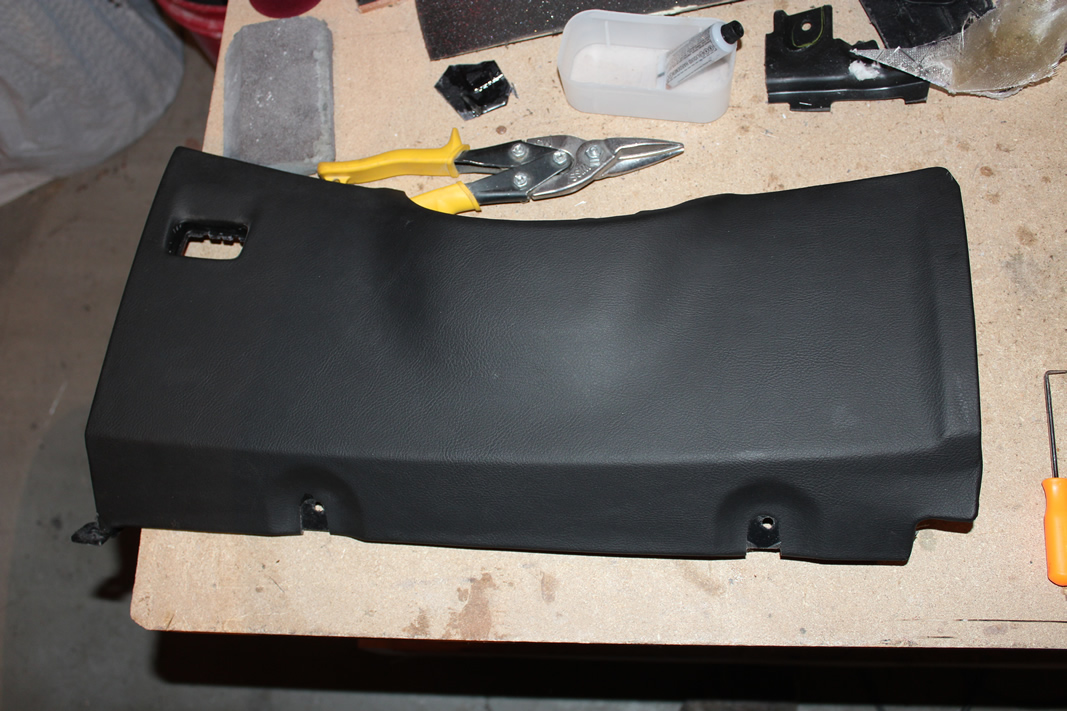
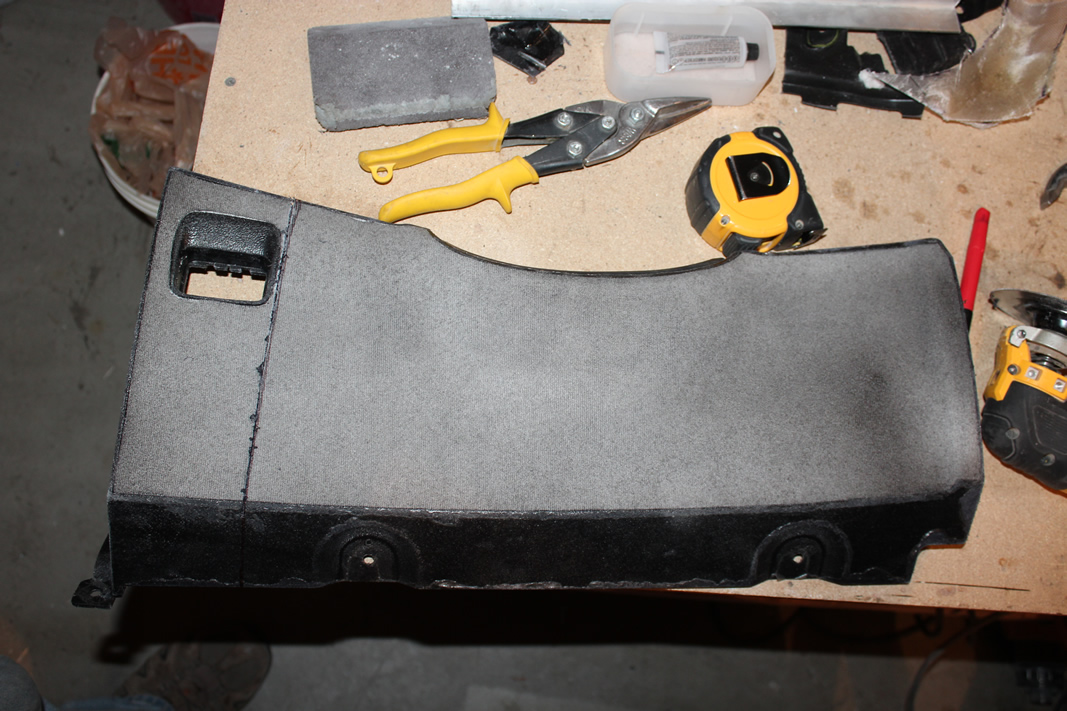
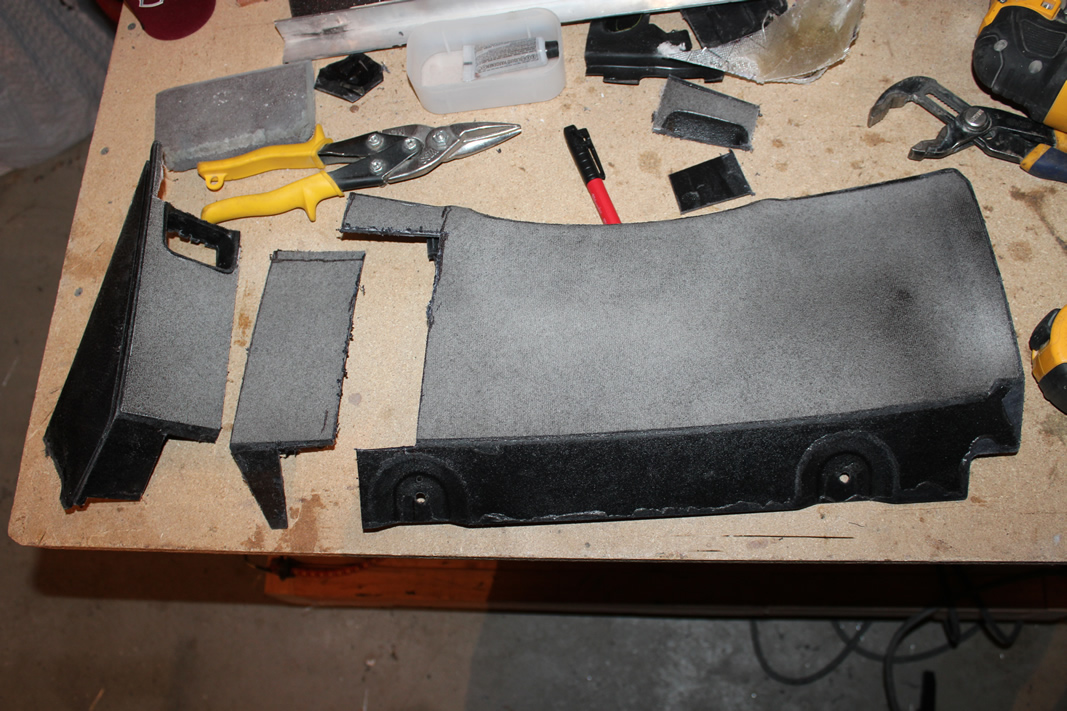
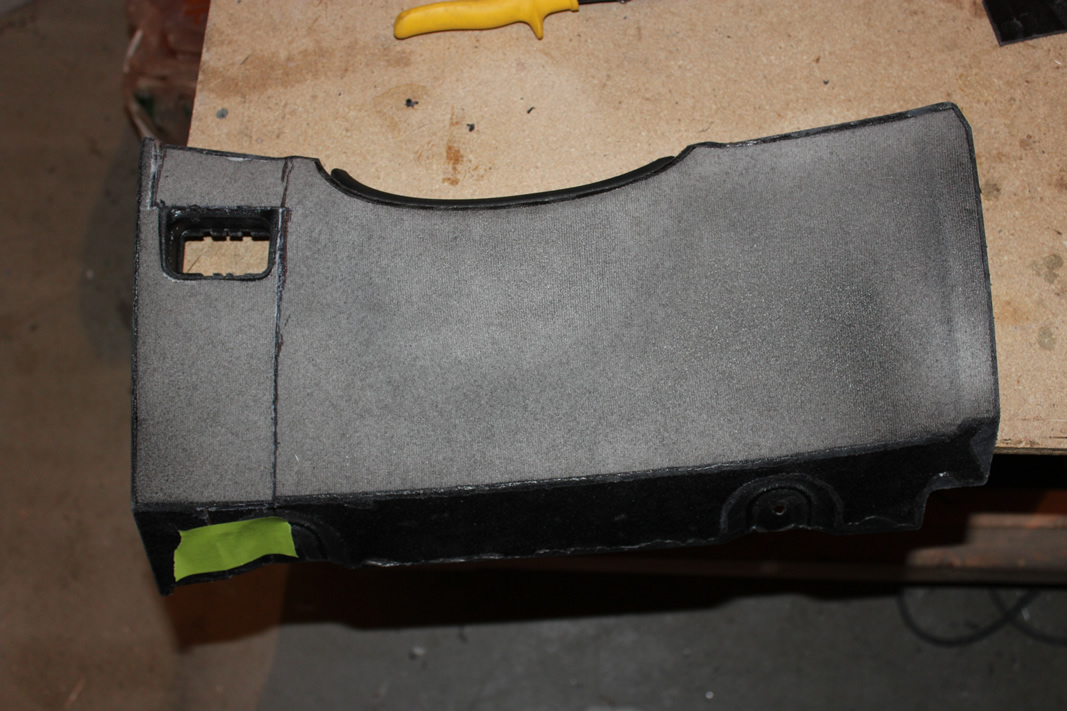
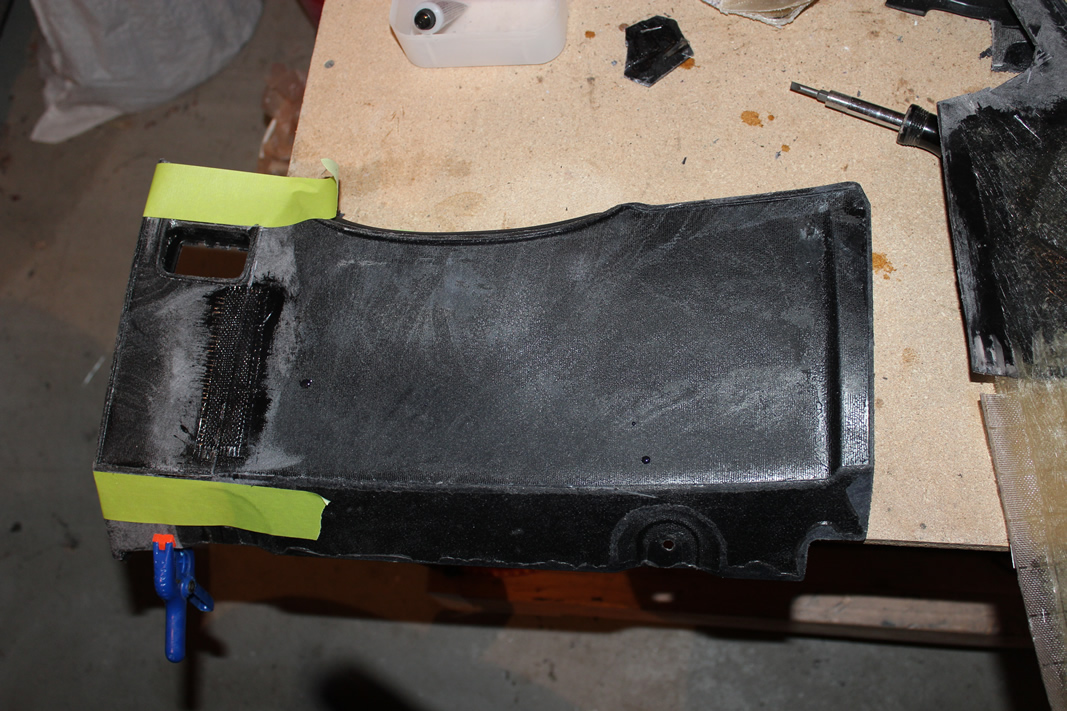
Passenger's side door panel is in and I've started the passenger's side of the dash. Worked on the glove box the last few days, as well as the vent/insert portion. I had to lose a total of four inches off the passenger's side.
Chopped it down and began fiberglassing it back together. Let the first few portions cure and did a test fit. Have to do it correctly or the offset color (currently red - will be burgundy) won't match up with the same offset on the door panel.
So far so good - that means something's gonna go wrong tomorrow.
Last edited by TileArt; 11-28-2015 at 11:39 PM.


 11-28-2015, 10:41 PM
#110
Nam Labrat


Member Since: Sep 2013
Location: New Orleans Loo-z-anna
Posts: 33,893
Received 4,173 Likes
on
2,735 Posts

Maniac!

11-28-2015, 10:49 PM
#111
Burning Brakes

This is simply outstanding fab work. Absolutely love this.
Impressed,
Lee
Impressed,
Lee
11-28-2015, 11:44 PM
#112
Instructor
Thread Starter
I'm using fiberglass, but I'm sanding the hell out of the plastic first to get a good bond. It IS a tenacious bond. Trying to take the driver's side apart to remove the additional inch was a bitch.
12-17-2015, 10:35 PM
#114
Instructor
Thread Starter
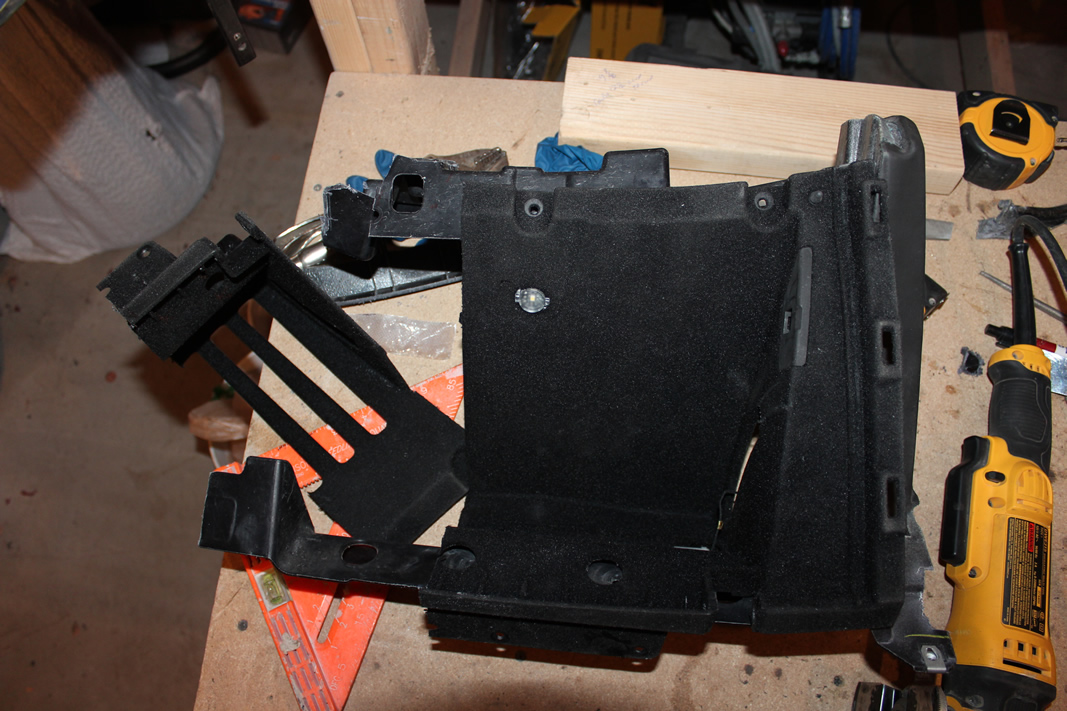
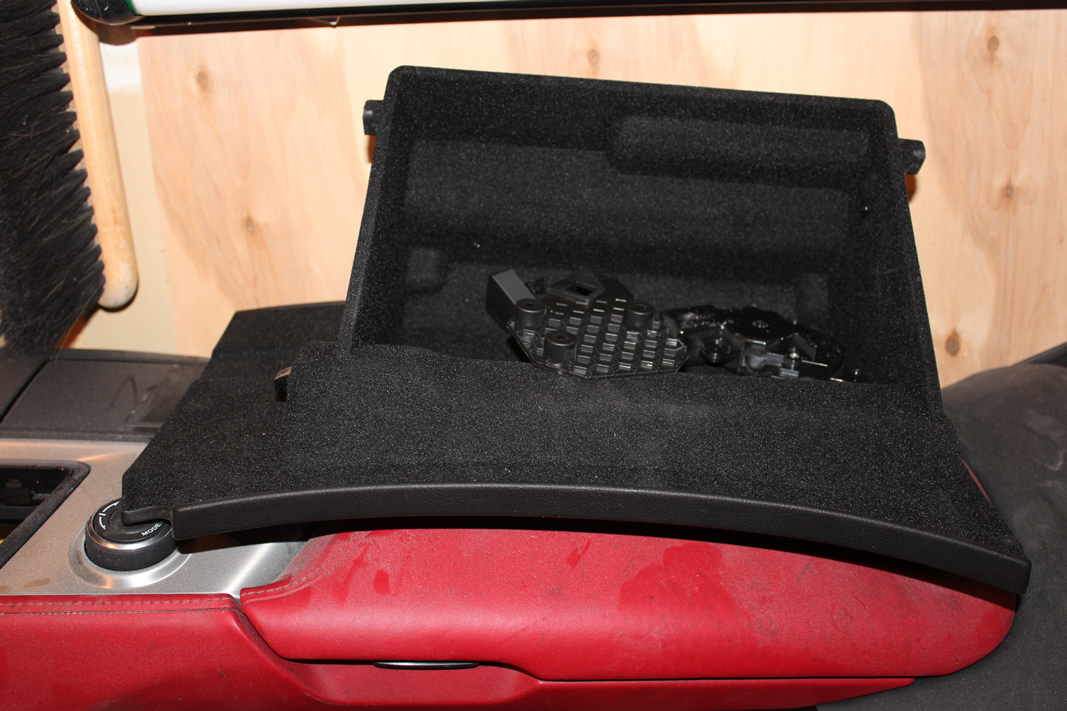
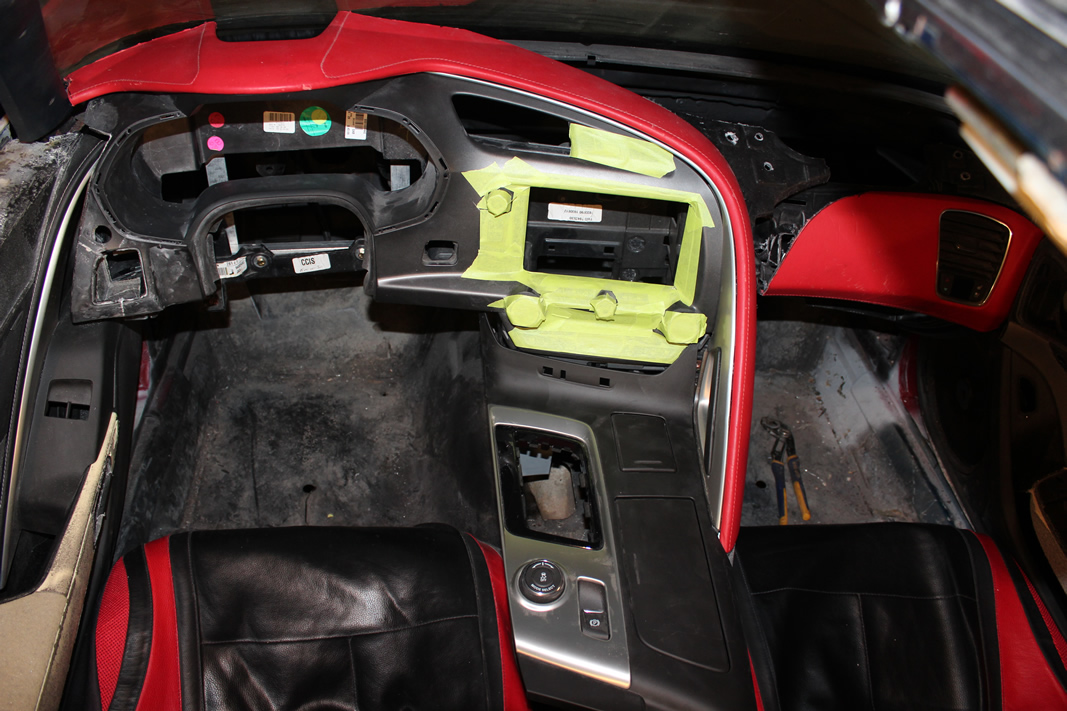
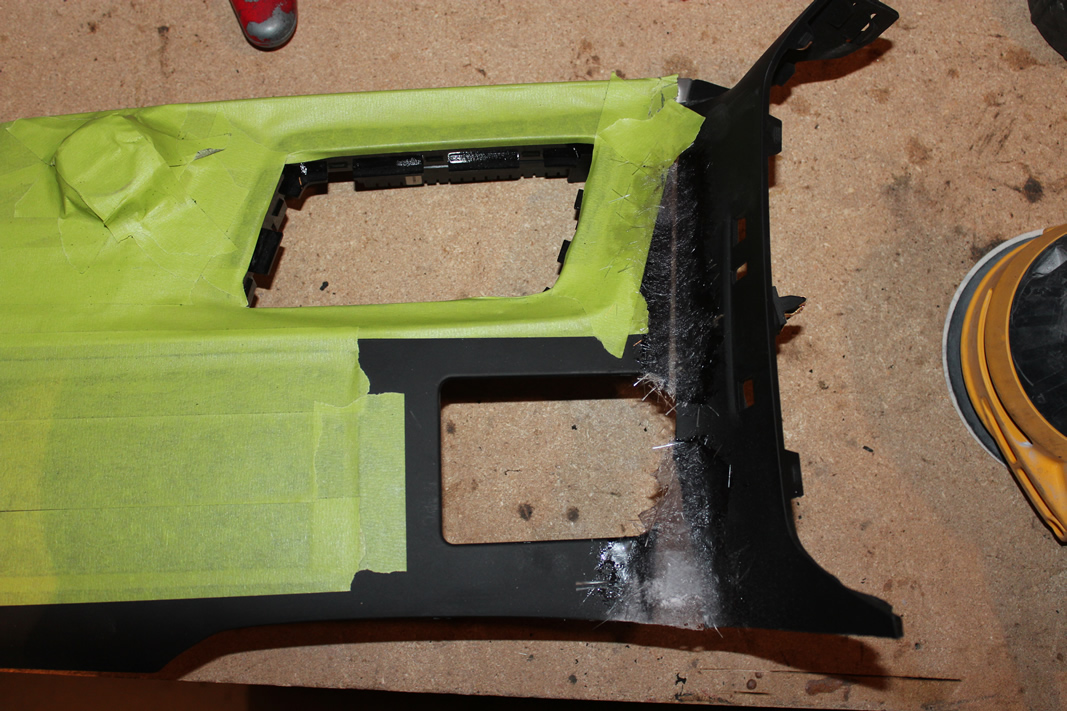
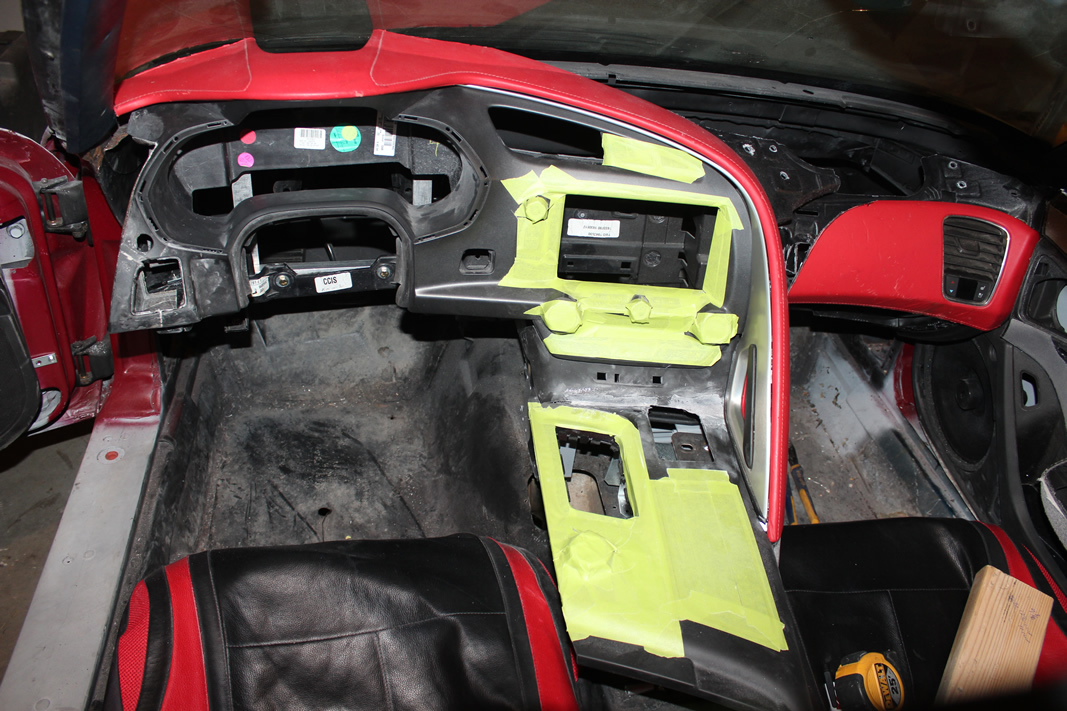
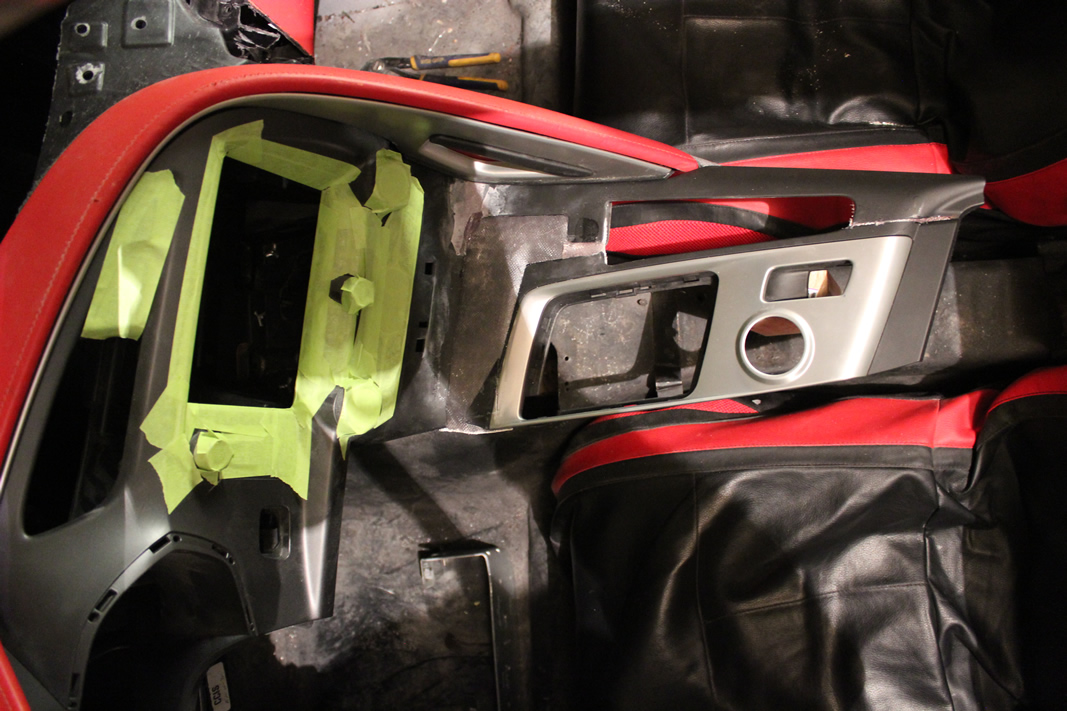
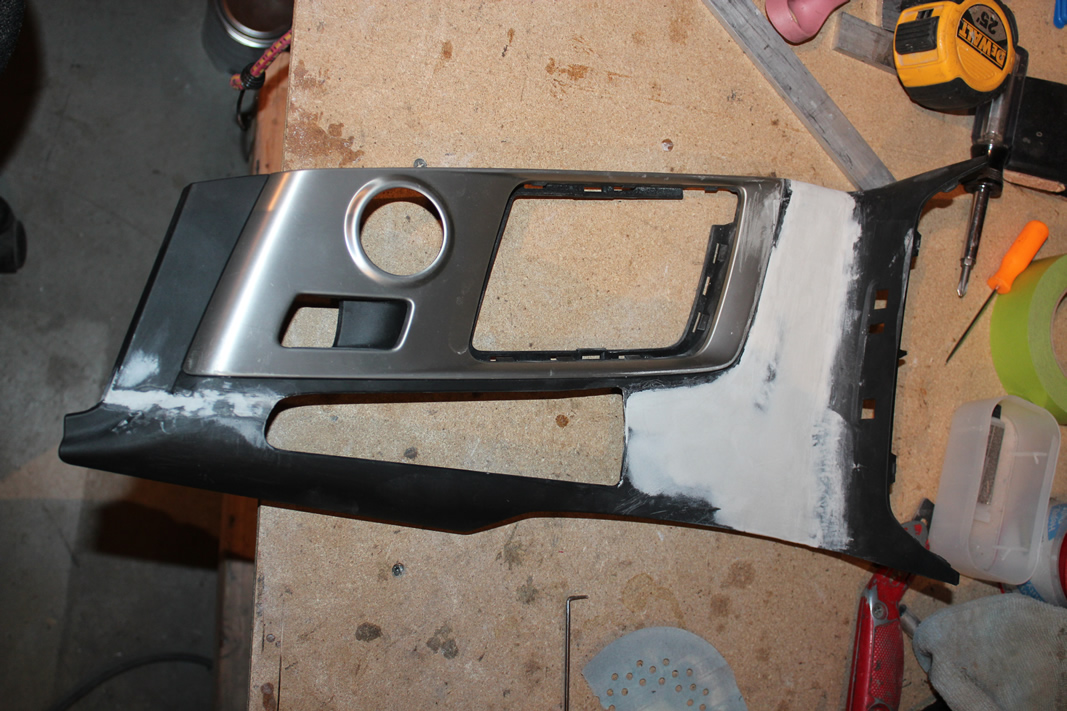
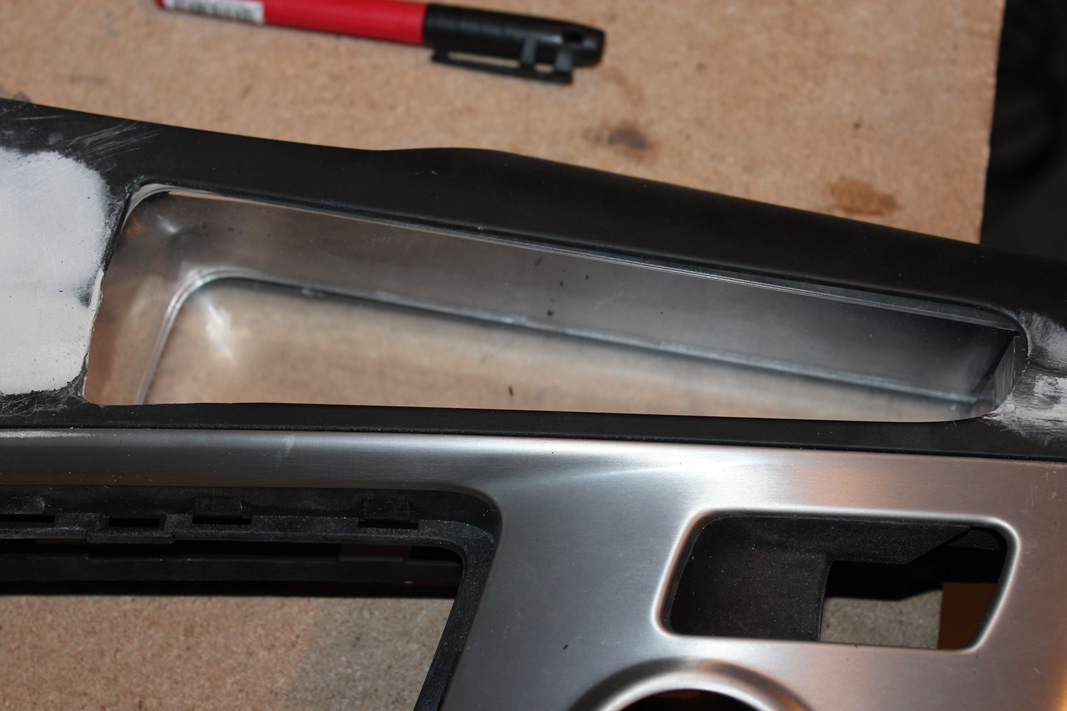
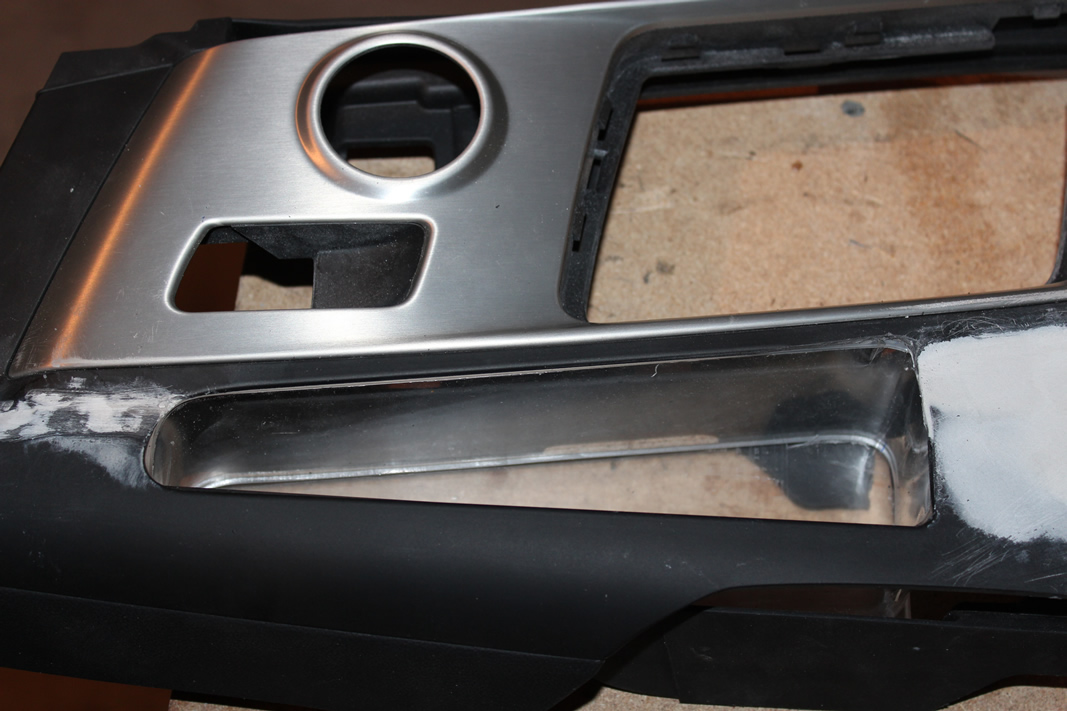
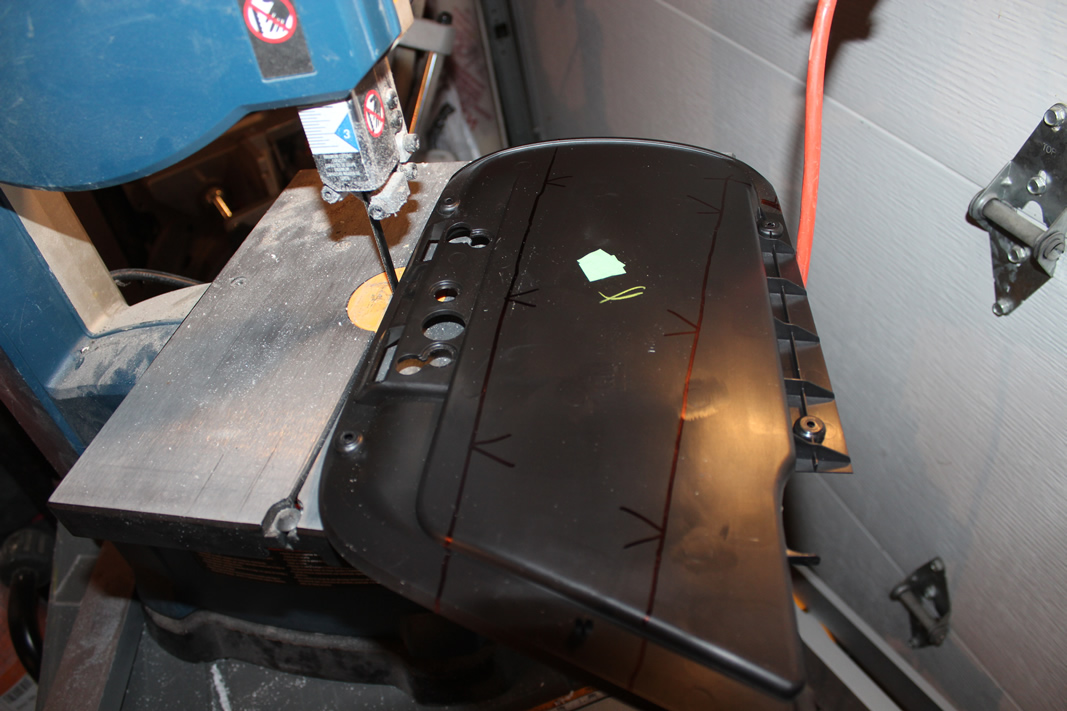
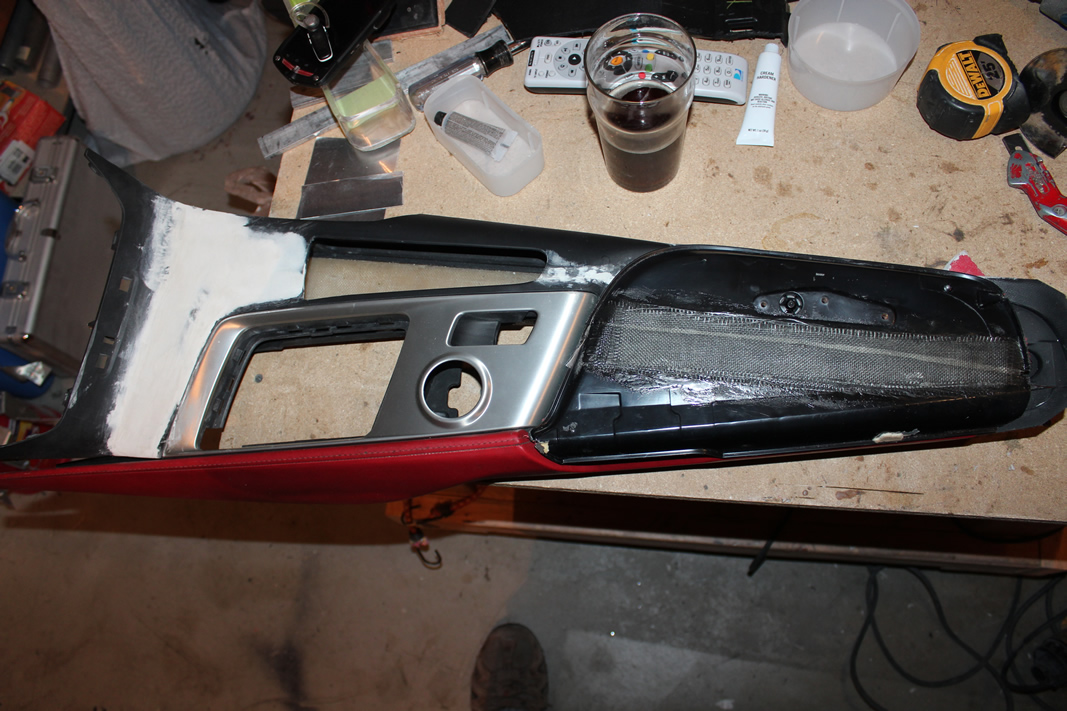
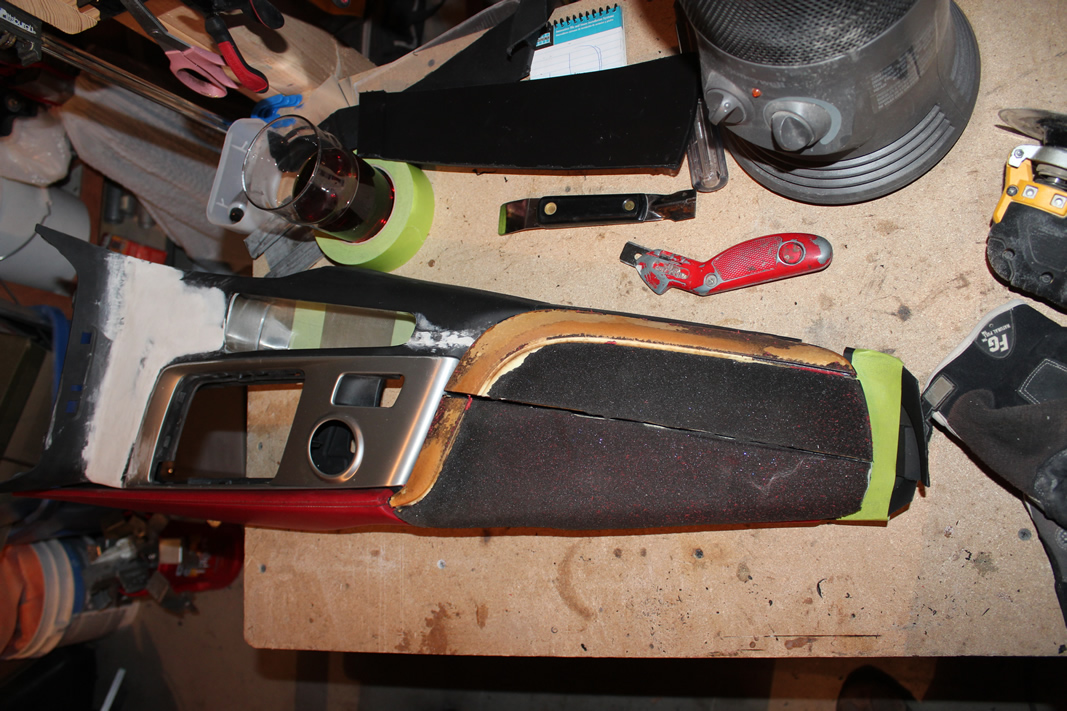
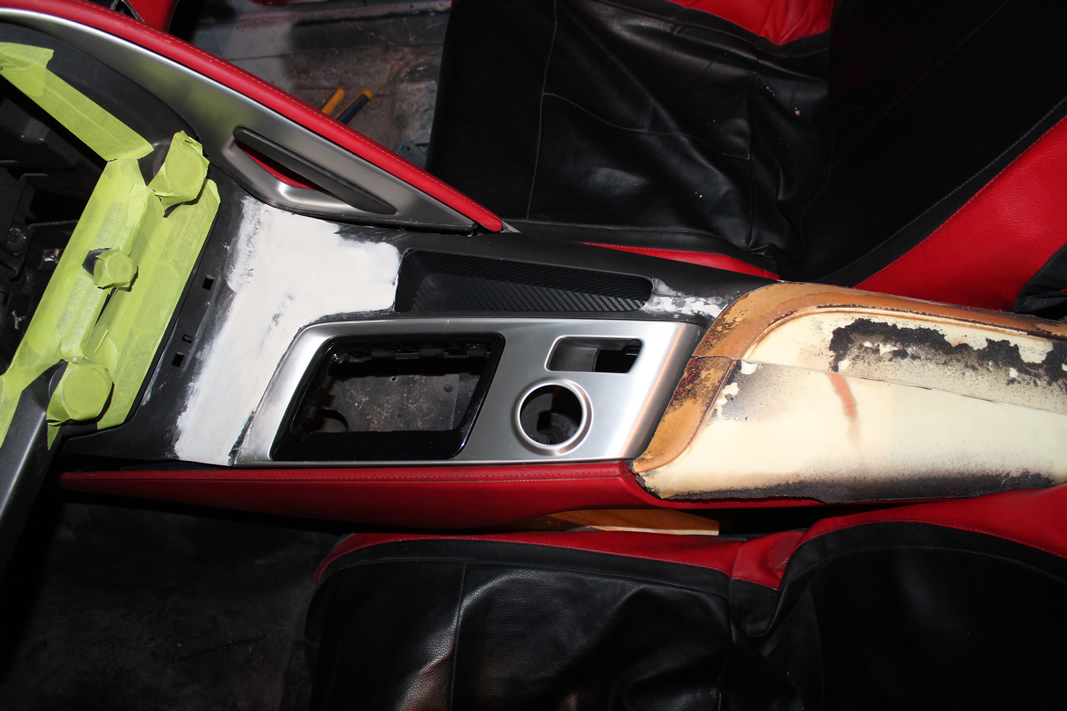
Finished the passenger's side glove box and vent/accent. Set the front half of the center console in to check the angles. Because of the way I needed to angle the handle/stripe (whatever you want to call it) I needed to cut the front half off and re-angle it. Once I did that I placed it back in there to test fit it.
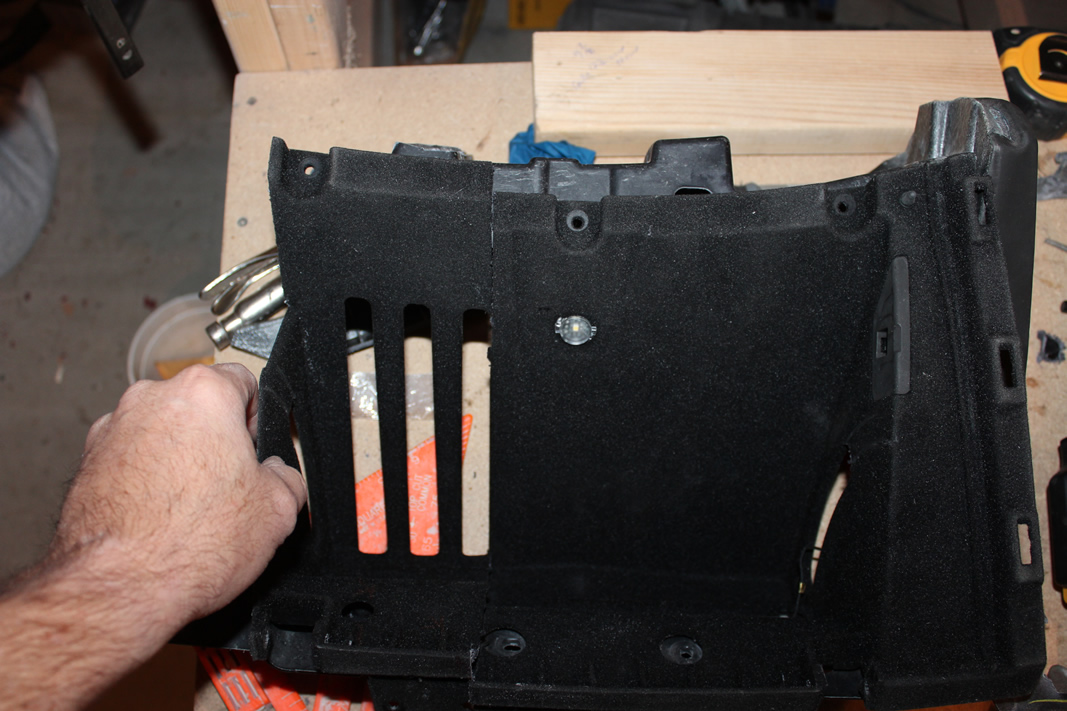
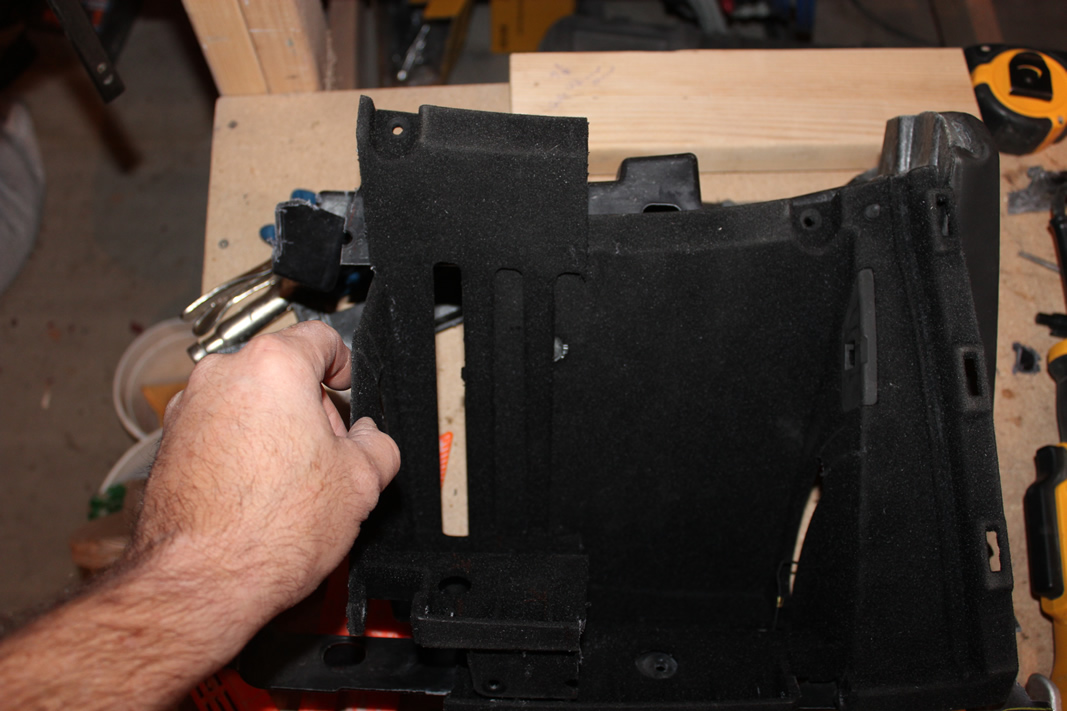
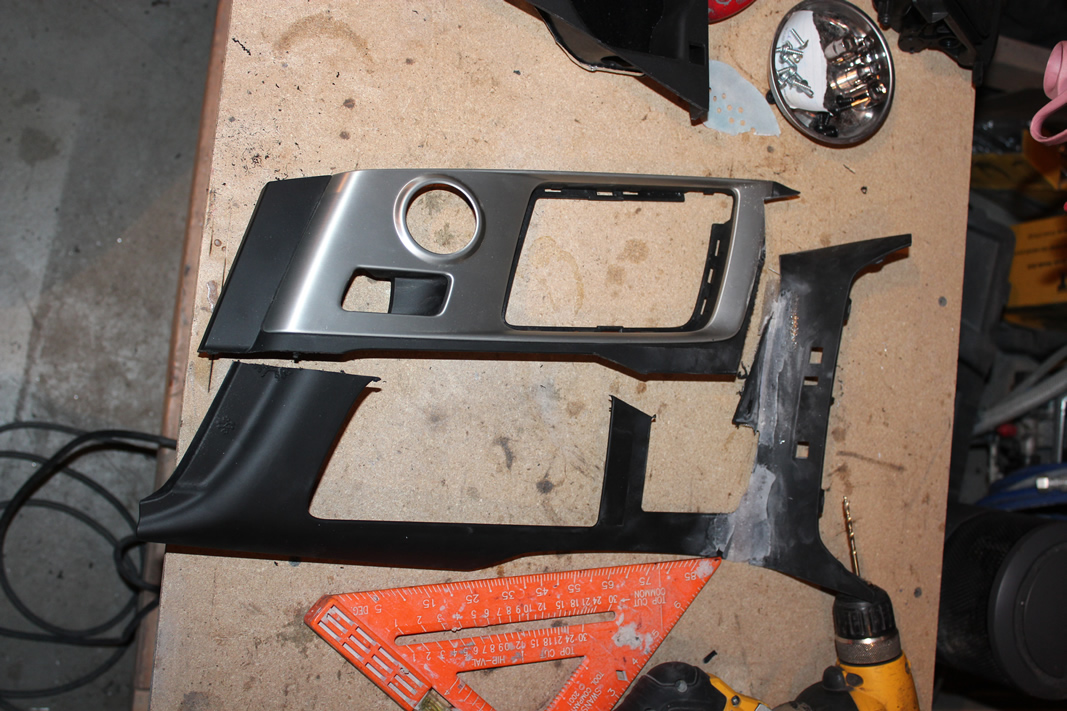
Once that fit correctly I needed to remove a total of four inches from the center console before it reached the area between the seats. Decided the best way to do that was to remove the cigarette lighter compartment (the small door in the front) and the cup holder (the larger door) and replace it with just a small compartment along that side.
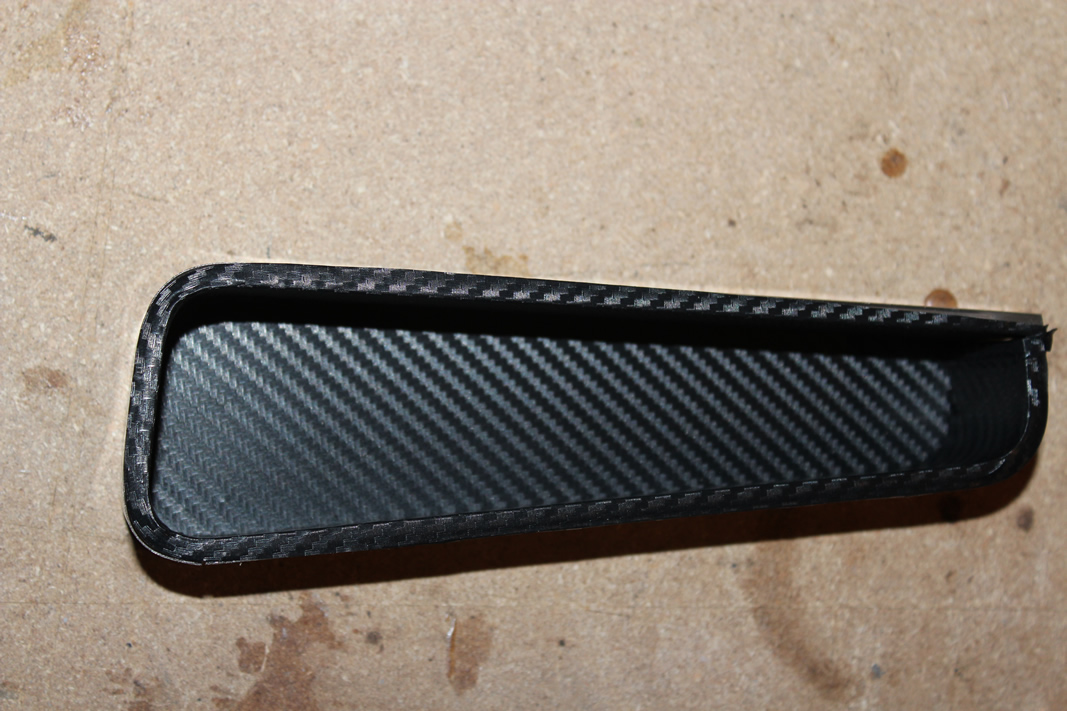
Created the compartment frame out of acrylic, fiberglassed everything back together and skim-coated over it with body putty. I'm covering it with carbon-fiber wrap so I needed a fairly smooth base. I'll have usb ports in the front of it for cell phones, mp3, whatever.

Once that fit correctly I needed to remove a total of four inches from the center console before it reached the area between the seats. Decided the best way to do that was to remove the cigarette lighter compartment (the small door in the front) and the cup holder (the larger door) and replace it with just a small compartment along that side.
Created the compartment frame out of acrylic, fiberglassed everything back together and skim-coated over it with body putty. I'm covering it with carbon-fiber wrap so I needed a fairly smooth base. I'll have usb ports in the front of it for cell phones, mp3, whatever.
12-18-2015, 11:24 AM
#115
Burning Brakes
Simply marvelous work, sir. Thanks for the update...keep up the innovative and slick mods!
Later,
Lee
Thanks for the update...keep up the innovative and slick mods!Later,
Lee
The following users liked this post:
TileArt (12-18-2015)
12-19-2015, 05:01 PM
#116
Dementer sole survivor

Member Since: Oct 2015
Location: YUPPY HELL Westford MASS
Posts: 16,432
Received 6,278 Likes
on
3,915 Posts
2020 C3 of the Year Finalist - Modified
2020 Corvette of the Year Finalist (performance mods)
2019 C3 of Year Winner (performance mods)
2016 C3 of Year Finalist
I love seeing progressive pictorials like this. Beautiful work. You can get someone to wire togther a voltage stepdown from 12 to the voltage necessary for the remotes built into the doors and you won't have to replace the batteries.
Good luck. Glad you stick to your convictions.
Good luck. Glad you stick to your convictions.
The following users liked this post:
TileArt (12-19-2015)
01-11-2016, 11:31 PM
#117
Instructor
Thread Starter
Well, almost another whole month gone by and work seems to be a bit slow on the Vette, made a lot of progress now that I look through the pics, but it never goes as fast (or as smoothly) as you want it to.
Thanks for the stepdown and remote advice Rescue - I'm still kicking around ideas of what I need or want to do with the electronics in the cabin, but that's a great alternative - on the top of the list at the moment.
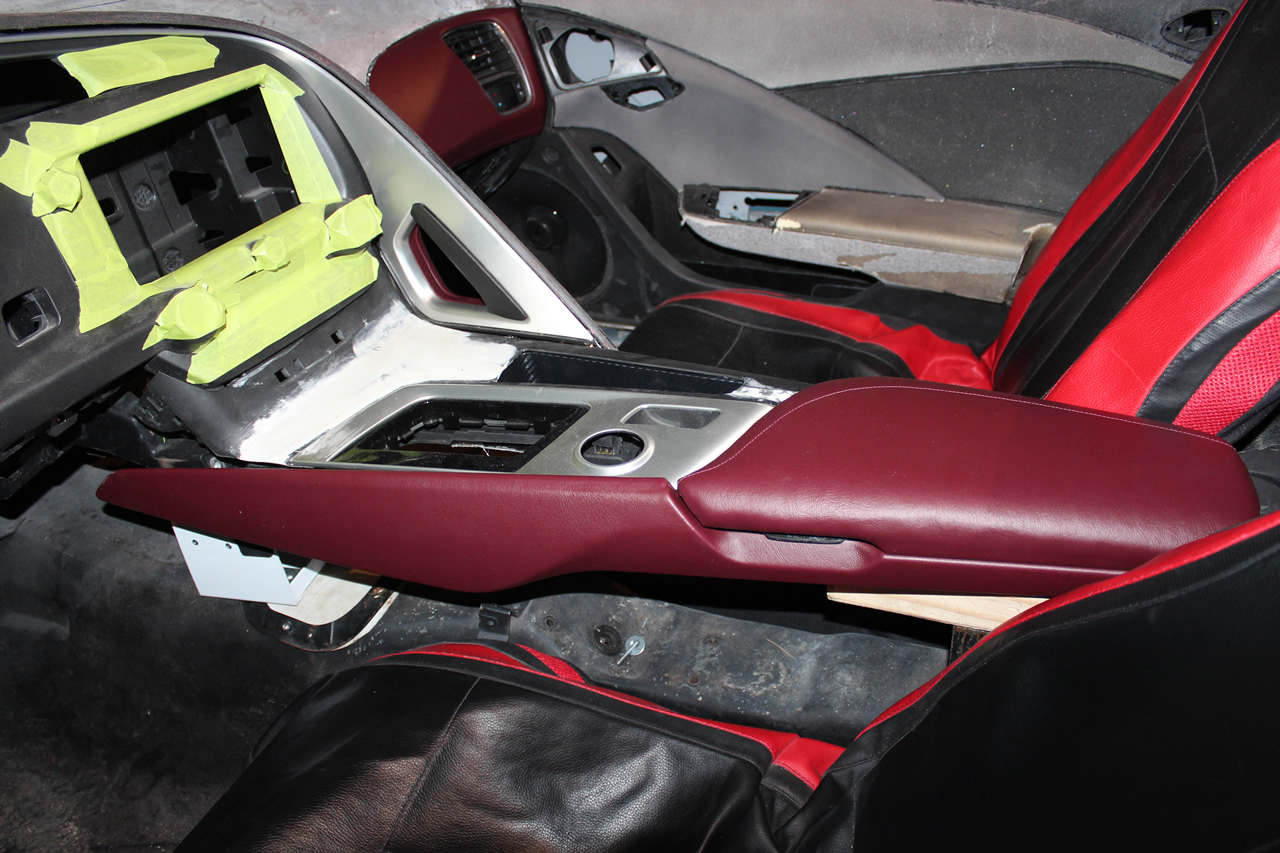
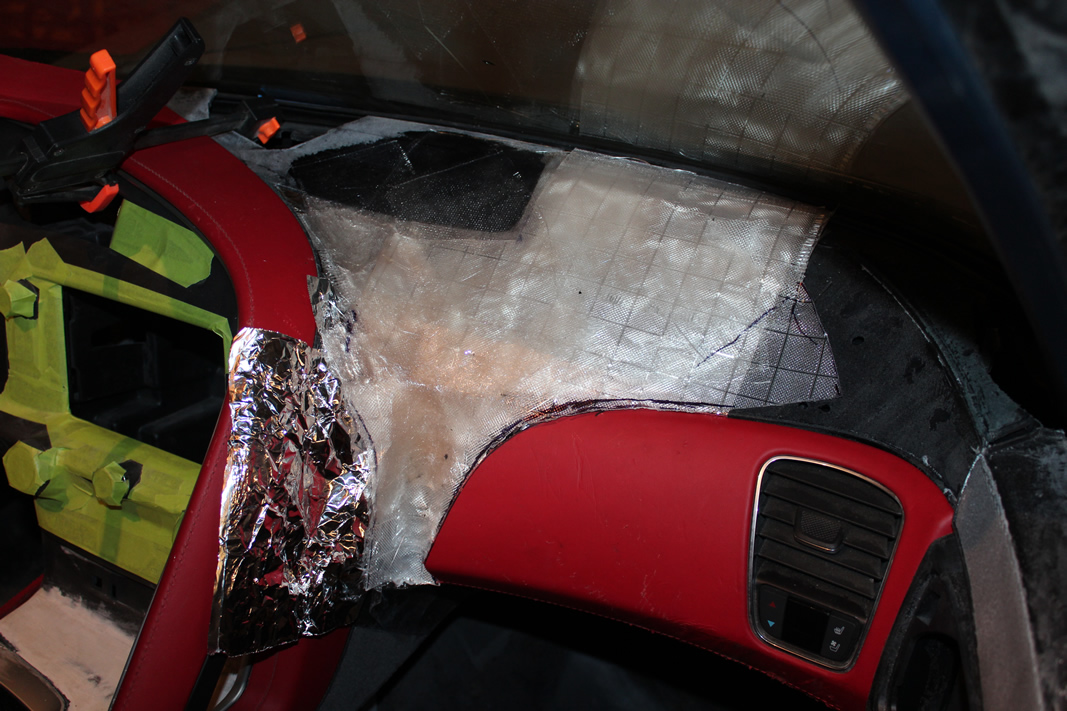
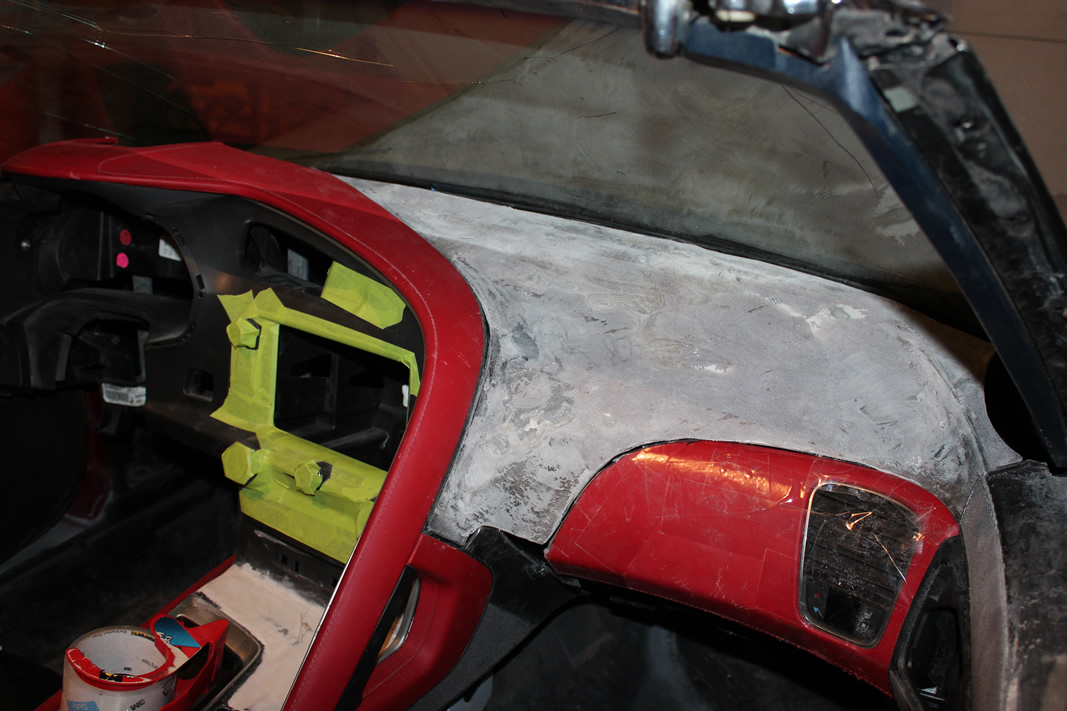
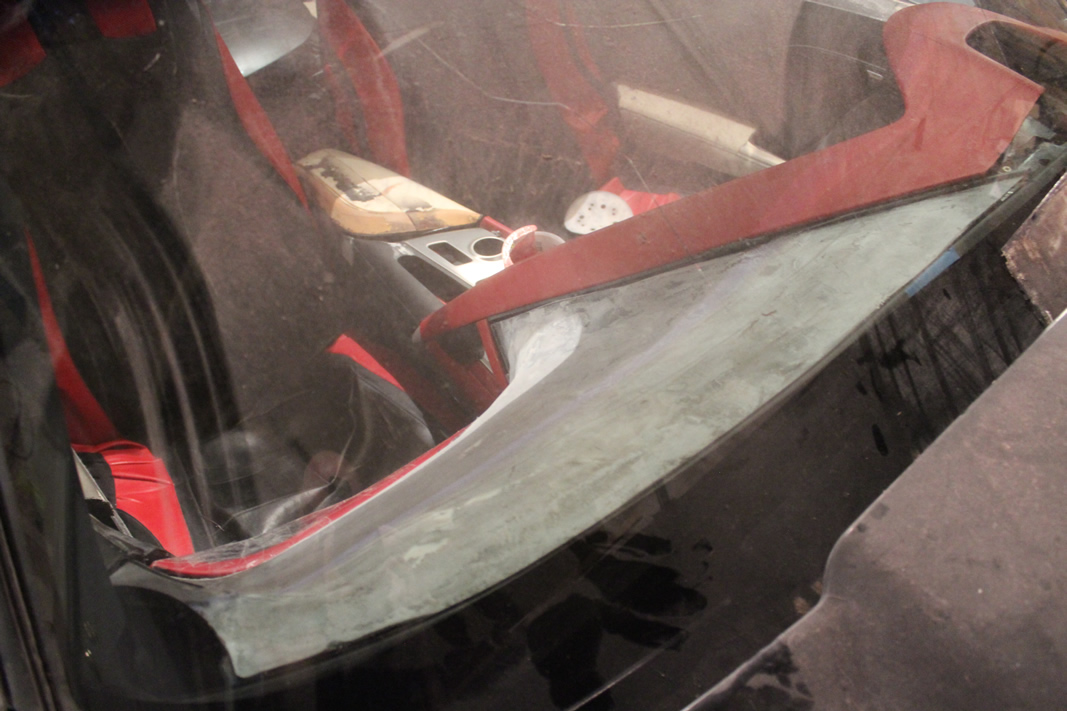
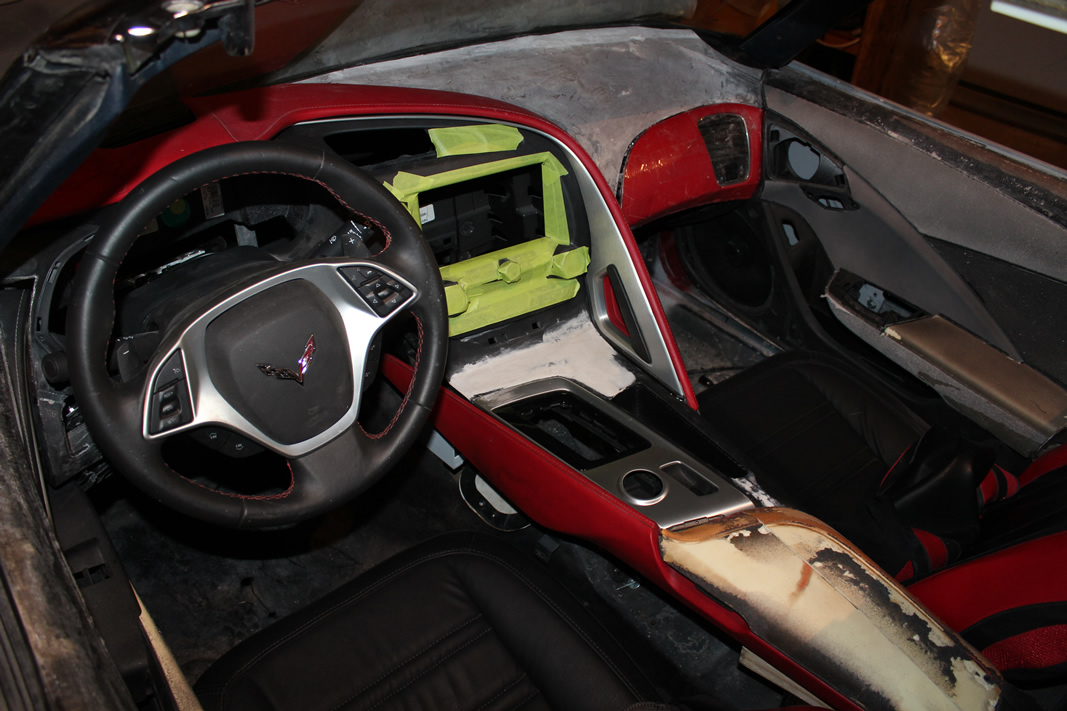
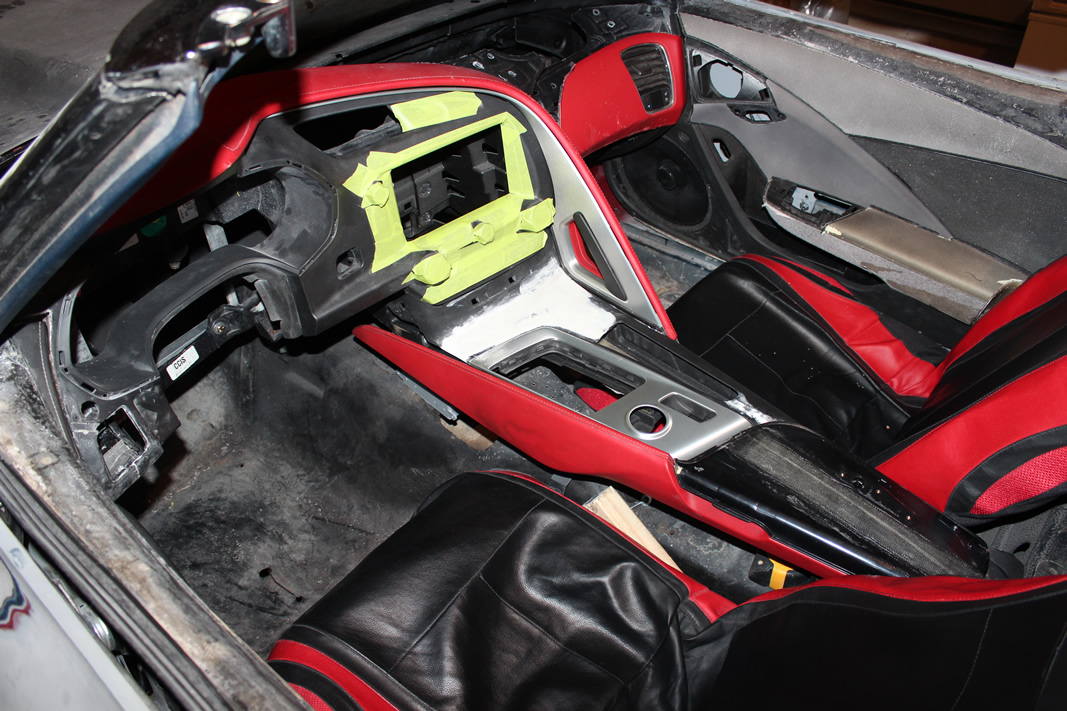
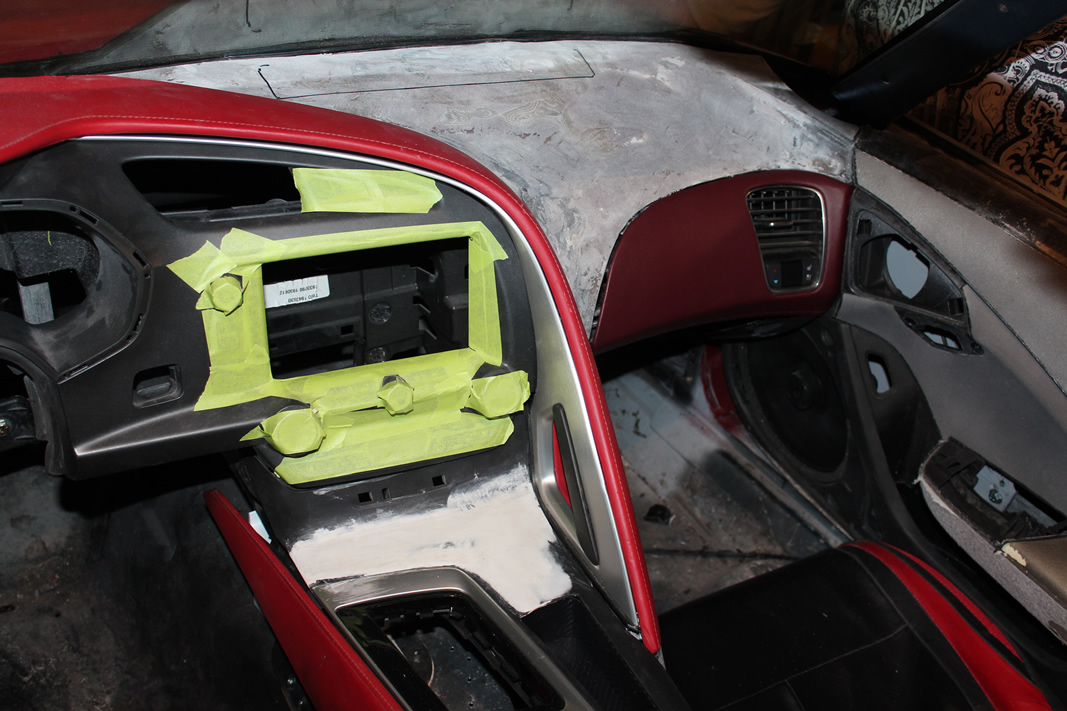
So I got the back half of the center console cut and shaped so it fits between the seats, finished up the upper half of the passenger's side dashboard, began fabricating the front portion of the upper driver's side dash where it meets the windshield (the upper part of the dash met the windshield about 2" above the bottom of the glass, so there was a huge gap between the dash and the bottom of the windshield when you looked through the front - needed to 'dive' it down to the bottom of the glass. Also cut and fabricated the driver's bolster (lower dash beneath the steering wheel).
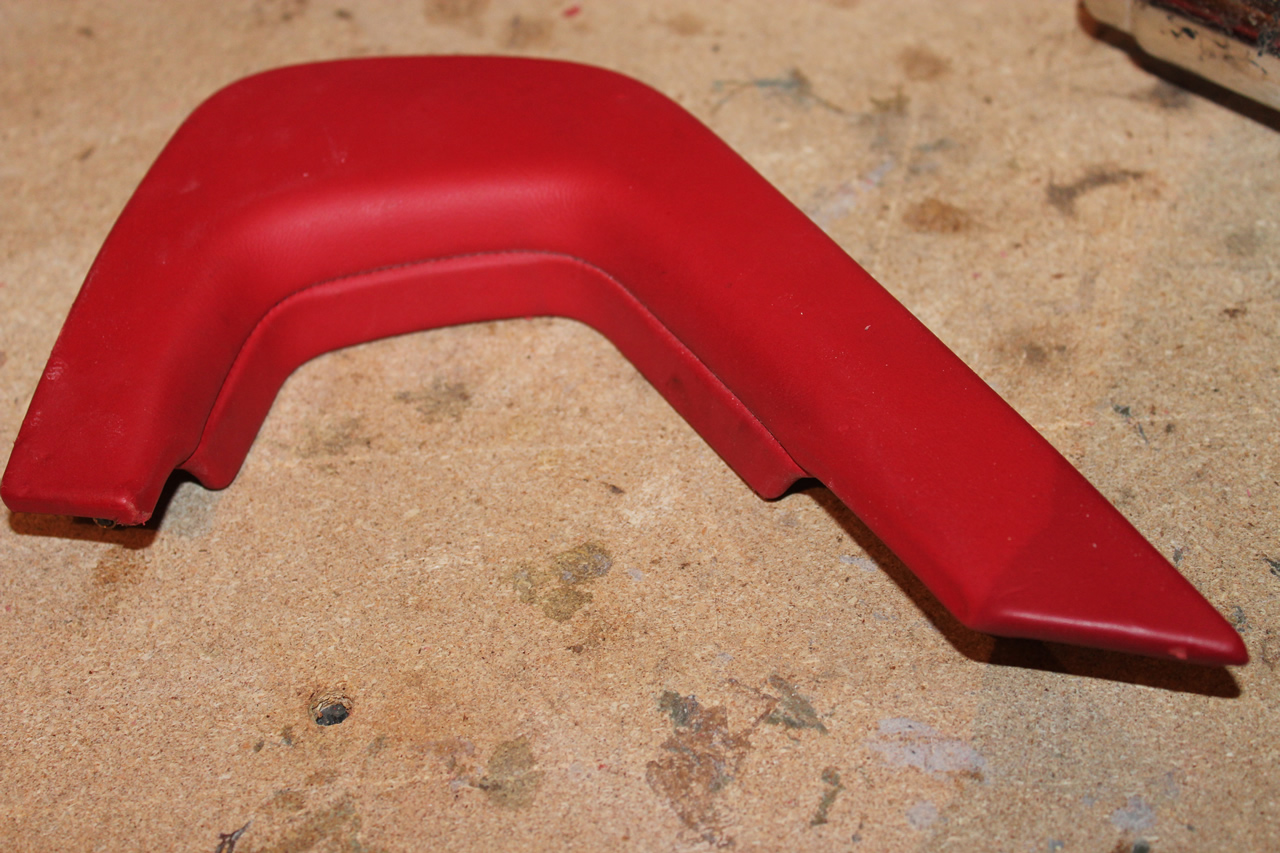
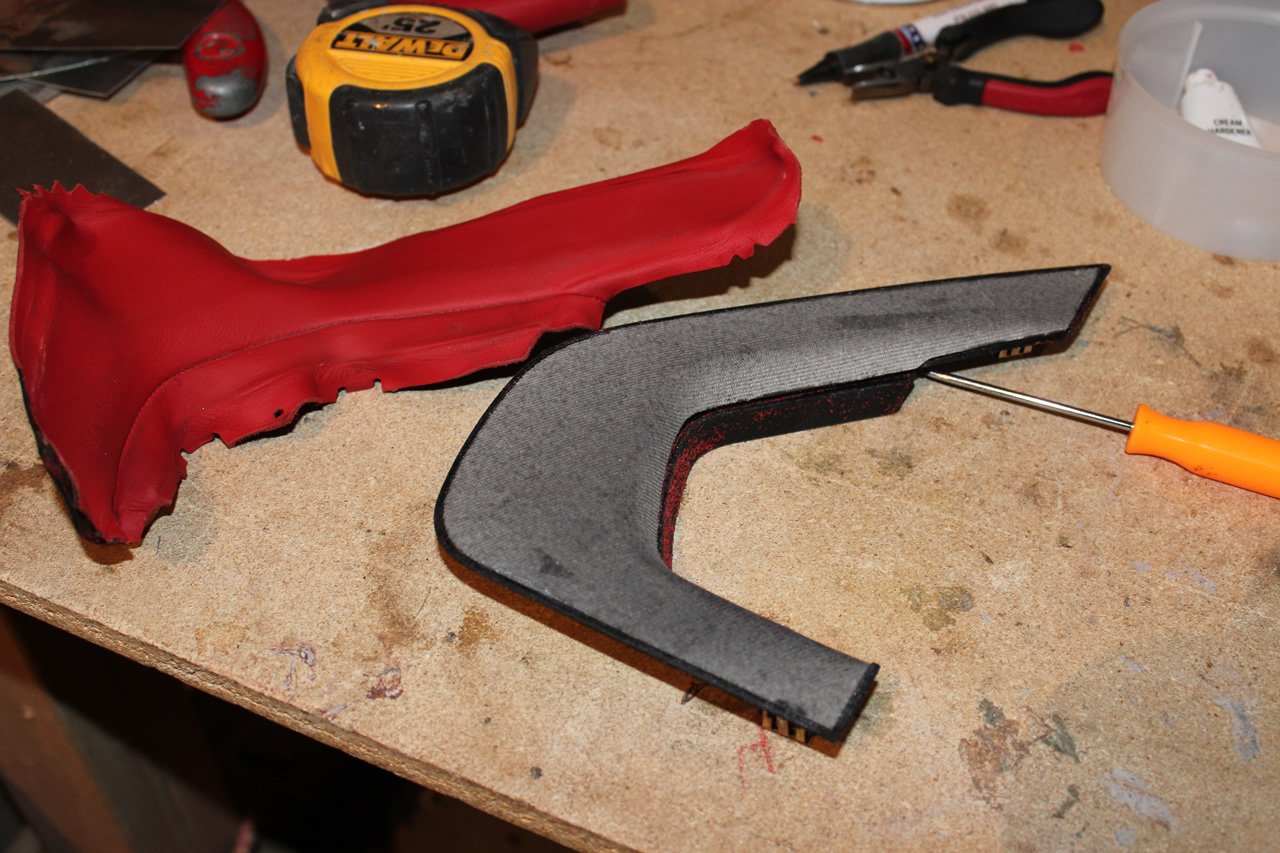
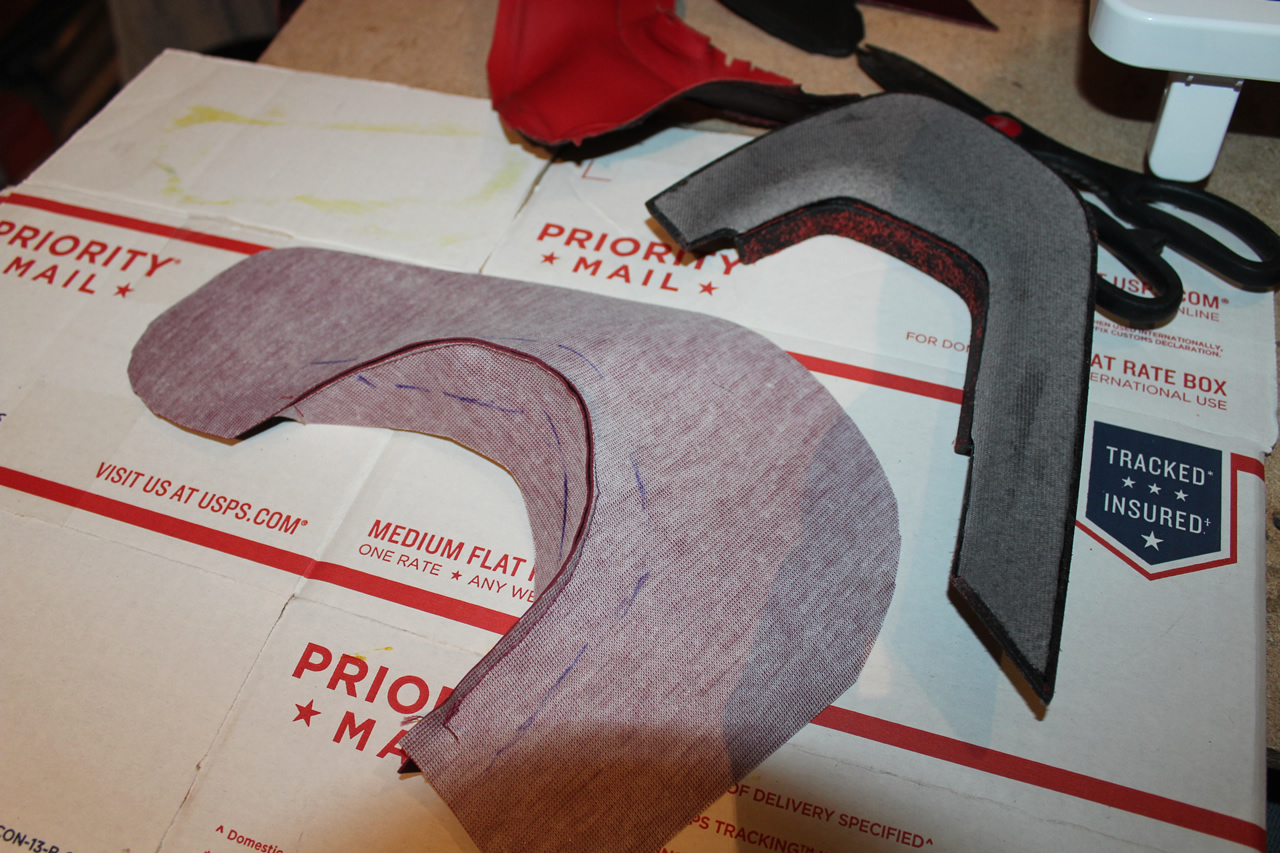
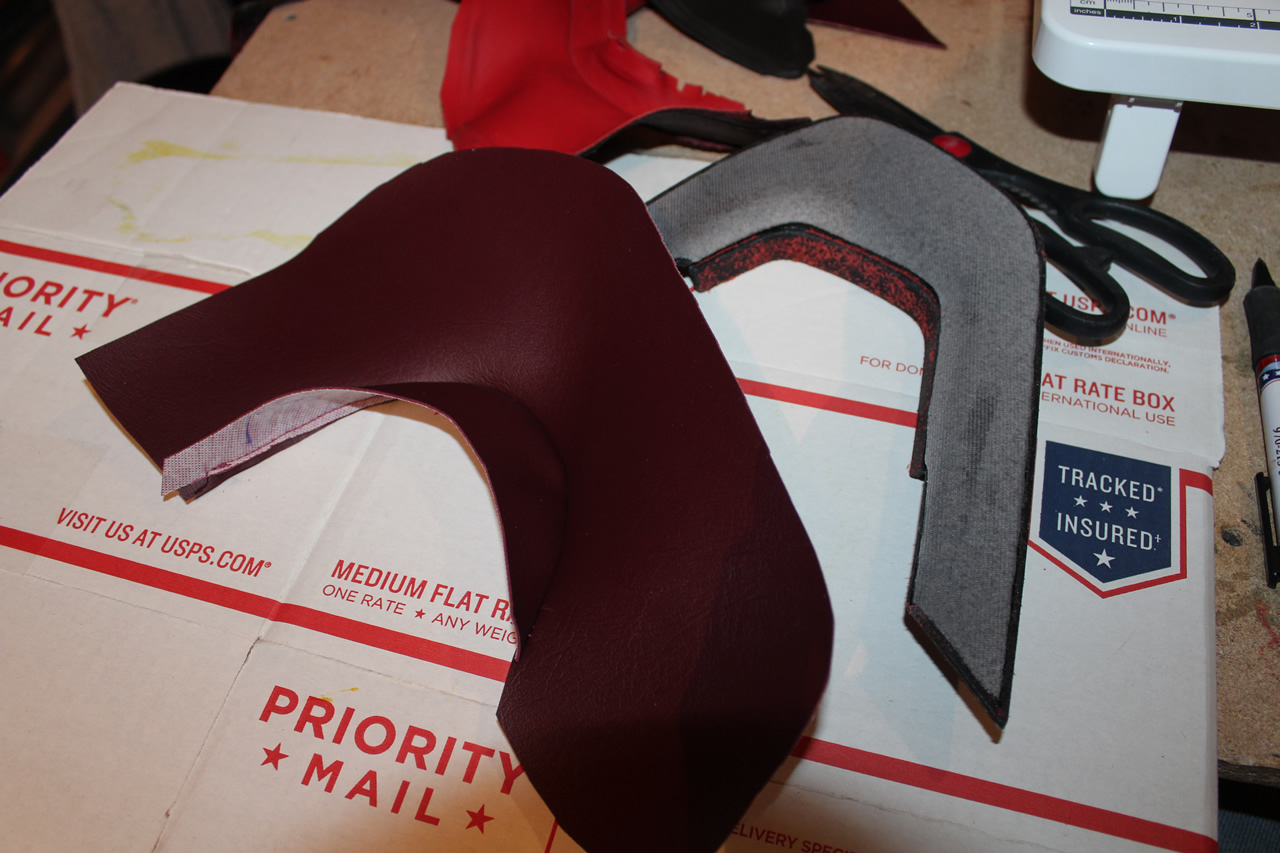
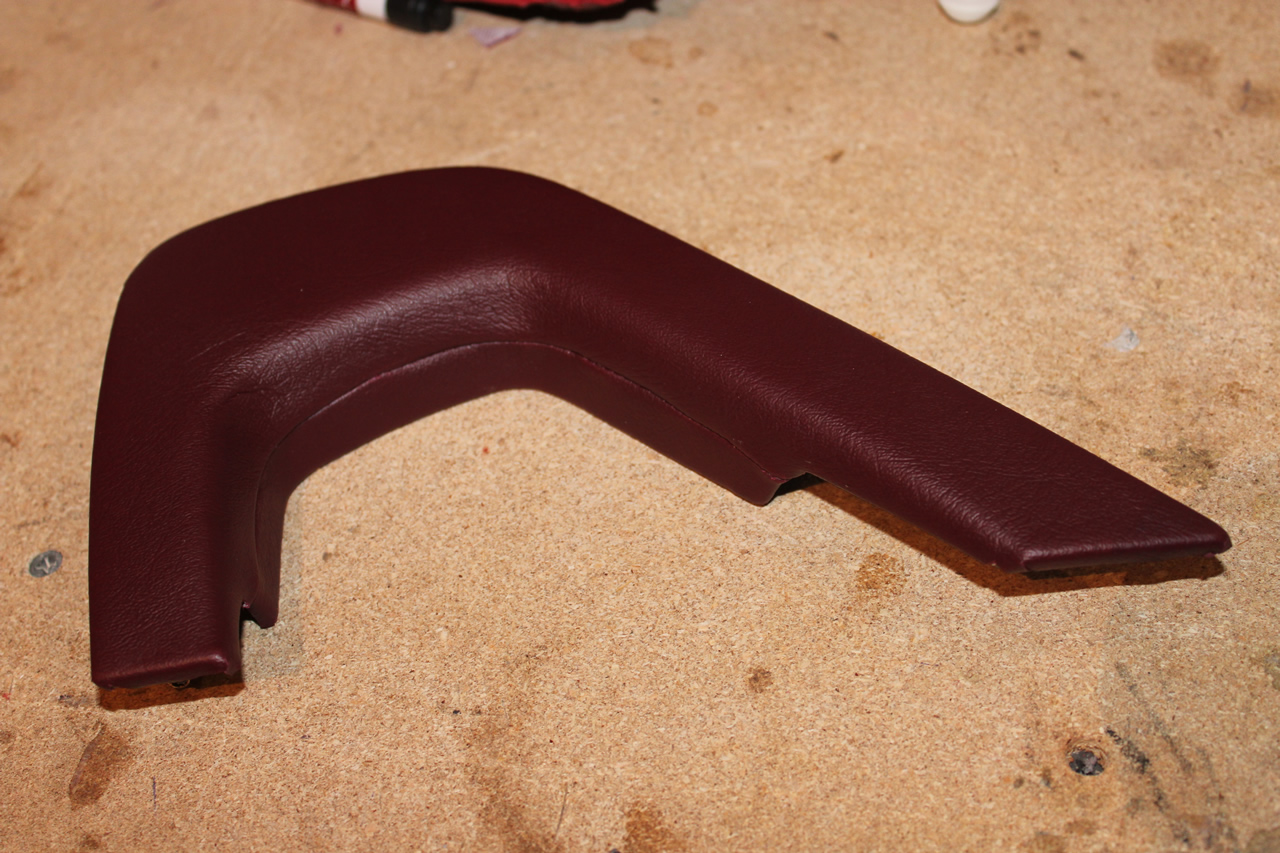
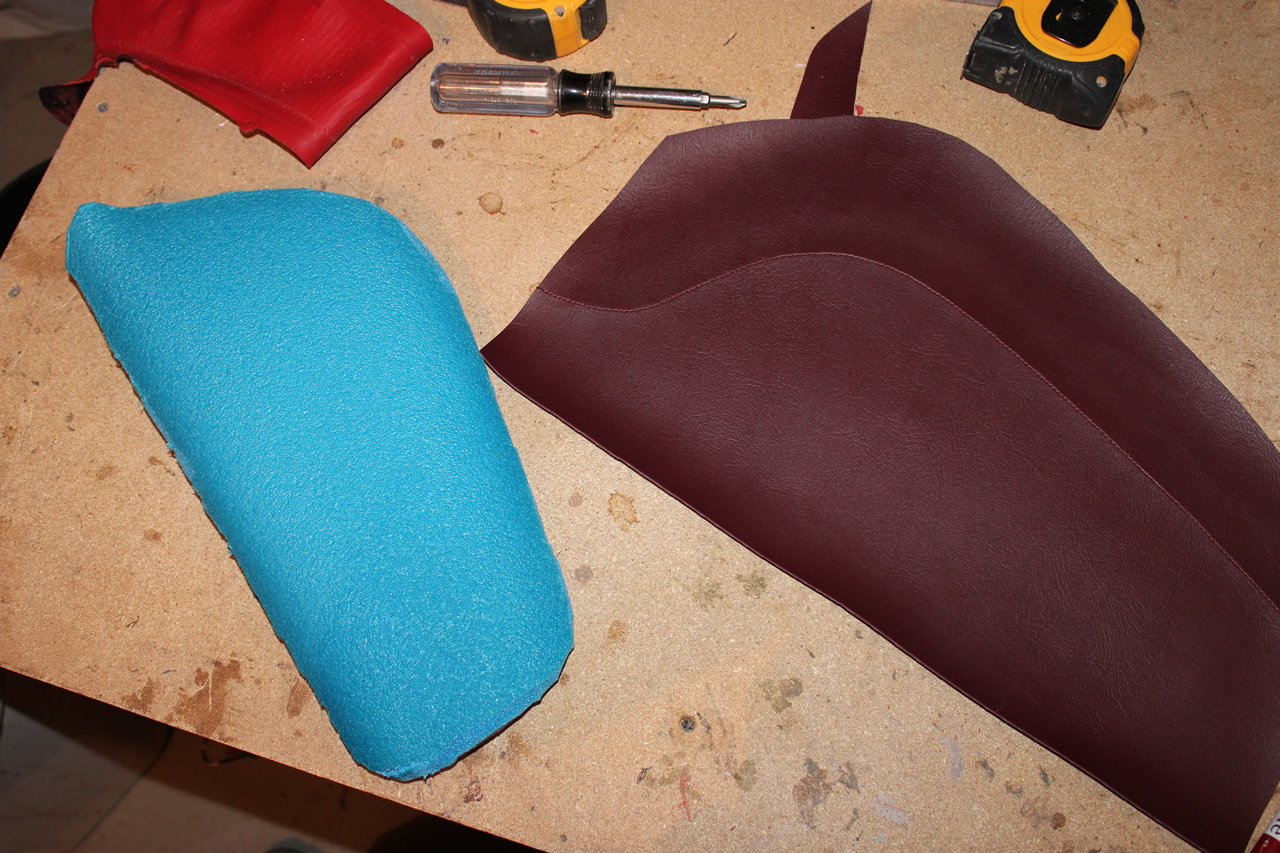
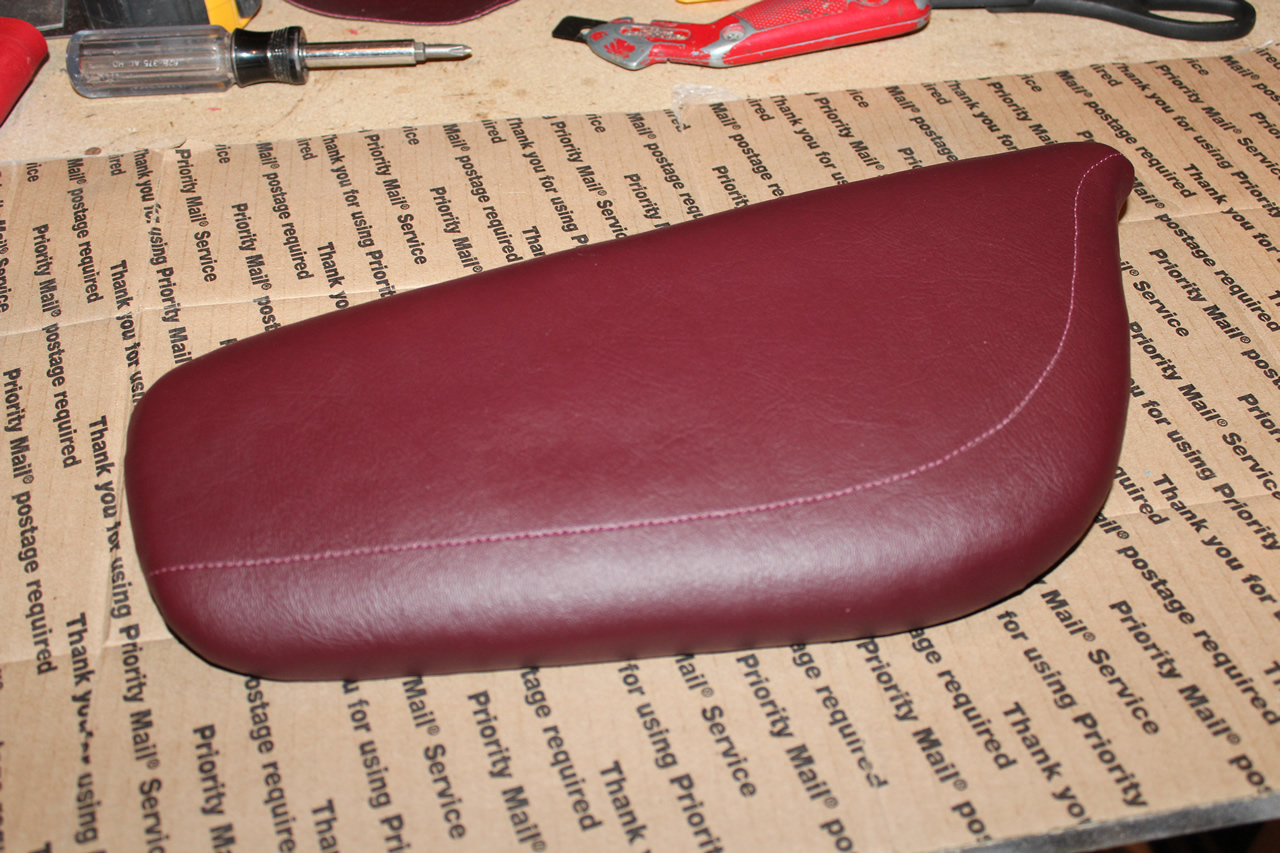
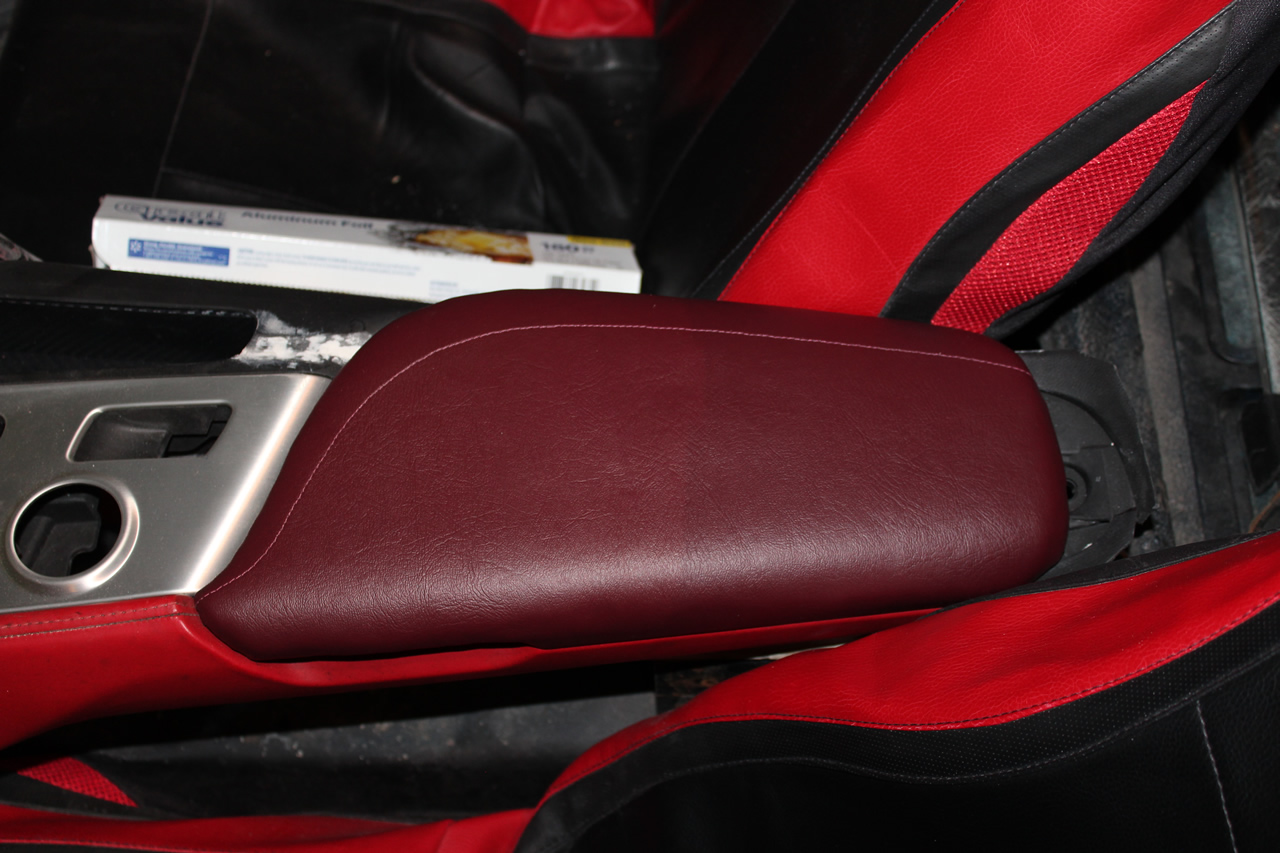
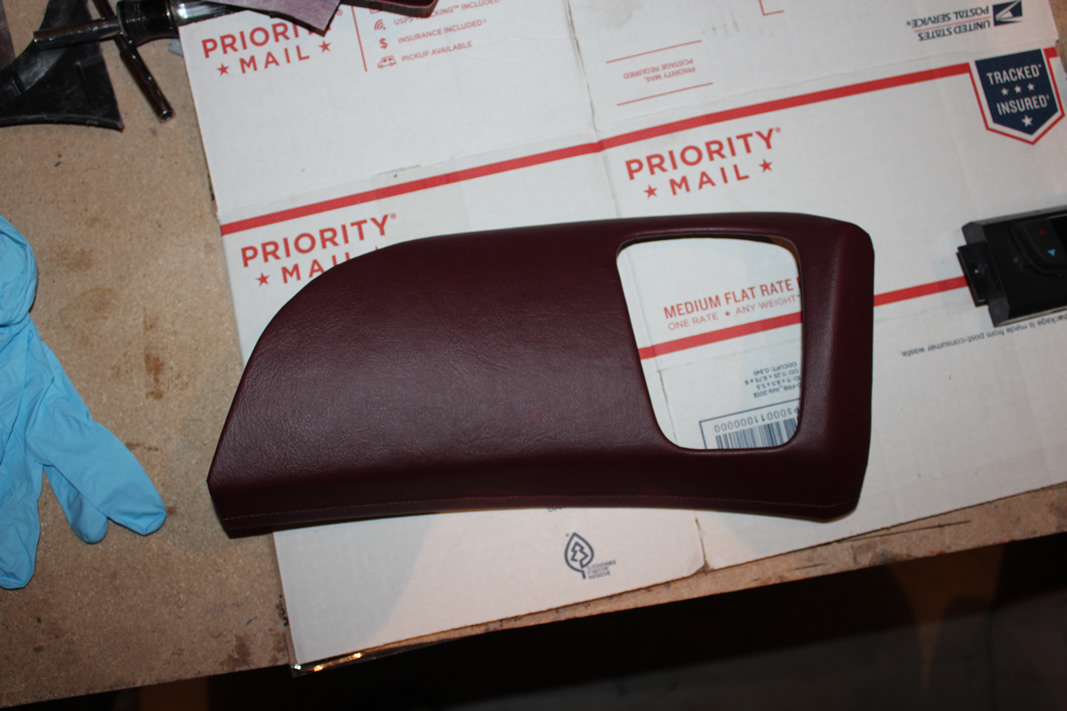
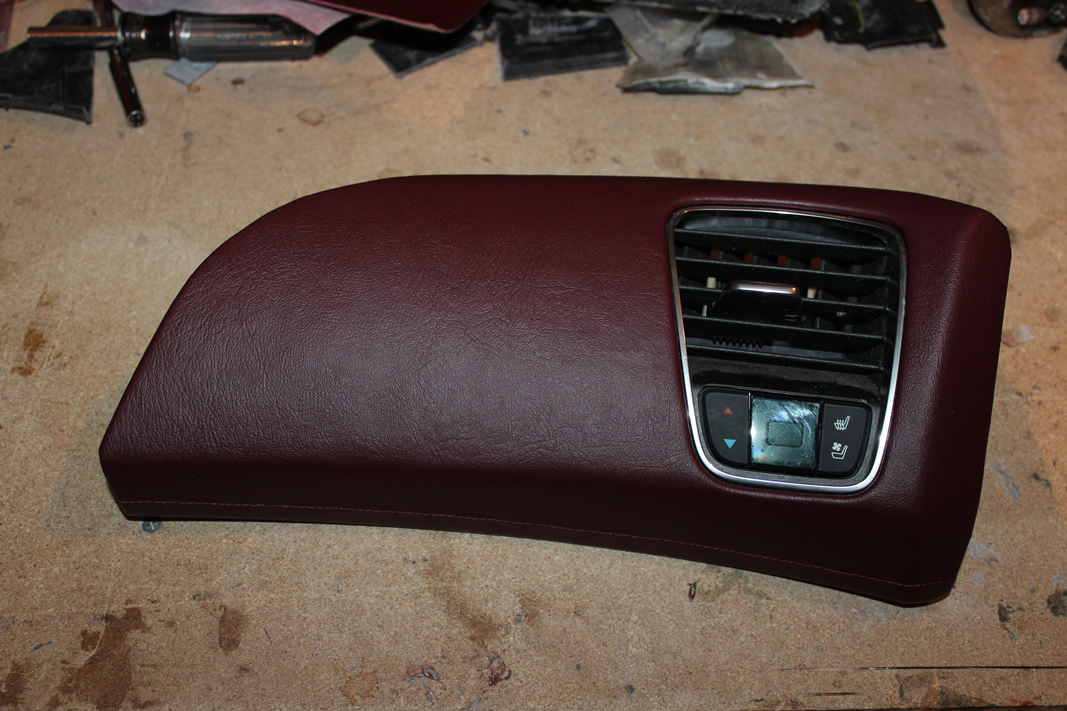
Bought a sewing machine and am working on learning how to do that. Got some of the burgundy leather (vinyl) sewn up and glued to the passenger's side dash (vent portion), handle, center console lid and driver's side accent (along the seat). Pretty happy with the way it came out and absolutely loving the color choice.
Right now working on the 'swoop' (don't know what else to call it - the accent the runs from the driver's side door panel to the 'oh ****' grab bar on the passenger's side of the center console). Carbon fiber wrap showed up this week so I will get the driver's side main panel touched up and sanded smooth, then wrap it and the rest of the center console. After that it's onto the black leather (vinyl) for the rest of the dash.
Absolute shitload of photos to follow:

Thanks for the stepdown and remote advice Rescue - I'm still kicking around ideas of what I need or want to do with the electronics in the cabin, but that's a great alternative - on the top of the list at the moment.
So I got the back half of the center console cut and shaped so it fits between the seats, finished up the upper half of the passenger's side dashboard, began fabricating the front portion of the upper driver's side dash where it meets the windshield (the upper part of the dash met the windshield about 2" above the bottom of the glass, so there was a huge gap between the dash and the bottom of the windshield when you looked through the front - needed to 'dive' it down to the bottom of the glass. Also cut and fabricated the driver's bolster (lower dash beneath the steering wheel).
Bought a sewing machine and am working on learning how to do that. Got some of the burgundy leather (vinyl) sewn up and glued to the passenger's side dash (vent portion), handle, center console lid and driver's side accent (along the seat). Pretty happy with the way it came out and absolutely loving the color choice.
Right now working on the 'swoop' (don't know what else to call it - the accent the runs from the driver's side door panel to the 'oh ****' grab bar on the passenger's side of the center console). Carbon fiber wrap showed up this week so I will get the driver's side main panel touched up and sanded smooth, then wrap it and the rest of the center console. After that it's onto the black leather (vinyl) for the rest of the dash.
Absolute shitload of photos to follow:
 01-11-2016, 11:54 PM
#119
Instructor
Thread Starter
More. Thought I had more pics of the center console and everything once I got the burgundy vinyl on it, but I don't. Right now I've got the entire dash out again to work on the driver's console, so once I get it wrapped and everything put back in I'll take some more photos and update.

Last edited by TileArt; 01-11-2016 at 11:57 PM.