When you click on links to various merchants on this site and make a purchase, this can result in this site earning a commission. Affiliate programs and affiliations include, but are not limited to, the eBay Partner Network.
This is my initial post for my journey, taking my car from a 350ci/270hp 3-speed auto to a beefier motor (TBD) and the relatively new Legend Gear & Transmission LGT-700.
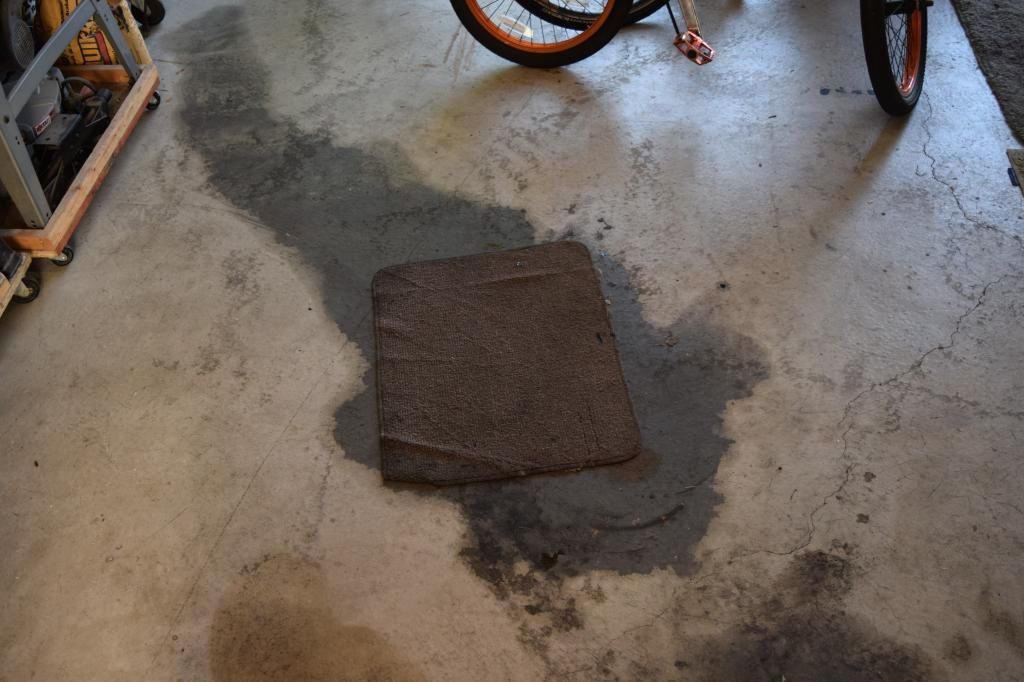
I'm looking forward to seeing the last of this, a leaky TH400:
Not sure how long the install is going to take, need some work on the crossmember, shorten driveshaft, and figuring out what to do about my engine. I'm hoping to have it done by mid to late October 2014, but no guarantees.
I'll keep updating this thread as I go along but wanted to get this thread up and going.
Last edited by StingrayLust; 09-10-2014 at 01:30 PM.
Let me know if you have any questions as I installed a SS700 (same trans) in my 69' Coupe just over a year ago.
Installation with the motor out was actually pretty straight forward and I didn't have any 'gottchas' with the conversion (went from a Muncie to the SS700 so I had the clutch assembly already).
Even with my welded-in crossmember, the install wasn't bad as long as you install the engine in trans as a unit.
Elm
It's been a while since I last updated this thread. I've had the trans sitting in my kitchen since almost July of 2014, so the wife wasn't happy.
The reason it sat there is that I wasn't sure what I was going to do with my engine, rebuild or crate. I ended up going with a crate 406" that I'll start another thread on. I pulled the motor in September 2014 but it would be almost 4 months before I actually got my new engine, mainly because I wasn't sure which direction I was going and once I knew there were a ton of details to make sure I got it right.
So I'll share some of my experiences installing the LGT700 in my '71 SB coupe. What better way than to start with some pictures:
These were the bolts that I was sent from Bowler for the transmission. I was a little upset that they weren't labeled for exactly what they were meant to be used for as this is my first time and I'd rather have explicit instructions than guess and get it wrong. I think there's some for my bellhousing in this pic as well:
This is for the speedo cable, crank bushing, and backup light:
Ready to pull the motor:
Out with the old TH400:
Checking runout. The first time I did it, the #'s shown here, I don't think I was that accurate. I had ordered some 0.007 offsets but after installing them things were worse. That was because I had really cleaned all of my mating surfaces and did a better job the 2nd and 3rd time with my readings. I ended up installing the stock dowel pins:
A couple friends came over to help (thx Paul and Nick) as I was ready:
My first small issue is where the speedo cable came out. It basically pointed directly at my exhaust. While I could probably make a really sharp bend in the cable to prevent any heat issues, I didn't really care for that. So I remembered that long ago, many years, I had bought one of those 90 degree tach cable adapters. I knew the speedo and tach cables are essentially the same, so I went and found my part and put it on (after greasing it). I like the fit much better, we'll see how it performs once I get it rolling:
The trans mounting adapter:
Here is my shift stick adapter plates and the center console opening position:
Here's the bottom view of the connection to the bellhousing:
very interested in seeing how you like it...definitely not the least expensive option, but the guys over on the pro touring sites rave about that transmission.
Not to derail your thread, but can you give us details about the motor you went with?
very interested in seeing how you like it...definitely not the least expensive option, but the guys over on the pro touring sites rave about that transmission.
Not to derail your thread, but can you give us details about the motor you went with?
Yes, most definitely not the cheapest route or the most proven over time, guess I'm taking a bit of a chance here. I'll post more once I get on the road.
Again, I have no experience with it (yet), but the guys I know that have them, run them HARD on the track. The two big selling points that I know about are the gearing ratios which apparently for big, long tracks is ideal, and the size itself....I guess these fit into trans tunnels that need clearanceing for some of the other gear boxes.
So I'm in the process of getting my driveshaft shortened as it's too long from the TH400 that was in there. I have no idea if it's an original or not. You can see here about how much longer it is:
When ordering the trans I had to decide on what size yoke to order for the u-joints: 1310, 1330, or 1350. I had no idea what was in there already for my TH400, turns out it looks like it was a 1330. However my LGT700 sits further back in the tunnel right where it really starts to narrow. If you searched around on Google, you might find some articles that relate to how Keisler shipped a bigger u-joint than the 1310 and people were having problems with fitting it in the tunnel. If you keep reading you'll see Keisler eventually defaulted to a 1310 for our C3s. I decided on using about 3/4" of space out of the back of the trans for the yoke as you can see here:
With that 3/4" yoke out from the trans, I barely have enough room in the tunnel for it to spin free as you can see here:
So I'll be taking my driveshaft over to FleetPride over in Burnsville MN. I'll have to keep the differential end the same size, but the other end needs to be smaller to fit. Here's the measurement and the yoke comparisons:
One thing of note is that when I took the driveshaft over to FleetPride, the guy initially wanted to use a conversion u-joing to marry a 1330 with a 1310. I emphatically told him no that he can't do that, there is no room without me doing some fiberglass work.
He seemed a bit worried about finding a new 1310 sized flange (is the the correct name) to weld onto the driveshaft that would fit my inner diameter, I guess they've been obsoleted.
If he can't find one, he'll probably have to make me a completely new driveshaft which will *at least* triple the cost it's going to take.
Thought I'd post some more images of the slip yoke differences between my new 1310 yoke and the one from my TH400 1330. You can certainly tell the 1330 has more meat on it. I hope this 1310 doesn't come back to bite me, but I don't track/race mine, time will tell if it's up the the task of my new mighty motor or not.
If I did it over, I might try and stay with the 1330 and do some fiberglass work to make it fit.
The FleetPride guy I took my driveshaft to said he found the correct 1310 u-joint flange to weld onto my existing driveshaft, so that should save me some money, said it should come in under $200.
After re-measuring from center of the diff u-joint to the center of the trans u-joint, I came with 26-3/4". This gives me a about 3/4" to slide the yoke in to remove the trans and just barely 1/4" of space before the tunnel gets too narrow and I hit fiberglass of that little metal tab to hold on the tunnel heat shield.
He said I should have it back next week Tuesday or Wednesday. I pray he gets the measurements spot on.
26 3/4 is the measurement that ezobens had told me that his driveshaft from Kiesler was with his kit. I recently got mine from Bowler without the driveshaft and had my driveshaft shortened but had to compensate for the block saver plate with my Lakewood bellhousing. (I had to shorten mine 3") You should be spot on @ 26 3/4
26 3/4 is the measurement that ezobens had told me that his driveshaft from Kiesler was with his kit. I recently got mine from Bowler without the driveshaft and had my driveshaft shortened but had to compensate for the block saver plate with my Lakewood bellhousing. (I had to shorten mine 3") You should be spot on @ 26 3/4
That's nice to hear that I'm in good company with my measurements! Thanks for the feedback.
Any new updates on the LGT-700 install? Would like to see how the trans compares to a TKO-600. How difficult has the install been including having to source the extra parts to make it fit?
I'm not sure if the any of the vendors have a complete kit with the LGT-700 for our C3's yet. If the only additional requirement was to adjust the drive shaft length then it would be a nice upgrade.
My 77 is a 4-spd now so not sure how the install would go compared to replacing your TH-400. I would like to know if the existing non-removable manual trans crossmember can be used or if a replaceable crossmember would be needed for the install to allow for proper fitment?
Any new updates on the LGT-700 install? Would like to see how the trans compares to a TKO-600. How difficult has the install been including having to source the extra parts to make it fit?
Hey Don, trust me I'm working on it and I've received a few PMs about my status as well. If you've seen some of my other very recent posts, you'll see that I've got "a lot of irons in the fire".
My list of things to finish is very small but there are still obstacles in my path I must overcome. Trust me, NO ONE wants to get this thing finished more than I, especially on the gorgeous day we had today in MN with my 2 vette buddies having their cars already on the road. I need to join them.
"Never give up, never surrender" via Galaxy Quest.
LGT700 owners, can you post a picture of the speedo cable connection you got?
I drove my car for the first time with the new engine and trans installed this week!! It was a very short ride as there are still some small items to take care of. One of those items is the exhaust, open headers under your butt hurts the ears!!!
So on Saturday I took it over to Classics Plus which is no more than 5 miles from my house. Once there, we put it up on the lift to go over how I wanted my exhaust and crossmember done. Once up, we noticed a good amount of fluid on the crossmember. Best we could tell is that the leak was coming from the speedo connection.
This is the speedo connector I was sent. You can see that there is just one small seal:
My question to you, is your speedo connector any different?
SL
Mine is different as it does not have the speedo cable screw on like yours. It has the o-ring but just push in and install hold down. I got mine from Mark @ Bowler Trans. His cable gives you more clearance at the exhaust than the screw on style cable. Hope this helps you SRL. I'm finishing mine today but won't be able to cruise it as it is going to rain the next 3 days

 09-10-2014, 01:27 PM