
Going To Build An Engine...Follow Along
 02-24-2015, 07:18 PM
#21
Senior Member


Thread Starter
Member Since: Jan 2008
Location: Easton, PA
Posts: 12,154
Received 2,031 Likes
on
1,103 Posts
St. Jude Donor '10

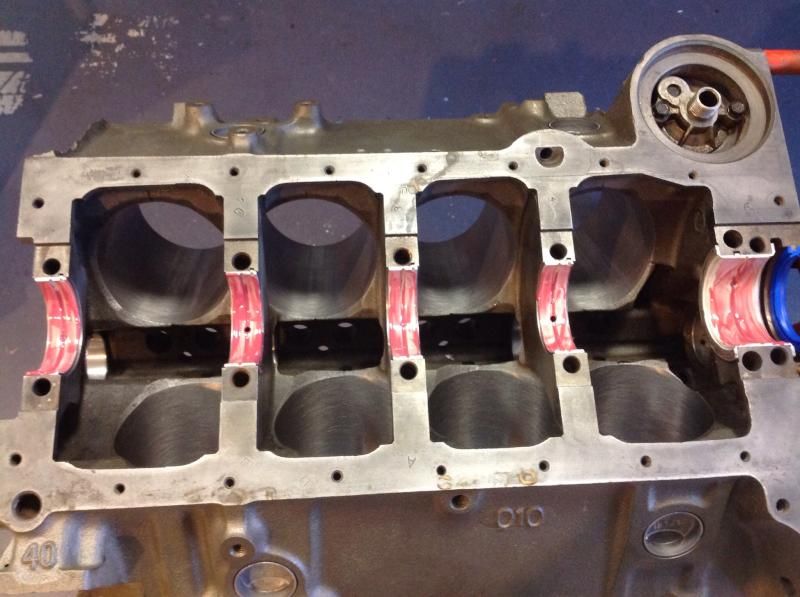
I was fortunate to locate a block that had been cleaned up, bored .030 over and machined .010 then MAGNIFLUXED and seals and bearing installed. The crank I have is cast crank and it will be balanced as part of the process. Gordon working on this now, should be fun outcome. Will keep you aware of decisions and costs.
David
David

 02-24-2015, 09:51 PM
#23
Race Director


I found an 010 4 bolt casting a couple of months ago. looking to build a 383 out of it. Ive never built one from scratch either so Ill be following along. I am probably going to make it a summer fall project. Too many irons in the fire to do much right now. I have only pulled the covers off and poked around it a bit.
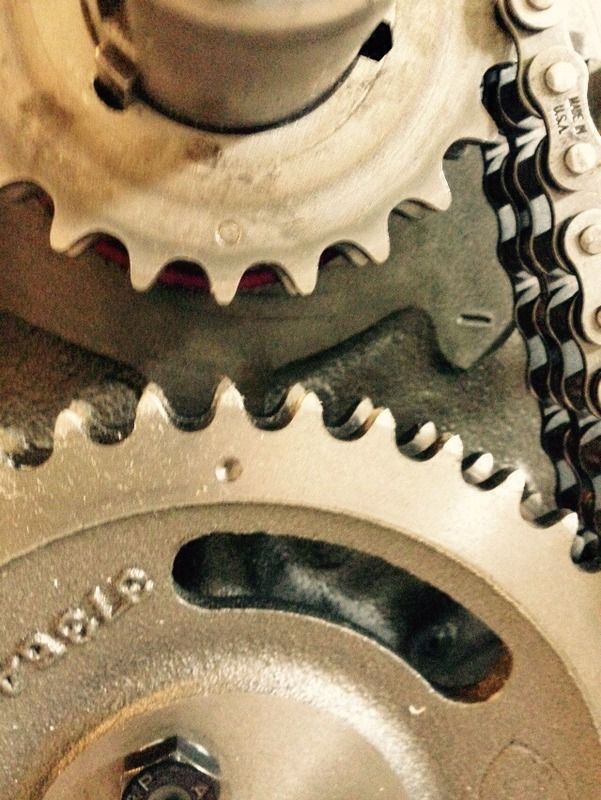
David I need to stop by and get the rest of the parts as I have to get the timing chain gear on the crank before I lay the crank in.
02-25-2015, 05:48 AM
#24
Senior Member
Thread Starter
Member Since: Jan 2008
Location: Easton, PA
Posts: 12,154
Received 2,031 Likes
on
1,103 Posts
St. Jude Donor '10
To build a 383 you will need to get the grinder out. It took me about a good hour to properly clearance the crank and rods. I had a bunch of metals shavings when done but plenty of clearance for the crank and rods. Spend a little time here doing this correctly and you won't have problems. I would take my 383 to 7000 rpm and never worried about anything. Take your time and do it right.
David I need to stop by and get the rest of the parts as I have to get the timing chain gear on the crank before I lay the crank in.
David I need to stop by and get the rest of the parts as I have to get the timing chain gear on the crank before I lay the crank in.
David
02-25-2015, 08:49 AM
#25
Burning Brakes

To build a 383 you will need to get the grinder out. It took me about a good hour to properly clearance the crank and rods. I had a bunch of metals shavings when done but plenty of clearance for the crank and rods. Spend a little time here doing this correctly and you won't have problems. I would take my 383 to 7000 rpm and never worried about anything. Take your time and do it right.
David I need to stop by and get the rest of the parts as I have to get the timing chain gear on the crank before I lay the crank in.
David I need to stop by and get the rest of the parts as I have to get the timing chain gear on the crank before I lay the crank in.

I plan to drop it off at the machine shop once its nekkid and have them clearance it and do their thing.
I am wondering if any of the parts I take off are worth anything to anyone. intake, heads, crank, cam etc...?
Keep us posted with lots of pics. looking forward to watching this thread.
02-25-2015, 06:14 PM
#26
Senior Member
Thread Starter
Member Since: Jan 2008
Location: Easton, PA
Posts: 12,154
Received 2,031 Likes
on
1,103 Posts
St. Jude Donor '10
I plan to drop it off at the machine shop once its nekkid and have them clearance it and do their thing.
I am wondering if any of the parts I take off are worth anything to anyone. intake, heads, crank, cam etc...?
Keep us posted with lots of pics. looking forward to watching this thread.
Good thought.
David
02-26-2015, 07:02 PM
#27
Race Director
I dropped off the crank, rods and Pistons today. They will press the Pistons on the rods and then balance the assembly. Should be done early next week. I have to wash the block but it has not been above freezing for weeks here. Maybe this weekend it will touch 40. For anyone who has done this you know you will get wet!
02-27-2015, 06:34 AM
#28
Senior Member
Thread Starter
Member Since: Jan 2008
Location: Easton, PA
Posts: 12,154
Received 2,031 Likes
on
1,103 Posts
St. Jude Donor '10
I dropped off the crank, rods and Pistons today. They will press the Pistons on the rods and then balance the assembly. Should be done early next week. I have to wash the block but it has not been above freezing for weeks here. Maybe this weekend it will touch 40. For anyone who has done this you know you will get wet!
Look forward to connecting next week.
David
03-08-2015, 01:02 PM
#29
Race Director
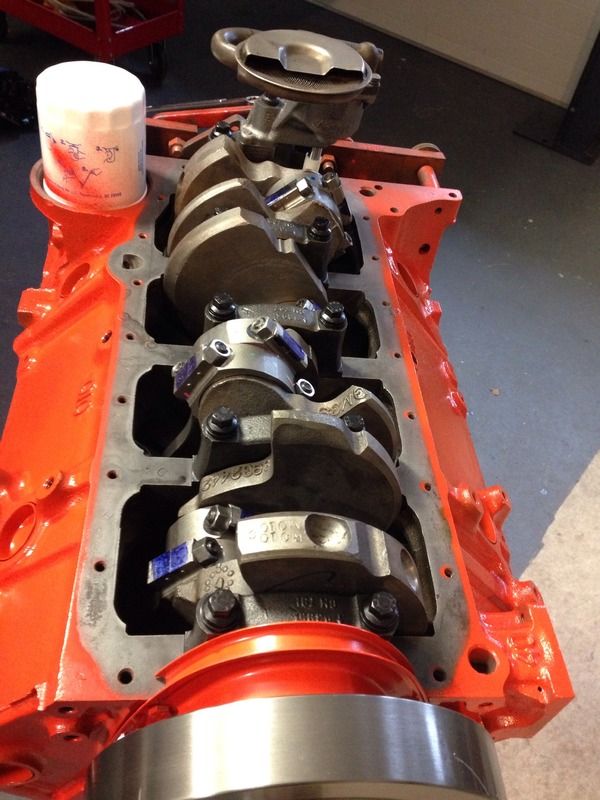
Today was the day I finally was going to get rolling assembling. First off the wrong gasket set was ordered. It was for a 1 piece rear main seal motor. Looked like a TPI motor because it had all the gaskets for that. So I only needed the rear main seal so I picked that up locally this morning. So I got everything laid out and started. Laid the crank in no problem. Got 3 of the rod Pistons in and thought something is just not right here. Got the 4th in the hole and knew something was wrong. Started measuring up the rod journals. Ahh! The crank was supposed to be a new crank but it has been turned .010. Pulled everything back out and measured up all main and crank journals. Yup all .010. I should know better and measure everything. Never assume anything! Oh well back to Summit for some .010 bearings. I need a bunch of other parts also.
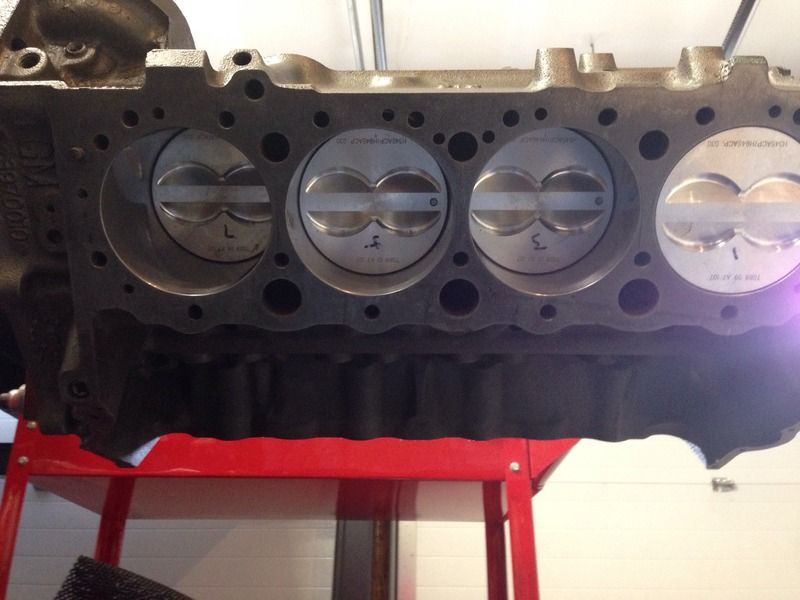
One other thing about cleaning the block and bores. An old trick an engine builder taught me was to wipe down the cylinder bores with a paper towel and transmission fluid. Keep using new white paper towels until you no longer see any darkness. The towel should be red and stay red with fluid. Transmission fluid is designed to suspend dirt. So it is an excellent cleaner to remove grit from the honing process. It takes many passes with a clean towel to get itmtocome out clean. Just when you think it is done go one more pass just to verify. The rings will seat immediately and last a long time if this is done right. I take my time doing this and it probably takes me a good hour or so to get the bores spotless.
Block cleaned and bearings lubed with assembly lube, wrong bearings now I discover
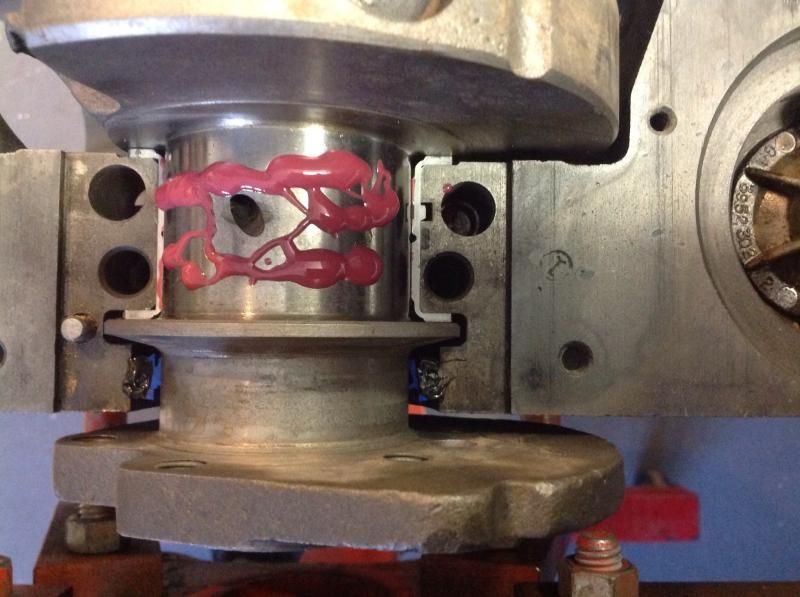
Here is a little something I do. Put a dab of sealant on the rear main seal to hopefully prevent some leaks. Along with the assembly lube.
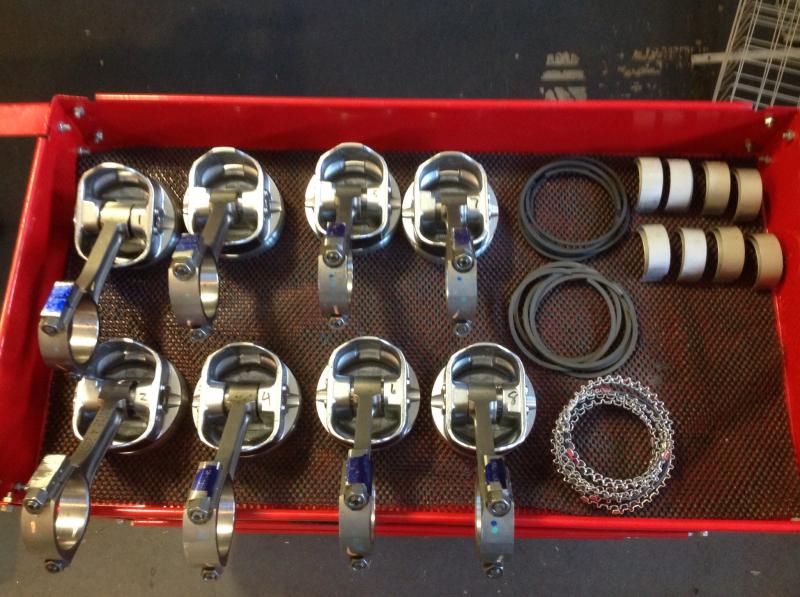
Here is the piston/rod assembly rings and now wrong bearings ready to go.

Last edited by Gordonm; 03-08-2015 at 01:09 PM.
03-08-2015, 02:51 PM
#30
Senior Member
Thread Starter
Member Since: Jan 2008
Location: Easton, PA
Posts: 12,154
Received 2,031 Likes
on
1,103 Posts
St. Jude Donor '10
Today was the day I finally was going to get rolling assembling. First off the wrong gasket set was ordered. It was for a 1 piece rear main seal motor. Looked like a TPI motor because it had all the gaskets for that. So I only needed the rear main seal so I picked that up locally this morning. So I got everything laid out and started. Laid the crank in no problem. Got 3 of the rod Pistons in and thought something is just not right here. Got the 4th in the hole and knew something was wrong. Started measuring up the rod journals. Ahh! The crank was supposed to be a new crank but it has been turned .010. Pulled everything back out and measured up all main and crank journals. Yup all .010. I should know better and measure everything. Never assume anything! Oh well back to Summit for some .010 bearings. I need a bunch of other parts also.
One other thing about cleaning the block and bores. An old trick an engine builder taught me was to wipe down the cylinder bores with a paper towel and transmission fluid. Keep using new white paper towels until you no longer see any darkness. The towel should be red and stay red with fluid. Transmission fluid is designed to suspend dirt. So it is an excellent cleaner to remove grit from the honing process. It takes many passes with a clean towel to get itmtocome out clean. Just when you think it is done go one more pass just to verify. The rings will seat immediately and last a long time if this is done right. I take my time doing this and it probably takes me a good hour or so to get the bores spotless.
Block cleaned and bearings lubed with assembly lube, wrong bearings now I discover
Here is a little something I do. Put a dab of sealant on the rear main seal to hopefully prevent some leaks. Along with the assembly lube.
Here is the piston/rod assembly rings and now wrong bearings ready to go.

 03-16-2015, 09:02 PM
#32
Race Director
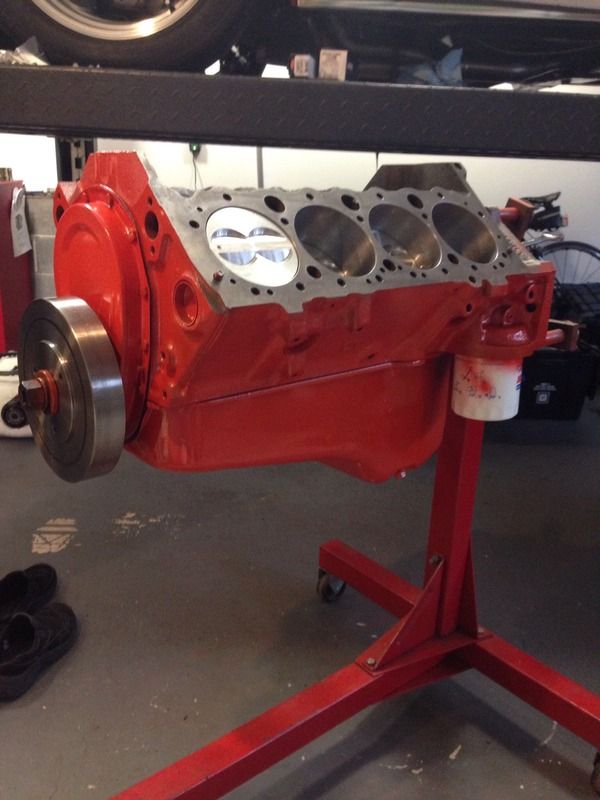
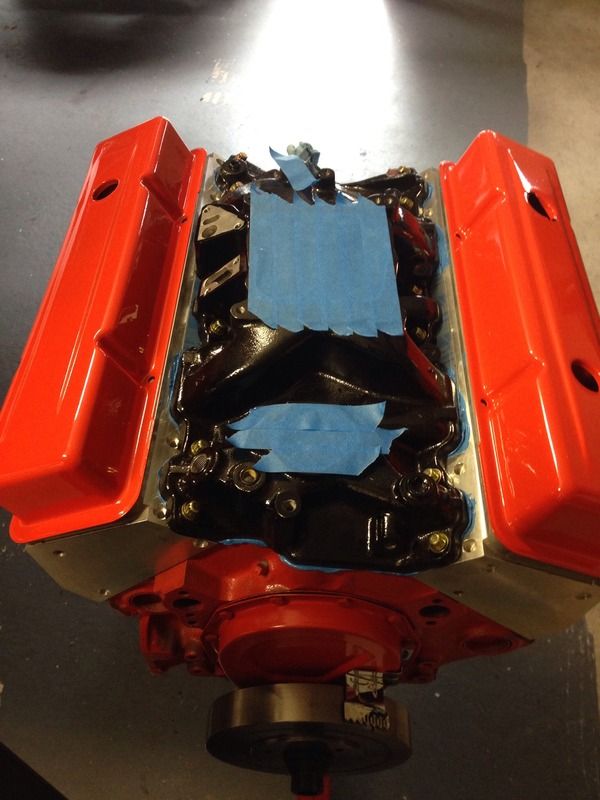
Short block pretty much assembled. We had the wrong 1 piece oil pan gasket so it is just hanging on by a few bolts right now. New gasket on its way. Little paint makes it look good. Cylinder heads arrived today so when I get back home I can continue
Oil pump on lower end buttoned up
Motor is actually at a 90 degree so it looks a little funny
Here it is pretty much ready for upper end

Oil pump on lower end buttoned up

Motor is actually at a 90 degree so it looks a little funny

Here it is pretty much ready for upper end
 03-16-2015, 09:54 PM
#33
Melting Slicks

If I ever need an engine rebuilt, I'm driving to Jersey...

What type of harmonic balancer is that? It looks really smooth and shiny compared to mine.
What type of harmonic balancer is that? It looks really smooth and shiny compared to mine.
Last edited by Mick71; 03-16-2015 at 09:57 PM.
03-17-2015, 06:43 AM
#34
Race Director
The balancer is from Summit. A lower cost stock type balancer that is degreed out to 60 degrees. I like this vs the timing tab on the timing cover. Trying to keep cost down. This is not going to be a high rpm motor so an expensive balancer was not used.
03-17-2015, 09:02 AM
#36
Pro


I built two small blocks from scratch, both 406's and one big block, a 468 that is currently in my vette. The specs on my 468 are laid out along with photos in my profile under the album called My Project. I like starting with a bare block, determine the power band I want, selecting the components that are complimentary to that power band objective and doing the assembly myself. You know what you've got when you're done. You seem to be getting off to a good start for a strong and reliable street engine. My caution to you would be that as you get near the end take a lot of pains in the details and double check everything so that you can get a quick start and break in on that engine. Those cams can be wiped out amazingly quickly if you don't get that run in started and continued properly. Good luck on your build and I will be following it.
Last edited by 68/BB; 03-17-2015 at 09:04 AM.
03-17-2015, 09:07 AM
#37
Senior Member
Thread Starter
Member Since: Jan 2008
Location: Easton, PA
Posts: 12,154
Received 2,031 Likes
on
1,103 Posts
St. Jude Donor '10
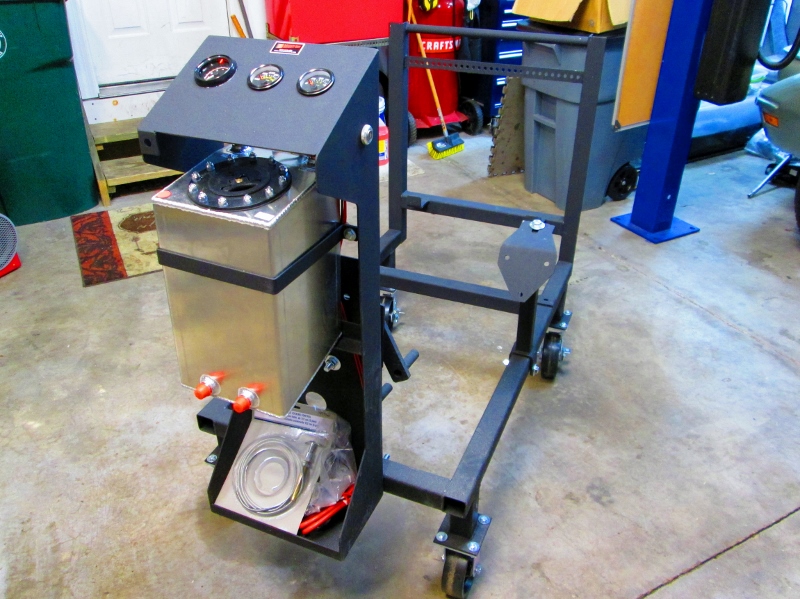
And sitting in the wings awaiting the shakedown of this new engine is this newly purchased, newly assembled, engine run stand that I put together last week. Can't wait to test the tester with the new engine. Radiator, SPAL fans, battery and a few more controls will be installed soon. Then we will be rocking and rolling.
Going to be fun.
Going to be fun.
03-17-2015, 09:31 AM
#38
Race Director
I built two small blocks from scratch, both 406's and one big block, a 468 that is currently in my vette. The specs on my 468 are laid out along with photos in my profile under the album called My Project. I like starting with a bare block, determine the power band I want, selecting the components that are complimentary to that power band objective and doing the assembly myself. You know what you've got when you're done. You seem to be getting off to a good start for a strong and reliable street engine. My caution to you would be that as you get near the end take a lot of pains in the details and double check everything so that you can get a quick start and break in on that engine. Those cams can be wiped out amazingly quickly if you don't get that run in started and continued properly. Good luck on your build and I will be following it.
04-18-2015, 06:44 AM
#39
Race Director
Getting back to this after some vacation and some work travel now. I finally got the correct pushrods and had to spring for new rocker arms due to the larger valve springs. Everything is now coming along smoothly and I have it pretty much all assembled ready to go. I left off things like carb and dist and fuel and water pump due to this motor has to travel. I will load it in my truck and deliver it to David. We can then assembly the remaining parts and put it on his test stand to fire it up.
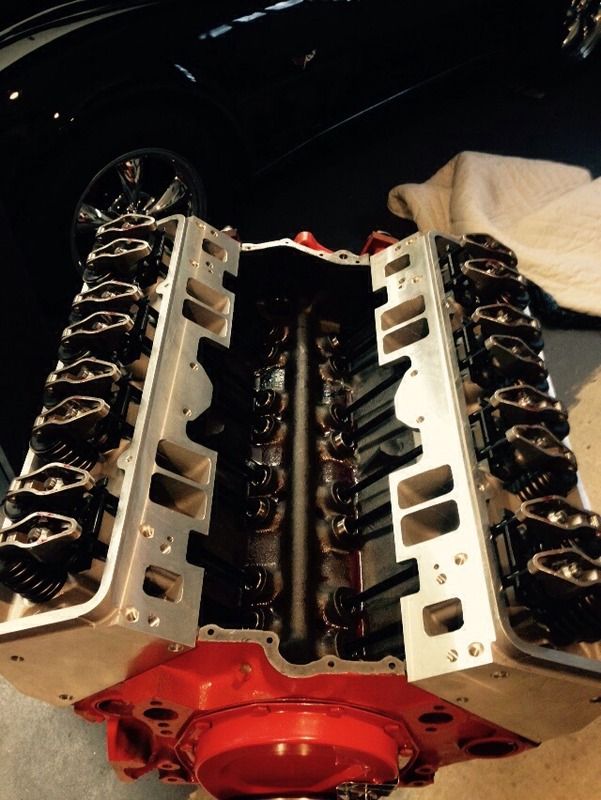
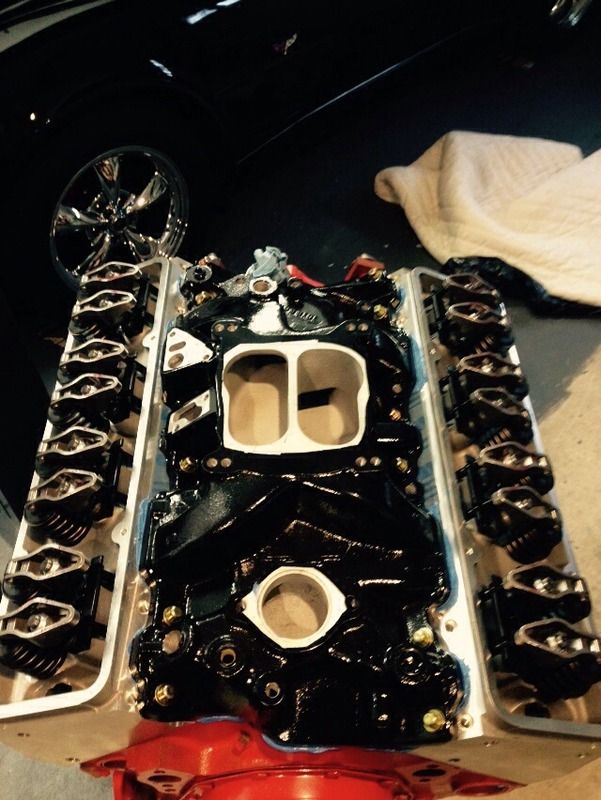
Here it is ready to load up and go


Here it is ready to load up and go

Last edited by Gordonm; 04-18-2015 at 06:48 AM.
04-18-2015, 07:48 AM
#40
Senior Member
Thread Starter
Member Since: Jan 2008
Location: Easton, PA
Posts: 12,154
Received 2,031 Likes
on
1,103 Posts
St. Jude Donor '10
Looking really good Gordon, thank you. Look forward to getting is assembled and then getting it on the stand to fire. I am getting excited.
David
David