
finally met my car but need help.
 03-18-2015, 11:22 PM
#21
Instructor

Thread Starter

I06 = April 06, 1979
Trim 122 = Oyster White Leather
Paint 58L = Dark Green Metallic
Interesting that the rest of the text on the tag seems to be missing...
So, your car rolled out of the factory on April 6th, 1979 with a Dark Green Metallic exterior and an Oyster White Leather interior. The car was repainted at least twice given the presence of red paint under the white. The interior has probably been gutted entirely at one point and had everything replaced with what you have now, (except the white steering wheel) or someone went through the trouble of dying everything. As has been said, your frame is not a 79: probably an 81 or 82.
Looks like you got yourself a fun little Frankenstein. Have fun!
 03-19-2015, 09:44 AM
#22
Racer
 04-08-2015, 05:49 PM
#23
Instructor
Thread Starter
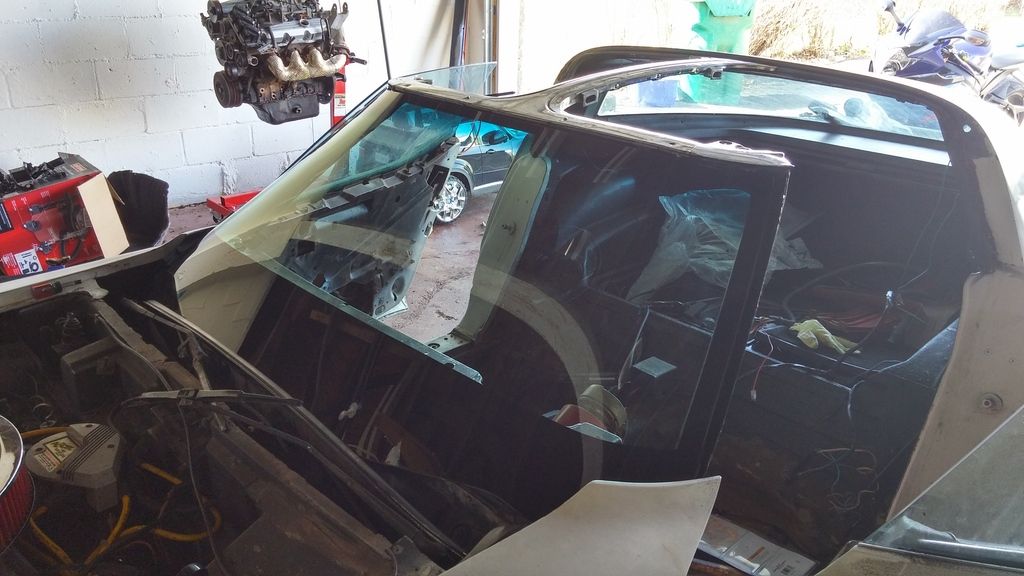
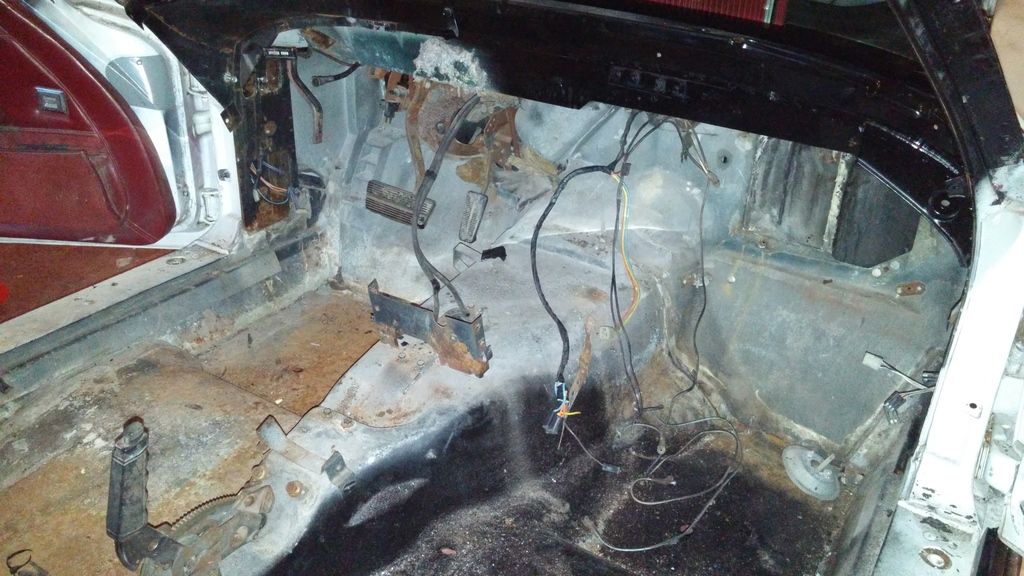
so far I've been busy ripping the car apart and labeling bags with screws and parts (at this point it doesnt matter because bubba used any screw he had). I ordered several parts and started on refurbishing the t top/windshield frame, floor pans, and dash/firewall. I'm in desperate need of a wiring diagram for a 80. I want to do a frame off but time is not on my side. I'm attaching pics of the progress and I will definitely have questions on the way..thanks.
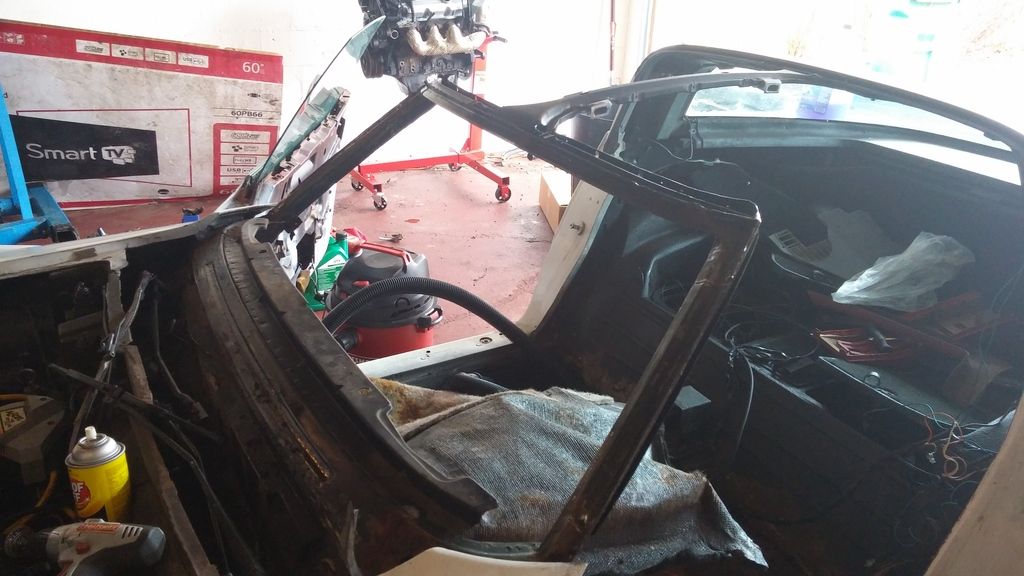
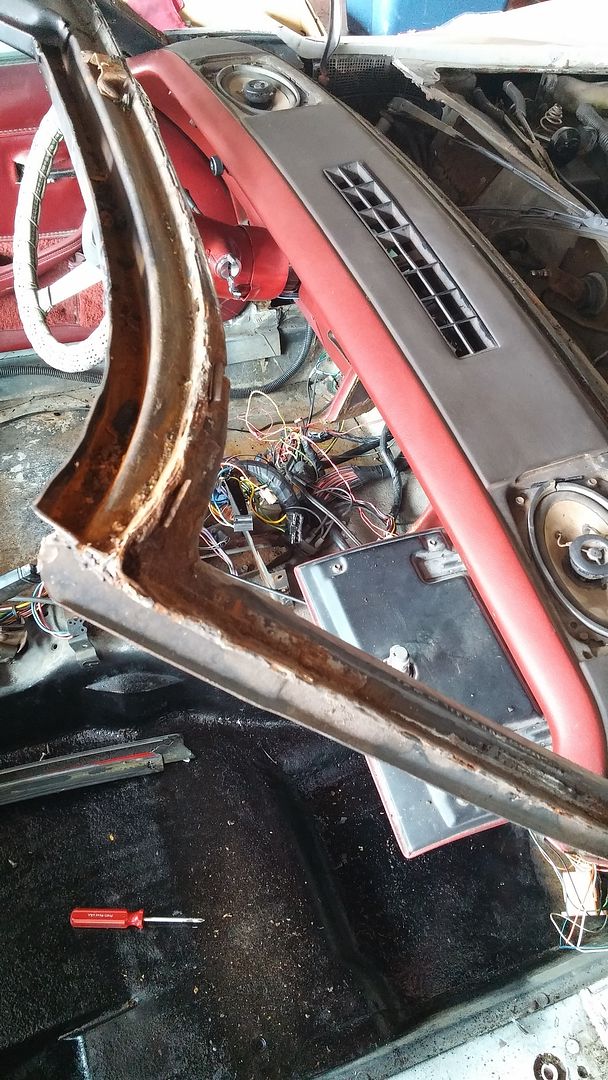
Bubba was definitely here
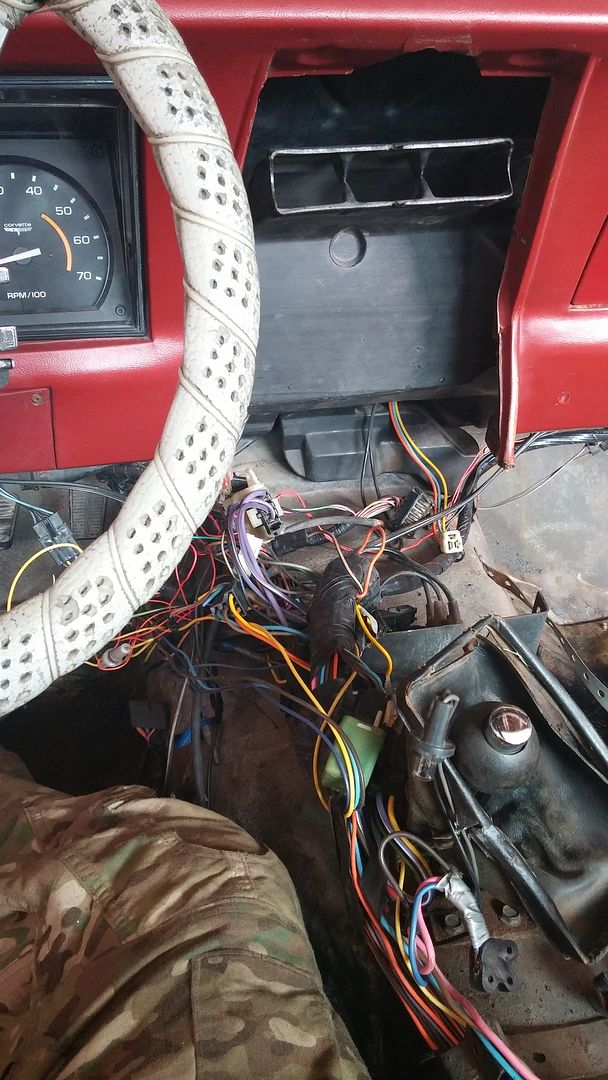
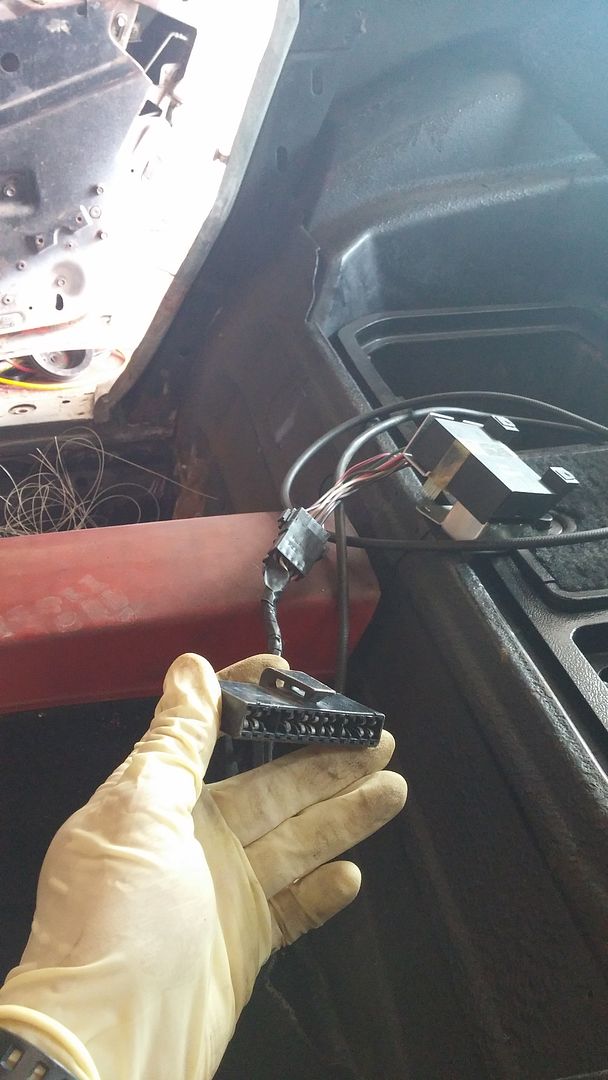
I have no clue what these plugs are for. maybe seat belts?

and this one, I think its for a relay but which one?


Bubba was definitely here

I have no clue what these plugs are for. maybe seat belts?

and this one, I think its for a relay but which one?
 04-08-2015, 08:59 PM
#24
Racer
Get your wiring diagrams from Dr. Rebuild. His are the only ones that show the connectors at the end of the wire: makes it dead-simple to identify disconnected wiring.
04-08-2015, 09:10 PM
#25
Safety Car


WOW. You wasted no time in tearing into this and starting the rebuild. You said you were tagging and bagging your parts and screws as you go. Another good idea is to take photos of every thing. Lots and lots of photos. You may be surprised at how helpful this can be months from now.
kdf
kdf
04-08-2015, 11:20 PM
#26
Instructor
Thread Starter
04-08-2015, 11:27 PM
#27
Instructor
Thread Starter
WOW. You wasted no time in tearing into this and starting the rebuild. You said you were tagging and bagging your parts and screws as you go. Another good idea is to take photos of every thing. Lots and lots of photos. You may be surprised at how helpful this can be months from now.
kdf
kdf
04-09-2015, 10:06 AM
#28
Racer
Went and checked for myself: he actually stops with 77... that's unfortunate. Thanks for pointing it out though. Now I wont mistakenly point people to a product that doesn't exist.
Good luck with your project.
Thanks for pointing it out though. Now I wont mistakenly point people to a product that doesn't exist. Good luck with your project.
04-21-2015, 11:14 AM
#29
Instructor
Thread Starter
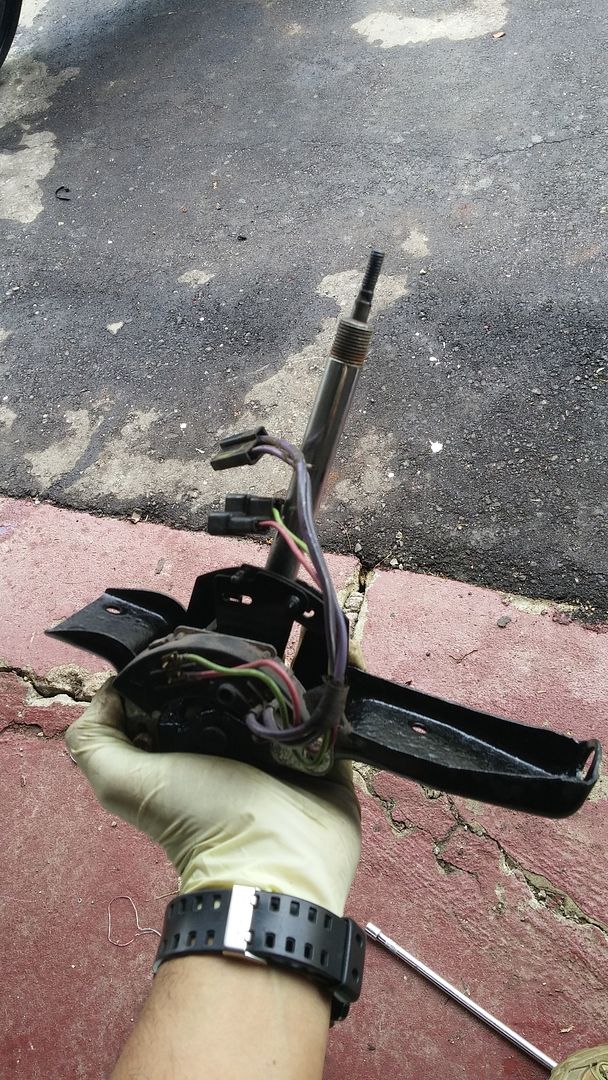
i slowed the pace down a bit to work on other things but definitely not stopping yet. so far i installed new windshield and i completely gutted the interior including dash, harness, and column. I am currently rebuilding the heat/ac system with new gaskets, seals, vacuum lines, and heater core. I'm thinking i will grind all the old floor sealant the bonds the metal to fiberglass and redo it. it looks like its all cracking and some parts are chipping off. I have sand blasted just about every bracket on this thing and painted them. oh and I'm just about done rebuilding the bubbafied wire harness.
before
after


before

after
 04-21-2015, 11:20 AM
#30
Instructor
Thread Starter
does anyone have any info for seat belts. I dont have belts or the bolts. someone told me to just order lap belts. I was thinking maybe these http://willcoxcorvette.com/product_i...ducts_id=28508
but i got a feeling i would rather have the retractable kind. only thing is i cant find any for less than 200 bucks. if you guys think the 200 is worth it, i'll pull the trigger on it.http://www.ebay.com/itm/1978-1979-1980-1981-1982-Corvette-3-Point-Seat-Belts-New-Complete-Set-/400658328412?var=&hash=item5d4918eb5c&vxp=mtr
but i got a feeling i would rather have the retractable kind. only thing is i cant find any for less than 200 bucks. if you guys think the 200 is worth it, i'll pull the trigger on it.http://www.ebay.com/itm/1978-1979-1980-1981-1982-Corvette-3-Point-Seat-Belts-New-Complete-Set-/400658328412?var=&hash=item5d4918eb5c&vxp=mtr
08-27-2015, 03:48 PM
#31
Burning Brakes


Dude,
this car is a ton of work. I found your project over on the "what have you done to your c-3 today" thread. I have an 80 and we just finished a full blown redo on a friends 78. Is there anything we can tell you or help with?
tim
this car is a ton of work. I found your project over on the "what have you done to your c-3 today" thread. I have an 80 and we just finished a full blown redo on a friends 78. Is there anything we can tell you or help with?
tim
The following users liked this post:
313hitman (10-31-2017)
08-27-2015, 11:21 PM
#32
Instructor
Thread Starter
thank you very much for offering you help, I am sure I'll have questions during my body off work
08-28-2015, 07:52 AM
#33

Not much to add here but I had a 79 years ago with an 81 frame. Previous owner loved the car but the northern climates and humidity in the summer caused enough damage to the steel over the years that he opted to swap the frame out for a good 81. Not an issue at all really, I'd rather have a clean 81 than a patch welded 79 with scars all over that will eventually need to be replaced anyway. Somebody probably did you a favor by swapping that out.
Just my 2 cents.
08-28-2015, 12:37 PM
#34
Instructor
Thread Starter
Not much to add here but I had a 79 years ago with an 81 frame. Previous owner loved the car but the northern climates and humidity in the summer caused enough damage to the steel over the years that he opted to swap the frame out for a good 81. Not an issue at all really, I'd rather have a clean 81 than a patch welded 79 with scars all over that will eventually need to be replaced anyway. Somebody probably did you a favor by swapping that out.
Just my 2 cents.
Just my 2 cents.


 08-28-2015, 12:47 PM
#36
Instructor
Thread Starter

this is the bubbafied mess i had hidden under the carpet.

installed dynamat under the main carpet and reflectix(i think that's what is called) on the firewall and trans tunnel.

coming together..
08-28-2015, 04:20 PM
#37
Racer
For seat belts, I pulled the rear belts off of a newer firebird. $20.00 at a pick-n-pull yard. I took everything for the seatbelts.
Just had to make sure that the retractor was at the correct angle to engage the self-lock when the belt is pulled quickly.
Just had to make sure that the retractor was at the correct angle to engage the self-lock when the belt is pulled quickly.
11-14-2015, 07:28 PM
#38
Instructor
Thread Starter
it's been almost 3 months and I haven't done much. I gutted each door and refurbished all the rollers, greased the slides, replaced broken regulator springs on both, and new window lift motors. only thing the doors are waiting for is the door felt to be installed. I am doing a frame off resto starting tomorrow. both #2 mounts have broken bolts and 1 #4 mount is just about done. the rest of the frame looks great but I will strip it and por 15 the frame. My job is letting me utilize the blasting booth and the painting booth for free.
11-15-2015, 12:41 AM
#39
Melting Slicks

hitman sounds like you are doing great. Things do tend to slow down and then it just working through. These guys are great encouragement. Step back, take a good look at what you started with and where you are now. Review your own thread! Keep it up and keep up the photos!

