
1972 Barn Find Restoration
 08-31-2015, 08:44 PM
#41
Instructor


Can you show us some pictures of #1 please.
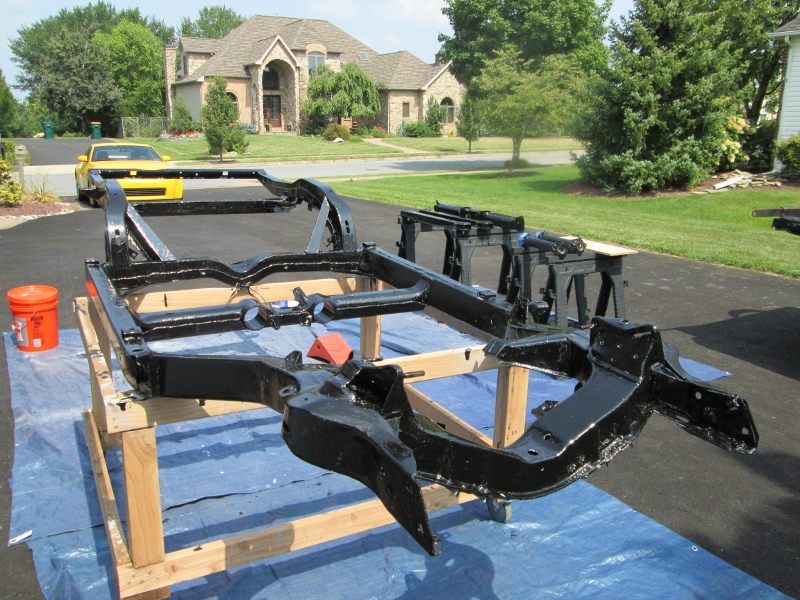
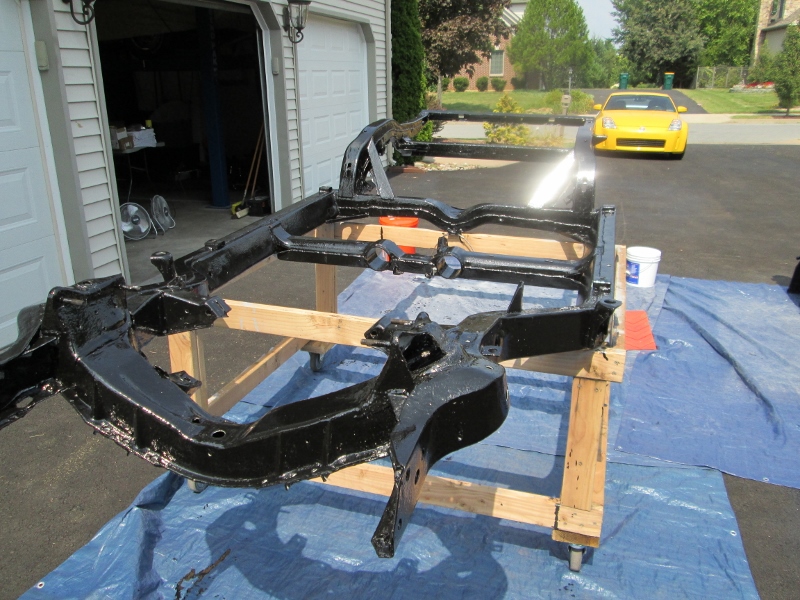
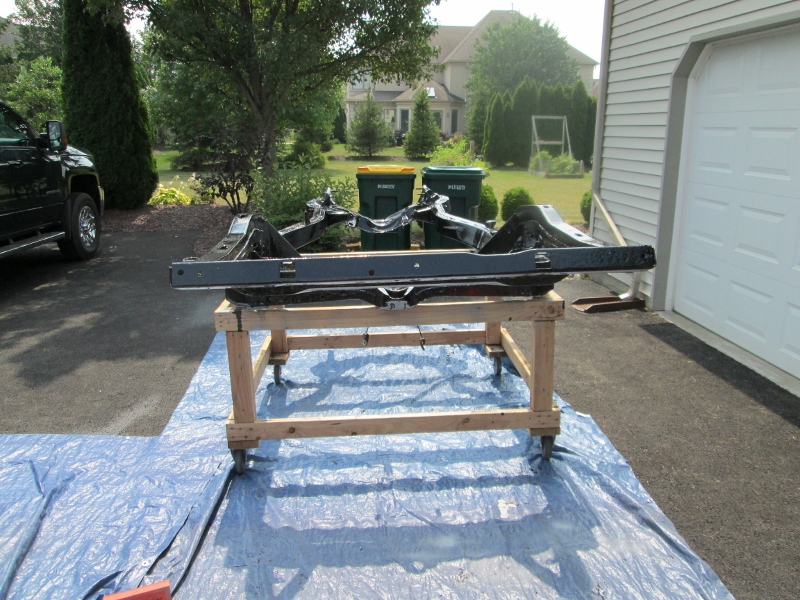
After a fun weekend at Carlisle it was time to get back onto the 72 Coupe and 72 road racer frame projects.
The 72 coupe is lagging the 72 racer but not by much. Currently the 72 coupe frame has:
1) Been repaired in the Kickup areas by welding new covers and reinforcements.
2) Power washing the frame.
3) Sanding the bottom of the frame.
4) Power washing the bottom of the frame.
5) Priming the bottom of the frame.
6) Flipping the fame over and putting it on the frame dolly.
7) sanding the top and sides of the frame.
8) Power washing the frame once again.
And that is the current status... ran out of energy and sunlight.
Attachment 47912274
Attachment 47912275
Attachment 47912276
Attachment 47912277
Attachment 47912278
Tomorrow I pick up my third chassis, this one is a 1969 and it has been repaired and will follow these two through the restoration process.
Stay tuned and thanks for watching.
David
 09-01-2015, 06:07 AM
#42
Senior Member


Thread Starter
Member Since: Jan 2008
Location: Easton, PA
Posts: 12,154
Received 2,031 Likes
on
1,103 Posts
St. Jude Donor '10

I am out of town today but I will post pictures of this this evening when I get home. Good idea and thanks for the suggestion.
The drive side rear section of the frame, just in front of the Kickup, had some rust through in this area so I sent it to a trust metal working shop to repair. They restore various cars including corvettes so I knew they would do a great job. That is the shop I am heading to today, located in West Virginia in a beautiful part of the World.
Stay tuned.
09-01-2015, 06:48 PM
#43
Senior Member
Thread Starter
Member Since: Jan 2008
Location: Easton, PA
Posts: 12,154
Received 2,031 Likes
on
1,103 Posts
St. Jude Donor '10
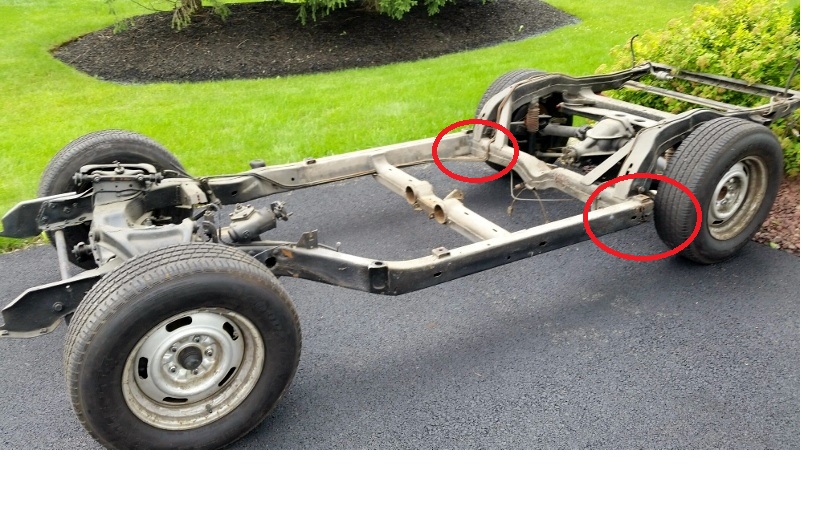
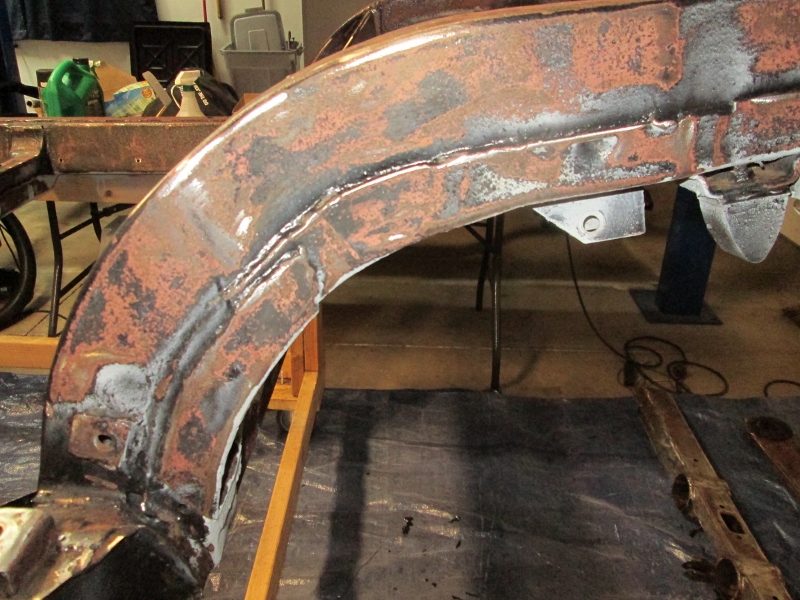
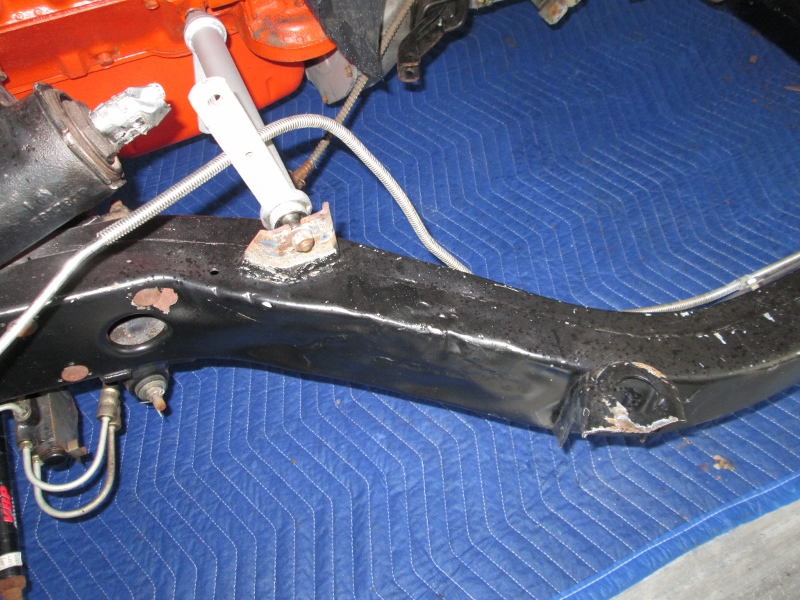
Its not the best picture but the areas I have circled in red had rusted through on the sides and back of the driver side and both driver and passenger side triangle braces were rusted through.
The repairs are hard to see, but let me try to explain them.
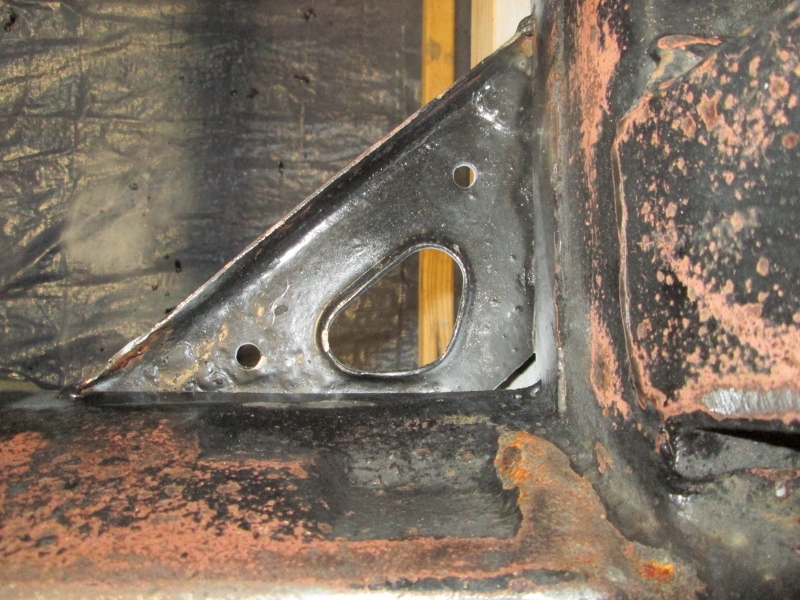
New bracket reinforcement was placed with the passenger support and welded into place, sized to match previous support.
Same is true on the drivers side but damage was worse underneath and lower portion, side portion, and rear portion were all replaced with new steel, welded into place and shaped to match. Stronger than new.
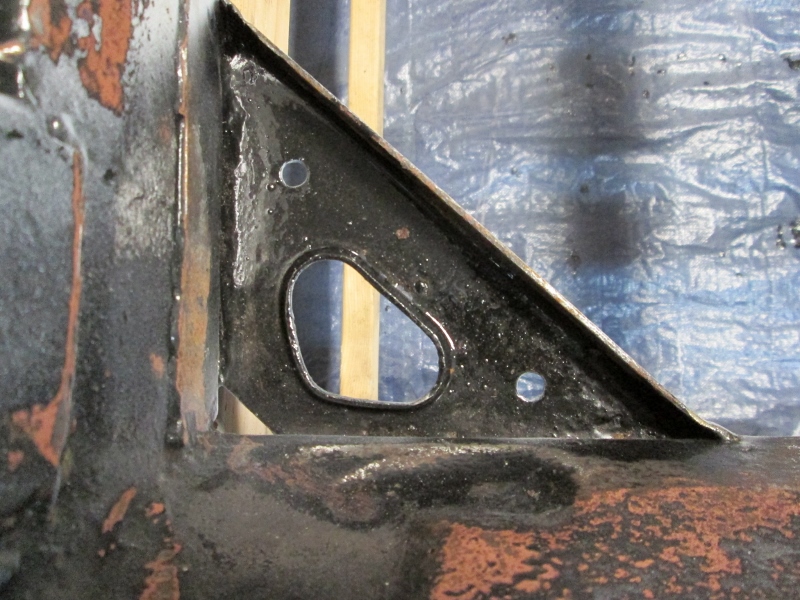
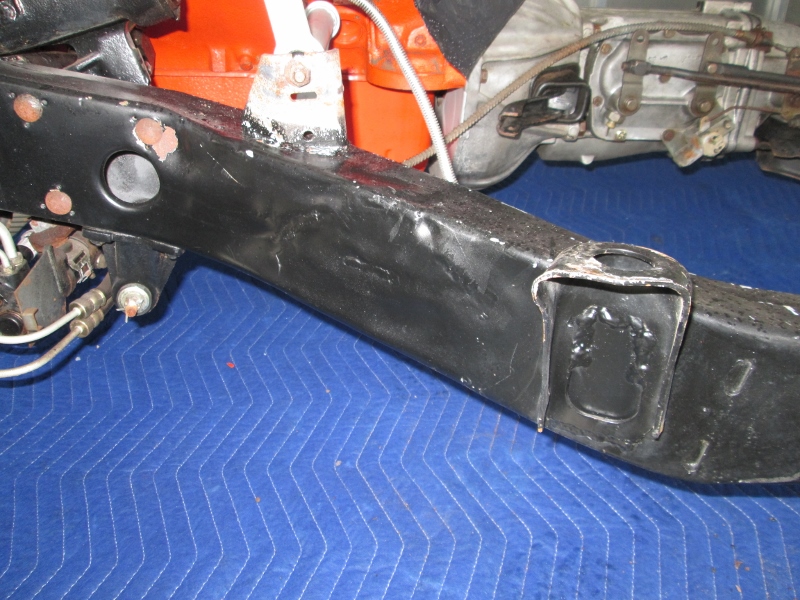
Here is a pretty good picture showing the back section and side section now on the frame. Note there are no holes on either panel, and the lower section, side section, and rear sections are new.
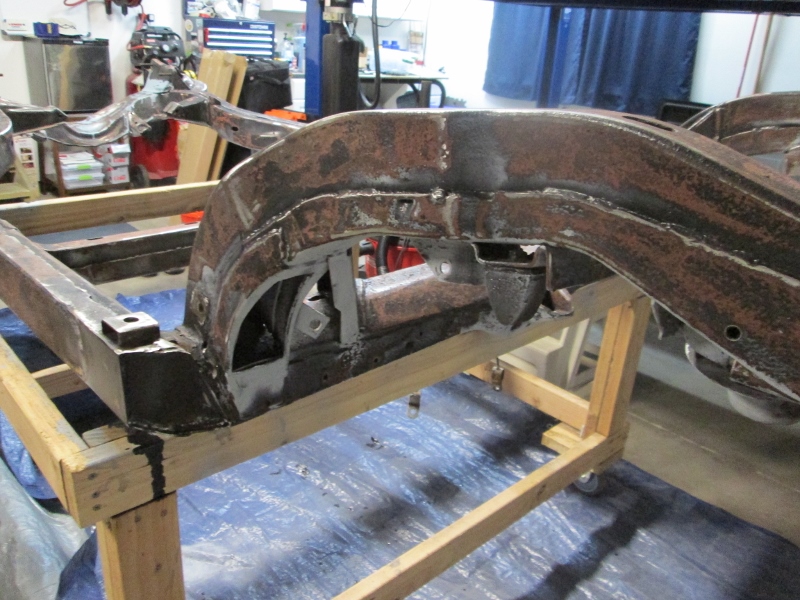
Driver side also had new welds at the 90 degree point of the frame to add more strength there.
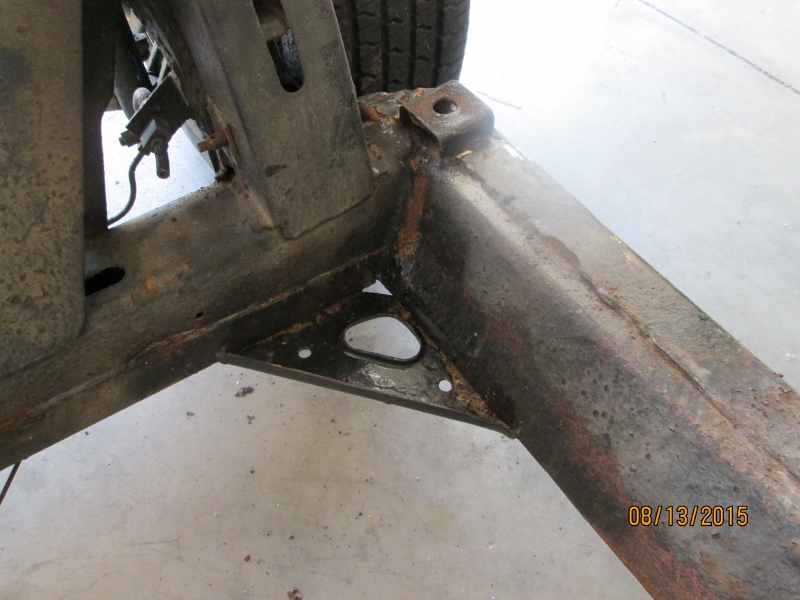
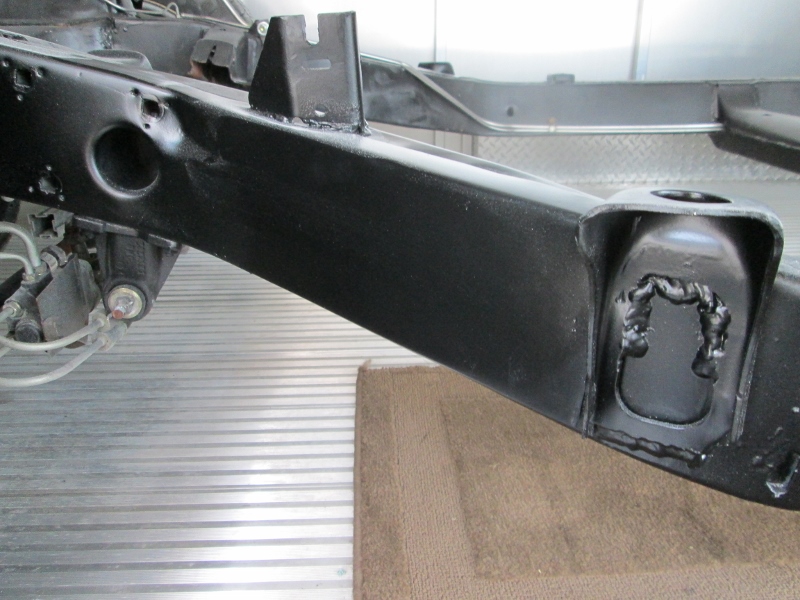
Kickup is ready for primer and paint.
My photographic skills are lacking, sorry, but the skills of my metal worker far outweigh my shortfall in photography.
Thanks for asking and best regards,
David
The repairs are hard to see, but let me try to explain them.
New bracket reinforcement was placed with the passenger support and welded into place, sized to match previous support.
Same is true on the drivers side but damage was worse underneath and lower portion, side portion, and rear portion were all replaced with new steel, welded into place and shaped to match. Stronger than new.
Here is a pretty good picture showing the back section and side section now on the frame. Note there are no holes on either panel, and the lower section, side section, and rear sections are new.
Driver side also had new welds at the 90 degree point of the frame to add more strength there.
Kickup is ready for primer and paint.
My photographic skills are lacking, sorry, but the skills of my metal worker far outweigh my shortfall in photography.
Thanks for asking and best regards,
David
09-01-2015, 07:12 PM
#44
Instructor
Thanks David that was very helpful
Its not the best picture but the areas I have circled in red had rusted through on the sides and back of the driver side and both driver and passenger side triangle braces were rusted through.
Attachment 47912568
The repairs are hard to see, but let me try to explain them.
New bracket reinforcement was placed with the passenger support and welded into place, sized to match previous support.
Attachment 47912571
Same is true on the drivers side but damage was worse underneath and lower portion, side portion, and rear portion were all replaced with new steel, welded into place and shaped to match. Stronger than new.
Attachment 47912572
Here is a pretty good picture showing the back section and side section now on the frame. Note there are no holes on either panel, and the lower section, side section, and rear sections are new.
Attachment 47912573
Driver side also had new welds at the 90 degree point of the frame to add more strength there.
Attachment 47912574
Kickup is ready for primer and paint.
Attachment 47912575
My photographic skills are lacking, sorry, but the skills of my metal worker far outweigh my shortfall in photography.
Thanks for asking and best regards,
David
09-01-2015, 08:19 PM
#45
Senior Member
Thread Starter
Member Since: Jan 2008
Location: Easton, PA
Posts: 12,154
Received 2,031 Likes
on
1,103 Posts
St. Jude Donor '10
Had to take a time out from the two 1972 builds I am doing today to retrieve the 1969 frame I had repaired. It is back now and beautifully repaired so third up will be my restoration of the 69 rolling chassis as well.
Am I having fun or what? Some guys never have two frames in their stable at one time, I have four of them now. Three in restoration and Sparty.
Each of them bring something unique to the party. Road racer 72, stock coupe 72, and...well, stay tuned.
David
Am I having fun or what? Some guys never have two frames in their stable at one time, I have four of them now. Three in restoration and Sparty.
Each of them bring something unique to the party. Road racer 72, stock coupe 72, and...well, stay tuned.
David
09-02-2015, 12:49 PM
#46
Senior Member
Thread Starter
Member Since: Jan 2008
Location: Easton, PA
Posts: 12,154
Received 2,031 Likes
on
1,103 Posts
St. Jude Donor '10
The 72 manual coupe frame is in primer.
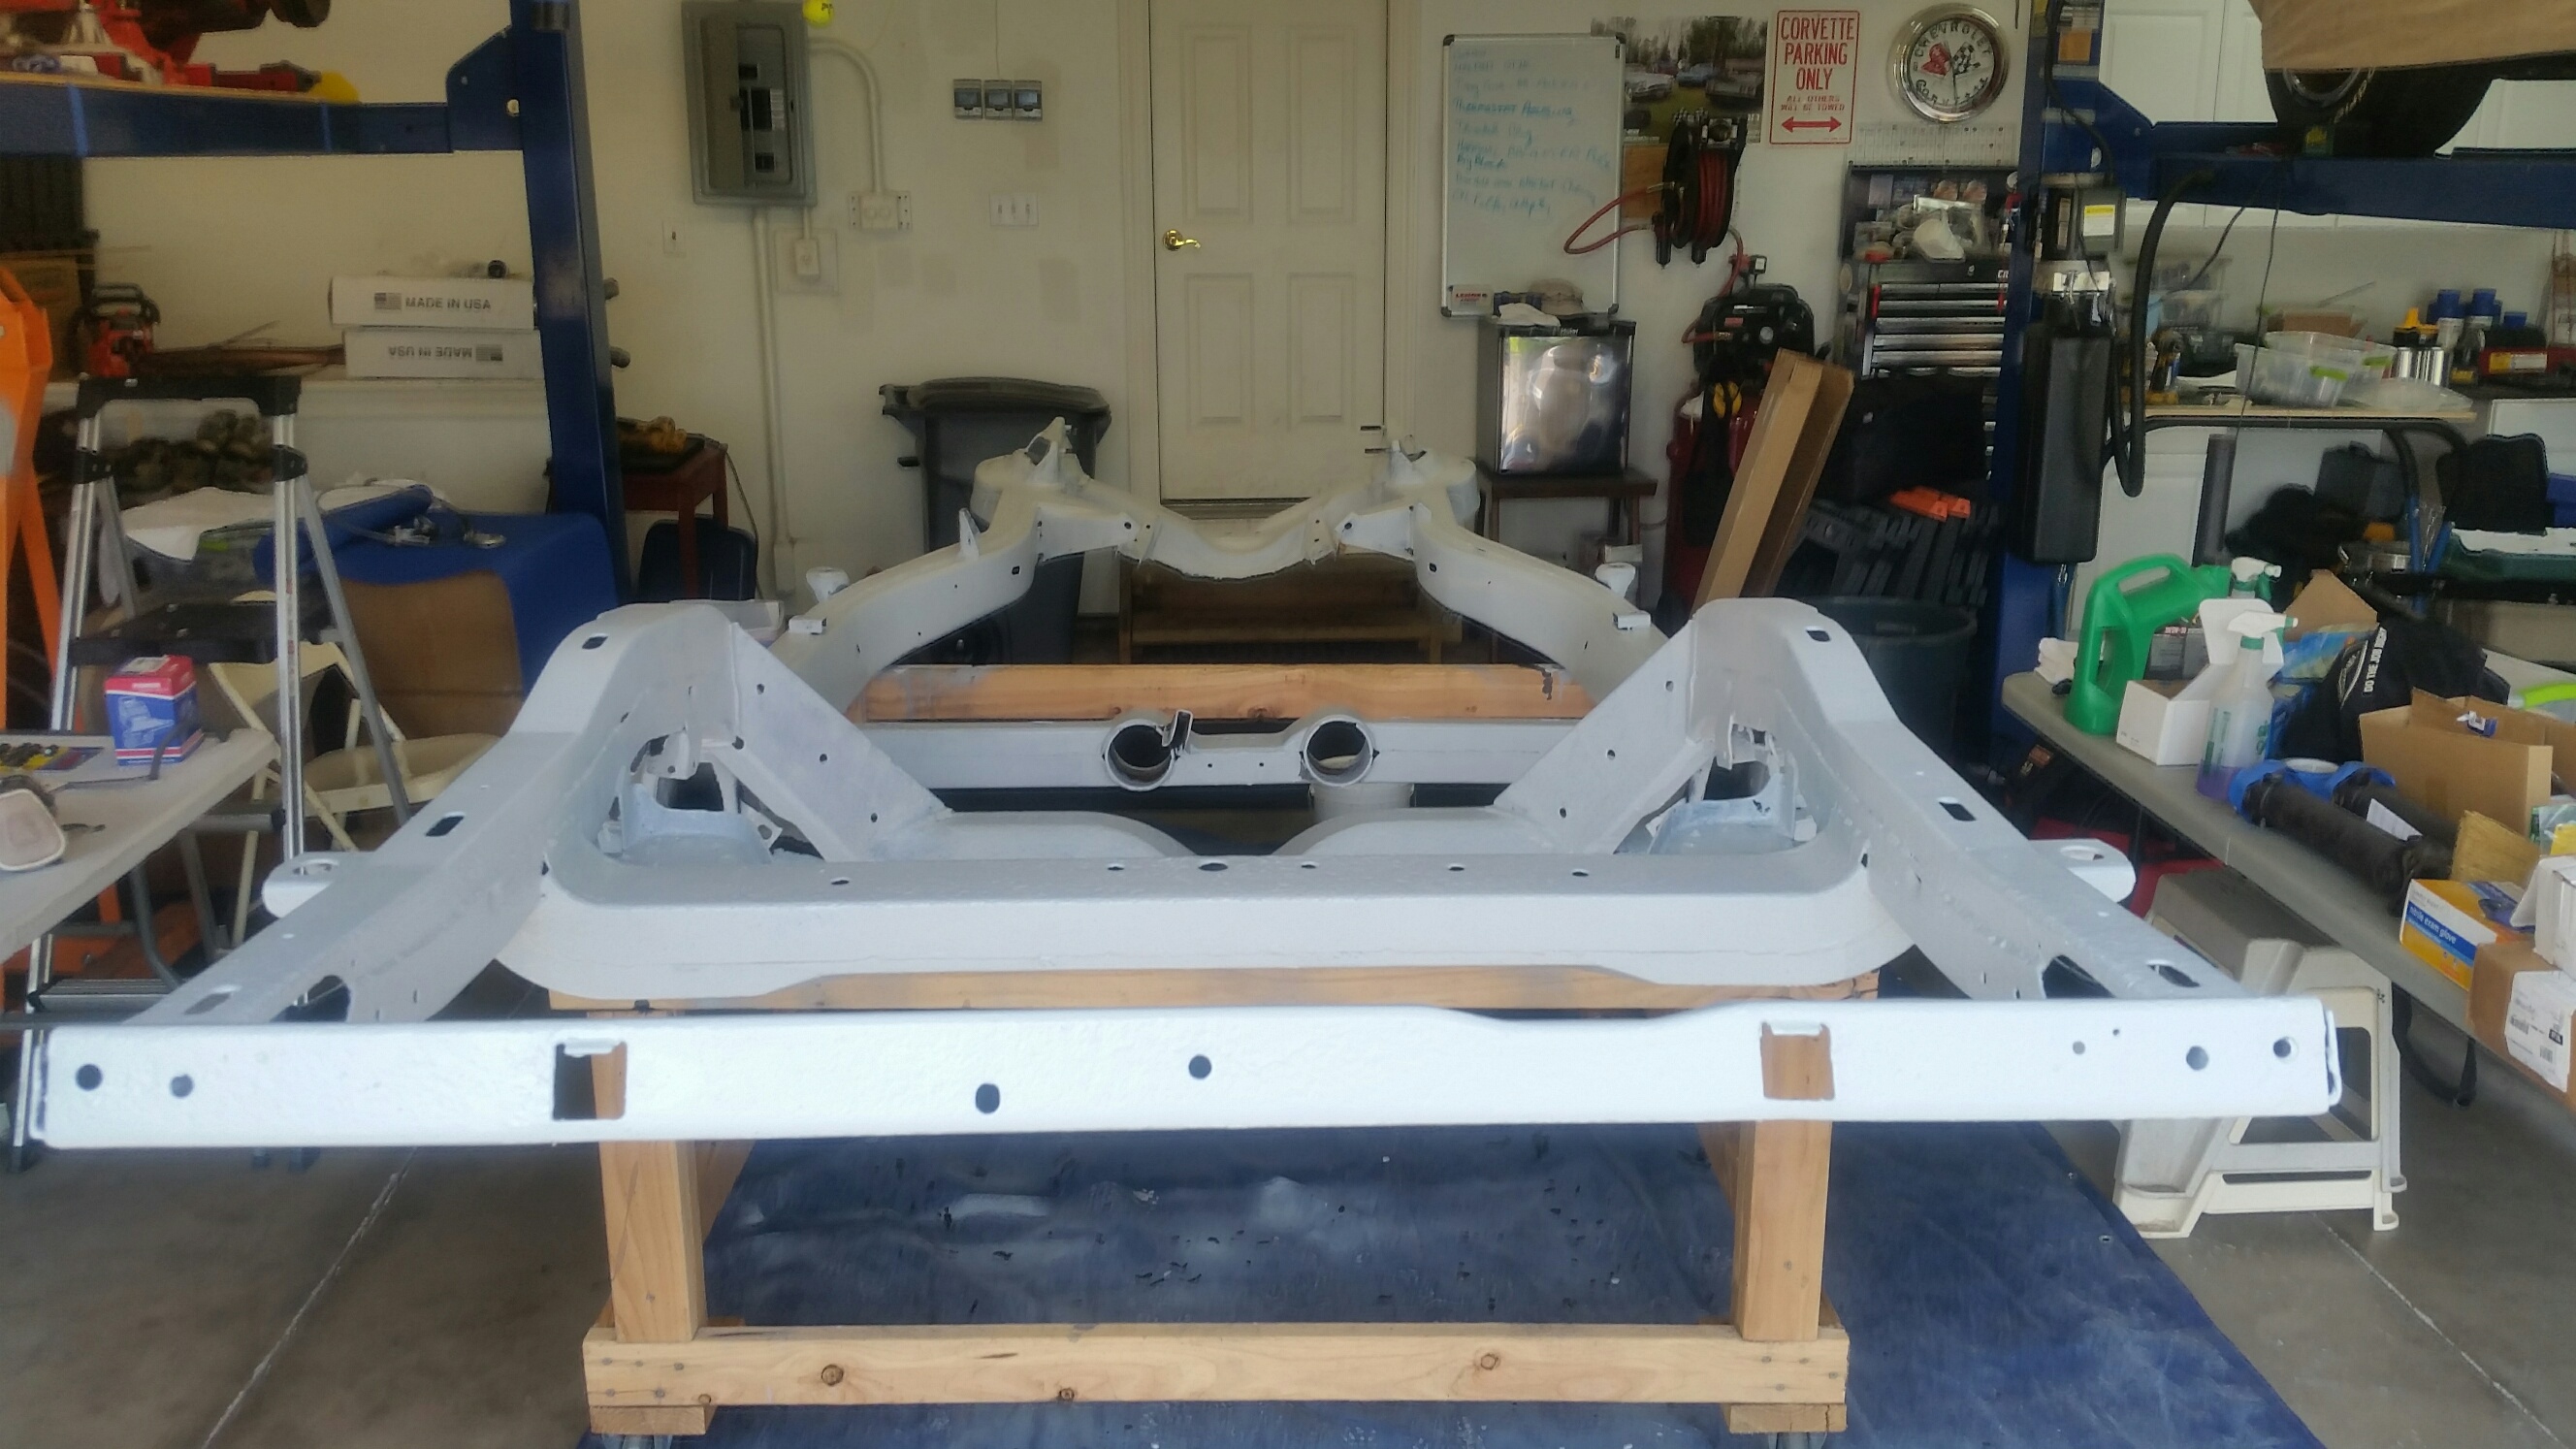
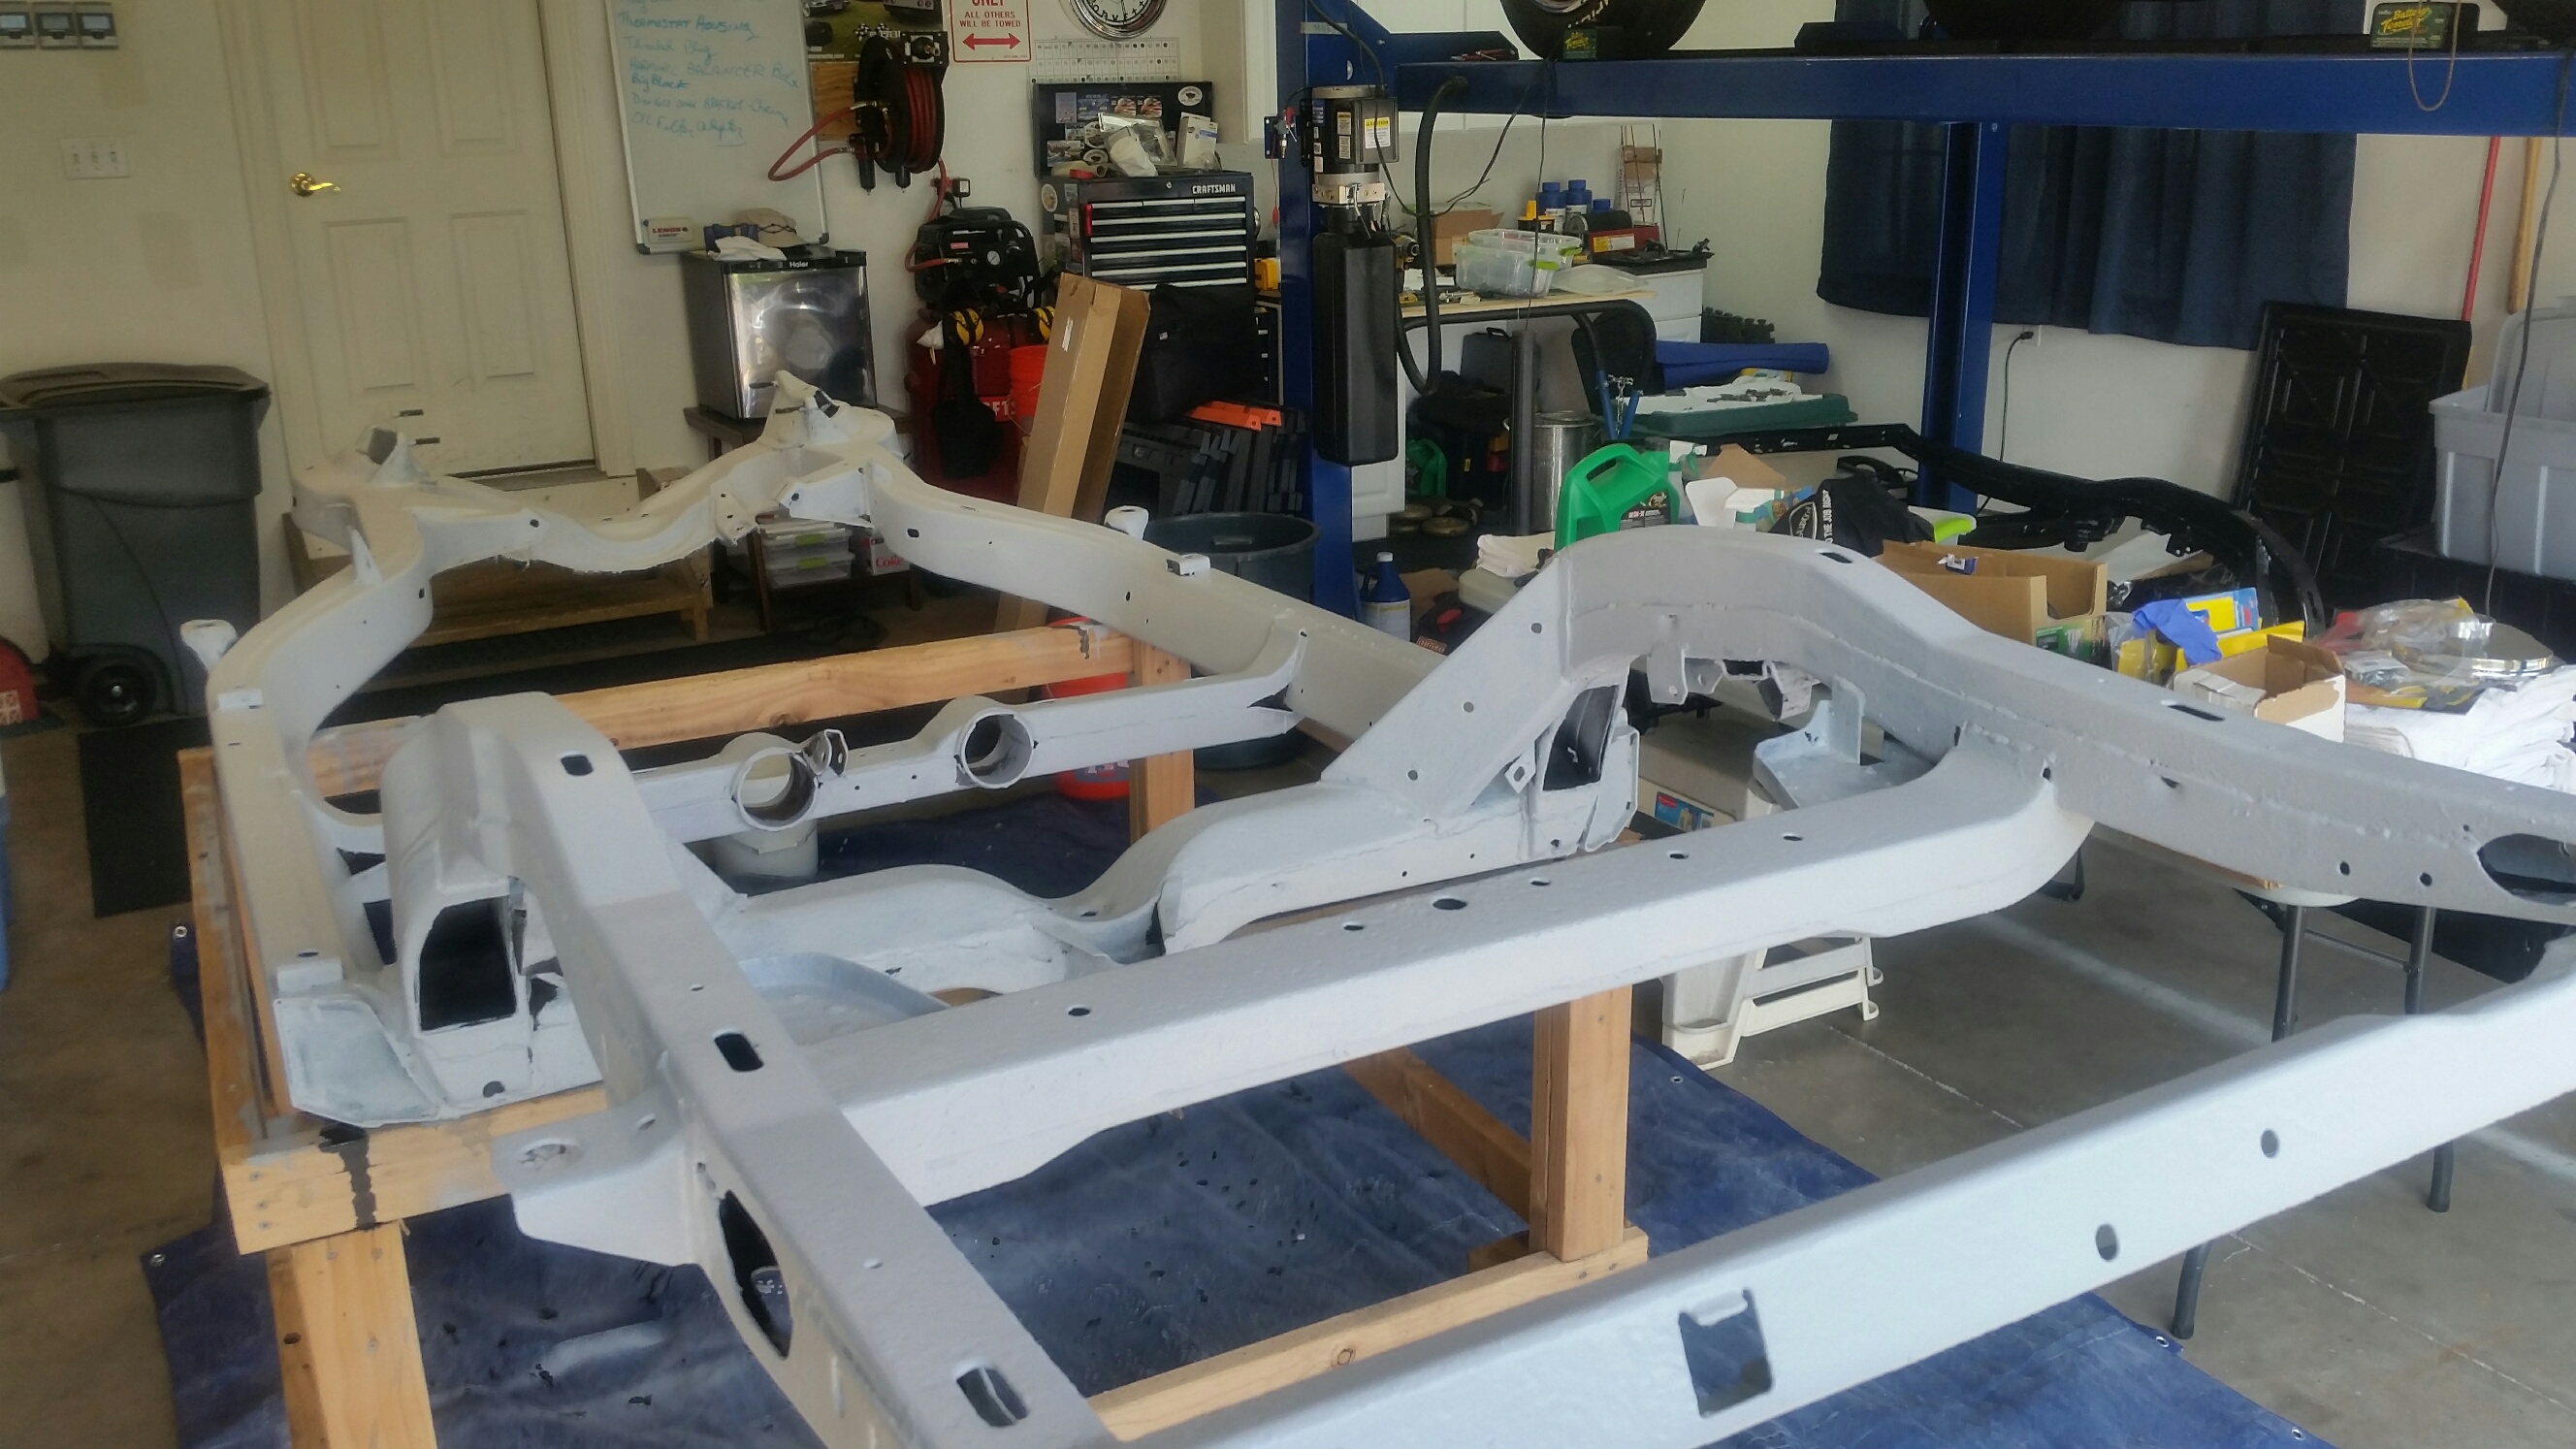
The POR 15 chassis black is supposed to arrive by early this evening and if it does then both frames will be coated in that product Thursday and Friday.
I will fine sand the build-up primer you see here now to get a smoother surface.
Also while working on priming and painting I finished painting the rear differential case that I have for the 72 coupe. It will be rebuilt with a 3.36 gear set and put into service.

Coming along.
The POR 15 chassis black is supposed to arrive by early this evening and if it does then both frames will be coated in that product Thursday and Friday.
I will fine sand the build-up primer you see here now to get a smoother surface.
Also while working on priming and painting I finished painting the rear differential case that I have for the 72 coupe. It will be rebuilt with a 3.36 gear set and put into service.
Coming along.
09-02-2015, 02:34 PM
#48
Senior Member
Thread Starter
Member Since: Jan 2008
Location: Easton, PA
Posts: 12,154
Received 2,031 Likes
on
1,103 Posts
St. Jude Donor '10
As you may recall, when I bought the 72 coupe it had a 69 donor chassis with it but upon inspection I found it had been damaged on the front end so I opted to purchase a 72 manual donor chassis and have it repaired (Kickup area, shared above) and then restore it and put it into service with the 72 coupe.
I also decided to have the 69 chassis repaired and straightened which has now been completed and I am very happy to report is done and gorgeous.
Here are two pictures showing the damage to the frame. It had been repaired by the previous owner but not correctly.
Here is the same frame repaired as it should have been and the frame dimensions verified to be correct, true, and centered.
Which means I now have a 1969 rolling chassis that I will be restoring this winter. Bonus. I will start a new thread with that progress later but wanted to share it here as well because it was the 72 coupe barn find that it originated from in the first place.
Thanks for watching.
David
09-02-2015, 03:01 PM
#50
Senior Member
Thread Starter
Member Since: Jan 2008
Location: Easton, PA
Posts: 12,154
Received 2,031 Likes
on
1,103 Posts
St. Jude Donor '10
No more repair needed, that is now done.
This will be a stunning example of a quality 69 chassis when I get done with it, I promise. LOL.
Best regards,
David
09-02-2015, 03:33 PM
#51
Safety Car

I would imagine they are a little harder to come by in your part of the World are they not? I am assessing this one now to see what I want to restore and what I want to replace.
No more repair needed, that is now done.
This will be a stunning example of a quality 69 chassis when I get done with it, I promise. LOL.
Best regards,
David
No more repair needed, that is now done.
This will be a stunning example of a quality 69 chassis when I get done with it, I promise. LOL.
Best regards,
David
Both my 69 has good frames, so I ok (for now :- )
I'm really looking forward seeing your 69 project.
My Coupe will go back to Monaco Orange (is now Yellow), 427 sbc with AFR heads, TH2004R (650hp), 3.70 rear and factory side pipes (I know they will take power, but I really like the 69 factory side pipe look, and I have them in stock: )


Last edited by c3_dk; 09-02-2015 at 03:37 PM.
09-02-2015, 03:39 PM
#52
Senior Member
Thread Starter
Member Since: Jan 2008
Location: Easton, PA
Posts: 12,154
Received 2,031 Likes
on
1,103 Posts
St. Jude Donor '10
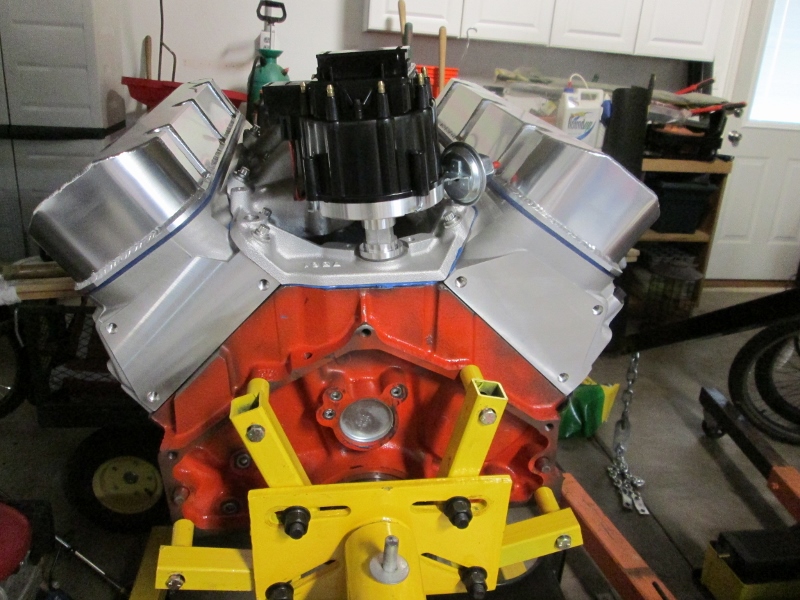
There is a small block hood on that 69 so you probably meant it is a 327 SBC and not a 427 SBC. Now this 496 Big Block I am going to put in my 72 road racer would give that 69 some power. 
Good luck with your build, you are starting with a nice car.
David
Good luck with your build, you are starting with a nice car.
David
09-02-2015, 03:47 PM
#53
Safety Car
There is a small block hood on that 69 so you probably meant it is a 327 SBC and not a 427 SBC. Now this 496 Big Block I am going to put in my 72 road racer would give that 69 some power.
Attachment 47912786
Good luck with your build, you are starting with a nice car.
David
Attachment 47912786
Good luck with your build, you are starting with a nice car.
David
The 69 Coupe will take a few years, I have my 69 Convertible for daily driving (If I didn't have EZ-EFI FAST ECU problems !!)
NICE 496 BB for sure

 09-03-2015, 01:01 PM
#54
Senior Member
Thread Starter
Member Since: Jan 2008
Location: Easton, PA
Posts: 12,154
Received 2,031 Likes
on
1,103 Posts
St. Jude Donor '10
I got the top coated in POR 15 this morning and man is it hot outside.
While I was out there and had the parts ready I did the half shafts for the 72 coupe.
And the rear cross member for the 72 racer, the 72 coupe, and the transmission cross member for the 72 racer. (I am using an automatic frame for ease of installation and removal of transmission in the years ahead).
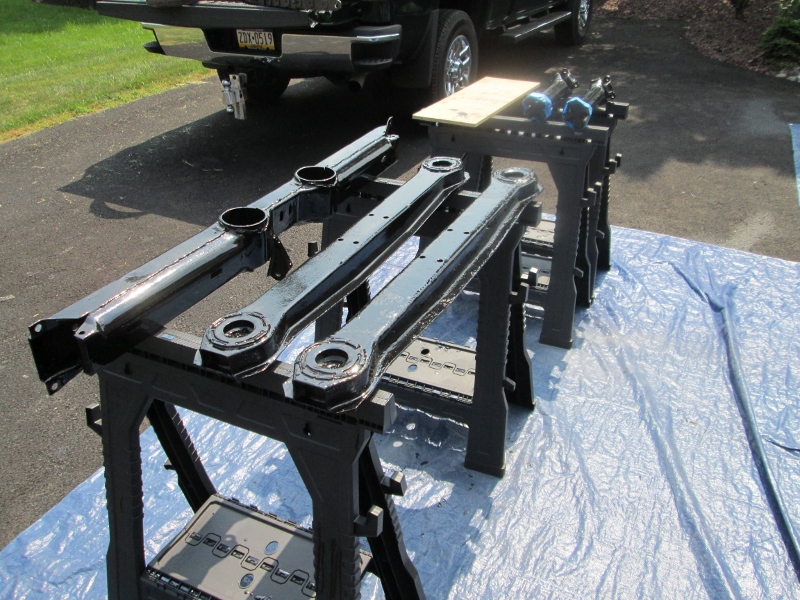
I will let all of this dry today and tonight, then flip them over and get the bottom of the frame and all spots I may have missed with the first coating.
I am planning to apply a final coating of POR 15 Chassis Black product which is supposed to be harder and more durable than the POR 15 regular product, and the can says when you use POR 15 Chassis Black Over your POR 15 paint you get a "Permanent Finish". I don't ever intend to paint these frames again, so permanent is what I am looking for.
Thanks for watching, I need to take a shower.....
David
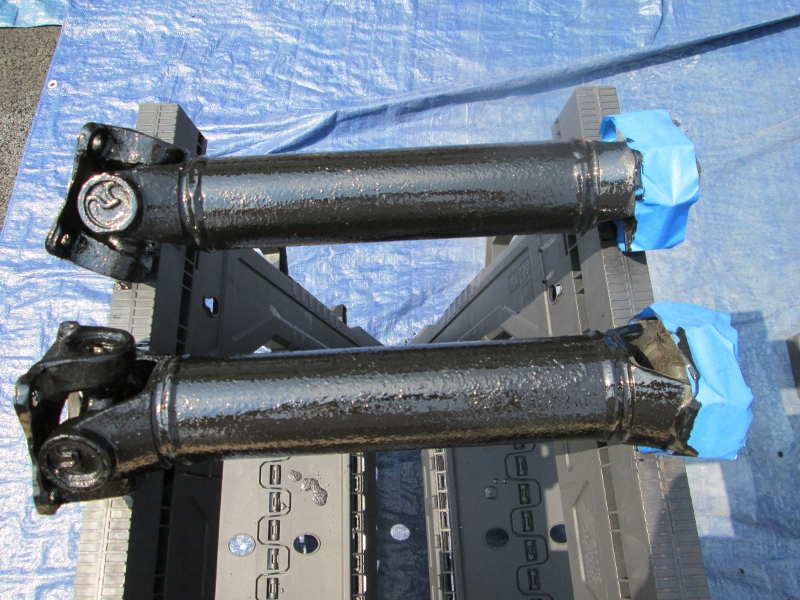
While I was out there and had the parts ready I did the half shafts for the 72 coupe.
And the rear cross member for the 72 racer, the 72 coupe, and the transmission cross member for the 72 racer. (I am using an automatic frame for ease of installation and removal of transmission in the years ahead).
I will let all of this dry today and tonight, then flip them over and get the bottom of the frame and all spots I may have missed with the first coating.
I am planning to apply a final coating of POR 15 Chassis Black product which is supposed to be harder and more durable than the POR 15 regular product, and the can says when you use POR 15 Chassis Black Over your POR 15 paint you get a "Permanent Finish". I don't ever intend to paint these frames again, so permanent is what I am looking for.
Thanks for watching, I need to take a shower.....
David
09-03-2015, 01:22 PM
#55
Instructor

I got the top coated in POR 15 this morning and man is it hot outside.
Attachment 47913083
Attachment 47913084
Attachment 47913085
While I was out there and had the parts ready I did the half shafts for the 72 coupe.
Attachment 47913086
And the rear cross member for the 72 racer, the 72 coupe, and the transmission cross member for the 72 racer. (I am using an automatic frame for ease of installation and removal of transmission in the years ahead).
Attachment 47913087
I will let all of this dry today and tonight, then flip them over and get the bottom of the frame and all spots I may have missed with the first coating.
I am planning to apply a final coating of POR 15 Chassis Black product which is supposed to be harder and more durable than the POR 15 regular product, and the can says when you use POR 15 Chassis Black Over your POR 15 paint you get a "Permanent Finish". I don't ever intend to paint these frames again, so permanent is what I am looking for.
Thanks for watching, I need to take a shower.....
David
I don't see any overspray on the car or truck in the photos. Haha
Mike
09-03-2015, 01:25 PM
#56
Senior Member
Thread Starter
Member Since: Jan 2008
Location: Easton, PA
Posts: 12,154
Received 2,031 Likes
on
1,103 Posts
St. Jude Donor '10
I was able to purchase the following EFI from a fellow forum member this week and I am looking forward to making it a part of the 496/565 engine build. Can almost hear it running now...
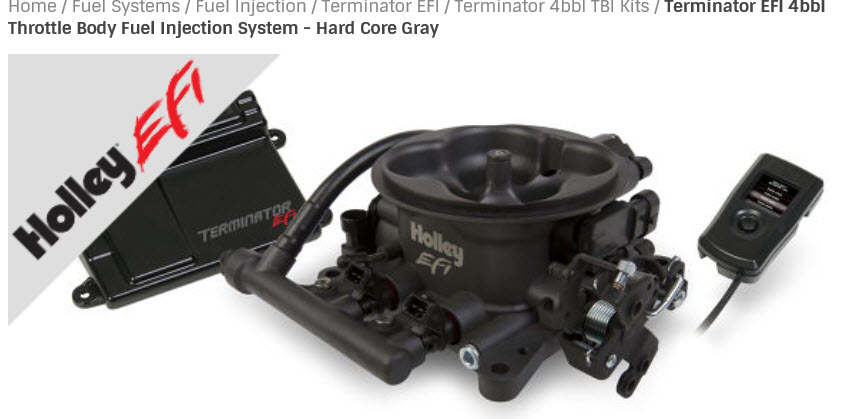
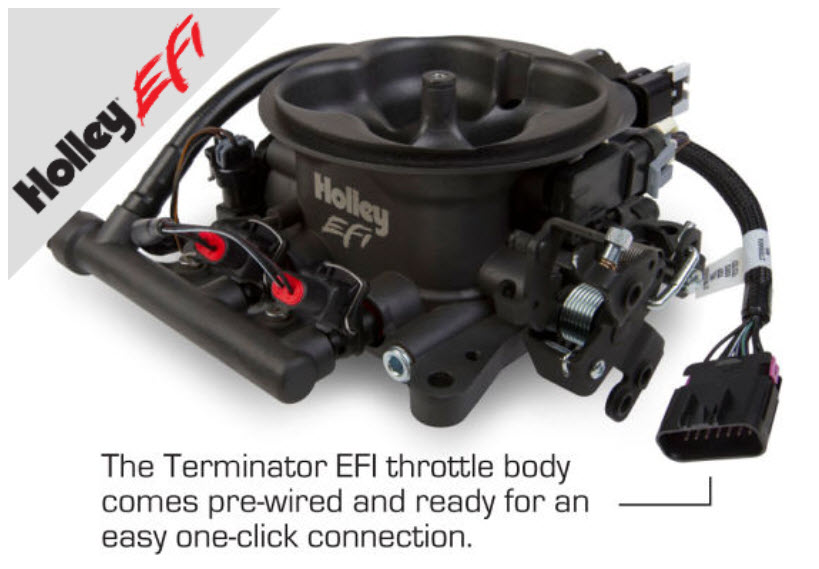
I figured if its good enough for NASCAR it is good enough for me...
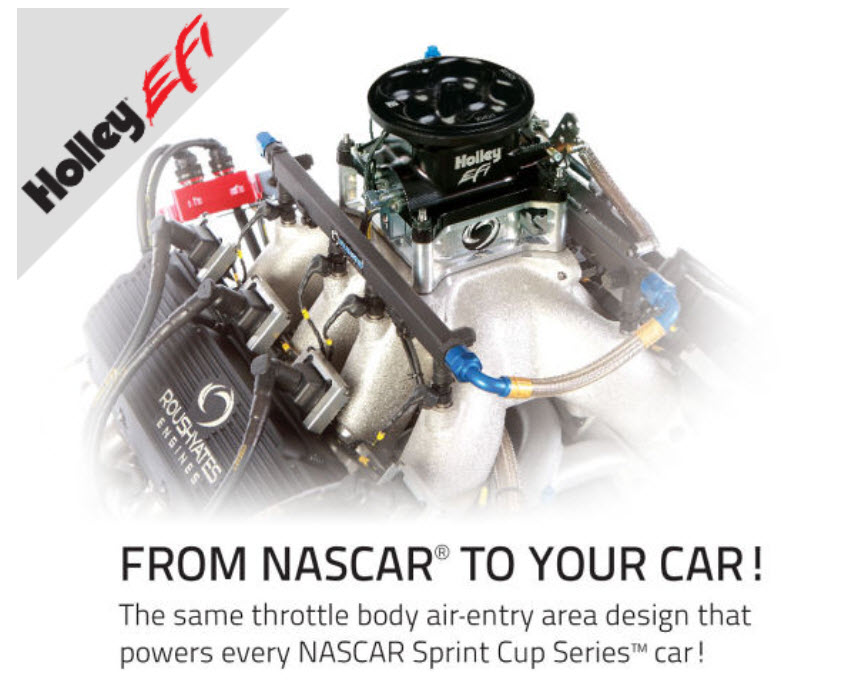
Thanks for watching.
I figured if its good enough for NASCAR it is good enough for me...
Thanks for watching.
09-03-2015, 01:34 PM
#57
Senior Member
Thread Starter
Member Since: Jan 2008
Location: Easton, PA
Posts: 12,154
Received 2,031 Likes
on
1,103 Posts
St. Jude Donor '10
Hope this helps, I like how it works but use a good respirator and stay outdoors if you can, the smell is overwhelming otherwise and not good for your lungs.
Best regards,
David
09-03-2015, 02:28 PM
#58
Instructor
Hi Mike. First I bought a quart, now I have a gallon of the product, bought them both from Summit Racing, fyi. I use a sponge roller for the larger areas, sponge brush for the smaller spots, weld areas, etc. It was a tip given to me by another forum member and it was a good one, now the only way I will apply it. You can see in the pictures an occasional drip on the tarps because I am applying it generously, drips are okay by me and I will be surface sanding and final treating these with the chassis black POR 15. I have a gallon of it as well.
Hope this helps, I like how it works but use a good respirator and stay outdoors if you can, the smell is overwhelming otherwise and not good for your lungs.
Best regards,
David
Hope this helps, I like how it works but use a good respirator and stay outdoors if you can, the smell is overwhelming otherwise and not good for your lungs.
Best regards,
David
Mike
09-05-2015, 08:16 AM
#59
Senior Member
Thread Starter
Member Since: Jan 2008
Location: Easton, PA
Posts: 12,154
Received 2,031 Likes
on
1,103 Posts
St. Jude Donor '10
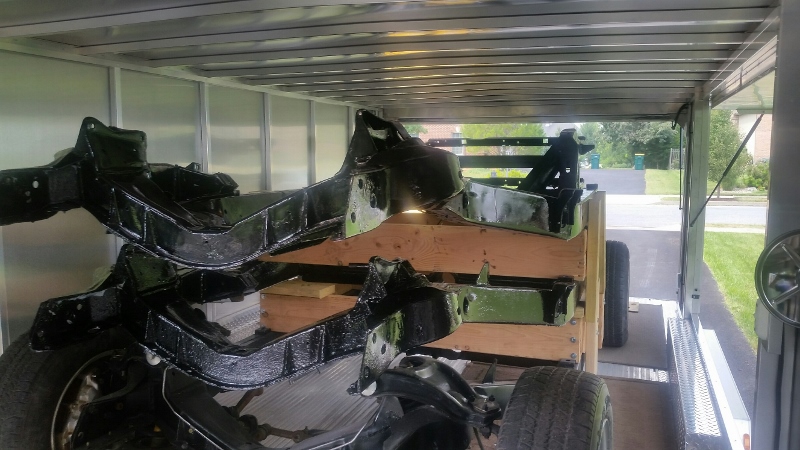
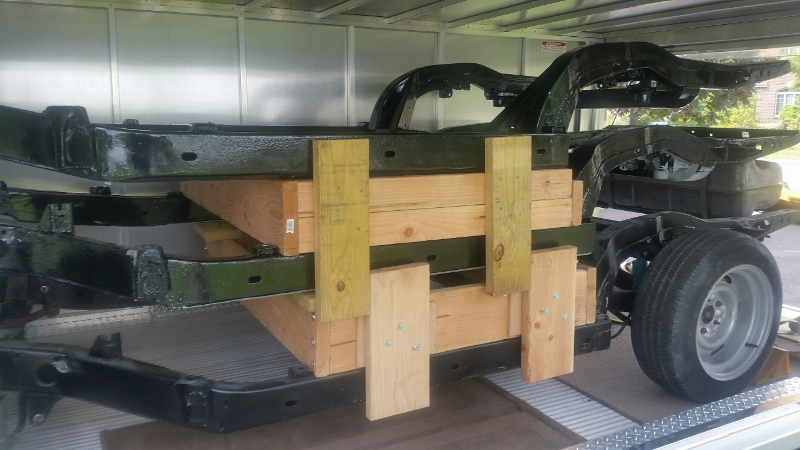
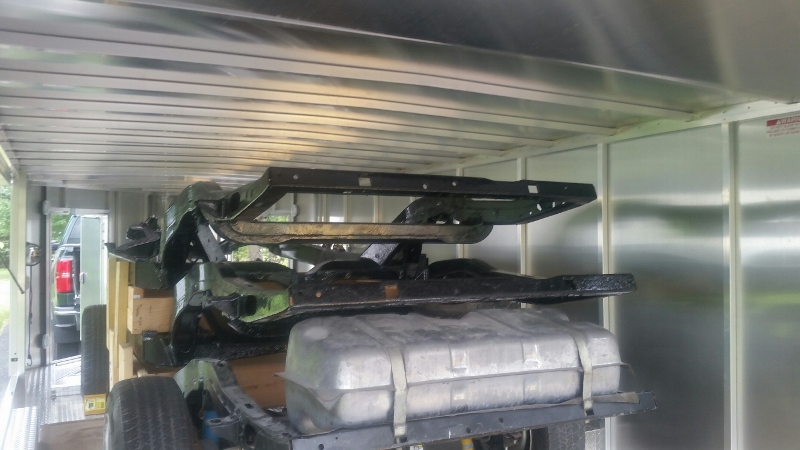
72 manual frame is on top of the pile.
Heading for powder coating in the next few weeks.
Bottom picture is my 3.36 differential case that I stripped. It is painted in a semi-gloss black rust oleum and it ready to be put back together.
However, international travel about to happen now so projects entering a hold phase until I can return.
Cheers to all.
David
09-05-2015, 11:09 AM
#60
Senior Member
Thread Starter
Member Since: Jan 2008
Location: Easton, PA
Posts: 12,154
Received 2,031 Likes
on
1,103 Posts
St. Jude Donor '10
Amazing results. I just pulled this from my soaking tank, wiped it off, took this picture. It was covered in rust when I took it off the 72 coupe frame. All better now.
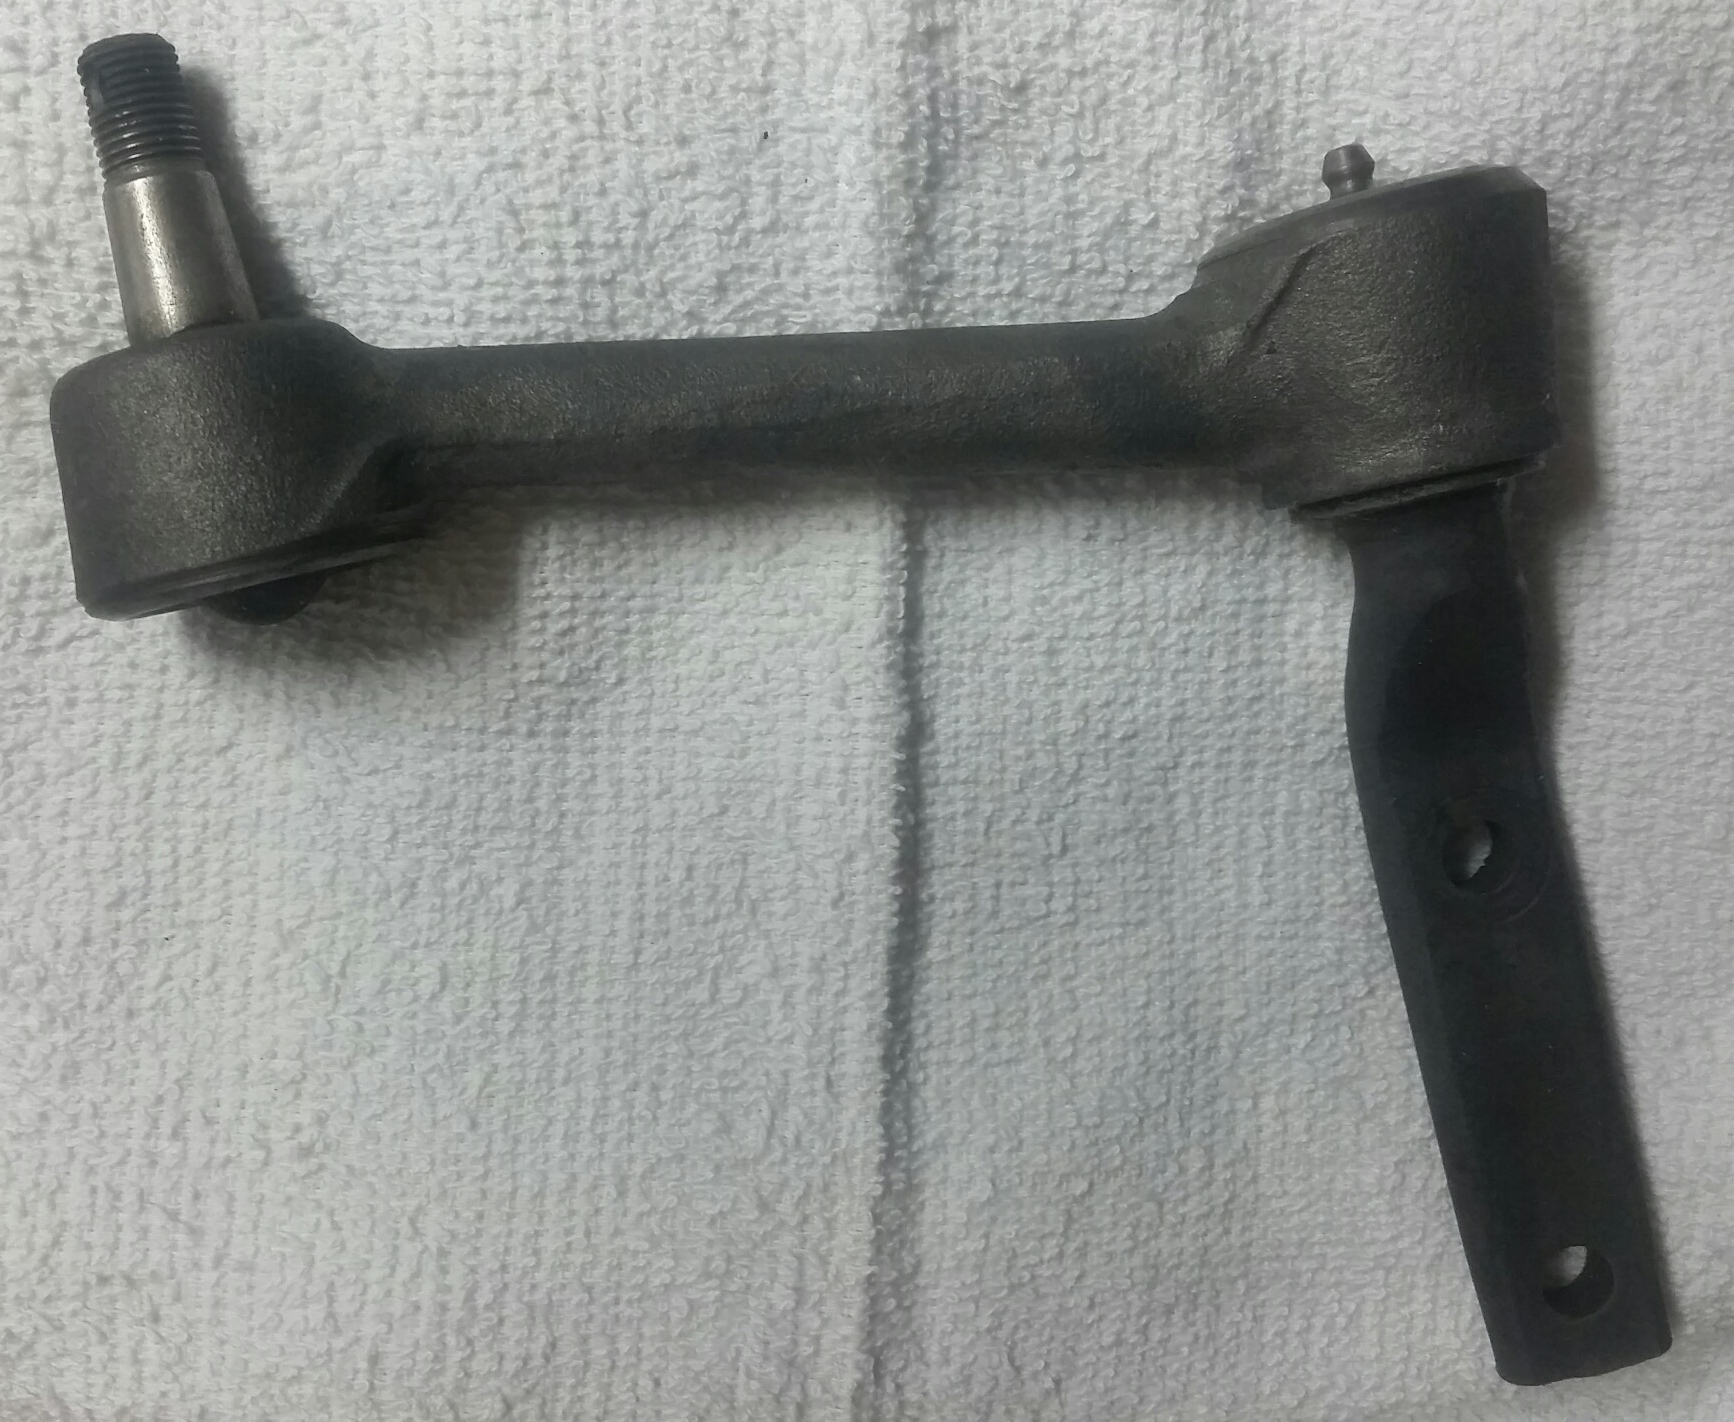
This will be a POR 15 coated part and then back into service.
Sweet.
David
This will be a POR 15 coated part and then back into service.
Sweet.
David