
Black 22"/20" wheels with machined accents +progress pics
 09-25-2015, 03:41 PM
#1
Pro

Thread Starter

I sometimes get ignored when posting progress pics (Except for BrianKeery, my only CF friend haha) But here I go again. At least I can look back on and enjoy my own progress threads in the future.
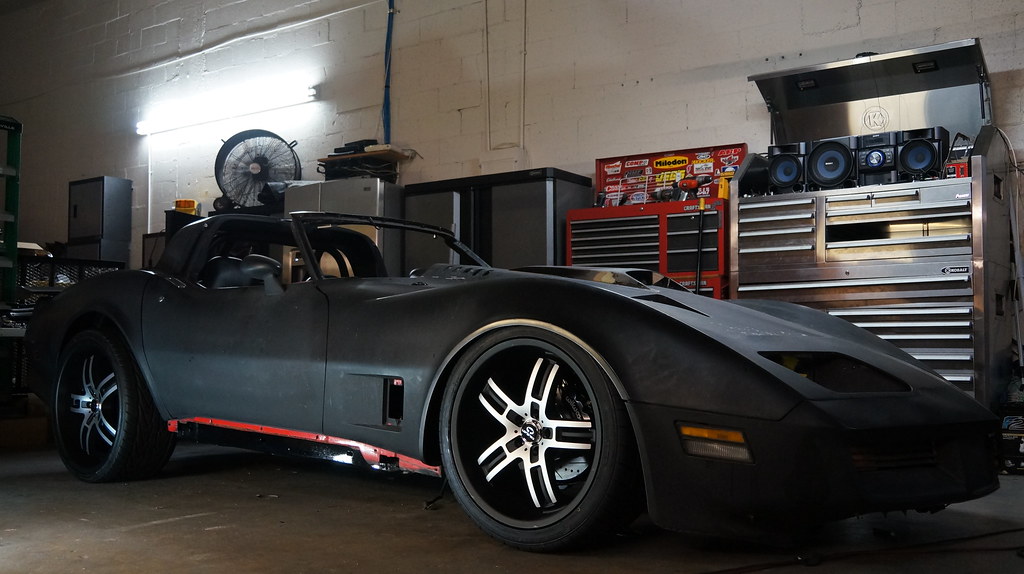
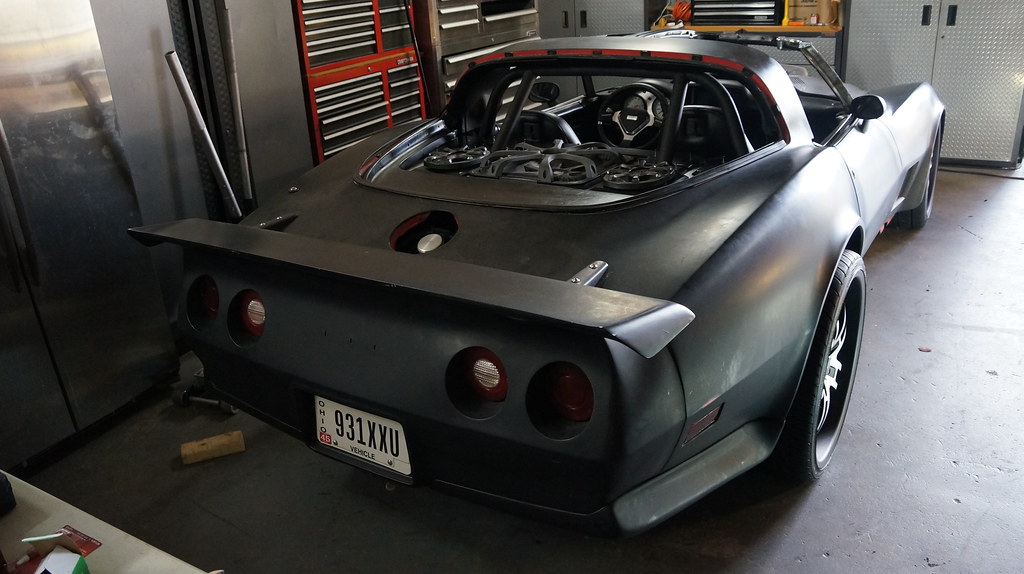
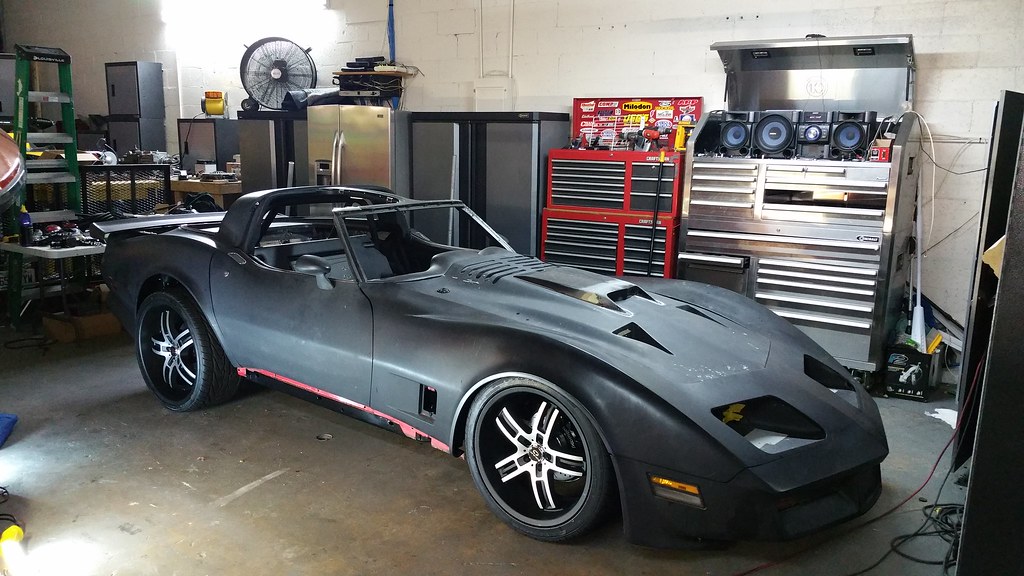
Rear is sitting about 3 inches higher then it will be when there is fuel in the tank, engine and trans installed, dual Yellow top Optima batteries, and the front end is sitting on the bump stops in this pic.
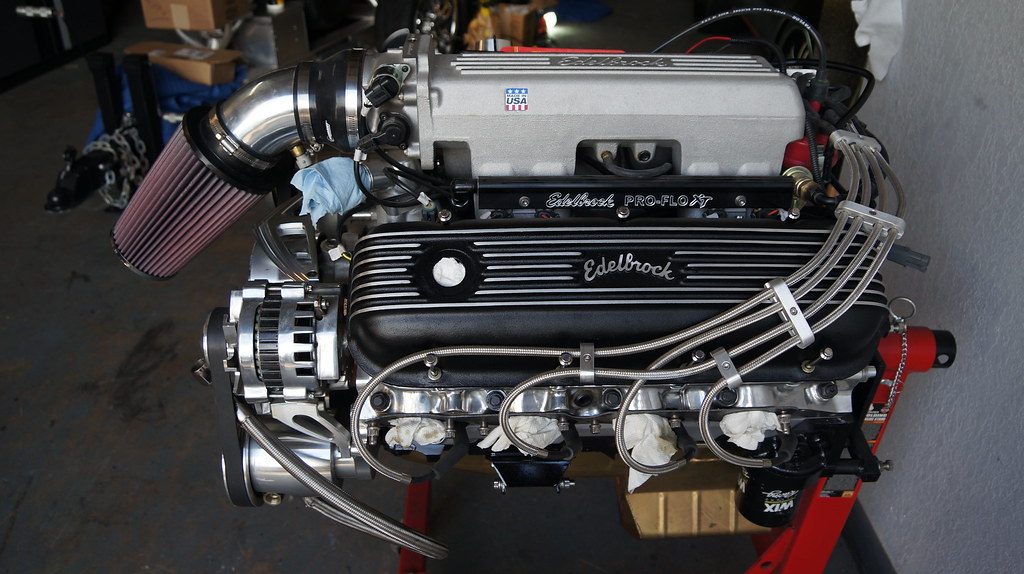
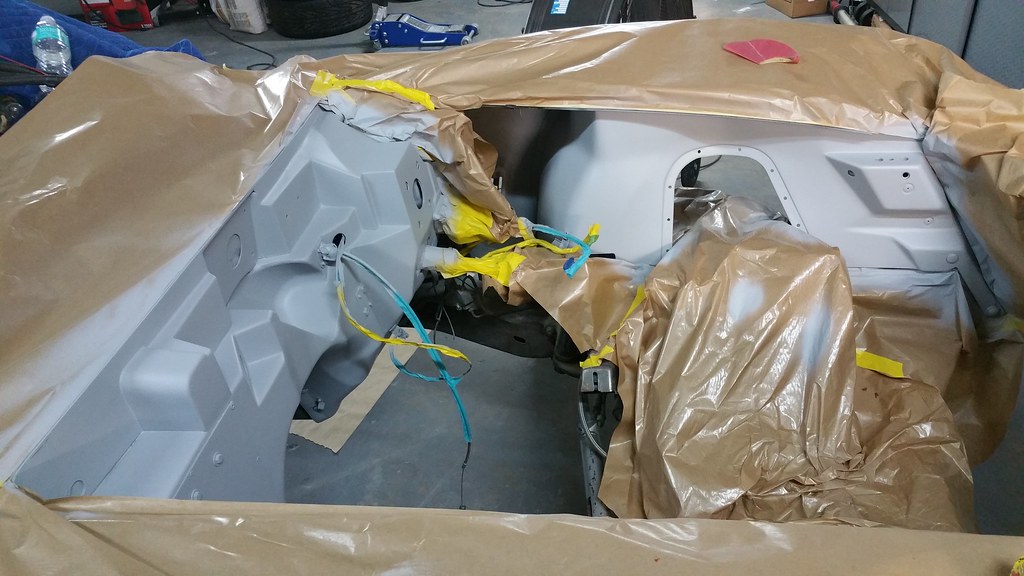
Planning on powdercoating the Pro Flo intake manifold black then sanding and polishing the top stripes/Edelbrock logo to match car/valve covers.
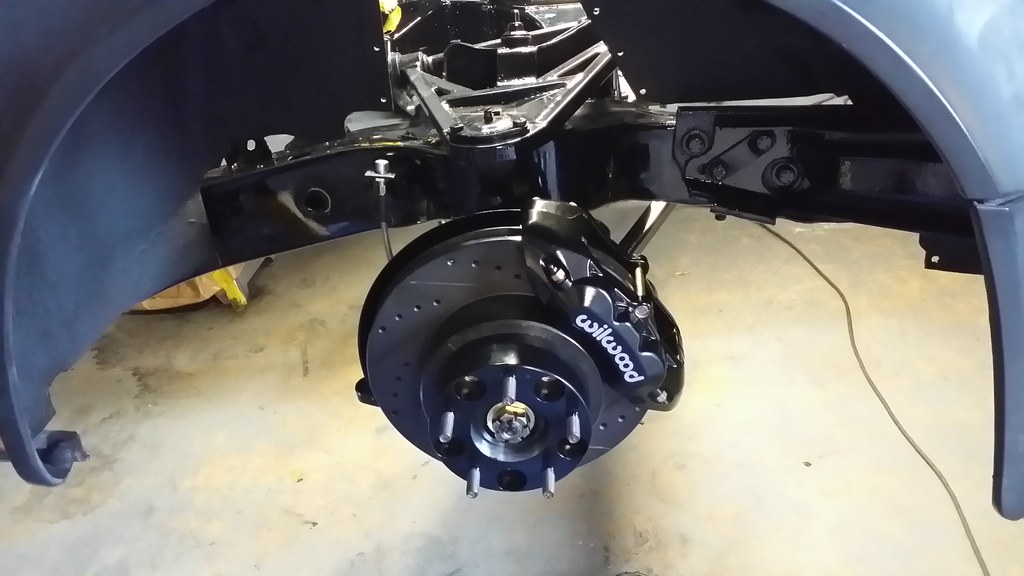
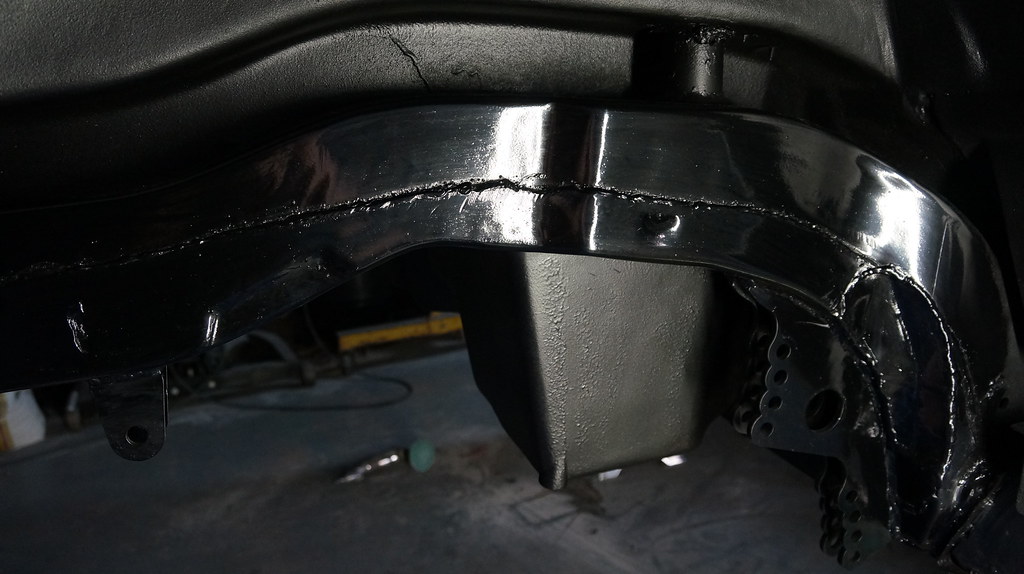
I got my frame almost finished, waiting on a new set of transverse spring bushings from VBandP, and to finish some touch up paint work from installing new brake lines chipping my frame paint..
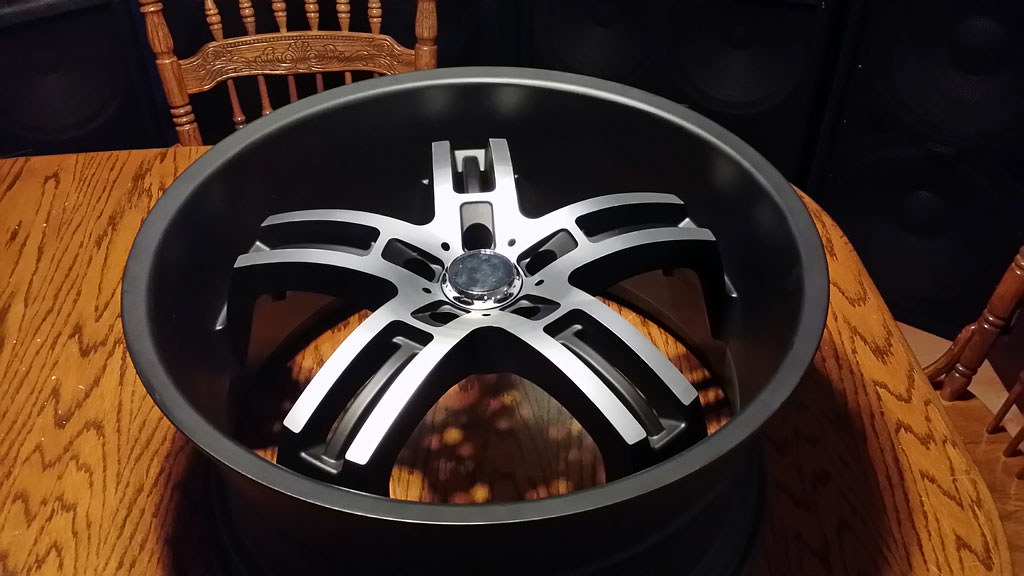
I went with 305/25/22 on the rear with a 10.5 Lorenzo wheel(2010+ Camaro fitment), with +35MM offset. I have about a half inch frame clearance on the back of each wheel, with a Moser rear setup for 4-link cut 2" wider then a stock vette on each side with 5x120 pattern.
The fronts are 275/35/20 with a 10" wheel, +35 offset and 1.25 adapter.
Lots more pics, just follow the Flickr link,,
As always work in progress...
 DSC02132 by Mewn, on Flickr
 DSC02177 by Mewn, on Flickr
 20150727_193223 by Mewn, on Flickr
 DSC02159 by Mewn, on Flickr
 Lorenzo by Mewn, on Flickr
 DSC02172 by Mewn, on Flickr
 DSC02208 by Mewn, on Flickr
 20141110_101647 by Mewn, on Flickr
 DSC02054 by Mewn, on Flickr
 20150923_065849 by Mewn, on Flickr
Re: 2012
Rear is sitting about 3 inches higher then it will be when there is fuel in the tank, engine and trans installed, dual Yellow top Optima batteries, and the front end is sitting on the bump stops in this pic.
Planning on powdercoating the Pro Flo intake manifold black then sanding and polishing the top stripes/Edelbrock logo to match car/valve covers.
I got my frame almost finished, waiting on a new set of transverse spring bushings from VBandP, and to finish some touch up paint work from installing new brake lines chipping my frame paint..
I went with 305/25/22 on the rear with a 10.5 Lorenzo wheel(2010+ Camaro fitment), with +35MM offset. I have about a half inch frame clearance on the back of each wheel, with a Moser rear setup for 4-link cut 2" wider then a stock vette on each side with 5x120 pattern.
The fronts are 275/35/20 with a 10" wheel, +35 offset and 1.25 adapter.
Lots more pics, just follow the Flickr link,,
As always work in progress...
DSC02132 by Mewn, on FlickrDSC02177 by Mewn, on Flickr20150727_193223 by Mewn, on FlickrDSC02159 by Mewn, on FlickrLorenzo by Mewn, on FlickrDSC02172 by Mewn, on FlickrDSC02208 by Mewn, on Flickr20141110_101647 by Mewn, on FlickrDSC02054 by Mewn, on Flickr20150923_065849 by Mewn, on FlickrRe: 2012
Last edited by Mewn; 09-25-2015 at 05:09 PM.

The following users liked this post:
MISTERZ06 (05-22-2017)
09-25-2015, 06:04 PM
#2
Melting Slicks


Wow that is a serious project with lots of work completed so far. 
How long have you been working on it and any estimation yet on when you'll get to do the first test drive?
How long have you been working on it and any estimation yet on when you'll get to do the first test drive?
 09-25-2015, 09:57 PM
#7
Race Director


You have a ton of fabrication into your C3 project and it really stands out. Nice work!
Keep the pictures coming.
Keep the pictures coming.
 09-26-2015, 06:27 AM
#9
Pro
Thread Starter
Projected build completion date: Never! Realistically hopefully paint on it by 2022
Last edited by Mewn; 09-28-2015 at 03:56 AM.
10-06-2015, 04:28 AM
#10
Melting Slicks

You have put in some some serious effort here, may not be everyones cup of tea but great workmanship.
Always something to learn by seeing what others have achieved.
Always something to learn by seeing what others have achieved.
Last edited by CraigH; 10-06-2015 at 03:59 PM.
10-06-2015, 08:38 AM
#11
Le Mans Master

looks great 
03-15-2017, 02:31 AM
#13
Pro
Thread Starter
The 540 is almost done, only a few more weeks! Decided to go with a Wilson built manifold and Gen 3 Ultra Dominator.
[url=https://flic.kr/p/SXU5qp]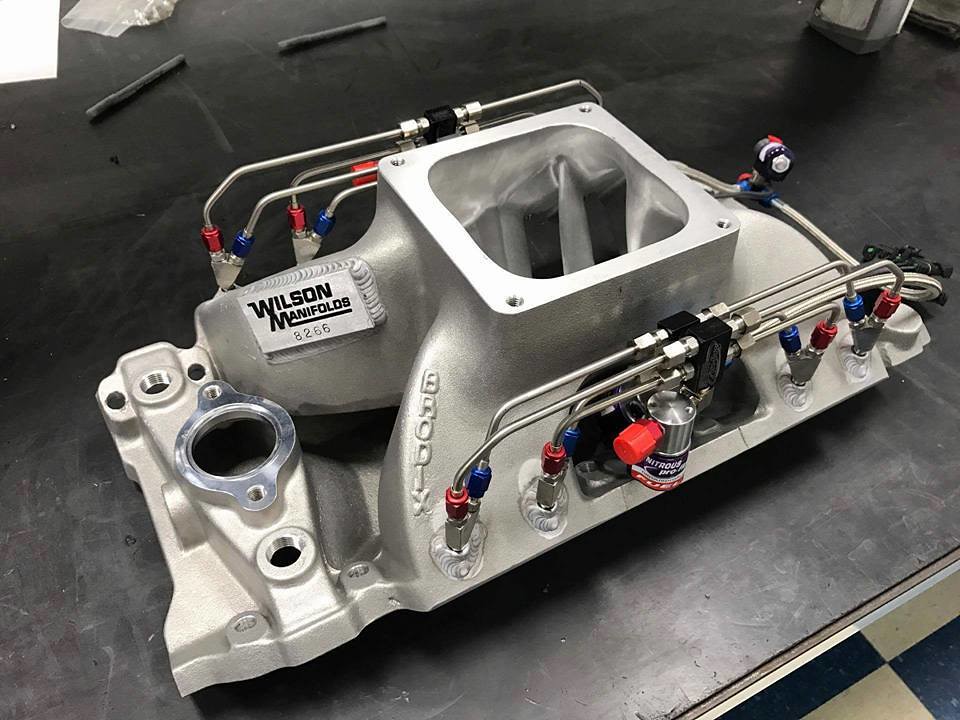
[url=https://flic.kr/p/RFpVsU]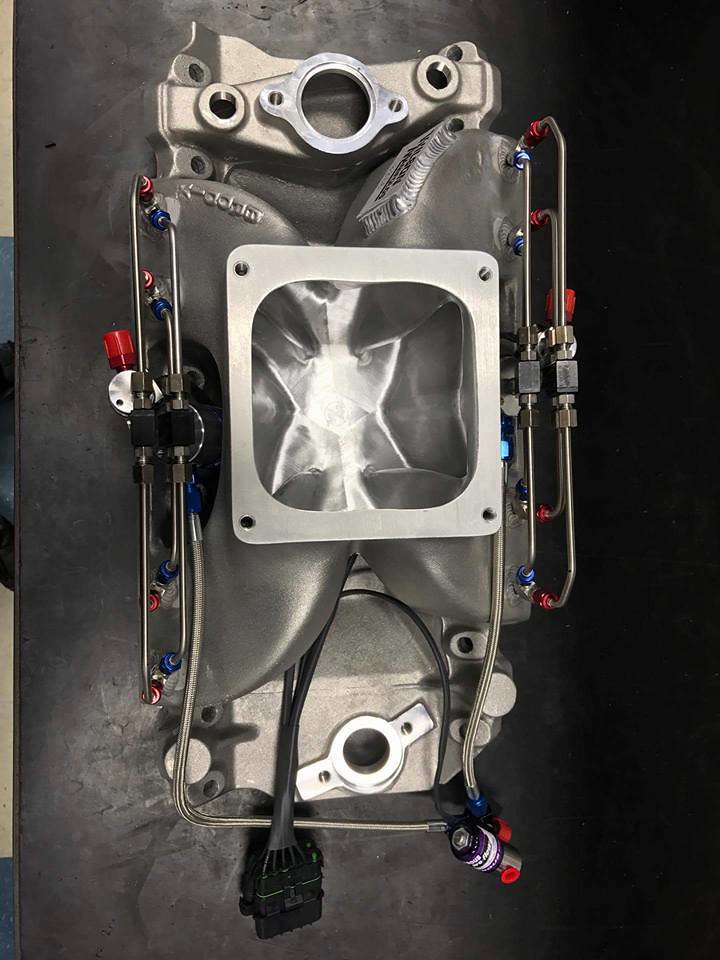
[url=https://flic.kr/p/RHXNaR]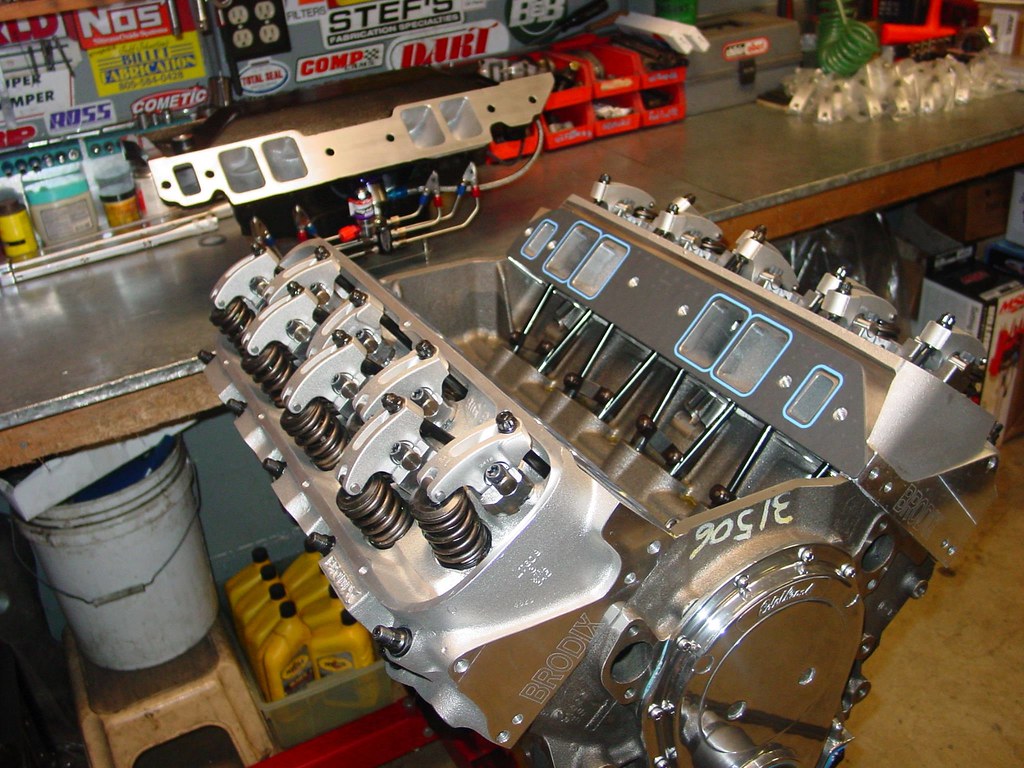
[url=https://flic.kr/p/SXU5xP]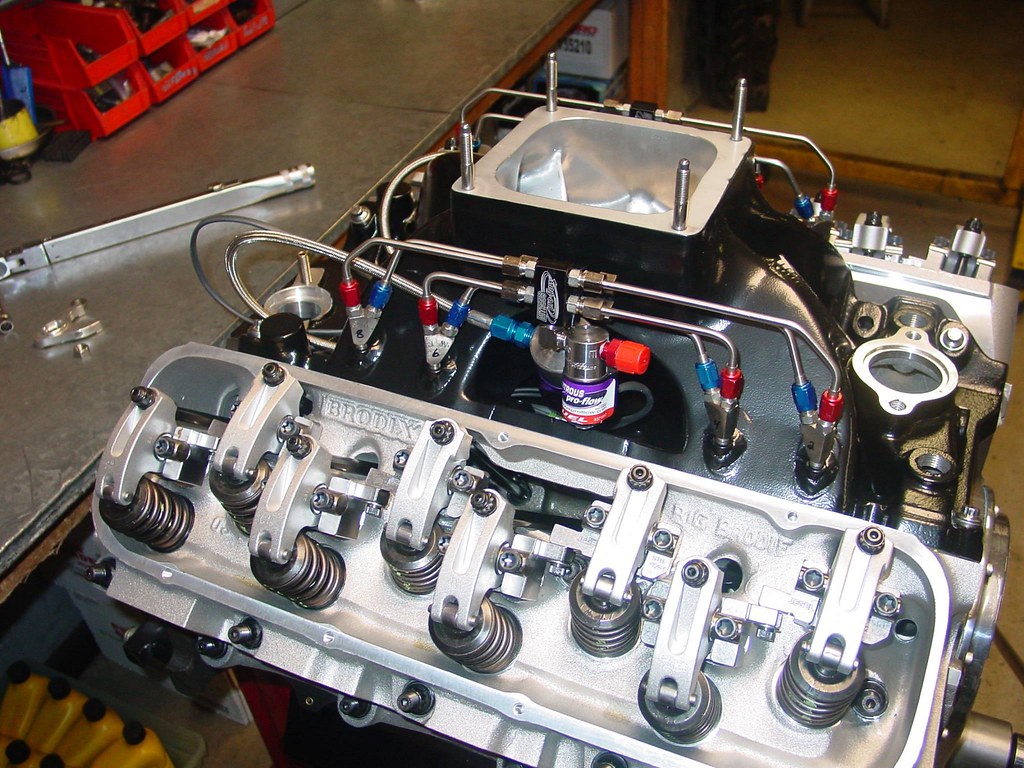
[url=https://flic.kr/p/SUkCuQ]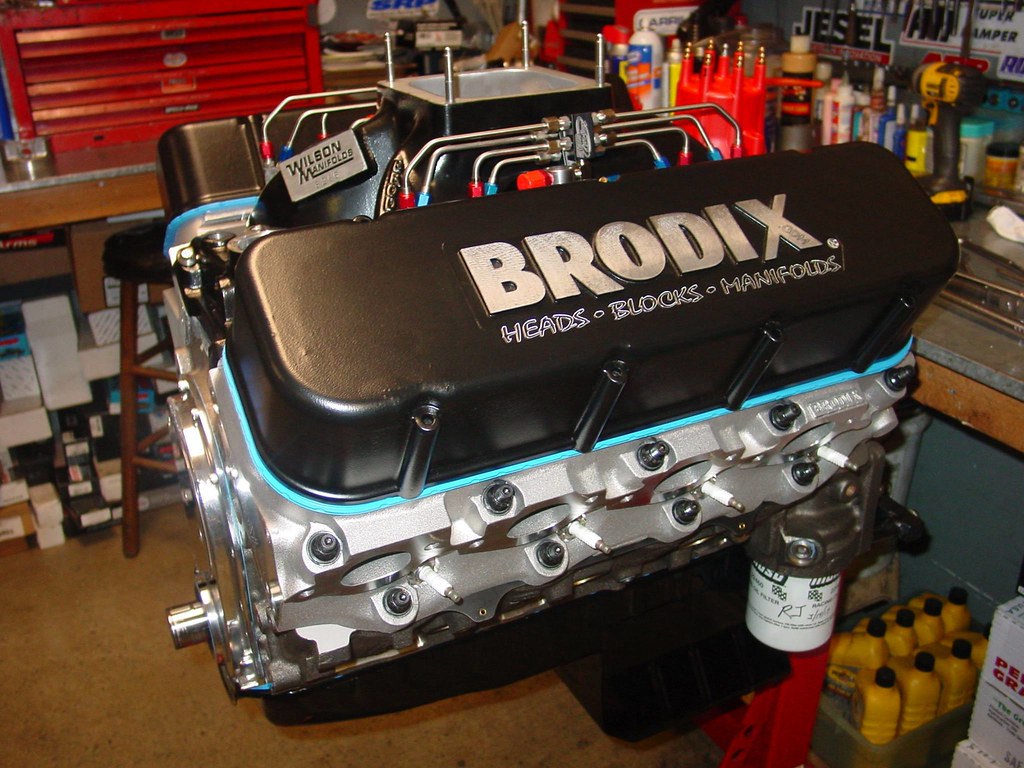
[url=https://flic.kr/p/SXU5qp]
[url=https://flic.kr/p/RFpVsU]
[url=https://flic.kr/p/RHXNaR]
[url=https://flic.kr/p/SXU5xP]
[url=https://flic.kr/p/SUkCuQ]
Last edited by Mewn; 03-15-2017 at 02:33 AM.
The following users liked this post:
MISTERZ06 (05-22-2017)
03-15-2017, 02:43 PM
#14
Melting Slicks
Nice touch with the black accents......that'll be good for running down to the store for a quart of milk.......
Good to hear from you, all the best.
Good to hear from you, all the best.
The following users liked this post:
Mewn (04-10-2017)
03-15-2017, 03:19 PM
#16
Instructor

I don't normally like this type of style because they usually looked pieced together...not the case with your build. Wow looks very cohesive and well done. Nice work and cant wait to see it done.
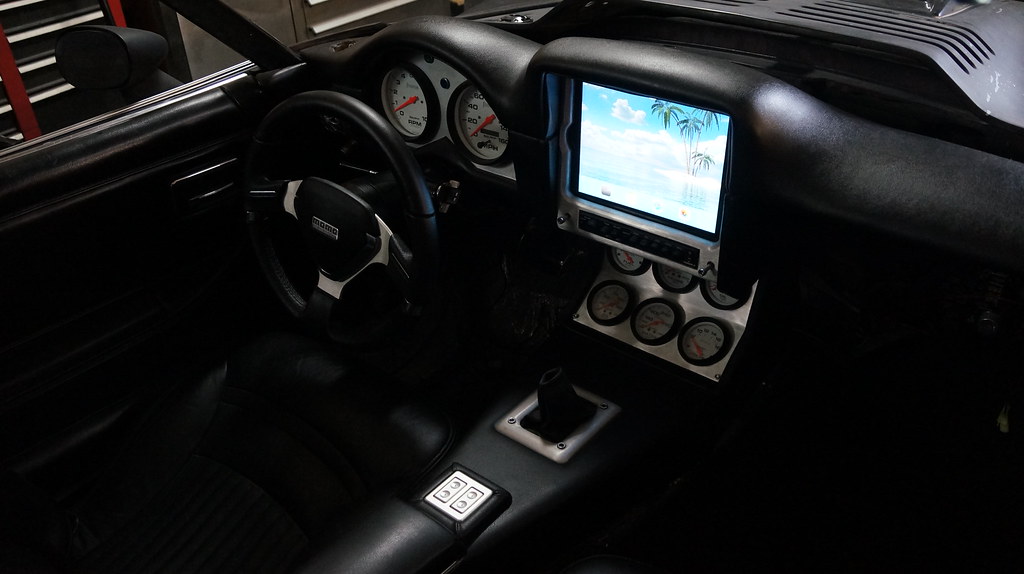
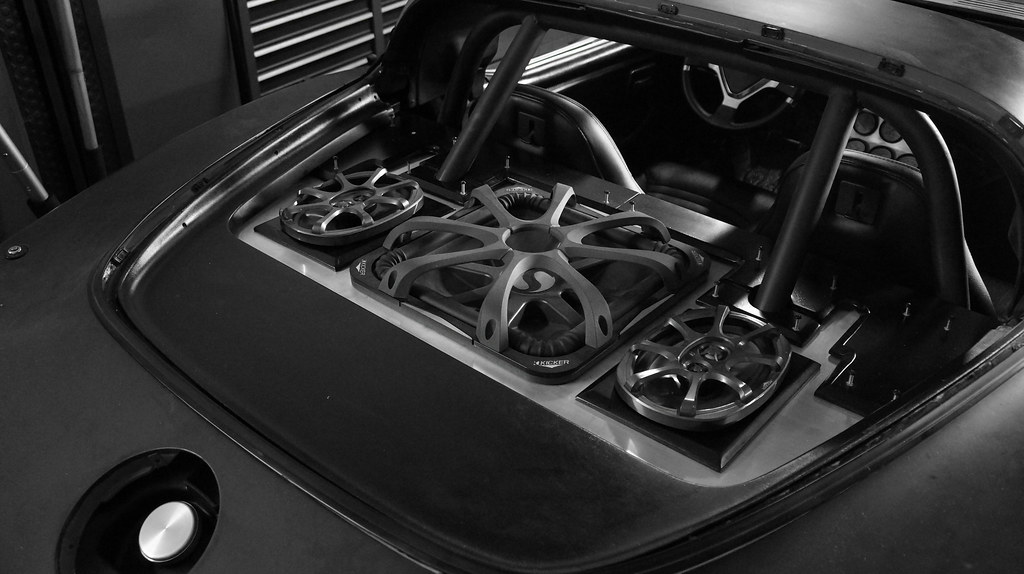
What did you use for the interior screen? Looks huge (in a good way)
What did you use for the interior screen? Looks huge (in a good way)
03-15-2017, 08:40 PM
#17
Pro
Thread Starter
Thank you,
It is a Ipad 2 from way back, Controls the sound system with a digital charger/interface with optical signal into a bit 1 processor. Will be due for a newer model swap in the future if I ever get to it.
Here is a link to the Corvette Blogger article on the install from back in '11.
http://www.corvetteblogger.com/2011/...-ipad-install/
03-16-2017, 11:02 PM
#20
Love the look at the front, but the rear I hope ends up like the front. I love the tight gaps of the front tires. I am not sure gas in the tank will be enough to lower it by 3". That would require a very weak spring.