When you click on links to various merchants on this site and make a purchase, this can result in this site earning a commission. Affiliate programs and affiliations include, but are not limited to, the eBay Partner Network.
Stamping on carb states it is a 1406 with what I guess is a serial number 0418. I checked the Edlebrock website, but it didn't give me any info other than the 1406 is a fuel efficiency carb. Think that may go better on the 1977 Monte Carlo I just got for my 17 year old daughter. It will be getting a nice calm 350. (IF anybody wants to see pix of that I will post them)
The other numbers stamped on it are a D-5 and this that I assume - I know that is dangerous, but I am think I am ok with this one- is the build date 1-24-98. ANybody got any ino? Any recommendations for the carb I should put on it? My goal is to be an on street driver and smoke my son's 91 Camaro Z28 and any Rustangs that think they are tough out there. The car will never be numbers matching, so my goal is to make it like I would have ran it when I was high school. So open to any suggestions.
I would blast them with the seals in place and then pop the pistons out, see what kind of shape everything is internally, I would expect that with a new set of seals they should be good to go. Put some brake fluid on the seals before you push them back into the bores JMPO. You can clean the calipers down with an air line after they have been blasted and then wash them with brake cleaner to finish. Remember to wipe them down again with thinners before you paint them. This is what I would do, someone else may have a better way.
Thanks for the input! Your PO is much appreciated! Will see if anybody else posts but want to keep moving. I have had this thing for a while and I want to get it done. The Muncie Rockcrusher is at the tranny shop being gone through (yeah, the cats peed on it too! UGH!).
You can use a small master-cylinder hone to remove any rust in the caliper bores---it probably won't take more than a few seconds at low rpm to have them shiny inside. I bead-blasted my calipers/then cleaned them in a parts-washing "sink"/then blew them out thoroughly with an "air-gun" at 90 p.s.i. to remove any blasting sand/media.
I fabricated a temporary sheetmetal "extension" for one end of my blasting cabinet so I could fit crossmembers/trailing arms/etc into it.
All parts including my rotors were blasted. Before removing the rotors for cleaning/re-packing with grease, snug the bearings and check the rotor faces with a dial indicator for side-run-out/do not drill out the original rivets---they keep the rotors "running true".
The driver-side frame where the bushing attaches may have a small bend causing the bushing not to fit correctly/you could straighten the bend yourself if needed.
DG - am looking at getting a used parts washer from a guy nearby. That will help. But don't know a thing about a dial indicator.. What be dat? Can I get one at HF? How de work? Any insight will be helpful! Also in order to straighten that driver's side frame, I am thinking I will have to take off my sway bar again and then turn the frame down from the inside until a level shows it to be straight? Eat a little boudan for me my Cajun friend!
Not sure this counts as working on the Vette, but I bought a used HF parts 'worsher" tonight! Woohoo! Now, can someone explain to me why I spent an hour cleaning it up? Wanted one these for years!
Also went to HF today (while the wife was at Hobby Lobby) and picked up some new wire wheels and a small dremel type tool with an assortment of brushes and stones. Spent about an hour on my caliper. It isn't done yet, but it sho enuf looks a might far piece better than it did before!
A dial indicator is a neat little instrument that can measure the amount of "wobble" (face run-out) when a rotor is rotated on the axle.
(I prefer to use a 1" travel dial indicator that has one "swivel clamp" and a magnetic base)
On the front rotor, the bearing nut needs to be temporarily snugged tighter than usual so there is no "looseness" between the rollers and the races, which would cause the dial indicator to give an inaccurate reading. (After the rotor "play/runout" is measured with the dial indicator the axle nut has to be "backed off" and "re-tightened" according to the maintenance manual to prevent "burning up" the bearing).
The indicator must be mounted on a solid surface and the tip of the indicator sliding rod placed perpendicular to the rotor face........the indicator should be positioned so that the needle moves one full turn on the dial face to "pre-load" the indicator in order to get an accurate reading, then the base and clamps should be tightened to hold the indicator in that position.
The dial ring can be rotated so that the needle tip and the 0 (zero) on the dial face line up. Then rotate the rotor clockwise slowly one full turn noticing how the needle moves left and right from the 0 (Zero). Using a permanent marking pen---rotate the rotor again and mark the spot with a "minus" mark where the indicator shows the greatest movement to the left of the zero. At that spot turn the dial face of the indicator until the zero lines up with the tip of the indicator needle.
(Now the indicator is set to read the "wobble" (run-out)of the rotor face)
Rotate the rotor clockwise slowly one full turn/the needle should gradually move clockwise showing any "wobble"-----then as the rotor is rotated, the needle should move counter-clockwise to the zero. The spot on the rotor where the most movement of the needle on the dial should be marked with a "plus" mark. This would be the maximum amount of "wobble" (run-out) that the rotor has.
There.....I think I got everything in order.
Last edited by doorgunner; 10-28-2015 at 01:26 AM.
[I]We interrupt this Corvette restoration for funding purposes! How do you pay for Vette parts? We save money by eating deer meat and not buying beef at the store! Takes some time, and we do the butchering ourselves, so for a few weeks now the garage and Vette get put on hold for hunting and butchering purposes! [/I]
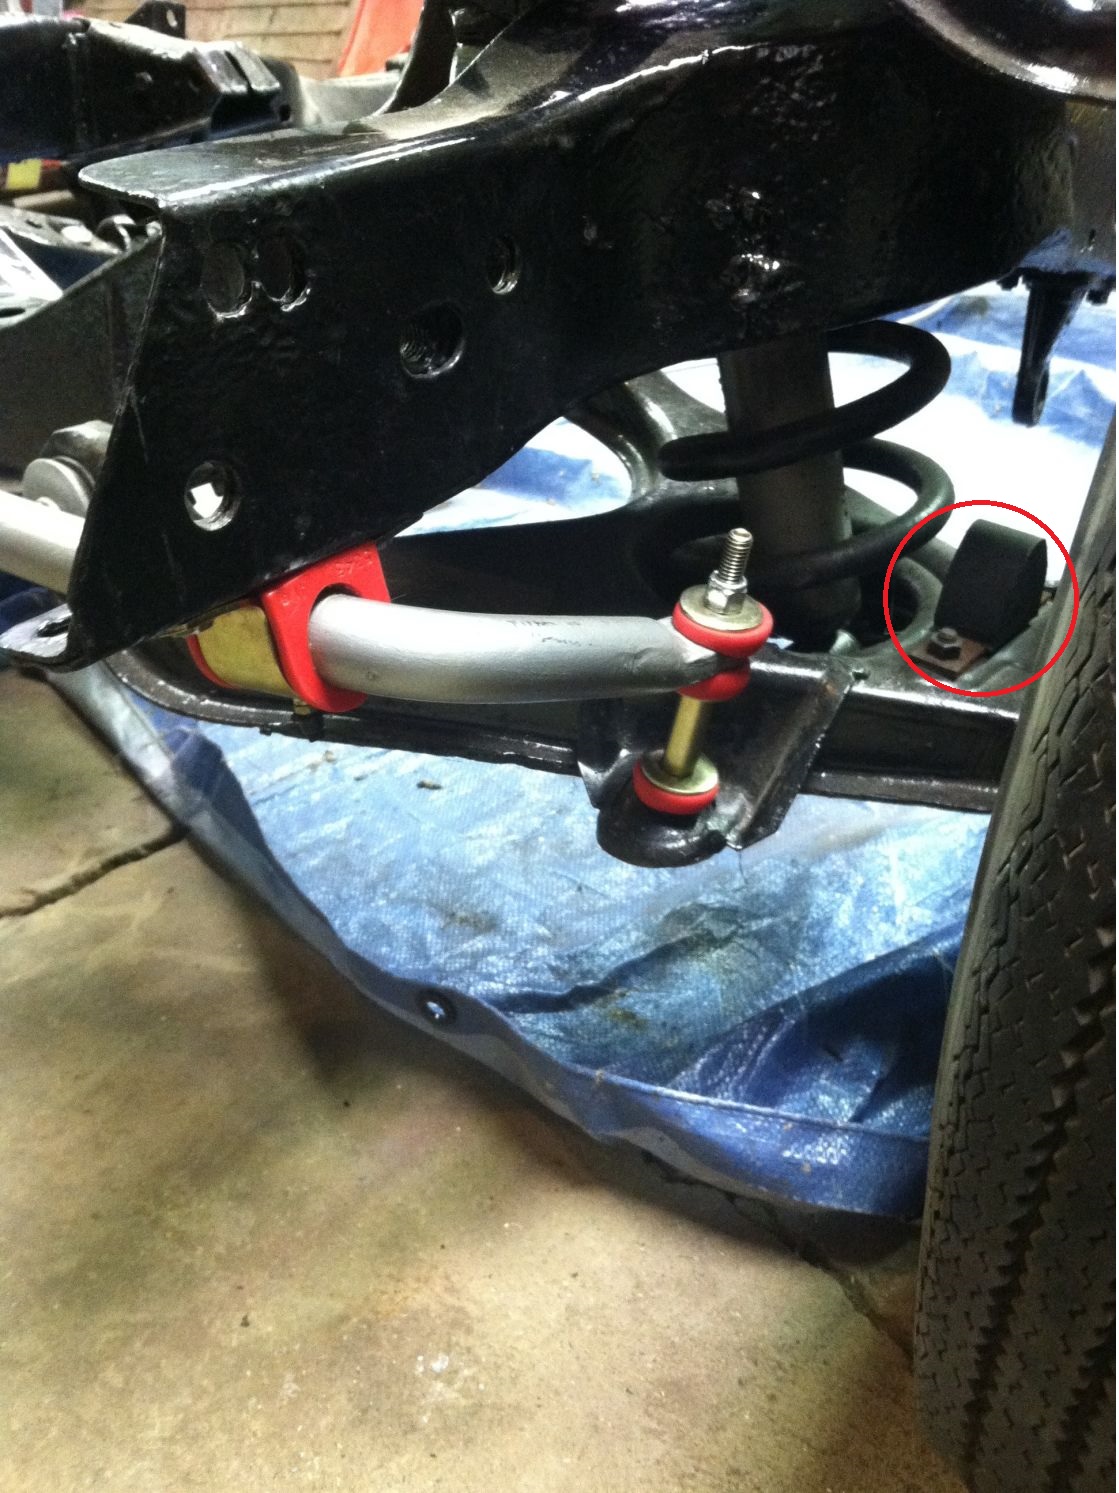
Regarding the gap on the driver side bushing for the sway bar, I notice that you have a tire on that side and no tire on the passenger side. You may want to wait until the frame is sitting on tires before being too concerned about the gap.
Also the AIM shows that the cut for the sway bar bushing should be facing toward the front of the car rather then the way you have them installed.
JR- Yes, it is bow hunting season here. We will hunt through December. We need about 5 deer to make it through the year without buying meat at the grocery store. And yes the rack is nice, not a monster, but a nice big body deer with lots of meat. Now to get a few tasty does and we will be in good shape!
Regarding the gap on the driver side bushing for the sway bar, I notice that you have a tire on that side and no tire on the passenger side. You may want to wait until the frame is sitting on tires before being too concerned about the gap.
Also the AIM shows that the cut for the sway bar bushing should be facing toward the front of the car rather then the way you have them installed.
Vettez73 - Thanks for the input about the gap on the sway bar. Had not considered that making a difference. That extra set of eyes and brains is helpful! Thanks, I will hold off on making any changes until I have both side settled and one the ground with tires! Note to self - be sure to check that out down the road!
I need to ask what AIM you are using? I actually have two of them, and neither of them show the cut on the sway bar bushing! Does it make a difference or is that just for being factory correct? I by no means want to do a Bubba job on this thing even if it isn't correct by NCRS. Guys, I must confess I am not used to paying THAT close of attention to that much detail, so be sure and let me know if I am going astray! And if a different edition of the AIM will make things more clear, I am ready to get it! Again, thanks for the eyes!
[QUOTE=vettz73;1590811367]You're also missing the bumper for the lower arm on the passenger side.
Yup, got that off, Dad only had one bolt through it! So I went ahead and took it off and determined to clean it and spill some paint on it when I go to re-rebuild the passenger side front brake. I will touch up the paint and get the rust and cat pee problems resolved. But again, thanks for the good eye!
Ok, Done with my Sunday work, not hunting tonight, so time to grab a cold one and get into the garage! Give me a break - remember I am a Baptist preacher! LOL! Insulin dependent diabetic too so it's gotta be diet! Great night to be in the garage. Not getting a lot done, but a little is better than nothing!

 10-25-2015, 09:43 PM


 /I]
/I]


 And if a different edition of the AIM will make things more clear, I am ready to get it! Again, thanks for the eyes!


