When you click on links to various merchants on this site and make a purchase, this can result in this site earning a commission. Affiliate programs and affiliations include, but are not limited to, the eBay Partner Network.
I think your best reference for the proper routing of those electrical wires and vacuum lines is the Assembly Instruction Manual (AIM) for your model year. You can buy them from most of the Corvette parts vendors. The drawings show how all assembly work was done at the final assembly plant.
2020 Corvette of the Year Finalist (performance mods)
2019 C3 of Year Winner (performance mods)
2016 C3 of Year Finalist
I know how you feel. Mine is stock and properly routed but doesnt look all that great. I want to see how everyone around here dressed theres up. I know the spark shield hides alot
I think your best reference for the proper routing of those electrical wires and vacuum lines is the Assembly Instruction Manual (AIM) for your model year. You can buy them from most of the Corvette parts vendors. The drawings show how all assembly work was done at the final assembly plant.
OK .. I will ... I already have one.. just thought it would be helpful if I saw a few photos... Thanks for your input.
Hi b,
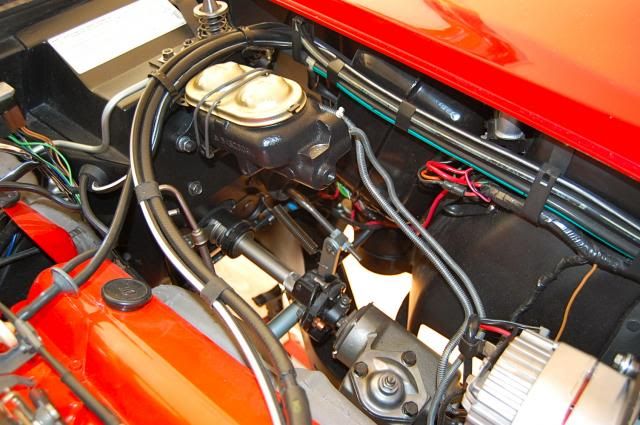
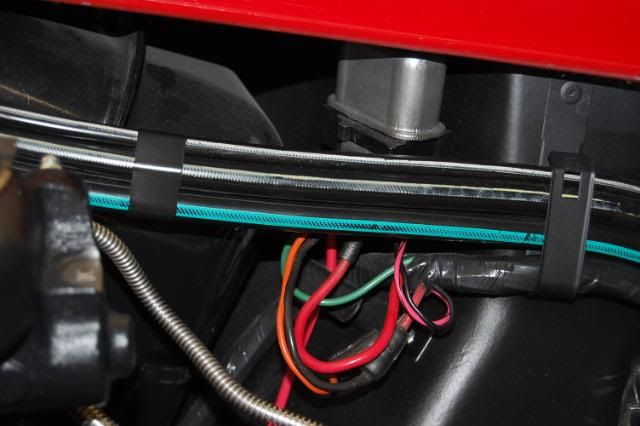
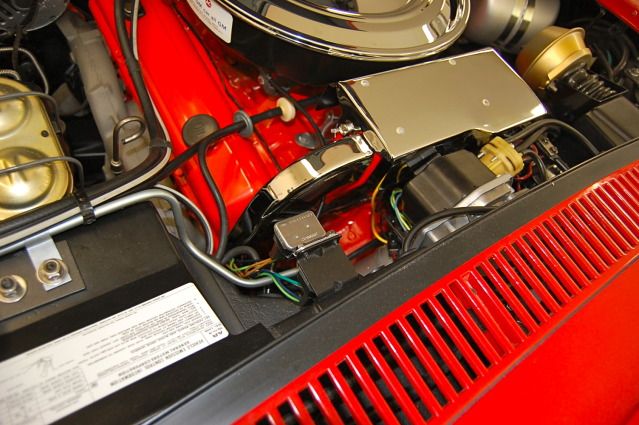
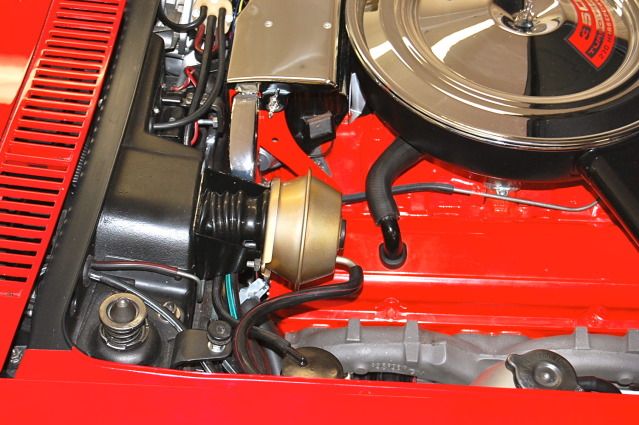
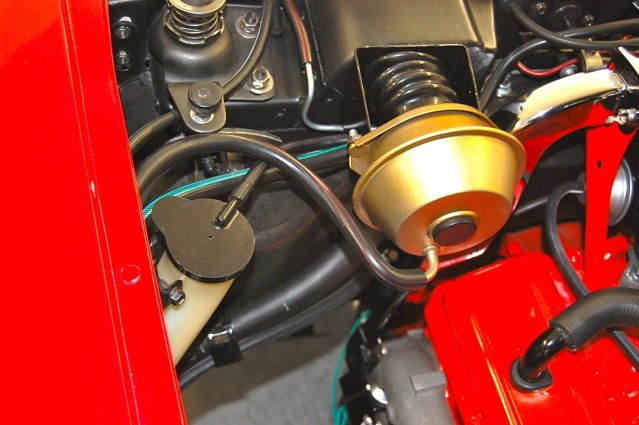
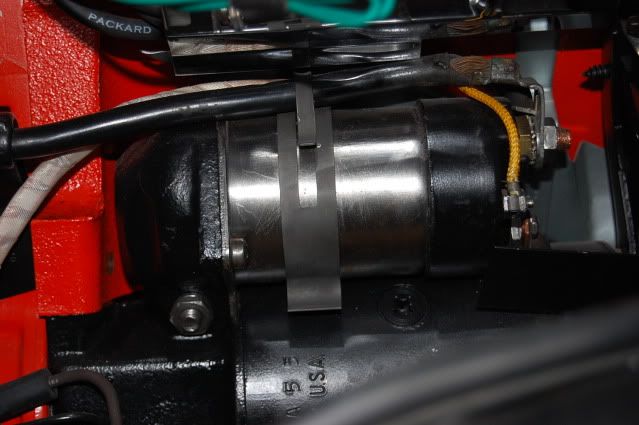
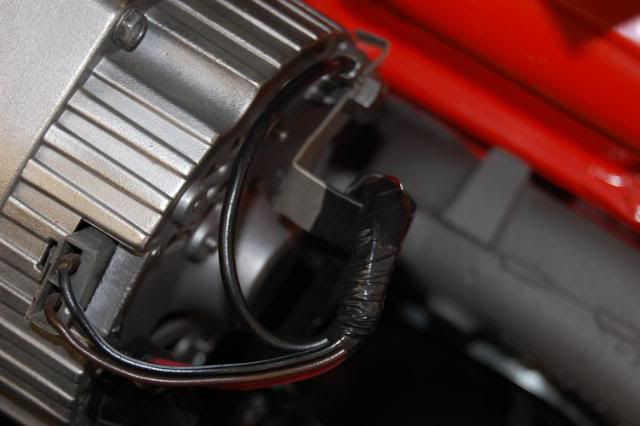
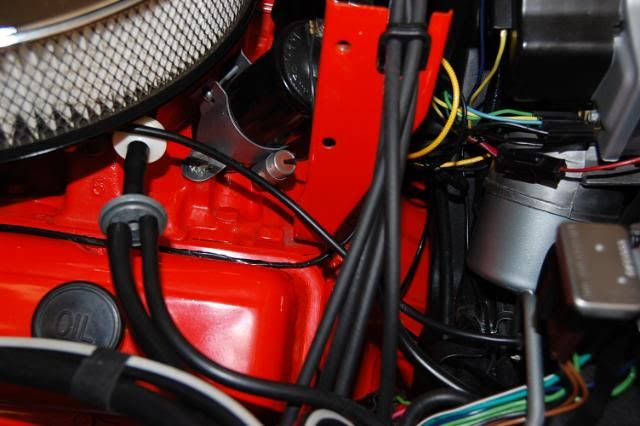
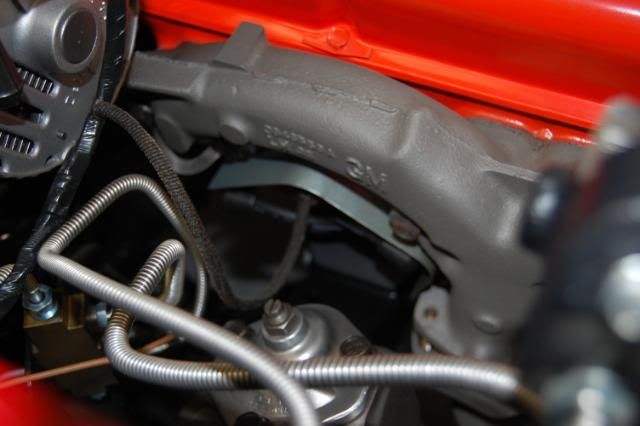
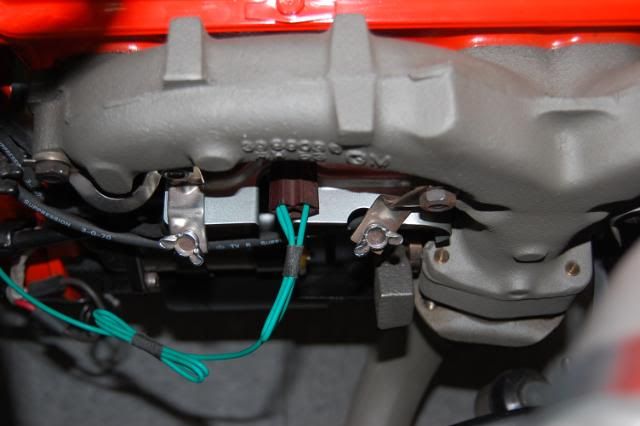
Here's some pics from my 71.
Perhaps these will be of some help to you though.
It doesn't have a/c so there are fewer vacuum hoses and one less harness to deal with.
In the 71 AIM I'd refer to:
UPC12: A12, A14, A15 'Vacuum Hose Routing'.
UPC12: A16, A17 Engine 'Compartment Wiring General Arrangement'.
Perhaps there are similar pages in your 69 AIM
Regards,
Alan
You're slipping, Alan. The two wing-nuts on the heat shield in the last picture don't line up exactly. If I were you, I'd pull the whole car apart and start over!
Hi b,
Here's some pics from my 71.
Perhaps these will be of some help to you though.
It doesn't have a/c so there are fewer vacuum hoses and one less harness to deal with.
In the 71 AIM I'd refer to:
UPC12: A12, A14, A15 'Vacuum Hose Routing'.
UPC12: A16, A17 Engine 'Compartment Wiring General Arrangement'.
Perhaps there are similar pages in your 69 AIM
Regards,
Alan
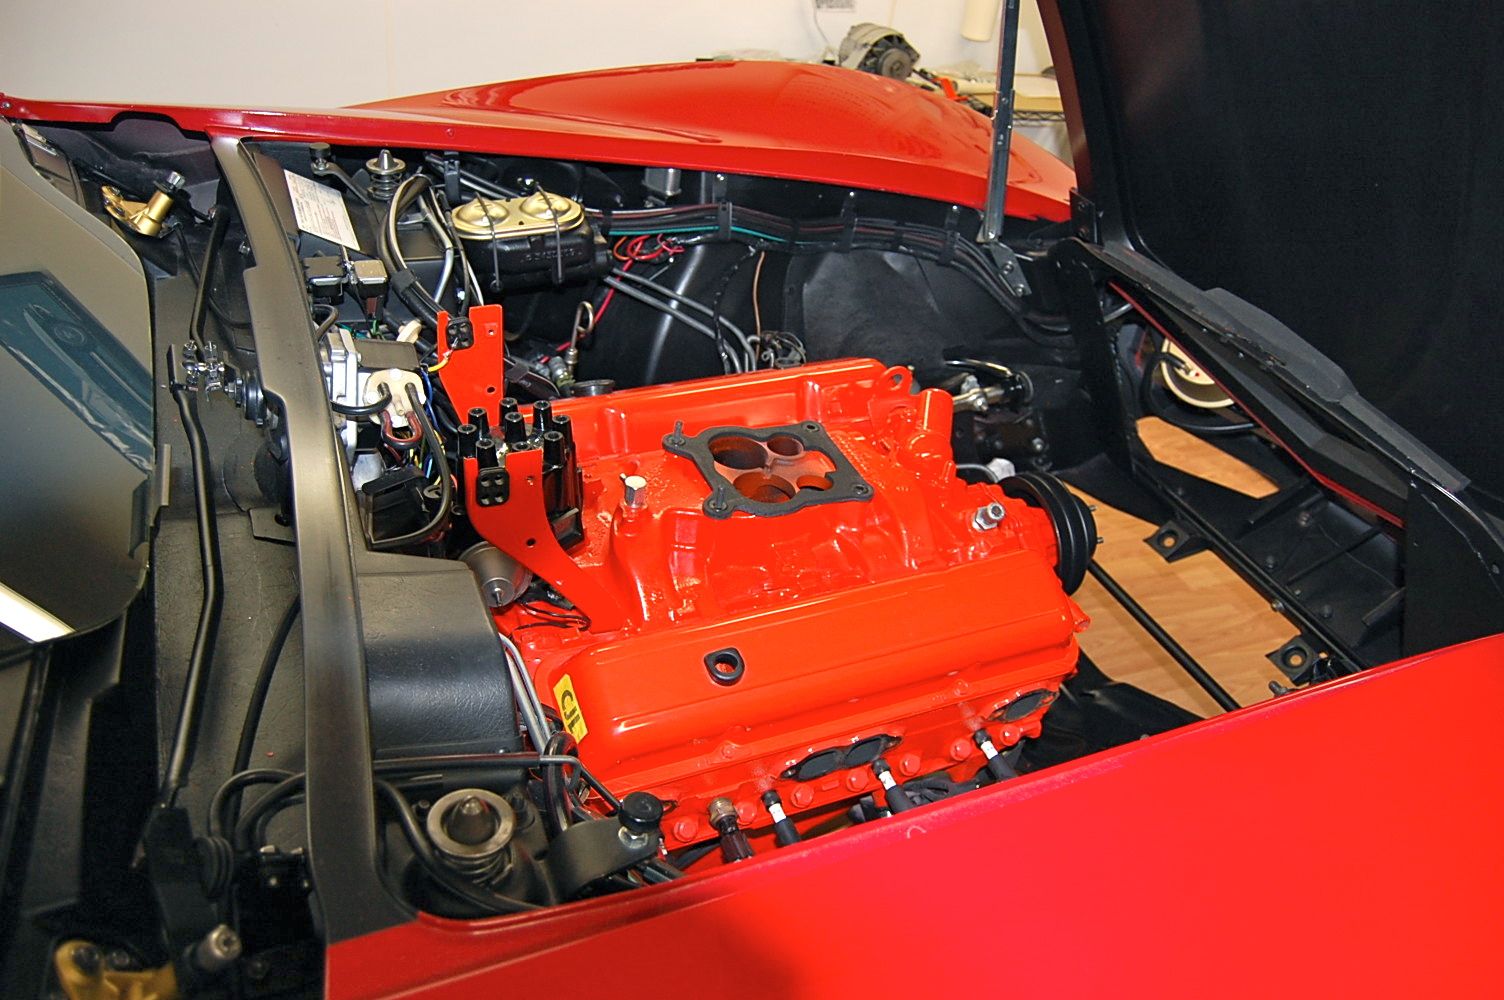
I LOVE to see photos of Alan71's car. But, I can guarantee you that NO GM factory-built C3 was put together like Alan's car. He has taken great time and effort to straighten/organize/align/pretty-up all wiring and hose installations under that hood. GM factory workers, on the other hand, just put them together as quickly as they could. Most of the time, they got it right; sometimes, they didn't. But, NOTHING looked as nice as Alan71's car.
His car IS a very nice reference vehicle to find where everything SHOULD be routed.
Alan's engine bay is cleaner than my kitchen counter.
Cleaning up EVERY wire and vac hose and arranging them better, then strapping it down with the correct straps, etc. will do wonders for the appearance of the whole engine bay. After a real good cleaning of your firewall, you may decide it needs no paint at all. It's kinda time consuming. I look for a long, long time before re-doing something, and sometimes still find myself undoing and re-doing work.
Another tip that will make things look much better:
Clean all the wiring insulation and rubber hoses with a rag dampened with lacquer thinner (this is NECESSARY if you have blackout paint on them). Once clean of paint/grease/oil/etc, wipe down all the wiring and hoses (including radiator hoses) with a polymer protectant like Nu-Vinyl [NOT Nu-Finish] or Meguiar's protectant for plastics. If they are really dry/dull, give them another coat.
Your hoses and wiring will look ALMOST as good as Alan71's!
Cleaning up EVERY wire and vac hose and arranging them better, then strapping it down with the correct straps, etc. will do wonders for the appearance of the whole engine bay. After a real good cleaning of your firewall, you may decide it needs no paint at all. It's kinda time consuming. I look for a long, long time before re-doing something, and sometimes still find myself undoing and re-doing work.
Carter
Thanks for your input Carter... Also it is comforting to know that I am not the only one undoing and redoing. Just striving for the excellence achieved by Alan.
Another tip that will make things look much better:
Clean all the wiring insulation and rubber hoses with a rag dampened with lacquer thinner (this is NECESSARY if you have blackout paint on them). Once clean of paint/grease/oil/etc, wipe down all the wiring and hoses (including radiator hoses) with a polymer protectant like Nu-Vinyl [NOT Nu-Finish] or Meguiar's protectant for plastics. If they are really dry/dull, give them another coat.
Your hoses and wiring will look ALMOST as good as Alan71's!
I've given up trying to make my Corvette look even ALMOST as good as Alan's.
Just trying to make it look nice and somewhat original.
Cleaning the wiring and hoses is a pretty quick process. You just need to wear rubber gloves and do it with an open garage (or outside) so the lacquer thinner fumes don't waste any more brain cells than we can spare!
That task was one of the more productive things I ever did to my Corvette.
P.S. My engine compartment clean-up was done with the engine installed! (intake/exhaust manifolds and heads were removed during a repair operation)

 11-28-2015, 06:27 PM


 mine looks like a monkeys butt


