When you click on links to various merchants on this site and make a purchase, this can result in this site earning a commission. Affiliate programs and affiliations include, but are not limited to, the eBay Partner Network.
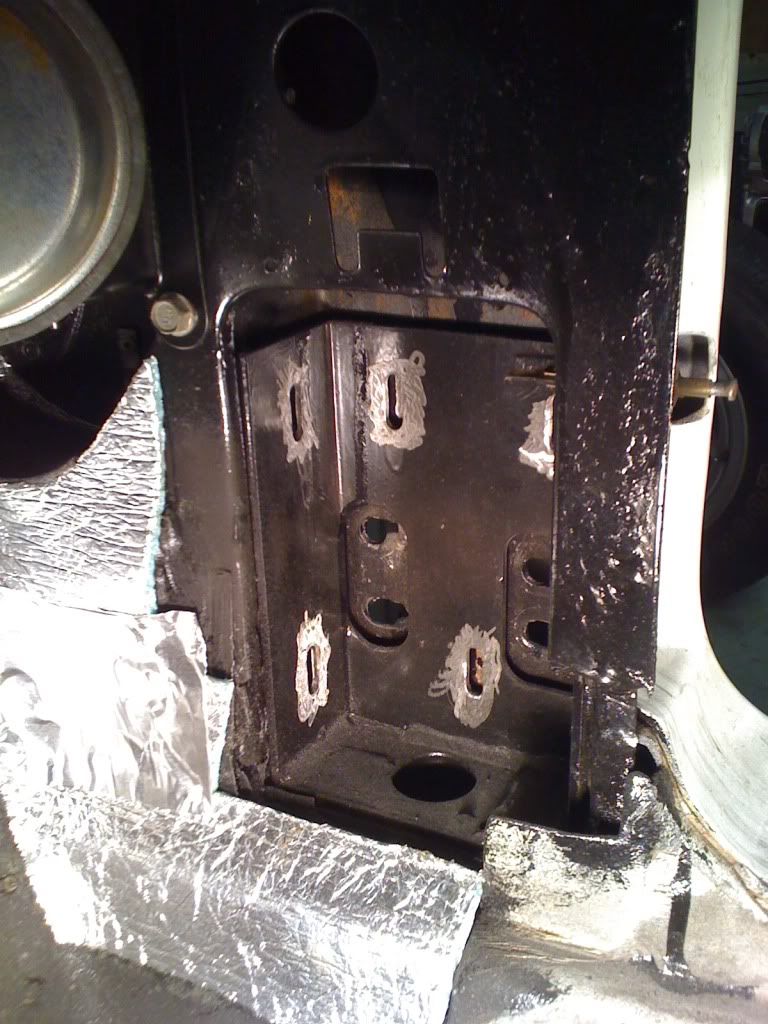
So, I've mocked everything up, tacking my parts in place. Not the prettiest... Anyway, I've also put the center channel in and used 5/8" bolts where the guide holes are. Basically following the instructions. Everything pops into place, but... The #2 and #3 inserts do NOT sleeve tight into the pockets. There's an 1/8" gap all around. I don't think that I can fill the plug welds. My thought is to cut the insert walls of their base and once the center channel is welded in place then weld the pieces together in the pockets. I'm going to call the manufacture tomorrow to see if they have any insight but I'm not sure how guys did this? I'll get some pictures up soon to help. I've put a thin coat of primer using SEM weld thru were weld laps are. Keep in mind, I don't do this for a living so...
Cut out the body mount areas in both A and B pillars. Clean up the old steel. I painted mine with POR15 along with the rest of the birdcage. The front section of the 3 piece rocker channel fits up into the A pillar from the bottom, the rear section of the 3 piece rocker channel fits up into the B pillar, and then install the center channel beneath them and secure it with 2 bolts which there should be 2 removable plugs for the bolt holes in the door threshold. Weld the center channel to the existing old channel cleaning the areas that are to be welded from paint, etc. Do not weld the front or rear sections to the center channel or anywhere else yet. Do 1 side at a time. Now remove the bolts from the center channels and mount the body back onto the frame and shim the mounts to get good door gaps, trial and error to get it right. Once the body is tightened to the frame, weld the front sections through the kick panels and the rear section through the body mount access panel in the rear wheel wells. Remove any flammable materials, carpet, etc. near the kick panels before welding.
How did you weld the inserts in? In pic one, you have the same gap that I have and I worry that I'll not be able to plug those - without burning through the thinner pillar metal. What settings did you use on your welder. I know this varies but I'm trying to get a good sense of where things need to be set at. Also the rear is just as bad and if I push the insert all the way back against the hinge pillar to get a good weld in the plug holes that the #3 mounting hole does not match up. So, two options here imo...I could push it back, weld it and grind out the mounting hole where it overlaps so that it's the shape it should be...OR I cut the bottom plate off weld it where it fits the mounting hole and then weld the sleeve part etc.... Would love to get your thoughts on this.
How did you weld the inserts in? In pic one, you have the same gap that I have and I worry that I'll not be able to plug those - without burning through the thinner pillar metal. What settings did you use on your welder. I know this varies but I'm trying to get a good sense of where things need to be set at. Also the rear is just as bad and if I push the insert all the way back against the hinge pillar to get a good weld in the plug holes that the #3 mounting hole does not match up. So, two options here imo...I could push it back, weld it and grind out the mounting hole where it overlaps so that it's the shape it should be...OR I cut the bottom plate off weld it where it fits the mounting hole and then weld the sleeve part etc.... Would love to get your thoughts on this.
It's been 7 years since I did the job, so I don't remember gaps and how I had the welder setup. They may have tightened up after installing the body on frame, then welding the A and B pillars. I know I did not have to alter the inserts. Give the Manufacturer a call with your questions and let us know what they say.
Called Caledonia and talked to Gary. He was very helpful as I described my 'adventure' and the concerns I had with the gaps I was seeing with the pillar inserts. Basically he said to get the center channel insert welded in, and mount the car back up before welding the pillar inserts and that the bird cage will flex a bit and should close up the gaps. He was very emphatic about that. Mostly because (I think) of the body and how it sits on the dolly...though the way my dolly is built (mimicking the chassis mounting locations/specs) it should not be all that different. I will say that my dolly does not have the shims the chassis had so it's not sitting exactly the way it was on the car. It is however sitting better IMHO. Door gaps look better than before etc.
So that's that. Still some debate in my mind about how much the body is off from how I have it sitting on the dolly.
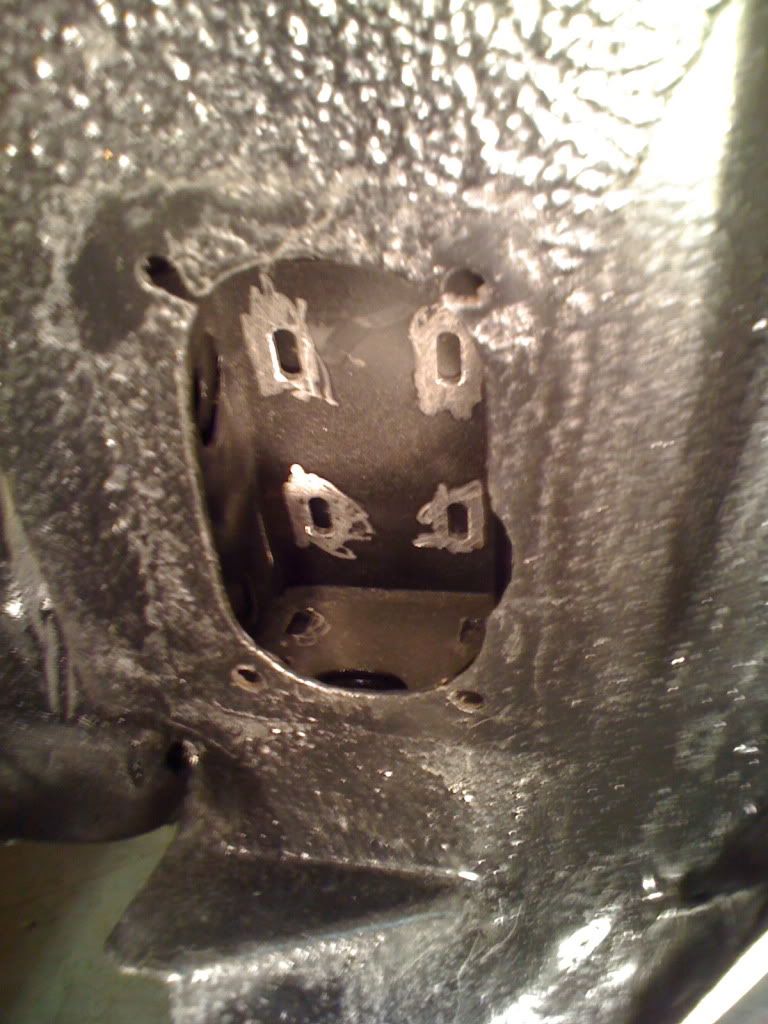
This is the gap I'm referring to to the back of the insert. This is with the body mount holes lined up.
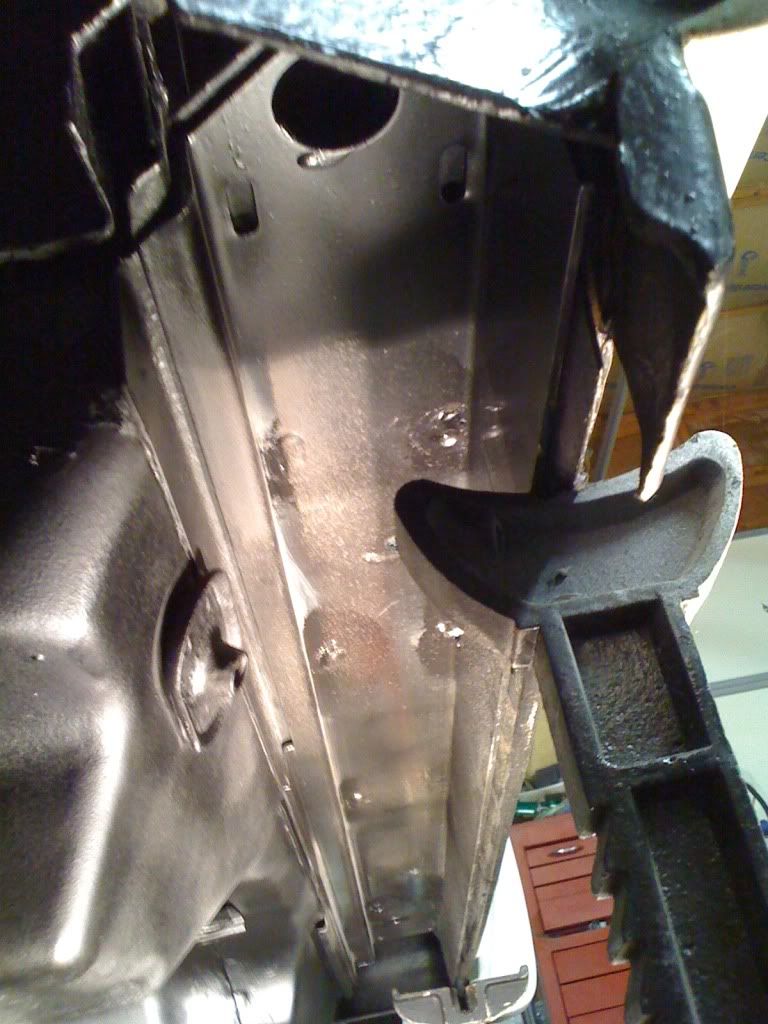
Obviously some clean up and some more welding but you get the idea. Again, I'm doing the best I can. Big difference in laying a bead on flat stock vs being contorted and vertical welding. o.O
I got the center channel in and everything so far seems to look pretty good. Making sure everything is primed and using SEM under lap joints etc. I wish the pillar channel looked better so I'm still working on grinding and welding. I'm learning that my garage is not a fabrication shop, harbor freight is awesome, and that my neighbors thin I'm crazy with all the grinding, welding, grinding...
Kind of a side note, but I was wondering the other day about the seem/adhesive sealer and thought I'd ask what's good to use? I have a tube of Dynatron 550. Made by 3M I think? Once things look good I need something to seal the back-rest and pillar, and just redo all the obvious seems around the area - including the hinge pillar and other areas that look like they need filled. Any recommendations? Also, can this stuff be used to seal the panel back up etc or do I need to use something different? A ways off from that but I try and get the stuff I'll need before I need it. I'll be looking for some 2-part when I re-adhere the nose panel between and forward of the lights...
I will say that my dolly does not have the shims the chassis had so it's not sitting exactly the way it was on the car. It is however sitting better IMHO. Door gaps look better than before etc.
this part is what would worry me , the body has shifted its shape . Especially when the guys selling the repair pieces say to put it back on before welding . I can understand you not wanting to move it around anymore than necessary but to weld it up and make it solid again , without doing all you can to do it the correct way is a huge risk .that's just my opinion but you have moved it once without any dramas ,now its more solid with the patches so putting it back on isn't really a big deal and the outcome has got to be less risky. When the gaps close up as stated by Gary then you will know you did it properly .
FWIW, what you have done looks good to me , you could end up cutting rust out of old vettes for a living
As for the sealer ? I'm waiting to see what's recommended as well
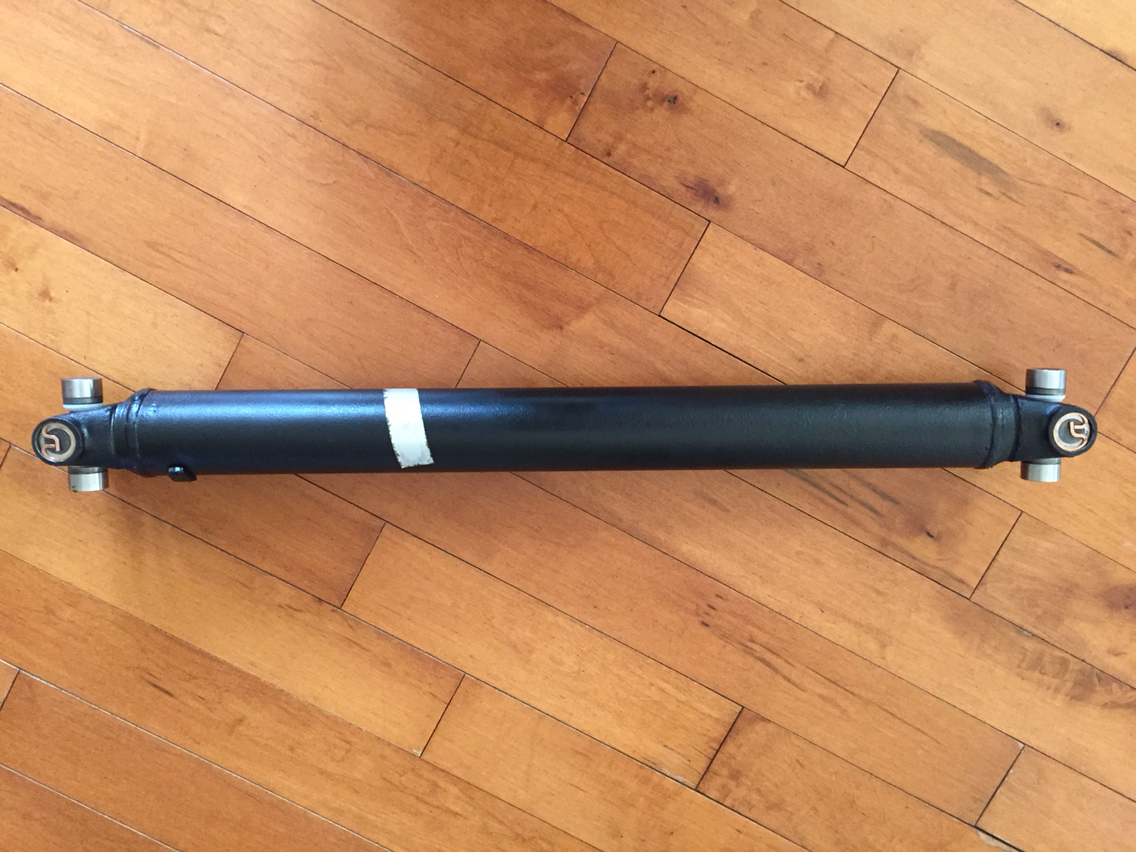
I took a break from the body this weekend and cleaned, panted, and rebuilt (new u-joints) the driveshaft. Looks pretty good - short project that made me feel like I got something accomplished!
No joke on scope creep!!! It'll get ya for sure! Its so easy when everything is just right there to fix! I'm doing the brake lines and fuel lines...give it a good cleaning and a bit of chassis paint and call it good. Oh, and the plugs!! There MUCH easier to get too. Thats my line in the sand.
I'm a ways off from worrying about this, but I managed to break one of the tabs on the headlight housing. Should I hunt for a new one or is JB welding this acceptable? All the other bolts (5 on each) came out fine but this one...I didn't have good enough light when doing this so I was going purely on feel...and it was turning - ugg.
Look on ebay. There are a lot of them for a pretty good price. The ones for the late 70's early 80's cars are much cheaper than the ones for '74 and earlier maodles.
Ken
An update. I took some time from the body and did some work on the chassis and a few other things - taking advantage of the body being off (good cleaning and paint, fuel lines, brake lines, spark plugs/wires, drive shaft u-joints diff snubber cushion, new #2 and #3 mounts/nuts, etc.) Back at the body this weekend and removed all the bad metal and prepping for wire brush, blast, and welding. Once the the passenger side is welded up I'm going to blast and repaint the core support...then it's back together! I'm equally as nervous as when I was prepping for the lift!
This stuff works pretty good. I didn't want to paint the fuel/brake line bolts so I blasted them and re-coated them in black oxide.
After being coated and being set to dry.
New Packard wires. The front two are a PIA trying to get through the motor mounts.
Cleaned but before wire brush etc.
after paint...but before I replaced the #3 mount block with a new one.
your welds look nice on that body mount ,coming along nicely .
Can you see now how some people get carried away and end up doing a lot more work on their cars than is really "necessary". Not saying its wrong because I do it all the time ! for example , there's no way I could leave that fuel tank as is ,it would rust treated and bright silver or body colour painted by now
JB Weld will not work here. It can be TIG'd back if you have the part that is missing in the photo.
Originally Posted by nix1981
I took a break from the body this weekend and cleaned, panted, and rebuilt (new u-joints) the driveshaft. Looks pretty good - short project that made me feel like I got something accomplished!
I can see you used SPICER U-joints.
Hopefully you marked the drive shaft so you know which end to put your transmission yoke on and how it as to also go on the u-joint correctly.
Glad you got the welding done....I know you have to feel good about that.
your welds look nice on that body mount ,coming along nicely .
Can you see now how some people get carried away and end up doing a lot more work on their cars than is really "necessary". Not saying its wrong because I do it all the time ! for example , there's no way I could leave that fuel tank as is ,it would rust treated and bright silver or body colour painted by now
The tank is driving me crazy...it's in good shape really. Just some light surface rust...but ITS RIGHT THERE!!! I reasoned that I could easily drop the take once the body is on and I've had nor seen any issues with it. I'm REALLY trying to draw the line in the sand somewhere.
JB Weld will not work here. It can be TIG'd back if you have the part that is missing in the photo.
I can see you used SPICER U-joints.
Hopefully you marked the drive shaft so you know which end to put your transmission yoke on and how it as to also go on the u-joint correctly.
Glad you got the welding done....I know you have to feel good about that.
DUB
Yep! I took pictures so I knew how everything was oriented. The weight and sticker were toward the back. As far as the joints...I think it can only go on one way? Or did I miss something...my luck I'll take my maiden voyage down the driveway and CLUNK.
I do feel much better about the welding. I've still got a bit left, but I kind of have a feel for how it's going. I did notice that metal temp played more of a role in a good weld than I'd thought. I noticed that the warmer the frame was (a little propane) the better the weld on the mounts - with the garage temp being 35-40. It was cold that day. The cage and the thinner metal is still a bit of a challenge for me.
draw the line after the tank . if your exhaust is old you will have trouble getting it out of the way to drop the tank when its all back together .are you putting new rubber hoses on there now ?
Yep! I took pictures so I knew how everything was oriented. The weight and sticker were toward the back. As far as the joints...I think it can only go on one way? Or did I miss something...my luck I'll take my maiden voyage down the driveway and CLUNK.
I do feel much better about the welding. I've still got a bit left, but I kind of have a feel for how it's going. I did notice that metal temp played more of a role in a good weld than I'd thought. I noticed that the warmer the frame was (a little propane) the better the weld on the mounts - with the garage temp being 35-40. It was cold that day. The cage and the thinner metal is still a bit of a challenge for me.
YES...the universal joint can only go in one way. But how your yoke is attached and on which end can make a difference in a vibration or not.
YES..On some thick metals..I also pre-heat the metal to make my welds get really good penetration if I have a concern. I have a serious welder that can weld really thick metal...but getting it out and set-up sometimes is not worth it when I can warm up the steel with my torch and get done. It all depends on what I am welding and how much welding I need to do.
Ok, so back to work on the rocker channels...yay! I will say that this side seems to be going much better. Either it was not as bad, or I'm getting a bit better. I tried to get more Colorado cuts vs. Texas which was a big help and made the fit and weld much cleaner. Next is prepping and welding in the center channel and then it's really ready to go back together. Almost!?
There are a few things I really want to make I do before everything goes back together - mostly sealing everything back up. I've drilled out and re-riveted all the old rivets that looked suspect. Mostly around the floorpans. I've got some 3M body sealant that I'll use to reseal the back panel and some other areas in the interior. I'd also like to seal the exterior part of the back panel and around the #3 pockets where the glass meets etc (you can see the area in the picture that I want to pull back a bit and squirt some new adhesive in). I've got the front panel near the front headlights I need to do and was going to use the Fusor product. Any suggestions on what I should use in these areas???? Another question...As I plan my reassembly, what do I use to put the bumper clips back on? They sell some clips but I'm not sure if those work with the brackets that I still have existing in my bumper clips or not? Or if I should just go get some bolts? Some suggestions on this would be great too!
are you talking about the front panel being the big headlight support panel ? if so I used Lord Fusor 116 . I have about 3/4 of a tube left but I have to throw it out as its too old. The new version is T21 , just check that is correct as I haven't used or bought any yet. I have a headlight bar to go on as well !!! I have had no problems with the 116 except you need strong hands to get it out of the tube !!!
I also dug out the old dried up sealer and put new fresh stuff where I could ,mainly inside behind the seat area(s).
I just bought new bumper bracing for both ends as I snapped off most of mine taking it apart. I went with the idea that you needed a long brace with studs coming off to give support along the entire length of the flange faces . I think it was 4 pieces for the back and 4 for front .I never bothered for the stainless , I figured the originals lasted 38 years until I messed with them and just zinc plated new ones will do the same .Plus I don't plan on doing that again
the Texas vs Colarado is just a size (of patch plate) comparison thing ?
I use the SEM BEIGE catalyzed flexible seam sealer where I seal up stuff...but that is just me.
I also use the SEM general purpose adhesive to bond the headlight support beam back in. I like it because it is epoxy based and that alone in itself...when properly prepped and applied ...stops rust from developing. Once again...that is just me.
If you need a gun for the SEM products...from what I was told by a friend who worked for SEM...that the area rep in your area can loan you the gun to apply it.
You lost me on the 'bumper clips'...post a photo of what you are referring to.
AS as for the reference pertaining to 'Texas' and 'Colorado'...it is referrign to the shape of those states...NOT the size of them.

 01-22-2017, 06:14 PM


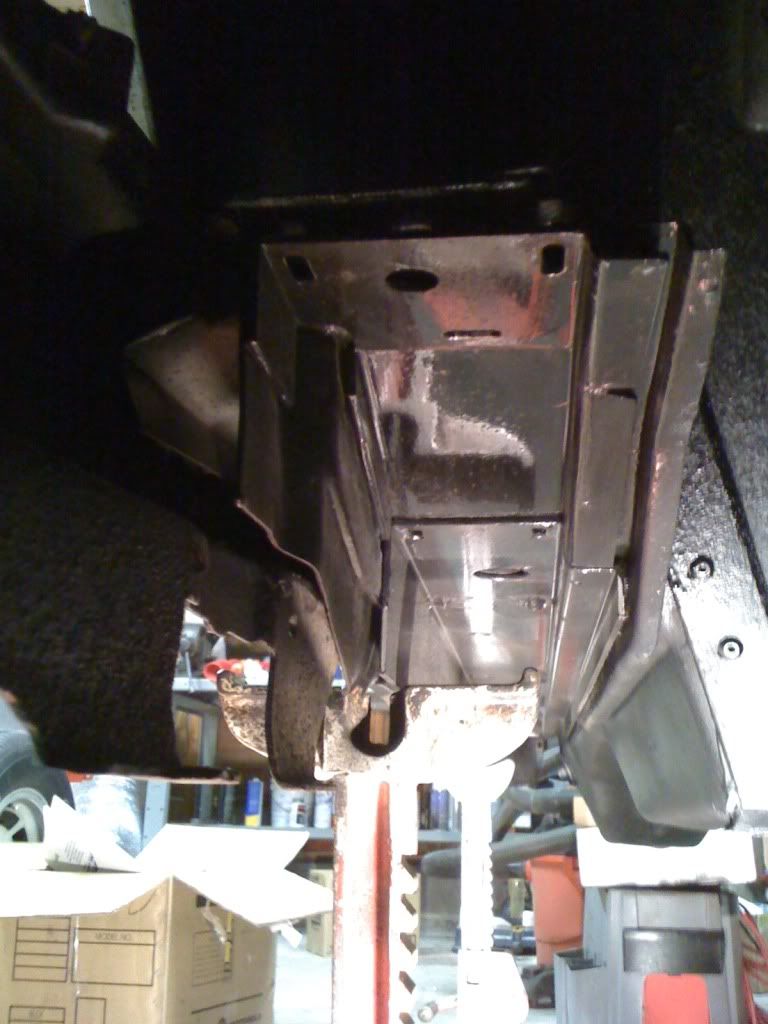


 I will say that this side seems to be going much better. Either it was not as bad, or I'm getting a bit better.

