
Speeddirect Clutch Linkgae - Install pics and a few critiques
 09-24-2009, 07:17 PM
#1
Le Mans Master


Thread Starter

So, I ordered the Speeddirect clutch linkage last week, got it Tuesday and installed it today. They have made some changes and I do have a few critiques.
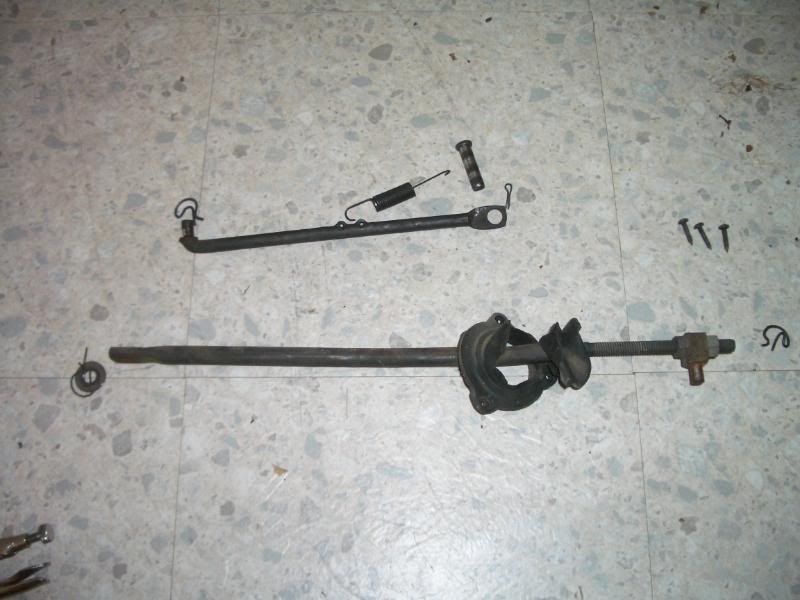
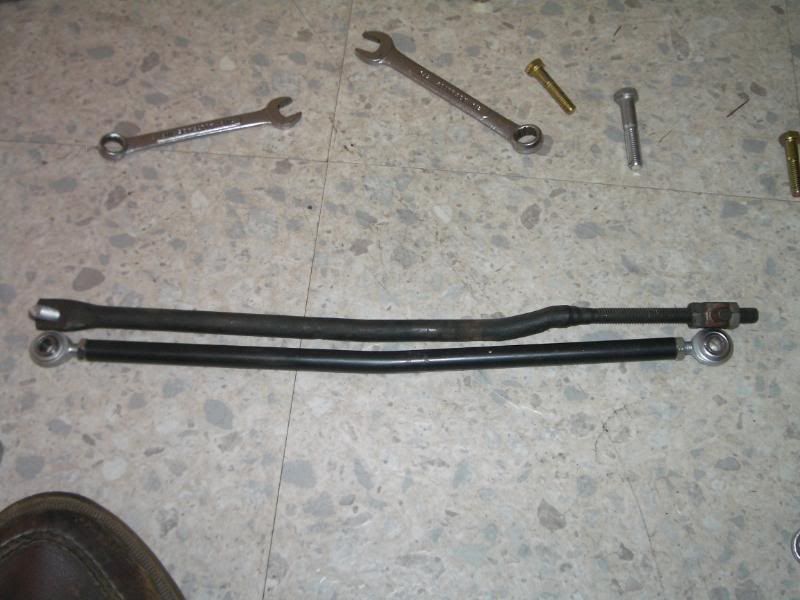
Old Linkage:
New linkage (new boot from Zip not shown):
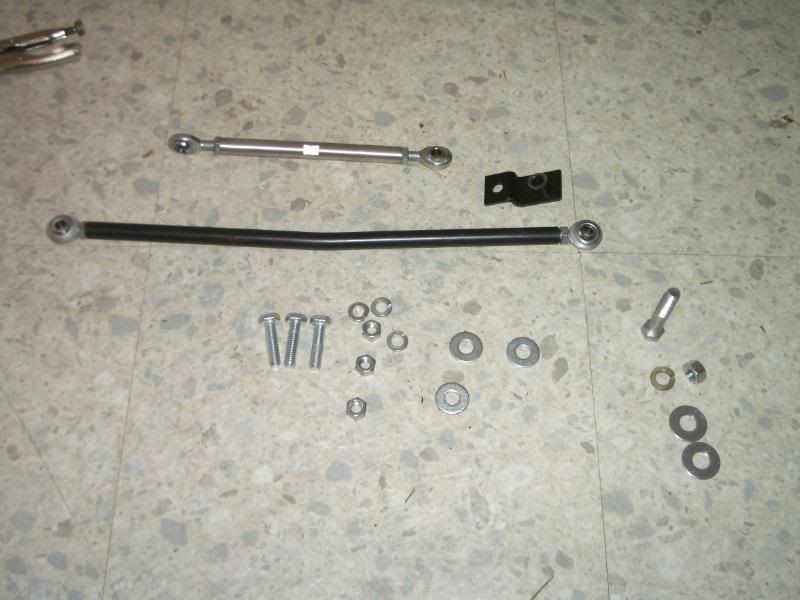
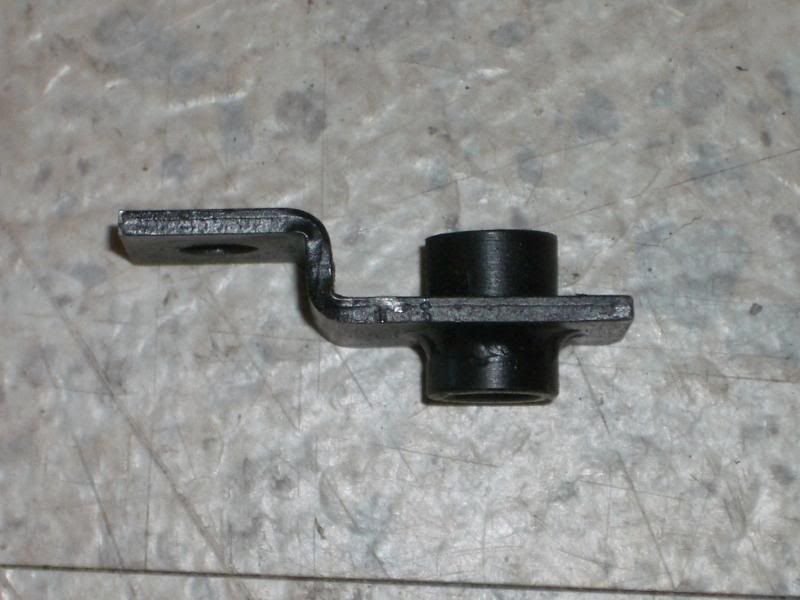
Speeddirect has changed the bracket that connects the lower rod to the clutch fork. This is a better design but there is an issue I will mention later.
Critique #1:
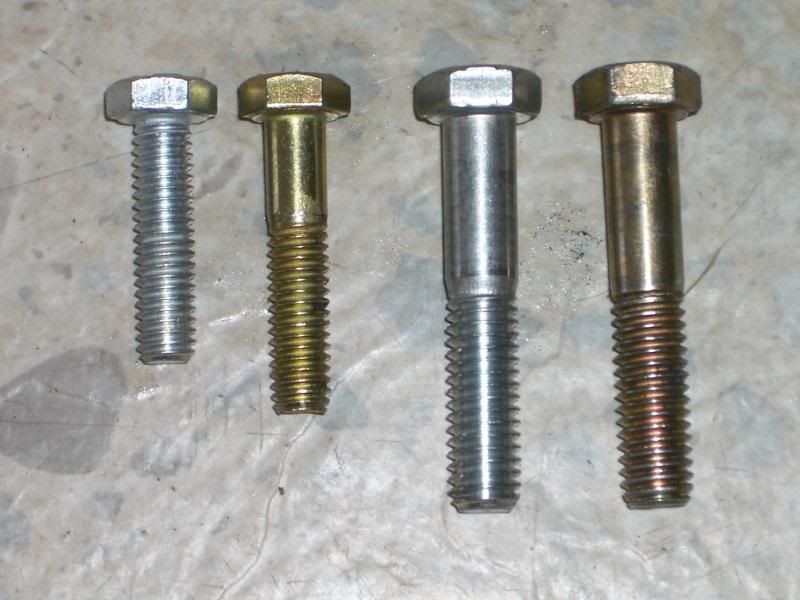
SD includes grade 2(?) bolts. I went and bought grade 8 bolts for peace of mind (also nylocs). The new 5/16" bolts are slightly longer but they have a shaft area that I feel is better for the rod ends to ride on.
Measuring the upper rod length. The upper rod has a simple bend vice the complex bend in the stock rod. Since the upper rod has this bend, it will be hard to use it to adjust clutch free play. Free play will be adjusted with lower rod.:
Critique #2:
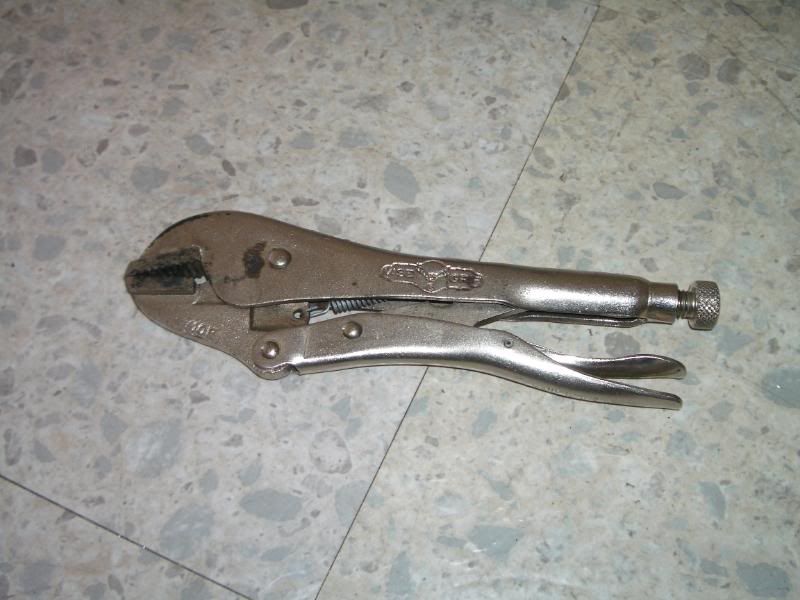
The upper rod has no flats to stop it from turning when tightening the lock nuts. Here is my tool to hold the rod while tightening the nuts.
Measuring the lower rod as a starting point:

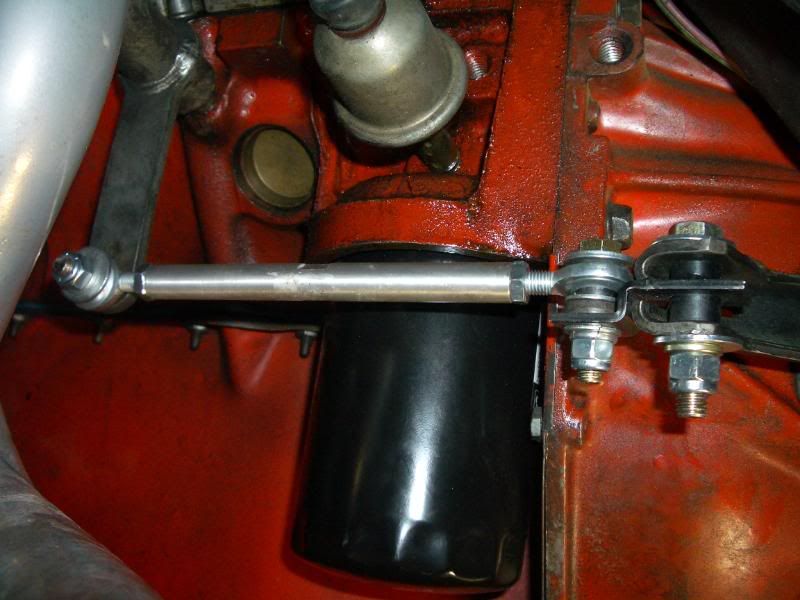
Critique #3:
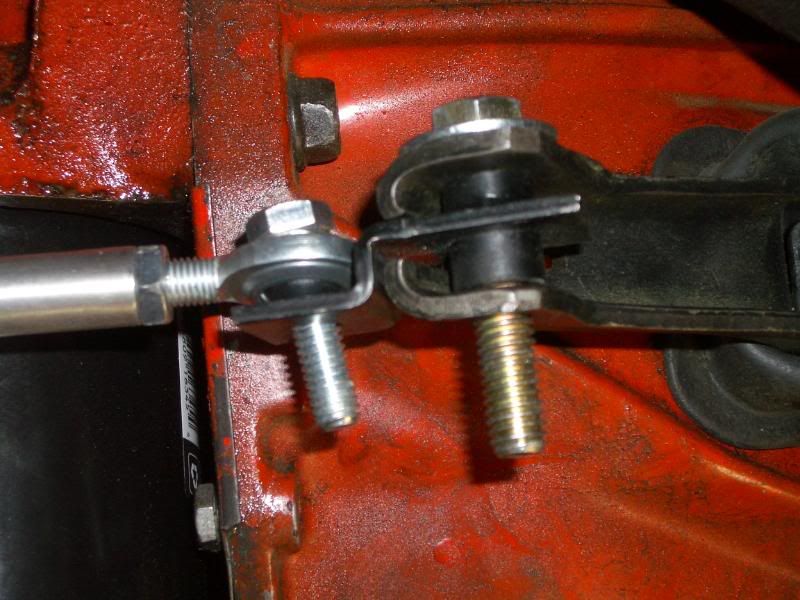
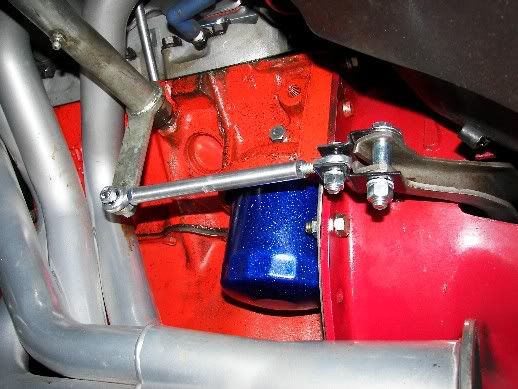
I think this is how the new linkage hooks up. Instructions were unclear and picture in instructions sent (and on website) refers to old bracket system.
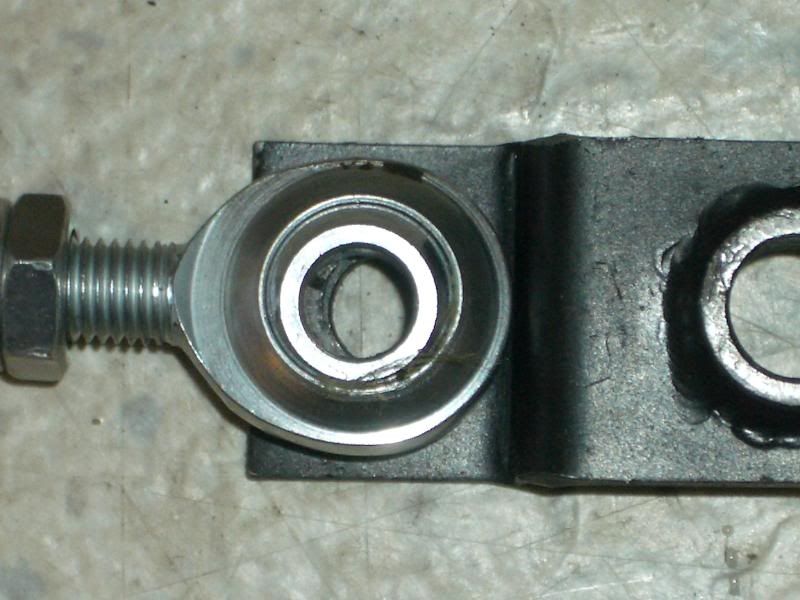
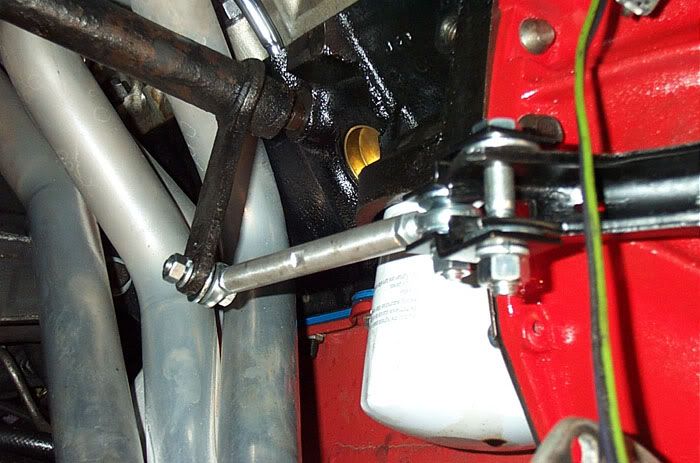
Critique 4: PROBLEM
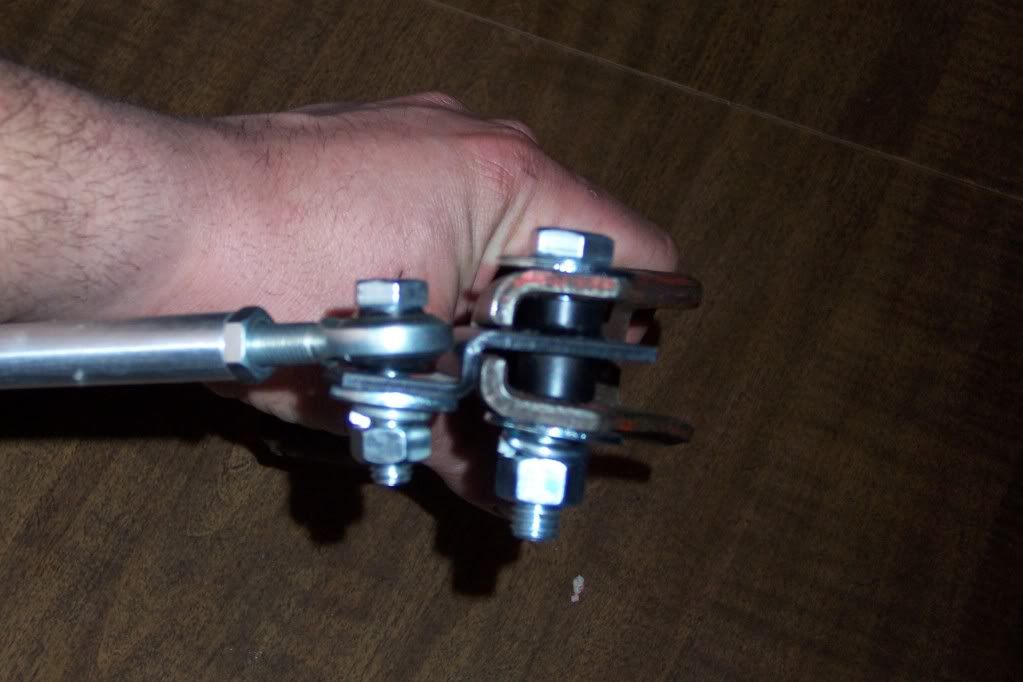
Rod end will not sit flush on bracket. Rod hits the bend in the bracket and holes do not line up.
Possible solution #1.
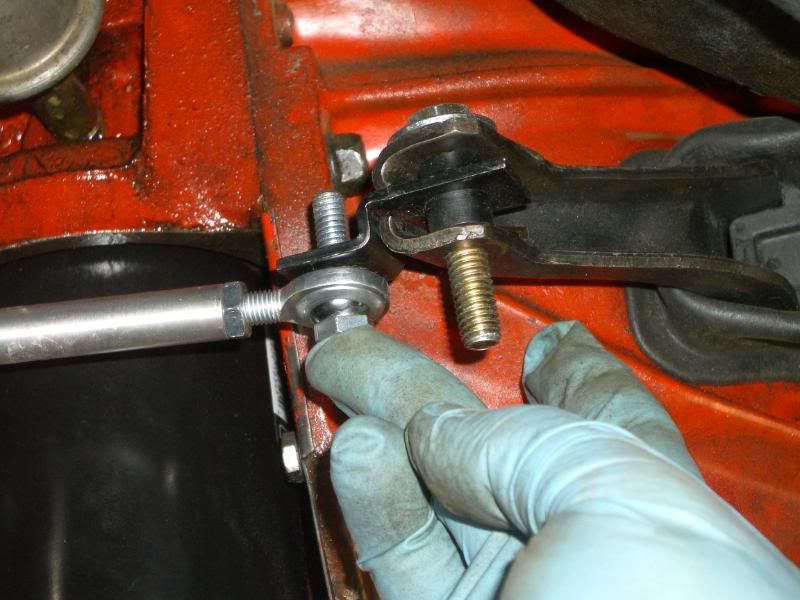
Possible solution #2.
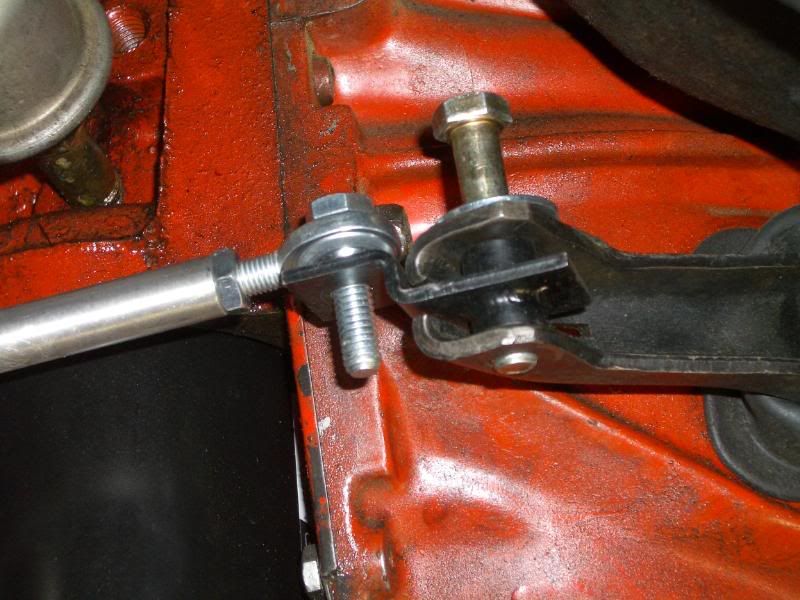
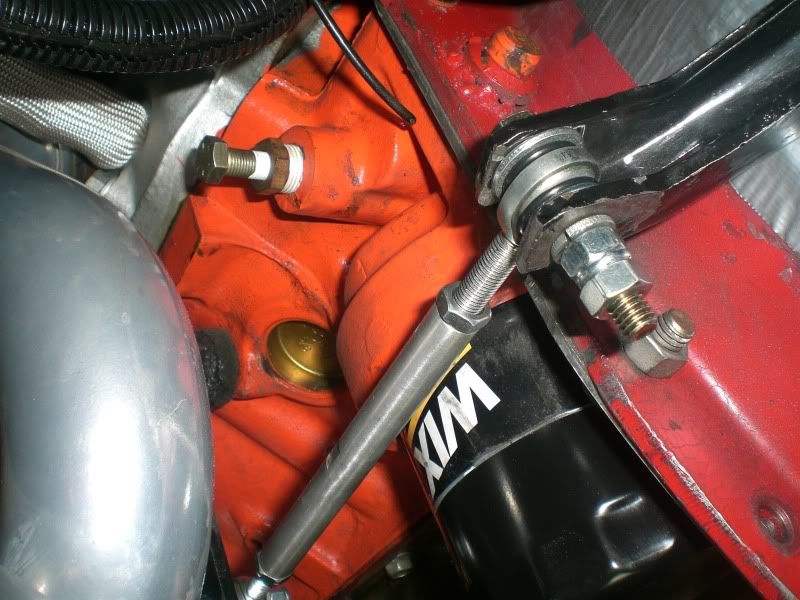
In the end, I used a spacer I had handy and a washer to space the rod end up from the bracket in the configuration I started with. The bolt is nice and tight with both a lock washer and a nyloc nut. I am not to worried about shear since I upgraded to the grade 8 bolt (good thing that I had the slightly longer grade 8 bolt).
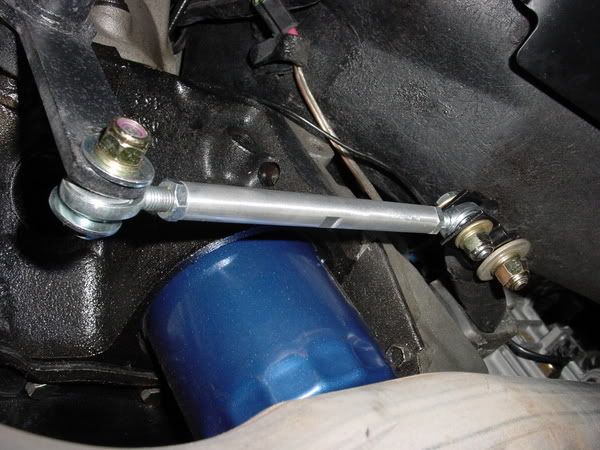
Final configuration:
Overall, the job took about 2-1/2 hours with over 45 min under the dash fussing with the pin under there. The clutch is very smooth and I like the kit. It was very easy to adjust to get 1-1/8" free play (spec is 1" to 1-1/4").
Issues I would like to see Speeddirect fix:
1. Better bolts.
2. Update instruction diagrams.
3. Add flats to the upper rod to make it easier to tighten rod ends.
4. Fix clutch fork bracket so rod end does not interfere with bend in bracket.
If Speeddirect could comment and tell me if I have the adapter bracket wrong, I would appreciate it.
Old Linkage:
New linkage (new boot from Zip not shown):
Speeddirect has changed the bracket that connects the lower rod to the clutch fork. This is a better design but there is an issue I will mention later.
Critique #1:
SD includes grade 2(?) bolts. I went and bought grade 8 bolts for peace of mind (also nylocs). The new 5/16" bolts are slightly longer but they have a shaft area that I feel is better for the rod ends to ride on.
Measuring the upper rod length. The upper rod has a simple bend vice the complex bend in the stock rod. Since the upper rod has this bend, it will be hard to use it to adjust clutch free play. Free play will be adjusted with lower rod.:
Critique #2:
The upper rod has no flats to stop it from turning when tightening the lock nuts. Here is my tool to hold the rod while tightening the nuts.
Measuring the lower rod as a starting point:
Critique #3:
I think this is how the new linkage hooks up. Instructions were unclear and picture in instructions sent (and on website) refers to old bracket system.
Critique 4: PROBLEM
Rod end will not sit flush on bracket. Rod hits the bend in the bracket and holes do not line up.
Possible solution #1.
Possible solution #2.
In the end, I used a spacer I had handy and a washer to space the rod end up from the bracket in the configuration I started with. The bolt is nice and tight with both a lock washer and a nyloc nut. I am not to worried about shear since I upgraded to the grade 8 bolt (good thing that I had the slightly longer grade 8 bolt).
Final configuration:
Overall, the job took about 2-1/2 hours with over 45 min under the dash fussing with the pin under there. The clutch is very smooth and I like the kit. It was very easy to adjust to get 1-1/8" free play (spec is 1" to 1-1/4").
Issues I would like to see Speeddirect fix:
1. Better bolts.
2. Update instruction diagrams.
3. Add flats to the upper rod to make it easier to tighten rod ends.
4. Fix clutch fork bracket so rod end does not interfere with bend in bracket.
If Speeddirect could comment and tell me if I have the adapter bracket wrong, I would appreciate it.
Last edited by SteveG75; 09-24-2009 at 09:13 PM.

The following users liked this post:
jim-81 (10-31-2018)
09-24-2009, 07:24 PM
#2
Race Director

 Waiting for the response from Speed Direct. I have the old design and made my own spacers so it would not crush.
Here is the old design. I put in a spacer on the clutch fork so it would not crush.
Last edited by Gordonm; 09-24-2009 at 07:26 PM.
The following users liked this post:
JBrooke825 (11-01-2018)
09-24-2009, 07:52 PM
#3
Le Mans Master
Thread Starter
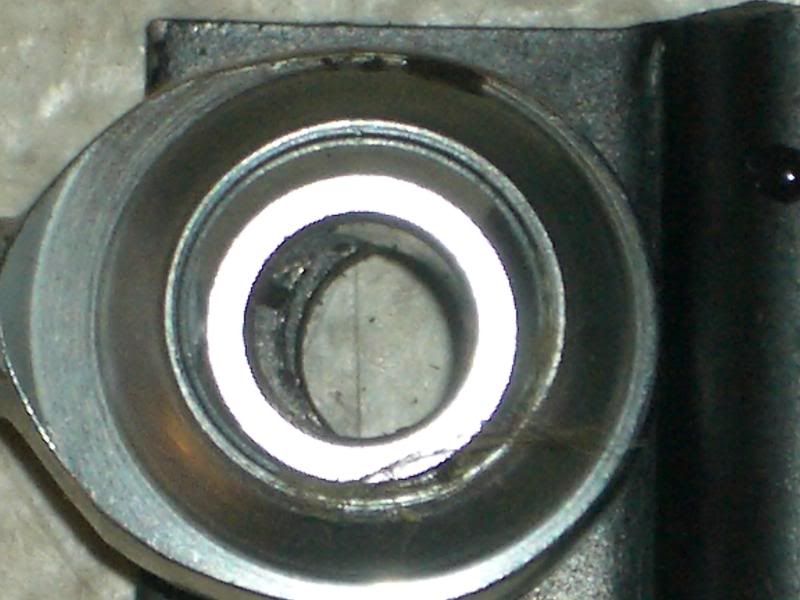
Gordon, the new bracket design was a complete surprise to me. You can see the welded collar for the 3/8" bolt. It would actually work very well if the rod end did not hit the bend in the bracket. My only concern is that the rod end is now spaced about 1/4" from the bracket. However, my concern is very minimal since I am using grade 8 bolts and the assembly is nice and tight so it can't move in shear.
Last edited by SteveG75; 09-24-2009 at 08:00 PM.
09-24-2009, 08:21 PM
#4
Instructor


I picked up a linkage for a 70 and a 63 and I have to agree about the directions. They were for the old unit and they didn't differ for the two cars. I am glad they addressed the bracket issue but the instructions were disappointing. I was a little surpised as the shark bar I purchased from them fit so easily and I couldn't believe I was working on the vette!
09-24-2009, 08:44 PM
#6
Le Mans Master
Thread Starter
09-24-2009, 08:48 PM
#7
Race Director


I have the old style too. I am on the fence about the new design on the bracket at the clutch fork. I can see where it would be much easier to get everything lined up and together. I did like Gordon and made some spacers out of brass so I could tighten down on ti really good. The only problem I have had out of the whole setup was created by my own doing when I installed the LS motor. I did not get the same bracket as I mentioned above tight enough, and one afternoon when I was paying to have my car tuned a little, the bracket moved and the clutch action was terrible. Easy fix but those brackets need to be tight. I would also like to add my two cents on the grade 8 hardware. I upgraded mine to grade 8 when it was going together also and I used nyloc nuts on everything to be sure nothing came apart. Overall it is another one of those upgrades I have been very happy with and glad I did.

The following users liked this post:
jim-81 (10-31-2018)
09-24-2009, 09:00 PM
#8
Le Mans Master
Thread Starter
If I have issues with the new bracket, I have the parts to build setup shown below on my Summit wish list.

Post 15 and 20 in this thread:
http://forums.corvetteforum.com/c3-t...clutch+linkage
Post 15 and 20 in this thread:
http://forums.corvetteforum.com/c3-t...clutch+linkage
09-24-2009, 10:31 PM
#9
Race Director
One of the best, cheapest mods I have done to the Vette. Much smoother action and there is more adjustment. As for the old bracket that connects to the throwout bearing arm, I just let it swing in towards the bellhousing and tightened it, no bushing or anything like that needed and it's been trouble free for 3 motors now 
09-24-2009, 10:38 PM
#10
Drifting

One of the best, cheapest mods I have done to the Vette. Much smoother action and there is more adjustment. As for the old bracket that connects to the throwout bearing arm, I just let it swing in towards the bellhousing and tightened it, no bushing or anything like that needed and it's been trouble free for 3 motors now
09-25-2009, 09:01 AM
#11
Le Mans Master
Thread Starter
TTT for Speeddirect's comments.
09-25-2009, 03:52 PM
#12
Premium Supporting Vendor
Thank you for bringing your thread to our attention. To address your specific points:
1. While the engineering says the bolts are more than adequate we understand that perception is also a factor so we will consider grade 8 hardware. Consider that a 5/16 grade 5 bolt in single shear will break with 5750 lbs of force (that is enough to hang the entire car with and still have a safety factor). A grade 8 bolt will fail at 6980 pounds. While that is more the relevant question is if it is necessary.
2. Agreed and that will be in the works shortly.
3. Good suggestion. We have never had anyone make a comment that it was an issue. We will look into it.
4. This will be fixed immediately. A fitment error like this is not in keeping with our standards. We strive to design and build fitment tolerant parts so that they always go together as they are intended.
What you have done with the spacer is perfectly fine and shouldn�t give you any problems in operation.
__________________
www.SpeedDirect.com
Corvette Forum Members get 10% off with code: CF10
Steeroids rack & pinion conversion kit for '53-'82 Corvettes
Shark Bite Suspension Front & Rear Coil-Overs, Aluminum A-Arms & Diff Covers, Stage Kits
Rod Links Spherical rod end clutch linkage for '65-'82 Corvettes
www.SpeedDirect.com
Corvette Forum Members get 10% off with code: CF10
Steeroids rack & pinion conversion kit for '53-'82 Corvettes
Shark Bite Suspension Front & Rear Coil-Overs, Aluminum A-Arms & Diff Covers, Stage Kits
Rod Links Spherical rod end clutch linkage for '65-'82 Corvettes
09-25-2009, 04:19 PM
#13
Le Mans Master
Thread Starter
Thank you for bringing your thread to our attention. To address your specific points:
1. While the engineering says the bolts are more than adequate we understand that perception is also a factor so we will consider grade 8 hardware. Consider that a 5/16 grade 5 bolt in single shear will break with 5750 lbs of force (that is enough to hang the entire car with and still have a safety factor). A grade 8 bolt will fail at 6980 pounds. While that is more the relevant question is if it is necessary.
2. Agreed and that will be in the works shortly.
3. Good suggestion. We have never had anyone make a comment that it was an issue. We will look into it.
4. This will be fixed immediately. A fitment error like this is not in keeping with our standards. We strive to design and build fitment tolerant parts so that they always go together as they are intended.
What you have done with the spacer is perfectly fine and shouldn’t give you any problems in operation.
Thank you for the quick response.
One thought that I had today was that if the upper rod has to be bent, could it be bent to duplicate the stock rod (i.e. an offset). Obviously, you would still have the same issue with making an adjustment. I realized this mornig that there is no way I will use the upper rod to make adjustments (other than remove and reinstall the upper Z-bar bolt) since I can't get under the dash to loosen that lock nut.
 Getting the clip back in there was fun enough.
 09-25-2009, 06:32 PM
#14
Melting Slicks

Not sure if any of you guys have run into an issue but sometimes when you compress the clutch pedal the rod-end pivots in towards the bell housing or pivots out away from the clutch fork. This prevents you from actually pushing the clutch fork in. I cranked my grade 8 bolts down pretty hard but with driving vibration they always seemed to allow it to pivot.
I had to weld some tabs onto the SD bracket to prevent it from pivoting on the clutch fork so it always stayed straight inline with the rod.
I have pics somewhere.
You just need a way to stop the brackets that bolt to the clutch fork from pivoting when you apply force to the pedal.
One way is to do what Steve G75 did and ditch the brackets and cut the clutch fork.
09-28-2009, 11:32 AM
#15
Drifting
Member Since: Apr 2007
Location: Springfield Illinois
Posts: 1,892
Likes: 0
Received 3 Likes
on
3 Posts

Not sure if any of you guys have run into an issue but sometimes when you compress the clutch pedal the rod-end pivots in towards the bell housing or pivots out away from the clutch fork. This prevents you from actually pushing the clutch fork in. I cranked my grade 8 bolts down pretty hard but with driving vibration they always seemed to allow it to pivot.
I had to weld some tabs onto the SD bracket to prevent it from pivoting on the clutch fork so it always stayed straight inline with the rod.
I have pics somewhere.
You just need a way to stop the brackets that bolt to the clutch fork from pivoting when you apply force to the pedal.
One way is to do what Steve G75 did and ditch the brackets and cut the clutch fork.
I had to weld some tabs onto the SD bracket to prevent it from pivoting on the clutch fork so it always stayed straight inline with the rod.
I have pics somewhere.
You just need a way to stop the brackets that bolt to the clutch fork from pivoting when you apply force to the pedal.
One way is to do what Steve G75 did and ditch the brackets and cut the clutch fork.
09-28-2009, 12:08 PM
#16
Melting Slicks
Member Since: Nov 2001
Location: Katy (Houston) TX
Posts: 2,659
Likes: 0
Received 7 Likes
on
5 Posts
CI 7-8 Veteran

Post #'s 2, 7, 8, and 9 were talking about this. I also have this kit and had the lower rod pivot around on the clutch fork. Fortunately for me it happened during testing while the car was up on jackstands. For the time being, I have done what MotorHead did and swivel the connecting bracket in towards the bellhousing. So far it's worked fine and I've driven over 2k miles this way with no problems. I would like to eventually put in a spacer that doesn't allow the clutch fork split to crush or get the new piece from Speed Direct.
09-28-2009, 12:21 PM
#17
Melting Slicks
If I have issues with the new bracket, I have the parts to build setup shown below on my Summit wish list.
Post 15 and 20 in this thread:
http://forums.corvetteforum.com/c3-t...clutch+linkage
Post 15 and 20 in this thread:
http://forums.corvetteforum.com/c3-t...clutch+linkage
09-29-2009, 08:24 PM
#18
Melting Slicks
 10-08-2009, 01:48 PM
#19
Melting Slicks
If I have issues with the new bracket, I have the parts to build setup shown below on my Summit wish list.
Post 15 and 20 in this thread:
http://forums.corvetteforum.com/c3-t...clutch+linkage
Post 15 and 20 in this thread:
http://forums.corvetteforum.com/c3-t...clutch+linkage
So I cut the clutch fork with a cutoff wheel and added some washers to make it work.
Works great, much cleaner and no more worries about loosing my shifting capabilities because of a loose bracket and unexpected pivoting.
I did put two rubber o-rings around the rod end joint to prevent any binding b/c of the angle of the rod. I also double nutted the bolt to prevent any loosening.
And yes, I plugged my oil pressure sending port b/c the damn hose snapped.

There is still a half an inch of thread left in the rod...if not more.
03-03-2011, 09:09 PM
#20
Racer
Member Since: Jul 2007
Location: Warren IL
Posts: 397
Likes: 0
Received 0 Likes
on
0 Posts
Thank you for bringing your thread to our attention. To address your specific points:
1. While the engineering says the bolts are more than adequate we understand that perception is also a factor so we will consider grade 8 hardware. Consider that a 5/16 grade 5 bolt in single shear will break with 5750 lbs of force (that is enough to hang the entire car with and still have a safety factor). A grade 8 bolt will fail at 6980 pounds. While that is more the relevant question is if it is necessary.
2. Agreed and that will be in the works shortly.
3. Good suggestion. We have never had anyone make a comment that it was an issue. We will look into it.
4. This will be fixed immediately. A fitment error like this is not in keeping with our standards. We strive to design and build fitment tolerant parts so that they always go together as they are intended.
What you have done with the spacer is perfectly fine and shouldn�t give you any problems in operation.