
Richmond 6 spd & cam change
 08-23-2011, 01:39 PM
#1
Burning Brakes

Thread Starter

Just completed two projects,I had going at the same time,One was a Richmond 6spd swap from a TH350 auto.The other was a cam change from a whatever it was to a Crower 00320 cam with EDM cool face solid lifters and roller rockers from PRW.
The removal of the TH350 and parts went smoothly,except for the pesky pedal assembly,what a PITA! You will have to remove the whole dash and steering column,and push the brake booster assembly forward.The pedal assembly has four bolts located in the cowl that were frozen,I ended up cutting the bolts off to remove the pedals.After installing the clutch & manual brake pedal with new bushings and the neutral safety switch with long wires to reach the console,where the neutral switch was located near the auto trans shifter.I then installed the pedal assembly.[IMG]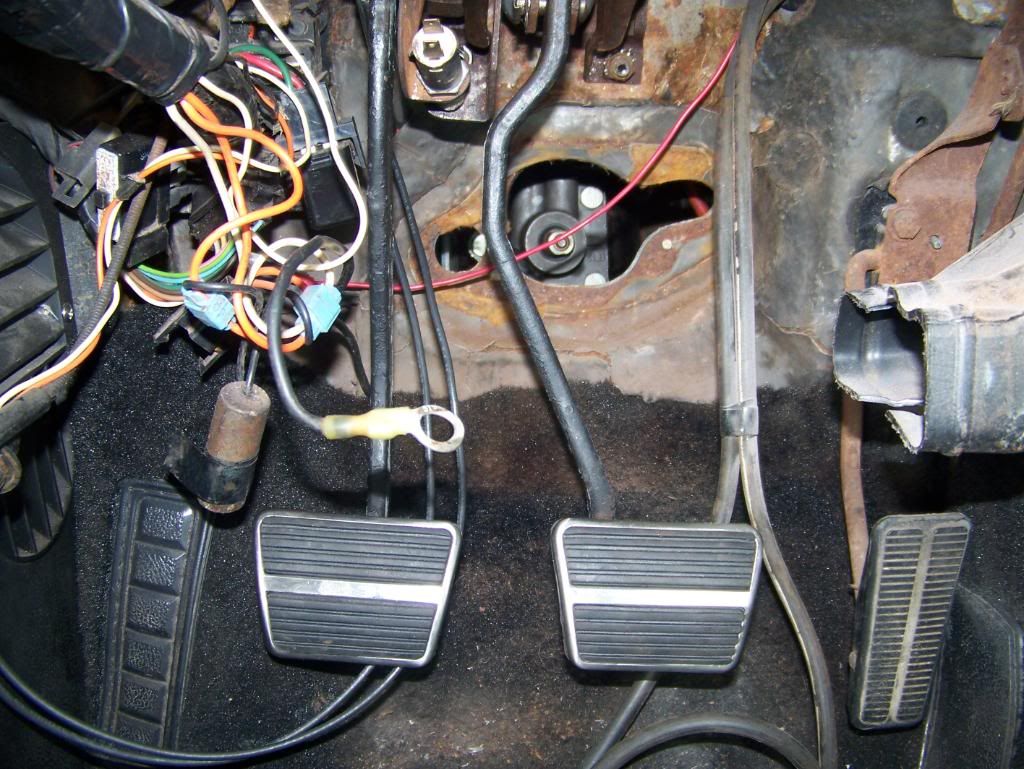 [/IMG]
Next was the clutch linkage Z bar assembly, removed the firewall cover for the clutch pedal rod to z bar and bolt the pivot ball to the block.After aligning the z bar and marking the frame using the bolt on bracket I drilled the location on the frame and used self tapping bolts to secure the bracket to the frame.[IMG]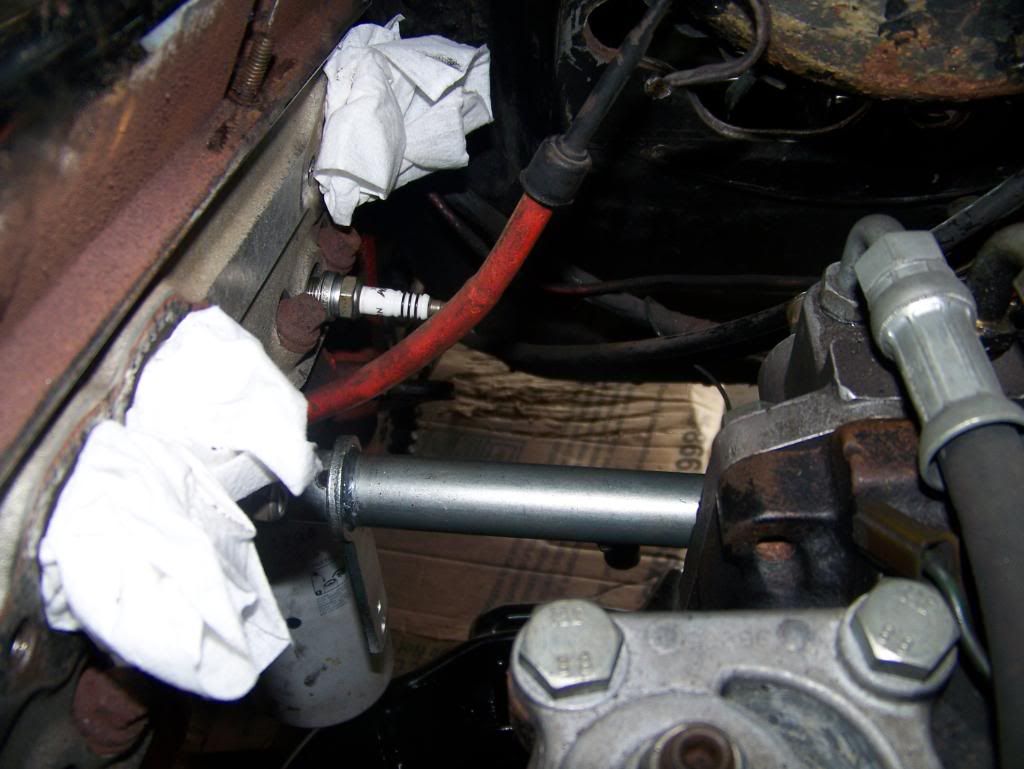 [/IMG][IMG]
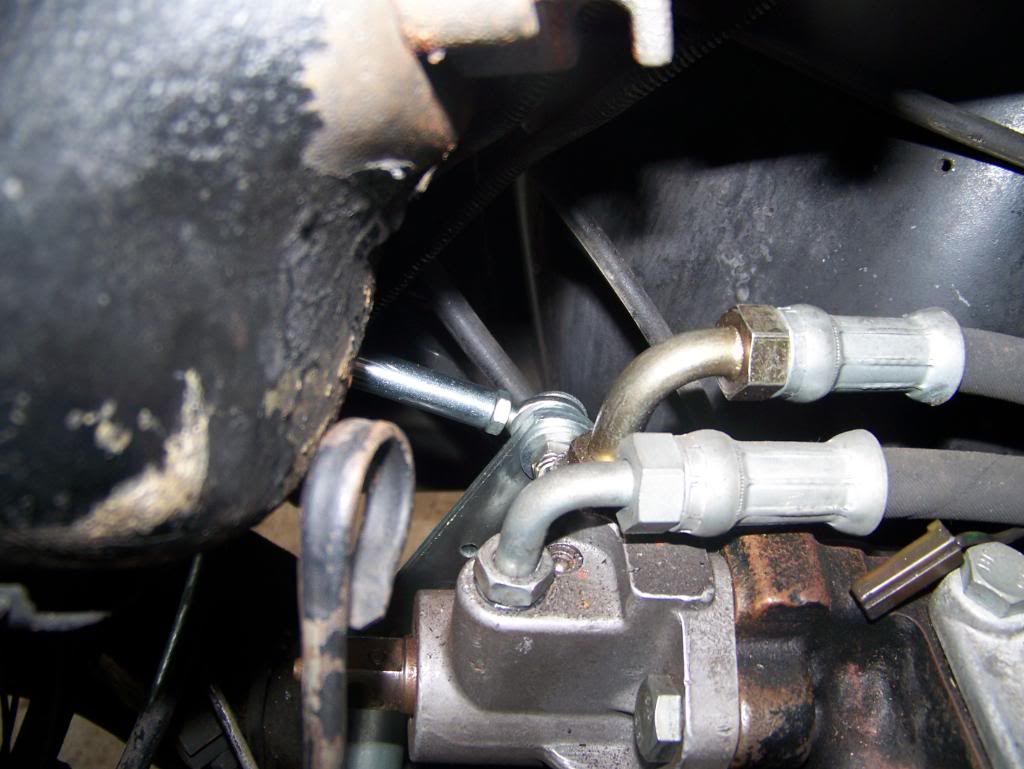 [/IMG][IMG]
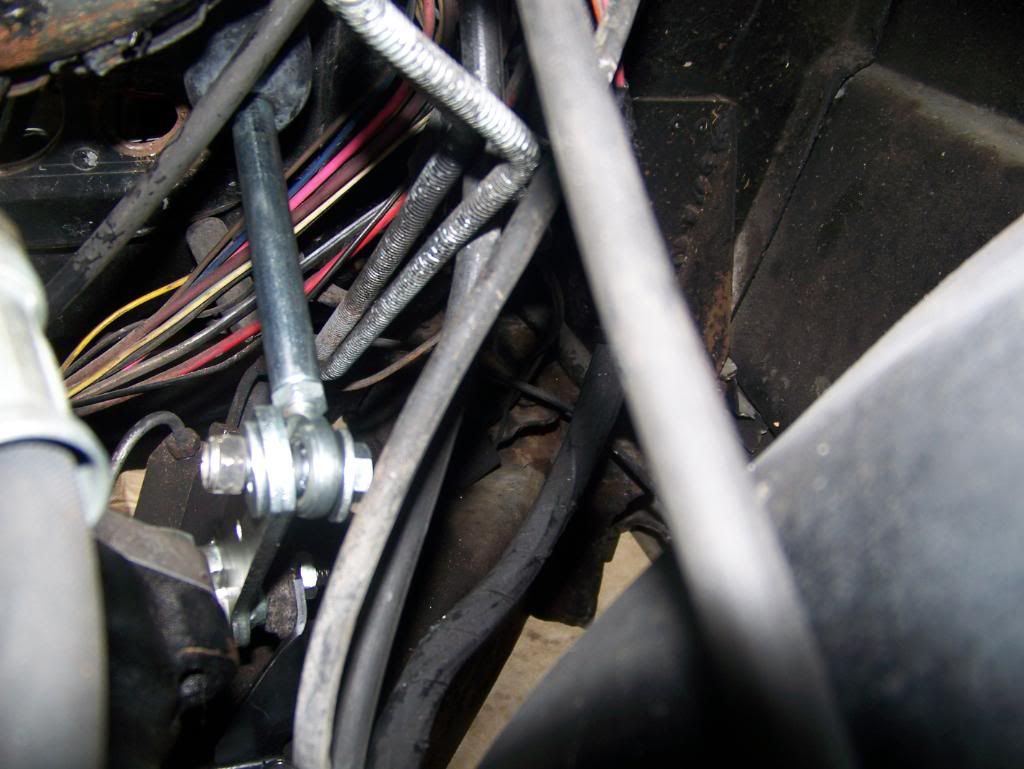 [/IMG]
Using the direct speed clutch linkage kit,then attached the pedal rod with firewall boot to the z bar.Next step was to install the new autogear bronze pilot bushing which was cooling in the freezer.I was dreading this part after reading all the horror stories of pilot bushings not fitting correctly!!Well my fears were quickly over as the bearing tapped in smoothly and fit perfectly!The guys at Autogear make a great pilot bearing for sure![IMG]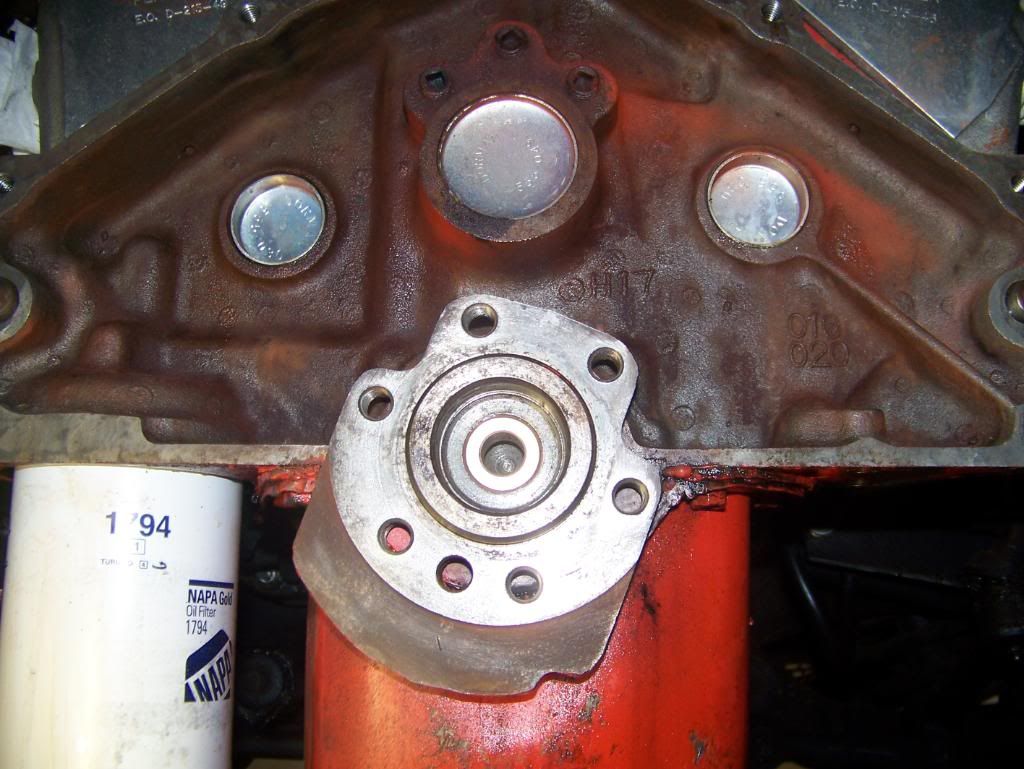 [/IMG][IMG]
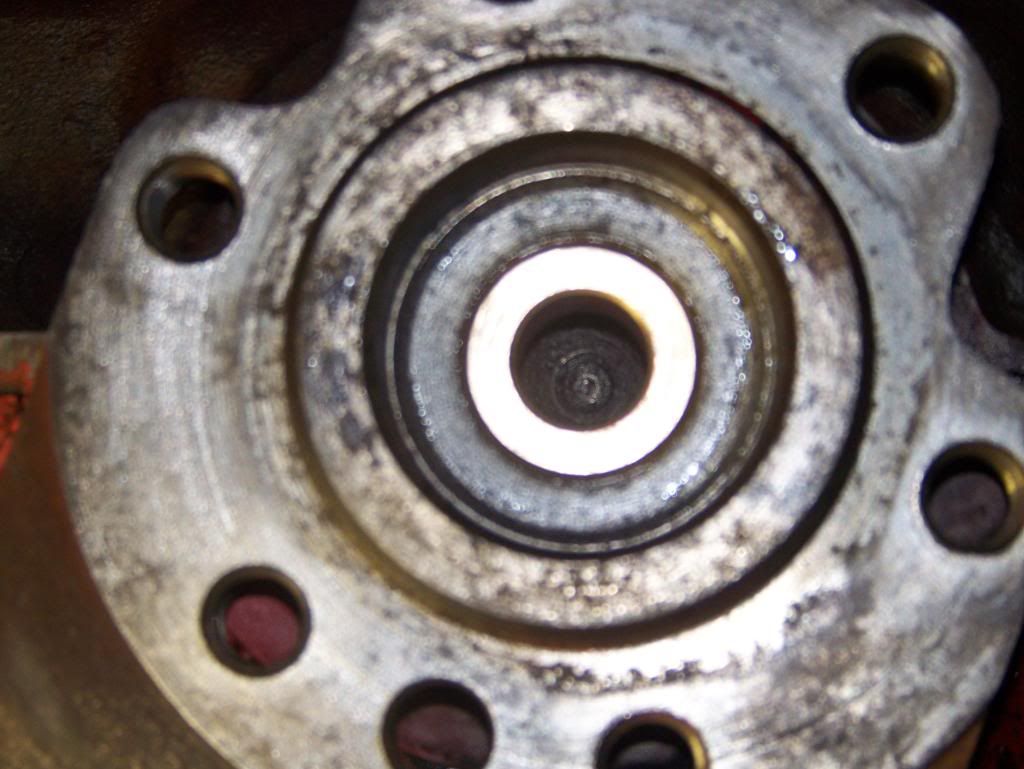 [/IMG]
New bellhousing which dialed in perfect,flywheel,kevlar clutch and pressure plate all from American Powertrain.Decided to try a Kevlar clutch,the write ups were good on this clutch and is supposed to give a smooth take off with little or no chatter.Here on the Kona Coast of the Big Island of Hawaii we have steep hills to deal with and I wanted a low 1st gear and a durable clutch,I will give a review on this combination after the road test.[IMG]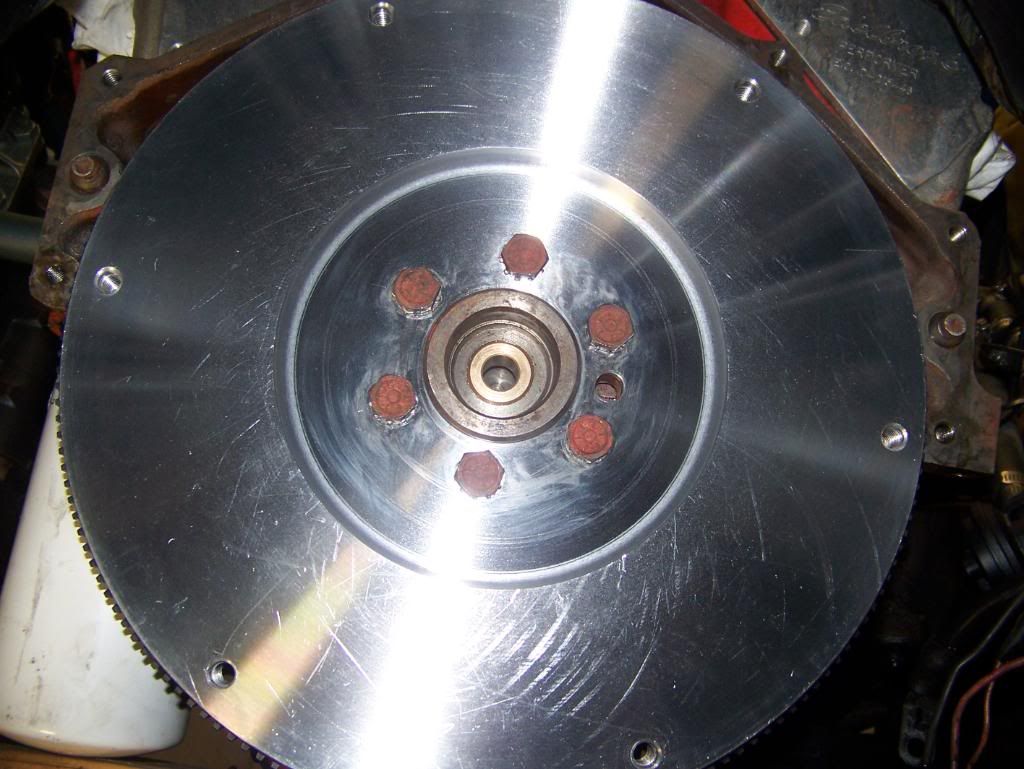 [/IMG][IMG][IMG]
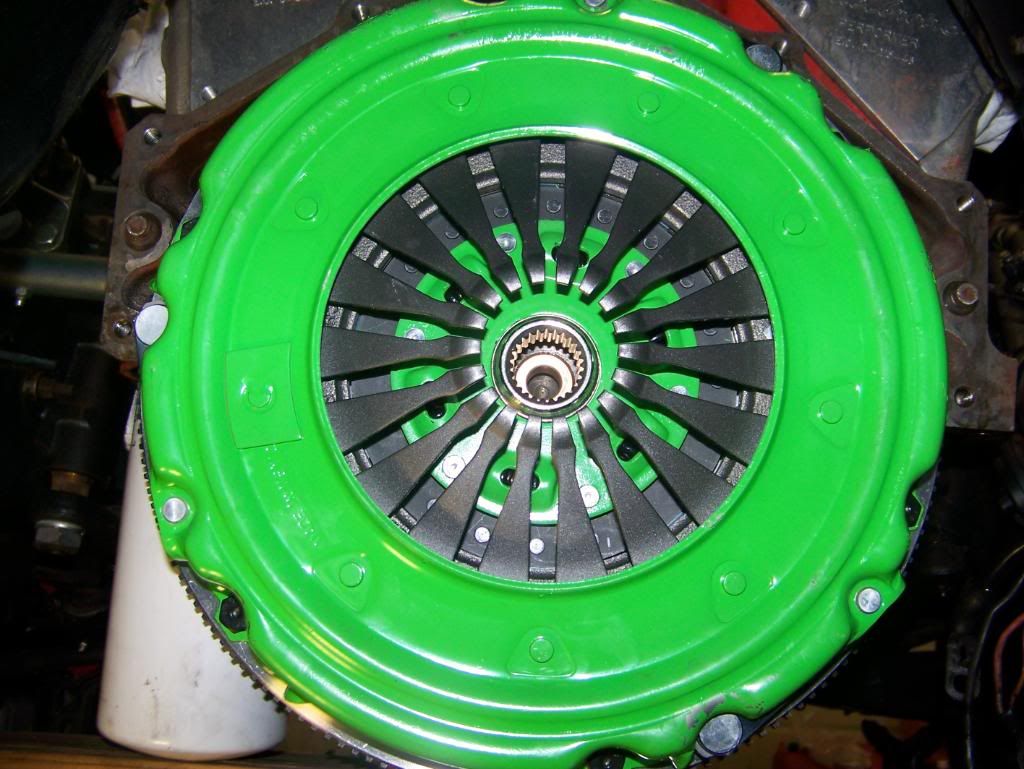 [/IMG][/IMG]
Next up was to install the Richmond trans.[IMG]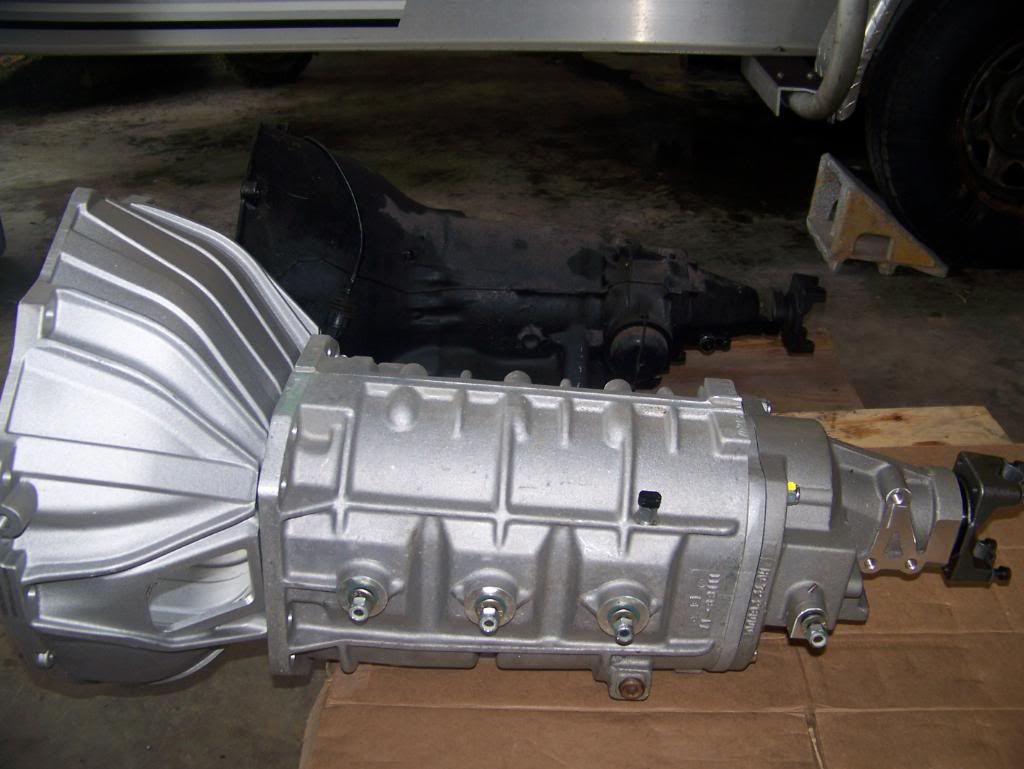 [/IMG]
Using long bolts that I cut the heads off to aid the trans install, all was going good until the last inch or so,could not get it to flush up with the bellhousing.I did a trail fit of all items to make sure it was all good so I knew it was a tight fit but all would work.I was tempted to bolt up the last inch or so by forcing the trans in place by using the bolts but my better judgement prevailed.Looking at past post here there was a little trick of pressing the clutch in and then the trans will slide in.Hooked up the Z bar to clutch fork pressed the clutch and presto trans slid right in! I guess the alignment was just a hair off and pressing the clutch in allowed the input shaft to align with the pilot bearing.[IMG]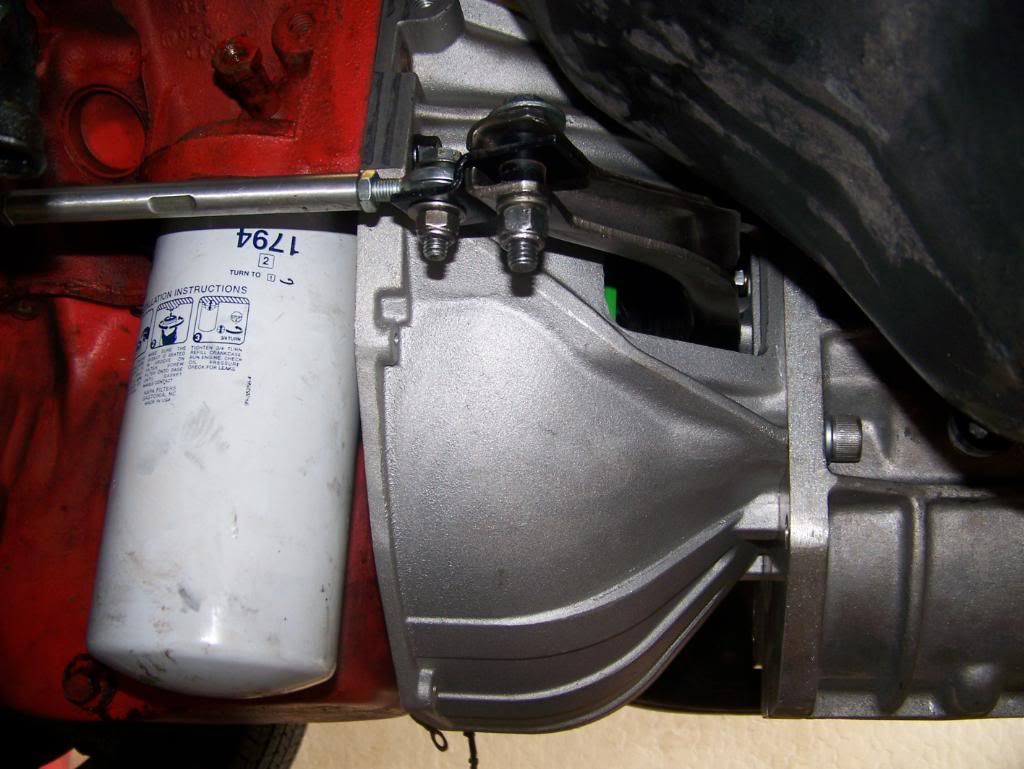 [/IMG]
Next was to cut the hole for the shifter and linkages.The adjustment for the shifter rods was very time consuming and confusing.You need to take your time and not get frustrated.I did mock up the rods before installing the trans but still had to do more adjusting when everything is bolted up in the car.[IMG]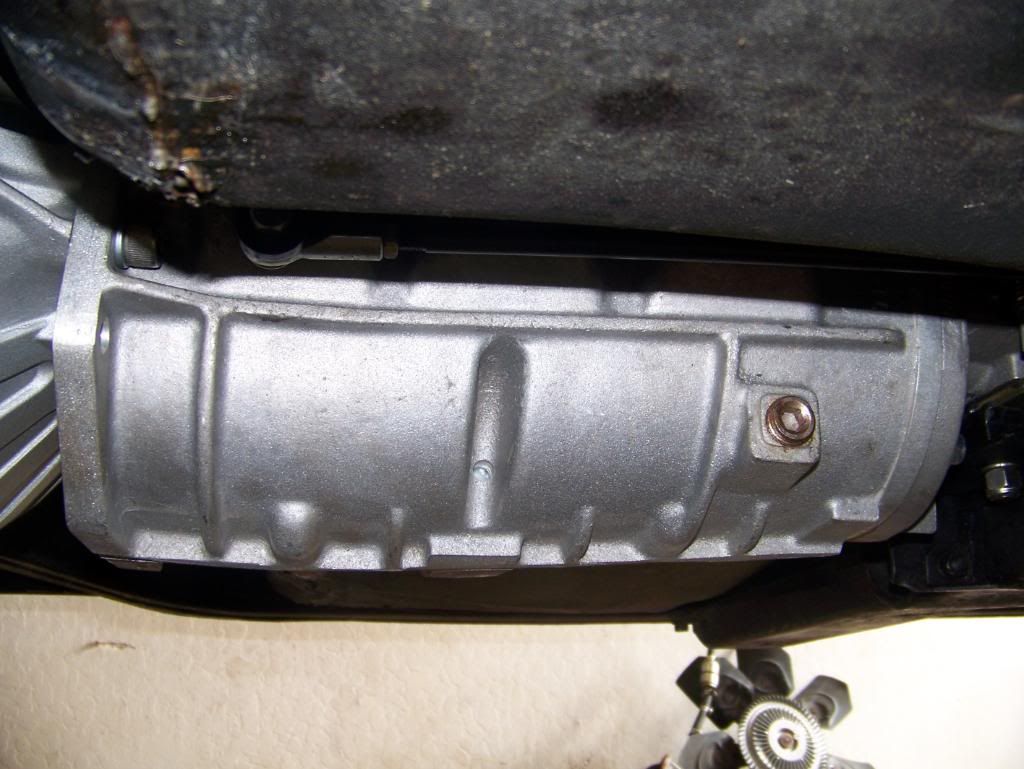 [/IMG][IMG]
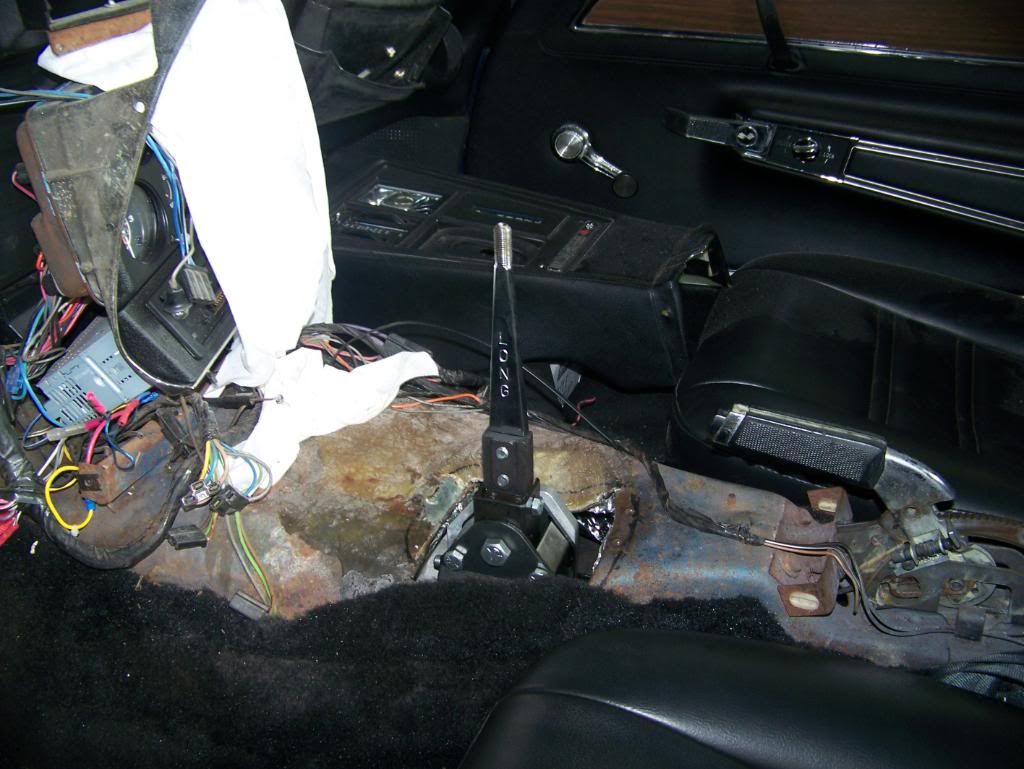 [/IMG]
For the crossmember I used a 700r4 one from Bowtie overdrive.I was hoping for a bolt on solution for the crossmember,trans mount but it didn't work out that way.First problem Bowtie sent me an 80-81 vette crossmember and I ordered one for a 76! Didn't realize the mistake until I was ready to bolt the xmember.Damn,the parking brake pulley is in the wrong location ! Look closely at the xmember and its stamped 80-81 crap! Call them up and yes I ordered correctly but they sent the wrong one.They offered to replace it no charge but I had already trimmed the mount to fit the Richmond Trans! Ok so I'll just deal with the problem,anyways the delay would be a couple of weeks to get the correct xmember.Bowtie would take the part back but I decided not to and just mod the one I have.I had to trim the mount drill new holes for the trans mount and relocate the parking brake bracket.Cost at the welding shop 60.00 not bad.Got the xmember bolted up attach the drive shaft with new solid u joints and do some clutch adjustment we are good to go! Now we move to the interior work.Next post coming up.Stay tuned.......
The removal of the TH350 and parts went smoothly,except for the pesky pedal assembly,what a PITA! You will have to remove the whole dash and steering column,and push the brake booster assembly forward.The pedal assembly has four bolts located in the cowl that were frozen,I ended up cutting the bolts off to remove the pedals.After installing the clutch & manual brake pedal with new bushings and the neutral safety switch with long wires to reach the console,where the neutral switch was located near the auto trans shifter.I then installed the pedal assembly.[IMG]
[/IMG]Next was the clutch linkage Z bar assembly, removed the firewall cover for the clutch pedal rod to z bar and bolt the pivot ball to the block.After aligning the z bar and marking the frame using the bolt on bracket I drilled the location on the frame and used self tapping bolts to secure the bracket to the frame.[IMG]
[/IMG][IMG][/IMG][IMG][/IMG]Using the direct speed clutch linkage kit,then attached the pedal rod with firewall boot to the z bar.Next step was to install the new autogear bronze pilot bushing which was cooling in the freezer.I was dreading this part after reading all the horror stories of pilot bushings not fitting correctly!!Well my fears were quickly over as the bearing tapped in smoothly and fit perfectly!The guys at Autogear make a great pilot bearing for sure![IMG]
[/IMG][IMG][/IMG]New bellhousing which dialed in perfect,flywheel,kevlar clutch and pressure plate all from American Powertrain.Decided to try a Kevlar clutch,the write ups were good on this clutch and is supposed to give a smooth take off with little or no chatter.Here on the Kona Coast of the Big Island of Hawaii we have steep hills to deal with and I wanted a low 1st gear and a durable clutch,I will give a review on this combination after the road test.[IMG]
[/IMG][IMG][IMG][/IMG][/IMG]Next up was to install the Richmond trans.[IMG]
[/IMG]Using long bolts that I cut the heads off to aid the trans install, all was going good until the last inch or so,could not get it to flush up with the bellhousing.I did a trail fit of all items to make sure it was all good so I knew it was a tight fit but all would work.I was tempted to bolt up the last inch or so by forcing the trans in place by using the bolts but my better judgement prevailed.Looking at past post here there was a little trick of pressing the clutch in and then the trans will slide in.Hooked up the Z bar to clutch fork pressed the clutch and presto trans slid right in! I guess the alignment was just a hair off and pressing the clutch in allowed the input shaft to align with the pilot bearing.[IMG]
[/IMG]Next was to cut the hole for the shifter and linkages.The adjustment for the shifter rods was very time consuming and confusing.You need to take your time and not get frustrated.I did mock up the rods before installing the trans but still had to do more adjusting when everything is bolted up in the car.[IMG]
[/IMG][IMG][/IMG]For the crossmember I used a 700r4 one from Bowtie overdrive.I was hoping for a bolt on solution for the crossmember,trans mount but it didn't work out that way.First problem Bowtie sent me an 80-81 vette crossmember and I ordered one for a 76! Didn't realize the mistake until I was ready to bolt the xmember.Damn,the parking brake pulley is in the wrong location ! Look closely at the xmember and its stamped 80-81 crap! Call them up and yes I ordered correctly but they sent the wrong one.They offered to replace it no charge but I had already trimmed the mount to fit the Richmond Trans! Ok so I'll just deal with the problem,anyways the delay would be a couple of weeks to get the correct xmember.Bowtie would take the part back but I decided not to and just mod the one I have.I had to trim the mount drill new holes for the trans mount and relocate the parking brake bracket.Cost at the welding shop 60.00 not bad.Got the xmember bolted up attach the drive shaft with new solid u joints and do some clutch adjustment we are good to go! Now we move to the interior work.Next post coming up.Stay tuned.......

The following users liked this post:
stayfocusedmike (02-28-2024)


 08-23-2011, 03:21 PM
#3
Heres the post of the ROD install I did 7yrs ago..Best thing Ive done for the drivability of the car.
http://69vettester.com/richmond.htm
http://69vettester.com/richmond.htm
08-23-2011, 04:46 PM
#4
Burning Brakes
Thread Starter
Since I had the dash,steering column and center gauges all out,decided to redo the gauges and clock upgrade.Ordered a set of gauge overlays from Whiteface gauges with dark gray background white numbers to match the original colors.Overlays were easy to install and look great! Polished up the lens and repainted the bezels satin black.Got a quartz clock kit to upgrade the non working clock.Kit was ez except getting the new retaining nuts to lock on the clock housing.I used the old nuts and clock now works.Replaced all the light bulbs .The clutch pedal switch is way under the dash above the pedal so you want to connect the wires before installing the pedal assembly.Make sure they are on good!! One of mine popped off and was a bear to get it back on.While your doing the neutral switch hook up the reverse light wires from the trans since they are on the same switch that was attached to the auto shifter.Install console,dash,center pod,and steering column.I ordered a new interior screw set from Zip since my interior was a hodge podge mix of the wrong fasteners.The kit comes with all the screws labeled where it goes so no guess work.My console was attached with just 2 screws bubba waz here!! Now the interior components are solid with the correct fasteners in place.[IMG]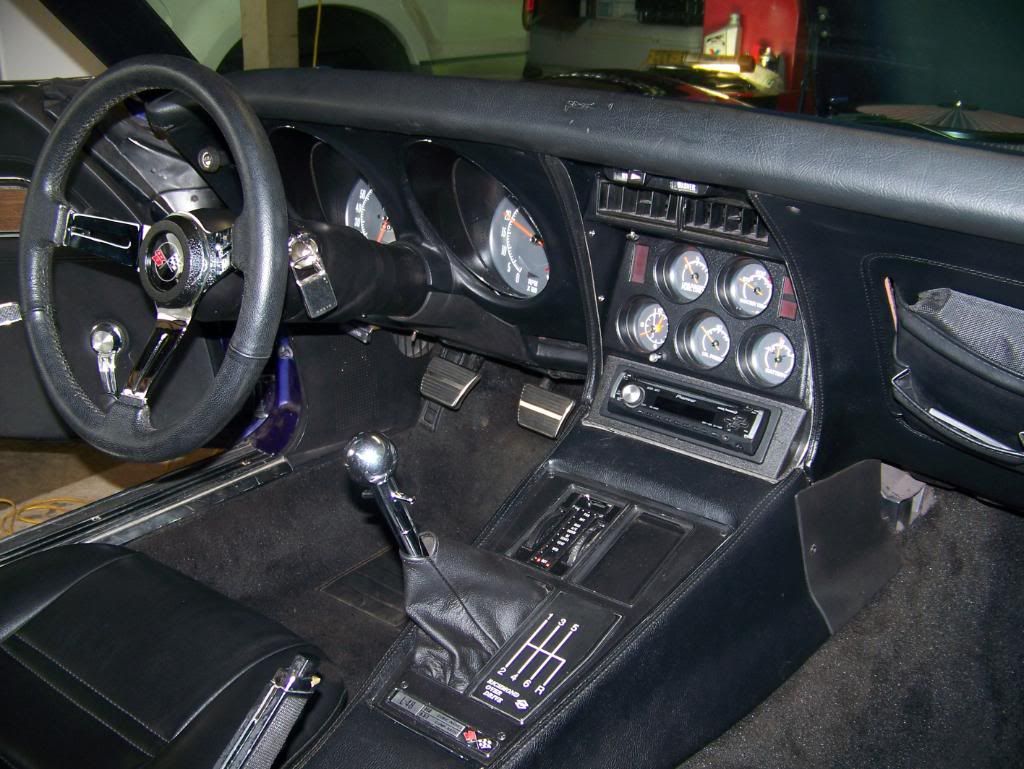 [/IMG][IMG]
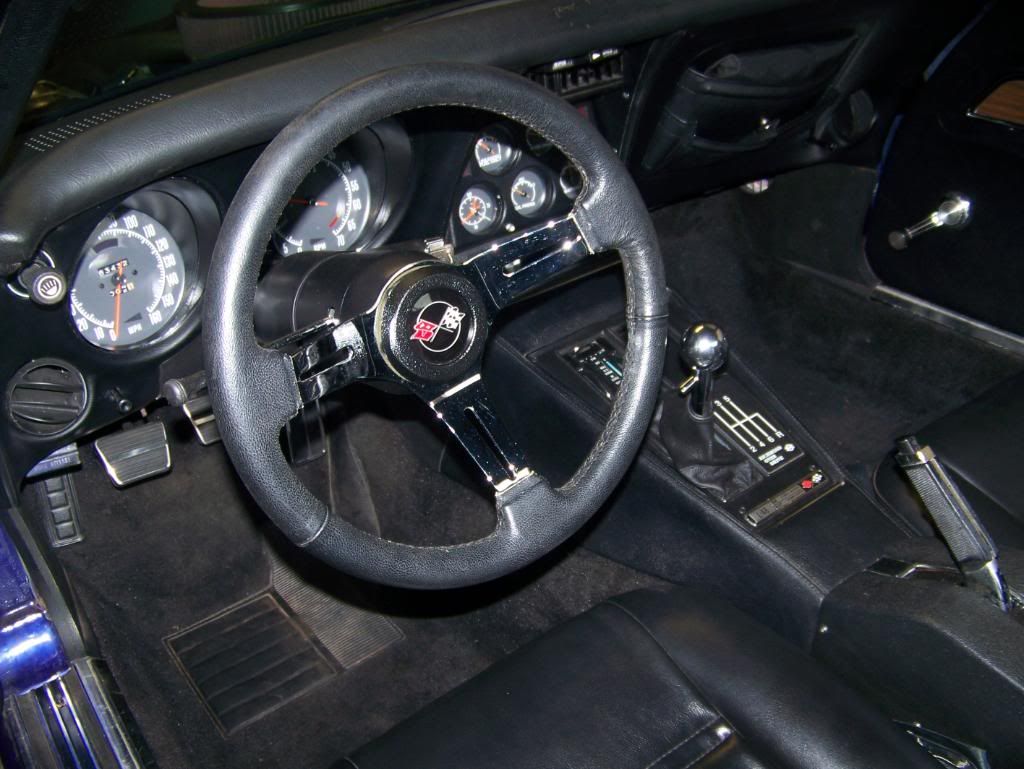 [/IMG]
Next part of the project was the engine work.Engine was in need of some upgrades due to oil leaks mismatched parts and it just didn't run right.Decided on a cam upgrade because I suspected the cam was installed way retarded,it needed 25 degrees base timing to get it run right.I also suspected an internal intake leak ,good excuse for a new air gap manifold!! Liked the idea of Crowers cool face lifters,it's a solid lifter with a .024 laser drilled oiling hole on the bottom of the lifter.The hole is offset from center ,so when the lifter spins it lubes the cam directly with an elliptically pattern.While doing the tear down discovered the cam gear is bolted with different bolts the timing marks are off and the crankshaft is scored up! Looks like they used a monkey wrench on the crankshaft! BOZOS!! Luckily the marks were not near the front oil seal.I was able to smooth out the damage and remove the crank gear.[IMG]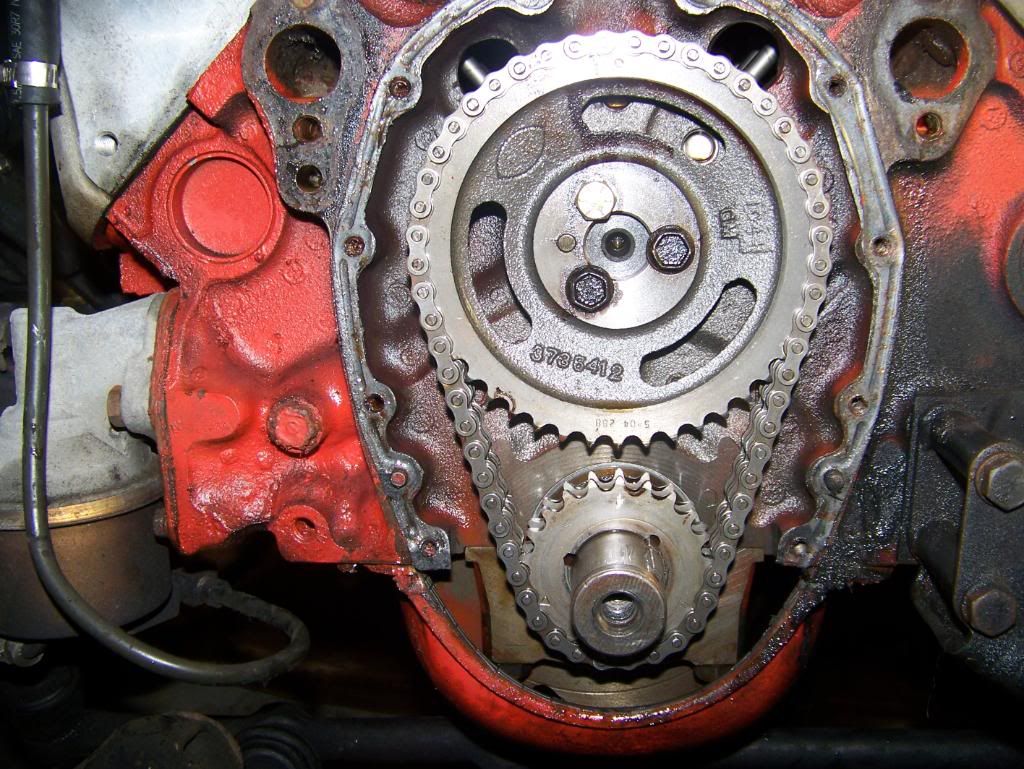 [/IMG]Install new Crower 00320 solid cam with new timing set advanced 4 degrees.Checked cam timing it was spot on per cam card but advanced 4 degrees per the timing set.I used Jegs timing set with multiple keyways and bronze thrust washer between the block and cam gear.It fit perfectly with no issues.Since the oil pan was smashed,from a jack no doubt,replaced that with a 6 quart Milodon oil pan,HV oil pump and correct pickup for that pan.A one piece Milodon gasket and new front timing cover gaskets.Installed lifters,check for valve train geometry with new 1.55 PRW roller rockers ,needed 7.800 pushrods with the Edelbrock Performer heads that were installed on the engine already.Oh yes prepped the cam with the break in lube adj valves per specs.Installed new Air gap manifold very carefully to avoid intake leaks using the right stuff sealant and felpro gaskets.Install carb and fuel line using Fragola 8000 push on hoses and fittings and Summit dual feed fuel line.Old fuel line was rubber hose and screw clamps was accident waiting to happen.New water pump,and aluminum radiator ,finished the engine work with new tall valve covers.Old covers were rusty and new roller rockers were to tall for the old covers.Ready to fire and break in that new solid cam OH YEAH!! Test drive almost here!![IMG]
 [/IMG][IMG]
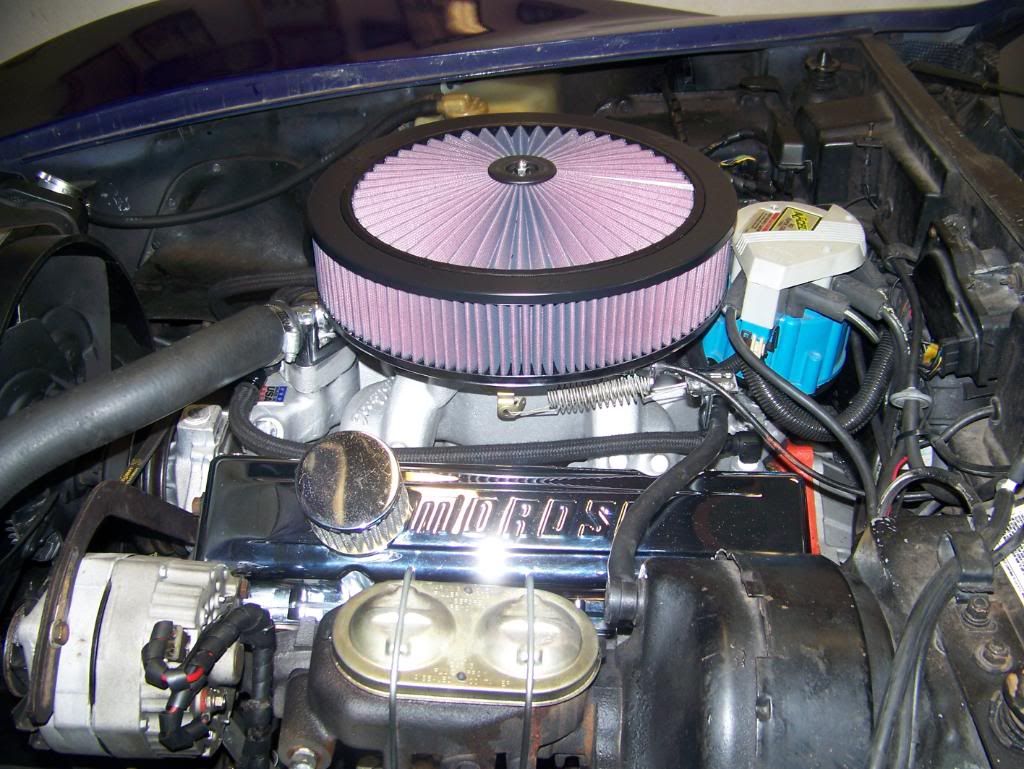 [/IMG]
Engine fires up on the first crank ,good to proceed to cam break in.After initial break in check valve lash hot all good.Set timing, carb adjustments good to go for test run.Start engine run through gears with clutch engaged all good no grinding present.Put trans in 1st release clutch slowly in pops out of gear! Damn gotta do more linkage adjusting! Adjust the 1st through 4th linkages,5-6 and reverse are good to go.Time consuming to get the gears to work right get 1st good 2nd goes wacky same for 3-4 gears.Finally got the sweet spot for both 1-2 linkage and 3-4 linkage.Lets go test drive! Kevlar clutch lets out smoothly no chatter at all! I'm very pleased! Hit the road going through the gears,little notchy which is expected but all good.This trans has a low first gear which works great with my 3.08 rear gear and the gear ratios are close you can always find the right gear.You do have to short shift 1st but man does the vette move outta the hole! That Crower 00320 cam advanced 4 degrees is awesome! The engine revs quickly and has lots of low end.Vacuum has increased to 14 in at idle where it was only 8 in before. Now I have to clean the outside and polish the wheels to make her look as good as she runs...[IMG]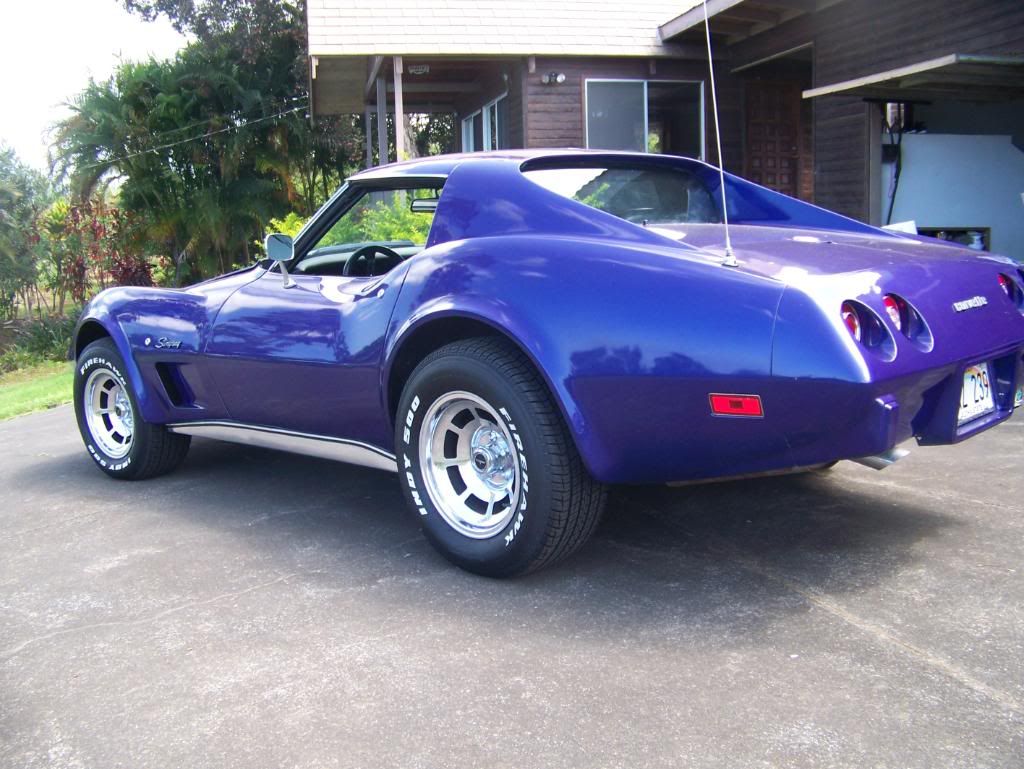 [/IMG]
All in all it was a fun project,not without problems but it was worth doing and the vette is so much more fun to drive! Side notes,I went with the Richmond due to the gear ratios would match my 3.08 rear better than a TKO500-600.The OD on those trans would lug the engine with the 3.08's and I did not want the added expense of a gear change.The Richmond bolts up to Chevy parts and is close to the same length as a TH350,I didn't have to mod the driveshaft.Forgot to mention I also needed a speedometer cable extension ,due to the Richmond has the output on the pass side.Trans project was costly.I got the trans from a guy who changed his mind about swapping the 4 speed in his 70 Chevelle and will keep his car original.He sold it new in the box for 2800.00 saved me 500.00 or so dollars because the shipping to Hawaii would have been nutz!Trans was in Hawaii already saving some dollahs.I also upgraded or replaced alot of items, you know while I'm at it I'll do this to! Trans swap estimated cost was close to 4800.00 due to my high shipping cost to Hawaii.You would probably be better off doing a complete trans kit from a vendor if you had different rear gears.This Richmond works well with the 3.08s,take offs are great and 6th gear cruising is perfect. Hope you enjoyed the write up! If you are considering this swap I can fill in the details for you Aloha's
[/IMG][IMG][/IMG]Next part of the project was the engine work.Engine was in need of some upgrades due to oil leaks mismatched parts and it just didn't run right.Decided on a cam upgrade because I suspected the cam was installed way retarded,it needed 25 degrees base timing to get it run right.I also suspected an internal intake leak ,good excuse for a new air gap manifold!! Liked the idea of Crowers cool face lifters,it's a solid lifter with a .024 laser drilled oiling hole on the bottom of the lifter.The hole is offset from center ,so when the lifter spins it lubes the cam directly with an elliptically pattern.While doing the tear down discovered the cam gear is bolted with different bolts the timing marks are off and the crankshaft is scored up! Looks like they used a monkey wrench on the crankshaft! BOZOS!! Luckily the marks were not near the front oil seal.I was able to smooth out the damage and remove the crank gear.[IMG]
[/IMG]Install new Crower 00320 solid cam with new timing set advanced 4 degrees.Checked cam timing it was spot on per cam card but advanced 4 degrees per the timing set.I used Jegs timing set with multiple keyways and bronze thrust washer between the block and cam gear.It fit perfectly with no issues.Since the oil pan was smashed,from a jack no doubt,replaced that with a 6 quart Milodon oil pan,HV oil pump and correct pickup for that pan.A one piece Milodon gasket and new front timing cover gaskets.Installed lifters,check for valve train geometry with new 1.55 PRW roller rockers ,needed 7.800 pushrods with the Edelbrock Performer heads that were installed on the engine already.Oh yes prepped the cam with the break in lube adj valves per specs.Installed new Air gap manifold very carefully to avoid intake leaks using the right stuff sealant and felpro gaskets.Install carb and fuel line using Fragola 8000 push on hoses and fittings and Summit dual feed fuel line.Old fuel line was rubber hose and screw clamps was accident waiting to happen.New water pump,and aluminum radiator ,finished the engine work with new tall valve covers.Old covers were rusty and new roller rockers were to tall for the old covers.Ready to fire and break in that new solid cam OH YEAH!! Test drive almost here!![IMG][/IMG][IMG][/IMG]Engine fires up on the first crank ,good to proceed to cam break in.After initial break in check valve lash hot all good.Set timing, carb adjustments good to go for test run.Start engine run through gears with clutch engaged all good no grinding present.Put trans in 1st release clutch slowly in pops out of gear! Damn gotta do more linkage adjusting! Adjust the 1st through 4th linkages,5-6 and reverse are good to go.Time consuming to get the gears to work right get 1st good 2nd goes wacky same for 3-4 gears.Finally got the sweet spot for both 1-2 linkage and 3-4 linkage.Lets go test drive! Kevlar clutch lets out smoothly no chatter at all! I'm very pleased! Hit the road going through the gears,little notchy which is expected but all good.This trans has a low first gear which works great with my 3.08 rear gear and the gear ratios are close you can always find the right gear.You do have to short shift 1st but man does the vette move outta the hole! That Crower 00320 cam advanced 4 degrees is awesome! The engine revs quickly and has lots of low end.Vacuum has increased to 14 in at idle where it was only 8 in before. Now I have to clean the outside and polish the wheels to make her look as good as she runs...[IMG]
[/IMG]All in all it was a fun project,not without problems but it was worth doing and the vette is so much more fun to drive! Side notes,I went with the Richmond due to the gear ratios would match my 3.08 rear better than a TKO500-600.The OD on those trans would lug the engine with the 3.08's and I did not want the added expense of a gear change.The Richmond bolts up to Chevy parts and is close to the same length as a TH350,I didn't have to mod the driveshaft.Forgot to mention I also needed a speedometer cable extension ,due to the Richmond has the output on the pass side.Trans project was costly.I got the trans from a guy who changed his mind about swapping the 4 speed in his 70 Chevelle and will keep his car original.He sold it new in the box for 2800.00 saved me 500.00 or so dollars because the shipping to Hawaii would have been nutz!Trans was in Hawaii already saving some dollahs.I also upgraded or replaced alot of items, you know while I'm at it I'll do this to! Trans swap estimated cost was close to 4800.00 due to my high shipping cost to Hawaii.You would probably be better off doing a complete trans kit from a vendor if you had different rear gears.This Richmond works well with the 3.08s,take offs are great and 6th gear cruising is perfect. Hope you enjoyed the write up! If you are considering this swap I can fill in the details for you Aloha's
The following 2 users liked this post by iokepakai:
stayfocusedmike (02-28-2024),
terrystrand (03-24-2018)
08-23-2011, 06:11 PM
#5


I did the Richmond 6 speed with my LS swap a few years ago. It's just so much more fun to drive, you're going to love it.
Btw, I'm jealous of your z bar linkage. I reused my old one.
And the Richmond does have perfect gears to go with a 3.08 rear like mine too.
Btw, I'm jealous of your z bar linkage. I reused my old one.
And the Richmond does have perfect gears to go with a 3.08 rear like mine too.
Last edited by Garys 68; 08-23-2011 at 06:13 PM.
08-23-2011, 06:46 PM
#6
Burning Brakes
Thread Starter
Howzit Gary68,
The more I get used to this trans the more I like it! Just concerned if I have the linkage adjusted all good.Had a bad time getting it just right.Any way to tell if it's spot on or is it good to go with no popping out of gear or grinding present? It seems to be good to go...Alohas
The more I get used to this trans the more I like it! Just concerned if I have the linkage adjusted all good.Had a bad time getting it just right.Any way to tell if it's spot on or is it good to go with no popping out of gear or grinding present? It seems to be good to go...Alohas
08-24-2011, 12:41 PM
#8
Howzit Gary68,
The more I get used to this trans the more I like it! Just concerned if I have the linkage adjusted all good.Had a bad time getting it just right.Any way to tell if it's spot on or is it good to go with no popping out of gear or grinding present? It seems to be good to go...Alohas
The more I get used to this trans the more I like it! Just concerned if I have the linkage adjusted all good.Had a bad time getting it just right.Any way to tell if it's spot on or is it good to go with no popping out of gear or grinding present? It seems to be good to go...Alohas
08-24-2011, 01:19 PM
#9
Burning Brakes
Thread Starter
Thanks for the advice! I need to drive it more (hahaha) to get the feel,but so far it's great.Can't wait for the weekend to go cruzin along side my friends 62 c1.Money well spent for sure.....Aloha's

 10-17-2011, 08:52 AM
#11
The Richmond will bolt tou your current Muncie bell housing on a big or small block. Muncies are all the same externally. They did not use separate transmissions for big vs small block. The only differences in strength are between the M20, 21, and 22. A big block could have any of those.
10-17-2011, 12:54 PM
#12
10-17-2011, 03:19 PM
#13

WOW! I really want to do this but have no idea where to even start. Not terribly mechanically inclined so I'm completely intimidated.
How much did this swap cost about?
I've priced out the Keisler unit ($3K) but they only have a 5sp. I was told that the 6sp would require significant modifications.
Anyone know anyone in the central Florida area that could do this this swap for me?
How much did this swap cost about?
I've priced out the Keisler unit ($3K) but they only have a 5sp. I was told that the 6sp would require significant modifications.
Anyone know anyone in the central Florida area that could do this this swap for me?
10-17-2011, 03:56 PM
#14
Pro


WOW! I really want to do this but have no idea where to even start. Not terribly mechanically inclined so I'm completely intimidated.
How much did this swap cost about?
I've priced out the Keisler unit ($3K) but they only have a 5sp. I was told that the 6sp would require significant modifications.
Anyone know anyone in the central Florida area that could do this this swap for me?
How much did this swap cost about?
I've priced out the Keisler unit ($3K) but they only have a 5sp. I was told that the 6sp would require significant modifications.
Anyone know anyone in the central Florida area that could do this this swap for me?
I did it (ROD) in my 69 (originally MT) and love it. I think it was the best mod I did.
10-18-2011, 09:20 AM
#15
If you're talking about swapping it to replace an existing 4-speed manual, then it is very easy. If you mean to do the auto to manual conversion, then as you see above, it is a bit more involved.
I did it (ROD) in my 69 (originally MT) and love it. I think it was the best mod I did.
I did it (ROD) in my 69 (originally MT) and love it. I think it was the best mod I did.
10-18-2011, 10:18 AM
#16
Pretty much any shop that can swap a trans or change a clutch can do it. You can reuse pretty much everything, bell housing, linkage, driveshaft, etc, almost no mods needed.
The only changes that might be necessary, swap out a removable crossmember (not absolutely necessary, but a great idea), shorten the TH400 yoke (maybe), zero in your bellhousing (you'll need to ask for them to do this).
Cost, about $3k for the trans. Last I looked SDparts had the best deal. A new clutch for about $120. TH400 yoke $80. A 67 corvette hurst shifter handle if you want the interior to look original $100.
The big advantage of the Richmond is that you can order it with a wide delection of 1st and 6th gear ratios to work with your engine and rear end ratio.
WOW! I really want to do this but have no idea where to even start. Not terribly mechanically inclined so I'm completely intimidated.
How much did this swap cost about?
I've priced out the Keisler unit ($3K) but they only have a 5sp. I was told that the 6sp would require significant modifications.
Anyone know anyone in the central Florida area that could do this this swap for me?
How much did this swap cost about?
I've priced out the Keisler unit ($3K) but they only have a 5sp. I was told that the 6sp would require significant modifications.
Anyone know anyone in the central Florida area that could do this this swap for me?
10-18-2011, 10:35 AM
#17
Pretty much any shop that can swap a trans or change a clutch can do it. You can reuse pretty much everything, bell housing, linkage, driveshaft, etc, almost no mods needed.
The only changes that might be necessary, swap out a removable crossmember (not absolutely necessary, but a great idea), shorten the TH400 yoke (maybe), zero in your bellhousing (you'll need to ask for them to do this).
Cost, about $3k for the trans. Last I looked SDparts had the best deal. A new clutch for about $120. TH400 yoke $80. A 67 corvette hurst shifter handle if you want the interior to look original $100.
The big advantage of the Richmond is that you can order it with a wide delection of 1st and 6th gear ratios to work with your engine and rear end ratio.
The only changes that might be necessary, swap out a removable crossmember (not absolutely necessary, but a great idea), shorten the TH400 yoke (maybe), zero in your bellhousing (you'll need to ask for them to do this).
Cost, about $3k for the trans. Last I looked SDparts had the best deal. A new clutch for about $120. TH400 yoke $80. A 67 corvette hurst shifter handle if you want the interior to look original $100.
The big advantage of the Richmond is that you can order it with a wide delection of 1st and 6th gear ratios to work with your engine and rear end ratio.
Great info.
10-18-2011, 11:44 AM
#18

Hmm, let's dig a little deeper.
http://sdparts.com/details/richmond-gear/rg7021626aa
http://sdparts.com/details/richmond-gear/rghb1000s
With the Richmond (rounded up .01) $2940 gets you get a transmission in a box. Add $534 (rounded up .01) for a total of $3474 getting you a trans with a shifter.
With Keisler, you get the following for $2499/$2799/$3199:
-5 speed overdrive trans (RS400/RS500/RS 600) with no notchy feel and a short throw shifter
-Fully engineered crossmember adapter bracket with isolator mount
-Complete ready-to-install driveshaft
-Fully calibrated speedometer cable or electronic speedo components
-Pilot bearing
-5 speed plate for console
-Reverse light pigtail
-Hardware
-12 month warranty
Am I missing something?
10-18-2011, 12:03 PM
#19
Hmm, let's dig a little deeper.
http://sdparts.com/details/richmond-gear/rg7021626aa
http://sdparts.com/details/richmond-gear/rghb1000s
With the Richmond (rounded up .01) $2940 gets you get a transmission in a box. Add $534 (rounded up .01) for a total of $3474 getting you a trans with a shifter.
With Keisler, you get the following for $2499/$2799/$3199:
-5 speed overdrive trans (RS400/RS500/RS 600) with no notchy feel and a short throw shifter
-Fully engineered crossmember adapter bracket with isolator mount
-Complete ready-to-install driveshaft
-Fully calibrated speedometer cable or electronic speedo components
-Pilot bearing
-5 speed plate for console
-Reverse light pigtail
-Hardware
-12 month warranty
Am I missing something?
http://sdparts.com/details/richmond-gear/rg7021626aa
http://sdparts.com/details/richmond-gear/rghb1000s
With the Richmond (rounded up .01) $2940 gets you get a transmission in a box. Add $534 (rounded up .01) for a total of $3474 getting you a trans with a shifter.
With Keisler, you get the following for $2499/$2799/$3199:
-5 speed overdrive trans (RS400/RS500/RS 600) with no notchy feel and a short throw shifter
-Fully engineered crossmember adapter bracket with isolator mount
-Complete ready-to-install driveshaft
-Fully calibrated speedometer cable or electronic speedo components
-Pilot bearing
-5 speed plate for console
-Reverse light pigtail
-Hardware
-12 month warranty
Am I missing something?
I would really just like a 6sp and if the difference between getting a 5sp and 6sp is basically $500, then I would opt for the 6sp.
So are you saying that I cannot use most of the current hardware as Gary stated? I'm truly a newb when it comes to this so if I've made it seem like I am minimizing your product, my aplogies.
10-18-2011, 12:20 PM
#20
The $3000 Richmond 6 speed comes with a Long 6 speed shifter.
If you buy the $2000 Richmond 5 speed (1:1 5th gear), then you need to buy a separate $500 shifter.
I was considering the Keisler kit, they make a good product. I did buy my bellhousing, clutch, etc from them, very happy with their stuff. Still kicking around the idea of buying one of their RS units for my 442. Price is great, quality sounds good, shifter location works.....
Like I said above, the reason I went with the Richmond was that I could get it with my choice of 1st and 6th gear.
OK, my apologies for the following blashemous pic.....
But that's a Richmond 6 speed connected to a Keisler LS bell housing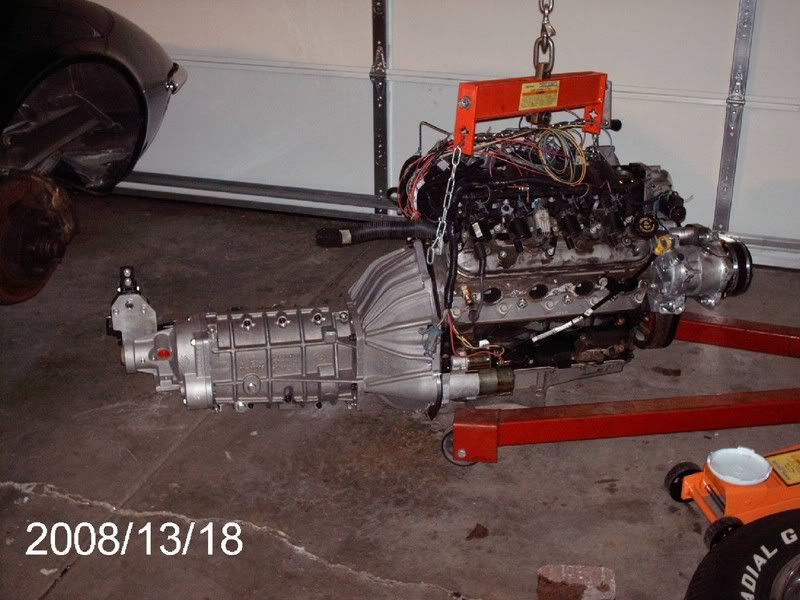
Last edited by Garys 68; 10-18-2011 at 12:26 PM.