
Windshield trim removal
 08-30-2011, 08:39 PM
#1
Le Mans Master


Thread Starter
Member Since: Jan 2007
Location: Danville Illinois
Posts: 9,292
Received 570 Likes
on
286 Posts
Finalist 2021 C3 of the Year - Modified
C3 of Year Finalist (appearance mods) 2019

How hard is it to remove the trim piece at the top of the windshield?
I have the side pillar moldings off and the trim off, just have to remove the top portion.
Have a big gap on one side and want to correct it.
I have the side pillar moldings off and the trim off, just have to remove the top portion.
Have a big gap on one side and want to correct it.
 08-30-2011, 11:18 PM
#2


There is a special tool that looks like a big 'arrow' but very broad at the end with it being angled up to about 30 degrees before the handle. Lisle sells them.
The purpose of the 'arrow' end is the actual left or right end of the arrow tip which allows you to insert under the reveal moulding and activate a small retaining clip that secures this moulding.
This part gets a bit tricky and requires an understanding in what you which to accomplish. Study how the clip holds the moulding secure and then see how the tool can interact with the 'release' of the moulding.
The process is as follows by inserting under the moulding, then at a slight slide towards the clip start by rocking that 'arrow' end as a fulcrum to 'release' the grip on the moulding and a very slight twist to lift the moulding off of the clip. Be very carefull as you can chip the glass.
Once removed you can determine why you have a large gap and rectify it.
Study the set up and you will understand your quest.
08-31-2011, 05:11 PM
#3
Team Owner

Member Since: Sep 2006
Location: Westminster Maryland
Posts: 30,173
Likes: 0
Received 2,878 Likes
on
2,515 Posts
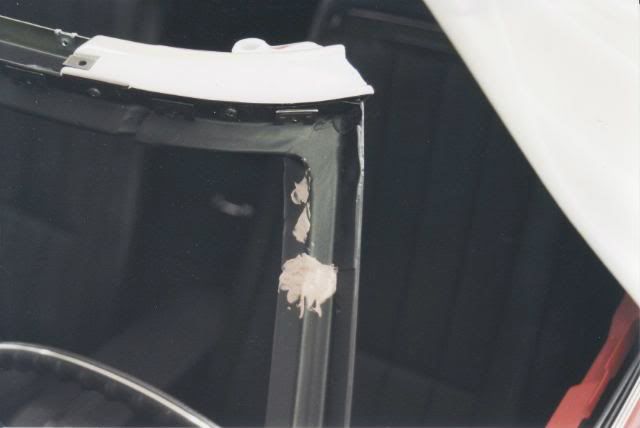
Hi mv75,
Here's a picture showing 3 of the clips kv posts about. The one near the a-pillar is easiest to see.
The long thin piece of trim has flat 'tabs' that slip into the clips.
Regards,
Alan
Here's a picture showing 3 of the clips kv posts about. The one near the a-pillar is easiest to see.
The long thin piece of trim has flat 'tabs' that slip into the clips.
Regards,
Alan
08-31-2011, 07:54 PM
#4
Former Vendor
Member Since: Aug 2006
Location: Jeffersonville Indiana 812-288-7103
Posts: 76,656
Received 1,813 Likes
on
1,458 Posts
St. Jude Donor '08-'09-'10-'11-'12-'13-'14-'15
Below is what the tool looks like and how you use it. You just slip it behind the clip and rock it open.
You can pick one up at your local parts house.

You can pick one up at your local parts house.
08-31-2011, 08:53 PM
#5
Le Mans Master
Thread Starter
Member Since: Jan 2007
Location: Danville Illinois
Posts: 9,292
Received 570 Likes
on
286 Posts
Finalist 2021 C3 of the Year - Modified
C3 of Year Finalist (appearance mods) 2019
Thanks Alan, the picture says it all, i believe i have one of those tools somewhere.
I will try to take some pics of the removal and reinstall.
Thank you Willcox corvette, your door weatherstrip and side window rubber arrived last week and looks and fits great.
I will try to take some pics of the removal and reinstall.
Thank you Willcox corvette, your door weatherstrip and side window rubber arrived last week and looks and fits great.
Last edited by Mod75; 08-31-2011 at 09:01 PM.