
78 LS1-T56 Turbocharged Build


 I'm such a
 11-16-2012, 04:33 PM
#46
Intermediate

Member Since: Jul 2007
Location: Shreveport Louisiana
Posts: 29
Received 0 Likes
on
0 Posts

Great project! You're way ahead of the game by being able to do so much fab work yourself.
Also, sorry if I missed it, but what size wheels/tires are you running?
Also, sorry if I missed it, but what size wheels/tires are you running?

 11-16-2012, 11:08 PM
#48
Instructor
Does the hood need to be that tall for clearance? I think the Ecklers Twin Turbo hood would look good on there.
Great looking Corvette.
Also, is that an RX-7 with a BowTie?
Chappie
Great looking Corvette.
Also, is that an RX-7 with a BowTie?
Chappie
11-17-2012, 09:53 AM
#49
Instructor
Thread Starter

Great project! You're way ahead of the game by being able to do so much fab work yourself.
Also, sorry if I missed it, but what size wheels/tires are you running?
Also, sorry if I missed it, but what size wheels/tires are you running?
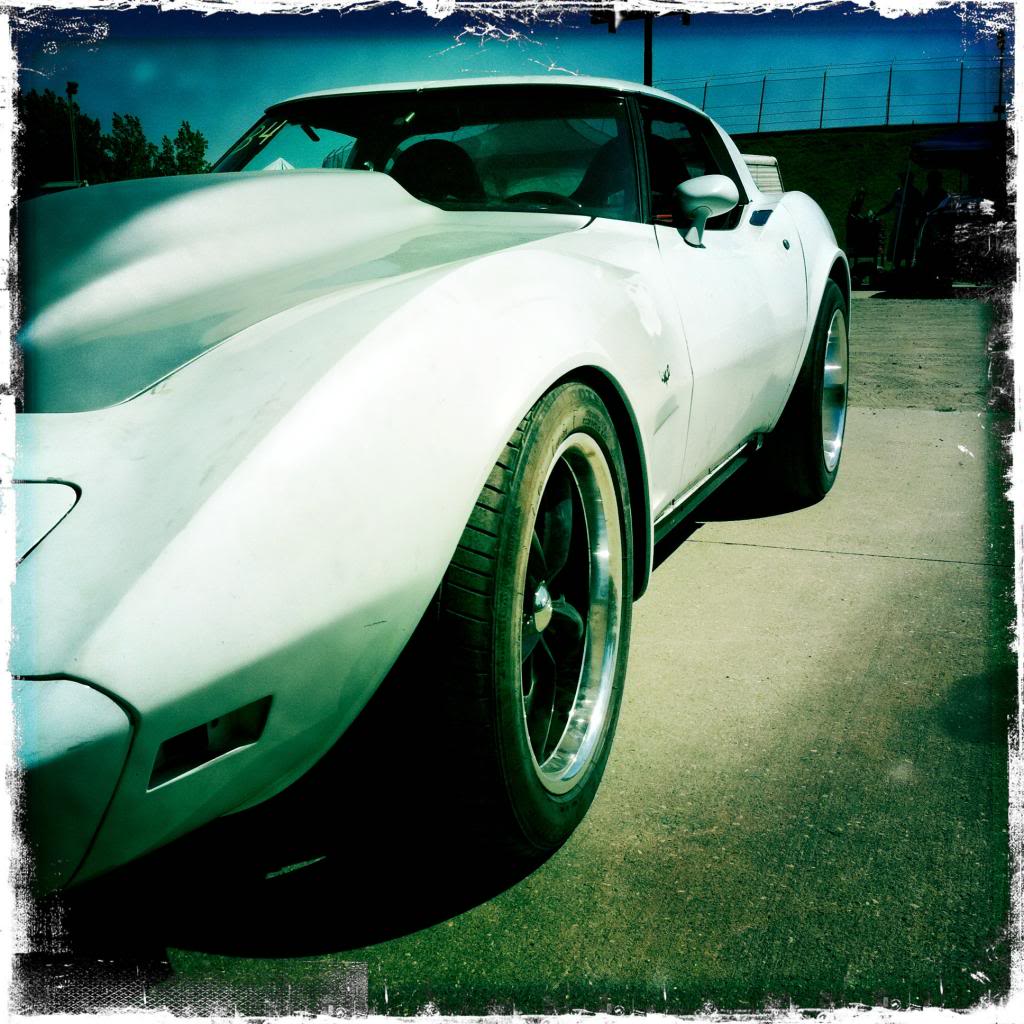
Wheels are 18x9.5 rear, tires usually are 295x45r18 fronts are 18x8 255x40r18
Great skills!!
Does the hood need to be that tall for clearance? I think the Ecklers Twin Turbo hood would look good on there.
Great looking Corvette.
Also, is that an RX-7 with a BowTie?
Chappie
Great looking Corvette.
Also, is that an RX-7 with a BowTie?
Chappie
The RX-7 is wearing a bow tie.. Thats my friends car, he's running an LSX in it and we work for GM, so it helps him fit in.
 11-21-2012, 12:05 PM
#50
Instructor
Thread Starter
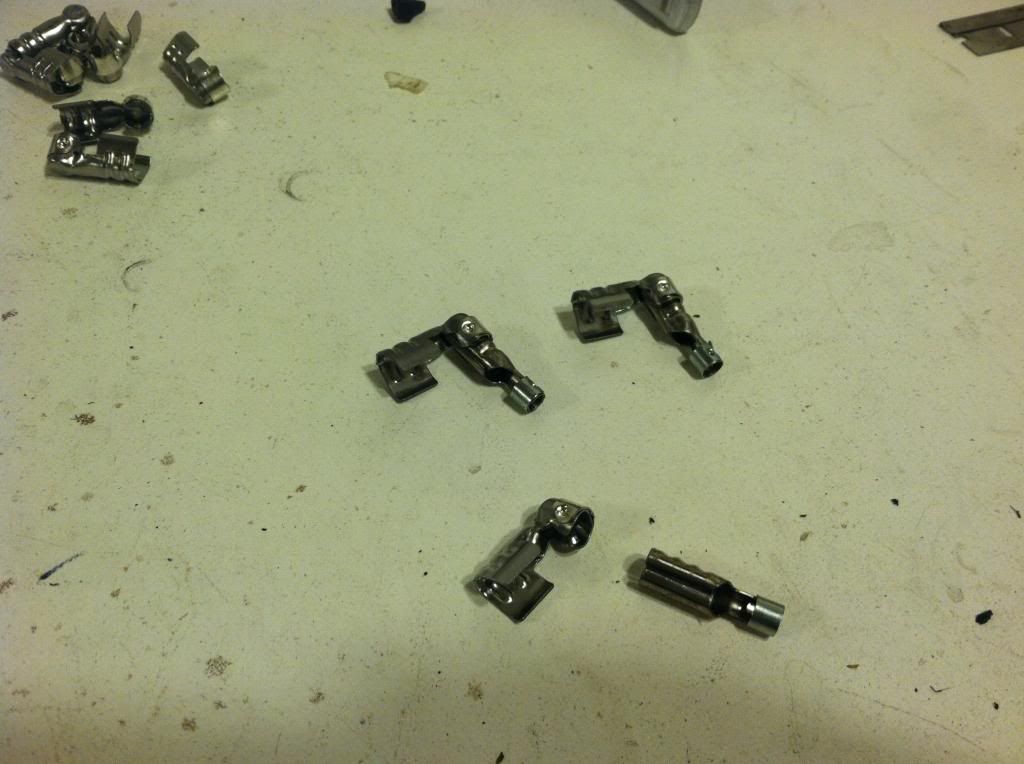
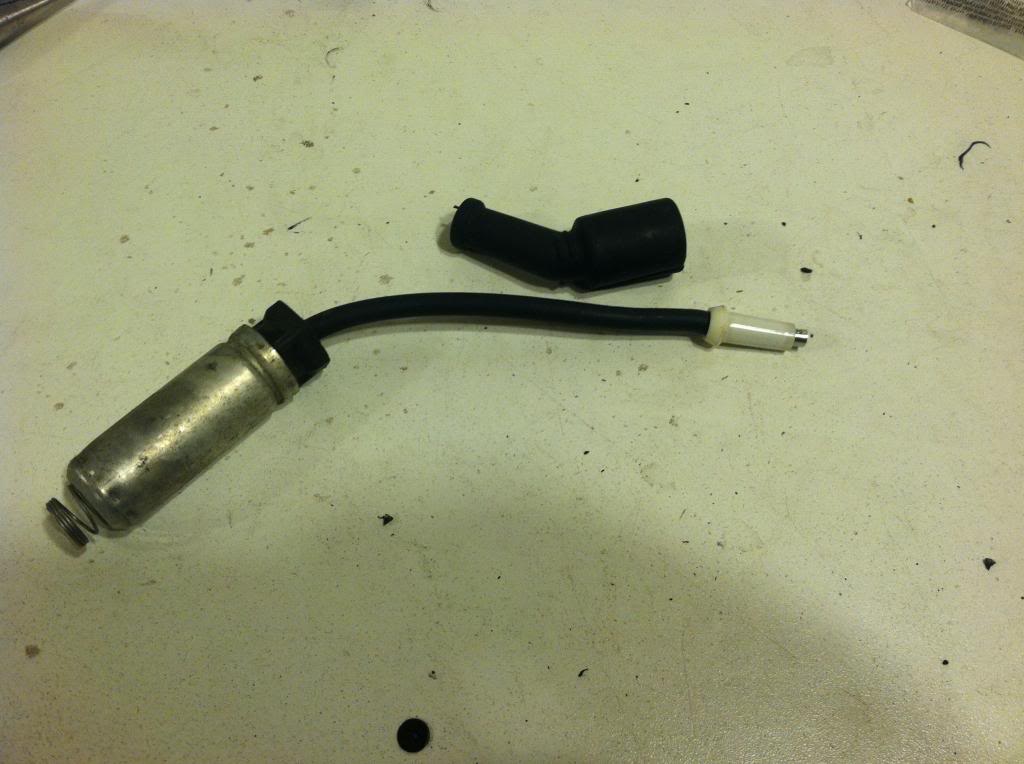
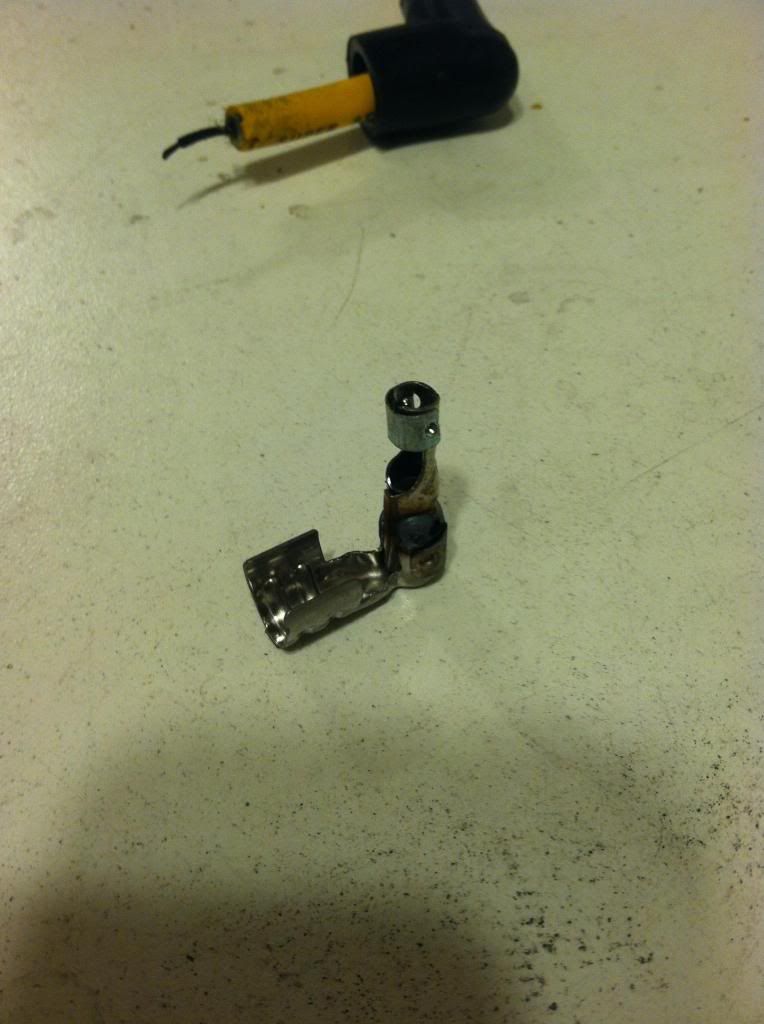
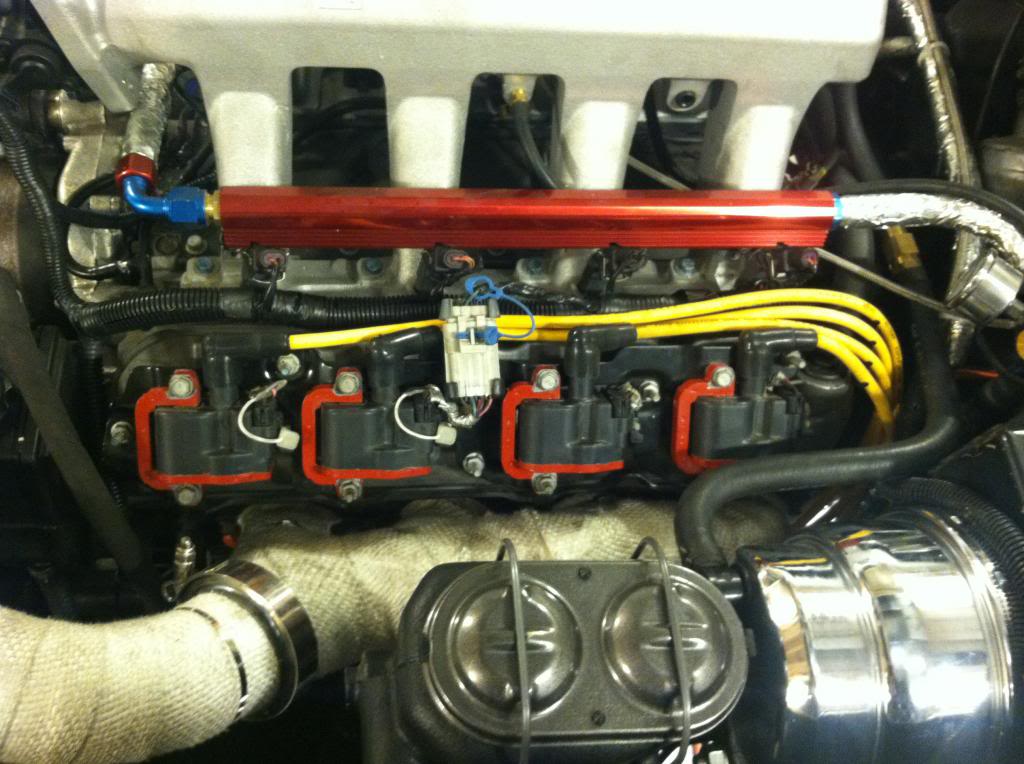
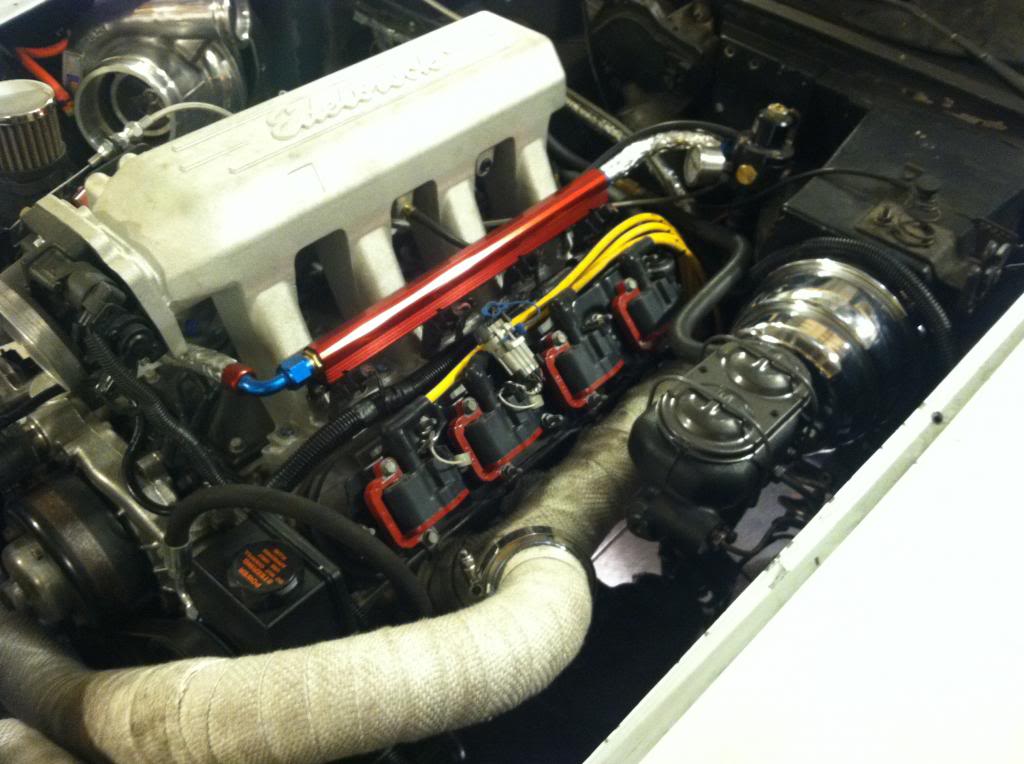
Made some new spark plug wires. I ended up flipping my coils on the valve covers, and wrapping the wires around the back side of the block. I used some general purpose cut to fit wires. I had to strip the factory wires of the original coil plug clip piece and insert it into one of the provided 45 degree units. I tack welded them together to give me a proper connection into my coils.
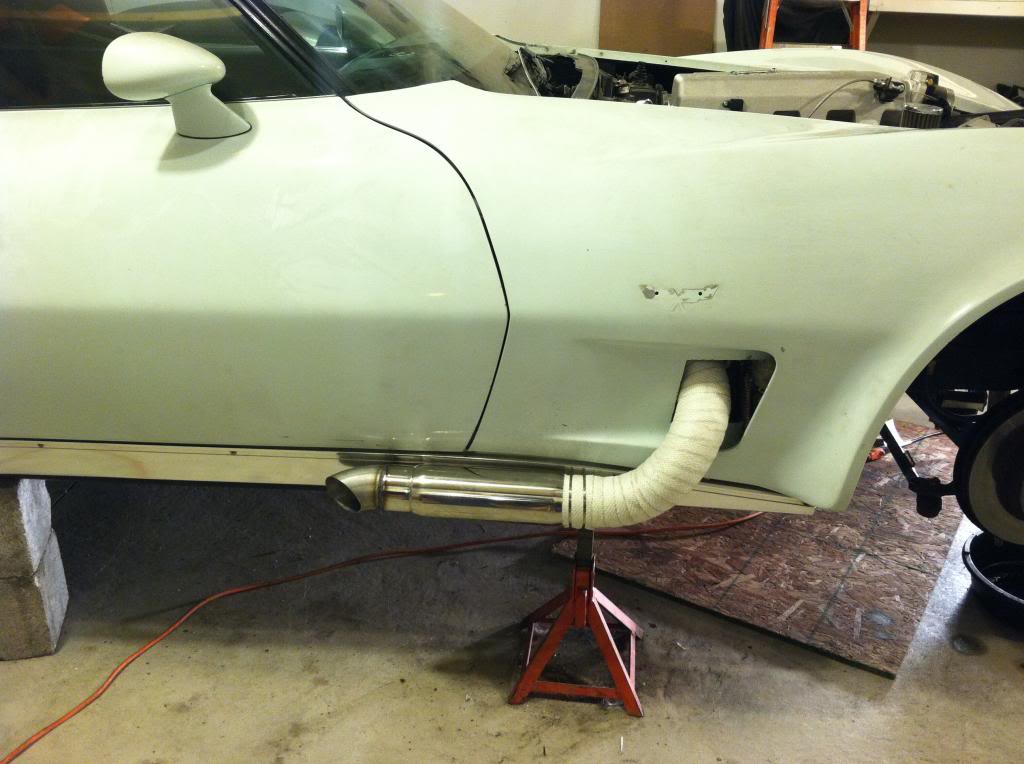
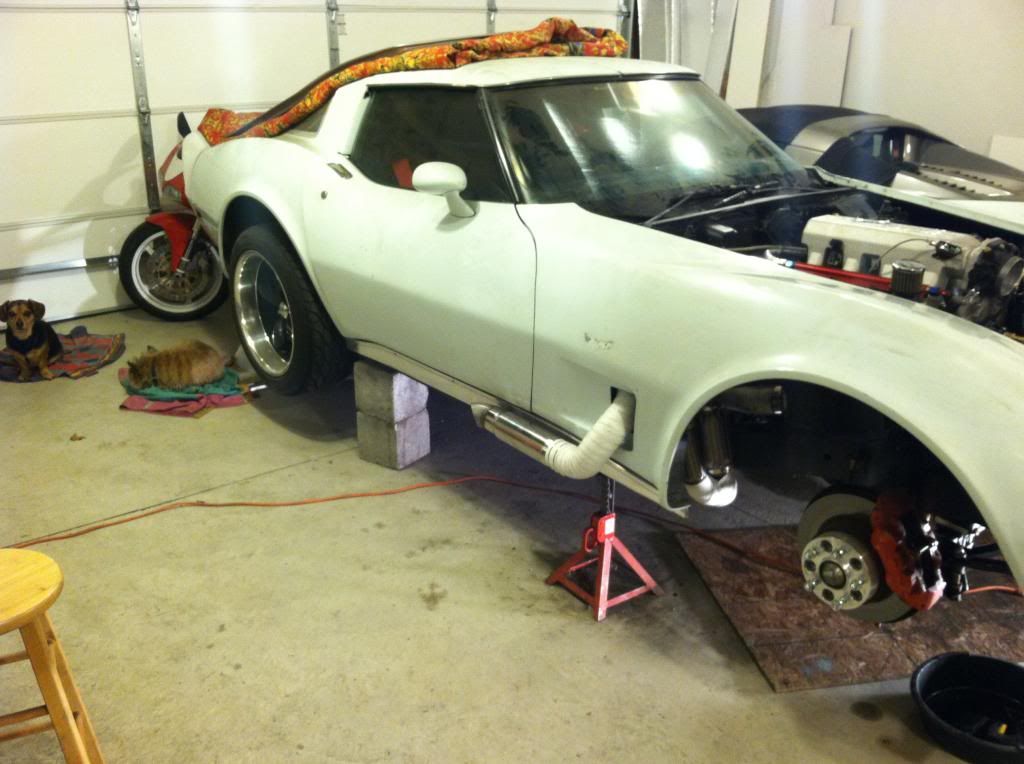
I also finished my shorty side pipe with resonater

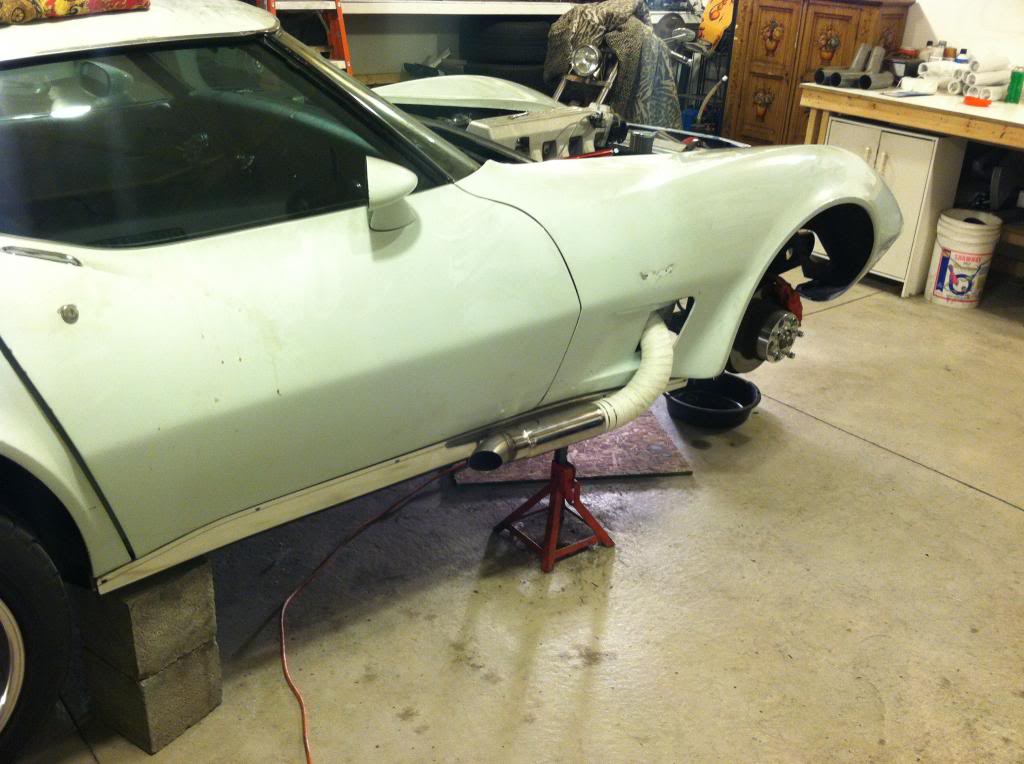
I also finished my shorty side pipe with resonater
11-22-2012, 12:05 AM
#51
Melting Slicks

Nice work.
Can't say I see your vision with the sidepipe - still, with how fast that thing will be; I suspect no one will notice as you blow their doors off
Can't say I see your vision with the sidepipe - still, with how fast that thing will be; I suspect no one will notice as you blow their doors off
 11-22-2012, 09:24 AM
#53
Instructor
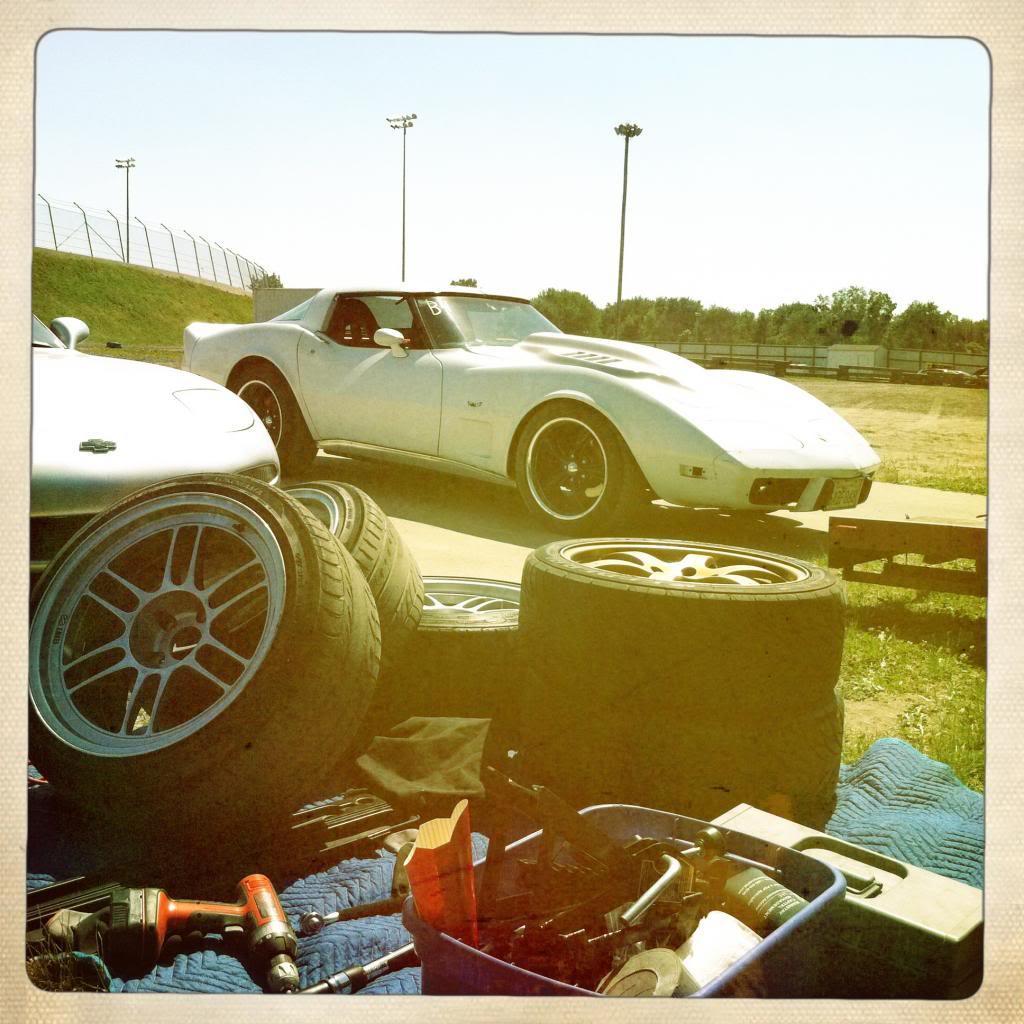
Is that a Lotus Elise behind the Vette?
The sidepipes look ok. No plans to extend them down the side of the car like original side pipes? Coilpacks and wires look pretty good.
Chappie
The sidepipes look ok. No plans to extend them down the side of the car like original side pipes? Coilpacks and wires look pretty good.
Chappie
11-22-2012, 03:20 PM
#54
Burning Brakes

I had white exhaust wrap on my Sportster bobber and it didn't take long to start to look real grungy. I would suggest spraying it down with some white header paint to make it easier to clean.
11-23-2012, 12:36 PM
#55
Instructor
Thread Starter
The car in the background is a Lotus. As far as the side pipe goes, because it's only on one side so I feel one full length side pipe would look a little goofy. Some may think a shorty side pipe is goofy but to each their own. I'm very much untraditional in a lot of aspects, so the traditional rout is not my goal at all. Ideally it wouldn't even come down to be a side pipe at all. I want the pipe to just come out the fender but it would be way too loud.
11-23-2012, 12:39 PM
#56
Instructor
Thread Starter
Already thought plenty about that. Not only to keep it cleaner but to keep the fiberglass fibers sealed in. I figure I will let it get a bit dirty and then once it pisses me off take it off and seal it in. That or if I need to take it apart it will get done then.
11-23-2012, 01:16 PM
#57
Drifting

Yes, make sure you seal them with several coats header paint or header wrap sealant, it will also help keep it from getting wet and over time unraveling.
The project is looking fantastic, keep up the awesome work.
Riggs.
The project is looking fantastic, keep up the awesome work.
Riggs.
 12-21-2012, 10:50 AM
#59
Instructor
Thread Starter
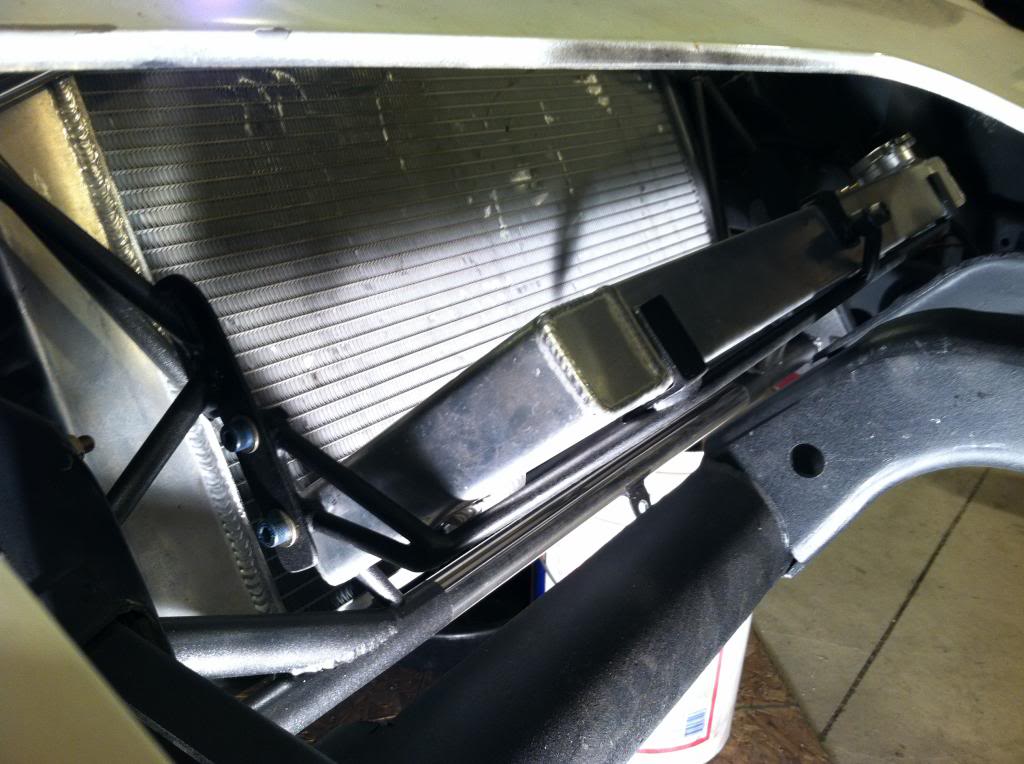
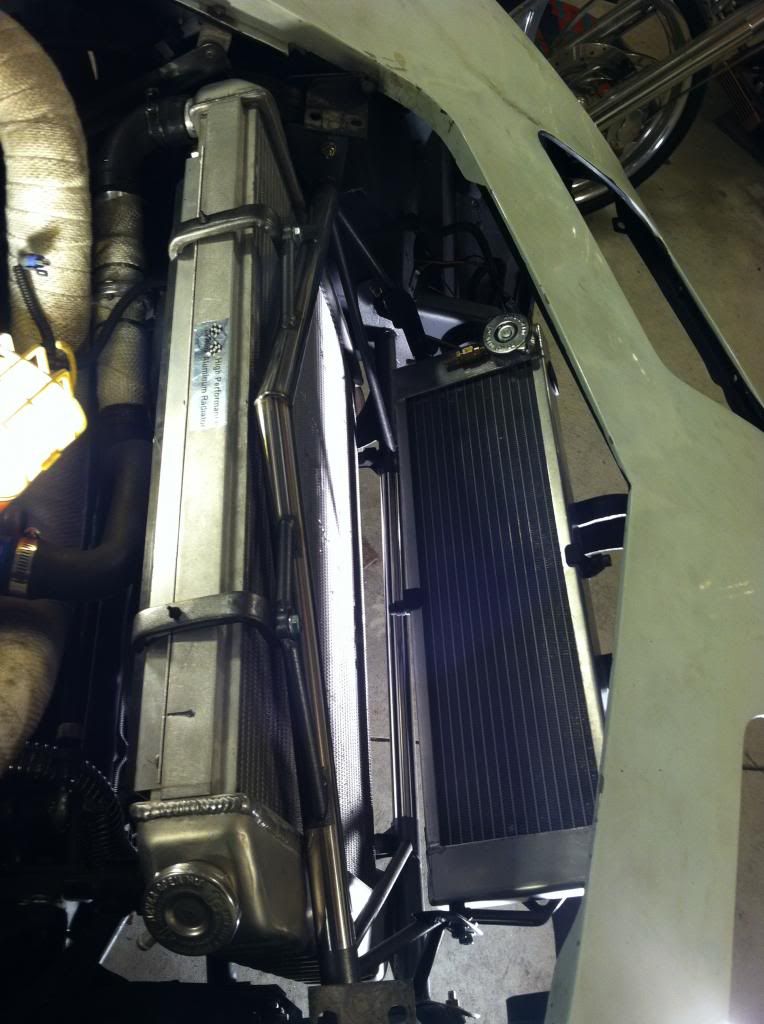
Well I had a change of plans. After messing with the intercooler piping coming over the radiator I came to the conclusion it was just not going to fit. I am now doing a water to air intercooler setup and have so far pieced together what should be a very nice setup on the cheap.
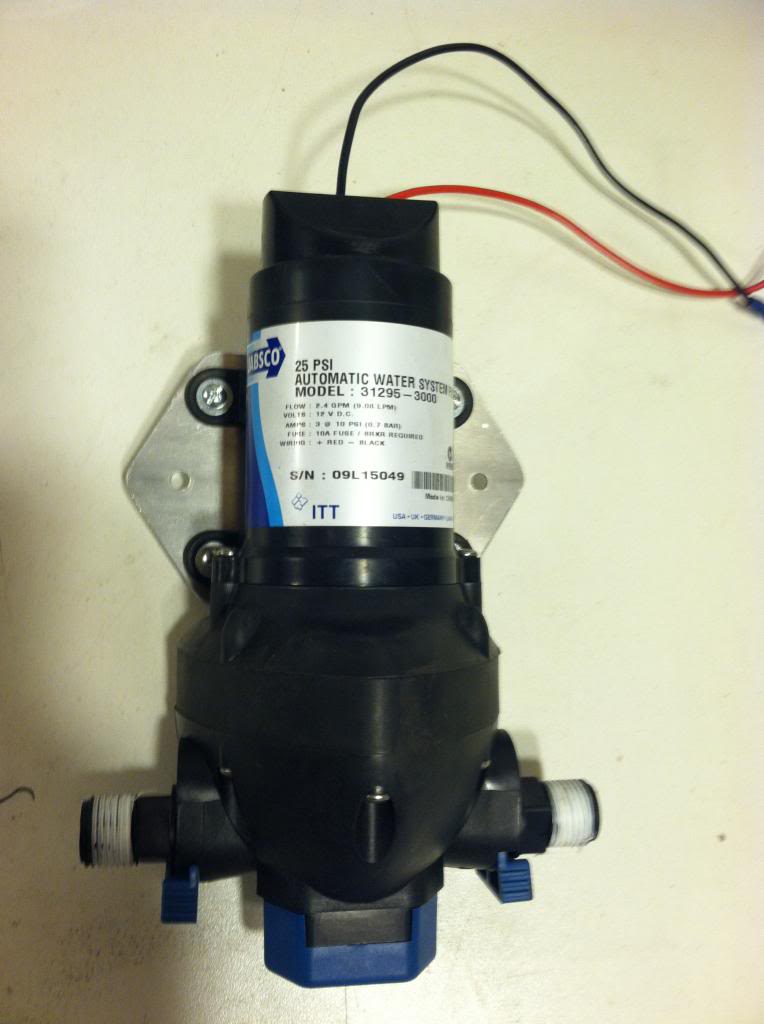
This is the pump I decided to run for now. It's a jabsco pump I picked up for $30 used but still brand new. About $60 cheaper than the bosche units and can run dry without damaging the pump. I made a little aluminum bracket for it and mounted it on an existing mount spot on the inner fender of the driver side nice and tucked away.
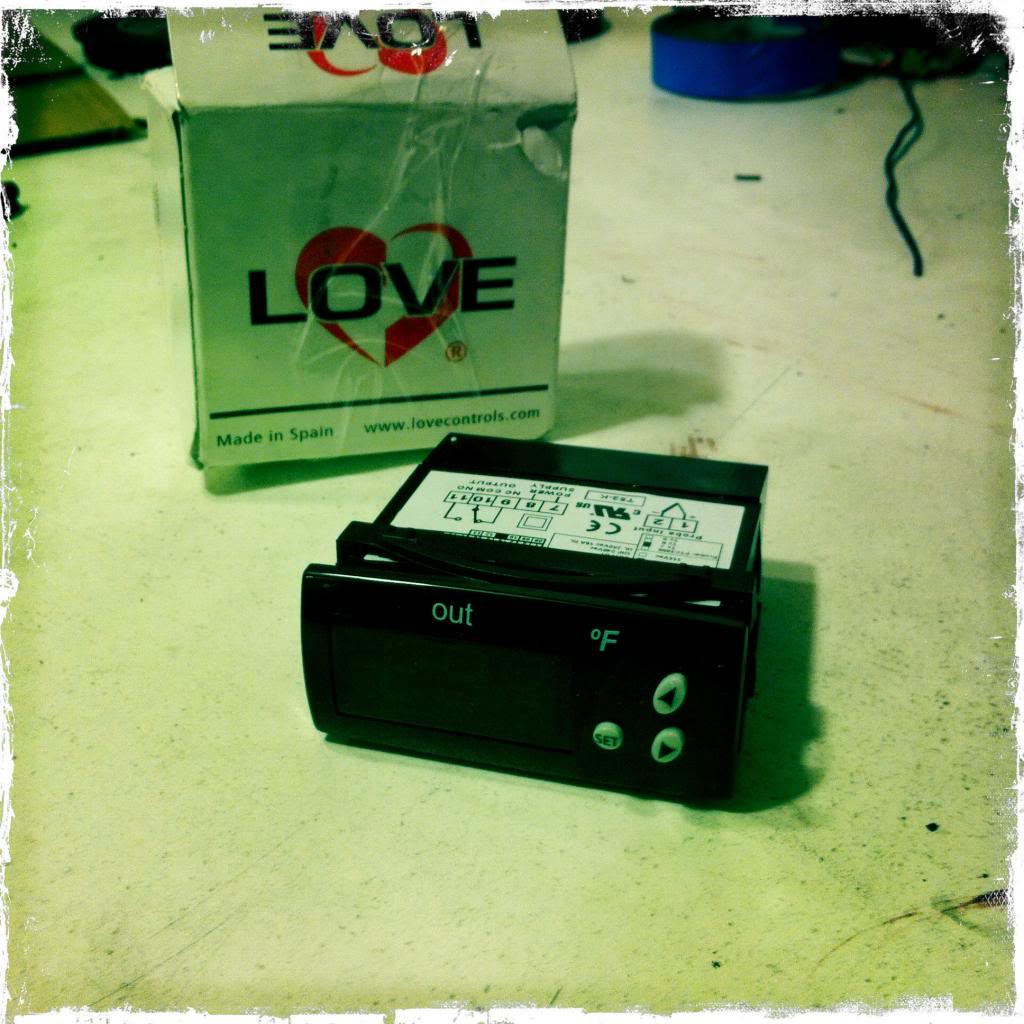
I didnt want the pump running all the time when it isnt needed so I spent a good amount of time figuring out a solid solution for a trigger. I also wanted a gauge to monitor the intake air temps. I wanted all this and didnt want to spend a lot of money as in the theam with every new thing I do to the car. I found this little Love 12 volt thermastatic controler. It has a digital readout and can be set at any temperature. I will probably keep it set around 110-120f so the pump will only kick in once the temps go above that. I found this $90 unit for $15..... Score!! and found a stainless braded thermocoupler for $2
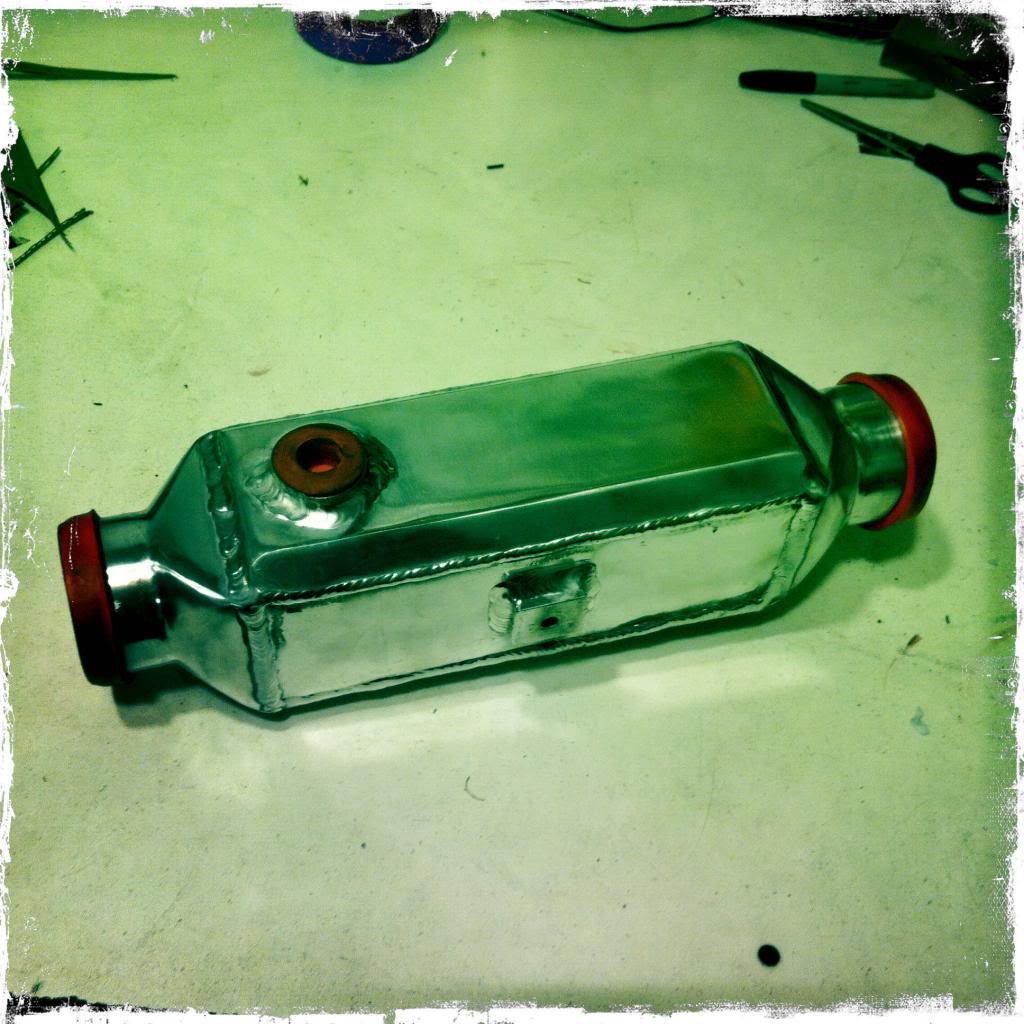
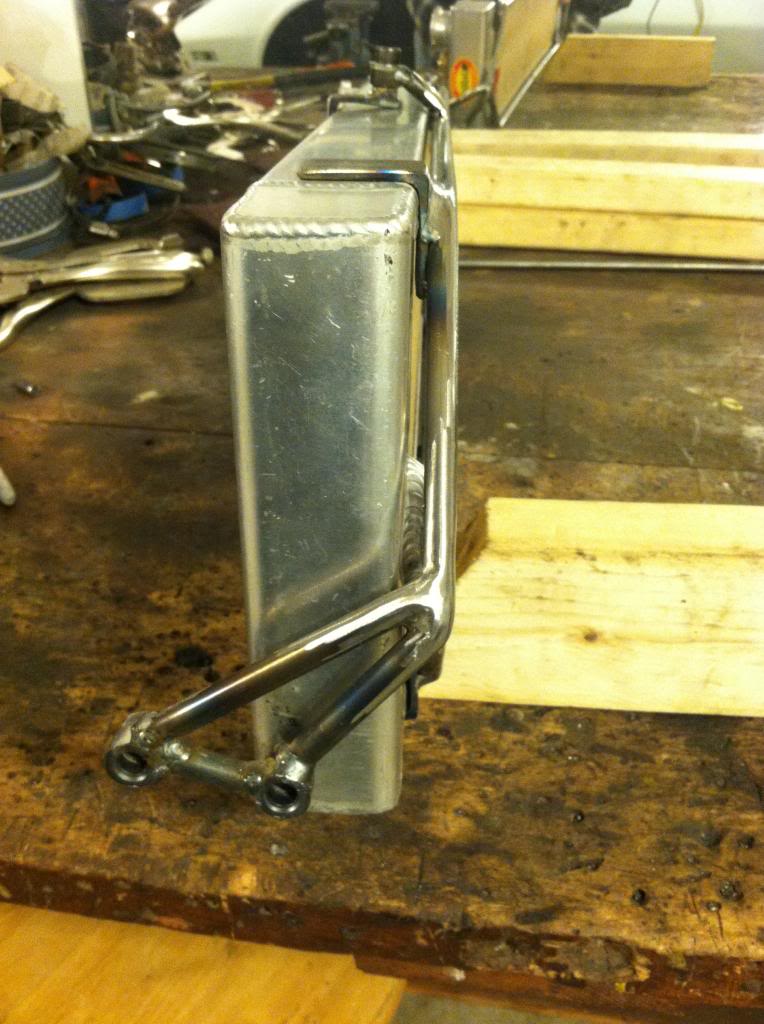
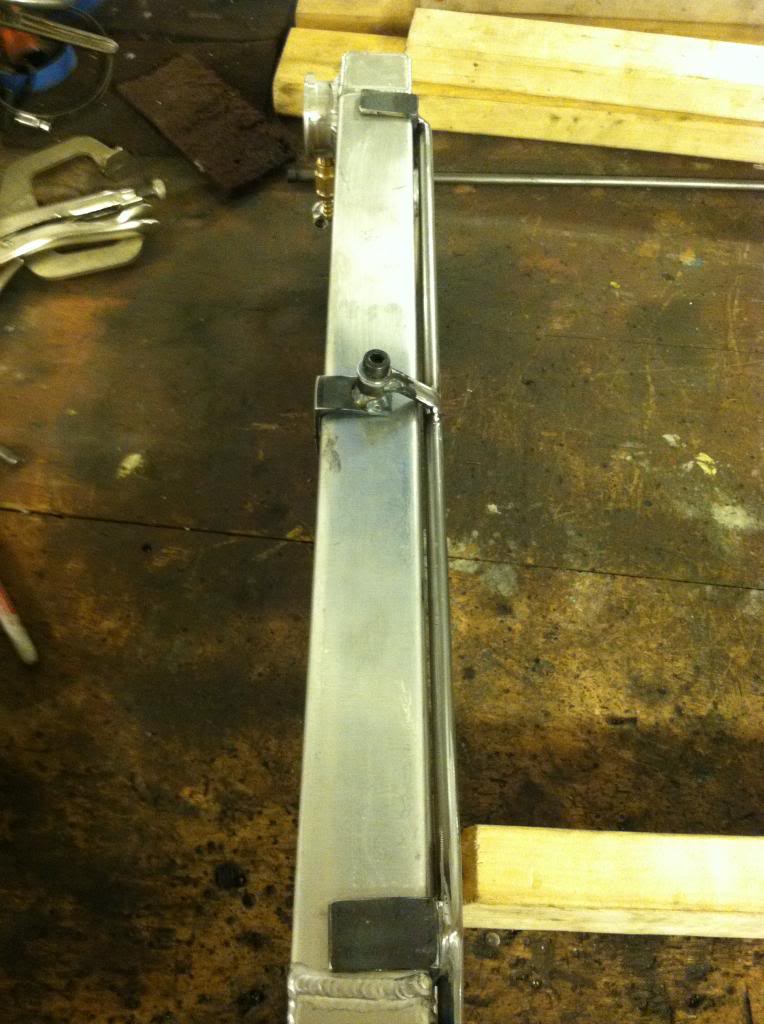
This is the water to air intercooler I decided to go with. It will package very nicely inline with the piping. Its not the biggest but I think the way I am seting up the rest of it there should be sufficient cooling. The core is essentially the same size as most w2a units out there. I wanted a barrel but this one is a fraction of the cost.
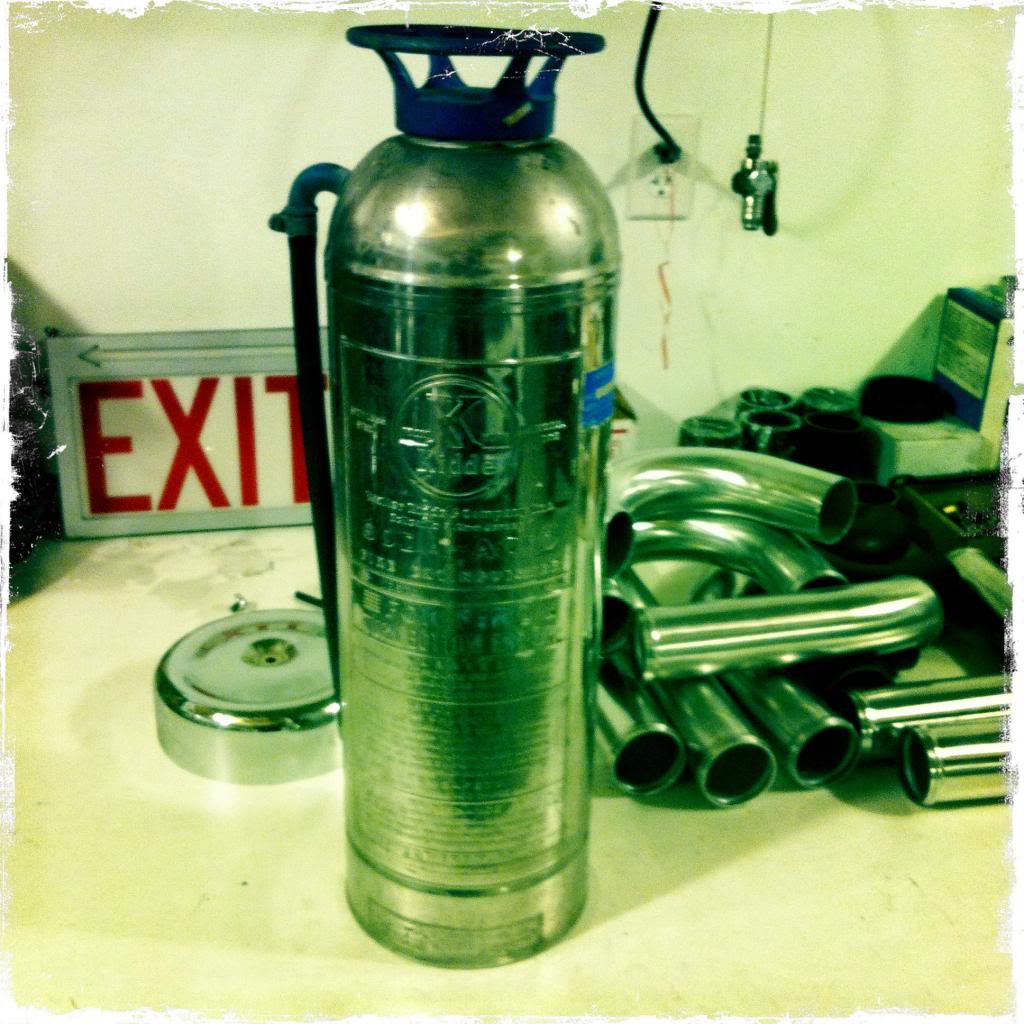
For the water tank I decided to go with a vintage stainless steel fire extinguisher. It's nice and light and will look real cool mounted in the center behind the seats. It's 2.5 gallon and has a large enough opening to put in ice if I want.
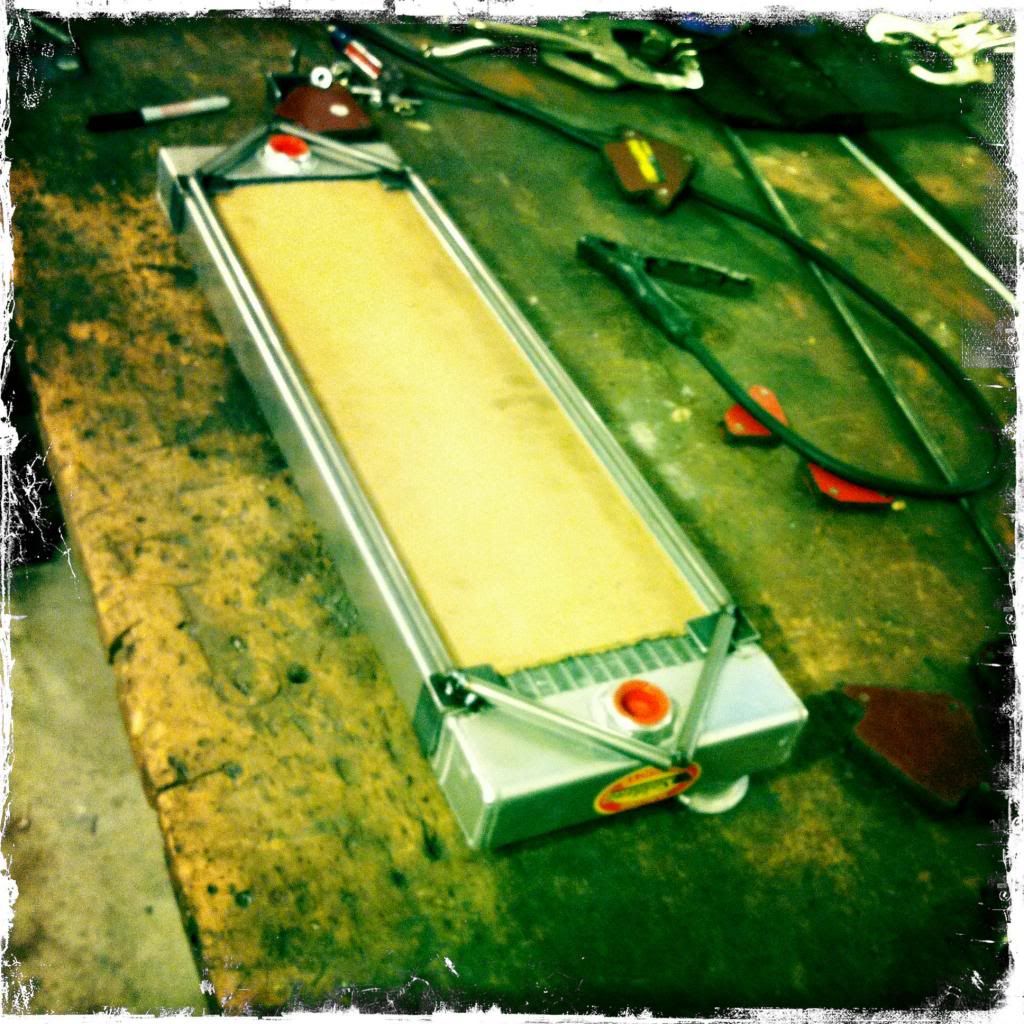
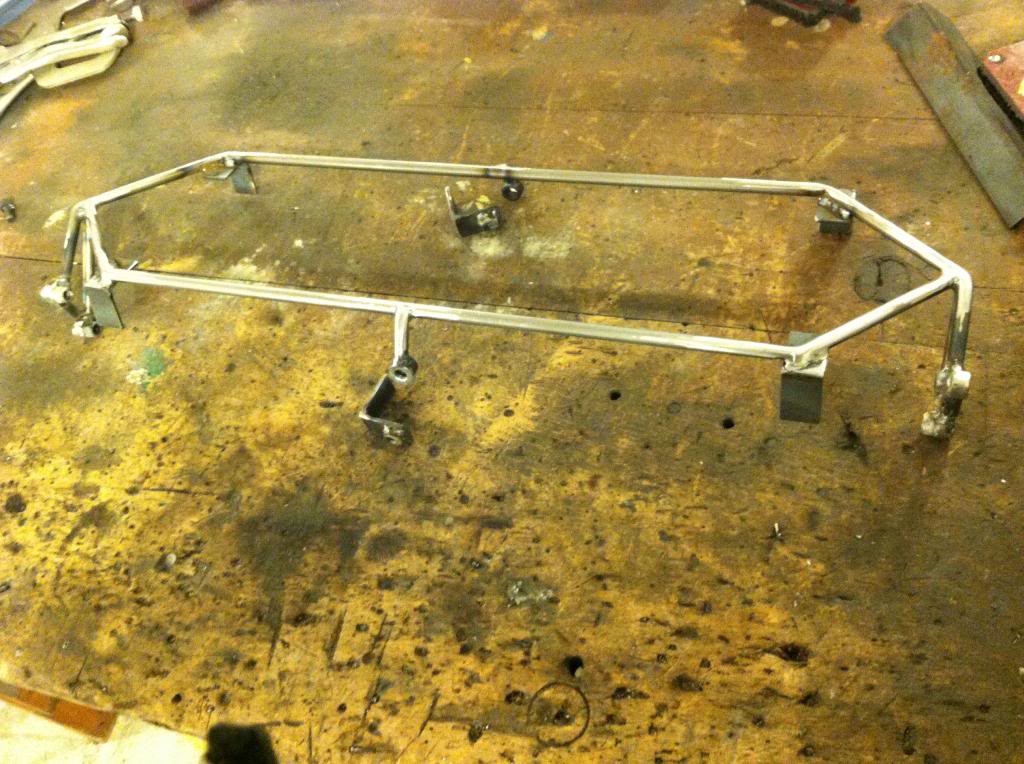
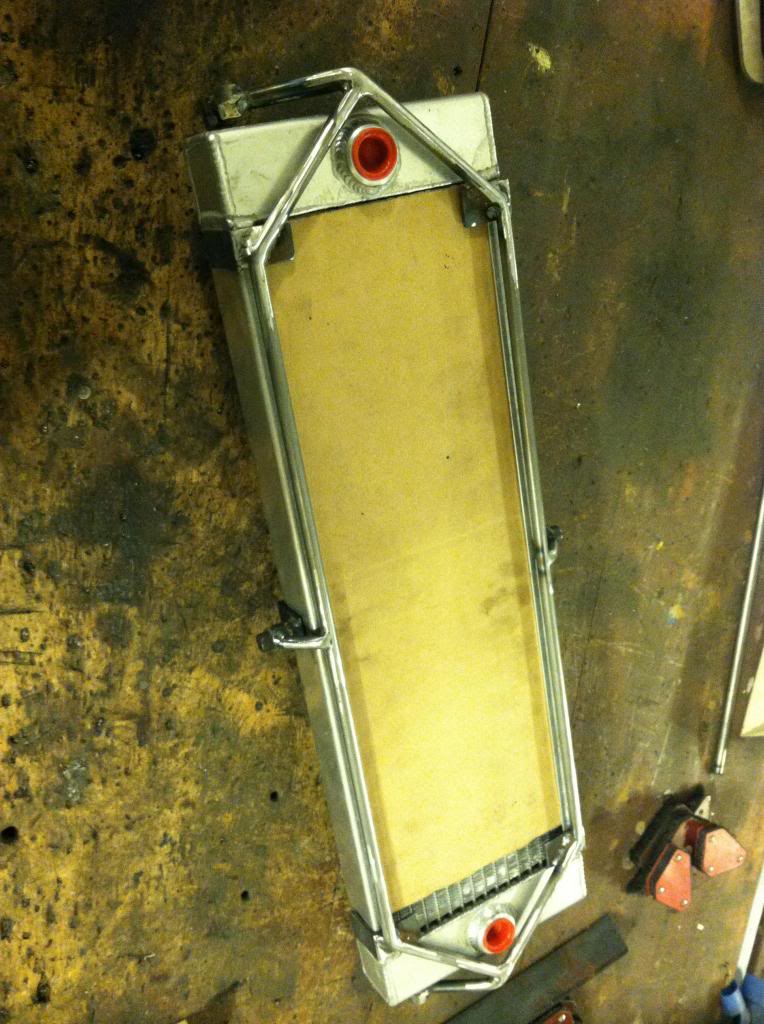
For the heat exchanger, I found this sprint car, or midget racing radiator on ebay. its 2" thick, 26" long, and 8" tall. This thing is legit and will cool wonders. Looked up the manufacturer and found they are going from $200-400. Picked this beaut up for a whopping $35. Cheaper than a small oil cooler. I started making a mount for it to bolt up to where the FMIC was going. I decided to do a V-mount setup and think it will catch great air from the front spoiler and not effect the engine radiator.
This is the pump I decided to run for now. It's a jabsco pump I picked up for $30 used but still brand new. About $60 cheaper than the bosche units and can run dry without damaging the pump. I made a little aluminum bracket for it and mounted it on an existing mount spot on the inner fender of the driver side nice and tucked away.
I didnt want the pump running all the time when it isnt needed so I spent a good amount of time figuring out a solid solution for a trigger. I also wanted a gauge to monitor the intake air temps. I wanted all this and didnt want to spend a lot of money as in the theam with every new thing I do to the car. I found this little Love 12 volt thermastatic controler. It has a digital readout and can be set at any temperature. I will probably keep it set around 110-120f so the pump will only kick in once the temps go above that. I found this $90 unit for $15..... Score!! and found a stainless braded thermocoupler for $2
This is the water to air intercooler I decided to go with. It will package very nicely inline with the piping. Its not the biggest but I think the way I am seting up the rest of it there should be sufficient cooling. The core is essentially the same size as most w2a units out there. I wanted a barrel but this one is a fraction of the cost.
For the water tank I decided to go with a vintage stainless steel fire extinguisher. It's nice and light and will look real cool mounted in the center behind the seats. It's 2.5 gallon and has a large enough opening to put in ice if I want.
For the heat exchanger, I found this sprint car, or midget racing radiator on ebay. its 2" thick, 26" long, and 8" tall. This thing is legit and will cool wonders. Looked up the manufacturer and found they are going from $200-400. Picked this beaut up for a whopping $35. Cheaper than a small oil cooler. I started making a mount for it to bolt up to where the FMIC was going. I decided to do a V-mount setup and think it will catch great air from the front spoiler and not effect the engine radiator.
Last edited by User-C3; 12-21-2012 at 10:54 AM.
12-26-2012, 07:04 PM
#60
Race Director

Member Since: Jan 2000
Location: Corsicana, Tx
Posts: 12,607
Received 1,875 Likes
on
913 Posts
2020 C2 of the Year - Modified Winner
2020 Corvette of the Year (performance mods)
C2 of Year Winner (performance mods) 2019
2017 C2 of Year Finalist

Very interesting buildup. I've been working out some of those same packaging issues with a twin turbo 555" C-2 I'm doing. It all fits..just have to think it through twice!
Where is the A/W cooler going to be mounted and how will cold side plumbing be run?
Looking forward to the updates!
JIM
Where is the A/W cooler going to be mounted and how will cold side plumbing be run?
Looking forward to the updates!
JIM