
Vintage Exotics L88 Headlight Guide
 09-23-2012, 04:49 PM
#1
Safety Car

Thread Starter
I've been promising you guys a write up on the L88 headlights from Vintage Exotics.
I contacted James Cantrell about a year ago regarding my project, and he has been a great help installing these headlights. James, thanks for all of the help - I have a lot of respect for the work you have put into your product, and without a doubt I will be using you in the future.
Jim purchased the rights to the headlight lense molds a while back. He has invested over $10 000 putting these into production, along with the aluminum buckets. They are exceptional.
The first thing I have to mention is how well these came boxed up. Packed with care and by a professional to say the least. Yeah, I know...who cares...get on with the good stuff...I care. It shows effort by the seller, and care for the product they are selling me. These could not have been packaged more professionally, and I applaud them for that.
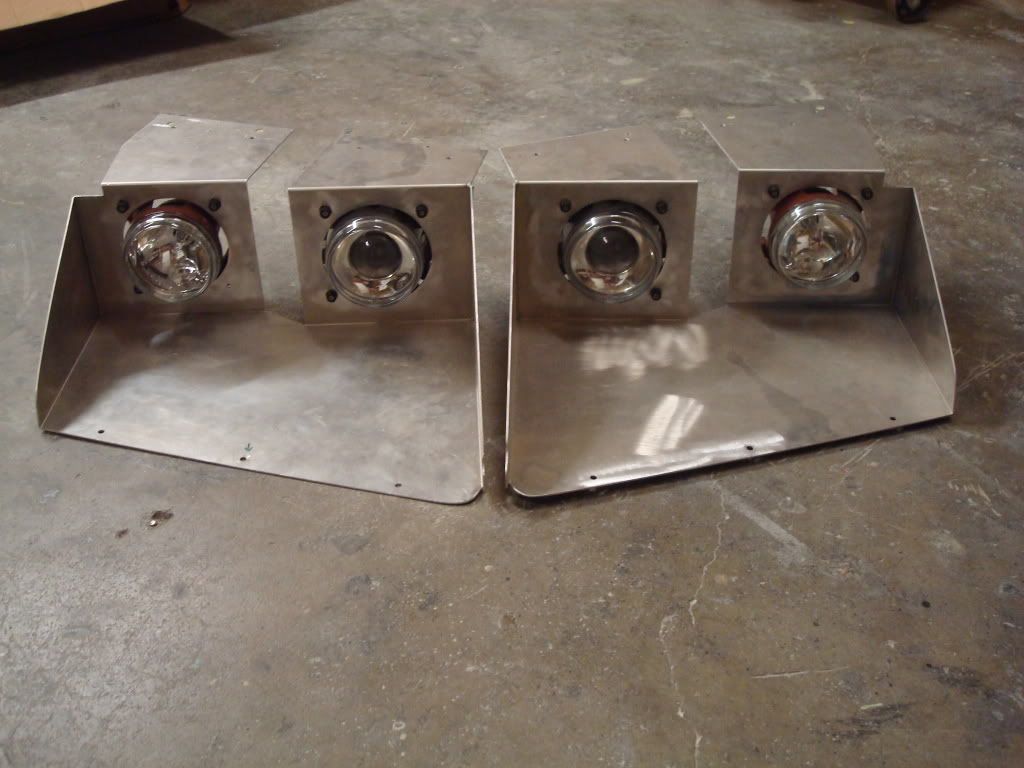
What you receive in the kit:
-2 headlight buckets
-2 headlight lenses
-2 headlight retainer moldings
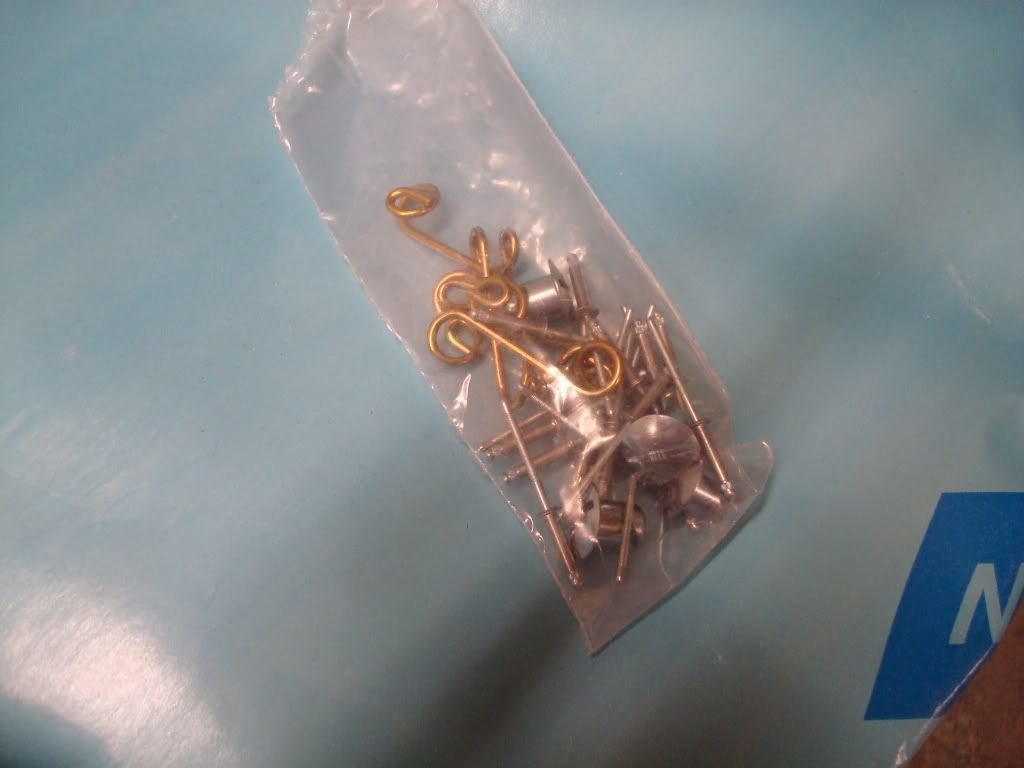
-dzus fasteners
-aircraft grade aluminum rivets
-machined backing plates for use with original headlights
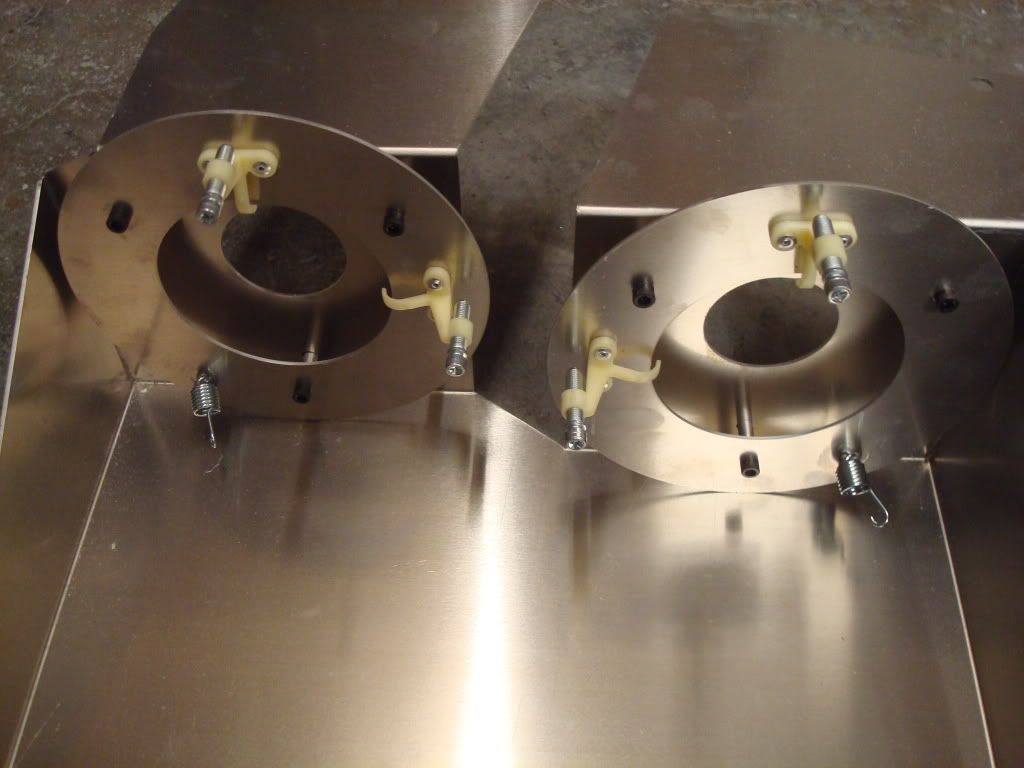

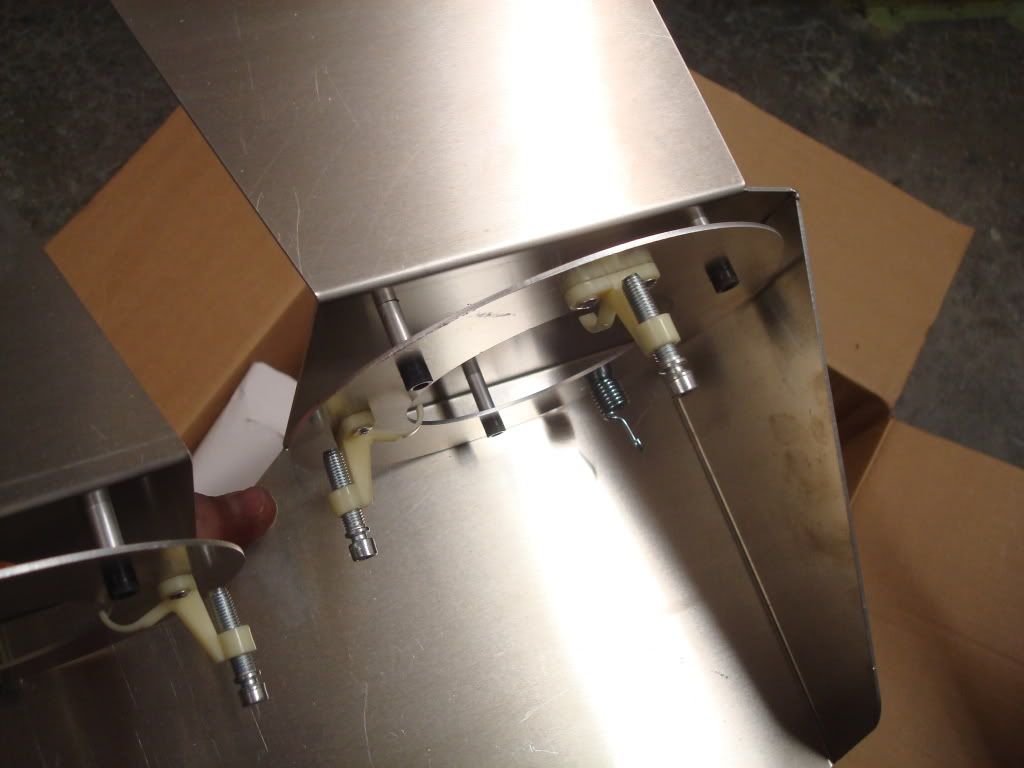
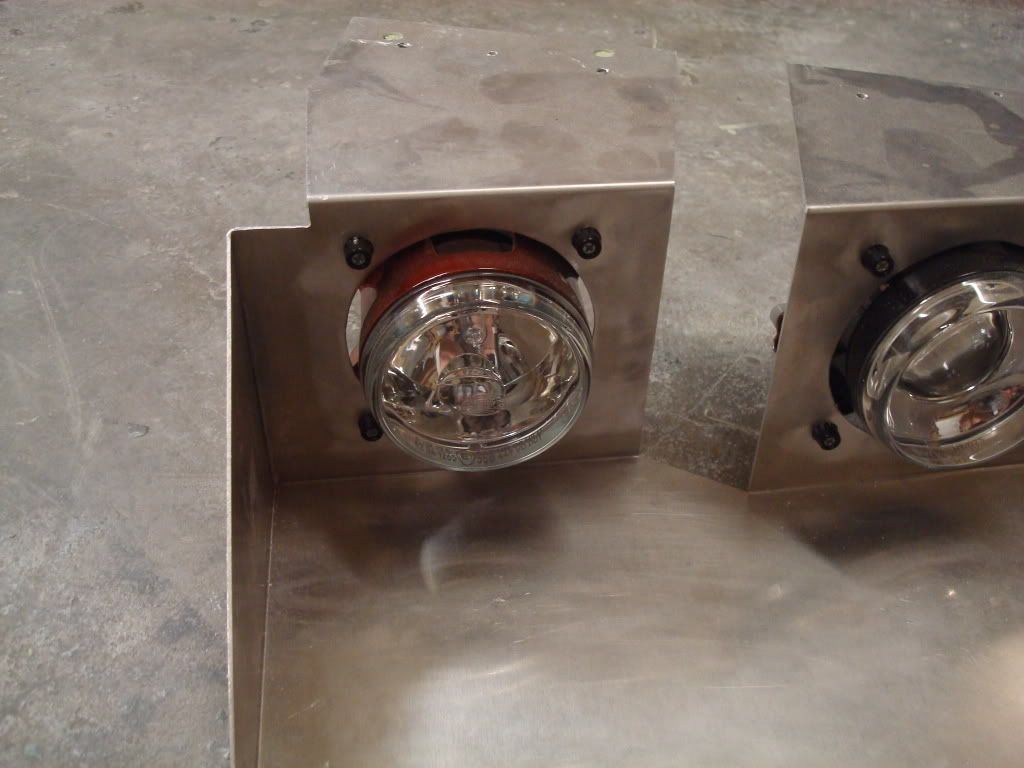
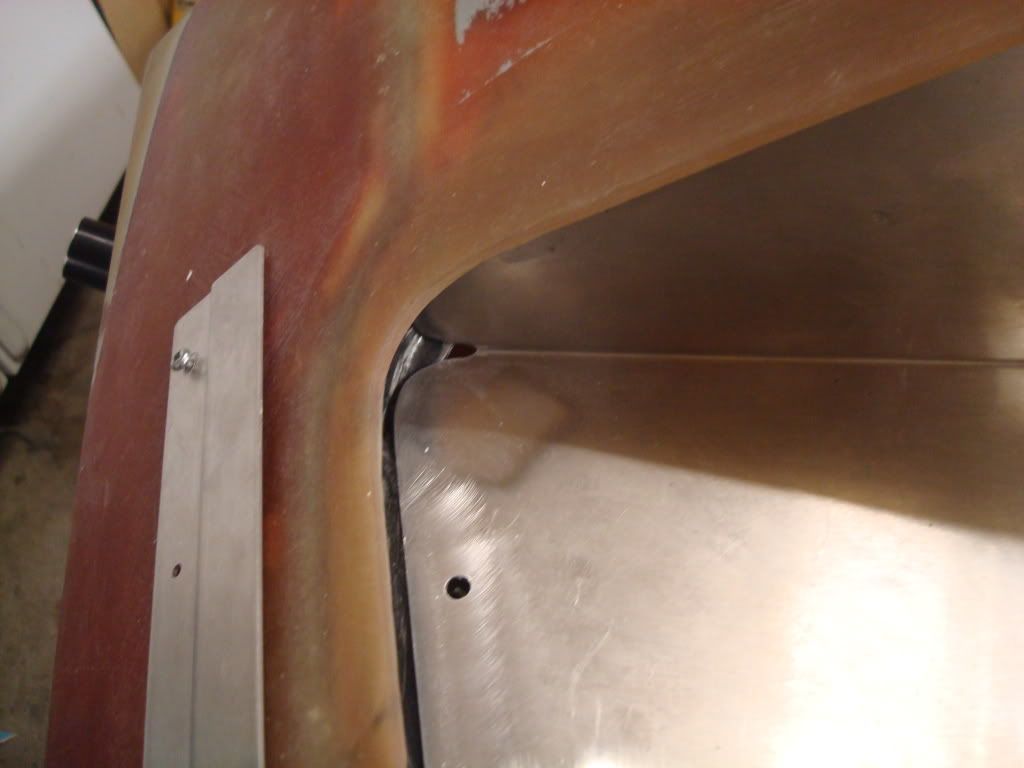
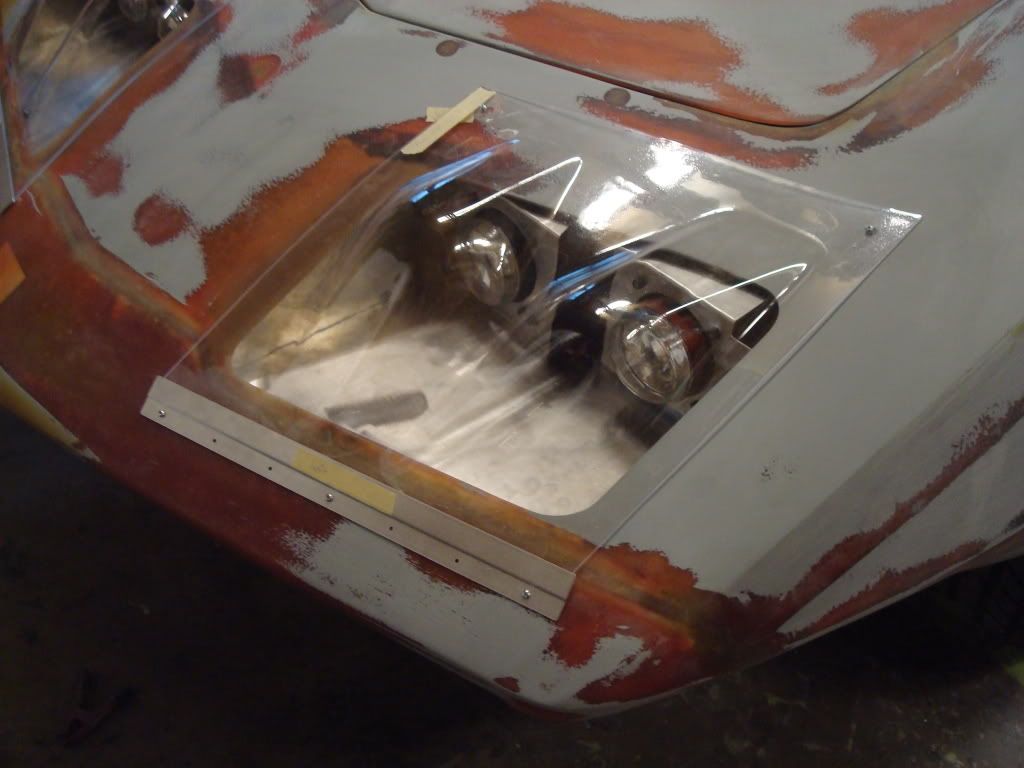
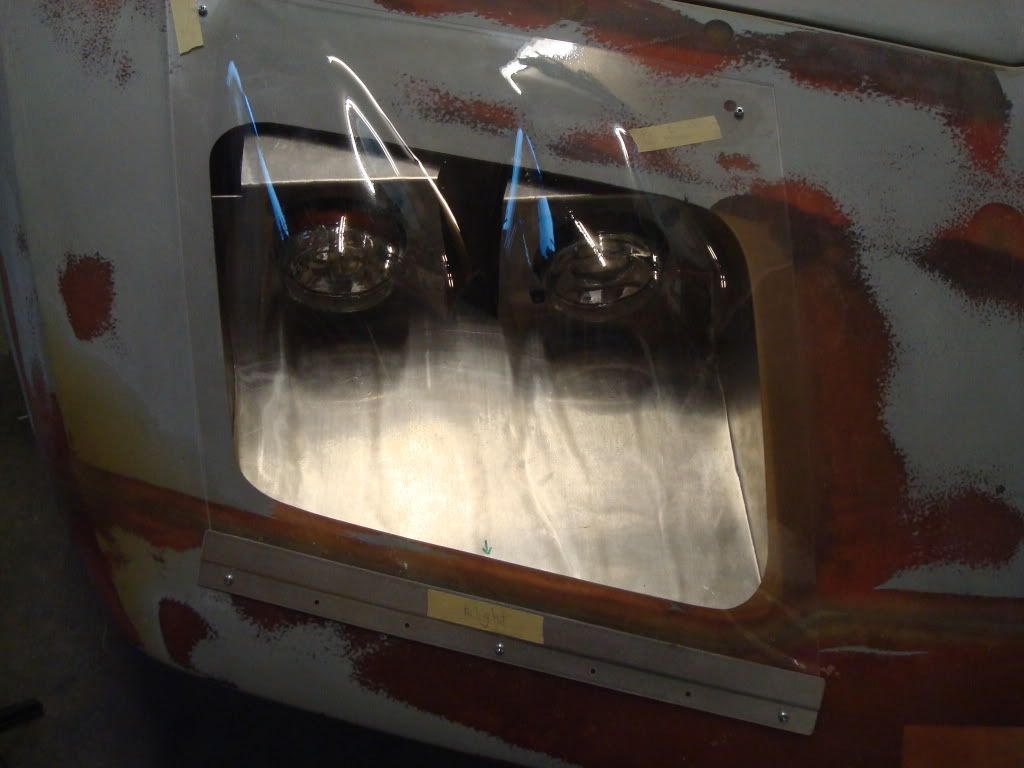
And obviously the lenses which you will see in upcoming pictures. In the pictures above, you'll notice the individual backing plates which are an improvement over previous setups. It looks cleaner, and it is a lot easier to install original style bulbs using these improvements. Everything is CNC punched, and the buckets are hand tig welded.
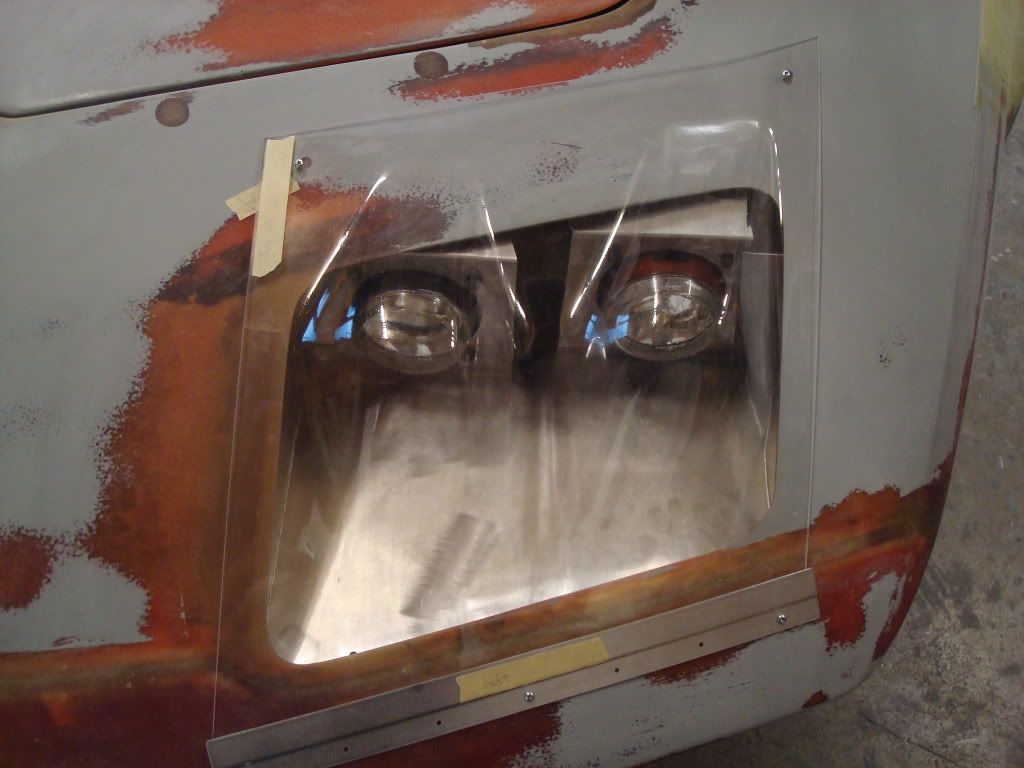
The setup above accomodates the original bulbs from your stock headlight buckets. If you are looking for an improvement in lighting however, there is a second option. I talked to Jim about improvements in lighting, and he suggested I purchase Hella 90mm halogen projectors if I wanted more of an intense beam. They are adjusted from the backside using a socket on the adjusters. He currently uses them on one of his Porsche's, and swears by them for the price and the quality of light. The best deal on the net is through Amazon. Make sure you order both the high and low beams.
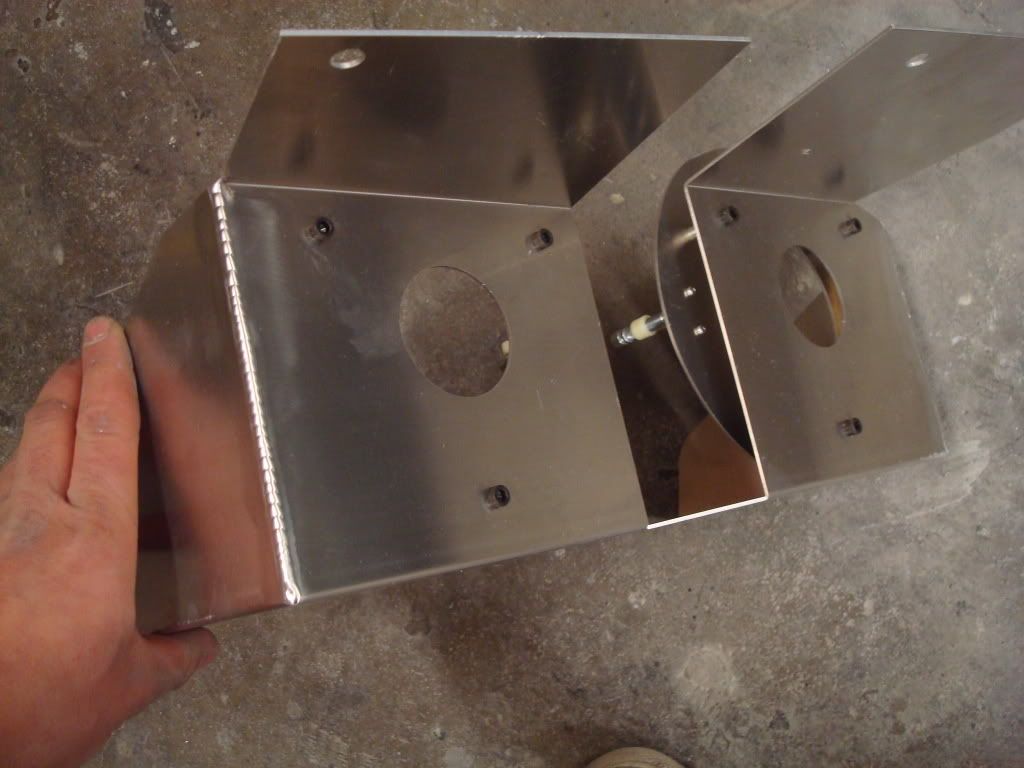
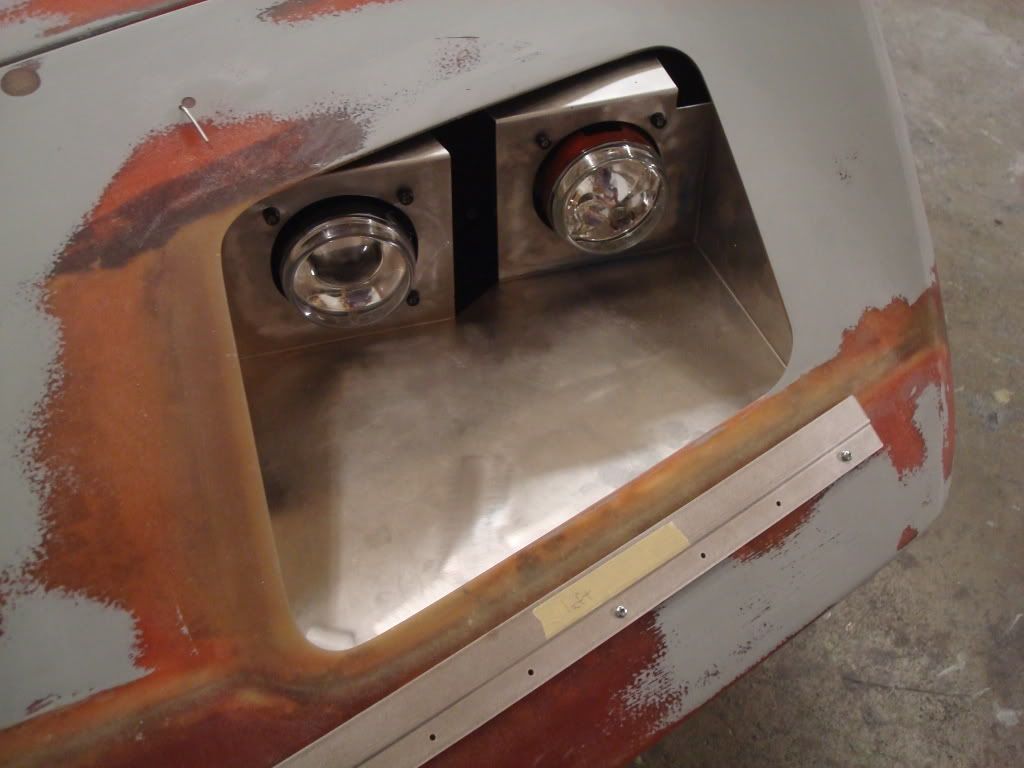
The holes on the backing plates will need to be opened up and three holes drilled to accomodate the adjusters which come with the projectors. Since I am all about things being symettrical, I did this once the buckets were physically mounted in the openings. I stood back and eyeballed where each bulb should be mounted, then marked the circles on the backing plates.
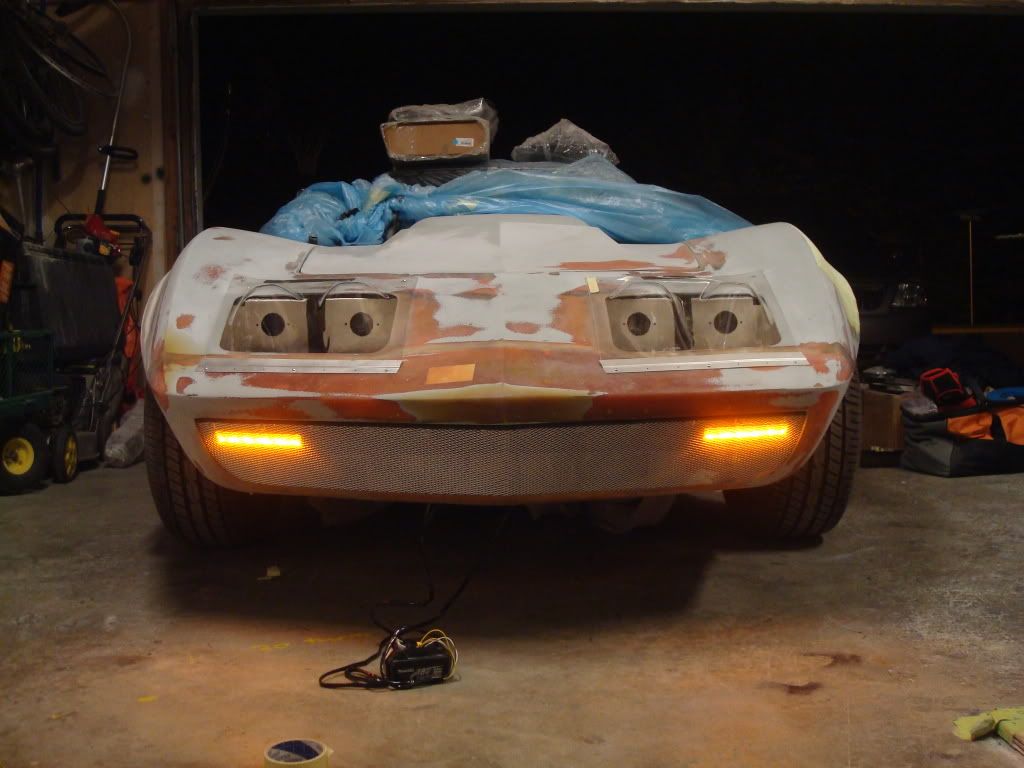
For those of you with aftermarket front ends, or surrounds which have been replaced. These buckets were modelled after original front ends. As you can see, my entire car has been modified, including me originally having to remove the header bar out of the car, cutting it in half, welding it back up, and pushing the surround down to match the point of the hood during fitment. This changed the contour of the glass on everthing in front of the header bar so I needed to carefully trim away material from the buckets edge to make them fit snug. Almost all of you shouldn't have this problem, but if you do, look towards it being a case in which your front end has had major work done to it, because chances are that is why it doesn't fit without trimming.
Another thing to consider is the hole openings on aftermarket front ends. I can tell you right now that the holes on my front end were way too wide for the bucket, which was a case of the original manufacturer of my front end cutting the holes too large. However, the first thing to do when installing these buckets is to get it in place, secured in its final position. Make sure everything is symetrical when you stand back and look at it. Its takes a little more time, but the result in the end is worth it in my opinion.
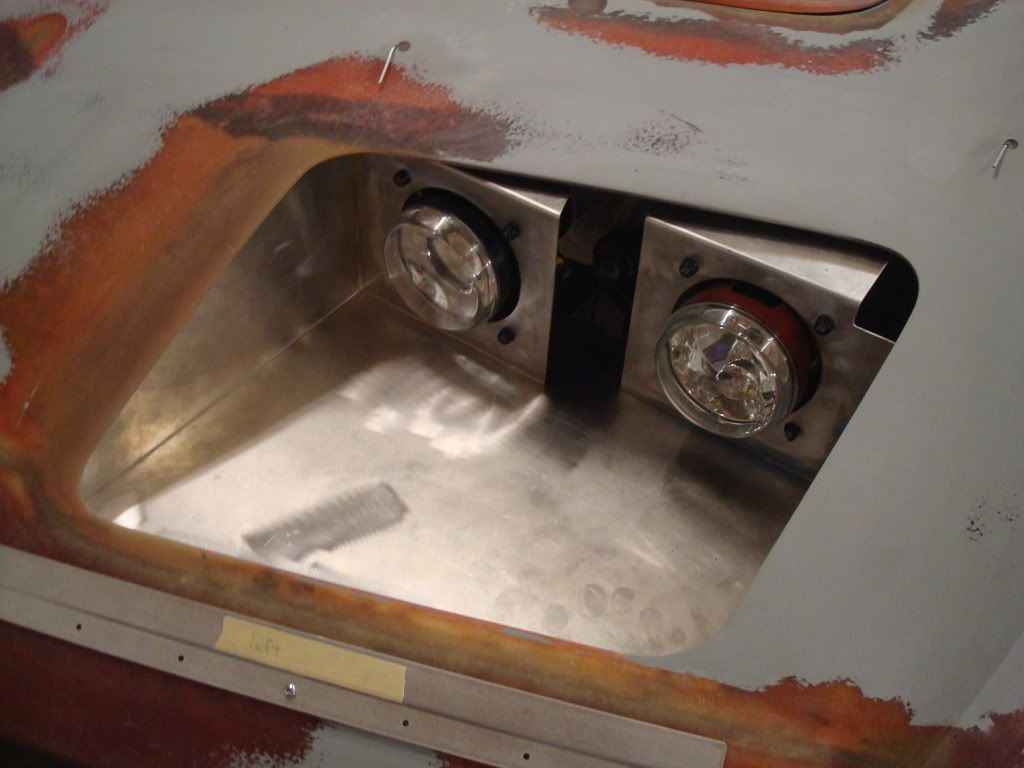
Once you get the buckets in their final positions, next is to square up your headlight openings. If your oppenings are too wide for the bucket, you will need to do some glass work and close up the openings so they cover up the edges of the buckets. Once that is complete, make sure to square up the sides of the openings using a block. Radius each corner so they are symmetrical to each other...it takes time, but its worth it in the end.
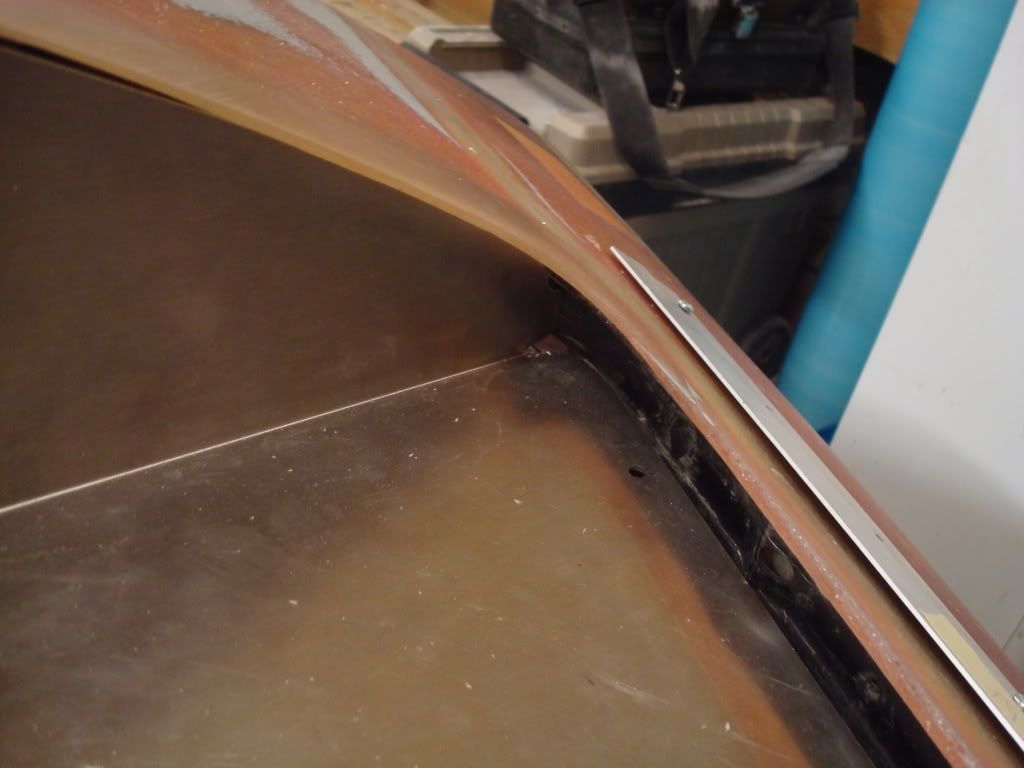
The lenses have a lot of material on them which allows you to place them exactly where you want them. Install them and trim them to your taste...I purposely squared the lenses to the headlight openings, as I thought it looked better. The front of the lense is held down with the supplied aluminum plates (which are cnc punched). They are held down with rivets. The rear corners of the lenses are held down with dzus fasteners, which I have yet to install.
I'm extremely impressed with the fit and quality of these...they are incredible.
I contacted James Cantrell about a year ago regarding my project, and he has been a great help installing these headlights. James, thanks for all of the help - I have a lot of respect for the work you have put into your product, and without a doubt I will be using you in the future.
Jim purchased the rights to the headlight lense molds a while back. He has invested over $10 000 putting these into production, along with the aluminum buckets. They are exceptional.
The first thing I have to mention is how well these came boxed up. Packed with care and by a professional to say the least. Yeah, I know...who cares...get on with the good stuff...I care. It shows effort by the seller, and care for the product they are selling me. These could not have been packaged more professionally, and I applaud them for that.
What you receive in the kit:
-2 headlight buckets
-2 headlight lenses
-2 headlight retainer moldings
-dzus fasteners
-aircraft grade aluminum rivets
-machined backing plates for use with original headlights
And obviously the lenses which you will see in upcoming pictures. In the pictures above, you'll notice the individual backing plates which are an improvement over previous setups. It looks cleaner, and it is a lot easier to install original style bulbs using these improvements. Everything is CNC punched, and the buckets are hand tig welded.
The setup above accomodates the original bulbs from your stock headlight buckets. If you are looking for an improvement in lighting however, there is a second option. I talked to Jim about improvements in lighting, and he suggested I purchase Hella 90mm halogen projectors if I wanted more of an intense beam. They are adjusted from the backside using a socket on the adjusters. He currently uses them on one of his Porsche's, and swears by them for the price and the quality of light. The best deal on the net is through Amazon. Make sure you order both the high and low beams.
The holes on the backing plates will need to be opened up and three holes drilled to accomodate the adjusters which come with the projectors. Since I am all about things being symettrical, I did this once the buckets were physically mounted in the openings. I stood back and eyeballed where each bulb should be mounted, then marked the circles on the backing plates.
For those of you with aftermarket front ends, or surrounds which have been replaced. These buckets were modelled after original front ends. As you can see, my entire car has been modified, including me originally having to remove the header bar out of the car, cutting it in half, welding it back up, and pushing the surround down to match the point of the hood during fitment. This changed the contour of the glass on everthing in front of the header bar so I needed to carefully trim away material from the buckets edge to make them fit snug. Almost all of you shouldn't have this problem, but if you do, look towards it being a case in which your front end has had major work done to it, because chances are that is why it doesn't fit without trimming.
Another thing to consider is the hole openings on aftermarket front ends. I can tell you right now that the holes on my front end were way too wide for the bucket, which was a case of the original manufacturer of my front end cutting the holes too large. However, the first thing to do when installing these buckets is to get it in place, secured in its final position. Make sure everything is symetrical when you stand back and look at it. Its takes a little more time, but the result in the end is worth it in my opinion.
Once you get the buckets in their final positions, next is to square up your headlight openings. If your oppenings are too wide for the bucket, you will need to do some glass work and close up the openings so they cover up the edges of the buckets. Once that is complete, make sure to square up the sides of the openings using a block. Radius each corner so they are symmetrical to each other...it takes time, but its worth it in the end.
The lenses have a lot of material on them which allows you to place them exactly where you want them. Install them and trim them to your taste...I purposely squared the lenses to the headlight openings, as I thought it looked better. The front of the lense is held down with the supplied aluminum plates (which are cnc punched). They are held down with rivets. The rear corners of the lenses are held down with dzus fasteners, which I have yet to install.
I'm extremely impressed with the fit and quality of these...they are incredible.
 09-23-2012, 05:35 PM
#2
Team Owner

Member Since: Sep 2006
Location: Westminster Maryland
Posts: 30,173
Likes: 0
Received 2,878 Likes
on
2,515 Posts

Hi S,
You certainly know about attention to detail!
Great Pictures!
Regards,
Alan
You certainly know about attention to detail!
Great Pictures!
Regards,
Alan

 09-23-2012, 06:08 PM
#4
Safety Car
Thread Starter


 09-24-2012, 10:32 AM
#7
Melting Slicks


 09-24-2012, 01:23 PM
#9
Advanced


Member Since: Jun 2012
Posts: 86
Likes: 0
Received 0 Likes
on
0 Posts
I've been obsessing about what I am going to do with my headlamps over the past 2-3 weeks myself.
Everything from original (I hate vacuum), to old style swap the originals side2side, to this kit.
Glad I found the post with an upgraded headlamps.
Another option to add to the list....
Everything from original (I hate vacuum), to old style swap the originals side2side, to this kit.
Glad I found the post with an upgraded headlamps.
Another option to add to the list....
09-24-2012, 09:00 PM
#10
Advanced
Member Since: Jun 2012
Posts: 86
Likes: 0
Received 0 Likes
on
0 Posts
Question...
How do you gain access to the adjustments once they are mounted?
I just looked at my vette and once the buckets are in, I can't see a way to access the back. I assume bulb replacement is from the back and that could be a challenge too.
Please enlighten me!
NDV
How do you gain access to the adjustments once they are mounted?
I just looked at my vette and once the buckets are in, I can't see a way to access the back. I assume bulb replacement is from the back and that could be a challenge too.
Please enlighten me!
NDV
09-24-2012, 09:14 PM
#11
Advanced
Member Since: Jun 2012
Posts: 86
Likes: 0
Received 0 Likes
on
0 Posts
Question...
How do you gain access to the adjustments once they are mounted?
I just looked at my vette and once the buckets are in, I can't see a way to access the back. I assume bulb replacement is from the back and that could be a challenge too.
Please enlighten me!
NDV
How do you gain access to the adjustments once they are mounted?
I just looked at my vette and once the buckets are in, I can't see a way to access the back. I assume bulb replacement is from the back and that could be a challenge too.
Please enlighten me!
NDV
 10-05-2012, 12:31 PM
#15
Racer
Question...
How do you gain access to the adjustments once they are mounted?
I just looked at my vette and once the buckets are in, I can't see a way to access the back. I assume bulb replacement is from the back and that could be a challenge too.
Please enlighten me!
NDV
How do you gain access to the adjustments once they are mounted?
I just looked at my vette and once the buckets are in, I can't see a way to access the back. I assume bulb replacement is from the back and that could be a challenge too.
Please enlighten me!
NDV
I met Jim at the Daytona, HSR event last December. My set should be on the way now that they have all the details worked out. I too have a one piece front end that does not have the metal 'header bar' that is in front of the headlights so will have to fabricate something and bond it in place.
I like the ones I've seen in which the leading edge of the covers are mounted with a stainless steel hinge (from a boat store for me) and the Dzus fasteners are on the rear.
Locke
