When you click on links to various merchants on this site and make a purchase, this can result in this site earning a commission. Affiliate programs and affiliations include, but are not limited to, the eBay Partner Network.
Hello everyone! I am new to forums in general, so please bear with me. I am a previous owner of a 1968 convertible and am presently assisting a friend with the rebuild of his 1968 convertible. He has had some less than accurate body work done including cover-up of the through-holes in the corners for front bumper mounting. Does anyone have close-up photos of these holes? (With the bumper removed of course!) Any suggestions will be appreciated.
Mount the bumper using the "horse collar" bracket and check the fit to the body work. If the fit is good, mark and drill the body where the bolts are to be inserted. There are also braces attached to the surround reinforcement and the bumper extensions that also must align. Good luck!
Your suggestion agrees with my initial attempt to loosen the "horse collar" bracket and draw it all together. The fit was good on the right side, but not on the left, where there are indications that damage occurred earlier in the car's life. Also, from photos that I have found, and others just provided here, the flats where the bumpers seats against the body are gone. Unfortunately, they have been molded over into a nice, smooth curve. Thank you very much for your reply.
Yes, I can see and feel the back side of the holes in the bonding strip. They, however, are elongated and other 'glas work has been done back there. Thanks very much for your reply. - Wilson68
I believe that the photos will clear things up. I will pass them along to my friend and his current body man (not the one who covered the holes). From what is being sold as correct brackets for the corners bracing, they are the same for all five years. If possible, please let me know the approximate diameter of the holes. Thank you very much for your reply. - Steve
Hi W68,
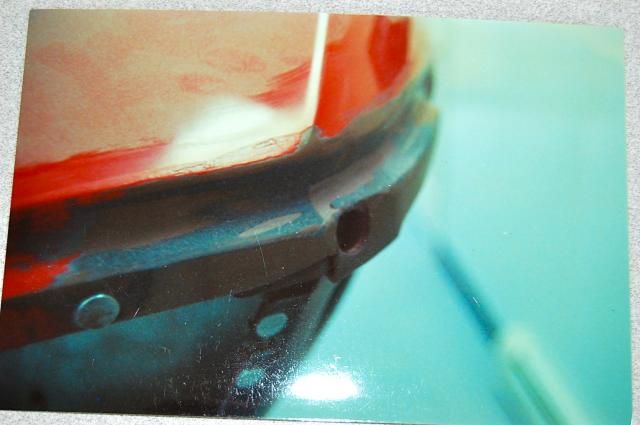
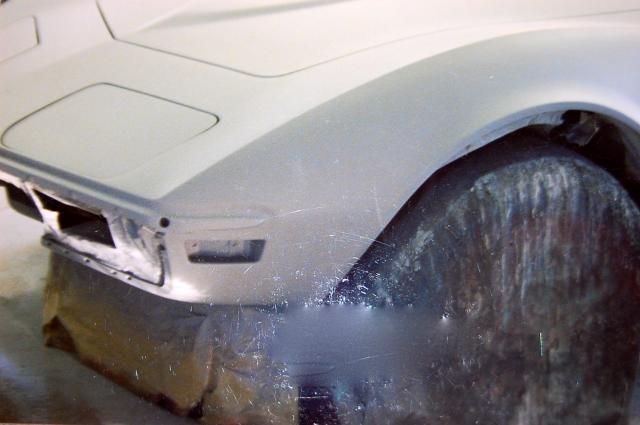
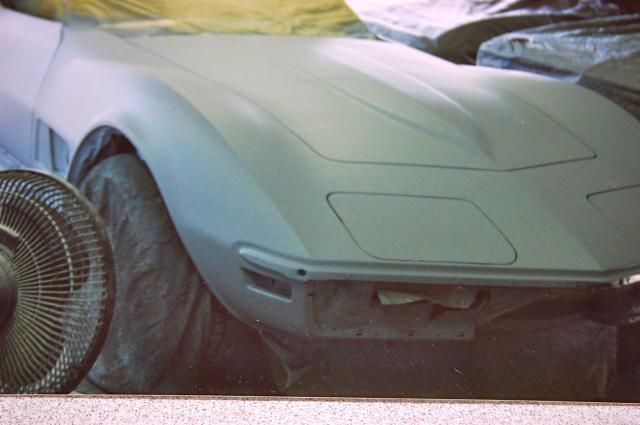
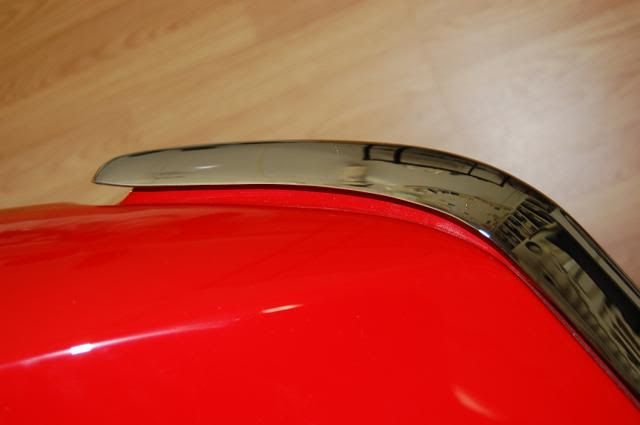
Here are the pictures plus a couple additional.
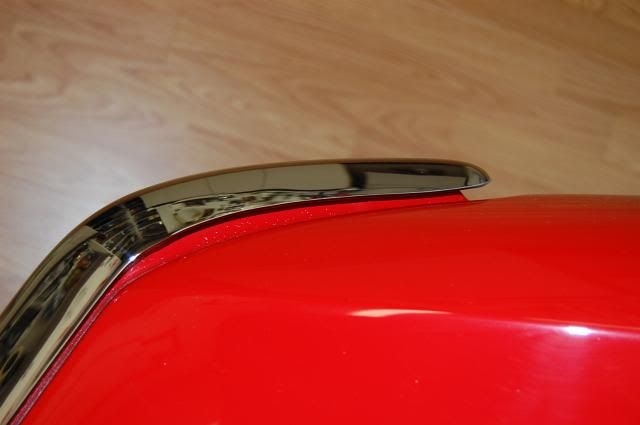
This shows a typical gap with an original bumper and no bodywork.
I'm thinking the holes are at least 5/8"…. they're larger than they need to be for the bolts to pass through.
Regards,
Alan
Also the fit on most after market bumpers well leaves a lot to be desired. They tend to look as if the body is of the wrong shape and or the bumper is to wide, this is why a lot of people only use the GM bumpers.
I was also having an issue with fitment when I first tried to install my front bumper (on a 71).... but a forum member mentioned that when ALL the bolts were installed & tightened, it would draw it in and fit much better. That advice turned out to be true. It was difficult to get a good looking fit by just sitting it in place with a couple bolts loosely installed. Once they were all in and tight, it looked GREAT! I also wanted to get the brackets, holes, and fitment adjusted BEFORE paint, so I wouldn`t scratch it all up putting the bumper back on.
Hi,
When using the bolts to "draw in the bumper" I believe you need to be very cautious because it's pretty easy to put pressure on the fiberglass too, and end up cracking it at the corners of the nose.
The center bracket is a bit different because neither the bracket or bolts touch the fiberglass. But for the corners I think it's best to move the brackets out to to meet the bumper, not use the bolts to pull in the bumper to meet the brackets.
Careful!!
Regards,
Alan
for the corners I think it's best to move the brackets out to to meet the bumper
A very good point Alan! That is what I did.... brought the brackets to the back side of the fiberglass, then drew the bumper in to the front side of the glass. Worked like a charm. In fact, I think it may have been you that gave me that advice!

 07-24-2014, 11:18 AM