
How I test the headlight vacuum relay--lots of pics
 11-03-2014, 09:37 PM
#1

This will be basic review of the headlight relay for many, but this post is intended to
1) supplement the excellent material available from Willcox and others and
2) present the topic in a different manner that might help someone figure out why their lights aren't working right.
To begin, some talk about the relay:
Its job is to direct vacuum to the hose at the back of the big pie pan headlight actuator (red) to close the headlight, or to the hose at the front of the actuator (green) to open the headlight.
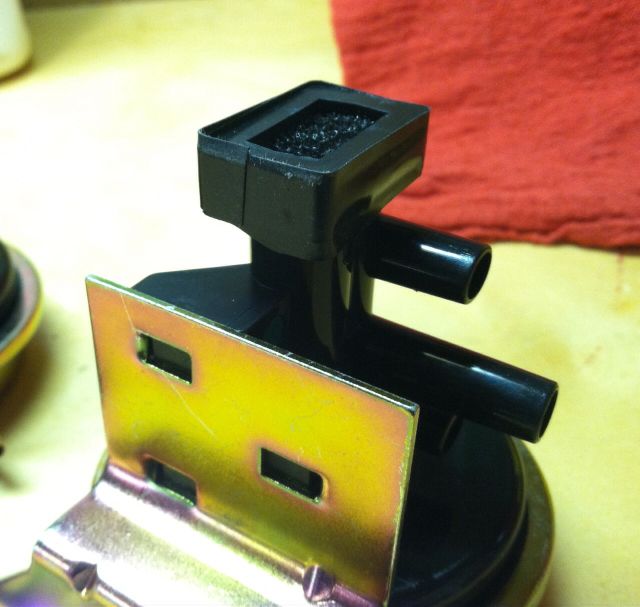
Here is a picture of it:

It has a control vacuum source from the dashboard switches (White). This is the small hose going into the top.
It has three large ports:
The top (red) goes to the back of the actuator to close the headlights
The middle (yellow) is the "power" vacuum source from the vacuum tank/canister.
The bottom (green) goes to the front of the actuator to open the headlights.
1) To start testing, hook a mighty-vac to the small (white) port and listen for the piston to move and see if it holds vacuum:
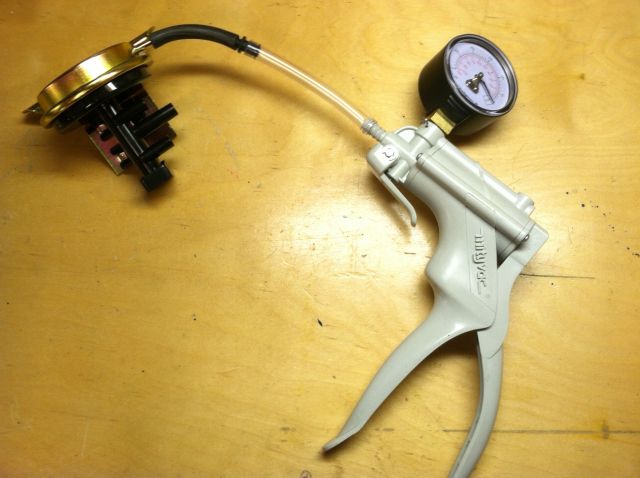
Releasing the vacuum, you should hear the piston slide back. You can see the end move if the filter foam is removed.
2) Next, leave the small white port open and attach vacuum to the middle large (yellow) port:
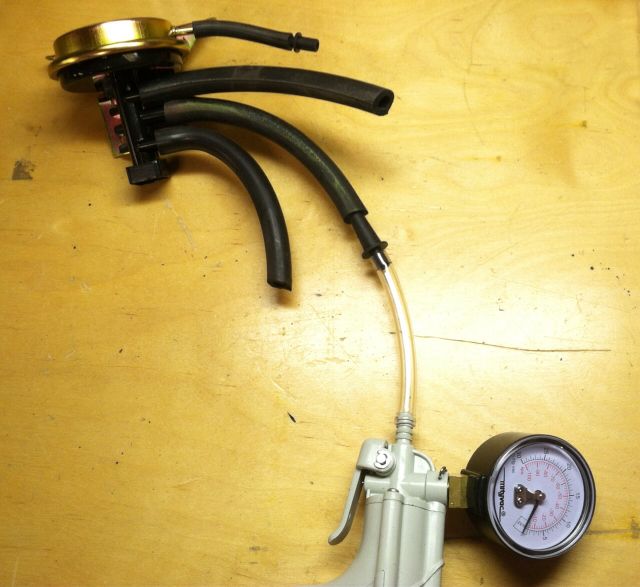
Then, clamp off (or plug with your finger) the bottom large (green) port.
This should be able to hold a steady vacuum.
(Note, I started to use vacuum to test in this manner because the relays on my car both had operating pistons and diverted compressed air to the correct hoses like in the Willcox videos, but neither one could hold vacuum in these circuits which involved the large hoses.)
3) Now, to test the red circuit. (This after all is what everyone wants, I.e. they want their headlights to go back down.):
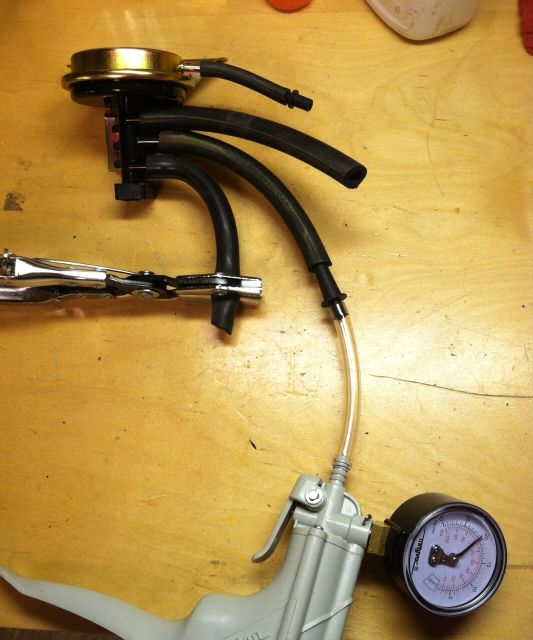
First, apply vacuum to the small vacuum source (white) port like you did for step one. After achieving vacuum in the small white tubing, clamp the tubing so vacuum is maintained in that port/hose when you remove the Mity-Vac:
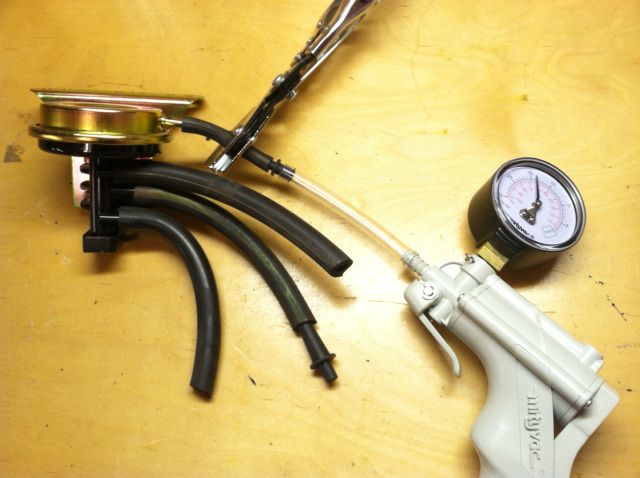
Now, apply vacuum to the middle large (Yellow) port while clamping/plugging the top large (red) hose:
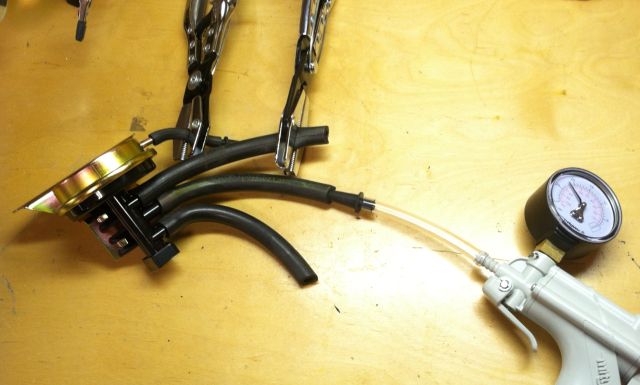
This should hold vacuum. If you unclamp the small white port at this time, the piston should slide back down and your gauge should show a loss of vacuum.
You should now be home free!
So in summary, vacuum loss in white circuit causes piston to slide down to open the green (the "on") circuit so the lights pop up. ("Fail-safe").
Intact vacuum in the white circuit pulls the piston back up to use the red (the "lights-off") circuit so the lights get pulled back down.
Hopefully this helps someone, let me know if I can answer any questions or if I need to make any corrections.
One final thing: I used non-NCRS replacement parts on my weekly driver and needed to apply tape to keep the filter foam from falling out:
Good luck!
1) supplement the excellent material available from Willcox and others and
2) present the topic in a different manner that might help someone figure out why their lights aren't working right.
To begin, some talk about the relay:
Its job is to direct vacuum to the hose at the back of the big pie pan headlight actuator (red) to close the headlight, or to the hose at the front of the actuator (green) to open the headlight.
Here is a picture of it:
It has a control vacuum source from the dashboard switches (White). This is the small hose going into the top.
It has three large ports:
The top (red) goes to the back of the actuator to close the headlights
The middle (yellow) is the "power" vacuum source from the vacuum tank/canister.
The bottom (green) goes to the front of the actuator to open the headlights.
1) To start testing, hook a mighty-vac to the small (white) port and listen for the piston to move and see if it holds vacuum:
Releasing the vacuum, you should hear the piston slide back. You can see the end move if the filter foam is removed.
2) Next, leave the small white port open and attach vacuum to the middle large (yellow) port:
Then, clamp off (or plug with your finger) the bottom large (green) port.
This should be able to hold a steady vacuum.
(Note, I started to use vacuum to test in this manner because the relays on my car both had operating pistons and diverted compressed air to the correct hoses like in the Willcox videos, but neither one could hold vacuum in these circuits which involved the large hoses.)
3) Now, to test the red circuit. (This after all is what everyone wants, I.e. they want their headlights to go back down.):
First, apply vacuum to the small vacuum source (white) port like you did for step one. After achieving vacuum in the small white tubing, clamp the tubing so vacuum is maintained in that port/hose when you remove the Mity-Vac:
Now, apply vacuum to the middle large (Yellow) port while clamping/plugging the top large (red) hose:
This should hold vacuum. If you unclamp the small white port at this time, the piston should slide back down and your gauge should show a loss of vacuum.
You should now be home free!
So in summary, vacuum loss in white circuit causes piston to slide down to open the green (the "on") circuit so the lights pop up. ("Fail-safe").
Intact vacuum in the white circuit pulls the piston back up to use the red (the "lights-off") circuit so the lights get pulled back down.
Hopefully this helps someone, let me know if I can answer any questions or if I need to make any corrections.
One final thing: I used non-NCRS replacement parts on my weekly driver and needed to apply tape to keep the filter foam from falling out:
Good luck!
Last edited by C3Hawk; 11-05-2014 at 06:59 PM.

The following 2 users liked this post by C3Hawk:
Punkchachi (04-11-2023),
SnowRocker88 (04-13-2022)

 11-08-2014, 07:28 PM
#4
Racer

 11-09-2014, 03:15 PM
#5
My understanding is if your vacuum reservoir is tight, the control circuit is tight, and your check calve works then there ideally should be enough vacuum left for 1 or 2 cycles with the engine off.
04-21-2018, 07:38 PM
#6
Instructor

This will be basic review of the headlight relay for many, but this post is intended to
1) supplement the excellent material available from Willcox and others and
2) present the topic in a different manner that might help someone figure out why their lights aren't working right.
To begin, some talk about the relay:
Its job is to direct vacuum to the hose at the back of the big pie pan headlight actuator (red) to close the headlight, or to the hose at the front of the actuator (green) to open the headlight.
Here is a picture of it:
It has a control vacuum source from the dashboard switches (White). This is the small hose going into the top.
It has three large ports:
The top (red) goes to the back of the actuator to close the headlights
The middle (yellow) is the "power" vacuum source from the vacuum tank/canister.
The bottom (green) goes to the front of the actuator to open the headlights.
1) To start testing, hook a mighty-vac to the small (white) port and listen for the piston to move and see if it holds vacuum:
Releasing the vacuum, you should hear the piston slide back. You can see the end move if the filter foam is removed.
2) Next, leave the small white port open and attach vacuum to the middle large (yellow) port:
Then, clamp off (or plug with your finger) the bottom large (green) port.
This should be able to hold a steady vacuum.
(Note, I started to use vacuum to test in this manner because the relays on my car both had operating pistons and diverted compressed air to the correct hoses like in the Willcox videos, but neither one could hold vacuum in these circuits which involved the large hoses.)
3) Now, to test the red circuit. (This after all is what everyone wants, I.e. they want their headlights to go back down.):
First, apply vacuum to the small vacuum source (white) port like you did for step one. After achieving vacuum in the small white tubing, clamp the tubing so vacuum is maintained in that port/hose when you remove the Mity-Vac:
Now, apply vacuum to the middle large (Yellow) port while clamping/plugging the top large (red) hose:
This should hold vacuum. If you unclamp the small white port at this time, the piston should slide back down and your gauge should show a loss of vacuum.
You should now be home free!
So in summary, vacuum loss in white circuit causes piston to slide down to open the green (the "on") circuit so the lights pop up. ("Fail-safe").
Intact vacuum in the white circuit pulls the piston back up to use the red (the "lights-off") circuit so the lights get pulled back down.
Hopefully this helps someone, let me know if I can answer any questions or if I need to make any corrections.
One final thing: I used non-NCRS replacement parts on my weekly driver and needed to apply tape to keep the filter foam from falling out:
Good luck!
-Ben
04-22-2018, 05:14 PM
#7
Former Vendor
Member Since: Aug 2006
Location: Jeffersonville Indiana 812-288-7103
Posts: 76,656
Received 1,813 Likes
on
1,458 Posts
St. Jude Donor '08-'09-'10-'11-'12-'13-'14-'15

1968-1982 Corvette Headlamp Vacuum Diagnostic Help.
Headlamp Housing Adjustment 68-82
Headlamp Housing Adjustment 68-82