
Rusty screw and headlight bulb removal
 11-17-2014, 04:57 PM
#1


Hi guys, I'm looking for some good advice for removing some rusty screws that hold headlight bulb ring in place. I have to replace a broken bulb... Thanks!
 11-17-2014, 06:04 PM
#2
Race Director


I assume you are not wanting to use these same rusty screws again. Other than getting new CORRECT SCREWS. If they will not come out easily...I have heated up the area where they get screwed in and got them out that way....or weld onto them and clamp a pair of wise grips on what I welded onto it.
I do not waste a lot of time in this area because I do this for a living and can not waste an hour on 3 screws...so in some cases...when it is really bad....after about 10 minutes...if they are stuck...I get a new assembly. I do not have days of letting it soak in some penetrating oil. But that is your call.
DUB
11-17-2014, 10:45 PM
#4
Melting Slicks

Member Since: May 2004
Location: Banana Republic
Posts: 2,627
Received 694 Likes
on
318 Posts
2023 C7 of the Year Finalist - Unmodified
2018 C3 of Year Finalist

I had a problem with one of the screws that holds on the front turn signal lens. I soaked it a couple of nights with Kroil (my favorite penetrant). I then used my Porter Cable impact driver with a new phillips head bit. On it's lowest setting and reversing directions a number of times, it finally broke free. The secret is to give up on the hand held screwdriver before it destroys the X in the screw head.
11-18-2014, 12:23 AM
#5
Race Director
I had a problem with one of the screws that holds on the front turn signal lens. I soaked it a couple of nights with Kroil (my favorite penetrant). I then used my Porter Cable impact driver with a new phillips head bit. On it's lowest setting and reversing directions a number of times, it finally broke free. The secret is to give up on the hand held screwdriver before it destroys the X in the screw head.
 Works all the time. Then use never-seize when I put it back together.
 11-18-2014, 05:45 PM
#7
Race Director
All of that is good as long as you can get the tip of your Phillips to take bite and actually work. I have had them where there was no way for a screwdriver to work....and even cutting a slot in it for a flat blade screwdriver was not possible....which is why I weld on them....or replace the assembly.
And YES...those screws are in REALLY TIGHT.
DUB
And YES...those screws are in REALLY TIGHT.
DUB
04-29-2015, 04:30 PM
#9
Team Owner

Member Since: Sep 2006
Location: Westminster Maryland
Posts: 30,173
Likes: 0
Received 2,878 Likes
on
2,515 Posts
Hi ID,
Are you asking about the headlight ring mounting screws? A couple of different screws are mentioned in this thread.
Paragon Reproductions lists a 'service replacement' screw which means it will work but may be a different configuration than the original.
I don't know if that matters to you or not.
Be careful you don't order the capsule screws rather than the ring screws.
Regards,
Alan
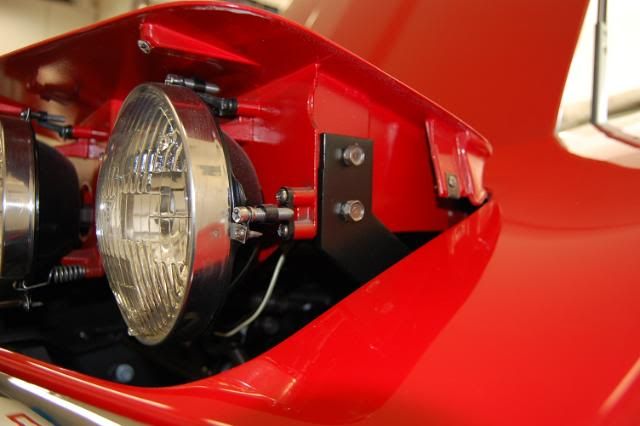
In this picture you can see what a sharp point the original has.
Are you asking about the headlight ring mounting screws? A couple of different screws are mentioned in this thread.
Paragon Reproductions lists a 'service replacement' screw which means it will work but may be a different configuration than the original.
I don't know if that matters to you or not.
Be careful you don't order the capsule screws rather than the ring screws.
Regards,
Alan
In this picture you can see what a sharp point the original has.
Last edited by Alan 71; 04-29-2015 at 04:40 PM.
04-29-2015, 08:12 PM
#10
Hi ID,
Are you asking about the headlight ring mounting screws? A couple of different screws are mentioned in this thread.
Paragon Reproductions lists a 'service replacement' screw which means it will work but may be a different configuration than the original.
I don't know if that matters to you or not.
Be careful you don't order the capsule screws rather than the ring screws.
Regards,
Alan
In this picture you can see what a sharp point the original has.
Thanks
04-29-2015, 10:02 PM
#11
Le Mans Master

Member Since: May 2003
Location: Fernandina Beach FL
Posts: 8,480
Received 3,219 Likes
on
1,731 Posts
2023 Restomod of the Year finalist
2020 C3 of the Year Winner - Modified

I wasn't worried about originality- upgraded to some Hella lights and 12gu wire w/ relays...
I went w/ some 6 32 stainless machine screws �" long and nylock nuts from my local hardware store.
Mine doesn't look near as nice as Alan's....
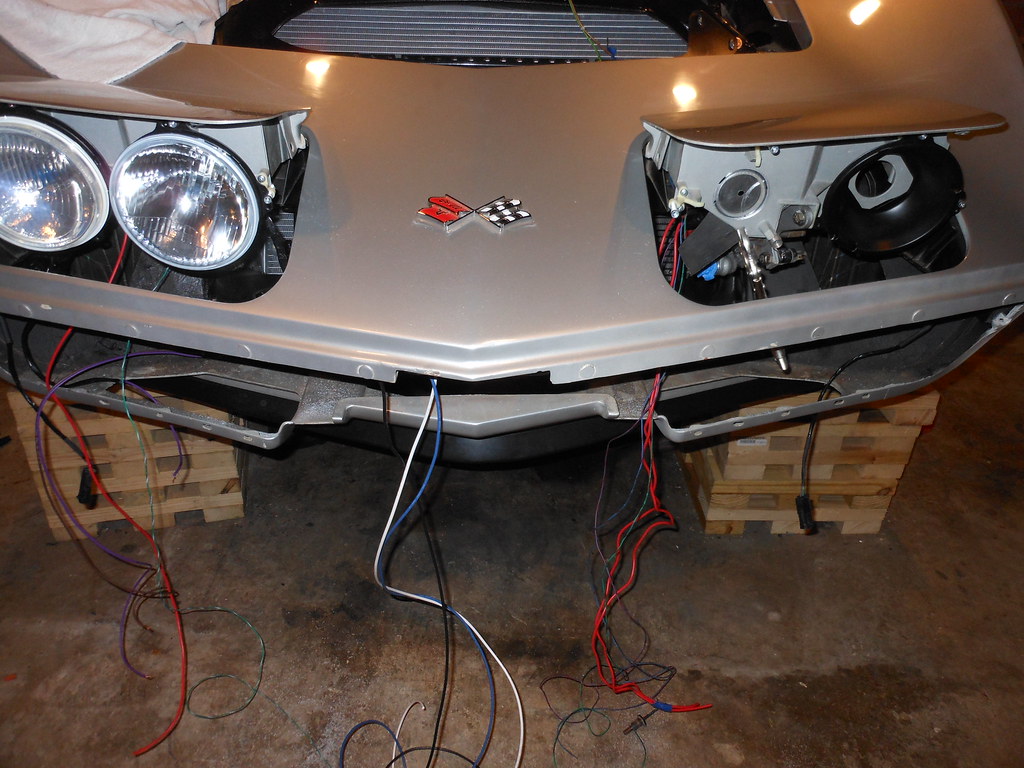 DSCN5143 by richardhayes454, on Flickr
I went w/ some 6 32 stainless machine screws �" long and nylock nuts from my local hardware store.
Mine doesn't look near as nice as Alan's....
DSCN5143 by richardhayes454, on Flickr
05-01-2015, 05:19 PM
#12
Race Director
I wasn't worried about originality- upgraded to some Hella lights and 12gu wire w/ relays...
I went w/ some 6 32 stainless machine screws �" long and nylock nuts from my local hardware store.
Mine doesn't look near as nice as Alan's....
DSCN5143 by richardhayes454, on Flickr
I went w/ some 6 32 stainless machine screws �" long and nylock nuts from my local hardware store.
Mine doesn't look near as nice as Alan's....
DSCN5143 by richardhayes454, on Flickrthe 71 I'm rebuilding had decking screws in the holders ?

I GUESS WHEN YOUR AS OLD AS THE PREVIOUS OWNER and cheep anything works....


I use SS screws from the local marine shop, paint them black and add never sieze.....

If you want the sharp point chuck the screw in a drill and hit it with a dremmel tool. works well
Last edited by BLUE1972; 05-01-2015 at 05:22 PM.
05-01-2015, 07:41 PM
#13
Le Mans Master
Member Since: May 2003
Location: Fernandina Beach FL
Posts: 8,480
Received 3,219 Likes
on
1,731 Posts
2023 Restomod of the Year finalist
2020 C3 of the Year Winner - Modified
those look really great,
the 71 I'm rebuilding had decking screws in the holders ?
I GUESS WHEN YOUR AS OLD AS THE PREVIOUS OWNER and cheep anything works....
I use SS screws from the local marine shop, paint them black and add never sieze.....
If you want the sharp point chuck the screw in a drill and hit it with a dremmel tool. works well
Deck screws? Better than drywall screws!!! At least the deck screws are weatherproof!
I chuck them up in a drill as well-but use my belt sander to get a point.
Richard
