
clip and bolt rust protection coating
 01-24-2015, 12:20 PM
#21
Team Owner

That would be "Alan's Book on C3 Alchemy and Plating/Coating Replication", and I'm waiting for it to be put to print! 
 01-24-2015, 02:06 PM
#22
Advanced

Thread Starter

Member Since: Nov 2013
Location: Twin Bridges Montana
Posts: 63
Likes: 0
Received 0 Likes
on
0 Posts
Hi Ed,
Thanks for the very interesting information. I just don't know ANYTHING about what I'm doing.
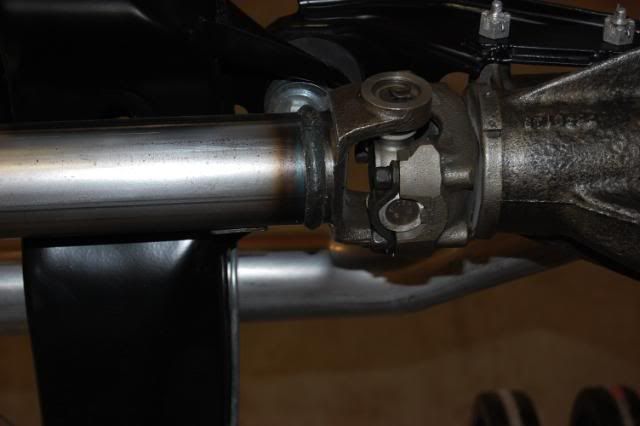
In appearance the heat zone seems to disappear when I surface the tube.
It comes back to some degree when I 'stain' the steel with the black oxide.
On the second picture� how was that look obtained in your opinion.
I 'don't' think that's a new shaft.
Thanks,
Alan
Heat zone no longer visible.

Striving for this (I think).
Thanks for the very interesting information. I just don't know ANYTHING about what I'm doing.
In appearance the heat zone seems to disappear when I surface the tube.
It comes back to some degree when I 'stain' the steel with the black oxide.
On the second picture� how was that look obtained in your opinion.
I 'don't' think that's a new shaft.
Thanks,
Alan
Heat zone no longer visible.
Striving for this (I think).
Anyhow, yes, you are removing the color by polishing because the color is actually a heat-produced oxidation. Different temperatures will produce different colors, and that will also vary by the composition of the steel.
In your second picture that certainly appears to have been produced by heat, as the pattern of the color follows the "tempering rainbow". In this picture the blue is close to the weld with the browner being further way. This is exactly what I would expect the colors to be when produced from heat. See the attached picture of the tempering color chart. As you can see, the blue produced at a higher heat than the brown which is what we see in your picture.
Many of these colors can also be produced by using chemicals, which also oxidize the steel, just without using heat. Different chemicals, used for different duration's produce different colors. See Bill Worden's site (http://www.steel-fx.com) for a pretty good selection of patina chemicals.
To reproduce exactly what you have there, heat would be the way to go, although a few practice runs to get what you want. For this a hand-held butane torch might do the job, may take an oxy-acetylene set to get enough heat for sure. Do it in a circular motion around the shaft, right at the weld and you'd reproduce. Chemicals might work, but would take a lot more experimentation.
01-25-2015, 08:33 PM
#23


Boy there is a lot of great information going on back and forth in this post. I agree with the part of learning a lot and not knowing what the heck you are doing. I also agree with both of you that it is fun trying to duplicate what GM did only where at home with limited resources. Alan I really like the finish on the short shafts and hope you will get back to us when you have documented all that was done.
R
R
01-26-2015, 07:26 PM
#24
Melting Slicks

Hi John,
There really is no single source for the finish specs for both paint and plating on the chassis and running gear.
I think probably the NCRS has compiled the most information.
Certainly their Technical Information Manual & Judging Guide for your year car would be a good place to begin.
Also keeping an eye on the topics on the NCRS Discussion Board and searching old posts is a helpful source too.
There is always some conflicting information but the useful info is there to be gleaned too.
There were really just a couple of paint finishes on the chassis, and just 4 plated finishes on the fasteners, but figuring out what was what is a bit of work.
There also were parts and fasteners left natural which need to be dealt with too.
It can be fun or drive you crazy… it depends!
Regards,
Alan
Last edited by 1-2-b-67L89; 01-26-2015 at 07:28 PM.
01-26-2015, 08:12 PM
#25
Team Owner
Member Since: Sep 2006
Location: Westminster Maryland
Posts: 30,173
Likes: 0
Received 2,878 Likes
on
2,515 Posts

Hi 1-2,
Thanks for the info.
I've been trying black oxide which I believe is what 'gun bluing' is.
In fact the last container of oxide I bought was through a gun maker's site.
I'm having trouble getting the 'fade' that the heat zone displays. Ed was good enough to explain why and how that happens and send me to a metal worker's site for some metal 'stain'.
I haven't gone back to the drive shaft yet because I started doing some more zinc and copy cad and will continue with that for a few days more.
Then I'll play with the black oxide again.
Do you have any pictures of the shafts you did? I'd like to see what other people are doing.
Thanks again.
Regards,
Alan
01-26-2015, 10:23 PM
#26
Melting Slicks
Hi 1-2,
Thanks for the info.
I've been trying black oxide which I believe is what 'gun bluing' is.
In fact the last container of oxide I bought was through a gun maker's site.
I'm having trouble getting the 'fade' that the heat zone displays. Ed was good enough to explain why and how that happens and send me to a metal worker's site for some metal 'stain'.
I haven't gone back to the drive shaft yet because I started doing some more zinc and copy cad and will continue with that for a few days more.
Then I'll play with the black oxide again.
Do you have any pictures of the shafts you did? I'd like to see what other people are doing.
Thanks again.
Regards,
Alan
Thanks for the info.
I've been trying black oxide which I believe is what 'gun bluing' is.
In fact the last container of oxide I bought was through a gun maker's site.
I'm having trouble getting the 'fade' that the heat zone displays. Ed was good enough to explain why and how that happens and send me to a metal worker's site for some metal 'stain'.
I haven't gone back to the drive shaft yet because I started doing some more zinc and copy cad and will continue with that for a few days more.
Then I'll play with the black oxide again.
Do you have any pictures of the shafts you did? I'd like to see what other people are doing.
Thanks again.
Regards,
Alan

 01-27-2015, 08:29 AM
#27
Alan or someone, might you know the proper finish for the arch type French locks that go on the rear have shafts. The ones on the donor are rusted to bad to tell.
Thank You
Roger
PS Is the short shaft shine coming from a lathe??
Thank You
Roger
PS Is the short shaft shine coming from a lathe??
01-27-2015, 08:36 AM
#28
Team Owner
Member Since: Sep 2006
Location: Westminster Maryland
Posts: 30,173
Likes: 0
Received 2,878 Likes
on
2,515 Posts
Hi 1-2,
Very nice job uncovering those paint stripes and marking.
It's always such a pleasant 'aha!' when something like that turns up.
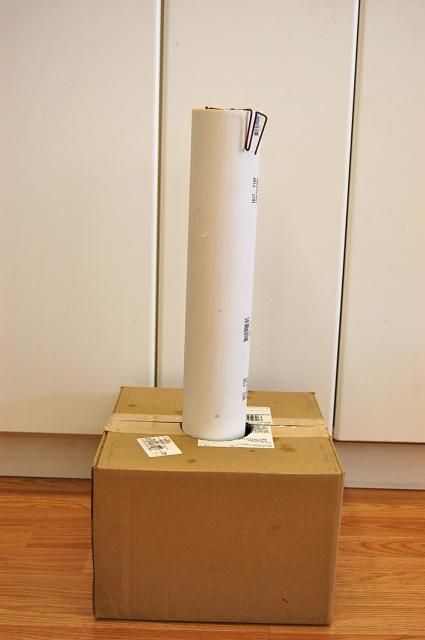
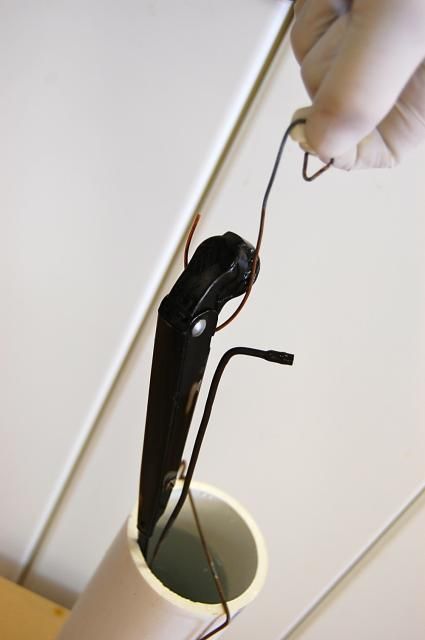
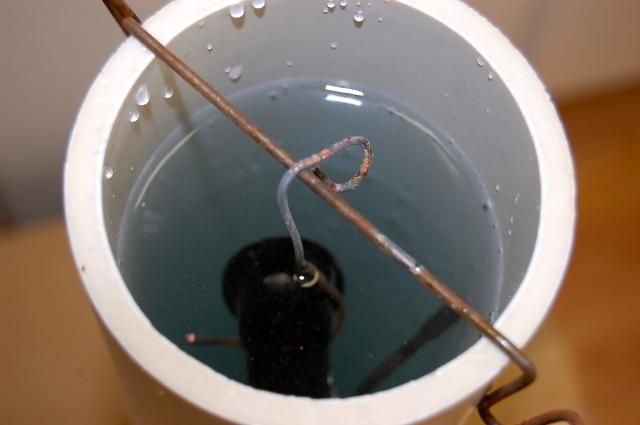
I'm using pvc too.
I made a simple rig so I could plate the wiper tubes on the wiper arms.
As you can see I put a lot of effort into creating a 'cradle' to hold the tube upright.
Regards,
Alan
Very nice job uncovering those paint stripes and marking.
It's always such a pleasant 'aha!' when something like that turns up.
I'm using pvc too.
I made a simple rig so I could plate the wiper tubes on the wiper arms.
As you can see I put a lot of effort into creating a 'cradle' to hold the tube upright.
Regards,
Alan
01-27-2015, 09:06 AM
#29
Melting Slicks
Great work Alan! As always I'm impressed!
You are correct about when you find those paint markings, its fun! I'm fortunate to have a local small company that does car parts for us in clear zinc, etc., but we do the preparation and all they do is plate. But I'm still interested in doing some of what your doing for things like a wiper transmission linkage.
Chick
01-27-2015, 10:44 AM
#30
Team Owner
Member Since: Sep 2006
Location: Westminster Maryland
Posts: 30,173
Likes: 0
Received 2,878 Likes
on
2,515 Posts
Hi Chick,
I'm quite unsure just what the original finish was on the transmission bodies themselves. I really think they had a gold finish on them and that's what they have now.
It's a moot point though because I believe the transmissions were in place when the wiper bay was blacked out.
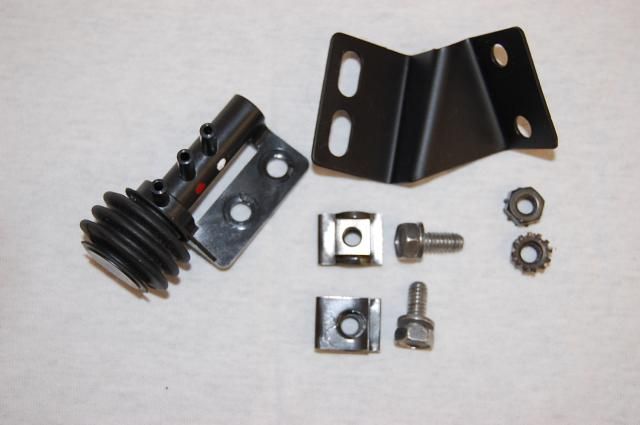
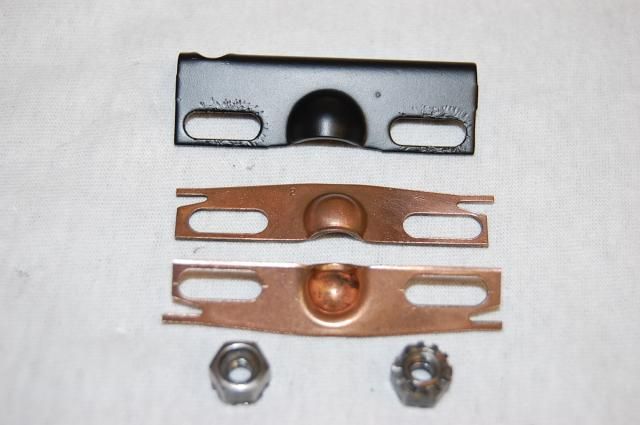
Here's a few pictures of what's in there now. It's always subject to change as I learn more.
Regards,
Alan
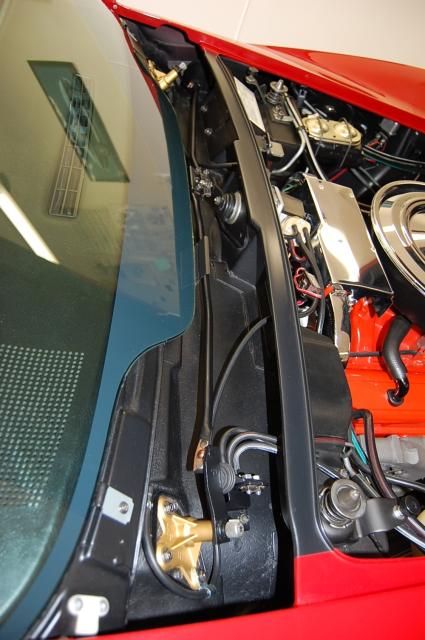
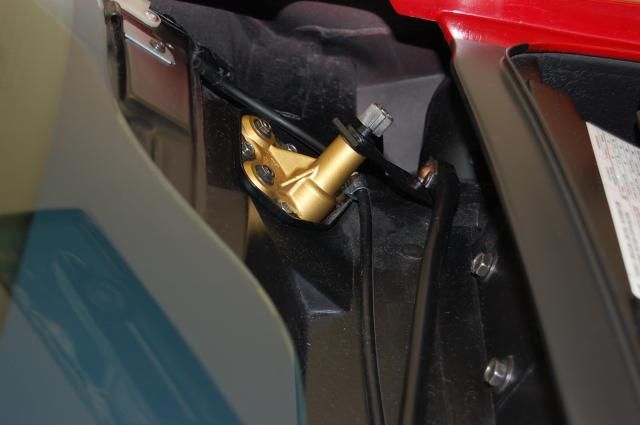
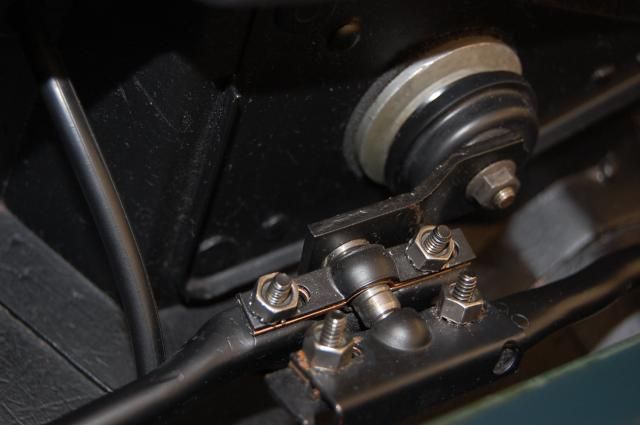
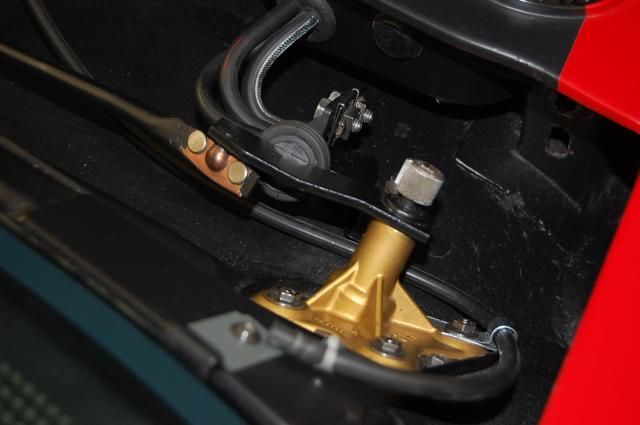
I'm quite unsure just what the original finish was on the transmission bodies themselves. I really think they had a gold finish on them and that's what they have now.
It's a moot point though because I believe the transmissions were in place when the wiper bay was blacked out.
Here's a few pictures of what's in there now. It's always subject to change as I learn more.
Regards,
Alan
01-27-2015, 01:02 PM
#31
Melting Slicks
Hi Chick,
I'm quite unsure just what the original finish was on the transmission bodies themselves. I really think they had a gold finish on them and that's what they have now.
It's a moot point though because I believe the transmissions were in place when the wiper bay was blacked out.
Here's a few pictures of what's in there now. It's always subject to change as I learn more.
Regards,
Alan
01-27-2015, 09:00 PM
#33
Melting Slicks
Palmetto products work well (mentioned earlier) and if you can boil water you can utilize them. As Alan mentioned you need SS or glass but one can also use granite-ware or whatever the camping stuff is called (blue speckled look). By using a hot plate the solution never gets above 180 degrees plus and the optimum is to keep it at 180 to 200 degrees.
Here is a Camaro gas tank strap bolt restored (one to the right) vs. an AMK repro made by Anchor to the left. This is the type of finish I find on many cars and what I aim for but granted their mainly 67 to 69 models. The next picture is of 4 original sub-frame bolts after restoration. Just wanted to show easy results can be obtained with Palmetto products. I then heat and coat the screws/bolts with Rust Prevention Magic which works great.
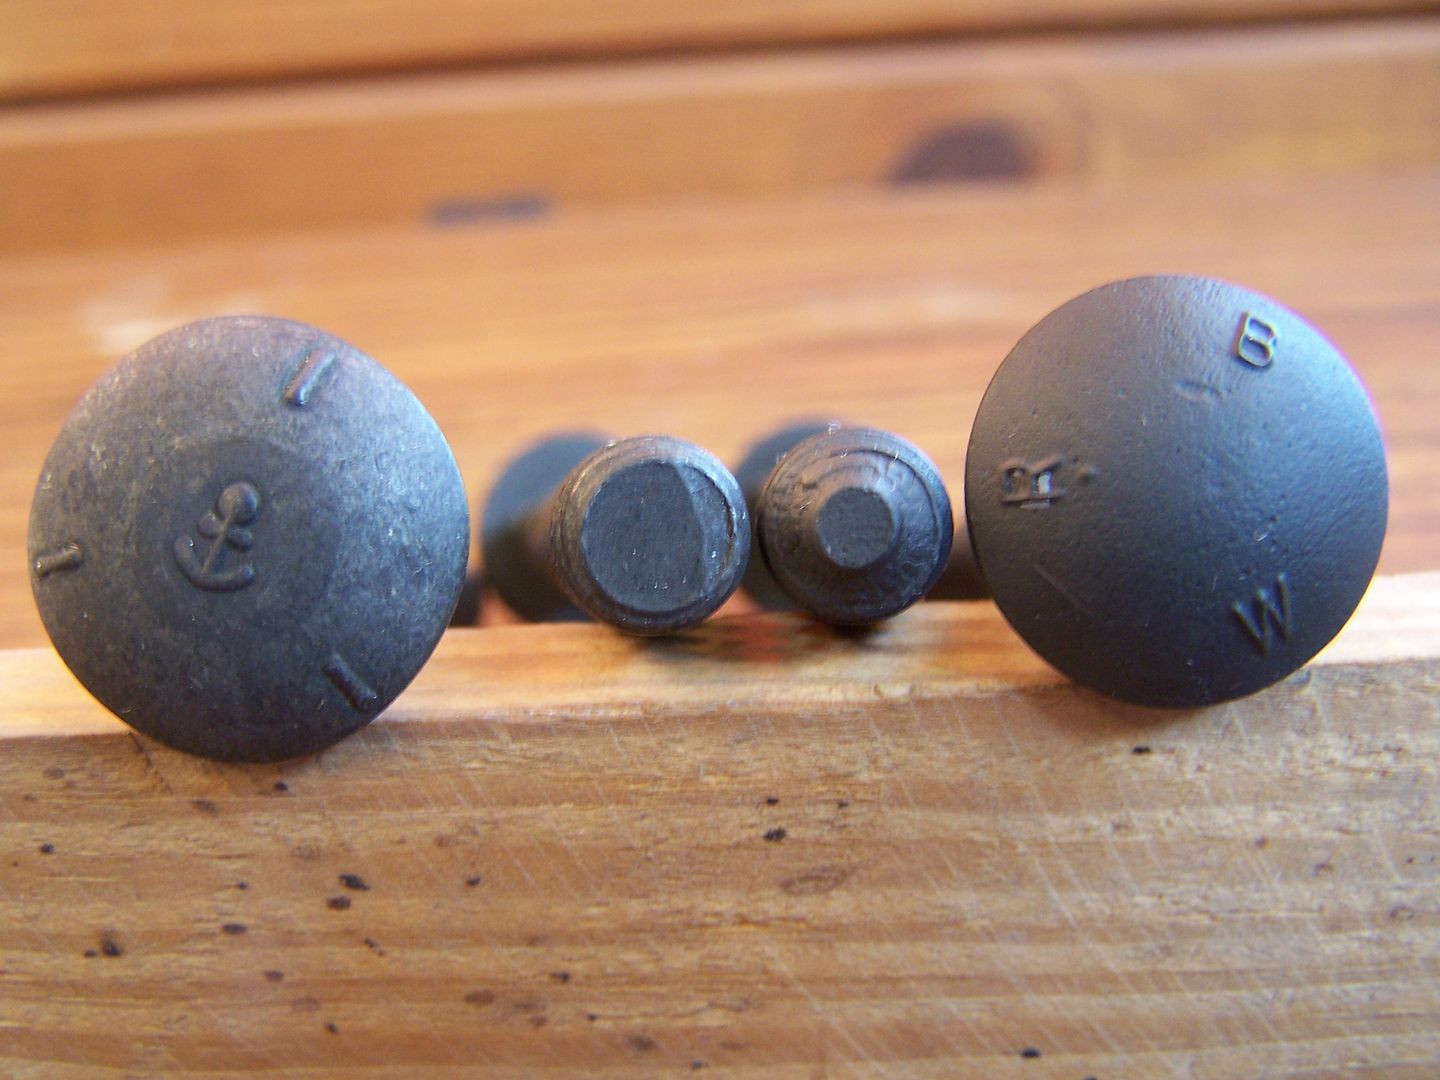
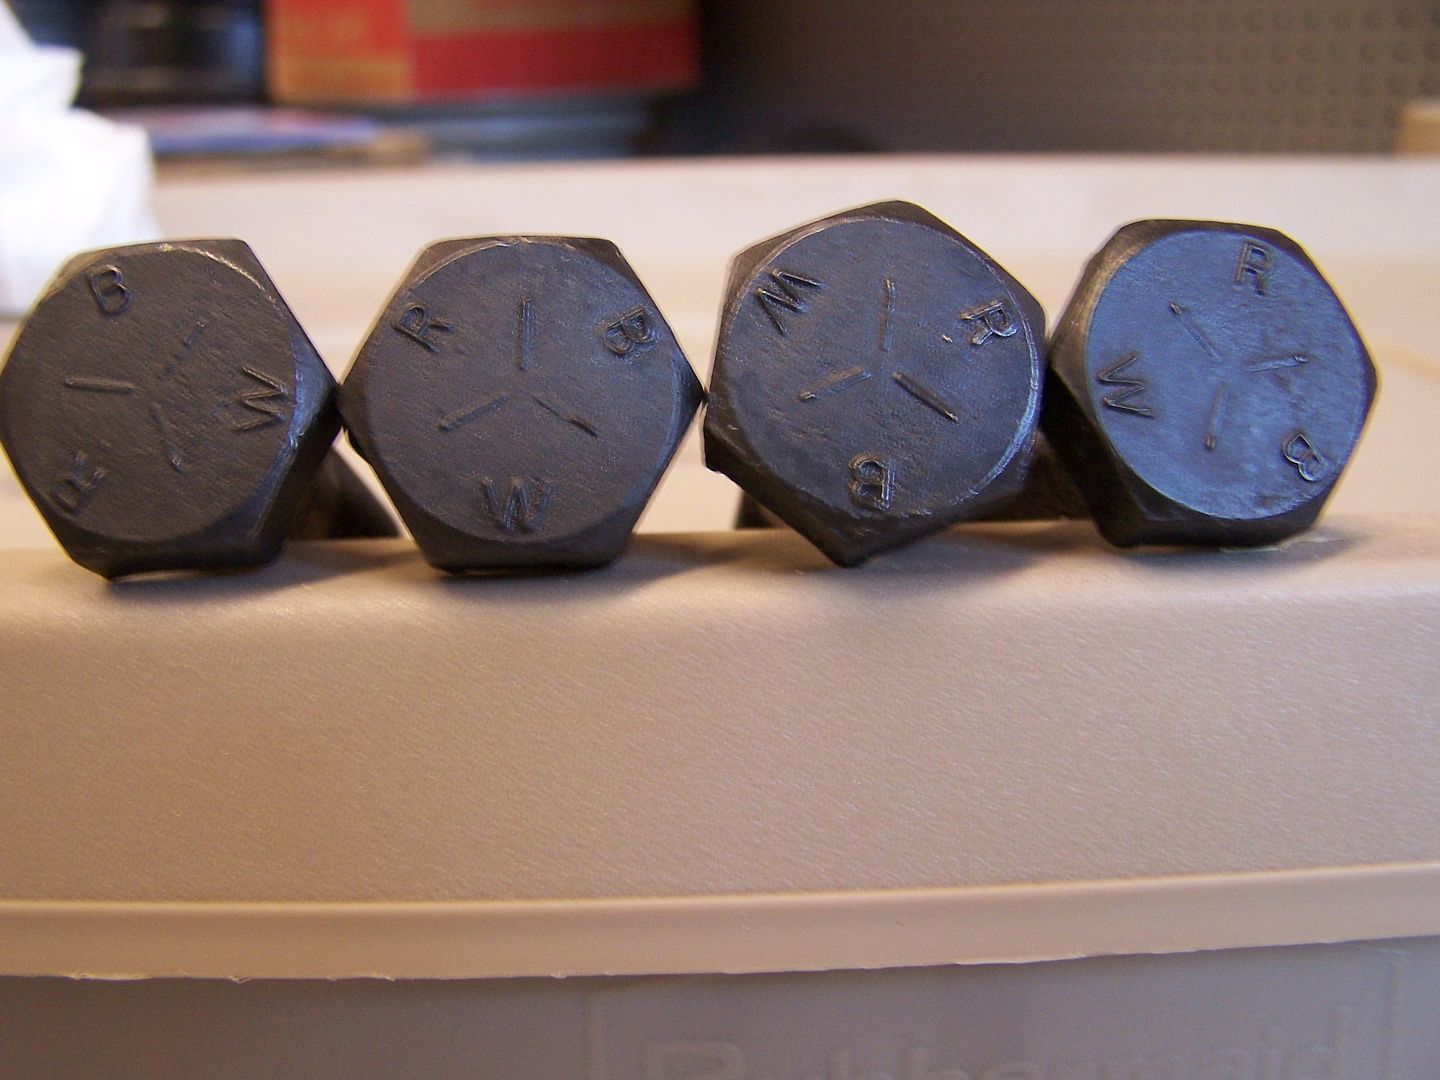
Here is a Camaro gas tank strap bolt restored (one to the right) vs. an AMK repro made by Anchor to the left. This is the type of finish I find on many cars and what I aim for but granted their mainly 67 to 69 models. The next picture is of 4 original sub-frame bolts after restoration. Just wanted to show easy results can be obtained with Palmetto products. I then heat and coat the screws/bolts with Rust Prevention Magic which works great.

