When you click on links to various merchants on this site and make a purchase, this can result in this site earning a commission. Affiliate programs and affiliations include, but are not limited to, the eBay Partner Network.
I've never seen such a thing. Can you post pictures? What I would do is sand it down by hand and cover the area with your filler of choice. Some like bondo but for corvettes I prefer something fiberglass based like gorilla hairs for repairs. Apply thin even coat and sand it smooth once it dries
There have been threads covering this topic before. The aluminum rivets reacted to the metal header, and have swelled up, causing the bumps to appear on the upper side. The rivets need to be removed. Otherwise, they will continue to swell, and sanding the bumps down becomes a temporary fix.
I followed the advice of Willcox Corvette, and IMO, this is the ONLY way to do it correctly.
You want to remove the headlight assemblies to give you room to work, then grind the heads off the rivets from underneath. Then, with a putty knife, carefully pry the metal header off the bonding strip. Now you can dig the rivets out of the bonding strip WITHOUT PENETRATING the top layer of fiberglass!
Once the rivets are out, you`ll need to re-glue the metal header to the bonding strip. Put extra glue in the holes where the rivets used to be.
I used a bunch of clamps and wood sticks.
When I did this repair on my 71 coupe, the front clip was off the car, so it was a lot easier. The following pics may help also....
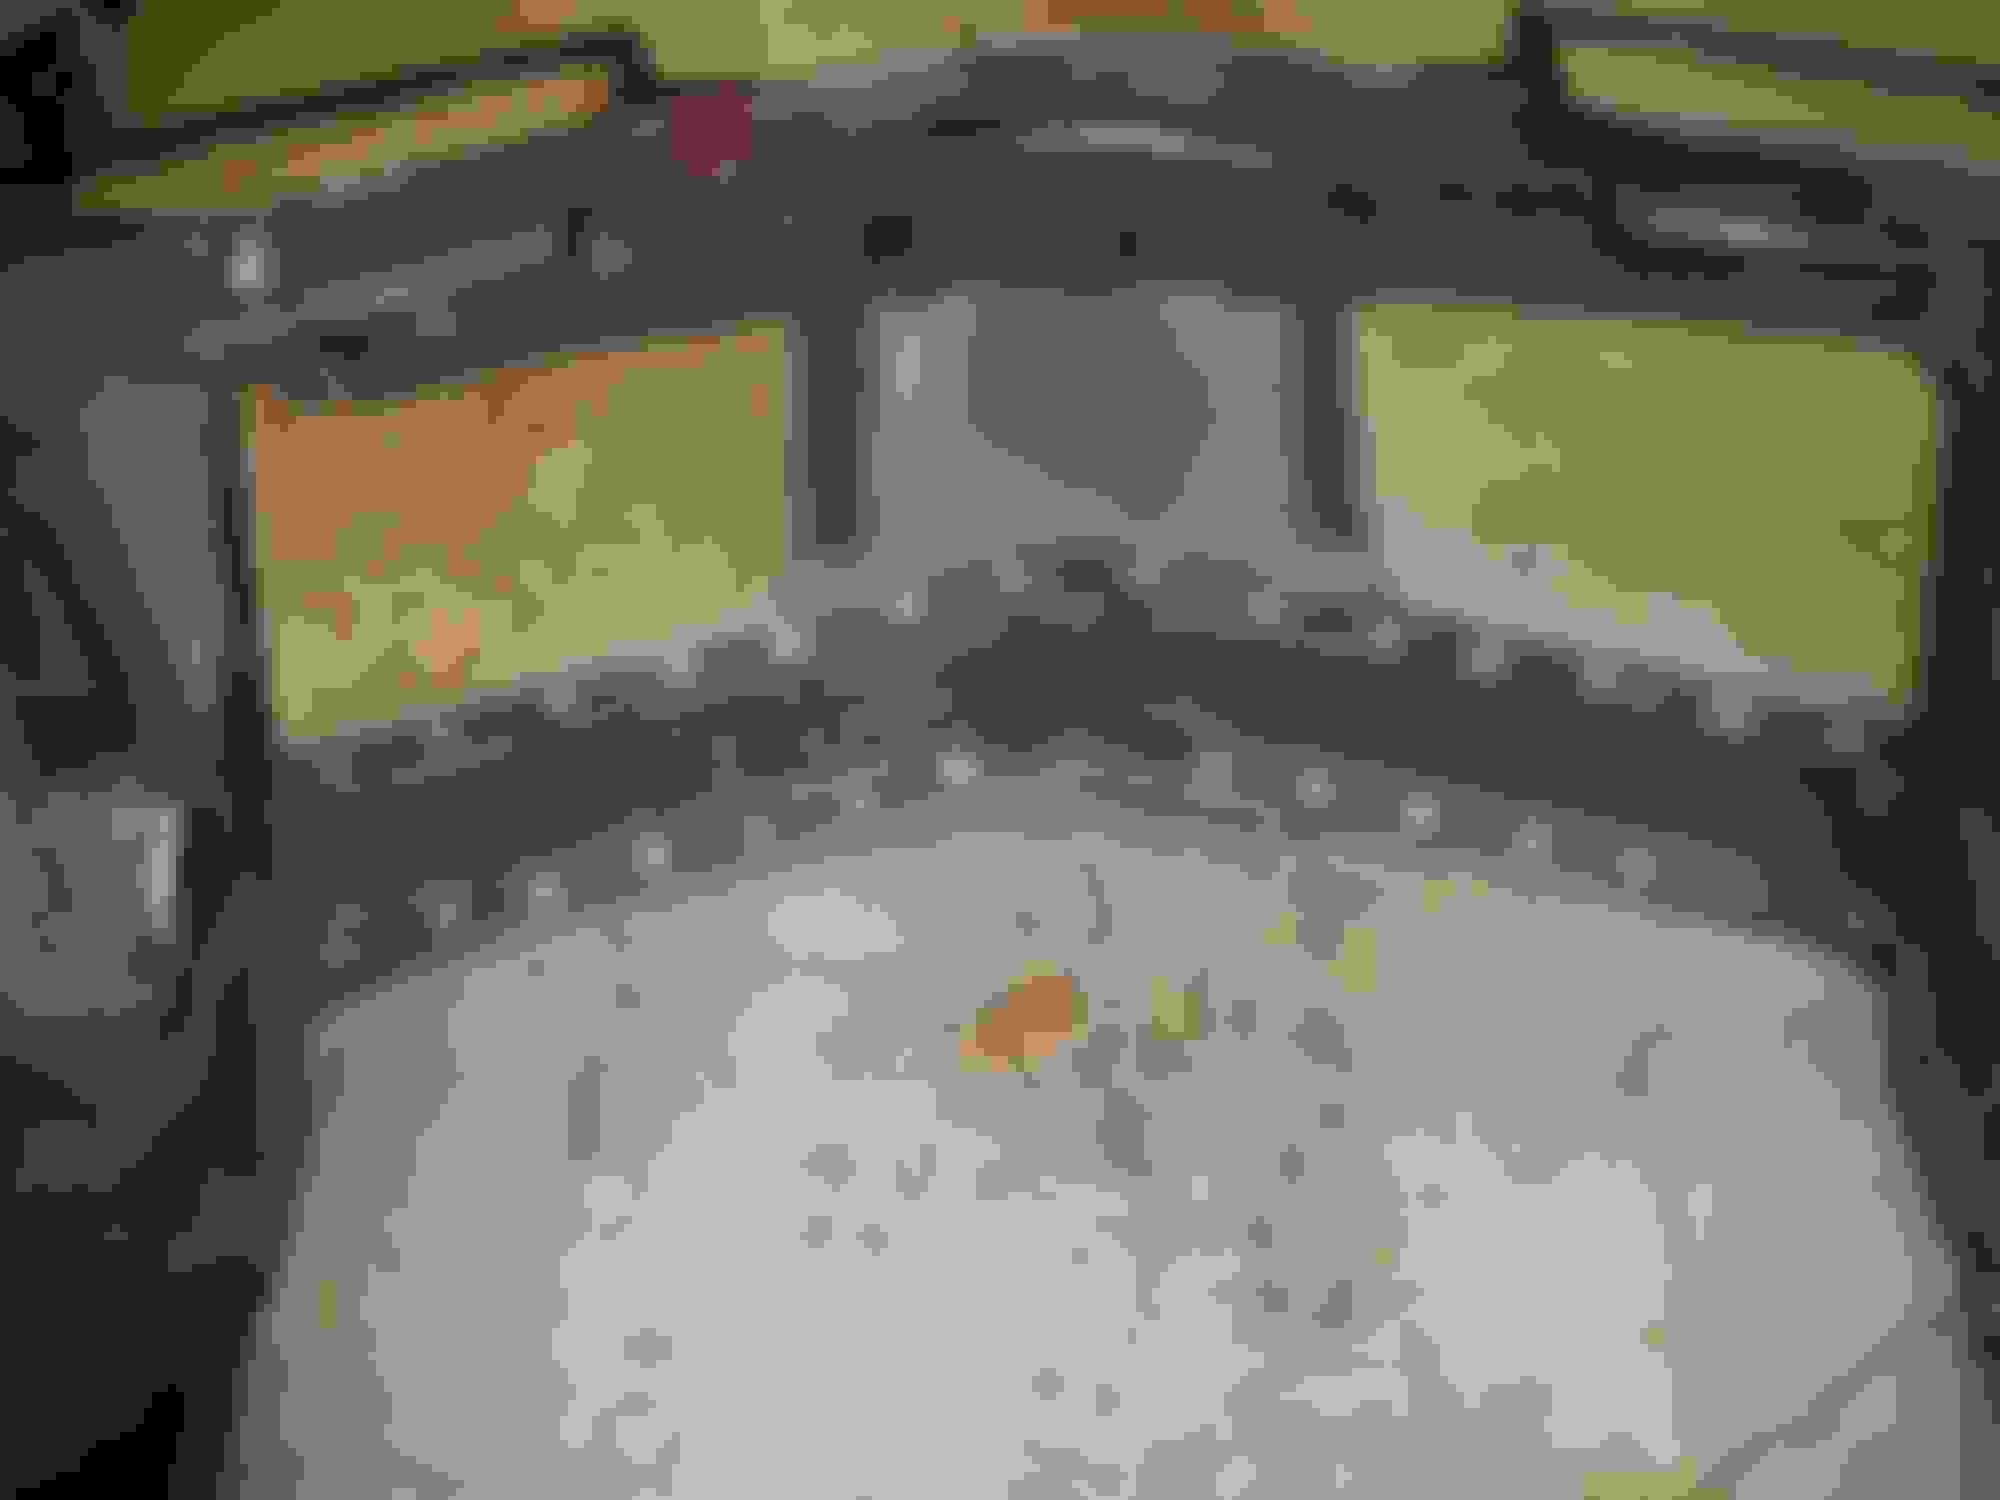
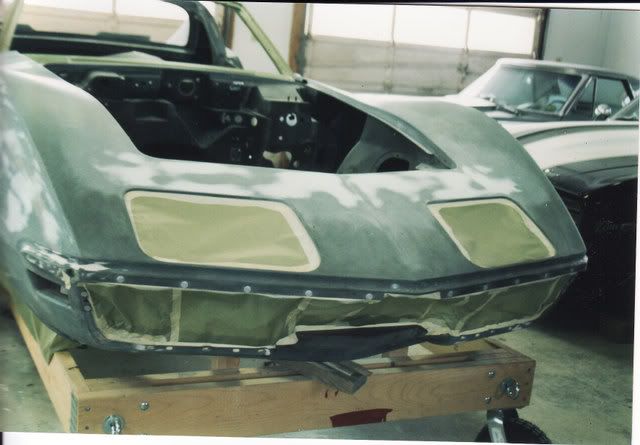
This is when we first brought the front clip home, you can see the rivet bumps above the headlights and along the front edge of the hood.
Here, the rivet heads are ground off, and the metal header is off, and I`m digging out the rivets....
Metal header is off, all rivets removed, note fiberglass bonding strip is still in place, NO HOLES in the top layer!
Be sure to dig the entire head of the rivets out of the bonding strip.
Re-bonding the metal header, the sticks help push the bumps back down. Clamps from Harbor Freight. My metal support for the front nose was rusted in half, so I replaced it while I was at it.
No more rivet bumps! Thanks to Willcox awesome advice!
I agree with this method...AND IT IS IMPERATIVE that ALL of rivet needs to be removed....so carefully grinding the fiberglass bonding strip down so the head of the aluminum rivet can be taken out. IF it is left in place...all of this work is for nothing.
What type of glue or adhesive should I use?
Should I use bondo or filler to fill the rivit holes before I re-glue the metal strip?
Thanks,
Al
I got a 3M product at the local paint & body supply store, just told them I needed an adhesive to bond metal & fiberglass..... they gave me a $40 tube and said it would glue "Anything to anything"! It required a special applicator gun ($60) because the glue is in two tubes, one big one & one small one, and the gun has two plungers. I went ahead and bought the gun as I still needed to bond the front clip on anyway.
The only filler in the holes was glue, I filled all the holes with glue just before I put the metal header back on and clamped it, but don`t fill them all the way to the top..... you want a little space for the glue to go when the boards & clamps push the bumps back down.
Hi Al,
On OGTO's next to the last picture he mentions the blocks he used and pushing down the 'bumps'.
Because the fiberglass has taken that shape for such a long time there may still need to be a little body work done from the top side if you want to insure that no trace of the bumps will be seen even when looking at an angle in bright light.
Regards,
Alan
Because the fiberglass has taken that shape for such a long time there may still need to be a little body work done from the top side if you want to insure that no trace of the bumps will be seen even when looking at an angle in bright light.
Originally Posted by Alan 71
Hi OGTO,
Nice pictures and description!!
Happy New Year!
Regards,
Alan
Thanks Alan! That`s true, there was still some block sanding on the top side, but I was worried about poking through... I didn`t want to have holes in the top to repair, like you would if removing a luggage rack. I`ve heard some say they will always be seen, some say you can repair them without a trace. I didn`t want to take a chance.
Hi GTO,
You're right, you don't want to have to fill a hole in the surface of the hood surround under any circumstance.
That would be just asking for trouble.
Regards,
Alan
The shop I work with uses the FUZOR line of products and has had great success with them. Most auto parts stores that cater to body shops carry a line of the FUZOR products as well as a number of other brands. http://www.lord.com/products-and-sol...nding-products
Before you spend any money on a dispensing gun, check with a local body shop that you trust and has experience with these bonding adhesives and see if they will lend you a gun. They may even sell you the product since they often have a few tubes that are close to their "use-by" date and will be happy to move them. The shop I use has a couple of the manual dispensing guns that they have loaned out to customers for small jobs at no charge.
The manual guns work well for smaller jobs, but for larger jobs such as bonding on a front end or such, they also have pneumatic guns that are just awesome.
Hi Al,
A body off restoration is quite an experience!!! To say the least!!!
You really need to consider taking pictures as you're taking things apart (LOT'S of them) to help you when you begin reassembly.
It's a very good idea to use baggies for all fasteners and label exactly where they are used.
Come up with a system to control the small parts since there will be a zillion of them.
If you don't already have them you should seriously consider buying the G.M. 1971 Chassis Service Manual, the 1971 Assembly Instruction Manual (AIM), and if you're going to be striving for at least some degree of originality, the NCRS 70-72 Technical Information Manual & Judging Guide.
Let the fun begin!!!!
Regards,
Alan
I use FUSOR and SEM...both have products that will bond to steel and finerglass/SMC...BUT...verify it to make sure the steel can be PRIMED or if it has to be BARE.


 12-27-2014, 05:19 PM