When you click on links to various merchants on this site and make a purchase, this can result in this site earning a commission. Affiliate programs and affiliations include, but are not limited to, the eBay Partner Network.
I have been attempting to reassemble the steering column on a '79 C3 after replacing the ignition switch. After laying out all the parts, I have 2 components I cannot remember how they came out:
One is a lower horn contact
Another is a spring (roughly 1 " in dia)
I have tried to find a diagram showing these components, but none a clear enough to complete the puzzle - I am stuck!!!
COME ON NOW...I KNOW you know this.....The spring goes on your steering column shaft BEFORE you install the lower horn contact and lock plate. BECAUSE.....this spring (in question) is what you are compressing to get the 'C' clip in and hold the LOCK PLATE... and this spring (in question) is also applying pressure to your upper bearing race so your upper column is tight when it is installed....if all other parts are in good condition.
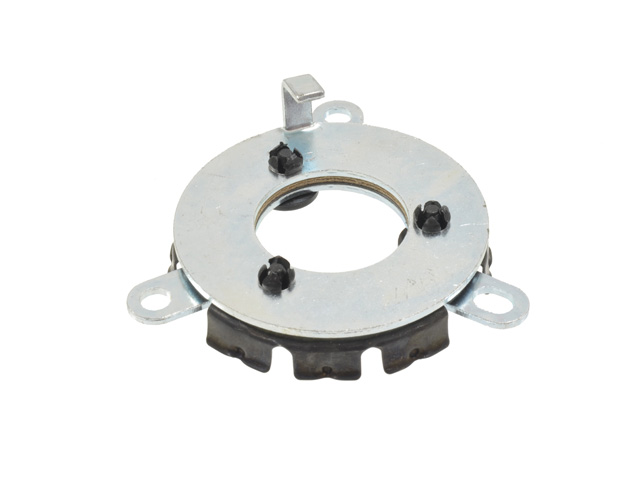
The donut-shaped piece appears to be part of this assembly While it may be due to the angle you took the photo, it would appear that the "L" shaped section of that piece has broken off.
I'm pretty much clueless regarding the spring. It doesn't appear to be part of this assembly as it looks both too fat and too short. Perhaps it is the return spring for the headlight bright/dim switch that's part of the turn signal switch. Does the switch spring back after you pull it forward?
The image shows a different perspective on the part in question. it is similar to the part you tagged, but i have that part as well.
The turn signal lever springs back properly when pulled forward.
Do you mean that you have the entire assembly that includes the ring-shaped part in the picture? If so I see no other piece in the parts illustration for the entire steering column that it could be. If now separate from the rest of the upper contact assembly you have to reattach the ring-shaped part using the plastic retainers.
I'm nearly positive that the spring is part of the hazard switch **** assembly. It fits between the two pieces that make up the hazard switch ****. It doesn't show in the parts illustrations in my manuals but I checked mine and it is definitely spring loaded and that one looks like both the right size and strength for the job.
The ONLY place that I can think of inside the steering column where that light spring goes is for the lever you press down on when you take out your ignition key.
I wish that were the case; however, I have the component you show IN ADDITION TO the part I showed. It looks exactly the same except it is not attached to another component. I am at a loss where it might fit.
I think you are correct about the hazard switch - thanks!!
I thought that was what it had to be as you shouldn't have been deep enough to disturb the key release. To confirm simply see if the two pieces of the hazard switch button have a bit of resistance between them and that the inner piece is always held against the column no matter the switch position. (I think the switch will work without the spring but you'd get a rattle as the inner portion bumps against the column.)
For some reason it looks like someone left behind part of the upper contact. Perhaps they lacked the proper shims and substituted that? Did you find shims behind the upper contact? Did your horn work before?
After taking a second look...the spring in 'question' DOES look like the spring for the hazard switch ****.

 11-27-2015, 05:38 PM


 After taking a second look...the spring in 'question' DOES look like the spring for the hazard switch ****.