Big Mouth Performance Air Dam
 12-11-2009, 06:15 PM
#1
Advanced

Thread Starter

Member Since: Nov 2005
Posts: 50
Likes: 0
Received 0 Likes
on
0 Posts

Hi guys,
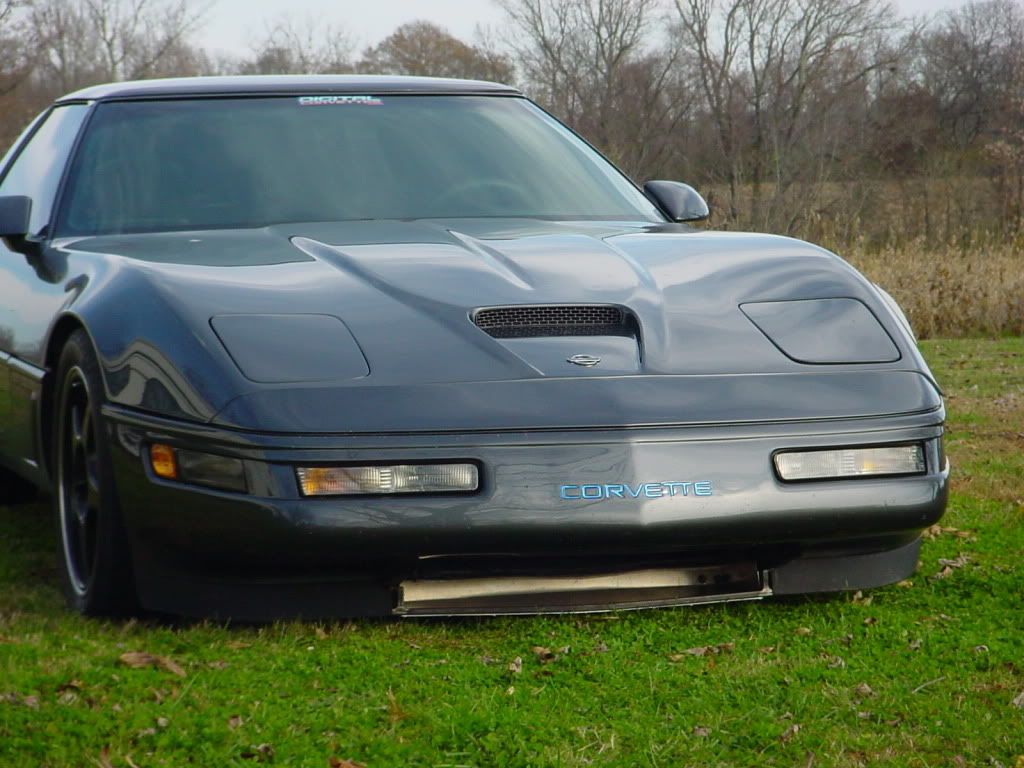
i´ve a procharger intercooled D-1SC system on my vette. Now i´m interested on the "Big Mouth Performance Air Dam" to get a lower air intake temperature . Is there anybody who have a response for the air dam?
http://www.ecklers.com/product.asp?p...1&dept_id=1758
Thanks and BR
Juergen
i´ve a procharger intercooled D-1SC system on my vette. Now i´m interested on the "Big Mouth Performance Air Dam" to get a lower air intake temperature
. Is there anybody who have a response for the air dam?http://www.ecklers.com/product.asp?p...1&dept_id=1758
Thanks and BR
Juergen
 12-15-2009, 10:59 AM
#2
Safety Car


Member Since: Jan 2004
Location: Northern California
Posts: 3,783
Likes: 0
Received 11 Likes
on
11 Posts

A forum member here produced and sold the Bigmouth airdam, his user name is "golfman2008".
Here is an old post from 2006, http://forums.corvetteforum.com/c4-p...big-mouth.html.
You'll get different opinions about the product and a lot of members just made there own since it's very easy to do from sheetmetal bought at Home Depot or Lowe's.
Back in 2006, I think he was selling it for $125.
Here is an old post from 2006, http://forums.corvetteforum.com/c4-p...big-mouth.html.
You'll get different opinions about the product and a lot of members just made there own since it's very easy to do from sheetmetal bought at Home Depot or Lowe's.
Back in 2006, I think he was selling it for $125.
Last edited by GKK; 12-15-2009 at 10:22 PM.
12-29-2009, 12:22 AM
#4
Racer
Member Since: Apr 2006
Location: OKlahoma City OK 89 vert
Posts: 300
Likes: 0
Received 0 Likes
on
0 Posts
For the money and HP I would just put water injection from www.alcohol-injection.com . I did it and wish I had done it 5 years ago. I had over heating problem. Took my inter cooler off and added the the injection. Love it. I now run 15 psi with no heat issues.
12-29-2009, 02:19 AM
#5
Advanced
Thread Starter
Member Since: Nov 2005
Posts: 50
Likes: 0
Received 0 Likes
on
0 Posts
i also still using an a.c.-injection (15glph) from blowerworks. i don´t have really problems with the temperatures. but the secret is, to get an air intake temperature as low as possible and so i´m looking also for another sollution. i think the big mouth air is a good part to get more air to the coolers to get alower temperature..
the procharger intercooler works verry good. we tested the car on dyno. I´ve a 9:1 copression ratio with 12 (on street i also get 12-14 psi, that´s a fluctuation of the air intake temperature) without a.c. injection 470RHP (we also make a safety ecm programm) and with a.c. injection only +10RHP. That was not the desired effect.
BR Juergen
12-29-2009, 03:50 PM
#6

This could help but requires a little more work.
The reason I did this modification was to get more cool air into my air to air intercooler for my supercharger. The air to air intercooler sits in front of my radiator and pre heats the air going to the radiator. The supercharger kit came with a diverter to split the air coming from the factory air dam so that half is diverted to the air to air intercooler and the other half to the radiator. I needed cool air into the air to air intercooler.
I looked at the forced air intake and for what they wanted for the kit, at the time it was $450.00, I thought I could do something similar for next to no cost.
Tools needed:
1. Dremmel (or similar tool) I recommend Sears brand (some of the kits come with attachments).
2. Flex shaft attachment (looks like a dental tool attachment)
3. Drill bit that fit’s the flex shaft attachment
4. Cutting wheels (thin that fit the above attachment about the size of a silver dollar, they are sold in packs)
5. Lead pencil or white correction pen
6. Shop light or flash light
7. Painters tape
The tools pay for themselves after just this one job considering the $450.00 cost previously mentioned.
I took the filler plate with the Corvette name and taped it off with masking tape. I wanted to keep the name and make a cross hair. This helps the plate from flexing. I used a dremmel (Sears brand) with the flex shaft and cutting wheel. Take your time cut a little less at first you can trim more after the initial cuts. You will be essentially cutting out four squares. As a side note I drew up several patterns and this simple one allowed the most air to pass through. You can also dress it up with ss or aluminum screening behind the plate when you are finished. I was looking for maximum air flow.
Next trace your license plate attached to your factory attachment points. Remove plate. IMPORTANT - I left the tabs for the license plate bolts in place if ever I should have to mount the plate. I then used the cutting wheel to cut out the plastic behind the plate leaving the mounting points in place. Try to take our in one piece in case you should want to put back in place in the future.
Now you will be facing a grid or egg crate plastic bumper enforcement. Using the dental attachment with the cutting drill bit and cutting wheel remove the section of material behind the license plate. The grid material is gray in color. I painted everything remaining black.
The next step use the light to look inside the opening. You should see a black steel bar(DO NOT CUT). You will be cutting the area underneath it. I placed a small thin board in front of the air to air intercooler as a safety, it was not needed. I then proceeded to use the flex shaft with the drill bit and made an outline of roughly a upside down triangle. Take your time and take a few brakes. I then just connected the holes with the bit until that piece was removed. If you wanted you could use some flex hose to the air filter cover from the opening giving you the forced air you were looking for.
Taking your time it should not take more than a few hours. You will also have the pride of telling someone you did the job your self. It is not a difficult process, I thought it was a fun Saturday project. It did help to cool things down for my supercharger.
I hope this helps.

 [/IMG]
The reason I did this modification was to get more cool air into my air to air intercooler for my supercharger. The air to air intercooler sits in front of my radiator and pre heats the air going to the radiator. The supercharger kit came with a diverter to split the air coming from the factory air dam so that half is diverted to the air to air intercooler and the other half to the radiator. I needed cool air into the air to air intercooler.
I looked at the forced air intake and for what they wanted for the kit, at the time it was $450.00, I thought I could do something similar for next to no cost.
Tools needed:
1. Dremmel (or similar tool) I recommend Sears brand (some of the kits come with attachments).
2. Flex shaft attachment (looks like a dental tool attachment)
3. Drill bit that fit’s the flex shaft attachment
4. Cutting wheels (thin that fit the above attachment about the size of a silver dollar, they are sold in packs)
5. Lead pencil or white correction pen
6. Shop light or flash light
7. Painters tape
The tools pay for themselves after just this one job considering the $450.00 cost previously mentioned.
I took the filler plate with the Corvette name and taped it off with masking tape. I wanted to keep the name and make a cross hair. This helps the plate from flexing. I used a dremmel (Sears brand) with the flex shaft and cutting wheel. Take your time cut a little less at first you can trim more after the initial cuts. You will be essentially cutting out four squares. As a side note I drew up several patterns and this simple one allowed the most air to pass through. You can also dress it up with ss or aluminum screening behind the plate when you are finished. I was looking for maximum air flow.
Next trace your license plate attached to your factory attachment points. Remove plate. IMPORTANT - I left the tabs for the license plate bolts in place if ever I should have to mount the plate. I then used the cutting wheel to cut out the plastic behind the plate leaving the mounting points in place. Try to take our in one piece in case you should want to put back in place in the future.
Now you will be facing a grid or egg crate plastic bumper enforcement. Using the dental attachment with the cutting drill bit and cutting wheel remove the section of material behind the license plate. The grid material is gray in color. I painted everything remaining black.
The next step use the light to look inside the opening. You should see a black steel bar(DO NOT CUT). You will be cutting the area underneath it. I placed a small thin board in front of the air to air intercooler as a safety, it was not needed. I then proceeded to use the flex shaft with the drill bit and made an outline of roughly a upside down triangle. Take your time and take a few brakes. I then just connected the holes with the bit until that piece was removed. If you wanted you could use some flex hose to the air filter cover from the opening giving you the forced air you were looking for.
Taking your time it should not take more than a few hours. You will also have the pride of telling someone you did the job your self. It is not a difficult process, I thought it was a fun Saturday project. It did help to cool things down for my supercharger.
I hope this helps.
[/IMG]
 01-02-2010, 02:19 PM
#7
Advanced
Thread Starter
Member Since: Nov 2005
Posts: 50
Likes: 0
Received 0 Likes
on
0 Posts
Hi!
That will be also a nice solution. but i´ve the problem, that we need in austira (europe) a licensce plate in the front of the car. and i´ve the license-plate in front of this part.
but it looks verry good also your solution on your hood.
BR Juergen
That will be also a nice solution. but i´ve the problem, that we need in austira (europe) a licensce plate in the front of the car. and i´ve the license-plate in front of this part.
but it looks verry good also your solution on your hood.
BR Juergen
 01-11-2010, 05:04 AM
#9
Instructor

Member Since: Jul 2009
Posts: 121
Likes: 0
Received 0 Likes
on
0 Posts
COPO,
Do you ever have ground clearance issues with that? All of my C4's (5 of them) scraped when I back out my driveway on the curb.
The curb is you standard 2ish inch drop.
I am wanting to do this and also get an intercooler sitting in front of the scoop with its own scoop.
Would like to know if you have any issue with steep grade, speed bumps, etc. For exampe there are a couple of stores I go to frequently that have a somewhat steep entrance ramp and if I dont gingerly go slowly, I scrape.
01-11-2010, 08:03 PM
#10
Burning Brakes

COPO,
Do you ever have ground clearance issues with that? All of my C4's (5 of them) scraped when I back out my driveway on the curb.
The curb is you standard 2ish inch drop.
I am wanting to do this and also get an intercooler sitting in front of the scoop with its own scoop.
Would like to know if you have any issue with steep grade, speed bumps, etc. For exampe there are a couple of stores I go to frequently that have a somewhat steep entrance ramp and if I dont gingerly go slowly, I scrape.
Do you ever have ground clearance issues with that? All of my C4's (5 of them) scraped when I back out my driveway on the curb.
The curb is you standard 2ish inch drop.
I am wanting to do this and also get an intercooler sitting in front of the scoop with its own scoop.
Would like to know if you have any issue with steep grade, speed bumps, etc. For exampe there are a couple of stores I go to frequently that have a somewhat steep entrance ramp and if I dont gingerly go slowly, I scrape.
I have only barely scraped a couple times since I have bulit it. Driving for several yrs with a lowered car I guess I have figured out where I can and can't go or get a good angle while turning in or out.
There are several ways you can get more air into the front, I am also building a new upper shroud for the IC and changing the bumper to get more air into the front. There are some pics of of what I did in my build thread. If I ever get done with it.
05-26-2011, 06:10 PM
#11
Drifting


Member Since: Jan 2010
Location: Katy TX
Posts: 1,447
Likes: 0
Received 0 Likes
on
0 Posts