Replacing ignition switch - Help, urgent!

 08-23-2009, 03:28 PM
#2
Race Director


Years ago I did this in an 84.If its the same you need to get a small compressor jobber to push the lock plate down,release it to get access to the switch.You might want to ask this in the Tech section.
08-23-2009, 03:34 PM
#3
Advanced

Thread Starter

Member Since: Aug 2009
Posts: 51
Likes: 0
Received 0 Likes
on
0 Posts
Link to said compressor? And I have the haynes manual but it shows a white plastic plate instead. I think it was different for 84-89
08-23-2009, 04:38 PM
#5
Friend Request Magnet


Steering Wheel lock plate spring depresser
You can usually borrow these tools at the parts stores.
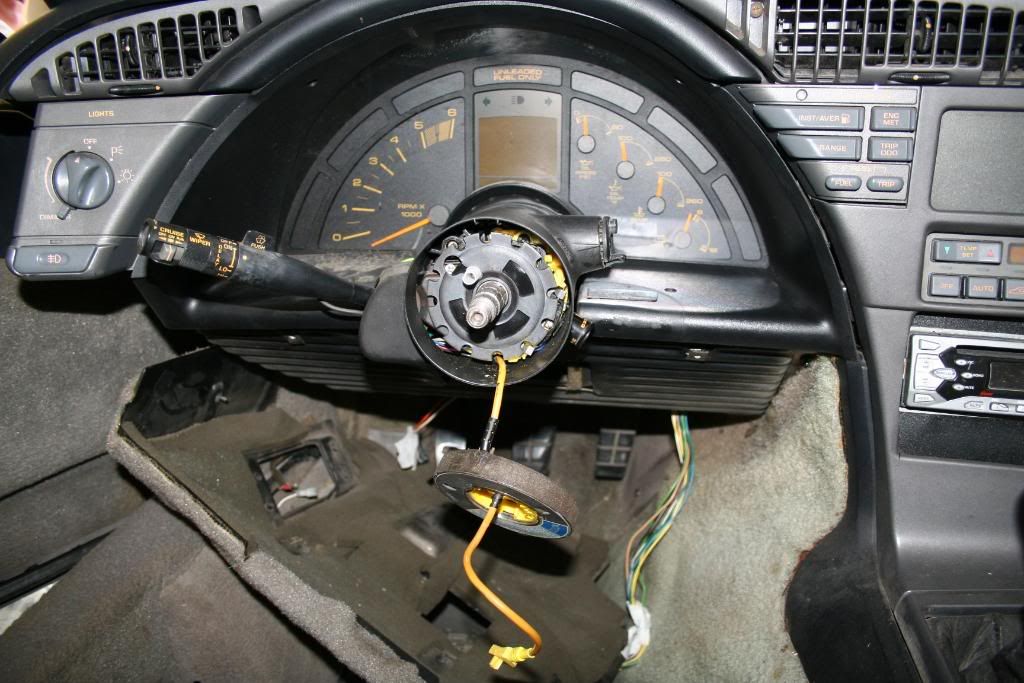
The ignition switch is located on top of the steering column under and behind gauges....if this is where your keys go, its the key switch for the ignition.
I write that to let you know so when you go buy the part they dont give you the wrong part because of the wording.
You can usually borrow these tools at the parts stores.
The ignition switch is located on top of the steering column under and behind gauges....if this is where your keys go, its the key switch for the ignition.
I write that to let you know so when you go buy the part they dont give you the wrong part because of the wording.
08-23-2009, 05:03 PM
#7
Advanced
Thread Starter
Member Since: Aug 2009
Posts: 51
Likes: 0
Received 0 Likes
on
0 Posts
08-23-2009, 05:09 PM
#8
Drifting


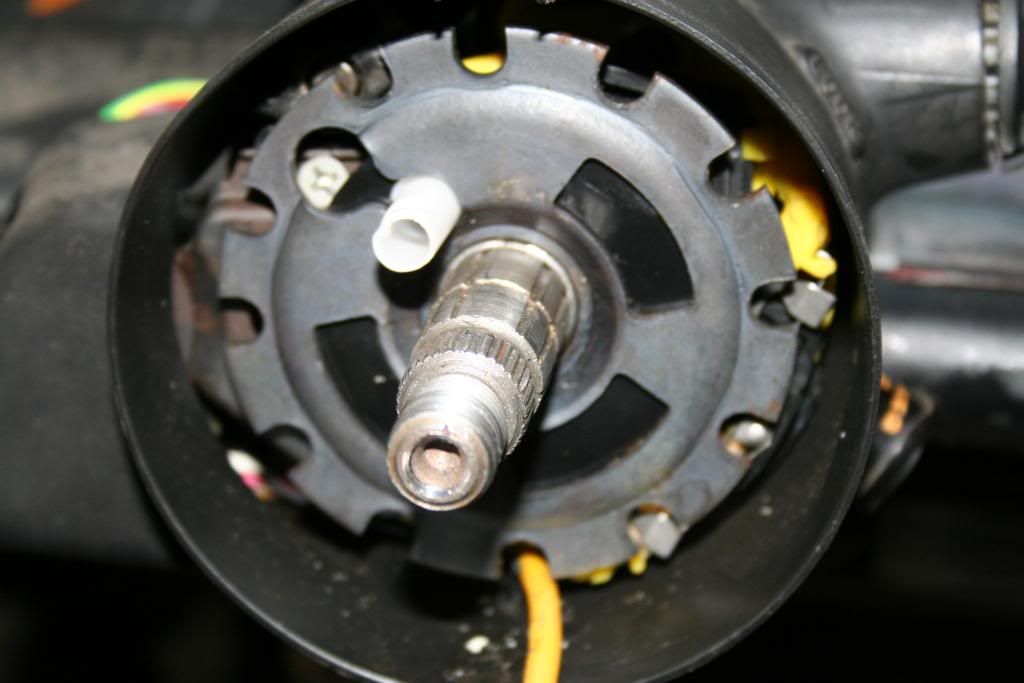
what I see from your pix tells me you're going after the lock cylinder for your key-switch. if this is your goal, you need to remove the lockplate retainer ring-it's that split ring seated right at the centre of your black lockplate inthe pix. the lockplate spring retainer tool pushes the lockplate down so you can remove the split ring with split ring pliers or a small screwdriver. the lockplate then slides up and off the shaft exposing your next steps. NOW, if it's really the "ignition switch" you're after then like 88yellow sez, you need to drop the column from it's support and go from there.
08-23-2009, 06:28 PM
#9
Advanced
Thread Starter
Member Since: Aug 2009
Posts: 51
Likes: 0
Received 0 Likes
on
0 Posts
what I see from your pix tells me you're going after the lock cylinder for your key-switch. if this is your goal, you need to remove the lockplate retainer ring-it's that split ring seated right at the centre of your black lockplate inthe pix. the lockplate spring retainer tool pushes the lockplate down so you can remove the split ring with split ring pliers or a small screwdriver. the lockplate then slides up and off the shaft exposing your next steps. NOW, if it's really the "ignition switch" you're after then like 88yellow sez, you need to drop the column from it's support and go from there.
 08-23-2009, 08:14 PM
#10
Drifting
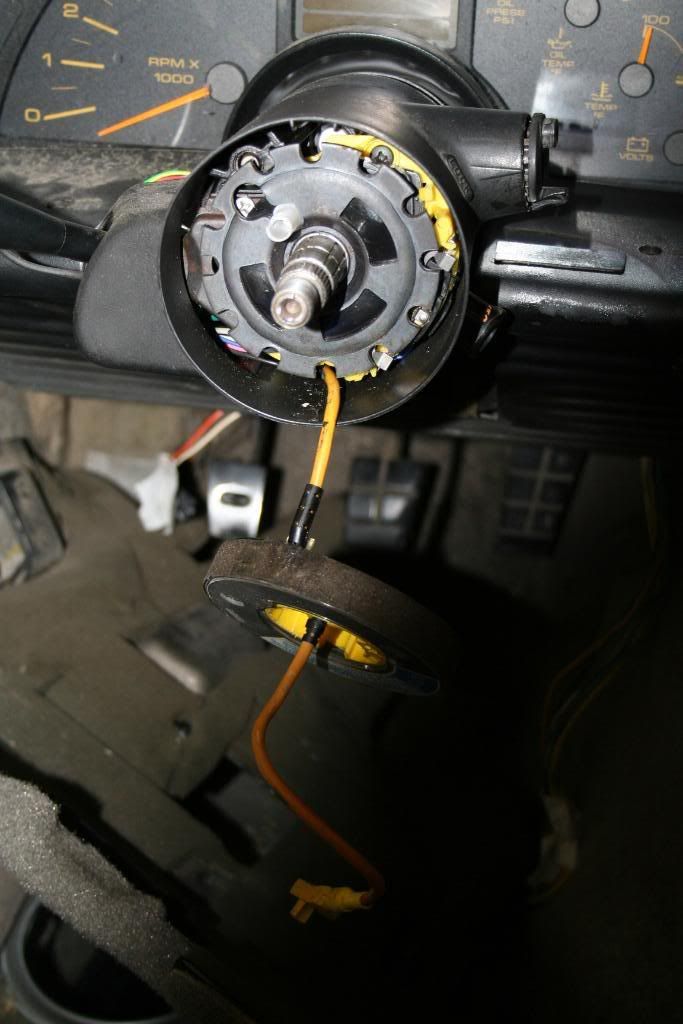
good! ok, the turn signal handle is held in with those two screws on the left. one silver and one black. it takes some juggling to remove. the best thing you're doing is using your camera to track these steps for reassembly!
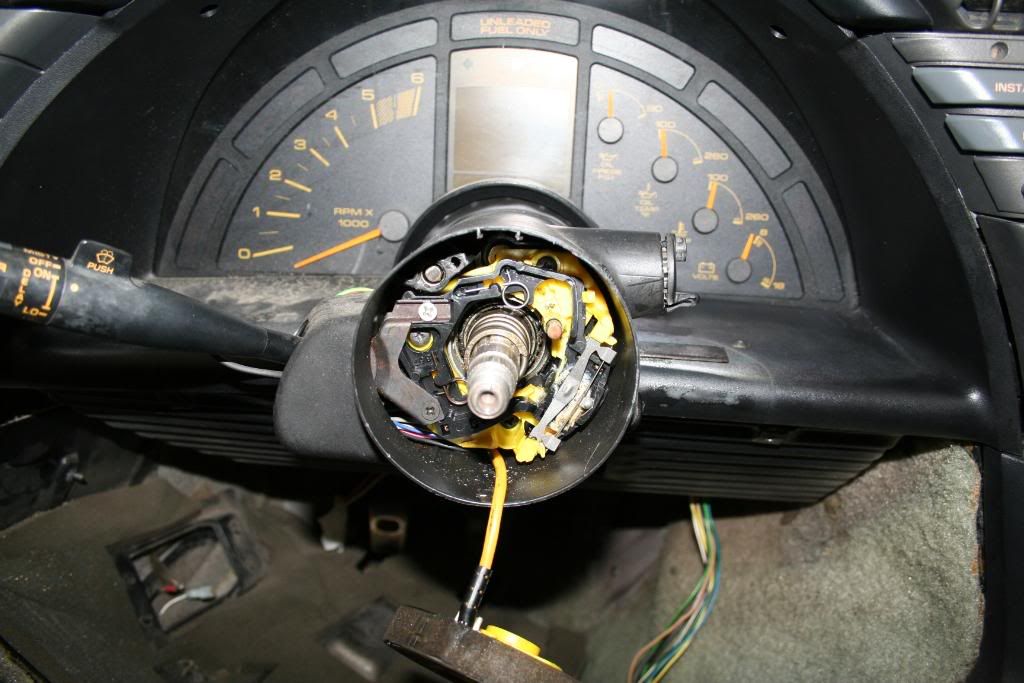
the hazard switch is a gm standard. either phillips or blade small screwdriver into the face of the button itself. the **** and collar come off. next are the 3 phillips that hold the plastic turn signal switch. you can remove the turn signal switch and hazard switch up through the column. the wires come up with it and you'll have to jockey it around to clear the shaft. there is one lone screw into the cast housing around the key cylinder to secure it. looking at your pix, it looks like that black one just above the centerline of the key cylinder. once that screw is out, you can remove the cylinder lock. be careful-the plastic finger that operates the contacts for the key buzzer will fall off and get lost as it was designed to-(never did find mine!).
you may find the order here a little different or not-this is from memory, but if you got as far as you did on your own, you have the "touch" to explore around a little to see exactly what you need in your particular application....good luck!
Last edited by SQUIRMIN VERMIN 84; 08-23-2009 at 08:25 PM. Reason: clarification
08-23-2009, 10:00 PM
#11
Advanced
Thread Starter
Member Since: Aug 2009
Posts: 51
Likes: 0
Received 0 Likes
on
0 Posts
good! ok, the turn signal handle is held in with those two screws on the left. one silver and one black. it takes some juggling to remove. the best thing you're doing is using your camera to track these steps for reassembly!
the hazard switch is a gm standard. either phillips or blade small screwdriver into the face of the button itself. the **** and collar come off. next are the 3 phillips that hold the plastic turn signal switch. you can remove the turn signal switch and hazard switch up through the column. the wires come up with it and you'll have to jockey it around to clear the shaft. there is one lone screw into the cast housing around the key cylinder to secure it. looking at your pix, it looks like that black one just above the centerline of the key cylinder. once that screw is out, you can remove the cylinder lock. be careful-the plastic finger that operates the contacts for the key buzzer will fall off and get lost as it was designed to-(never did find mine!).
you may find the order here a little different or not-this is from memory, but if you got as far as you did on your own, you have the "touch" to explore around a little to see exactly what you need in your particular application....good luck!
Last edited by superc4; 08-23-2009 at 11:35 PM.
08-24-2009, 02:25 AM
#12
Drifting
your plastic housing on the left side for the turn sig and cruise should come off(different years come off differently), then you can remove turn sig arm through that opening. you may need to get slack in that cable by removing the panel beneath steering column to get to the flat connector and separate it. this should give you the slack you need to remove these pieces.