85-89 Instrument Cluster Bulb replacement Guide
 11-29-2010, 10:36 AM
#1
Racer

Thread Starter
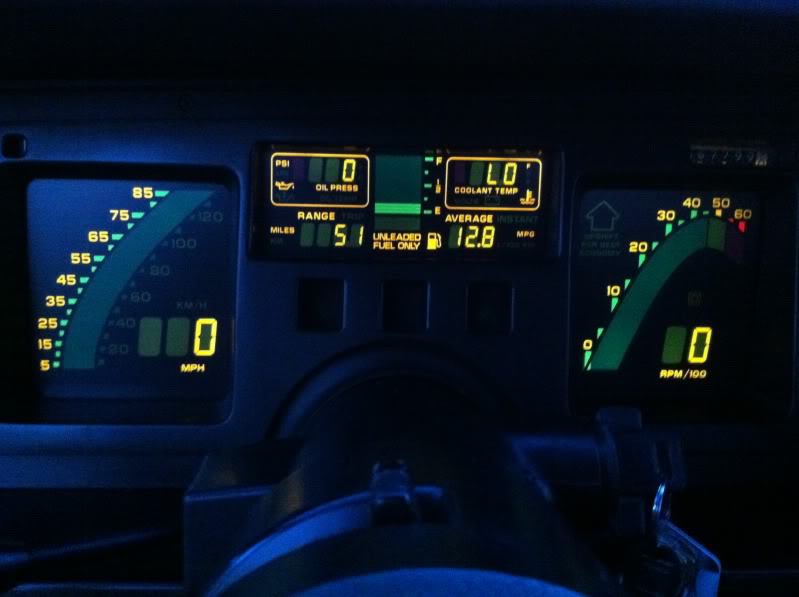
Had to change a few instrument cluster bulbs in my 87 this weekend and to my surprise their were not a lot of pictures to show how this is done. So, I decided to do a little short write up of how I changed them and include a few simple pictures. This is my first how to, so be easy on me!
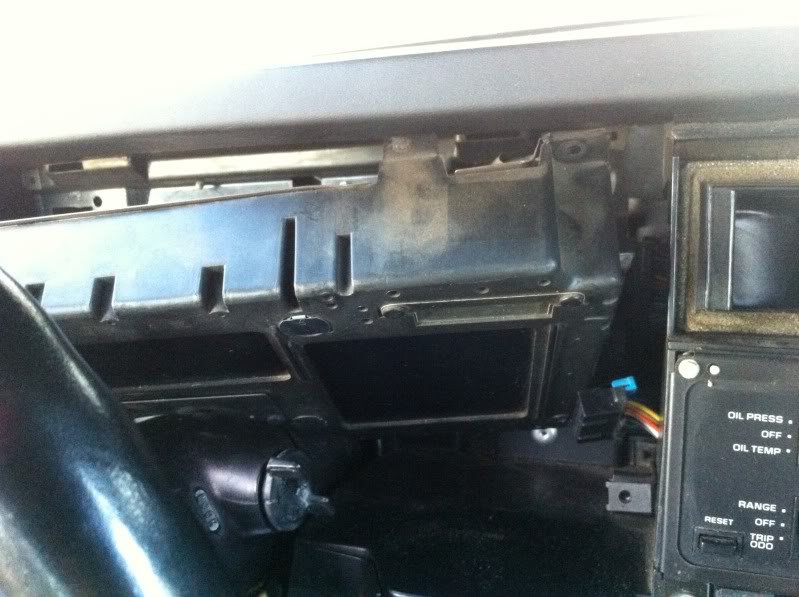
BEFORE

First remove the headlight **** (the back side has a little clip) and then cluster bezel.
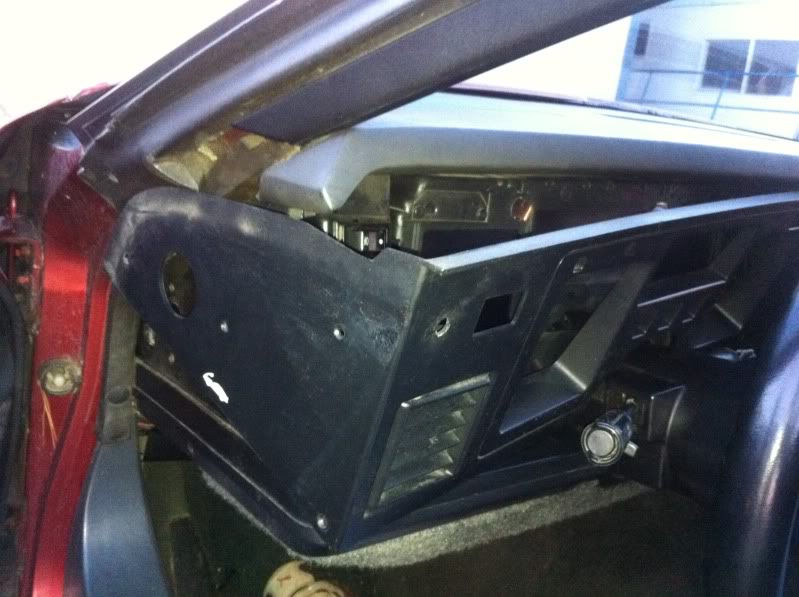
Next remove the information center/radio/climate bezel.
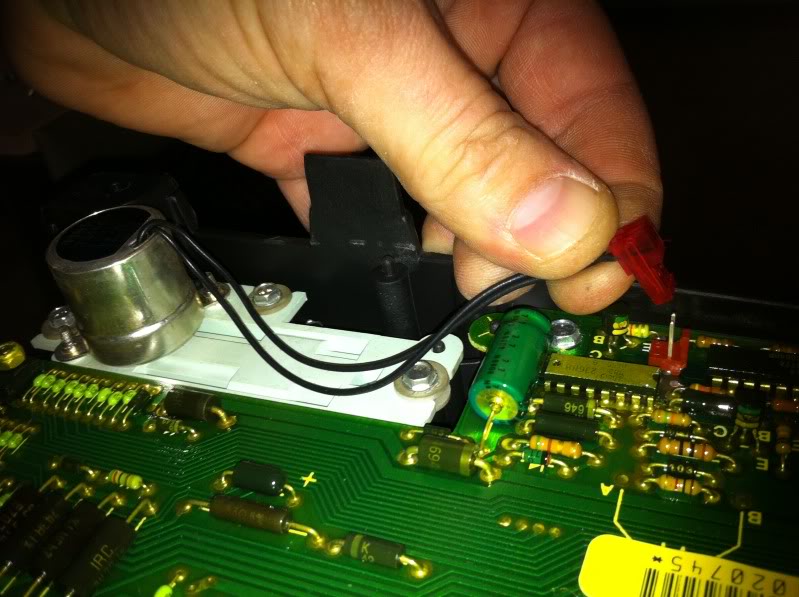
The next step is to remove the 4 screws holding the instrument cluster in, also unscrew the tilt wheel ****, it will be in the way if you don't (make sure you steering wheel is all the way down) and the last part to this step is tricky. I found it easier to reach behind the instrument cluster and unplug the TOP wiring harness first (little patience)
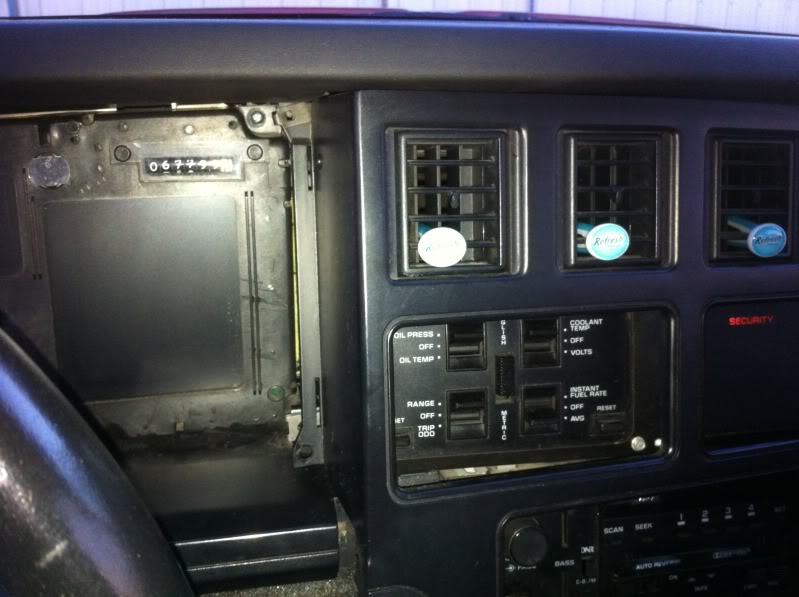
The next step is to remove the blue retaining clip holding on the lower wiring harness to the cluster and unplug it.
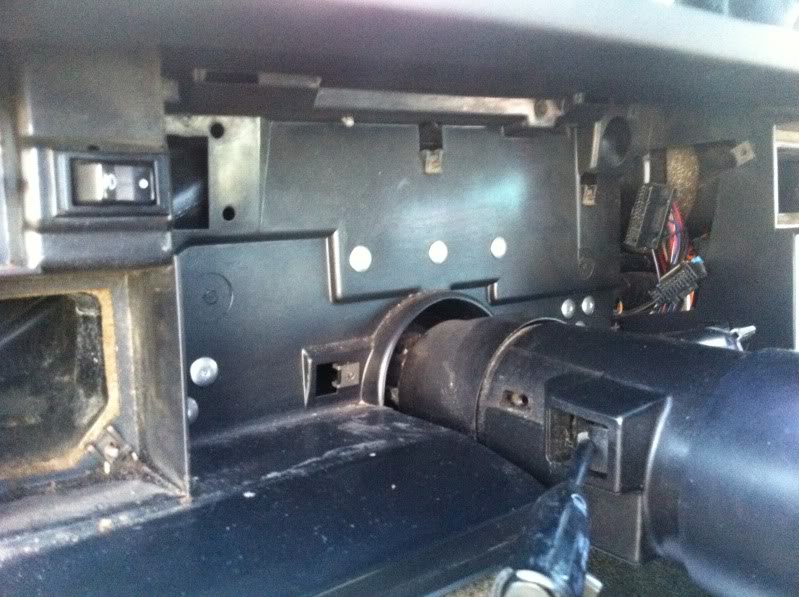
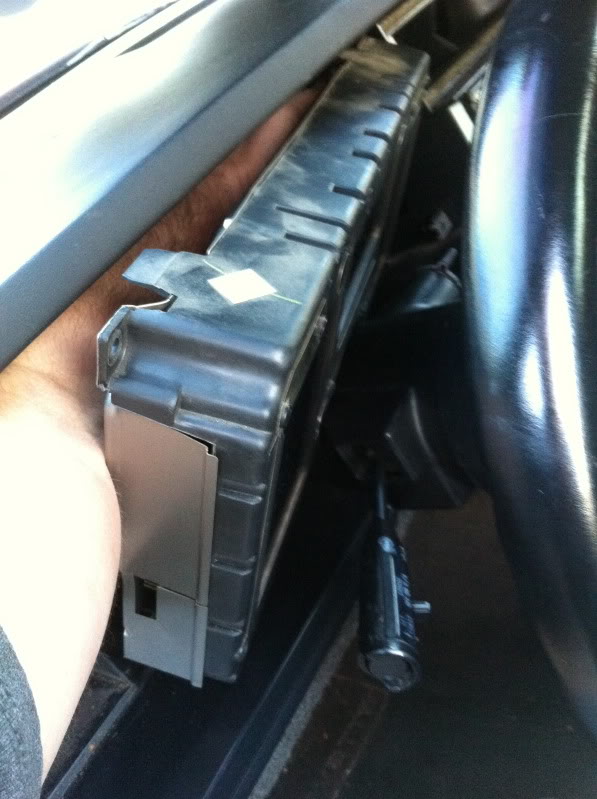
AND HERE IT IS!
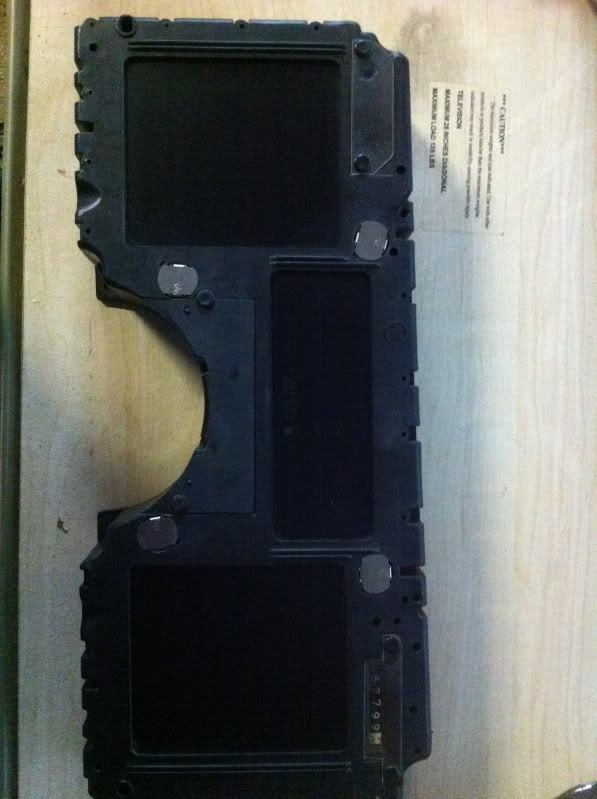
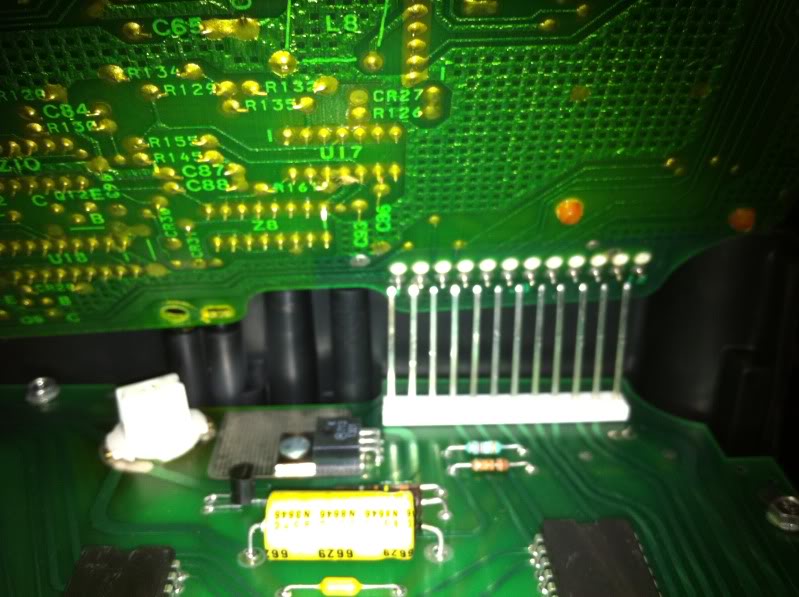
Remove all the screws on the back side of the instrument cluster
Next, Remove all screws holding the mother bored to the gauge cluster and unplug the motor that controls the mileage (don't forget to plug it back in after your done )
)
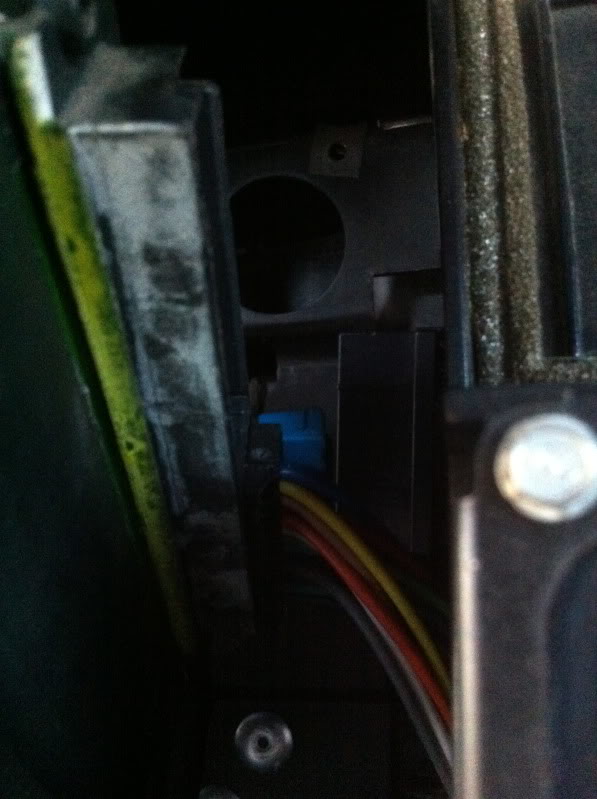
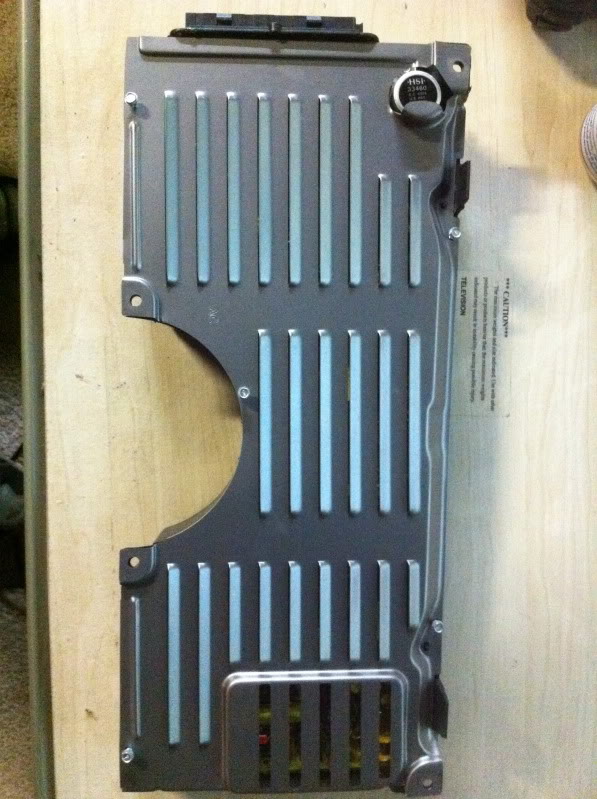
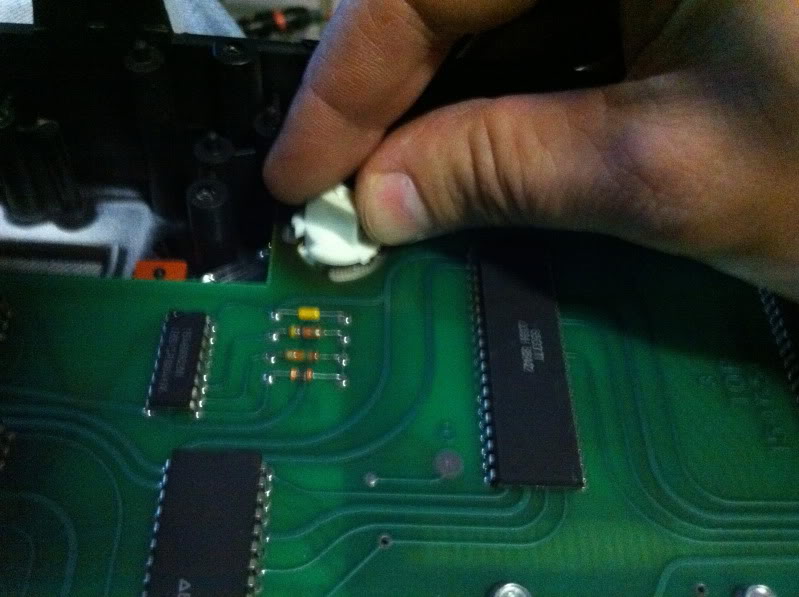
GENTLY!!!!!!! Lift the mother board up and you will see the connectors on right side (looks like a little white clip) it will come straight up. be gentle

Well, we are to the back side of the cluster where the bulbs are located their are 4 bulbs located here. I personally replaced all of them.

I went back with the original 882 bulbs (Oreilly's had them) that is what came out so that is what went back in. Their are a few people that will tell you that it is ok to run different, Im sure it is, as long as they are no more than 5w and don't run too hot.

The next is pretty easy just twist out the old bulbs and twist in the new!
Putting it back together is pretty simple, just be sure to be easy with the connectors on the motherboard (press firmly and straight down)
Don't forget to plug back in the motor that controls the mileage
Now just do everything that I listed in reverse to put it back together! One tip that I will end with is plug the instrument cluster in and check the bulbs to insure they were seated properly! Enjoy!
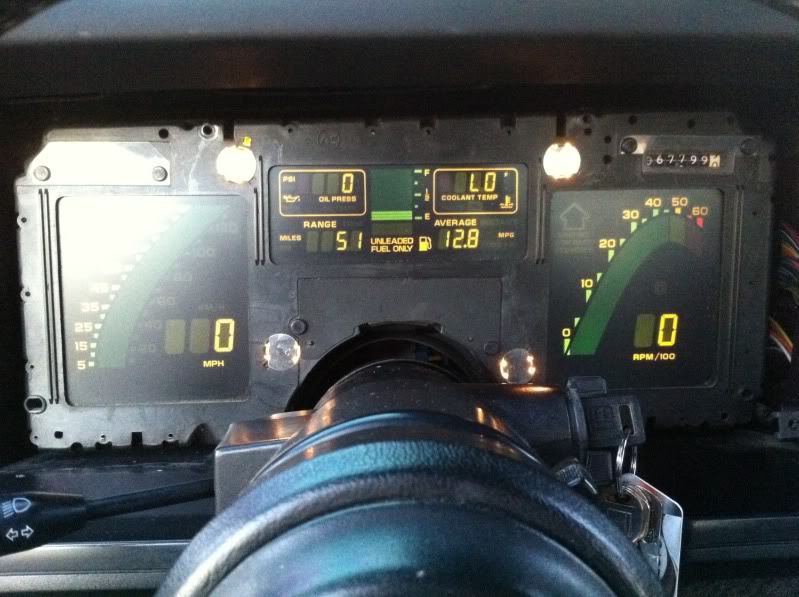
Final results!
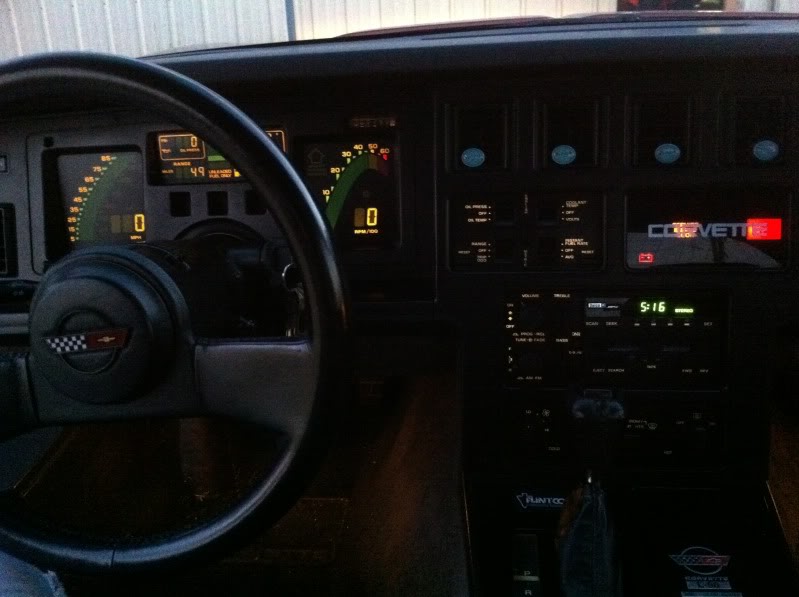
BEFORE
First remove the headlight **** (the back side has a little clip) and then cluster bezel.
Next remove the information center/radio/climate bezel.
The next step is to remove the 4 screws holding the instrument cluster in, also unscrew the tilt wheel ****, it will be in the way if you don't (make sure you steering wheel is all the way down) and the last part to this step is tricky. I found it easier to reach behind the instrument cluster and unplug the TOP wiring harness first (little patience)
The next step is to remove the blue retaining clip holding on the lower wiring harness to the cluster and unplug it.
AND HERE IT IS!
Remove all the screws on the back side of the instrument cluster
Next, Remove all screws holding the mother bored to the gauge cluster and unplug the motor that controls the mileage (don't forget to plug it back in after your done
)GENTLY!!!!!!! Lift the mother board up and you will see the connectors on right side (looks like a little white clip) it will come straight up. be gentle
Well, we are to the back side of the cluster where the bulbs are located their are 4 bulbs located here. I personally replaced all of them.
I went back with the original 882 bulbs (Oreilly's had them) that is what came out so that is what went back in. Their are a few people that will tell you that it is ok to run different, Im sure it is, as long as they are no more than 5w and don't run too hot.
The next is pretty easy just twist out the old bulbs and twist in the new!
Putting it back together is pretty simple, just be sure to be easy with the connectors on the motherboard (press firmly and straight down)
Don't forget to plug back in the motor that controls the mileage
Now just do everything that I listed in reverse to put it back together! One tip that I will end with is plug the instrument cluster in and check the bulbs to insure they were seated properly! Enjoy!
Final results!
Last edited by usmc_butler; 11-29-2010 at 01:44 PM.

 11-29-2010, 05:46 PM
#3
Drifting

great write up. Your cluster looks good for an 87. Mine had dark tarnish around the solder joints and my bulbs were a brownish burnt toast color when I replaced them. I also replaced the sockets along with the bulbs instead of just replaceing the bulbs alone.
11-29-2010, 06:11 PM
#4
Le Mans Master


Tip
If your original plastic bulb holders are intact you can sometimes get away with simply pulling the old burnt out bulbs from the front while sitting in the driver seat and pushing the new bulbs back on. This prevents you from having to remove and dissemble the cluster requiring only the removal of the front dash trim saving you time and hassle. I've used needle nosed pliers and small flat tip screwdrivers to pull the old ones out. I've also heard others shrinking a piece of heat shrink tubing over the bulb in order to grap and pull it out.
I feel this is your first best option if you original bulb holders are still there intact and not missing or broken. I found it very difficult to seperate the two circuit boards because their pin connector was on really tight. It's very easy for someone to pull them apart wrong and crack the circuit boards.
It's best to remove the lower hush panel and loosen the two steering column bolts and drop the steeing wheel another 1" or so. I found that without doing this the cluster wants to scratch up the column and dash trim on the way out.
 10-23-2011, 02:56 PM
#7

I am doing this now with mine. I was hoping all I had to do was replace an 882 bulb, but the socket is or was busted. I have yet to dismantle the unit.
About the only thing I would do, is make a list of tools needed , along with sizes.
Besides that, this is actually not to hard to do Just time consuming.
I will report on how things came out.
About the only thing I would do, is make a list of tools needed , along with sizes.
Besides that, this is actually not to hard to do
Just time consuming. I will report on how things came out.
10-23-2011, 05:25 PM
#8
Melting Slicks


Tip
If your original plastic bulb holders are intact you can sometimes get away with simply pulling the old burnt out bulbs from the front while sitting in the driver seat and pushing the new bulbs back on. This prevents you from having to remove and dissemble the cluster requiring only the removal of the front dash trim saving you time and hassle. I've used needle nosed pliers and small flat tip screwdrivers to pull the old ones out. I've also heard others shrinking a piece of heat shrink tubing over the bulb in order to grap and pull it out.
I feel this is your first best option if you original bulb holders are still there intact and not missing or broken. I found it very difficult to seperate the two circuit boards because their pin connector was on really tight. It's very easy for someone to pull them apart wrong and crack the circuit boards.
It's best to remove the lower hush panel and loosen the two steering column bolts and drop the steeing wheel another 1" or so. I found that without doing this the cluster wants to scratch up the column and dash trim on the way out.
If your original plastic bulb holders are intact you can sometimes get away with simply pulling the old burnt out bulbs from the front while sitting in the driver seat and pushing the new bulbs back on. This prevents you from having to remove and dissemble the cluster requiring only the removal of the front dash trim saving you time and hassle. I've used needle nosed pliers and small flat tip screwdrivers to pull the old ones out. I've also heard others shrinking a piece of heat shrink tubing over the bulb in order to grap and pull it out.
I feel this is your first best option if you original bulb holders are still there intact and not missing or broken. I found it very difficult to seperate the two circuit boards because their pin connector was on really tight. It's very easy for someone to pull them apart wrong and crack the circuit boards.
It's best to remove the lower hush panel and loosen the two steering column bolts and drop the steeing wheel another 1" or so. I found that without doing this the cluster wants to scratch up the column and dash trim on the way out.
 You can save your self hours of work doing it as mentioned in most cases.
10-23-2011, 06:40 PM
You can save your self hours of work doing it as mentioned in most cases.
10-23-2011, 06:40 PM
#10
Melting Slicks
10-23-2011, 08:06 PM
#11
Pro

For those of us with '89 C4's, the 882 halogen bulbs are not correct for our clusters.
The '89's came with a lower heat producing Xenon instrument cluster bulbs (OEM was a Stanley #7073), to help prevent heat related main board failures.
These bulbs are very hard to source, I found these; I don't recommend buying from this vendor you can do better on pricing! See my next post in this thread!
http://www.ebay.com/itm/84-89-CORVET...item4156373607
And a nice writeup with detailed info here;
http://www.corvettemagazine.com/1999...ash/dashp1.asp
Last edited by mako41; 10-27-2011 at 12:26 AM. Reason: Spelling
10-24-2011, 09:30 AM
#12
I took the digital dash out yesterday afternoon. Was feeling a tad bit tired. so decided to go to church, relax and start up later in the day.
One thing I have learned, dont do work when you are tired or sleepy. That can lead to bad consequences. You tend to hurry up and may end up missing something or worse, breaking something.
One thing that makes this much less scary for me, I do have some experience with installing and uninstalling parts in a PC. So I am somewhat familiar with things.
Now a tech type question:
Is there any sort of decent electrical connection cleaner type stuff I should know about ?
Thank you all,
10-24-2011, 03:28 PM
#13
OH, all the electrical type bolts. The ones that hold the metal back plate and the ones that hold down the top board, are all 7/32 " .
I did mine this morning, the actual job of replacing the socket and the bulb about 2 minutes. It took longer to take the unit out of the clam shell thingy
It was a bit nerve wracking, but I took my time, checked it out before I bolted the unit back on.
Now, this is what I call a perfect how to article.
Thank you for it
10-25-2011, 11:36 PM
#14
Race Director

I used either 3/8" or 1/2" heater hose to extract the old bulbs w/o removing the cluster and touching the bulbs. Use a long 1' long piece and use mouth suction on one end to create enough pull to extract the bulb. Put the new bulb in a short 3" piece to install. Push the bulb in the socket using needle-nose or anything small.
After doing that, you'll find the 90x series bulbs from auto parts stores are dimmer. You'll probably also find bulbs become intermittent over time. That's when the removal procedure listed in the OP is required.
When you have the whole thing apart, use fine sandpaper (300-600ish) to clean the socket contacts and board "tracings". This will restore good contact from the socket to the board.
Batee's website has another suggestion to resolder "cold" joints. I did not to that in my first trip into the cluster.
Zip Corvette sells sockets if/when you decide to replace the sockets. Cheap fix to do so. Could be better than my contact cleaning for some climates/cars.
10-26-2011, 05:55 PM
#15
Pro
For forum members with '89 C4's and those impossible to find Stanley 7073 Xenon bulbs......
I've found these wedge type Xenon bulbs with a claimed life of 10,000~20,000 hours. Looks like a pretty good replacement option for all '84~'89 vettes. These should not produce the same amount of heat as the OEM #882 Halogen bulbs ('84~'88) and are similar to the '89 7073 Stanley Xenon bulbs in light output.
If you plan on not removing the entire cluster and replacing just the 4 cluster backlight bulbs, thru the front of the cluster try these!
http://www.pegasuslighting.com/xenon...2v.html#tabtop T3-1/4 wedge based 12v 5 watt ('89 C4)
http://www.pegasuslighting.com/xenon...se-5w-12v.html T2-G4 Pin based 12v 5 watt ('84~'88 C4's)
T2-G4 pin based 12v 5watts ('84~'88 C'4s)
If your twist type bulb sockets are heat damaged you can buy these replacements from grainger. You will have to remove the cluster and take it apart to twist in new bulbs w/sockets.
http://www.grainger.com/Grainger/wwg...N=0&sst=subset
Or buy the bulbs in groups of ten like the PC board sockets even cheaper here;
http://www.goodmart.com/products/bul...amp-715505.htm
One more link even cheaper with no minimum quantity!
http://www.lightbulbsdirect.com/page...nWedge/X5WW12V
Keep in mind the reason GM went to the lower heat producing Xenon bulbs in the first place was that they found the #882 Halogens were burning up the sockets and then the boards after years of use in the '84~'88 instrument clusters.
Last edited by mako41; 01-18-2014 at 09:11 PM. Reason: Added link
10-27-2011, 12:17 PM
#16
Race Director
Guess I'm in left-field with my understanding of this issue.
1) I thought the 882 was first used in 1989 and was in my 89. There is a replacement sold by auto parts stores that's slightly dimmer and presumably cooler. Seems like it's a 902, 912 or 920....can't remember. (But you can find it in CF searches).
2) I didn't think Grainger sold to the general public. It's been a few years, but my local branch would not sell to me. Said I needed a commercial account. OTOH, the price for 10 units of the socket is dirt-cheap. If you can't get them from Grainger, Zip-Corvette has them for about $5. Maybe that's each? Haven't looked it up recently.
10-27-2011, 03:59 PM
#17
Pro
Good info and I'll respond before this post gets deleted. 
The Xenon bulbs I linked too are the higher 5watt versions, not the lower 3watt versions that are also available from the suppliers I mentioned above.
Not sure what you mean when you reference the "X2" Xenon bulbs? OR WHY YOU WOULD CLAIM TO BE SELLING SOMETHING BETTER AND BRIGHTER? I'm also an EE and have researched these bulbs very extensively!
Do you mean these bulbs rated at 13.5 not 12 volts, they look alot like the bulbs you have pictured on Ebay at a better price!
http://www.elightbulbs.com/Eiko-4902...=GoogleBaseCSE Refered too by the manufacturer as X5's
http://www.elightbulbs.com/Eiko-4902...ive-Light-Bulb Refered to by the manufacturer as X2's
The 5W T3-1/4 Xenon bulbs I linked to are pretty close to the OEM Stanley 7073 Xenon bulbs GM installed in '89 C4 instrument clusters, they are rated at 5watts at 12volts not 13.5 volts! The 13.5 volt bulbs would be brighter and hotter and would not last as long!
Last edited by H P Bushrod; 11-29-2011 at 11:47 AM. Reason: nsv post deleted
10-28-2011, 12:06 AM
#18
Pro
Sounds like you have some good real world info on these bulbs, care to share it.
I would be very interested in actual current draw, lumens produced & heat output over extended run times between the different xenon T3-1/4 bulbs. Specifically the difference between the '89 OEM 7073 Stanleys, that GM went to for lower heat output, and the replacement Xenon bulbs available to us today? Why are you recommending a 5W xenon bulb rated at 13.5v and .37amps? These surely must produced more heat than the 5W 12v Xenon bulbs linked to above. Isn't excess heat the problem?
How would the led replacements you speak of work with the OEM ambient light sensor that controls the auto-dimming function built into the clusters?
Edit; I see vettesportdotcom deleted his reference to "new LED" replacements for our clusters.... I don't see how they might have worked at 1/10th the current draw with the built in dimming feature GM designed into our clusters??
Last edited by mako41; 10-29-2011 at 02:04 PM.
10-29-2011, 05:56 AM
#19
- 1986 Original Owner -


Hey Jim, Great to see you're a member here now. You won't remember me, but I bought parts from you many years ago for the clusters I was rebuilding. Mostly LCDs. Rebuilt half a dozen for guys over here in the UK. Just wanted to say hi and thank you for all your help over the years.
Basically, in engineering practice, validation lies in testing. I don�t rely on printed specs, they�re only a start. In this application you cannot rely on voltage and current specs to choose the right lamp for the Corvette cluster or any other system. P=I^2R is not the only factor Although they should be considered the "ratings" are not directly proportional to heat dissipation, brightness, and actual longevity (gas and filament are more important). Equating simple specs to field performance can result in disaster; unfortunately, to many new hire engineers hit auto dimension in solidworks or the transfer output button in spice� that�s when I get the call as a consultant. Actually sat in the lab tonight and compared current draw, lumens, and heat output for all the bulbs in question(x2 x5 7073 194 168 etc) reconfirming what I did years ago.
11-29-2011, 01:08 AM
#20
Racer

I need to replace mine also (89), are you using the bulbs from Pegasuslighting? They do appear to be a good choice.
Thanks for the link!
Joel
Thanks for the link!
Joel
For forum members with '89 C4's and those impossible to find Stanley 7073 Xenon bulbs......
I've found these wedge type Xenon bulbs with a claimed life of 10,000~20,000 hours. Looks like a pretty good replacement option for all '84~'89 vettes. These should not produce the same amount of heat as the OEM #882 Halogen bulbs ('84~'88) and are similar to the '89 7073 Stanley Xenon bulbs in light output.
If you plan on not removing the entire cluster and replacing just the 4 cluster backlight bulbs, thru the front of the cluster try these!
http://www.pegasuslighting.com/xenon...2v.html#tabtop
If your twist type bulb sockets are heat damaged you can buy these replacements from grainger. You will have to remove the cluster and take it apart to twist in new bulbs w/sockets.
http://www.grainger.com/Grainger/wwg...N=0&sst=subset
Or buy the bulbs in groups of ten like the PC board sockets even cheaper here;
http://www.goodmart.com/products/bul...amp-715505.htm
One more link even cheaper with no minimum quantity!
http://www.lightbulbsdirect.com/page...TGY/XenonWedge
Keep in mind the reason GM went to the lower heat producing Xenon bulbs in the first place was that they found the #882 Halogens were burning up the sockets and then the boards after years of use in the '84~'88 instrument clusters.