1987 Conv.Restore - A Greenwood Corvette is born


 03-25-2011, 04:31 PM
#22
Advanced

Thread Starter

Member Since: Mar 2011
Location: Stockholm
Posts: 50
Likes: 0
Received 0 Likes
on
0 Posts
Me too, there has been some nice custom work done in its earlier days that in my opinion, still works today.
03-25-2011, 06:27 PM
#23
Advanced
Thread Starter
Member Since: Mar 2011
Location: Stockholm
Posts: 50
Likes: 0
Received 0 Likes
on
0 Posts
Gentlemen, what you have been waiting for.... Part III
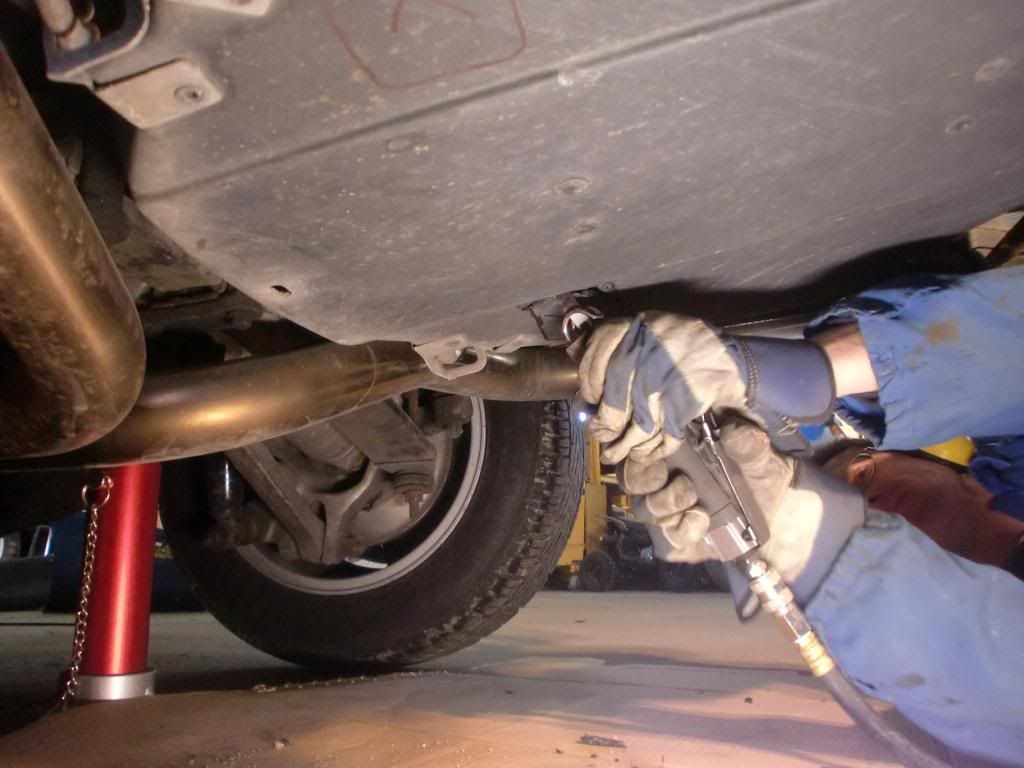
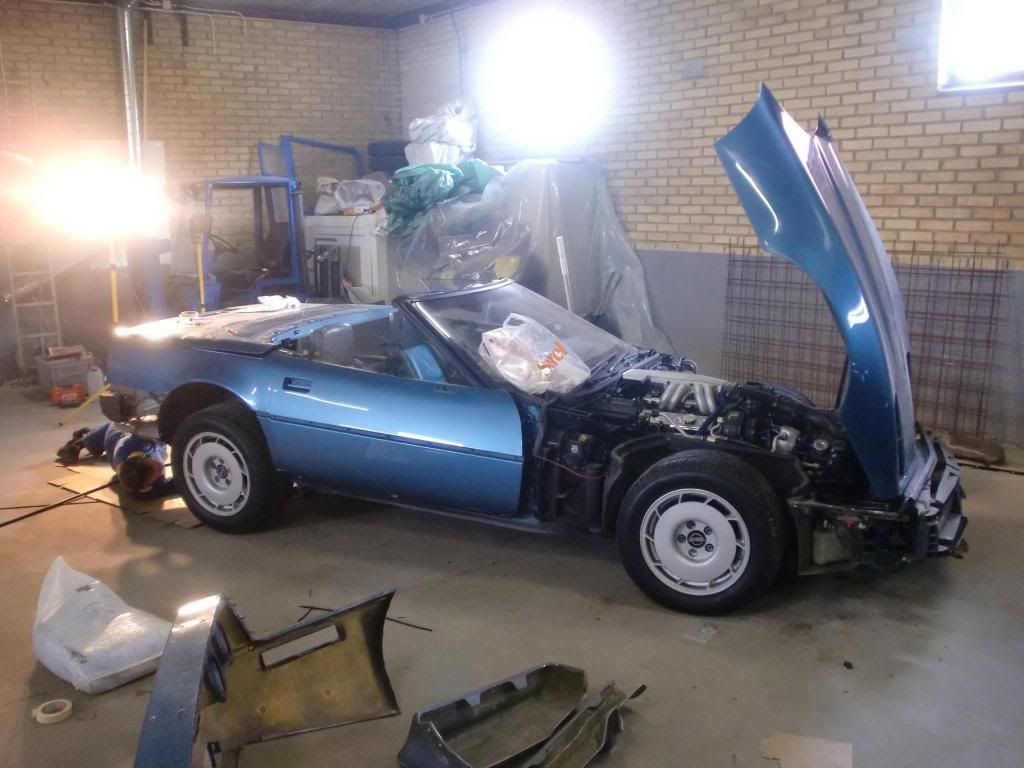
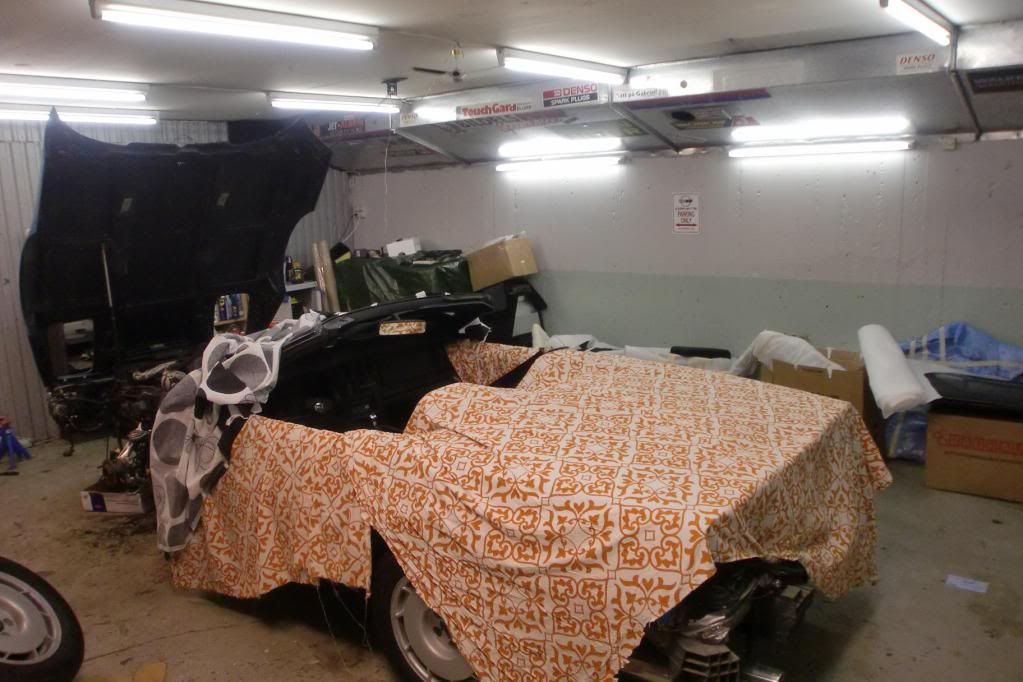
The work with dismantling the car continued
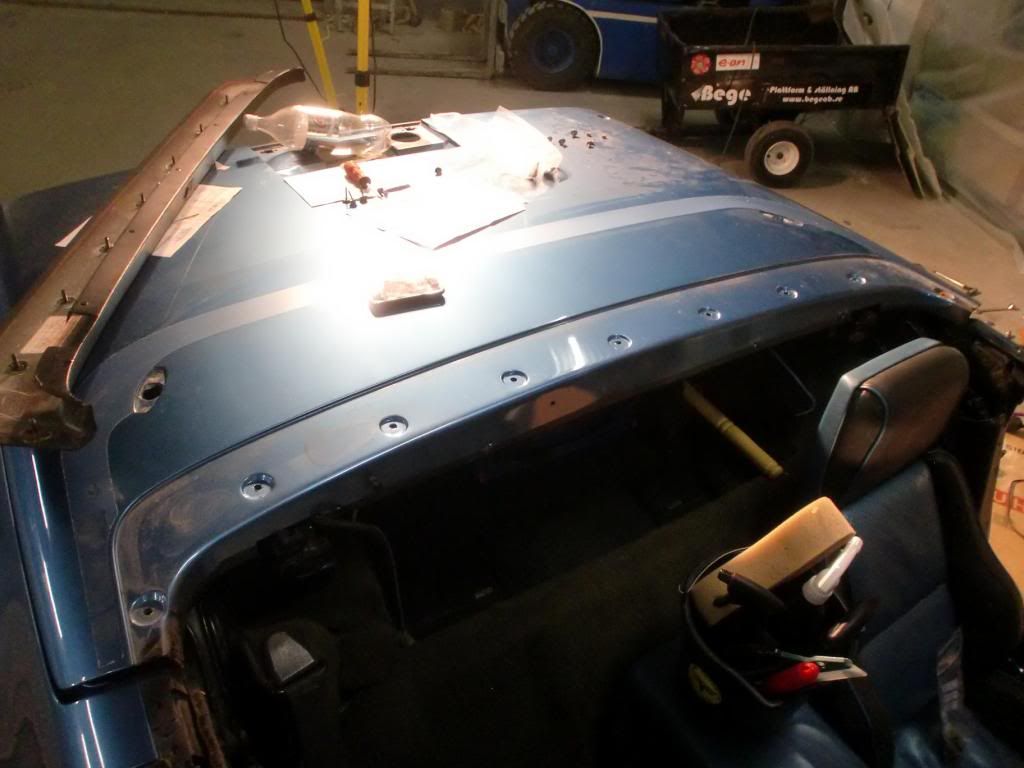
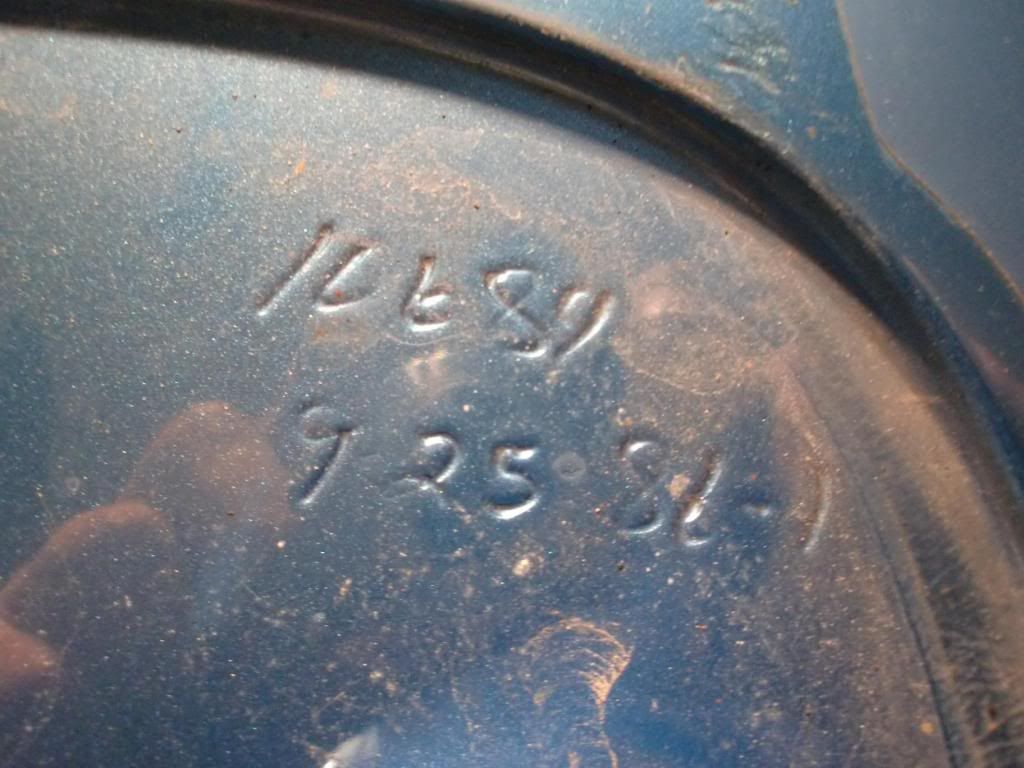
I found some interesting notes while working with the conv.top lid:

My friend Paul worked with cutting the holes in the spare tire cover. This is where the two mountings for the venturi tunnel will be:
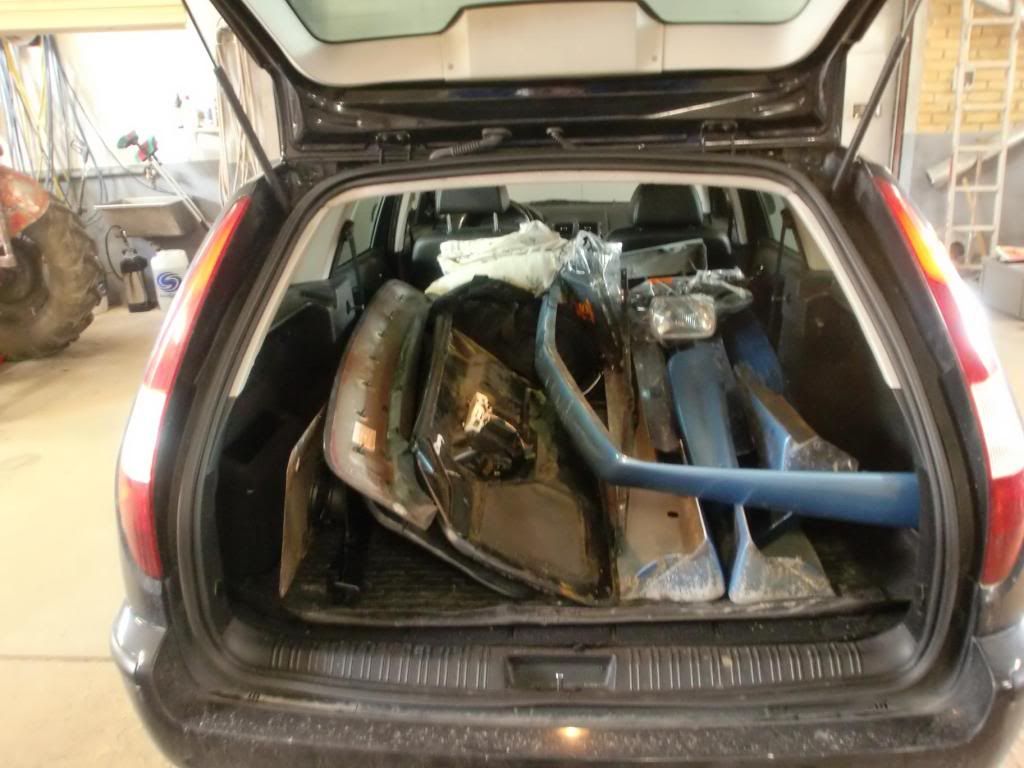
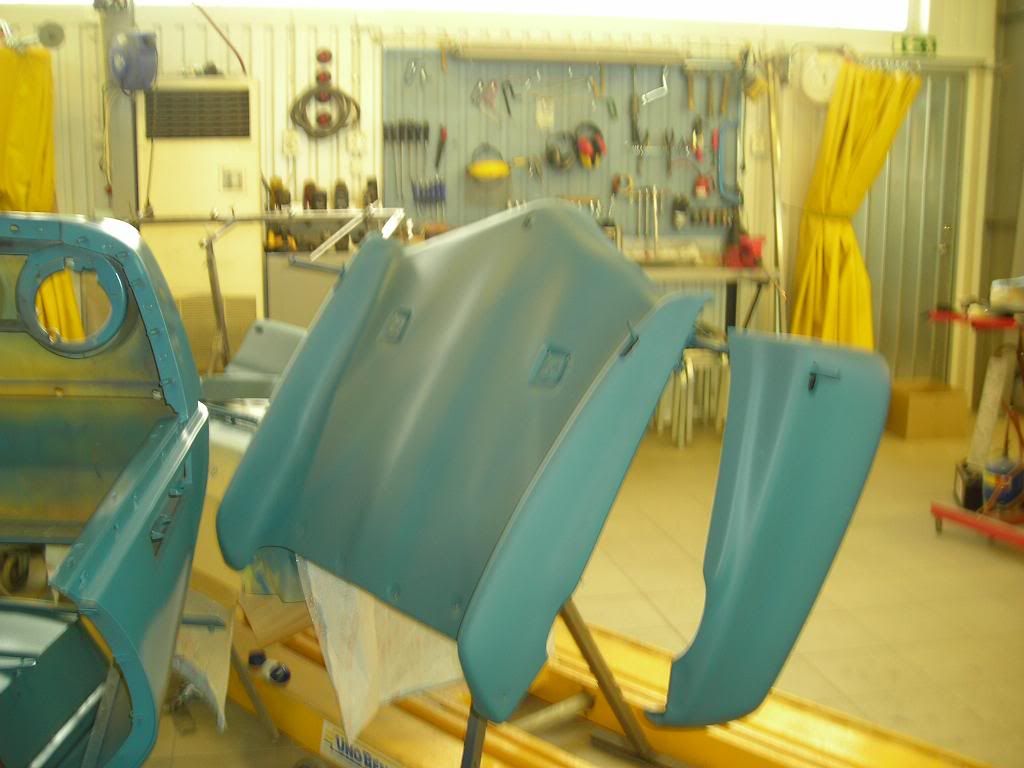
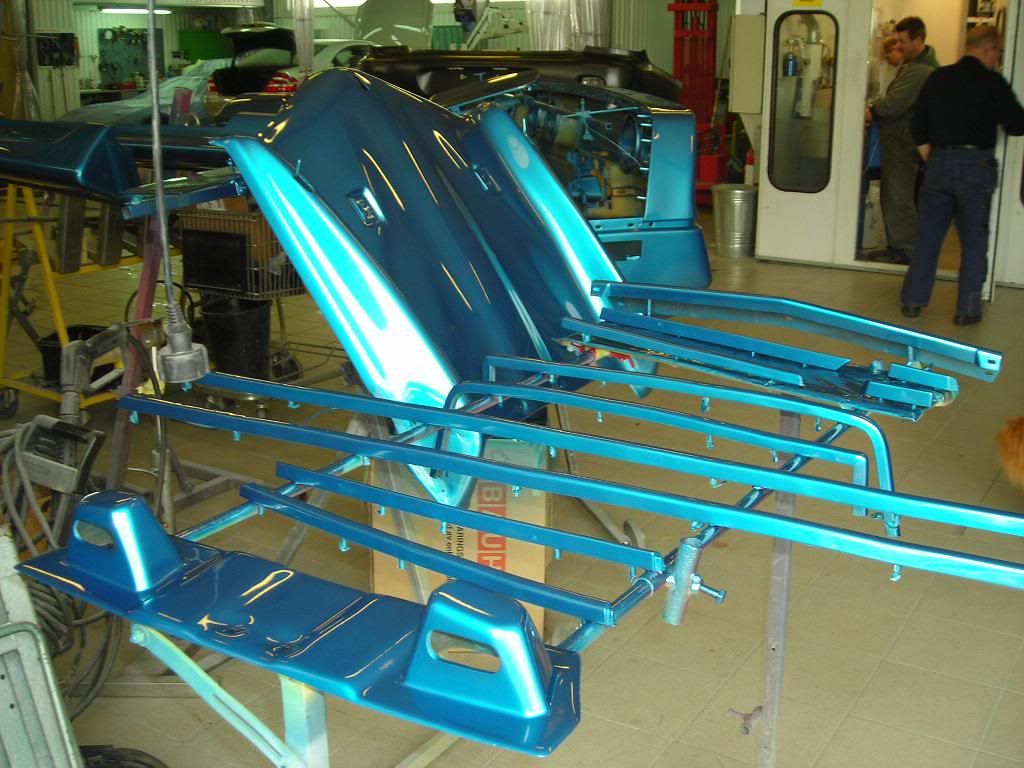
Some parts....
Almost done
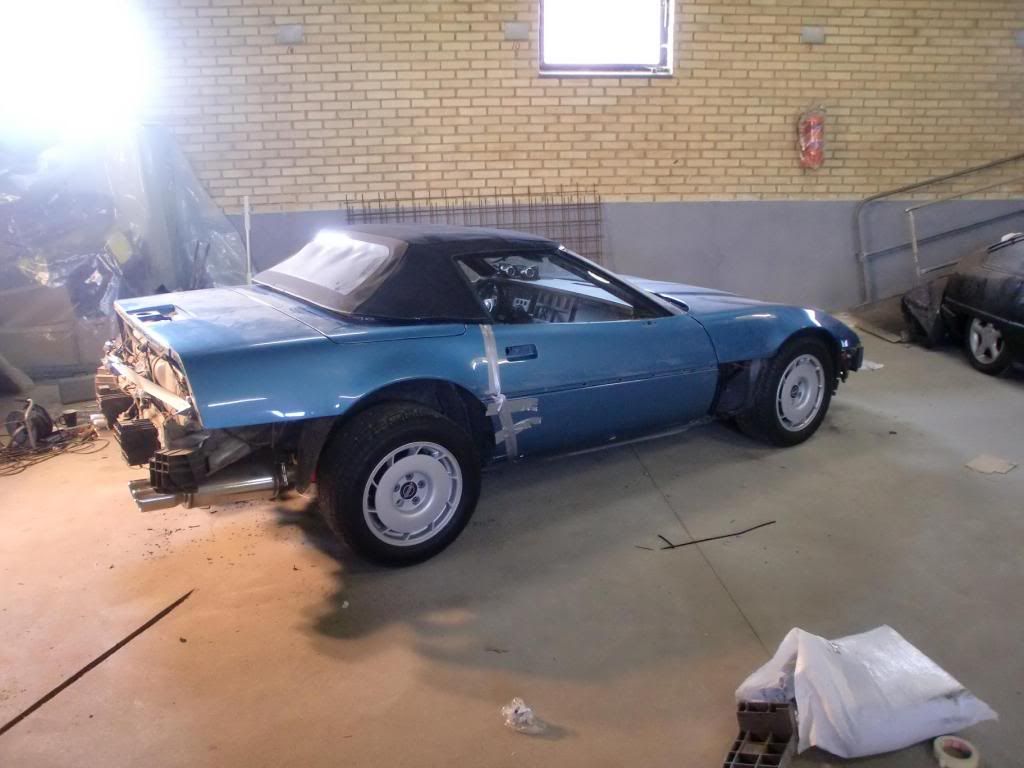
Everything set up, doors are duct taped and we are ready for the next step.
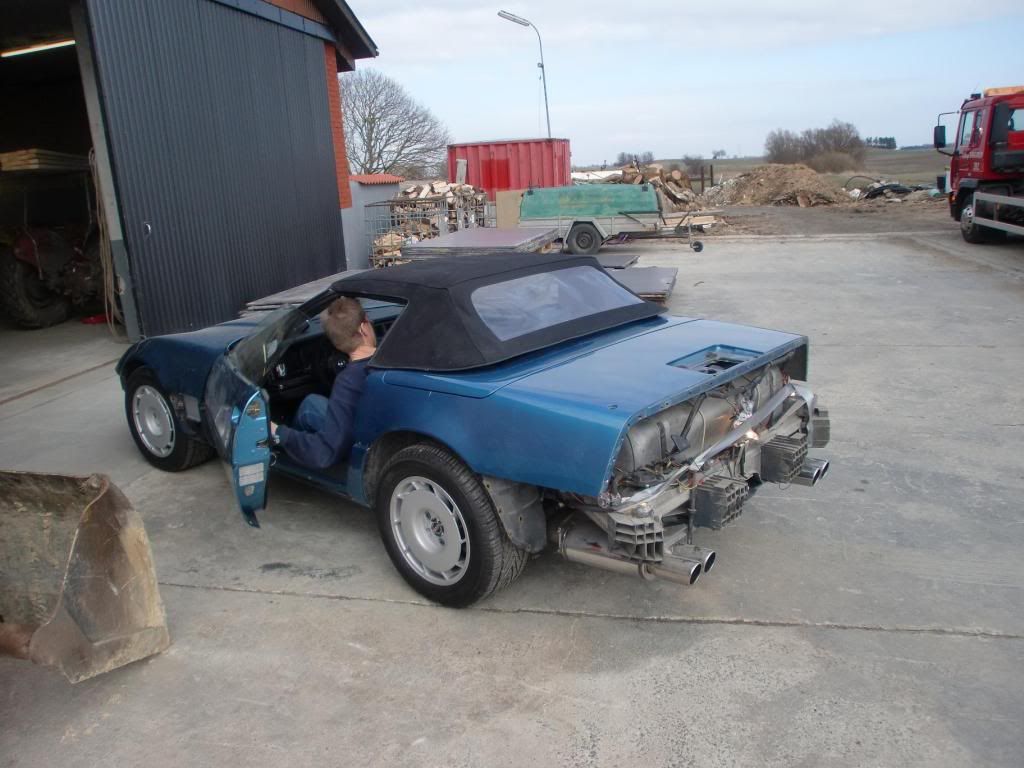
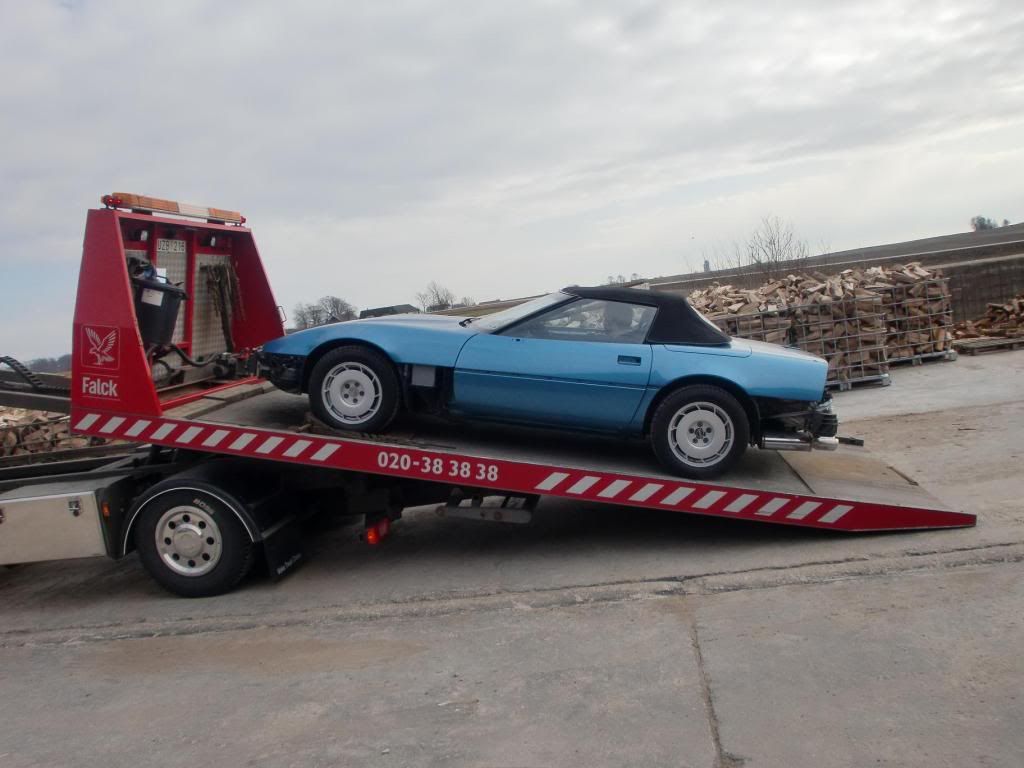
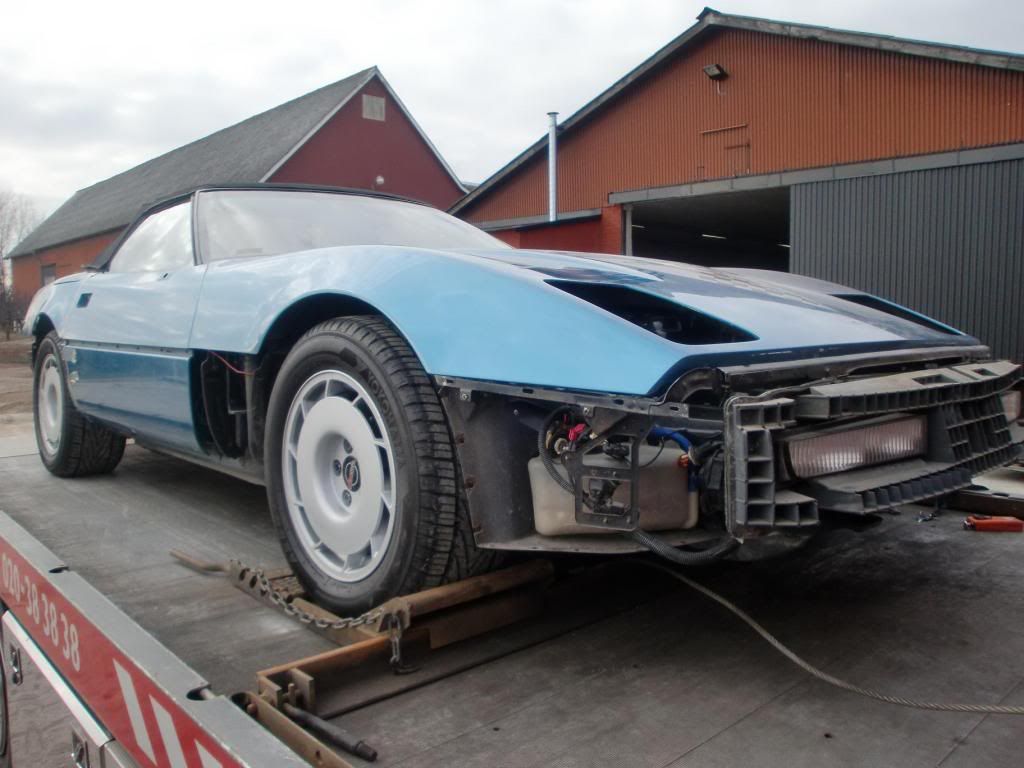
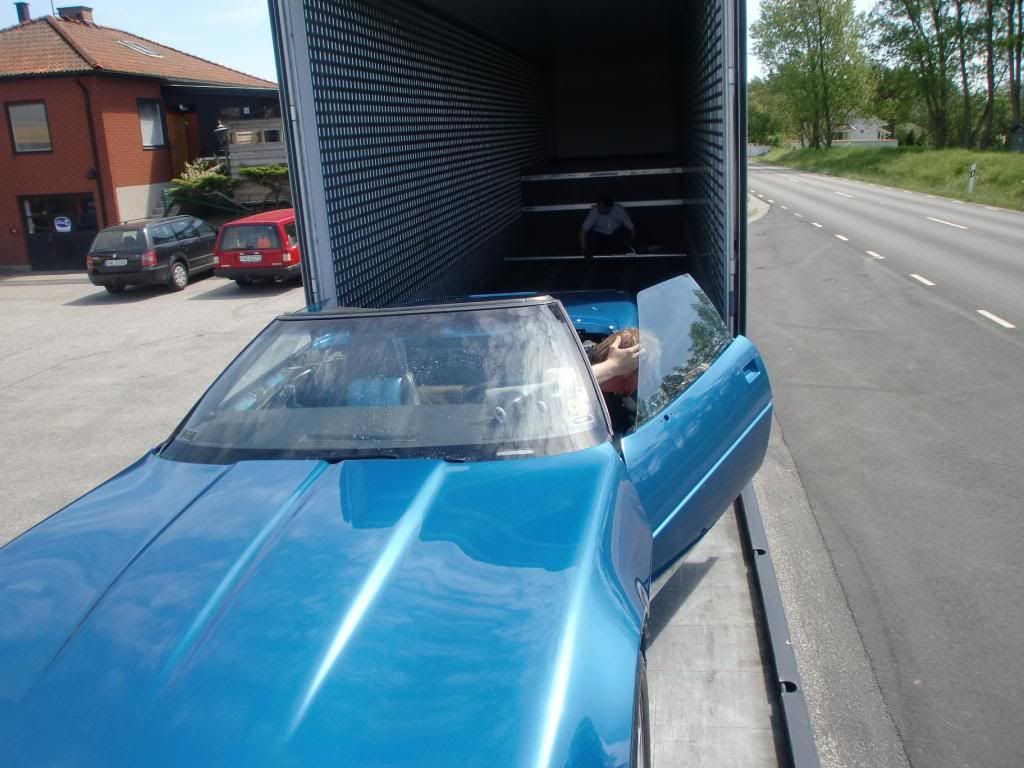
Another friend of mine came with his towing truck to transport the car to the bodyshop.
Loading:
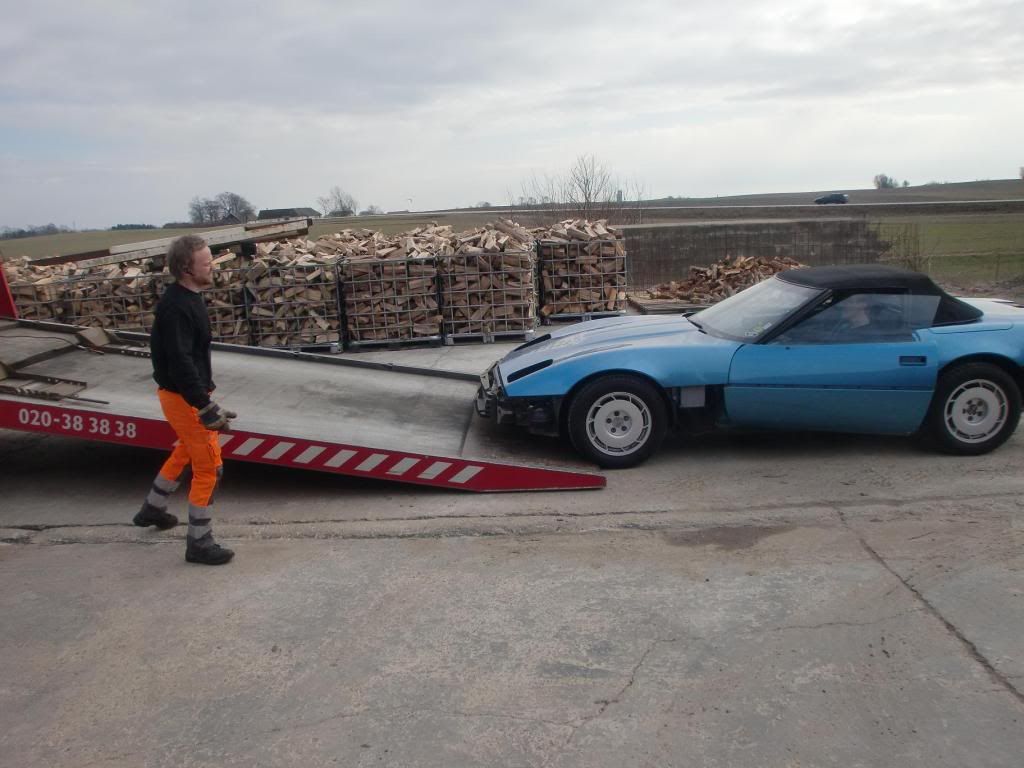
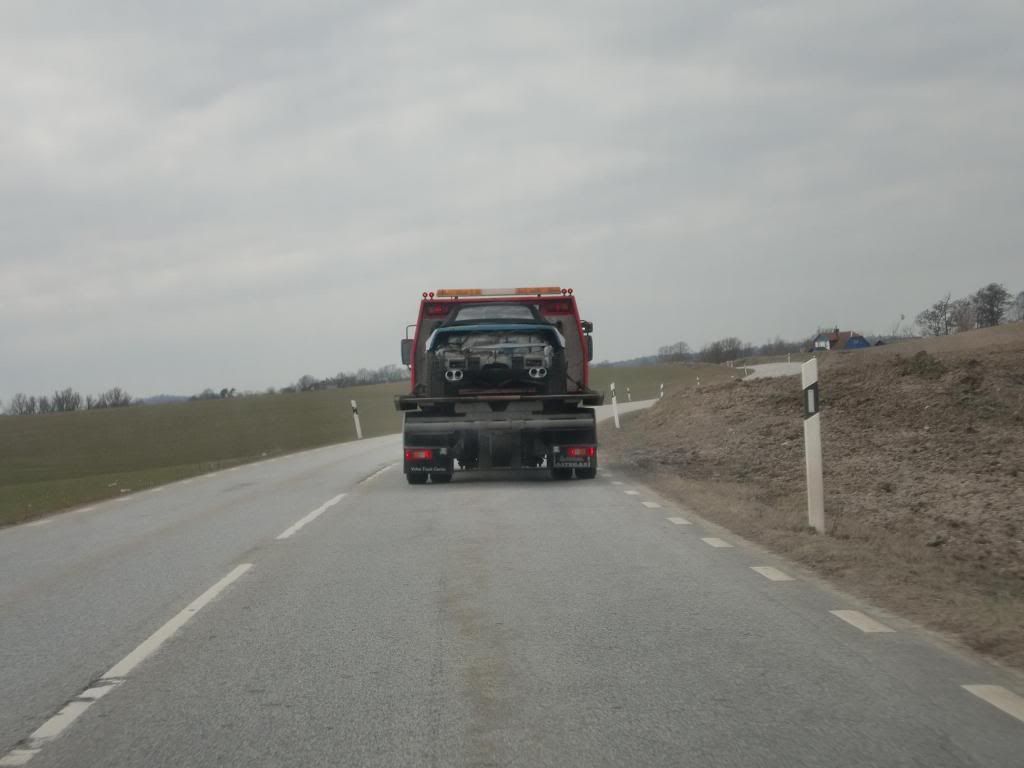
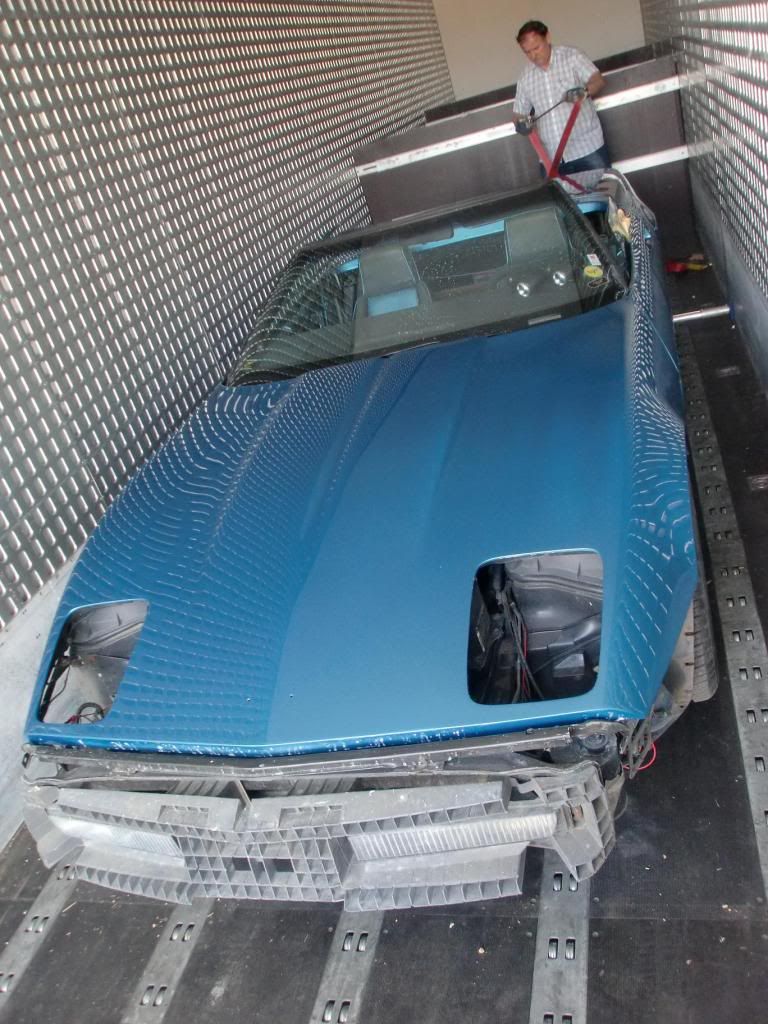
And off we went!
Upon arrival, it was time for unloading!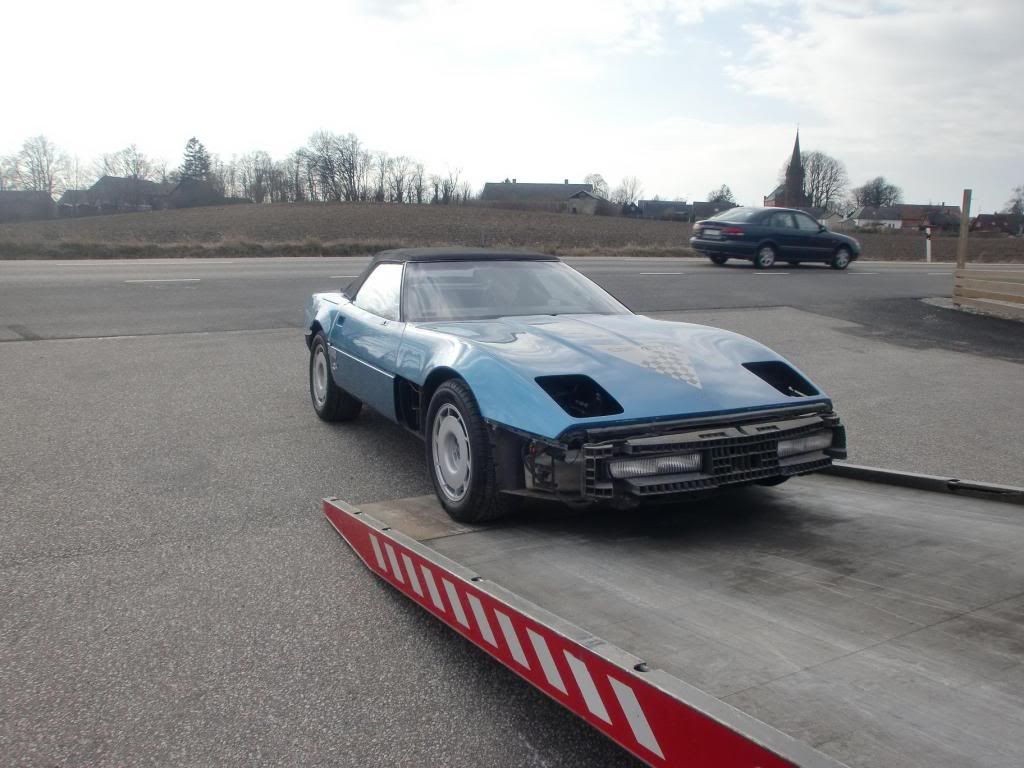
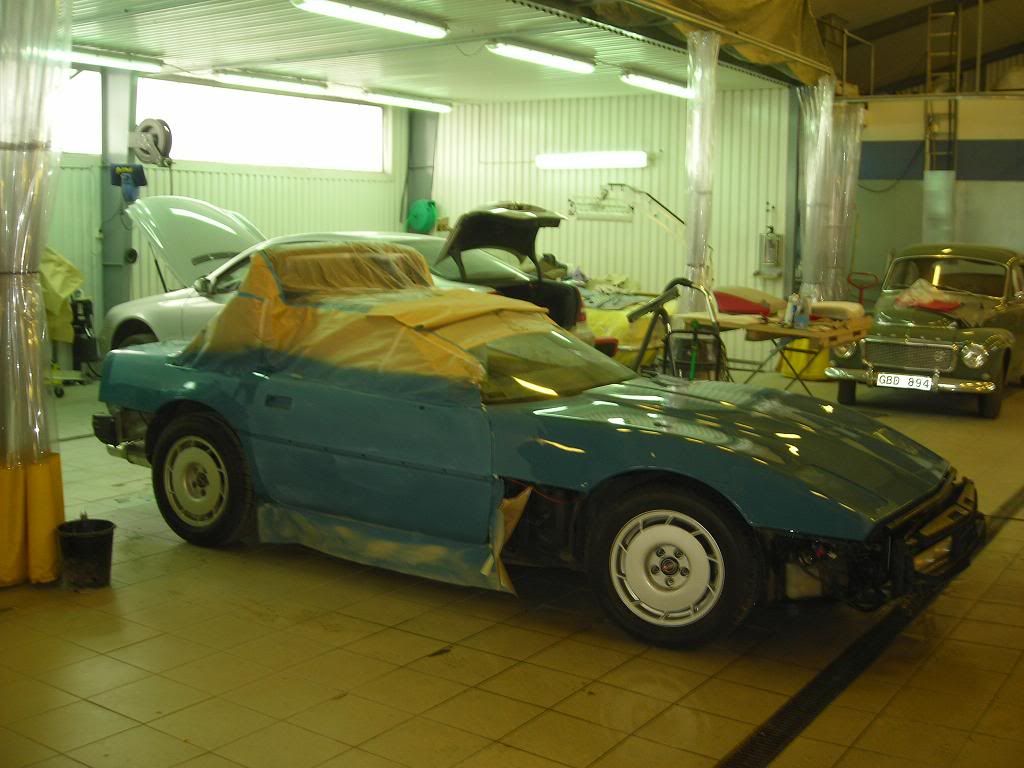
And finally inside the bodyshop!

The Corvette sticker on the hood was already there when i bought the car. I noticed on the inside of the hood that it had a repairjob done once upon a time, so i was quite excited to finally see what it looked like..
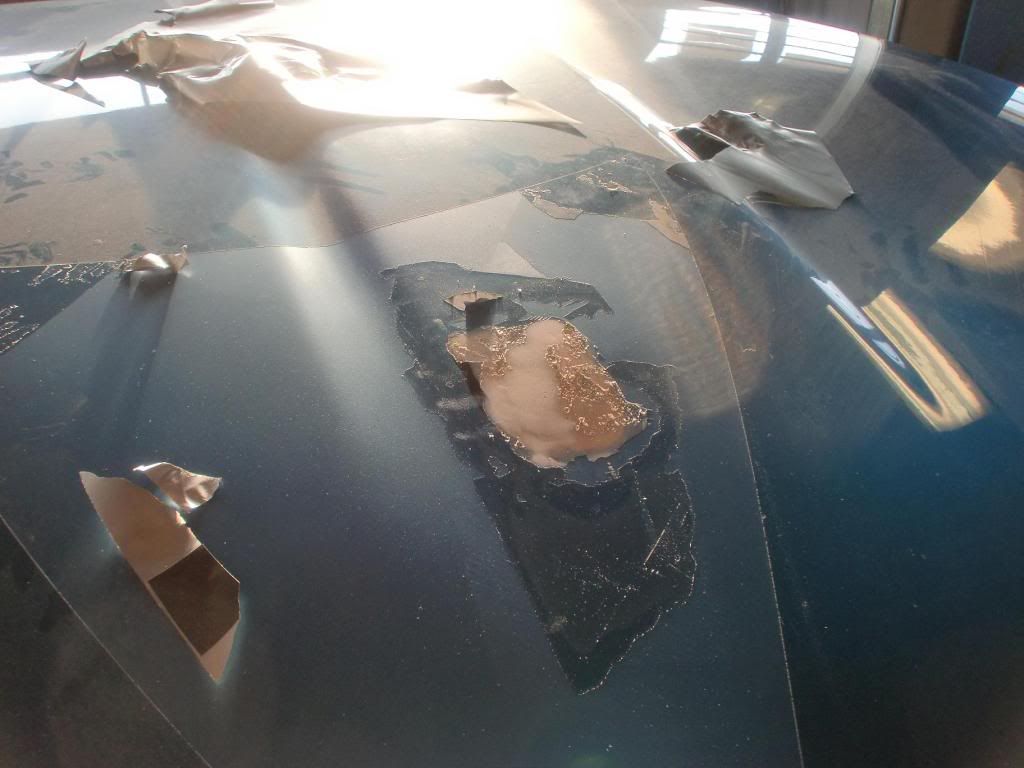
What in the name of god has happened here!?!?
After this i did the 385 miles trip back home and waited for the first update to come.
Finally it came!
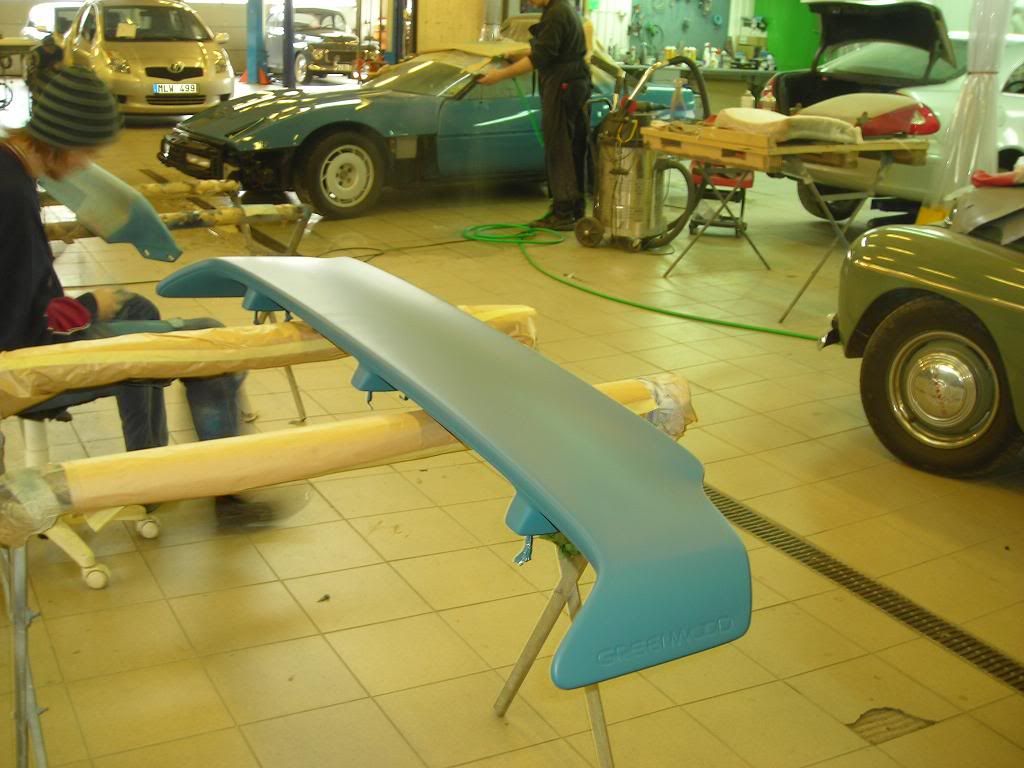
The guys sanding all the parts:
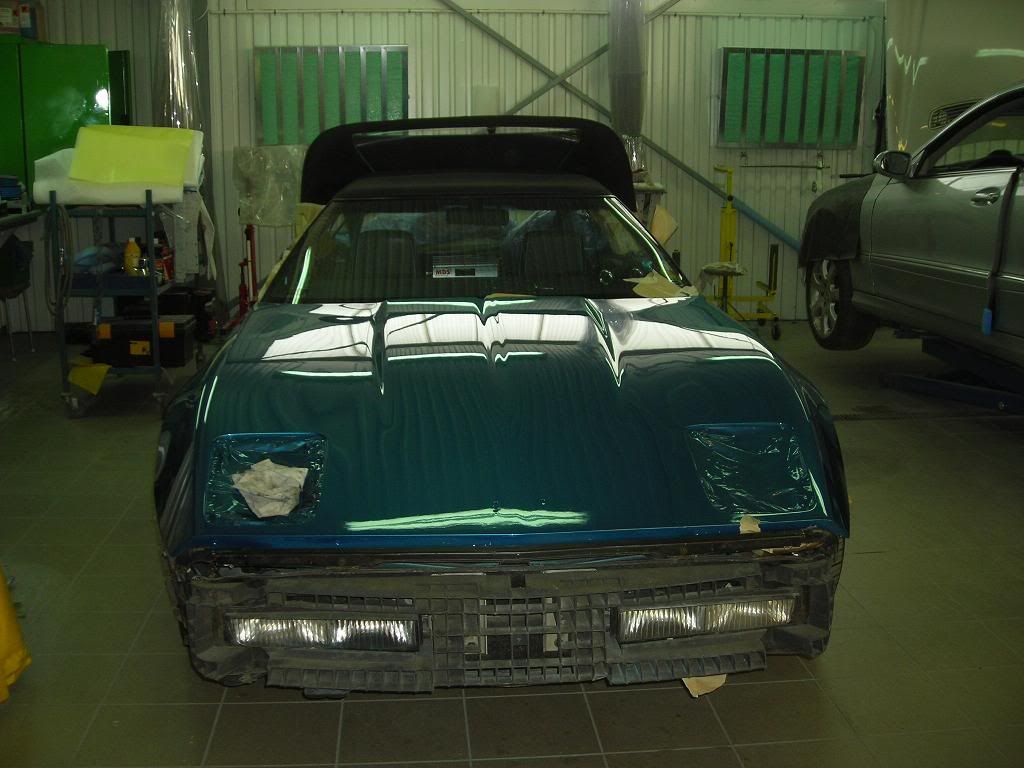
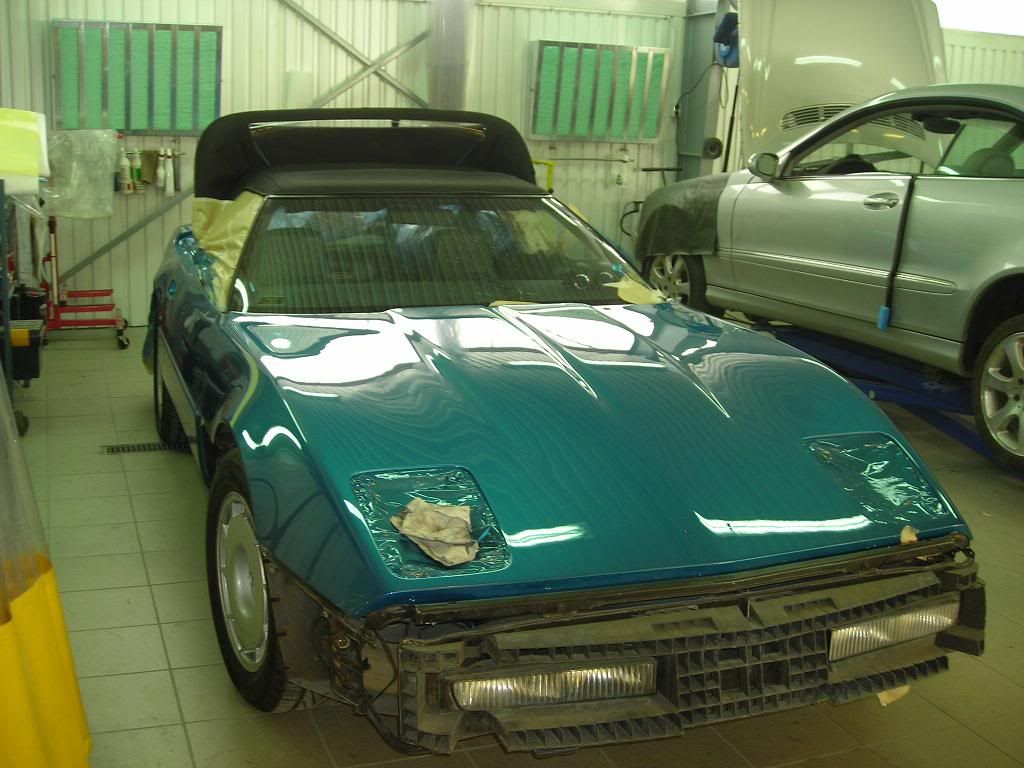
After this, the next step came. After a long phone conversation we agreed in trying something new. A new technique made it possible to colour up the paint from the beginning. So instead of the traditional white primer, mine went blue. Why you may ask? Simple, if i get a stonechip, it won´t be the traditional white dot that lights up as a bulb on the hood. instead it is still going to be blue, "hiding" the stonechip.
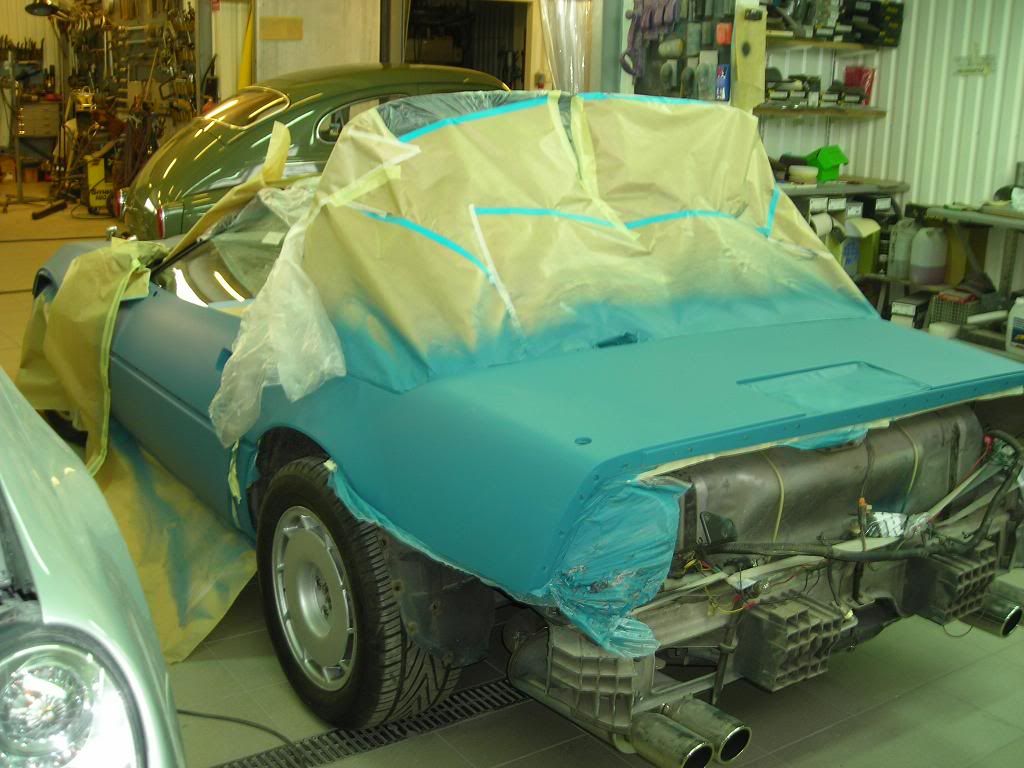
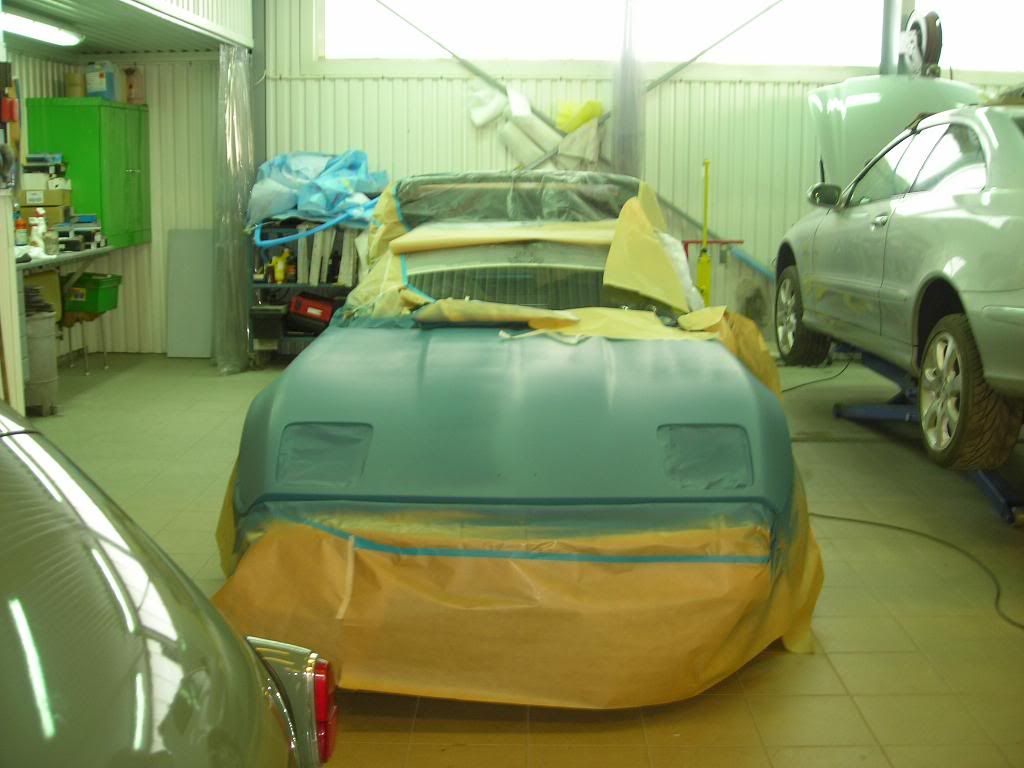
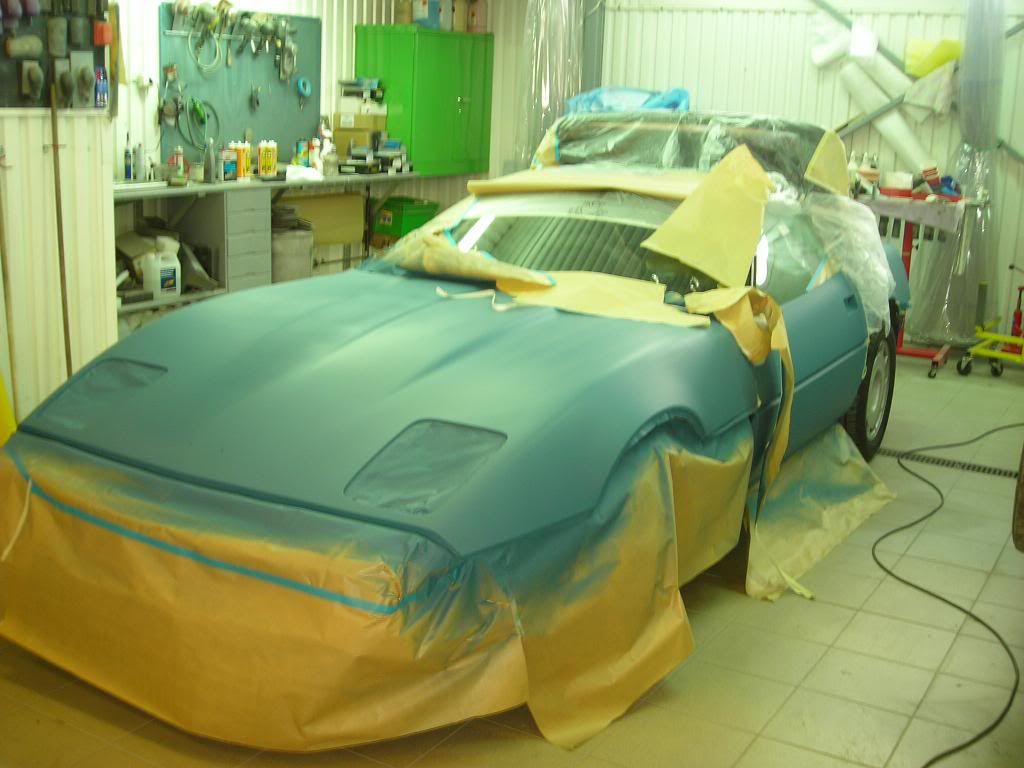
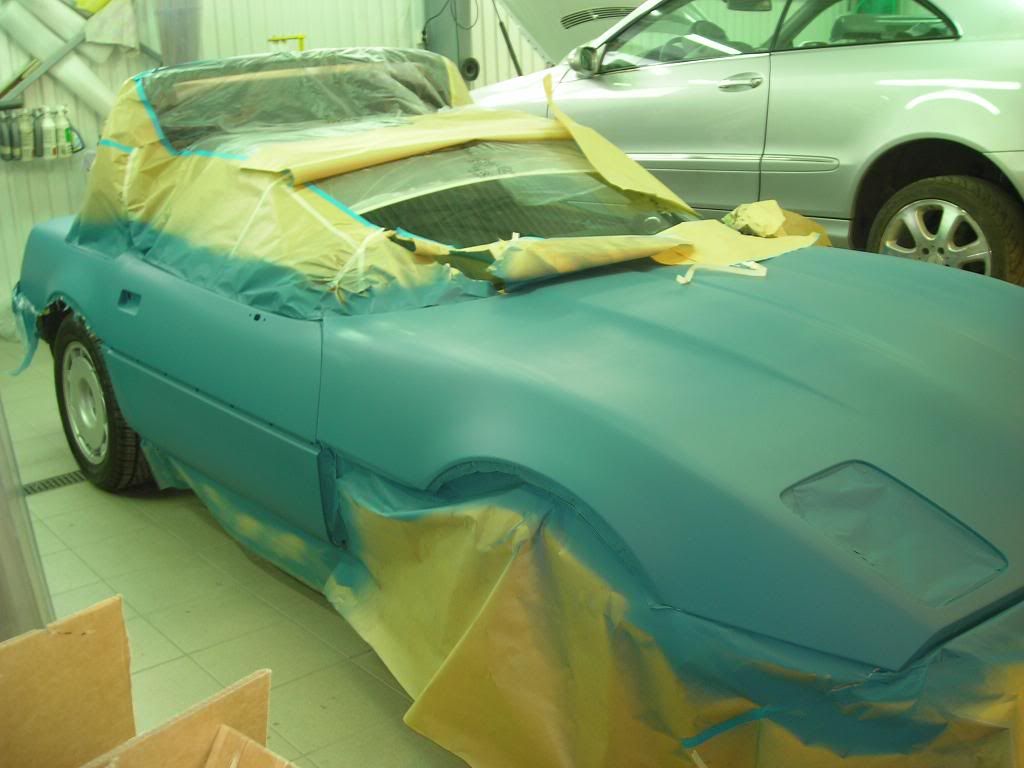
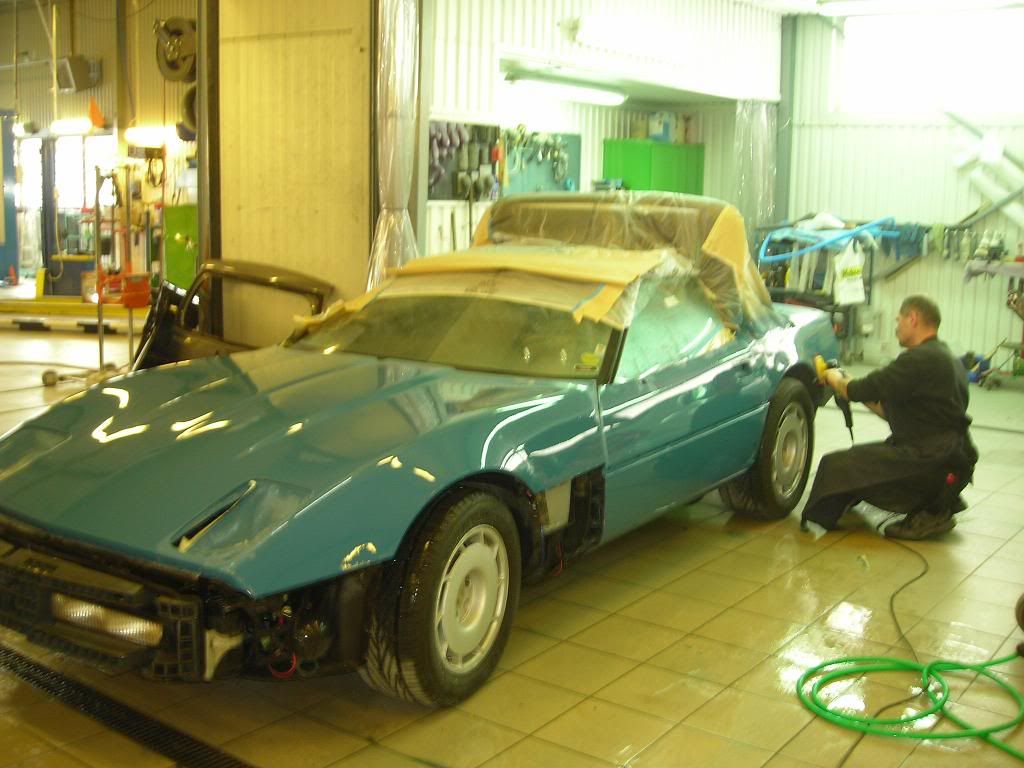
After this it was time to work with the wetsanding of the car. The guys doing an awesome job
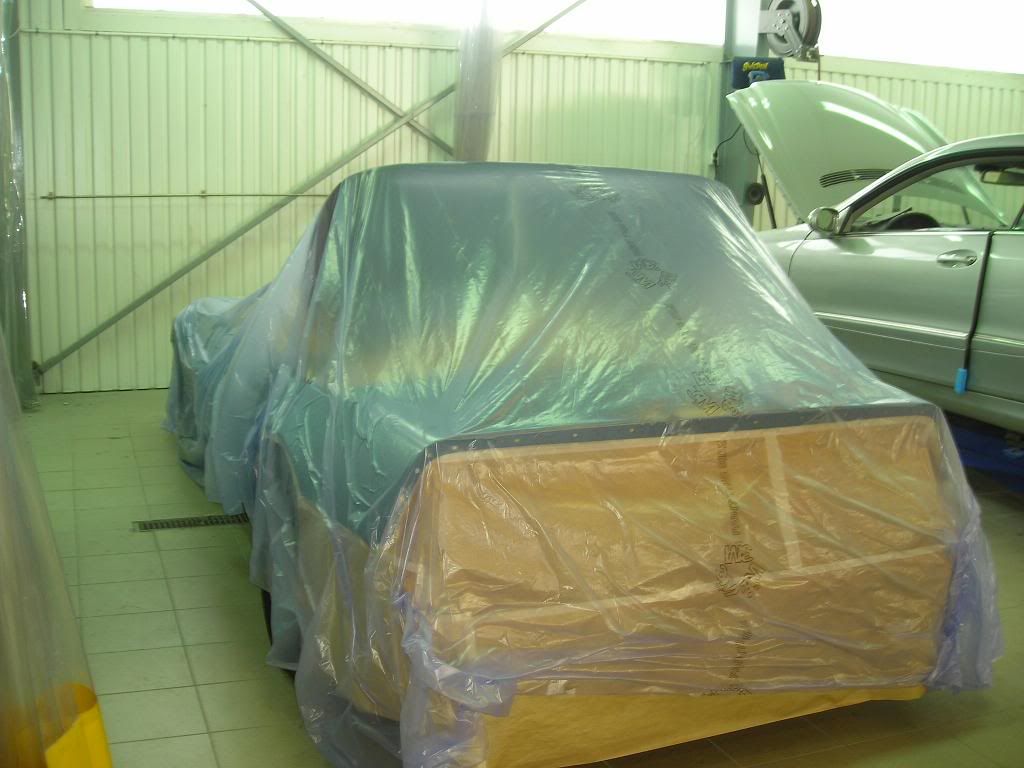
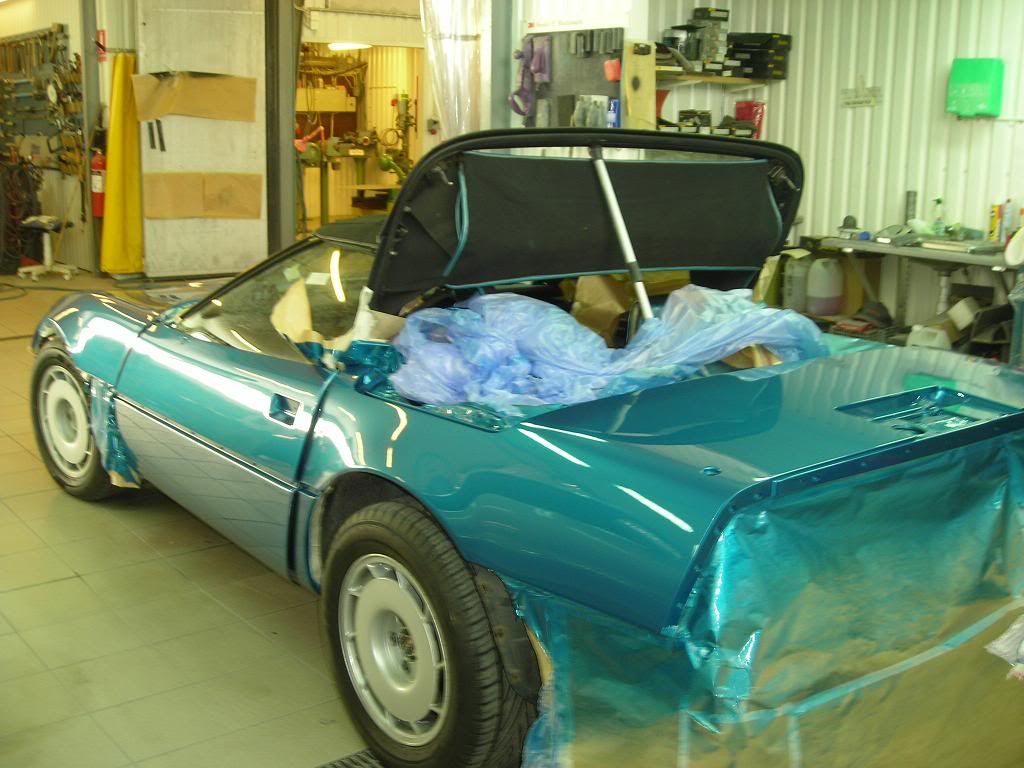
She had to stay in storage for a few days to dry up after the wetsanding and ofcourse to cover her from dust etc, she was all wrapped in plastic.
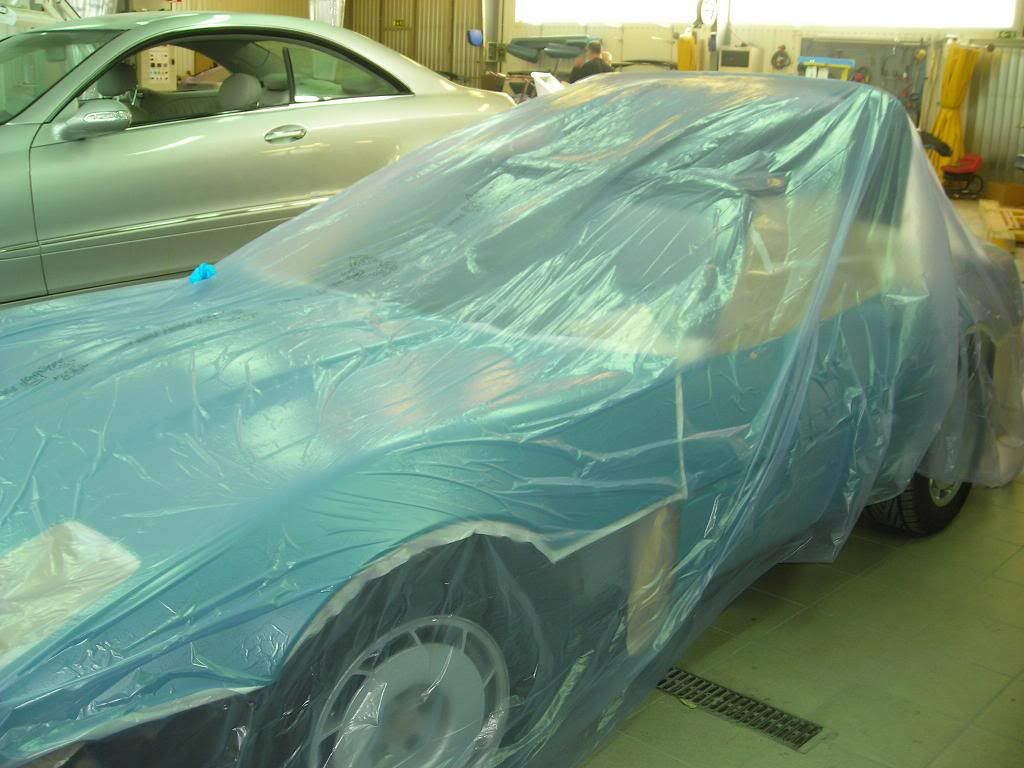
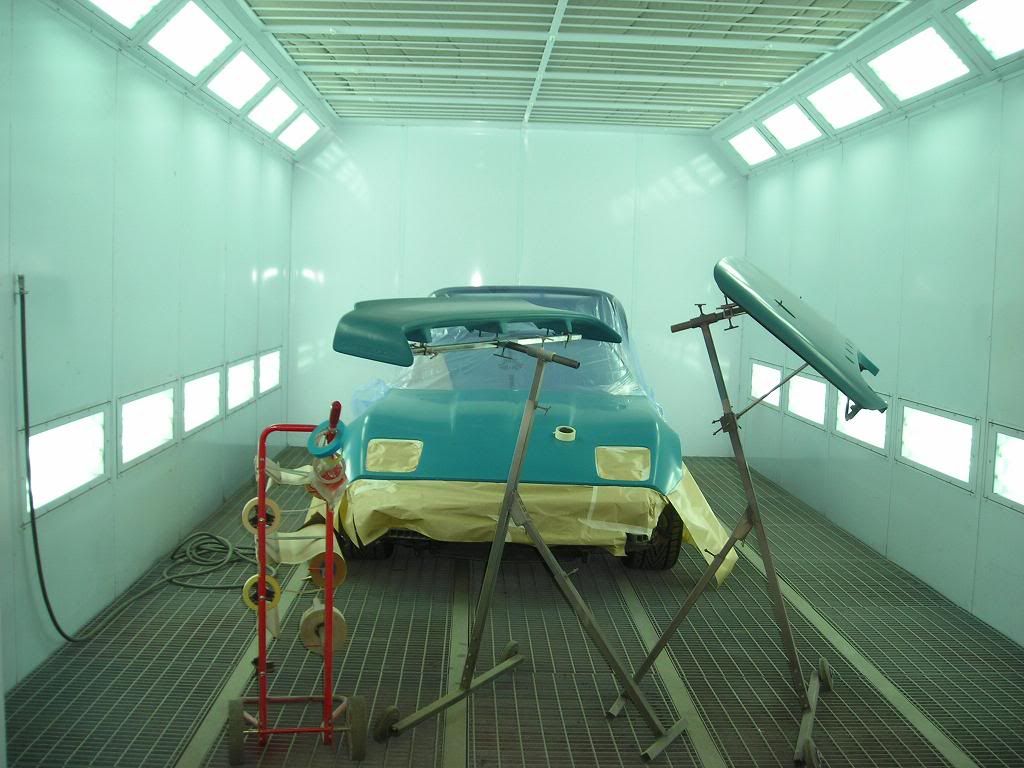
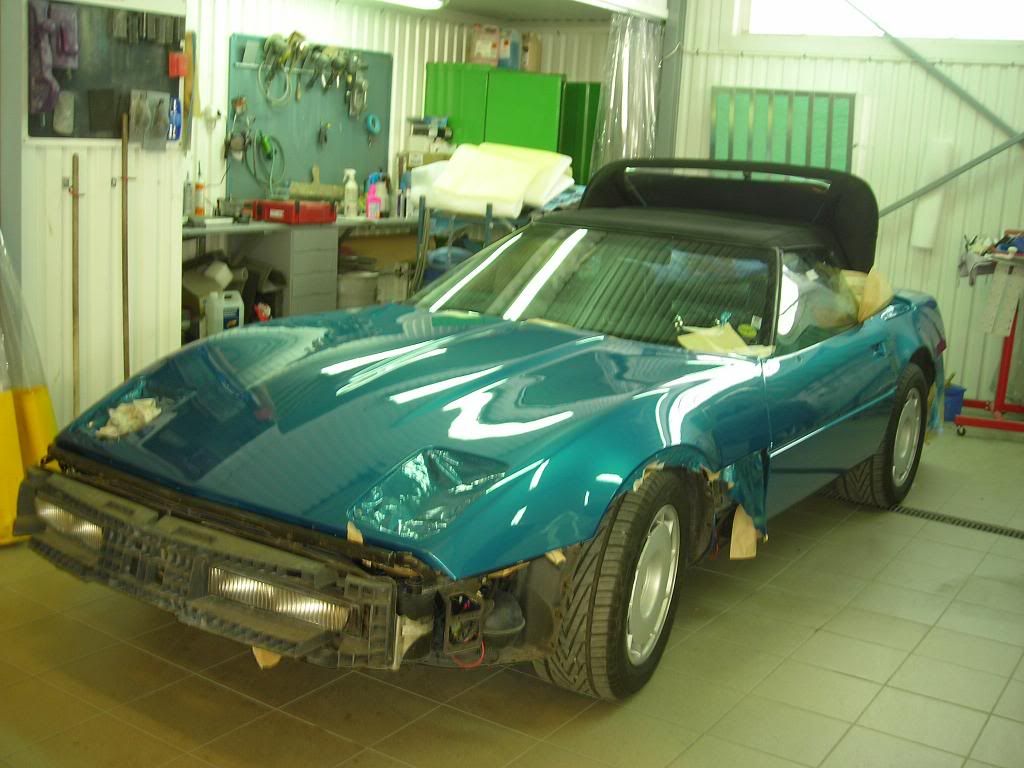
Next step, to roll her into the booth!
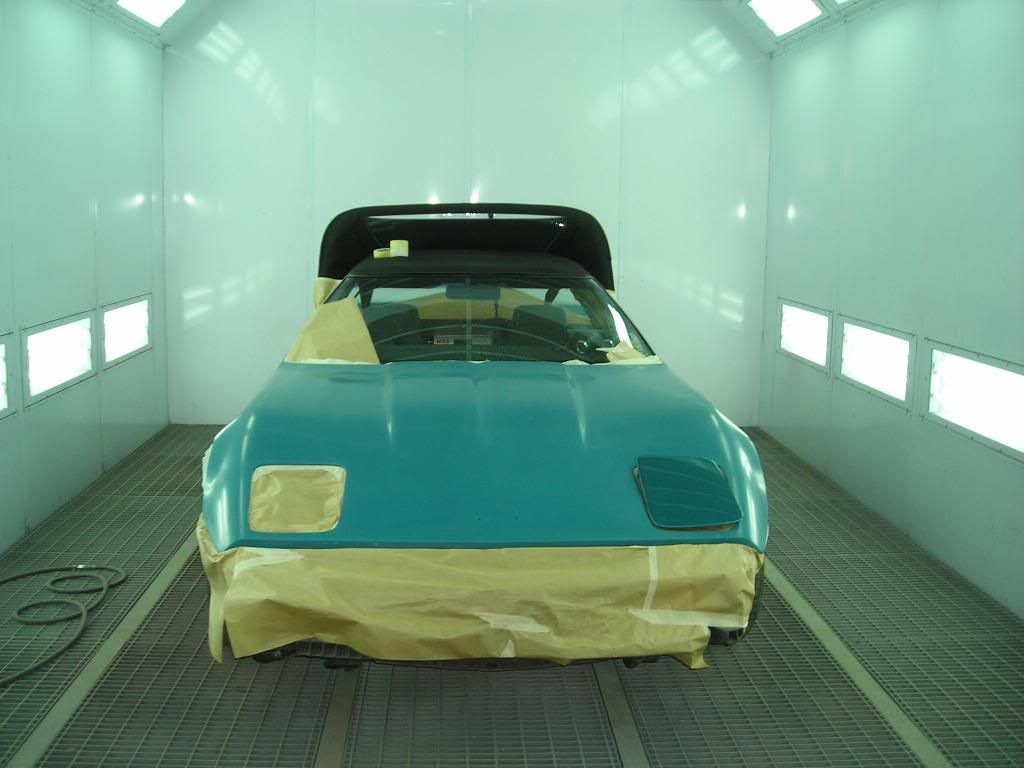
The last and big moment is very close!
And thats the end of part III, and as usual, it will continue. I think you guys can already guess what part IV will cover?
The work with dismantling the car continued
I found some interesting notes while working with the conv.top lid:
My friend Paul worked with cutting the holes in the spare tire cover. This is where the two mountings for the venturi tunnel will be:
Some parts....
Almost done
Everything set up, doors are duct taped and we are ready for the next step.
Another friend of mine came with his towing truck to transport the car to the bodyshop.
Loading:
And off we went!
Upon arrival, it was time for unloading!
And finally inside the bodyshop!
The Corvette sticker on the hood was already there when i bought the car. I noticed on the inside of the hood that it had a repairjob done once upon a time, so i was quite excited to finally see what it looked like..
What in the name of god has happened here!?!?
After this i did the 385 miles trip back home and waited for the first update to come.
Finally it came!
The guys sanding all the parts:
After this, the next step came. After a long phone conversation we agreed in trying something new. A new technique made it possible to colour up the paint from the beginning. So instead of the traditional white primer, mine went blue. Why you may ask? Simple, if i get a stonechip, it won´t be the traditional white dot that lights up as a bulb on the hood. instead it is still going to be blue, "hiding" the stonechip.
After this it was time to work with the wetsanding of the car. The guys doing an awesome job
She had to stay in storage for a few days to dry up after the wetsanding and ofcourse to cover her from dust etc, she was all wrapped in plastic.
Next step, to roll her into the booth!
The last and big moment is very close!
And thats the end of part III, and as usual, it will continue. I think you guys can already guess what part IV will cover?


 03-26-2011, 10:35 PM
#27
Moderator

Member Since: Jun 2002
Location: Maryville Tn
Posts: 46,071
Received 109 Likes
on
84 Posts
CI 5-6-7-8-9-10-11-12 Veteran
St. Jude Donor '09-'10-'11-12-'13-'14-'15-'16-'17-‘18-'19-'20-'21-'22-'23
NCM Sinkhole Donor


Great job! Keep us posted and enjoy your ride. 
Last edited by H P Bushrod; 03-26-2011 at 10:39 PM.
 03-28-2011, 03:56 PM
#29
Advanced
Thread Starter
Member Since: Mar 2011
Location: Stockholm
Posts: 50
Likes: 0
Received 0 Likes
on
0 Posts
Gentlemen, the time has come....PART IV
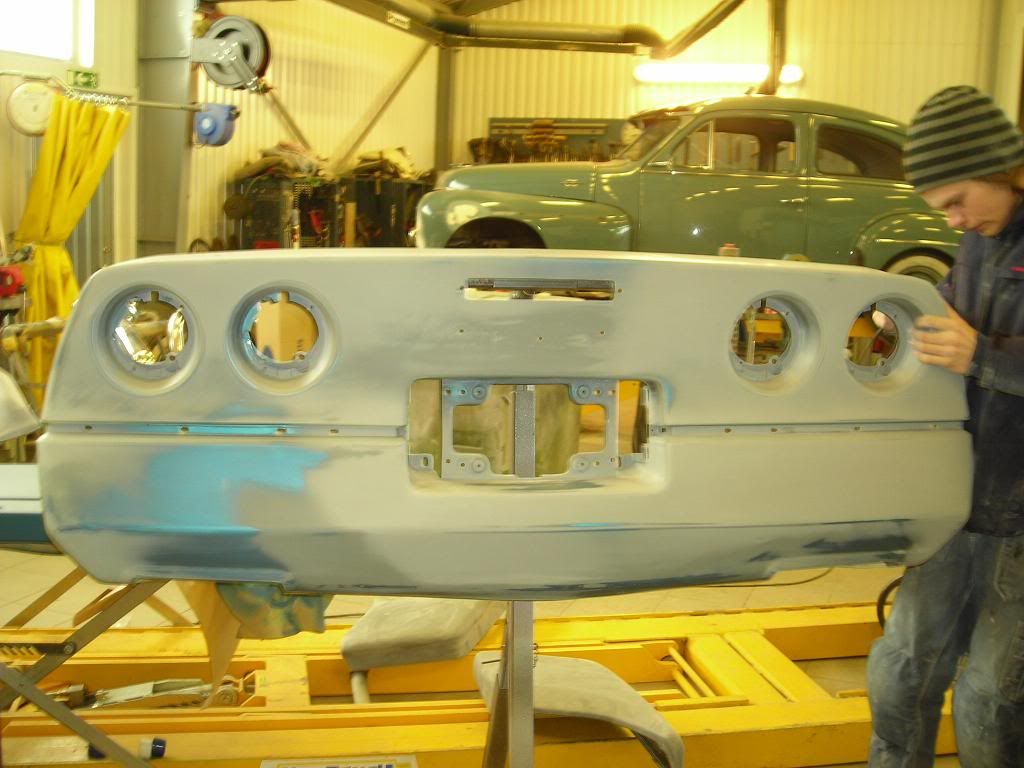
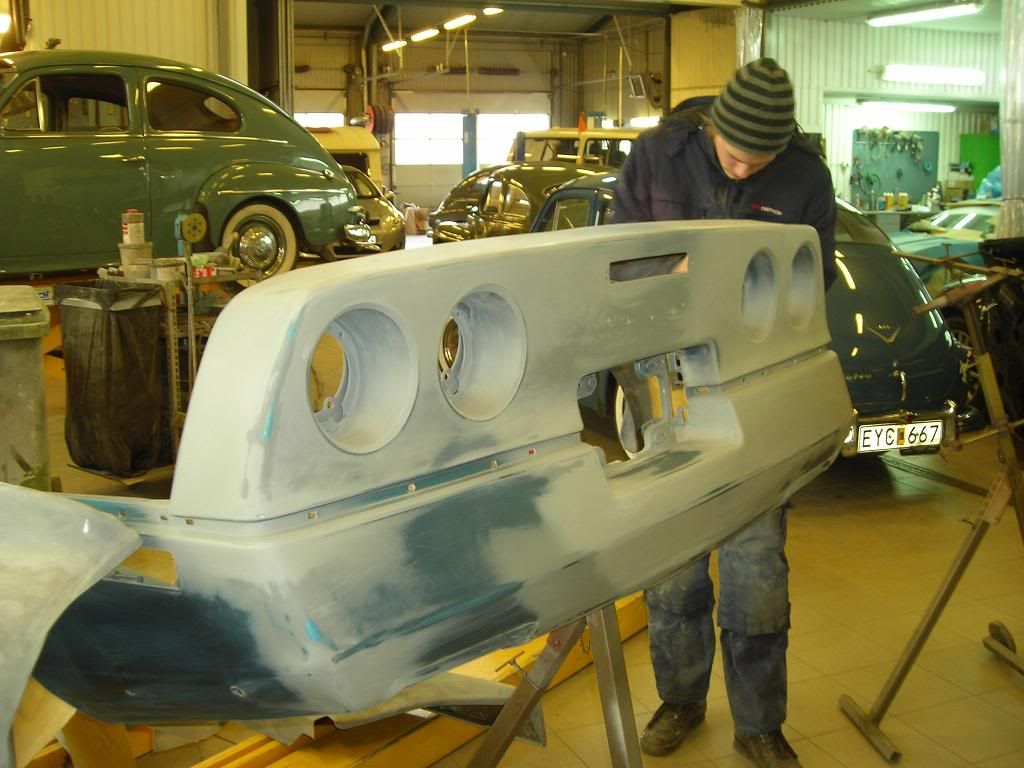
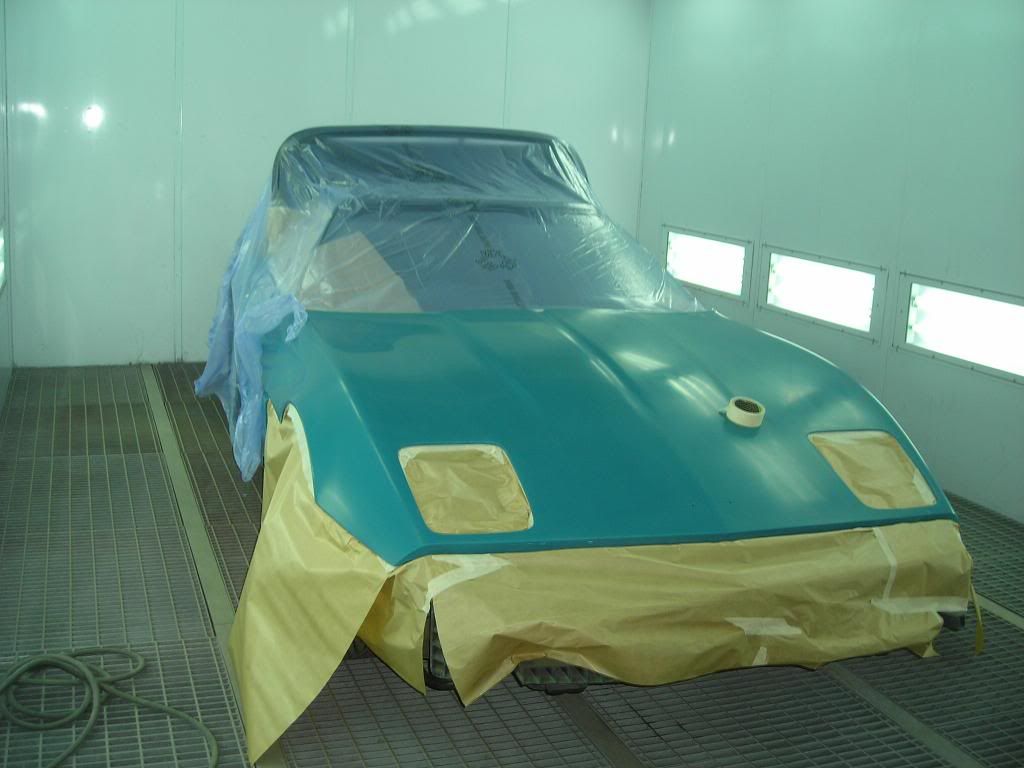
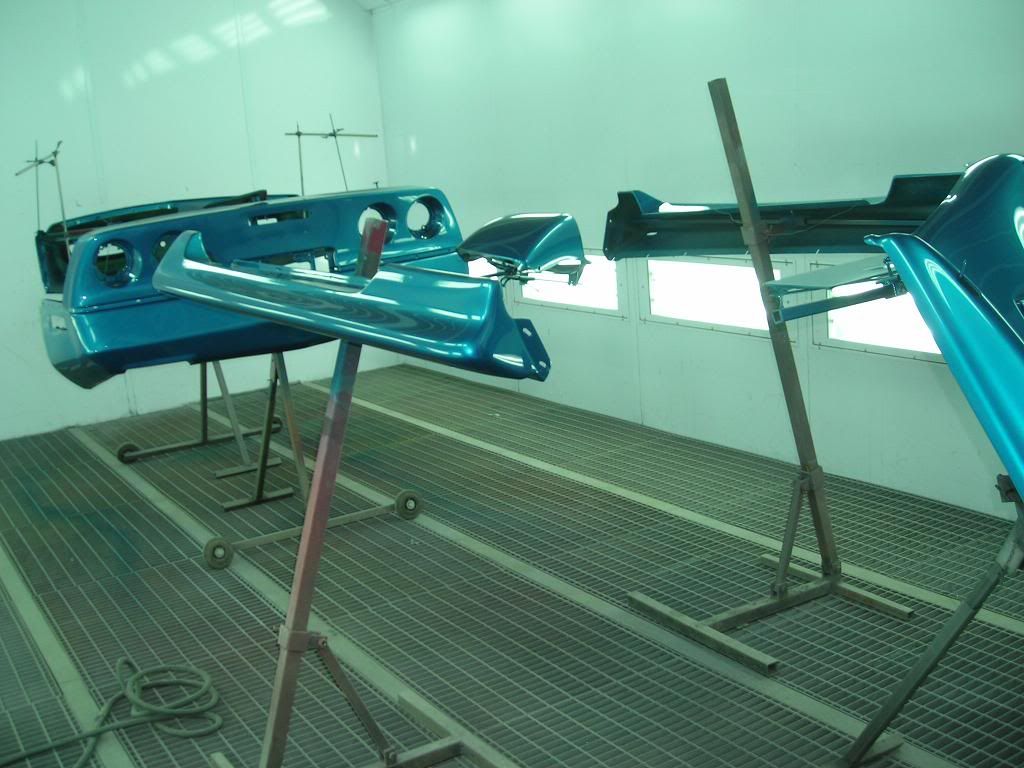
As i ended up part three, the doors to the paintbooth got closed and my friend Tommy started to work with the car. We had another long conversation over the phone (since i live 385 miles from his workshop) and everything was set up. He actually surprised me with putting three layers of clearcoat on the front and the hood, just to make sure it is resistant against stonechips. The first pictures came and by now i was very anxious to see the result.
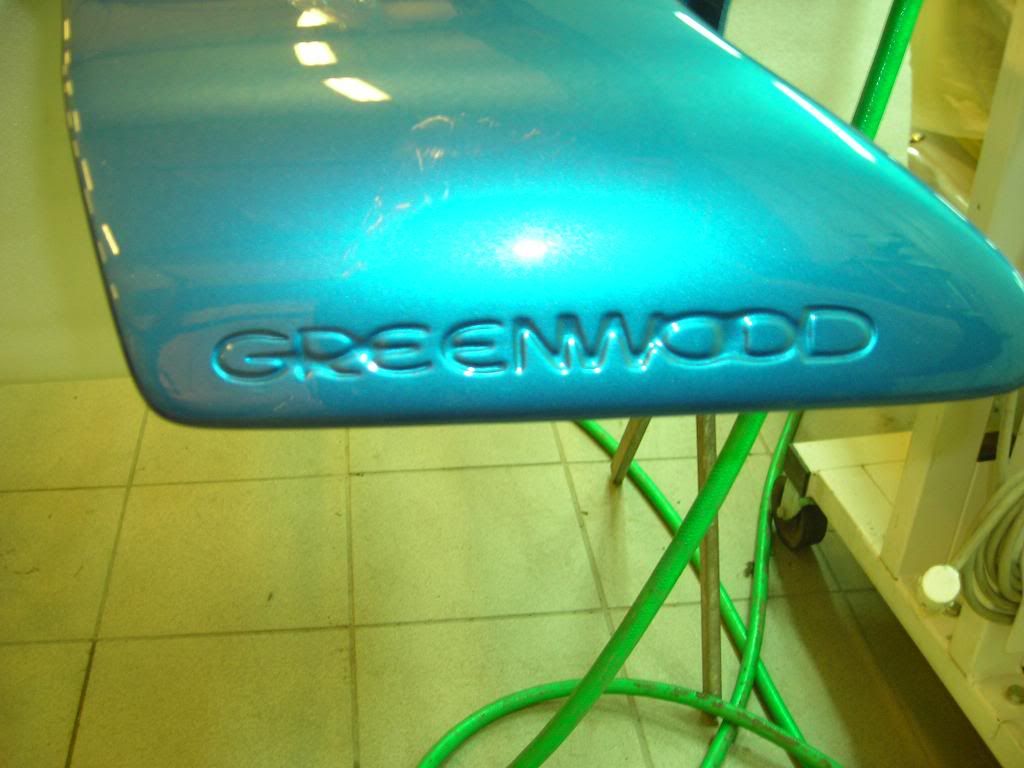
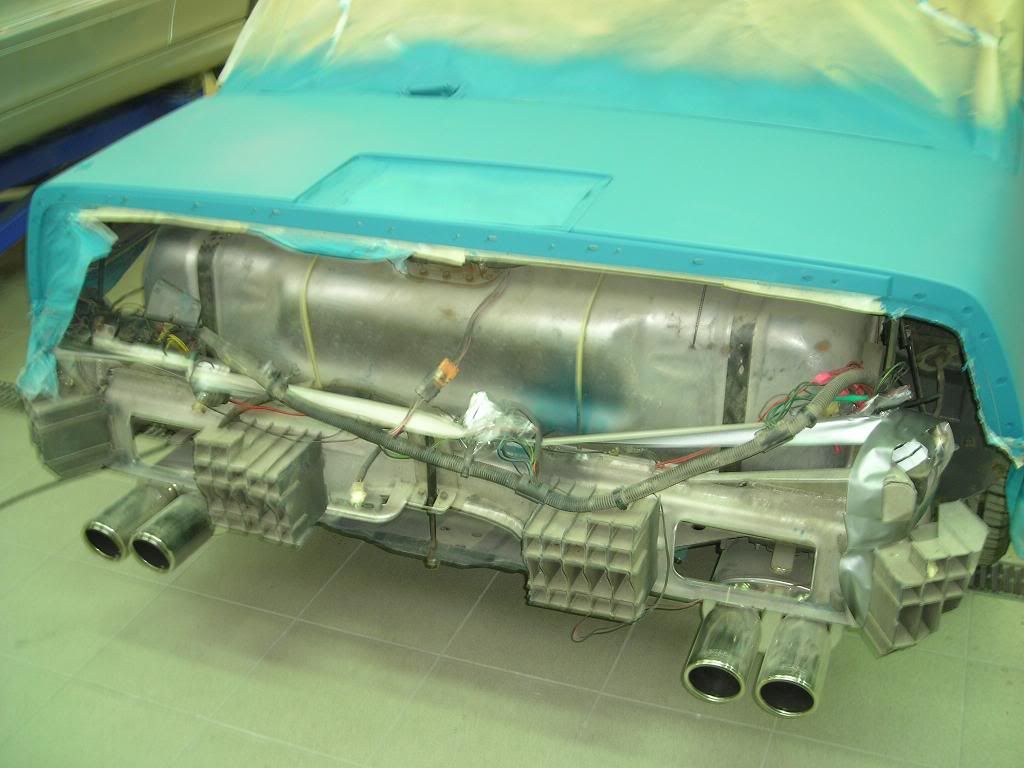
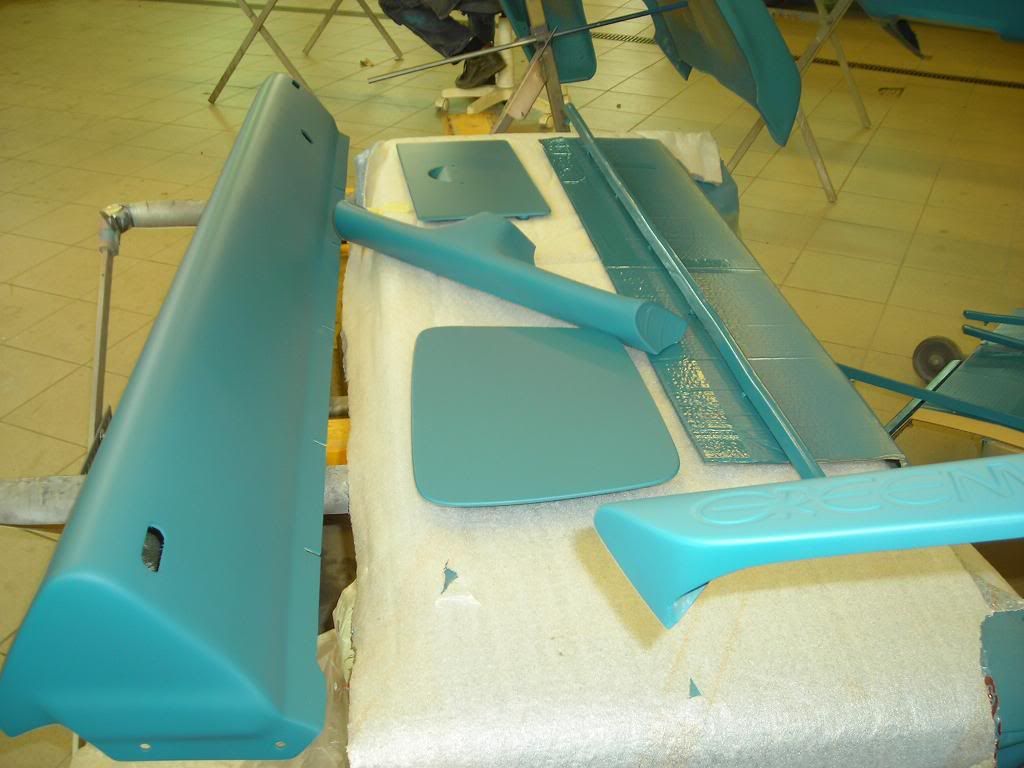
The Greenwood rear valance and yes, the side moldings are painted !

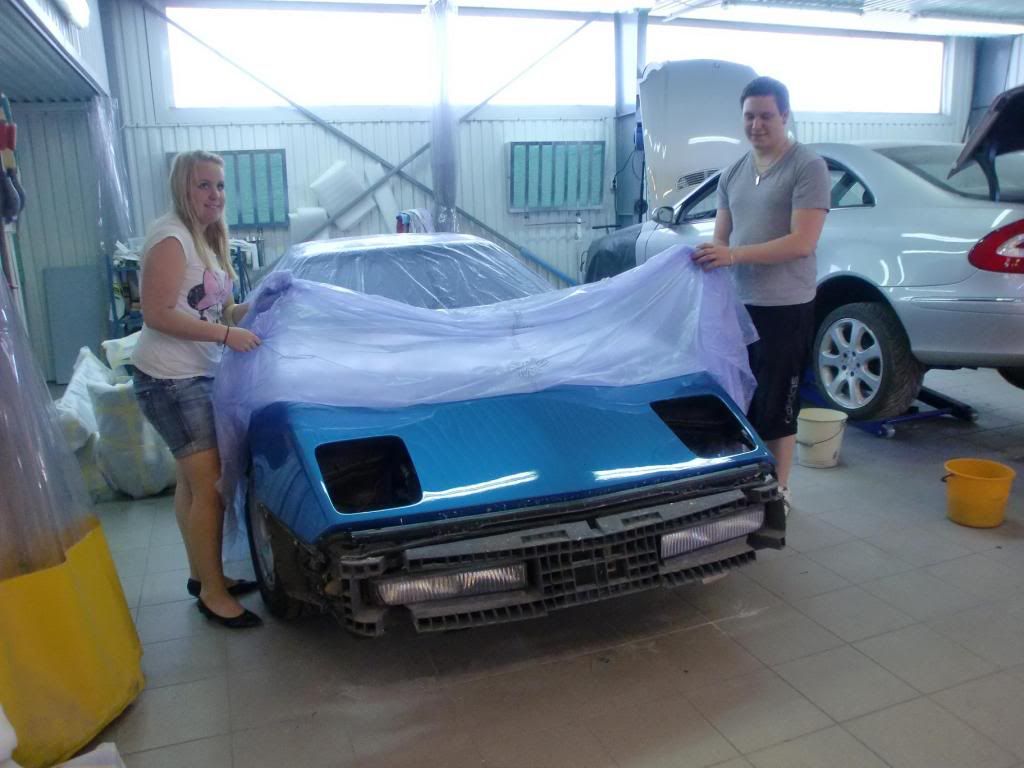
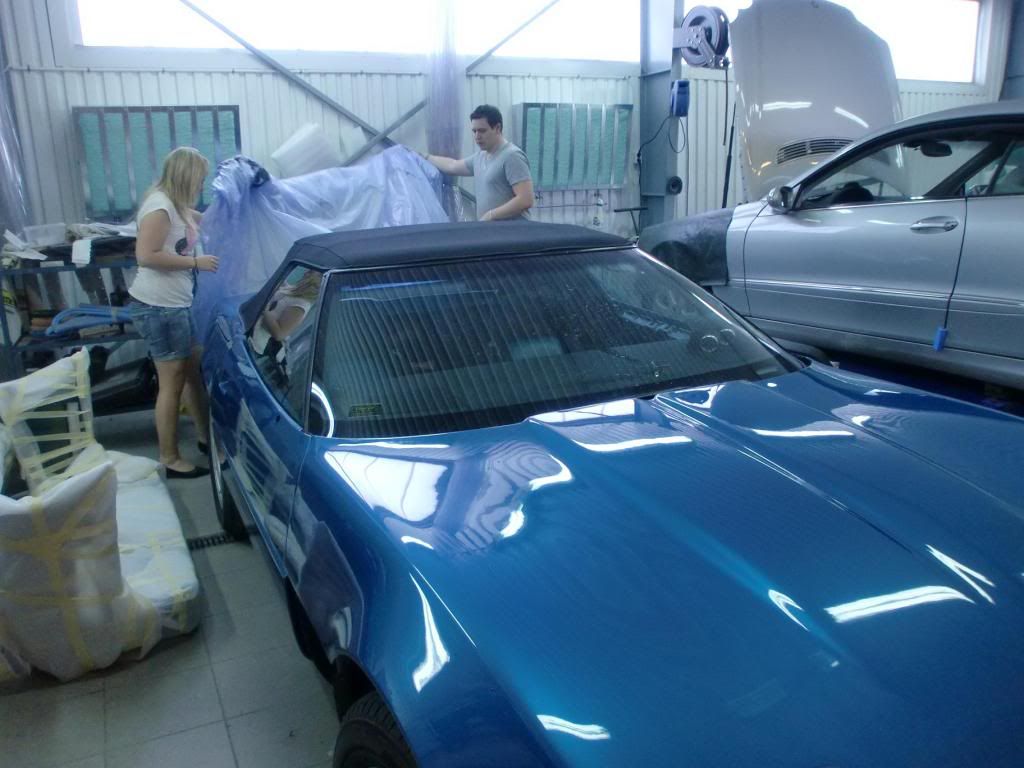
Now we took the plane down to south of Sweden to see her for the first time. I was stunned. I couldn´t believe it was the same car that i left there. What a feeling!!!!
Uncovering her together with my fiancee.
After this the royal transport showed up and we started to load everything. Great to have a dad who is into road transport&logistics
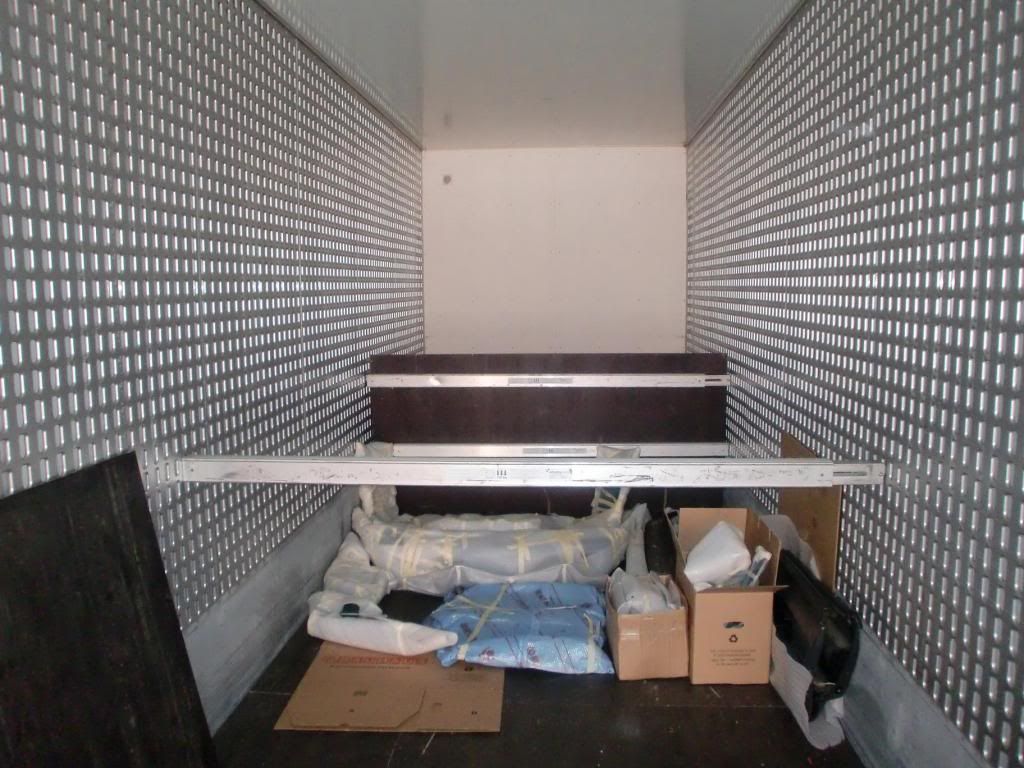
Me and Truckdriver Jan is starting to build up walls in the trailer for all the loose parts:
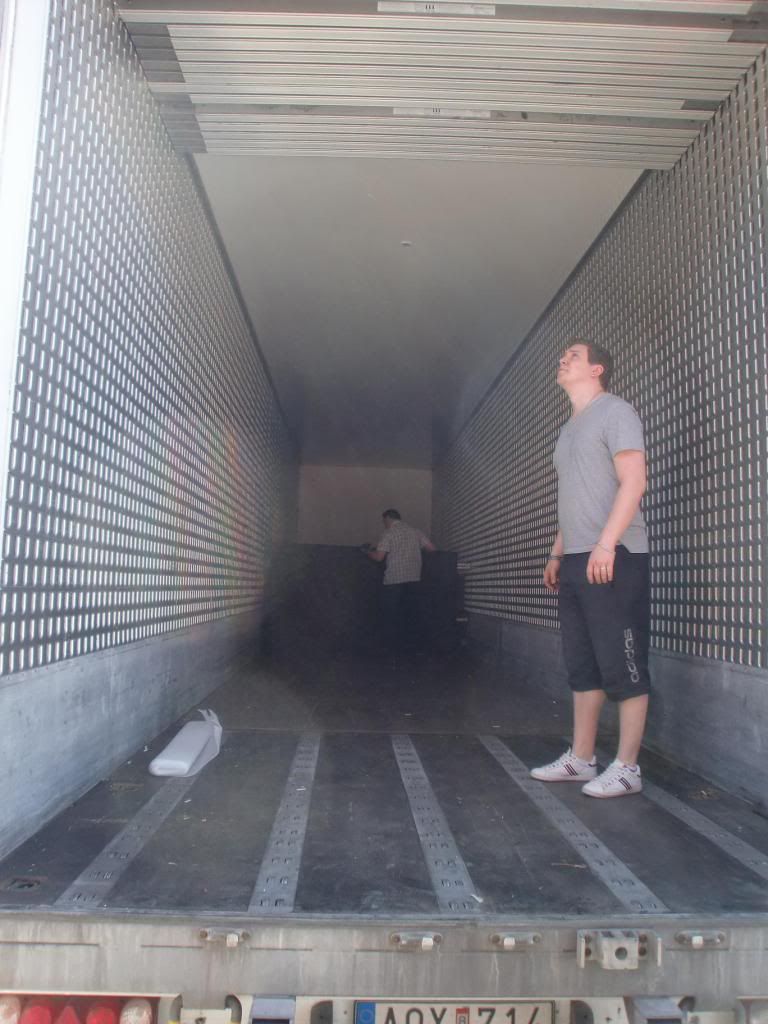
All loose items are loaded and secured:,
Next step was to take her out into the sun for the first time, my friend showed up with his towing truck again.
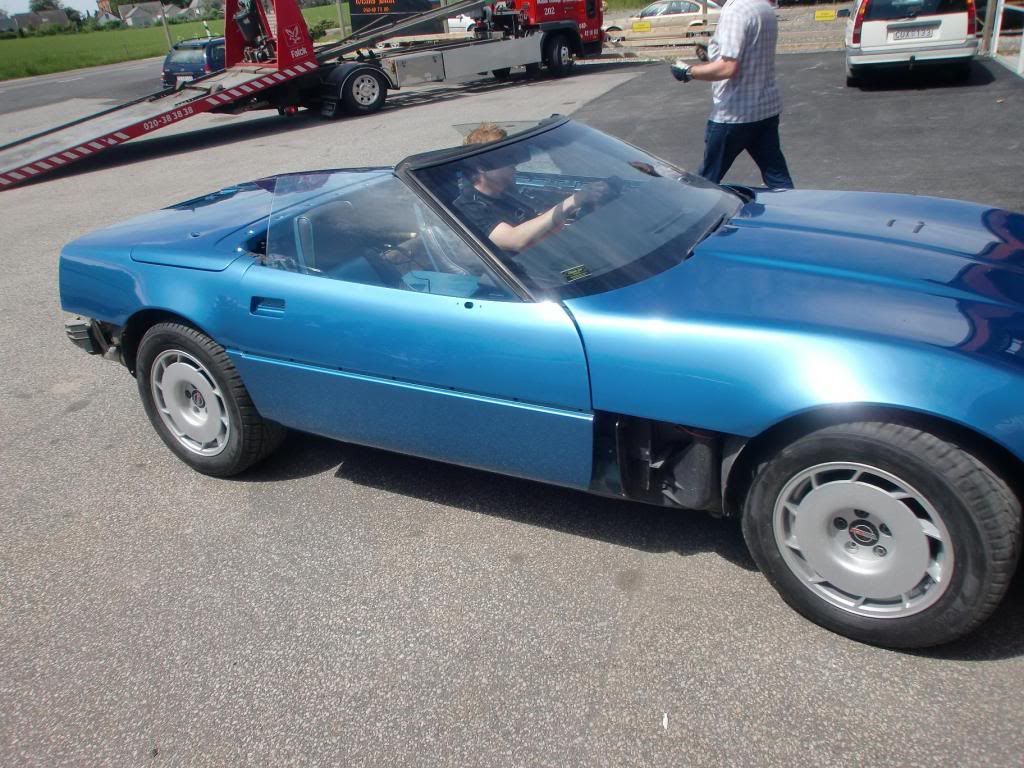
No hitch trailers for me guys, big boys needs big toys and ofcourse my Vette was going to travel like a queen
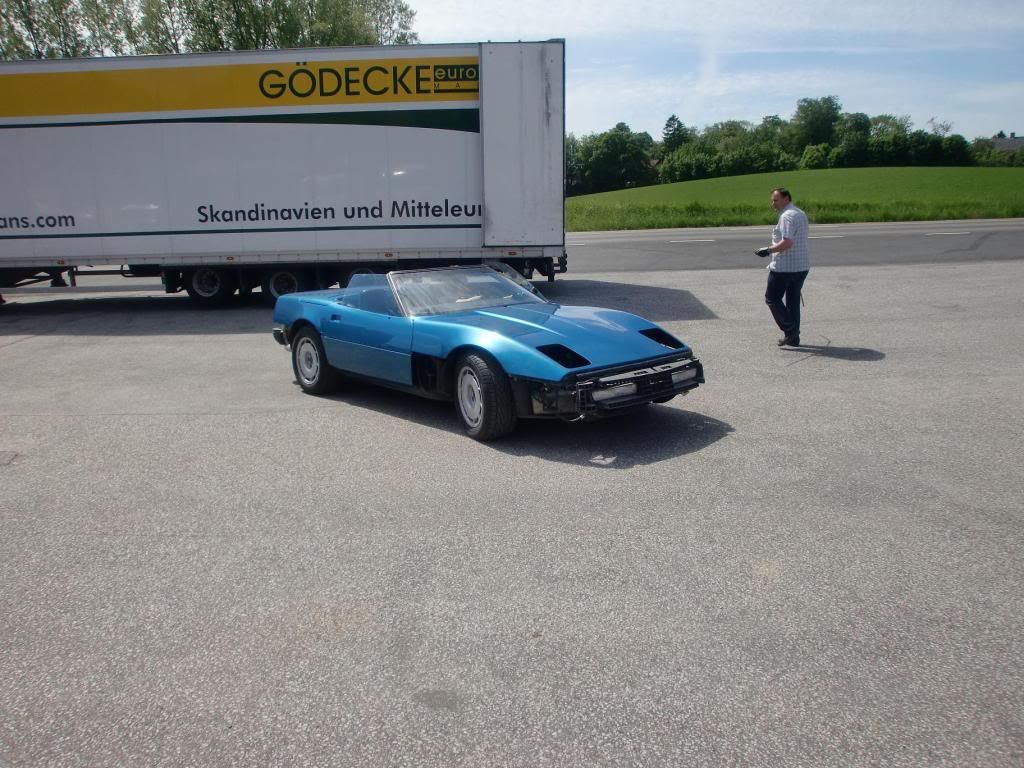
We needed the towing truck again to load the Vette onto the trailer. We simply drove the Vette up on the towing truck, reversed it, leveled it against the trailer, and the reversed the vette off into the trailer.
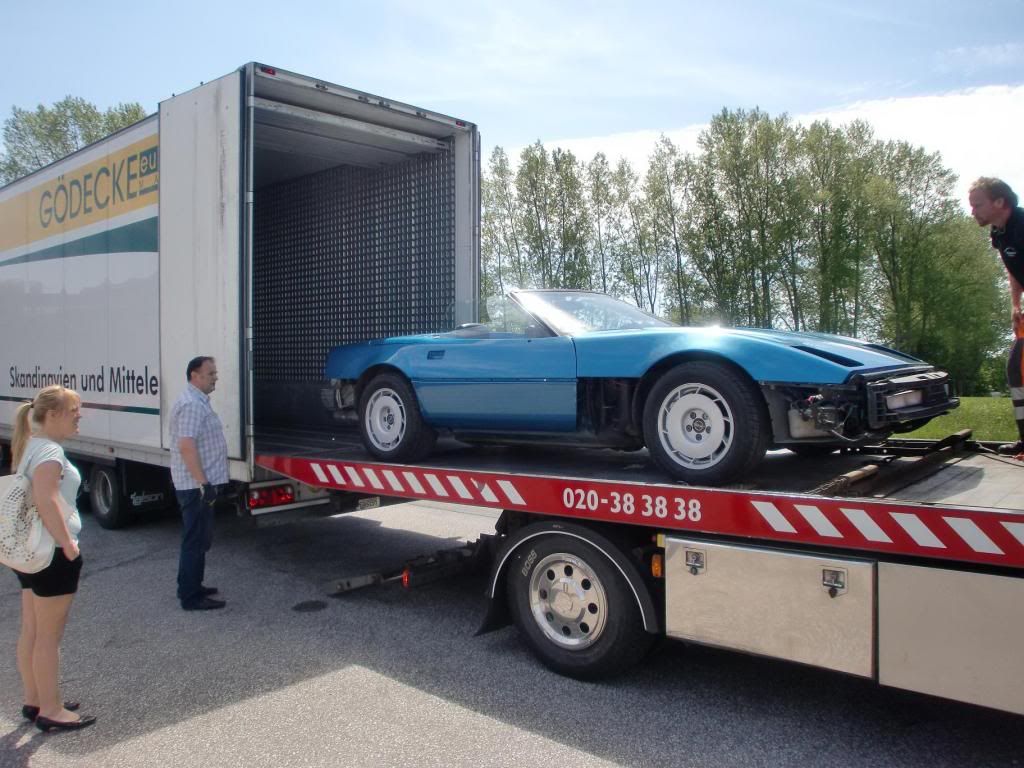
Almost secured and ready to go!
Into the truck we went and hitted the roads for 385 miles in true Smokey and the Bandit spirit
Upon arrival to the Stockholm, the capital of Sweden, we unloaded everything and rolled the car down into my "new" garage where she got covered. I pretty much left here like this all the summer, it was such an amazing summer here so i really didnt want to bother being in a garage. The fall of 2010 work began....and so did the upcoming part V !
Thanks for all kind comments guys, i enjoy them
As i ended up part three, the doors to the paintbooth got closed and my friend Tommy started to work with the car. We had another long conversation over the phone (since i live 385 miles from his workshop) and everything was set up. He actually surprised me with putting three layers of clearcoat on the front and the hood, just to make sure it is resistant against stonechips. The first pictures came and by now i was very anxious to see the result.
The Greenwood rear valance and yes, the side moldings are painted !
Now we took the plane down to south of Sweden to see her for the first time. I was stunned. I couldn´t believe it was the same car that i left there. What a feeling!!!!
Uncovering her together with my fiancee.
After this the royal transport showed up and we started to load everything. Great to have a dad who is into road transport&logistics
Me and Truckdriver Jan is starting to build up walls in the trailer for all the loose parts:
All loose items are loaded and secured:,
Next step was to take her out into the sun for the first time, my friend showed up with his towing truck again.
No hitch trailers for me guys, big boys needs big toys and ofcourse my Vette was going to travel like a queen
We needed the towing truck again to load the Vette onto the trailer. We simply drove the Vette up on the towing truck, reversed it, leveled it against the trailer, and the reversed the vette off into the trailer.
Almost secured and ready to go!
Into the truck we went and hitted the roads for 385 miles in true Smokey and the Bandit spirit
Upon arrival to the Stockholm, the capital of Sweden, we unloaded everything and rolled the car down into my "new" garage where she got covered. I pretty much left here like this all the summer, it was such an amazing summer here so i really didnt want to bother being in a garage. The fall of 2010 work began....and so did the upcoming part V !
Thanks for all kind comments guys, i enjoy them
 03-28-2011, 05:45 PM
#32
Instructor
Member Since: Dec 2004
Location: Pickering Ontario
Posts: 135
Likes: 0
Received 0 Likes
on
0 Posts

Boy the car looks grate. The work involved and time invested show the kind of pride some people put into the car they love. No resale consideration on this build. Good job keep it up
Brian
Brian
03-28-2011, 06:59 PM
#34
Melting Slicks

Really enjoying this thread. The car looks great!
Any chance you could get the wheel repaired? I really liked the way the car looked with those aftermarket ("Breyton") wheels. Its a pity you couldn't get them fixed so you could use them.
Regardless, looking forward to Part VI!
Any chance you could get the wheel repaired? I really liked the way the car looked with those aftermarket ("Breyton") wheels. Its a pity you couldn't get them fixed so you could use them.
Regardless, looking forward to Part VI!
Last edited by wu6fiend; 03-28-2011 at 07:32 PM.


 03-29-2011, 02:29 PM
#37
Advanced
Thread Starter
Member Since: Mar 2011
Location: Stockholm
Posts: 50
Likes: 0
Received 0 Likes
on
0 Posts
 04-03-2011, 07:46 AM
#39
Advanced
Thread Starter
Member Since: Mar 2011
Location: Stockholm
Posts: 50
Likes: 0
Received 0 Likes
on
0 Posts
As for Corvettes, we do have quite many over here
Thanks man, they are coming !
Really enjoying this thread. The car looks great!
Any chance you could get the wheel repaired? I really liked the way the car looked with those aftermarket ("Breyton") wheels. Its a pity you couldn't get them fixed so you could use them.
Regardless, looking forward to Part VI!
Any chance you could get the wheel repaired? I really liked the way the car looked with those aftermarket ("Breyton") wheels. Its a pity you couldn't get them fixed so you could use them.
Regardless, looking forward to Part VI!
I really do like them and got alot of compliments when i had them on, but for now i want to try and "style" the car with "Corvette Original" parts. I wont sell them though, you never know when i get bored of the set of wheels i have now and refurb them

Thanks Meeko !
Hi kenv. Thats an interesting combo you´ve got. The Aeropieces except for the front which is the Motorsport pieces but without the middle part. It looks a little bit odd to see the front that way but i really like the car. A yellow manual trans. coupe 1990 is my big dream at the moment
Thank you. There s alot of passion put into this car since it is my very big dream since i was 8 years old. I haven´t thought anything about the old pieces yet. They are just laying around in the garage at the moment.
04-03-2011, 09:09 AM
#40
Advanced
Thread Starter
Member Since: Mar 2011
Location: Stockholm
Posts: 50
Likes: 0
Received 0 Likes
on
0 Posts
Hi Folks! I´ve been quite busy this week so i haven´t had the chance to update you.
Before i continue, i would like to say a big thank for all comments you have posted. They keep me taking the time to update this thread.
Enough talking, let get down to business. Part V is here gentlemen!
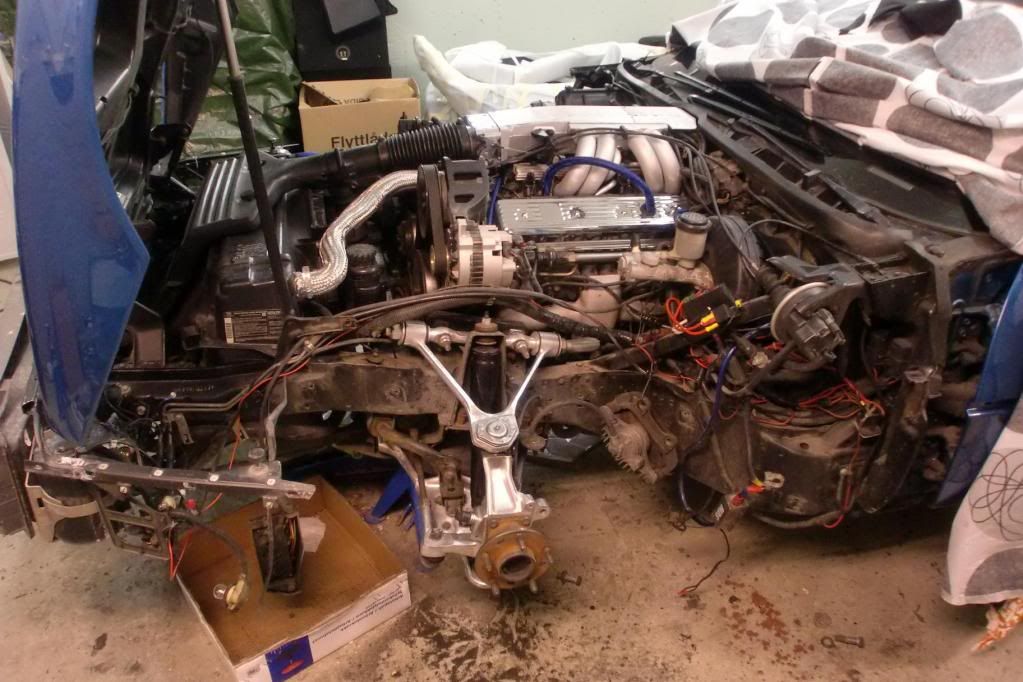
So as i ended up part IV, the car was just sitting in the garage and it still looks pretty much the same. I have had a minor coolingsystem leak and i started to search for it. I found it, one of the hoses that goes into the throttle body. I then gave the engine a good wash and was going to start putting things together. I started to paint the brackets that hold the side indicator/curvelight housing and was putting it back. I thought that i needed to wash the coolant reserve tank. When that was done i looked at the engine. The whole intake manifold and some of the runners where totally green from all the coolant liquid. Should i put the car back together as planned and deal with it later?
No, i could not. I guess i am way too much into perfection. So, i started to dismantle parts and by now i wanted to try to polish some parts.
It is extremely time consuming but once done it just looks so good. I have been dealing with the engine compartment for 6 months now, i am far far far away from pleased but wifie doesn´t allow me to keep up anymore with it. I have to start working with the body again if i am ever going to drive it this year.
At this time i had no thought of making a thread so i don´t have too many progress pictures, and some of them are taken with my phone, which is a a little bit sad now afterwards.
I would like to have one before and one after pic but....
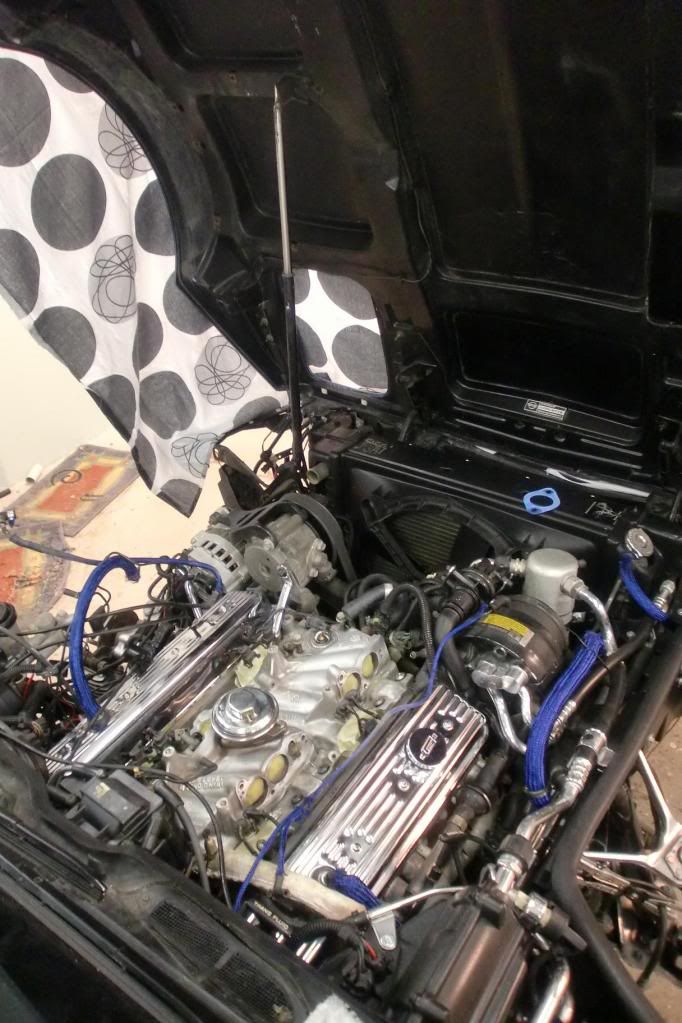
This is pretty much how it looked when i started, i guess you can tell why i have been spending 6 months under the hood... There are alot of other things i have done that i haven´t mentioned. It would simply be too much to tell! But here is some of the things presented.
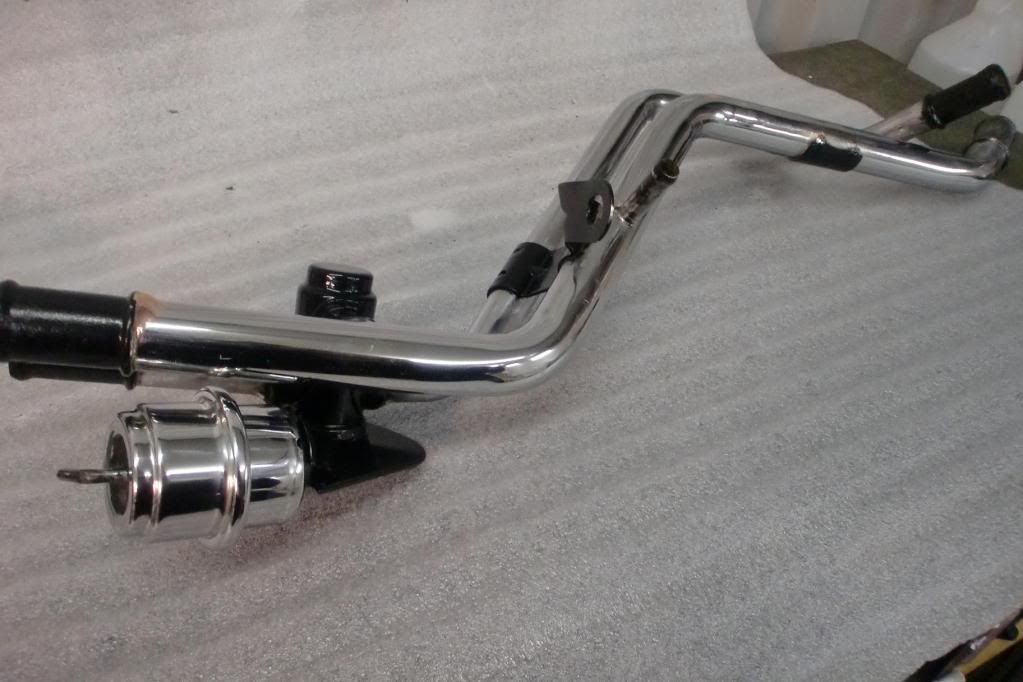
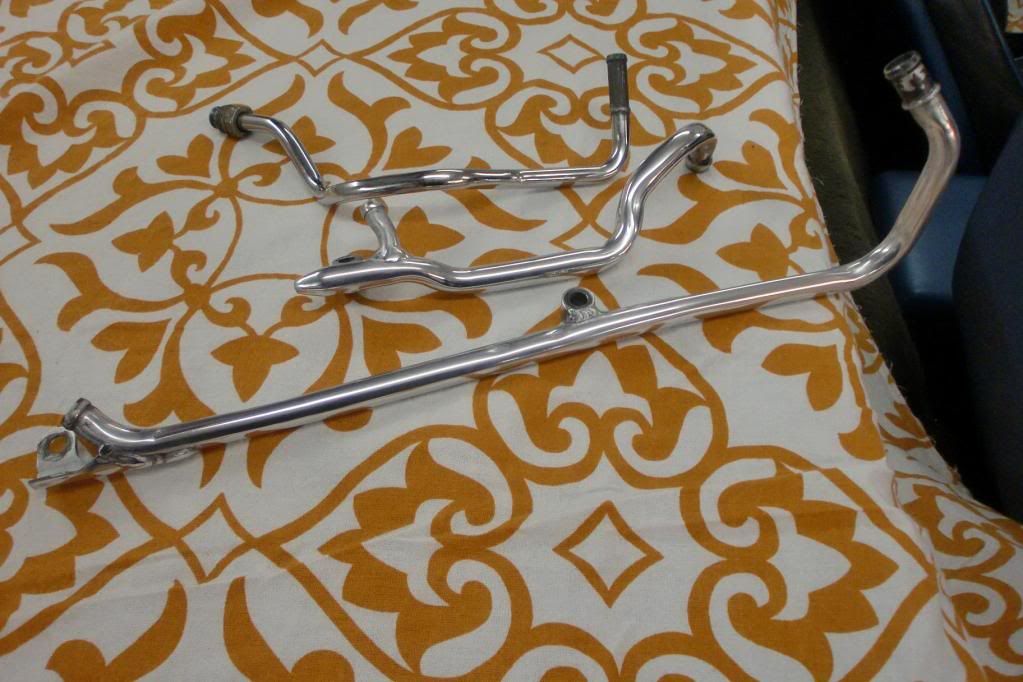
I started to work with the pipes that run to the heater element. The first piece i did. I spent somehwere around 6 hours of sanding it down and then finally polished them. After that i painted some of the parts black. The result:
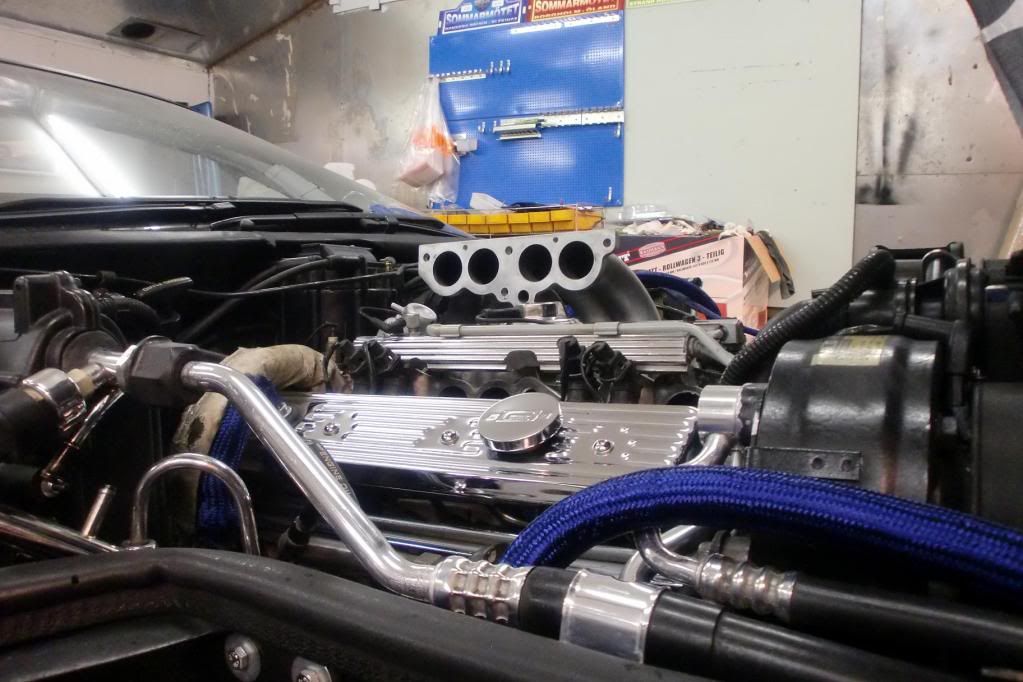
After having the plenum and runners removed, you can see that the intake manifold is totally green from all the coolant fluid..
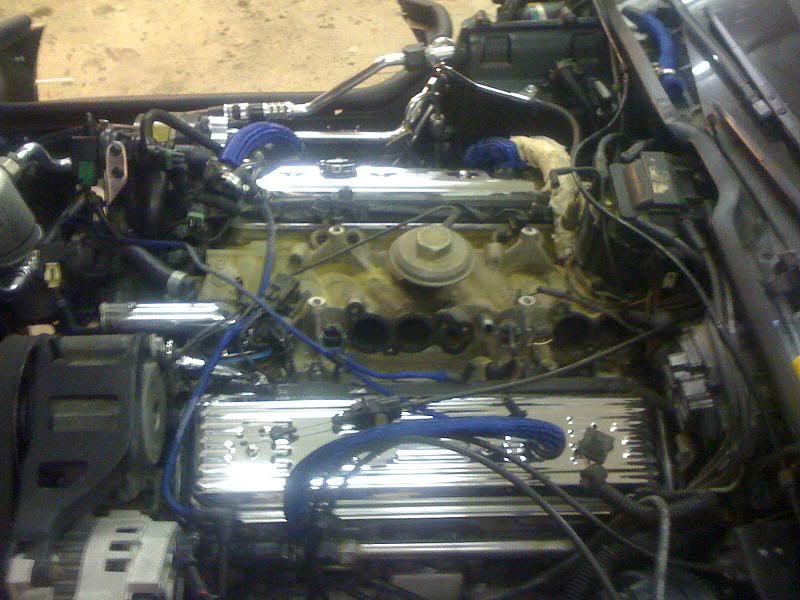
Intake now ready to be cleaned...
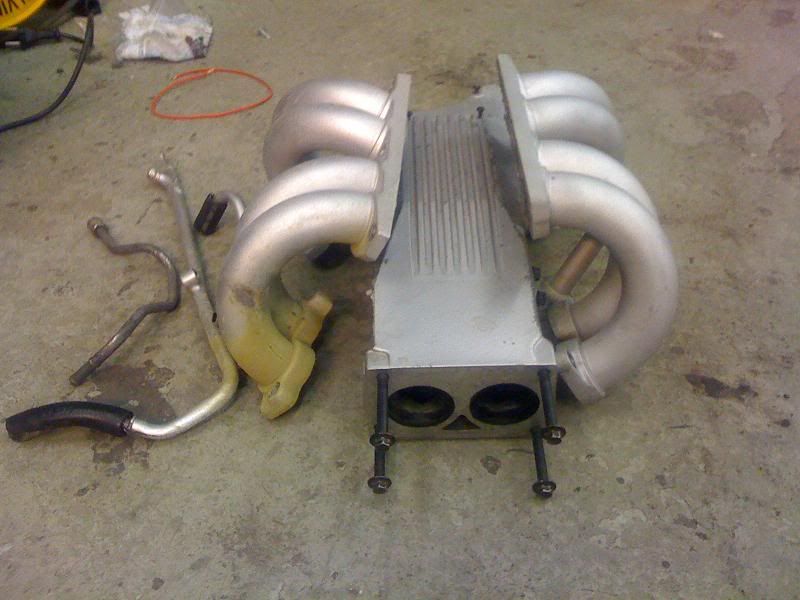
Some vacuum lines and the runners and plenum. you can see the mess on the runners from the coolant fluid..
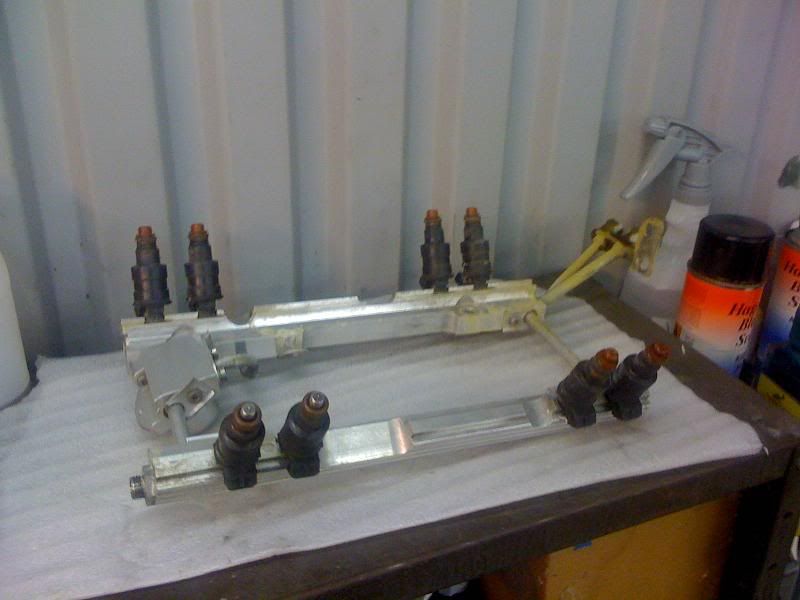
The fuelrail dismantled and ready to be dealt with:
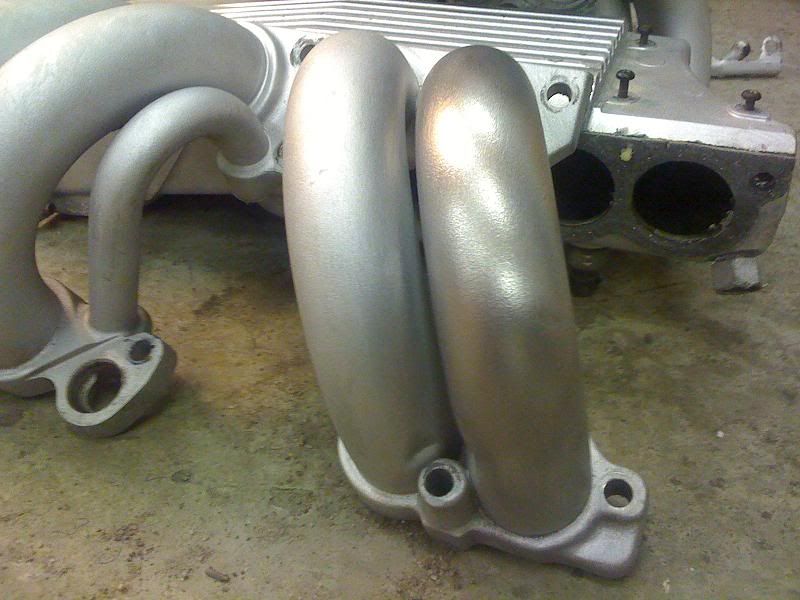
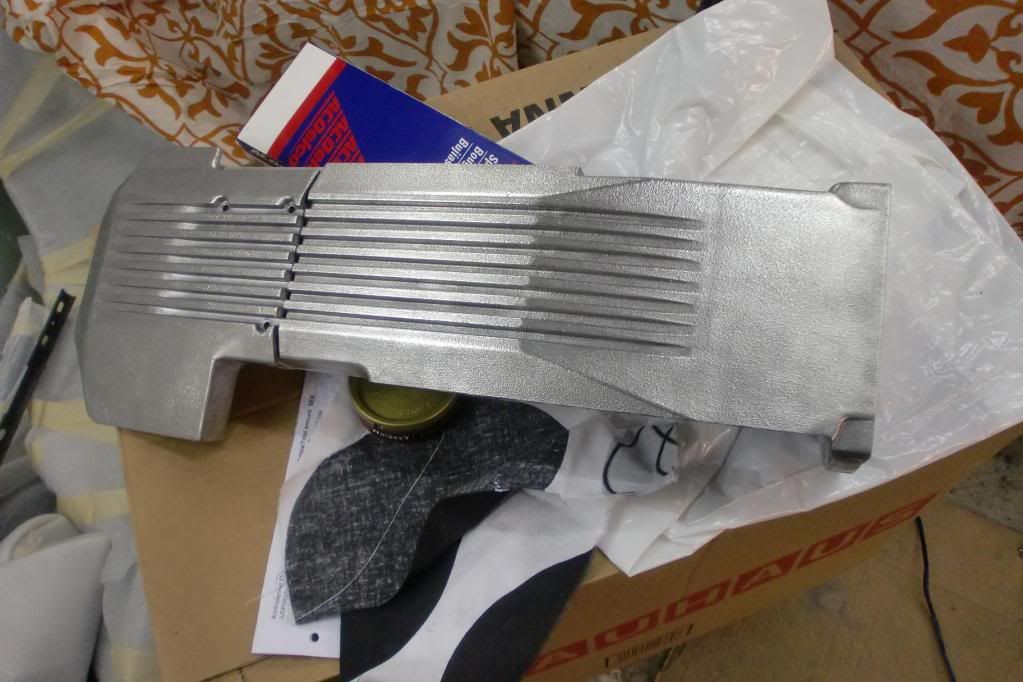
A couple of years ago i painted the runners and plenum. The paint was peeling off and they simply looked awful. So i started to work with them. Using a steelbrush mounted on a drillingmachine the hours started to get consumed. After brushing them down to the aluminum i rubbed them up using "Autosol" and then just wiped with a dry cloth and put on some wax. One pipe done...
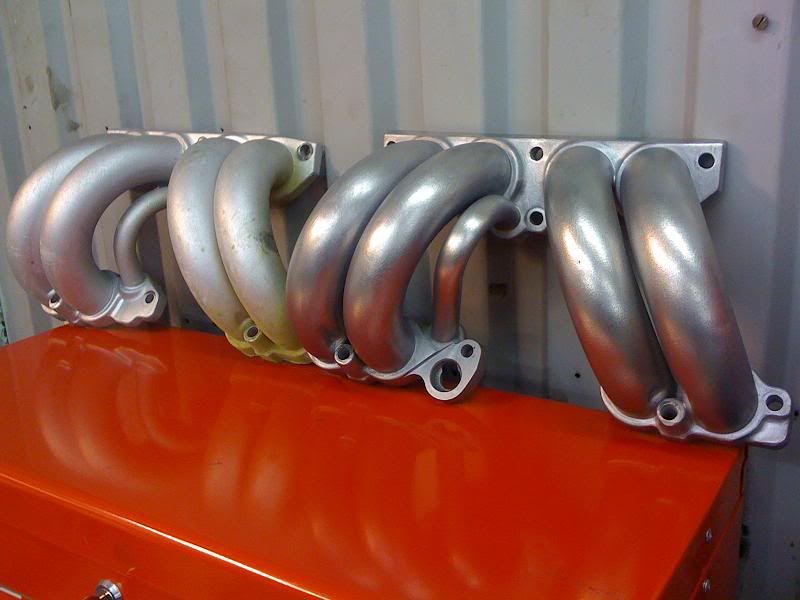
After many hours, one side done, "just" one more to go:
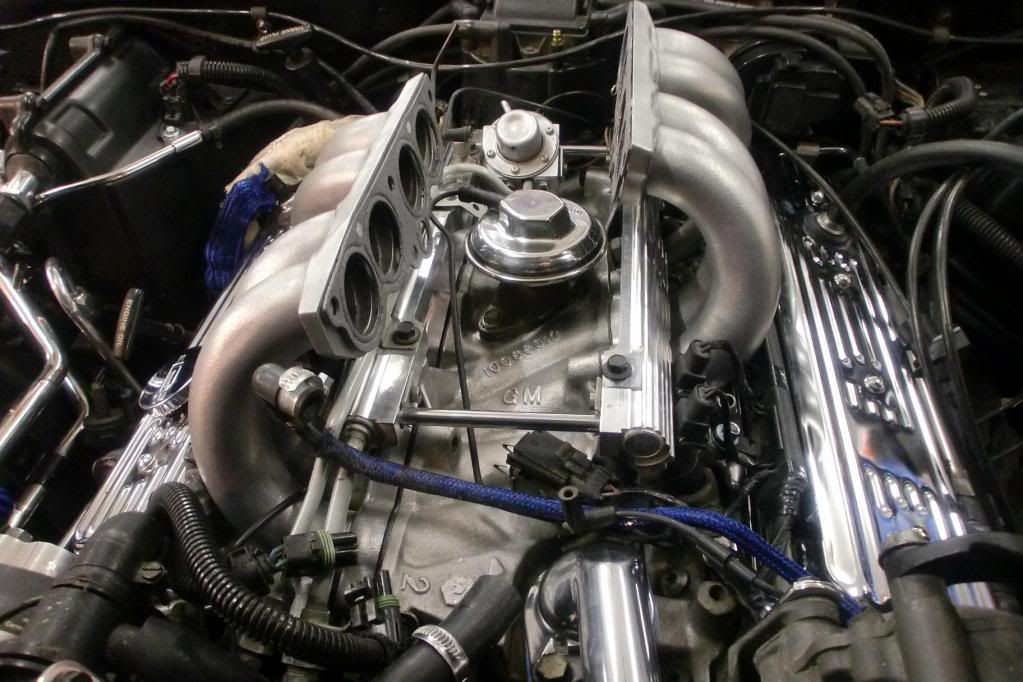
Spending a couple of nights in the garage with trying to clean up the manifold was well worth the time. I also polished that vacuum thing on top of the intake. This is what things looked like after a few months ( i will never ever again try to detail an engine compartment while the engine is still in there!!!!!)
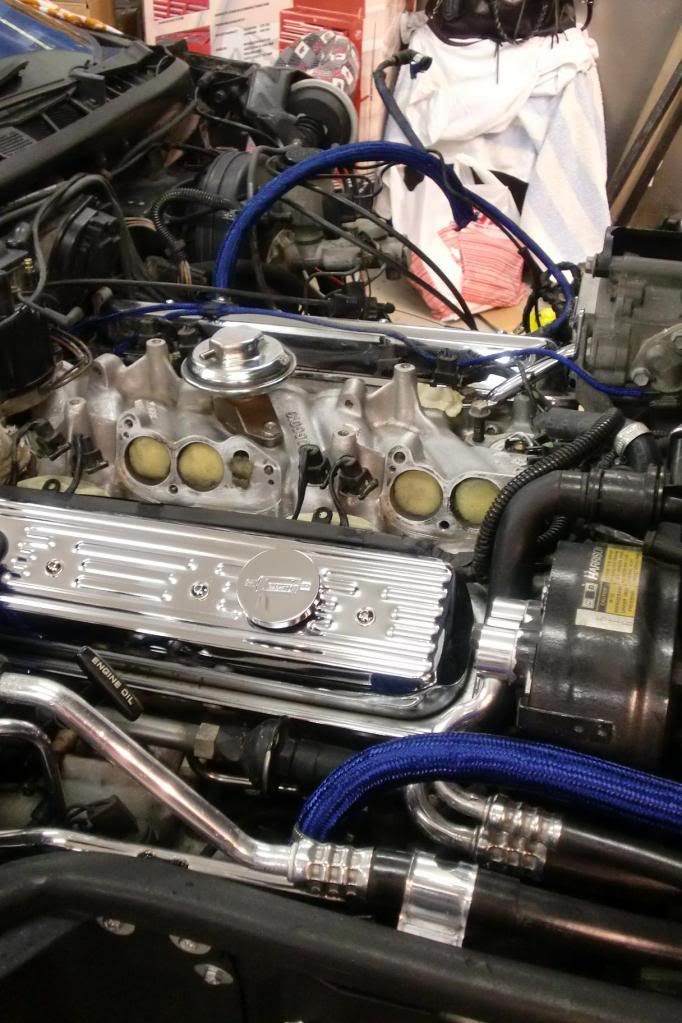
I did the same procedure with the plenum as with the runners. My intention was never to polish these parts because i would never get the original runners look good. I don´t have the right tools to do it either so i just wanted them to be smooth and clean.
Even though it is extremely time consuming to polish parts, it is so much fun seeing the result. I dont know how many hours i have spent of just sanding small parts to be able to polish them. I have to say that i admire myself from not loosing all my inspiration during all these months.
To spend 8 hours just to sand down a small bracket and polishing it is insane
Just to give you an idea.
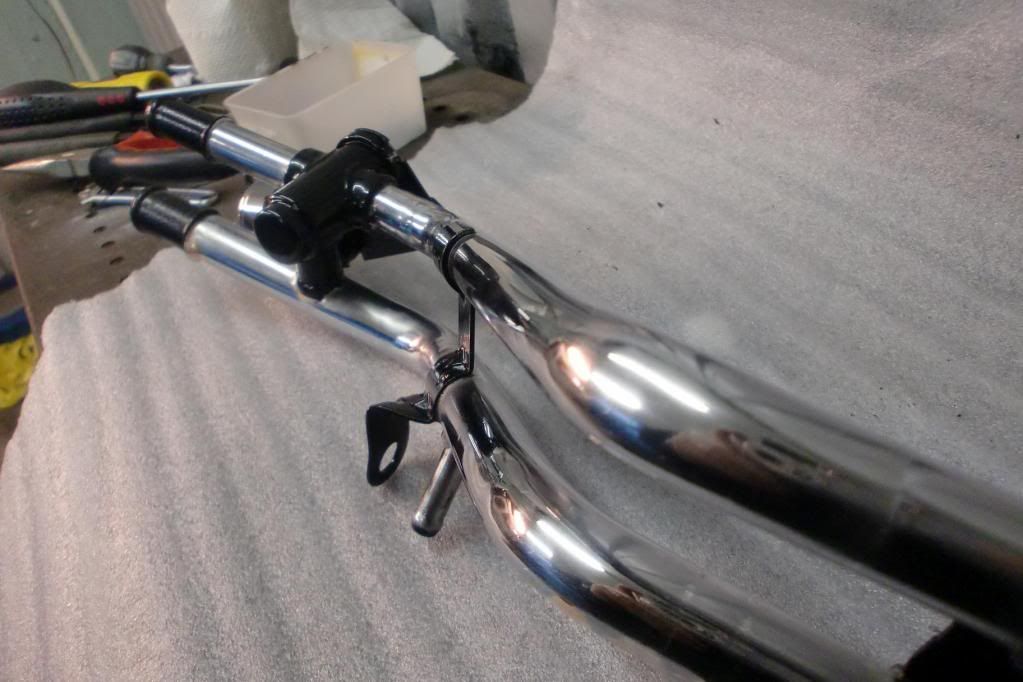
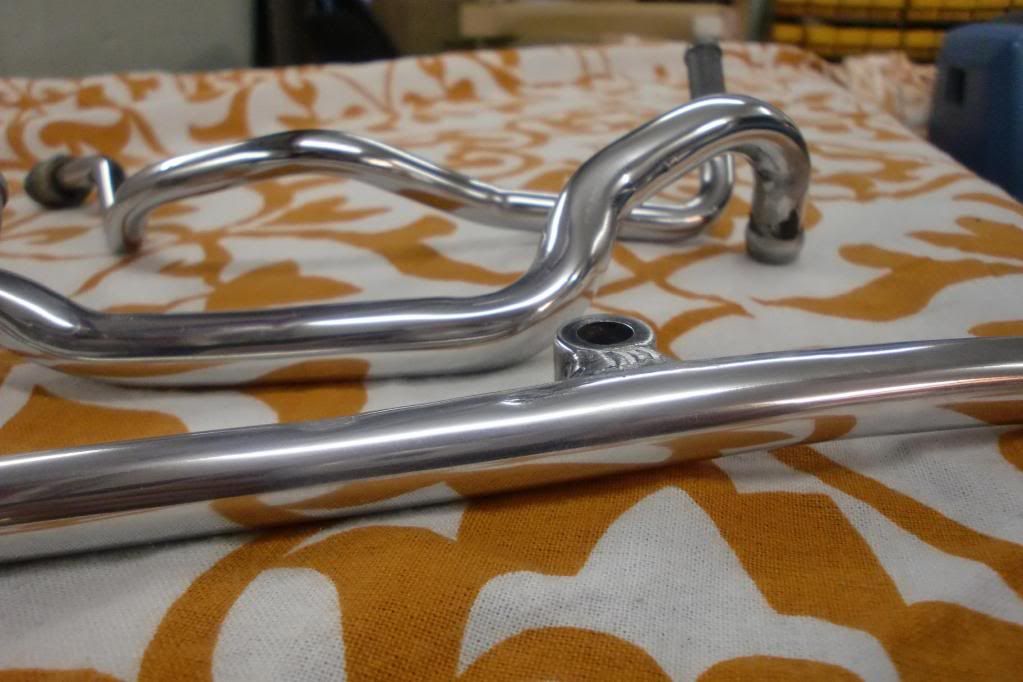
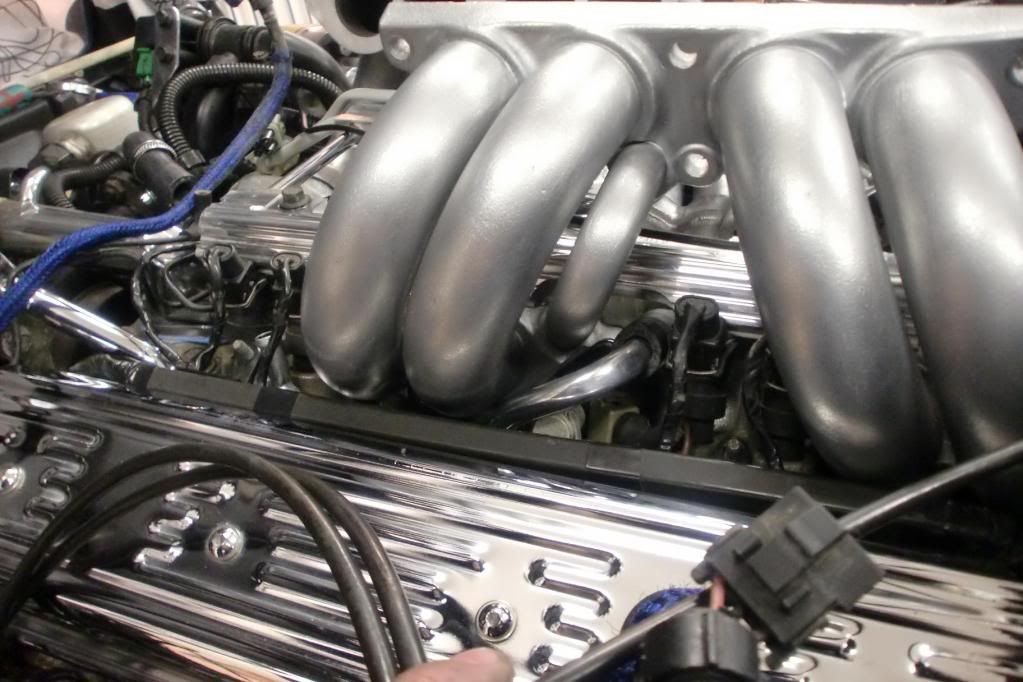
Look at the vacuum lines to the left in the picture:
I start with sanding them down with a 180 paper. This take approx 1 hour for the three pipes.
Next step is the 240 paper. I then continue with 320, 400, 600, 800, 1000 and finish of with 1200 paper. That means i spent somewhere around 8 hours working with them and polishing them with my machine. Thats why so many months has passed and i haven´t got that far (in my opinion). The result?
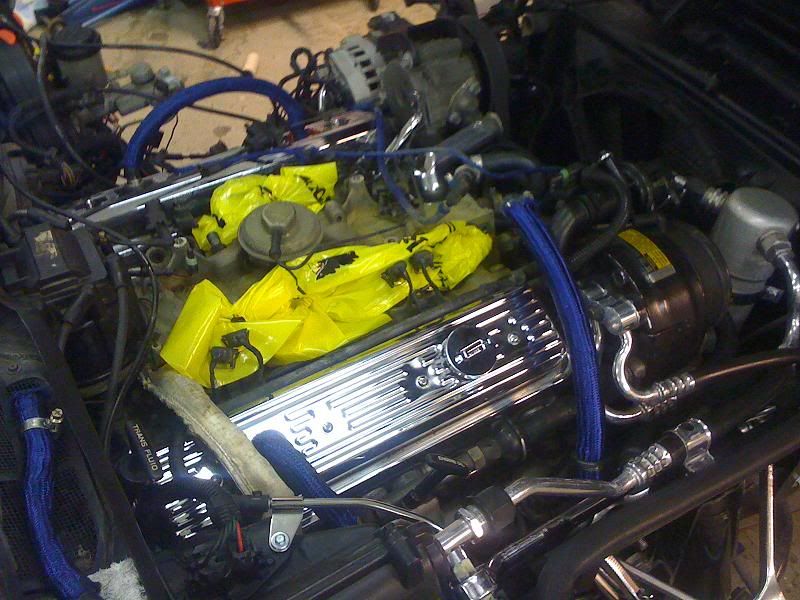
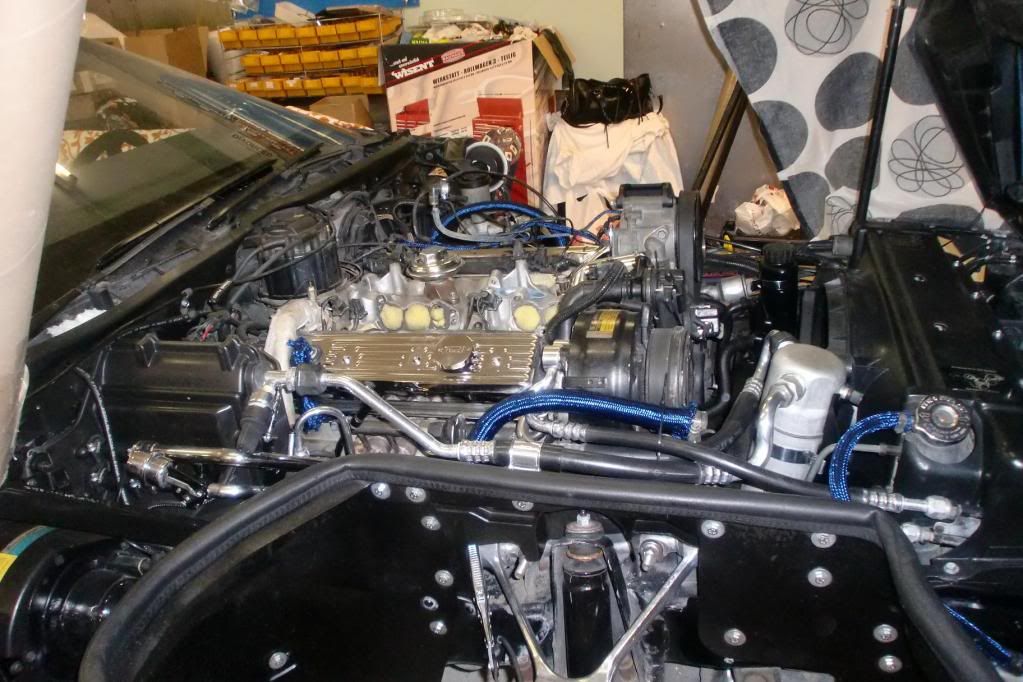
This week i finally started to put things together again...
Fuelrail in place again.
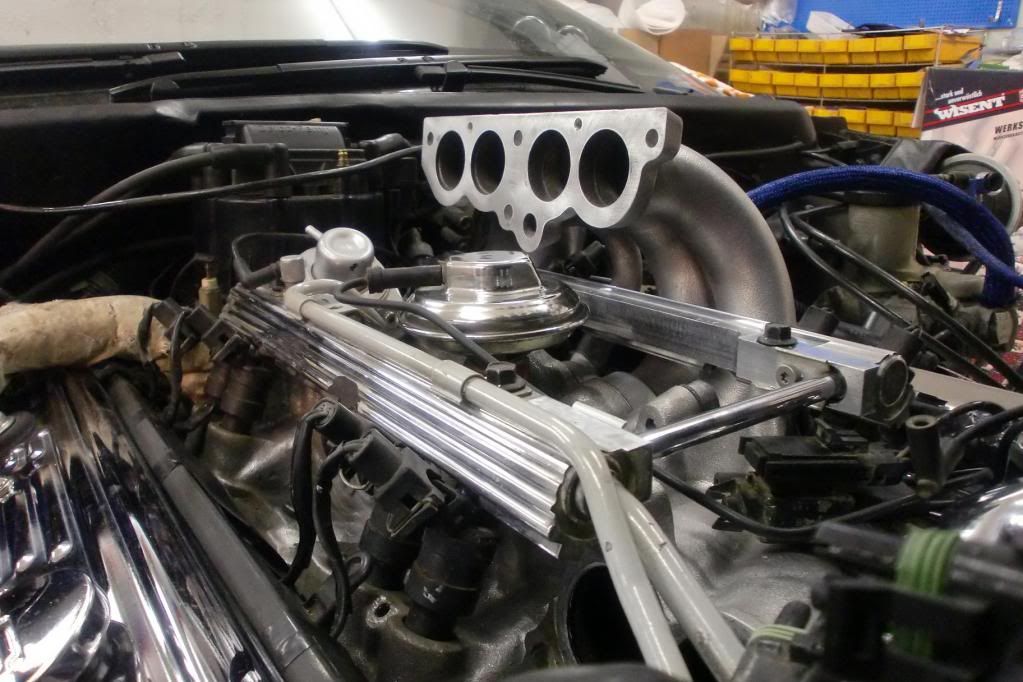
Runners lined up with new gaskets and ready to for the plenum.
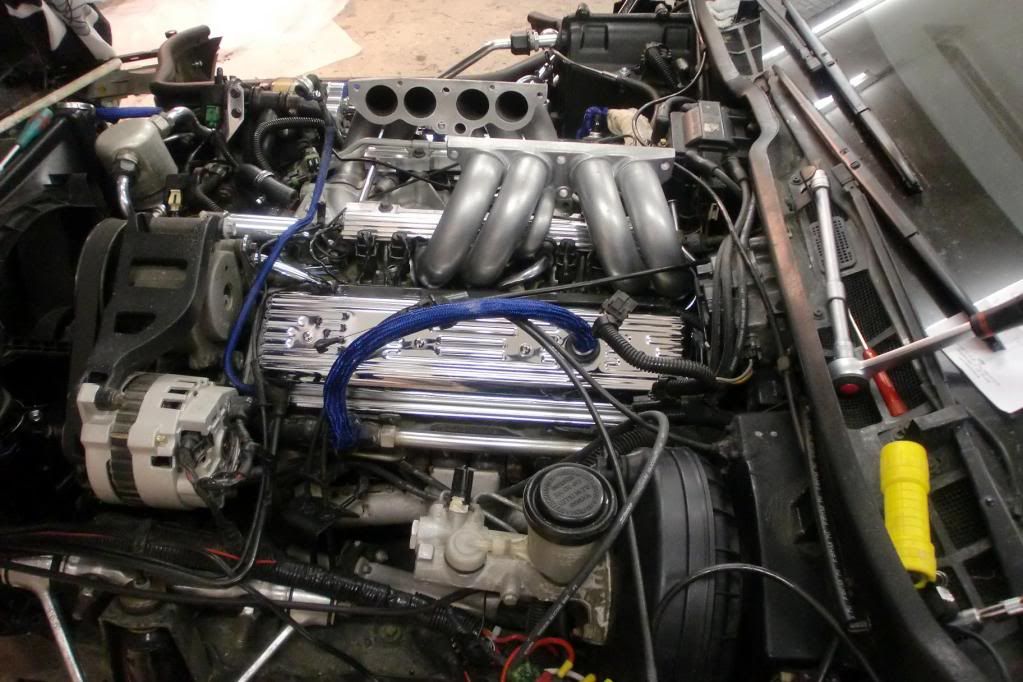
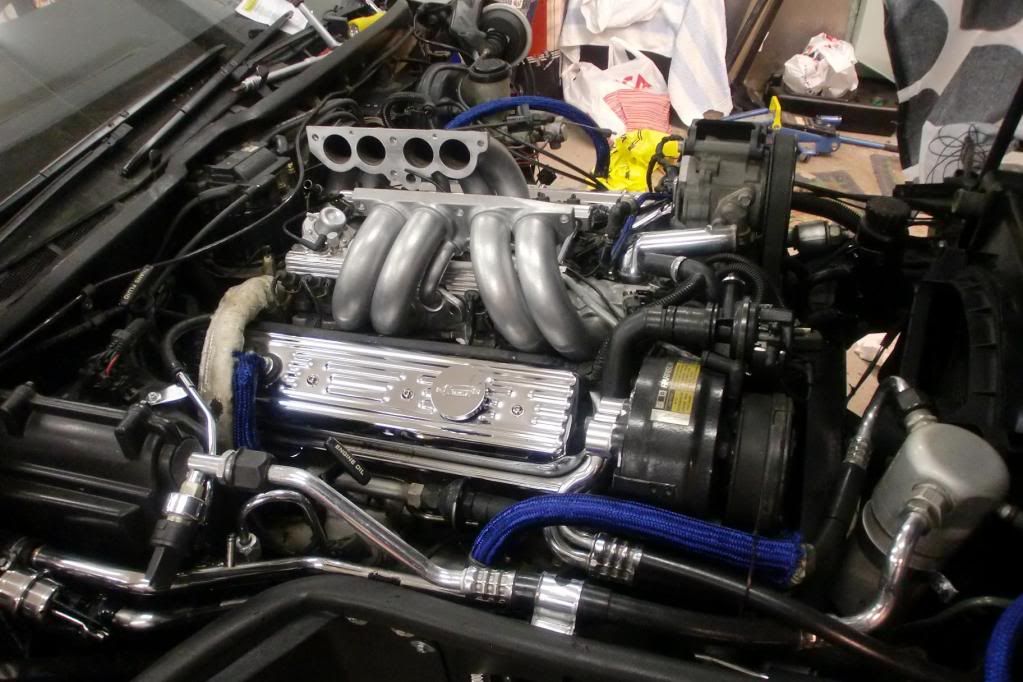
And the Plenum finally in place!

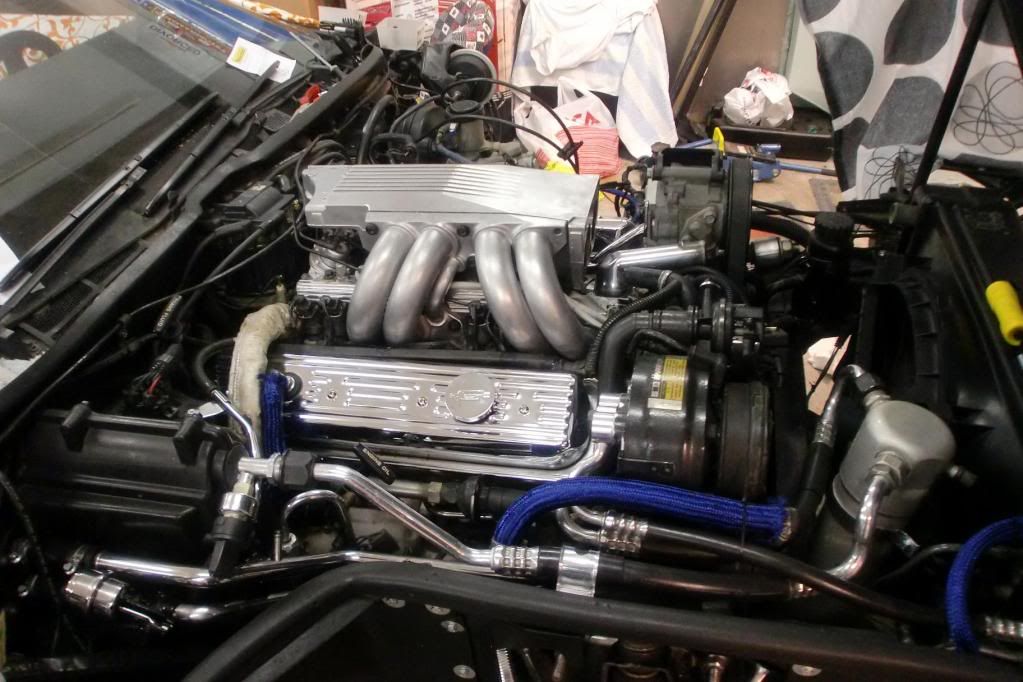
And thats where this week ended and part V aswell. i will continue my work tomorrow with putting everything back together. Now i finally see a light in the tunnel. but, i am not satisfied with it but it will be this way for this season. I wont pop the hood without feeling ashamed though.
Hope you enjoy Part V gentlemen and a special hello to you Dodo
Before i continue, i would like to say a big thank for all comments you have posted. They keep me taking the time to update this thread.
Enough talking, let get down to business. Part V is here gentlemen!
So as i ended up part IV, the car was just sitting in the garage and it still looks pretty much the same. I have had a minor coolingsystem leak and i started to search for it. I found it, one of the hoses that goes into the throttle body. I then gave the engine a good wash and was going to start putting things together. I started to paint the brackets that hold the side indicator/curvelight housing and was putting it back. I thought that i needed to wash the coolant reserve tank. When that was done i looked at the engine. The whole intake manifold and some of the runners where totally green from all the coolant liquid. Should i put the car back together as planned and deal with it later?
No, i could not. I guess i am way too much into perfection. So, i started to dismantle parts and by now i wanted to try to polish some parts.
It is extremely time consuming but once done it just looks so good. I have been dealing with the engine compartment for 6 months now, i am far far far away from pleased but wifie doesn´t allow me to keep up anymore with it. I have to start working with the body again if i am ever going to drive it this year.
At this time i had no thought of making a thread so i don´t have too many progress pictures, and some of them are taken with my phone, which is a a little bit sad now afterwards.
I would like to have one before and one after pic but....
This is pretty much how it looked when i started, i guess you can tell why i have been spending 6 months under the hood... There are alot of other things i have done that i haven´t mentioned. It would simply be too much to tell! But here is some of the things presented.
I started to work with the pipes that run to the heater element. The first piece i did. I spent somehwere around 6 hours of sanding it down and then finally polished them. After that i painted some of the parts black. The result:
After having the plenum and runners removed, you can see that the intake manifold is totally green from all the coolant fluid..
Intake now ready to be cleaned...
Some vacuum lines and the runners and plenum. you can see the mess on the runners from the coolant fluid..
The fuelrail dismantled and ready to be dealt with:
A couple of years ago i painted the runners and plenum. The paint was peeling off and they simply looked awful. So i started to work with them. Using a steelbrush mounted on a drillingmachine the hours started to get consumed. After brushing them down to the aluminum i rubbed them up using "Autosol" and then just wiped with a dry cloth and put on some wax. One pipe done...
After many hours, one side done, "just" one more to go:
Spending a couple of nights in the garage with trying to clean up the manifold was well worth the time. I also polished that vacuum thing on top of the intake. This is what things looked like after a few months ( i will never ever again try to detail an engine compartment while the engine is still in there!!!!!)
I did the same procedure with the plenum as with the runners. My intention was never to polish these parts because i would never get the original runners look good. I don´t have the right tools to do it either so i just wanted them to be smooth and clean.
Even though it is extremely time consuming to polish parts, it is so much fun seeing the result. I dont know how many hours i have spent of just sanding small parts to be able to polish them. I have to say that i admire myself from not loosing all my inspiration during all these months.
To spend 8 hours just to sand down a small bracket and polishing it is insane
Just to give you an idea.
Look at the vacuum lines to the left in the picture:
I start with sanding them down with a 180 paper. This take approx 1 hour for the three pipes.
Next step is the 240 paper. I then continue with 320, 400, 600, 800, 1000 and finish of with 1200 paper. That means i spent somewhere around 8 hours working with them and polishing them with my machine. Thats why so many months has passed and i haven´t got that far (in my opinion). The result?
This week i finally started to put things together again...
Fuelrail in place again.
Runners lined up with new gaskets and ready to for the plenum.
And the Plenum finally in place!
And thats where this week ended and part V aswell. i will continue my work tomorrow with putting everything back together. Now i finally see a light in the tunnel. but, i am not satisfied with it but it will be this way for this season. I wont pop the hood without feeling ashamed though.
Hope you enjoy Part V gentlemen and a special hello to you Dodo