How I fixed my curled up dash board pad
 03-13-2012, 09:39 PM
#1
Burning Brakes

Thread Starter
Member Since: Jul 2011
Location: Myrtle Beach South Carolina
Posts: 781
Likes: 0
Received 183 Likes
on
121 Posts

OK , after reading and searching this forum on dash problems, this is what I decided to do. It worked well for me and as of now, only time will tell the longevity of the repair. I purchased some adhesive to repair the dash pad, and after I removed the dash pad and looked at the seperated edges,I decided not to use adhesive, this was the route I opted for.
First thing after dash removal was to get my supplies and tools, first picture is my flexshaft ( basically a dremel on steroids, it has foot control and a handpiece on a flexible shaft),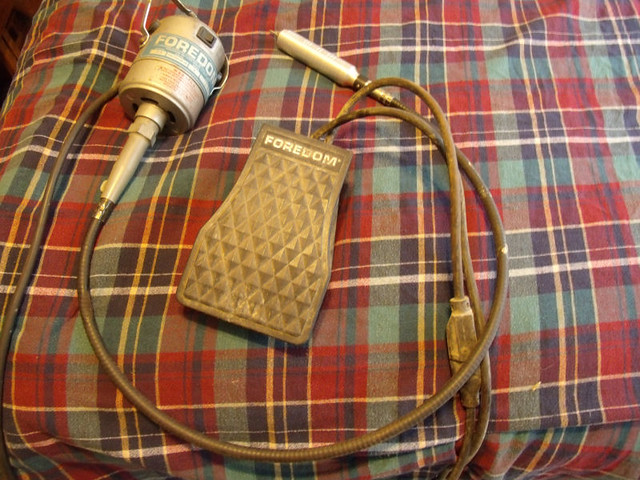
flex by chadv68, on Flickr
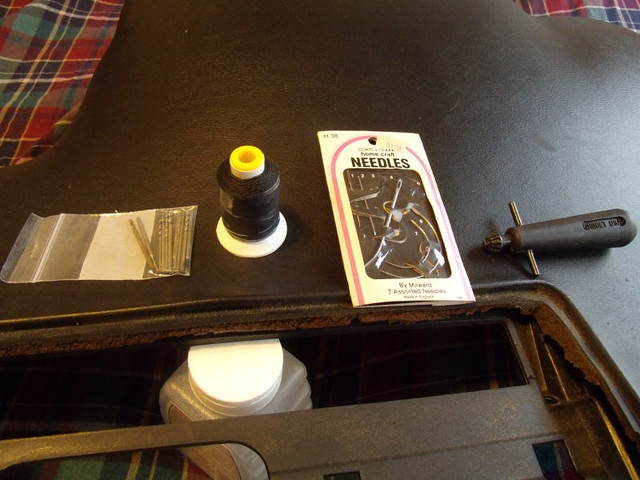
the second photo is of the supplies i used, 1/64" drill bits (I'm a jeweler and have tons of these that are worn and won't cut metal but do great on vinyl and plastic!) outdoor uv resistant heavy duty nylon thread,an upholstery needle, and the chuck key for my flexshaft .
step 2 by chadv68, on Flickr
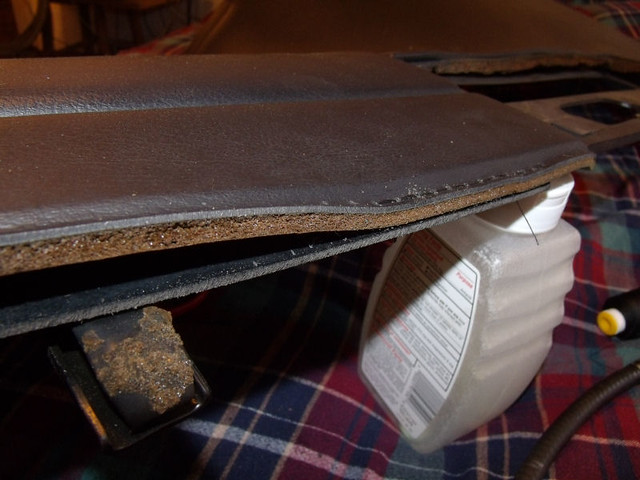
The next two pics are of how bad the seperation was. This was along the complete backside as well as the vent area

sep1 by chadv68, on Flickr
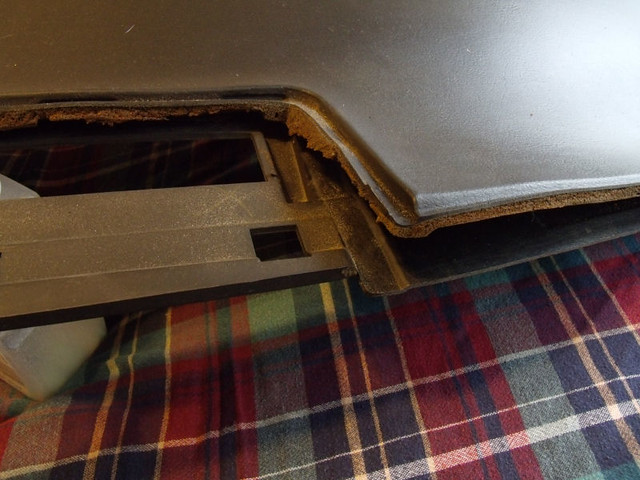
sep2 by chadv68, on Flickr
Next, I start to drillholes straight thru the top , foam and bottom plastic. I tried to keep the spacing around 1/4 of an inch betwen holes, like I said, tried. This was done around the complete back perimeter of the pad,
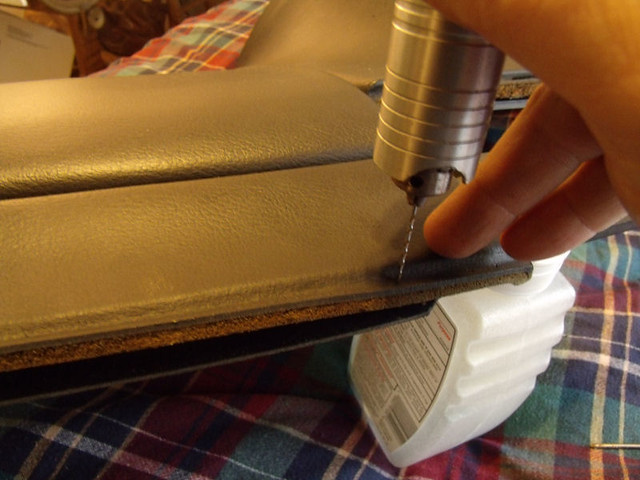
step3 by chadv68, on Flickr
Next, I started the stitching, I am not sure of the name of the stitch I used but I call it a double stitch,

step3a by chadv68, on Flickr
This is a run of stitching, I did it in sections since it was being by hand and I didn't want to spend all day untangling knots,
step4 by chadv68, on Flickr
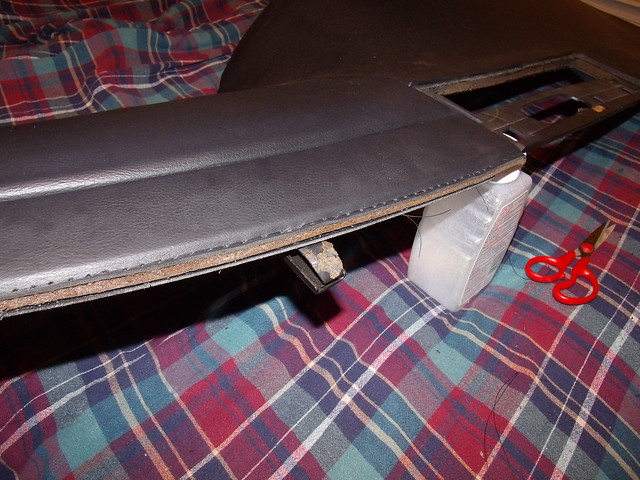
This is the completed back. This took about two hours of drilling and stitching but I like the fact that the foam is back where it started and not removed so I could glue the top down. I know this won't be for everybody or maybe even anybody else, but I am happy with the results. Thanks for looking......
finish by chadv68, on Flickr
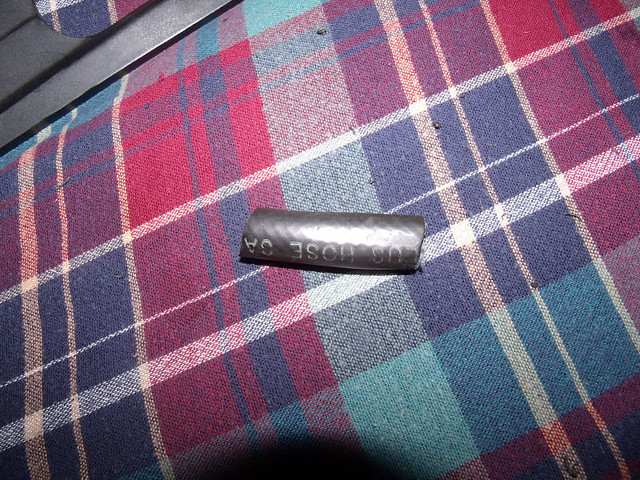
One last thing, is this some kind of anti-squeak or anti-rattle piece? I found this wedged between the dash and the dash frame. I know all of the reviews for 1995 Corvettes said they addressed those issues, but I hope this was not how they did it! Anybody else find anything like this before?
antisqueak by chadv68, on Flickr
First thing after dash removal was to get my supplies and tools, first picture is my flexshaft ( basically a dremel on steroids, it has foot control and a handpiece on a flexible shaft),
flex by chadv68, on Flickr
the second photo is of the supplies i used, 1/64" drill bits (I'm a jeweler and have tons of these that are worn and won't cut metal but do great on vinyl and plastic!) outdoor uv resistant heavy duty nylon thread,an upholstery needle, and the chuck key for my flexshaft .
step 2 by chadv68, on Flickr
The next two pics are of how bad the seperation was. This was along the complete backside as well as the vent area
sep1 by chadv68, on Flickr
sep2 by chadv68, on Flickr
Next, I start to drillholes straight thru the top , foam and bottom plastic. I tried to keep the spacing around 1/4 of an inch betwen holes, like I said, tried. This was done around the complete back perimeter of the pad,
step3 by chadv68, on Flickr
Next, I started the stitching, I am not sure of the name of the stitch I used but I call it a double stitch,
step3a by chadv68, on Flickr
This is a run of stitching, I did it in sections since it was being by hand and I didn't want to spend all day untangling knots,
step4 by chadv68, on Flickr
This is the completed back. This took about two hours of drilling and stitching but I like the fact that the foam is back where it started and not removed so I could glue the top down. I know this won't be for everybody or maybe even anybody else, but I am happy with the results. Thanks for looking......
finish by chadv68, on Flickr
One last thing, is this some kind of anti-squeak or anti-rattle piece? I found this wedged between the dash and the dash frame. I know all of the reviews for 1995 Corvettes said they addressed those issues, but I hope this was not how they did it! Anybody else find anything like this before?
antisqueak by chadv68, on Flickr

The following users liked this post:
thunder1951 (05-13-2016)


 ...Looks good...What a great fix..


