Repainting my front bumper, 1993 Ruby Red Saturday project.


 09-17-2013, 02:55 PM
#42
Melting Slicks

Great job. I've always loved that color. I bought my paint from the same guys, I was very impressed with the paint quality and customer service.
I just finished painting my targa top and it will take a lot of paint to get the factory finish look. One can of epoxy primer, one can of sandable primer/sealer and at least three 12oz cans of color and three 12oz cans of clear. Always get extra in case something happens. In my case, something fell on the top while spraying the base coat. You want to be sure to paint when the surface is cool and dry and not in direct sunlight. The respirator is a must too. I bet my neighbors wished they had one when I was painting.  Painting is the easy part, its the prep and masking that takes forever.
Painting is the easy part, its the prep and masking that takes forever.
 09-18-2013, 01:16 AM
#44
Pro

Thread Starter
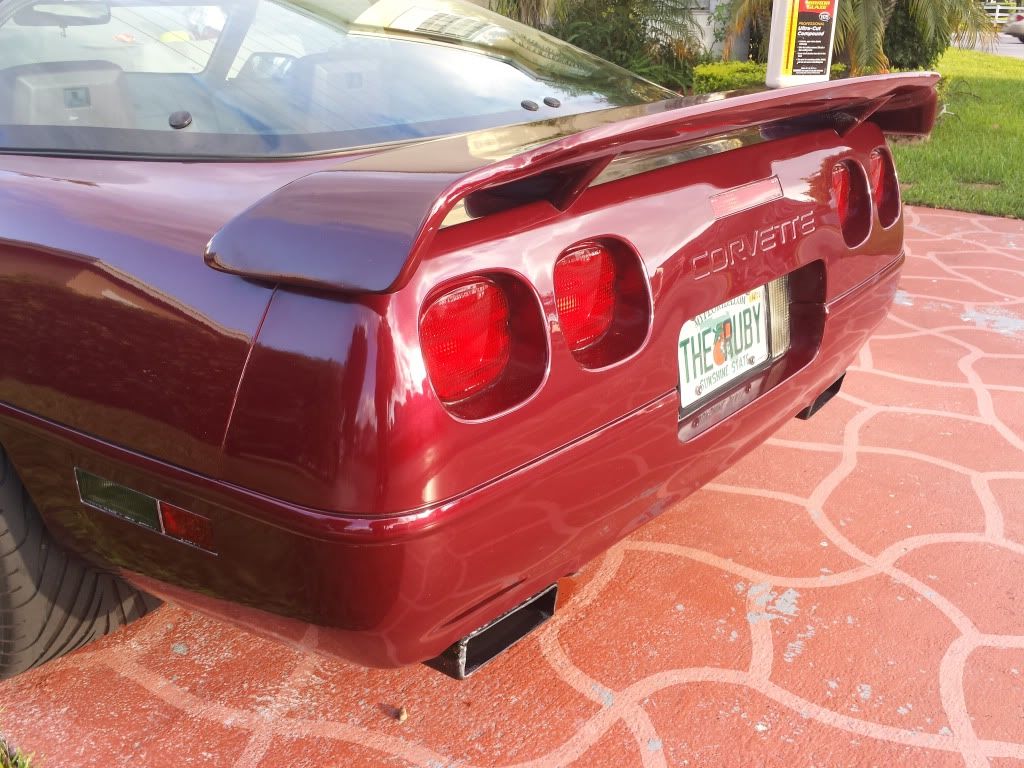
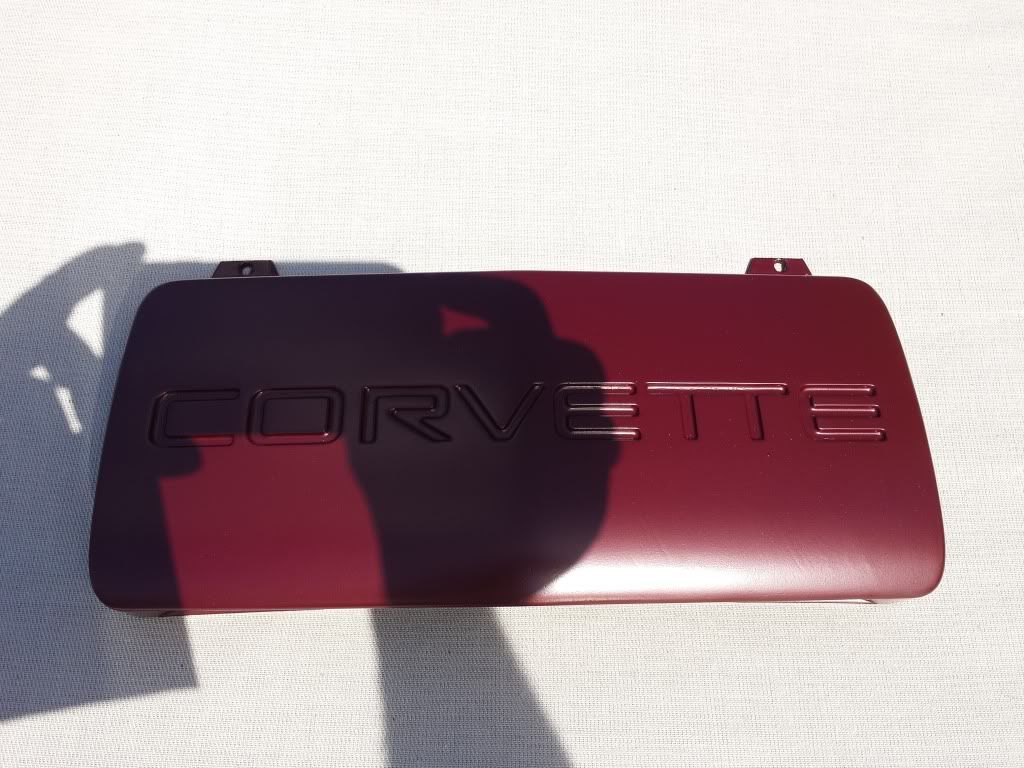
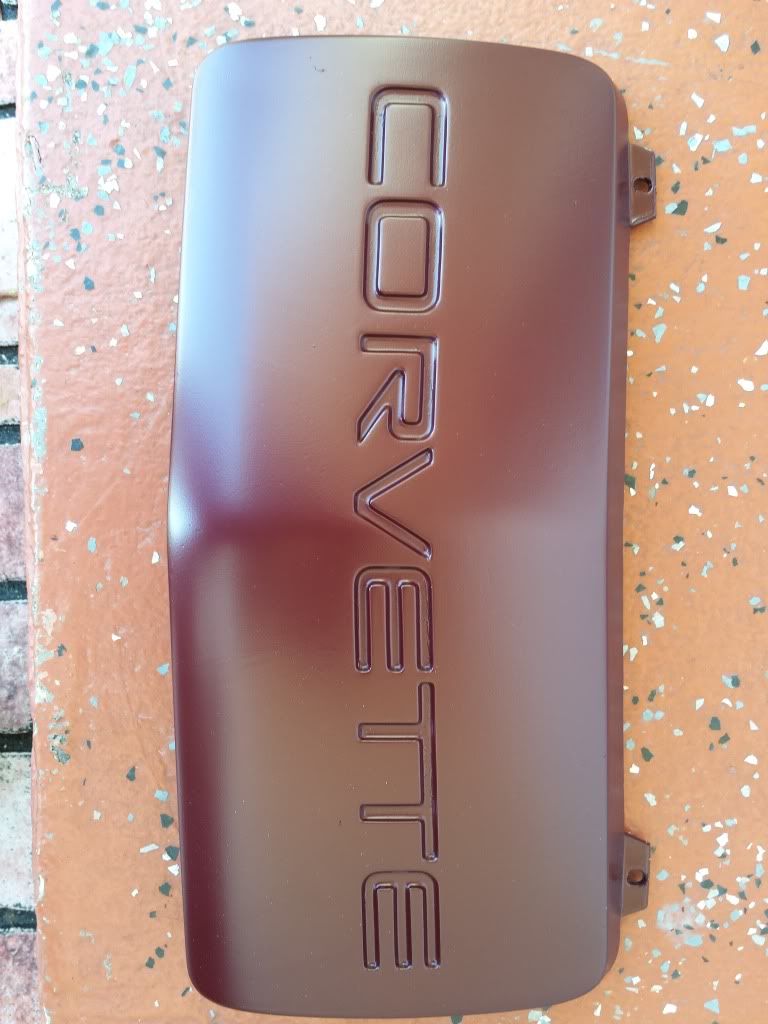
I re shot the rear bumper with 2k clear over the weekend.
Very pleased with the results again.
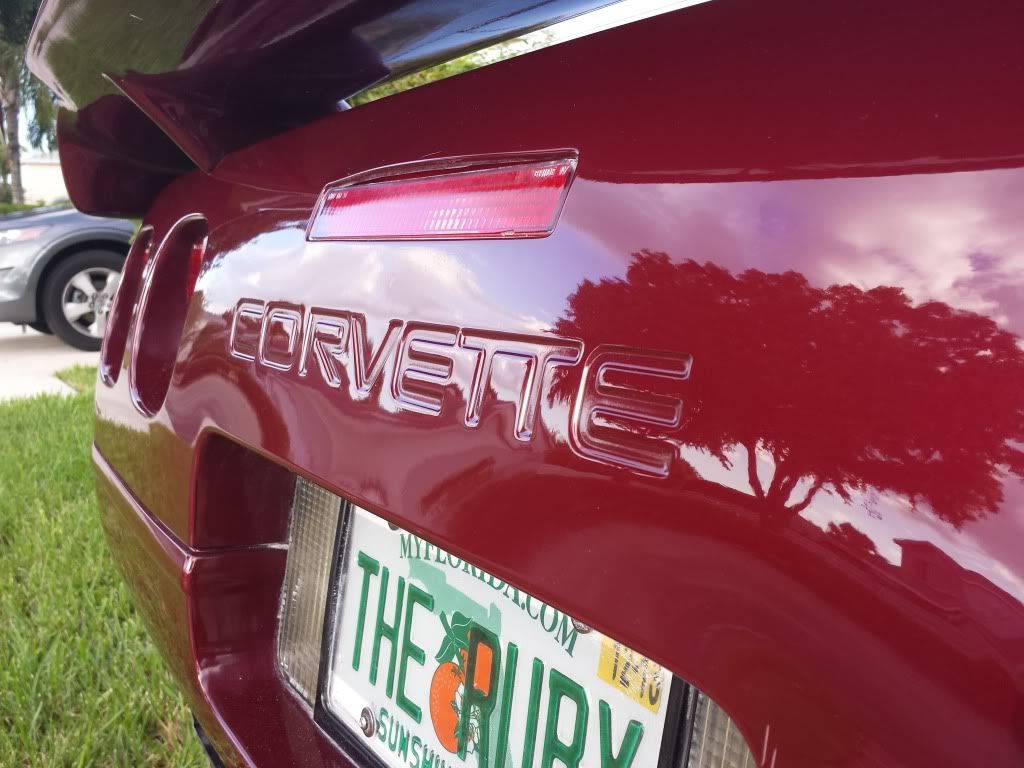
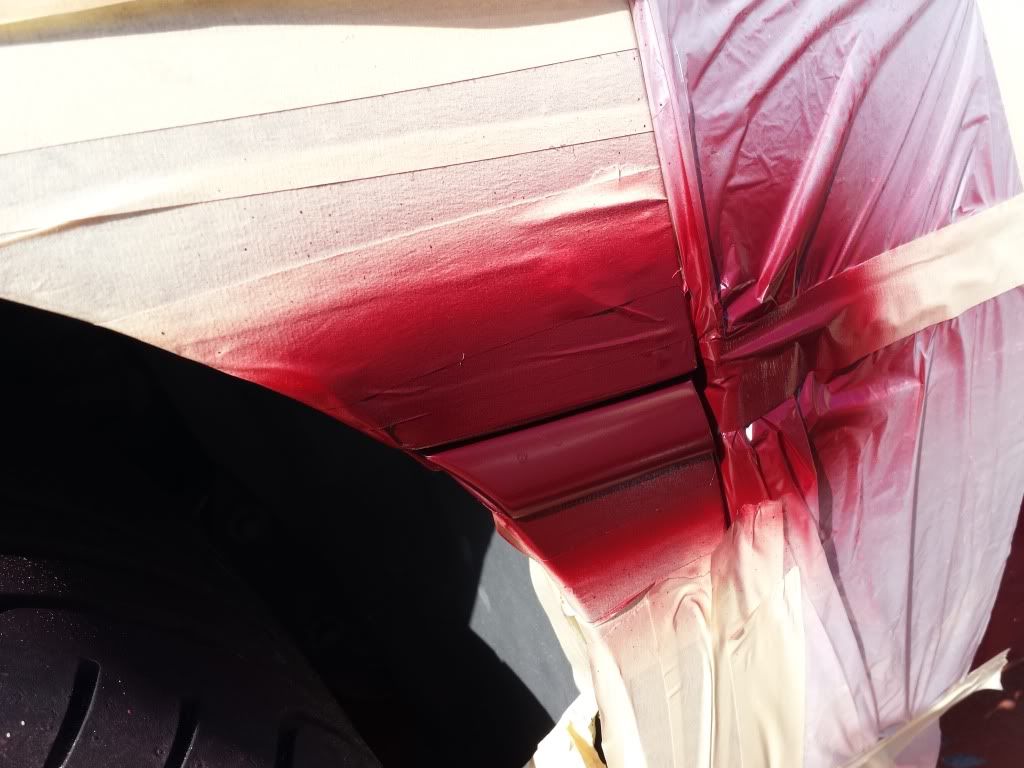
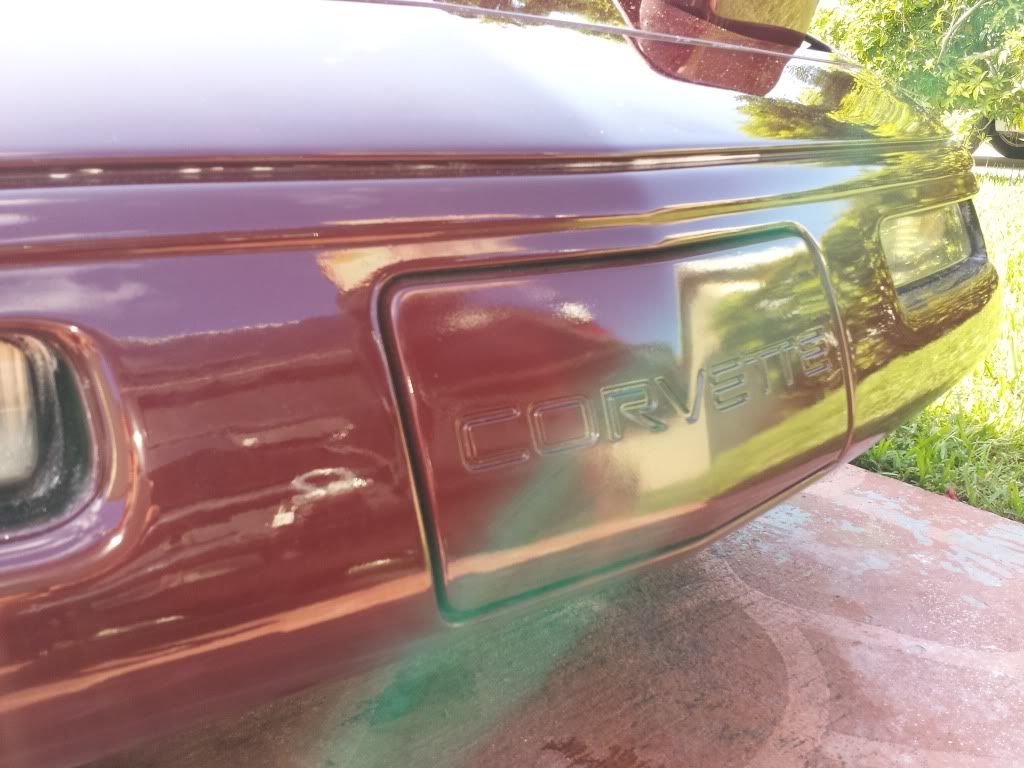
The stop light recess' and bottom side under the license plate were all faded and clear was starting to flake off.
On the top side of the bumper were it meets the body, the clear was flakingboff all over the place in tiny bits.
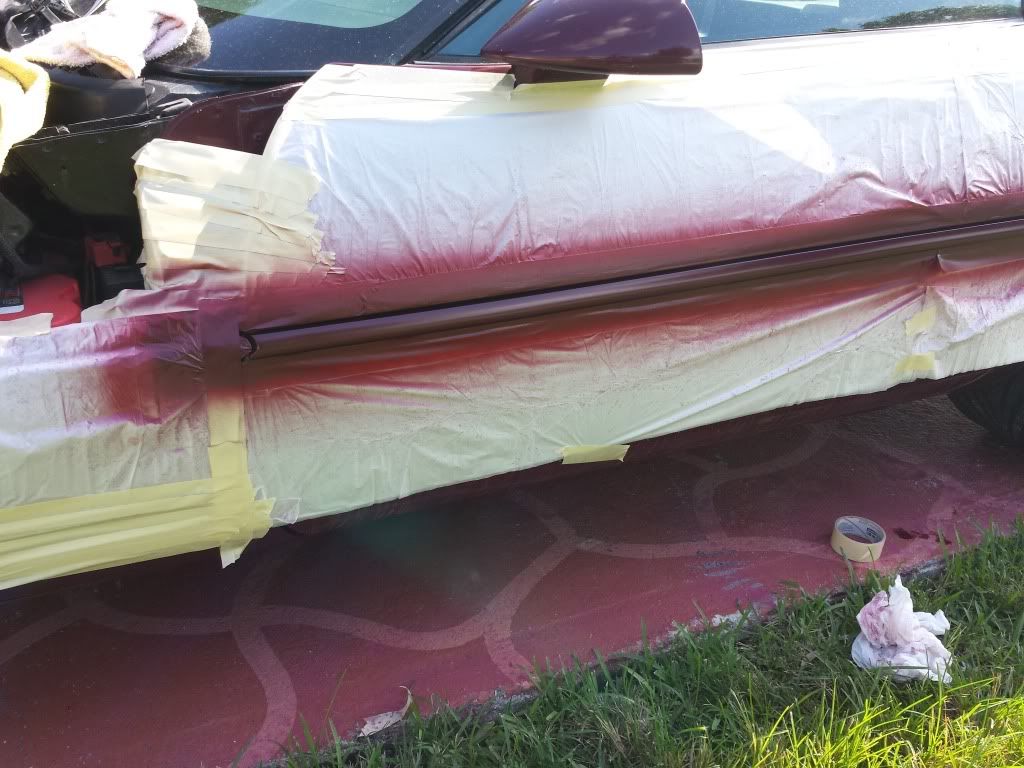
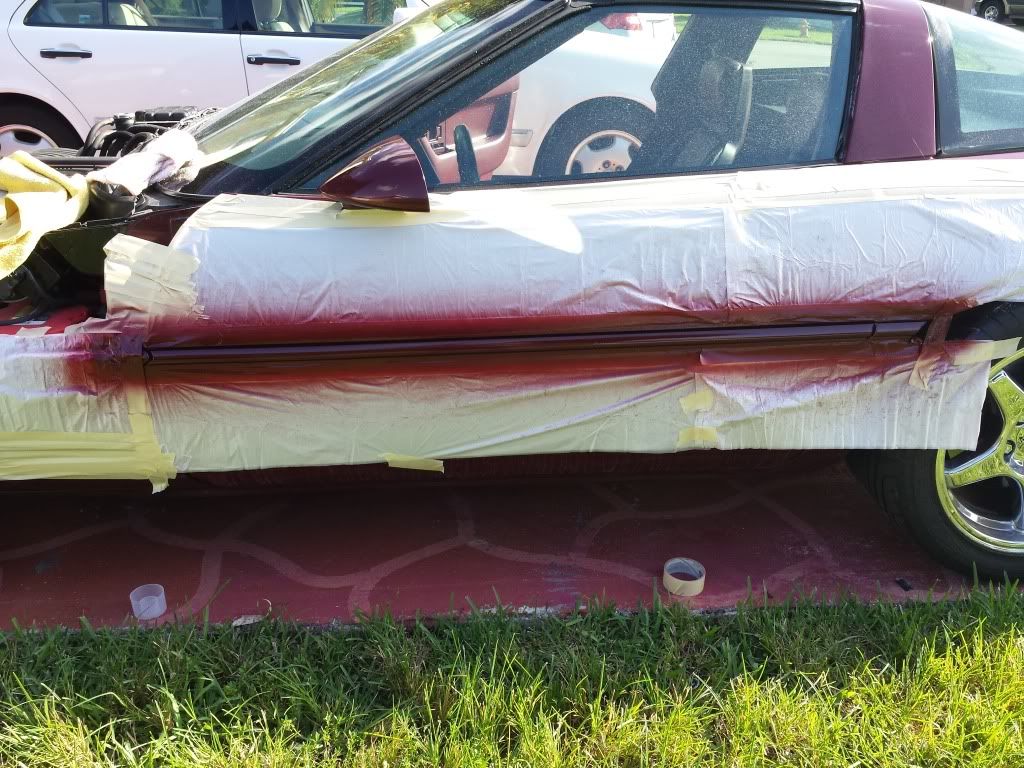
I took the rear wing off hoping to leave it that way, but unfortunately the holes on the body would require a larger body and paint repair on the rear quarters, so I just masked all the borders on the body that I did not want to sand off, and sanded the clear off from the bumper with 800 / 1000 grit, and then washed it really well with dish soap.
After dry time, masking again and covering most of the rear of the car with two layers of paper ( I threw an old car cover over the top to help prevent overspray towards the front.)
I used some prep solvent and lint free tack cloth for final wiping, and shot several coats of 2K clear over the original base color.
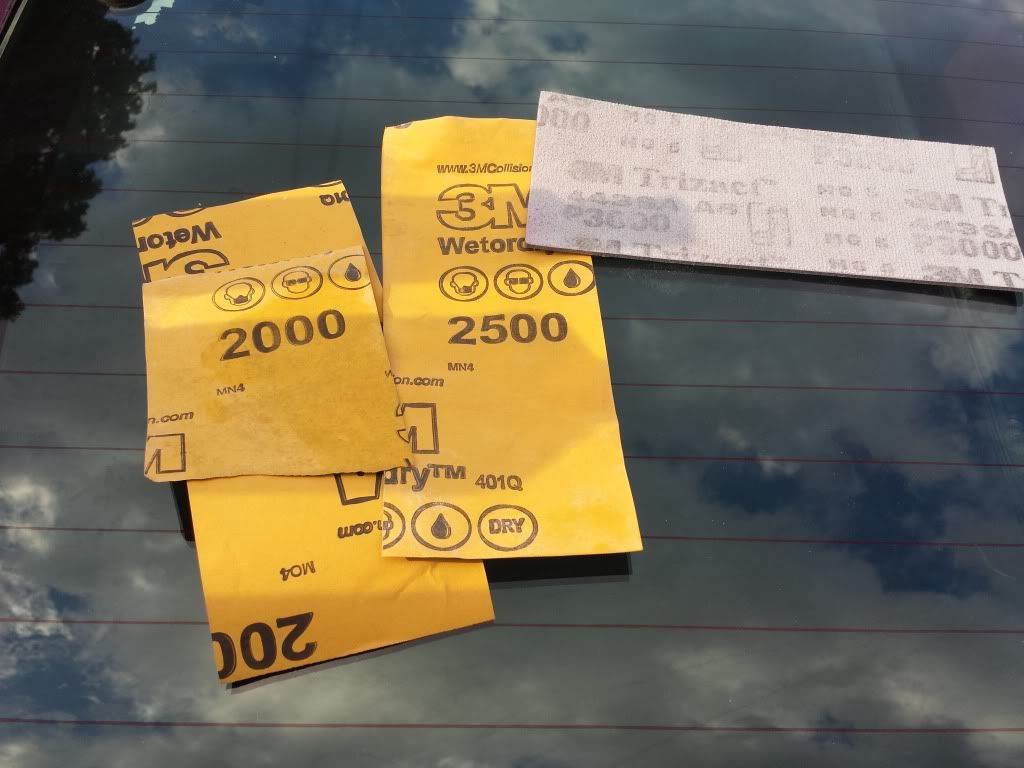
I waited about 24 hours and did some final sanding with 2000/2500/3000 grit amd got rid of all signs of orange peel, and did one first polish with turtle wax rubbing compound. Very nice shine everywhere already, and I still need to do the final polishing with glaze and mirror glaze from Mother's. I bought Mother's power ball and power cone to help me polish the stop light recessed areas, and they are coming out very nice.
I did not take pictures of the process as I did with the front, but I will post some after the final polish has been completed once I return home from this trip.
The wing will be reinstalled for now, until I can get the full paint job and body work to cover the holes.
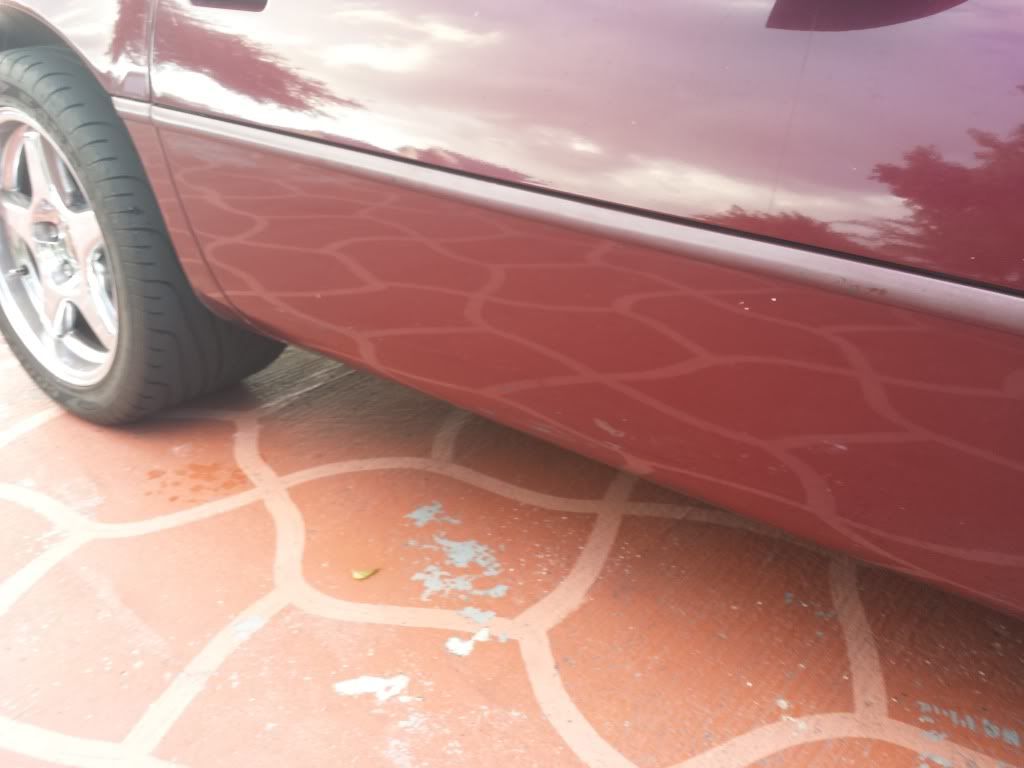
The last thing I need to finish my paint refinishing, will be to take off the door and aft of door moldings, sand, 2k prime, base color coat and 2k clear coat on them. After seeing the bumpers coming back to life so nicely, the faded moldings stick up like sore thumbs.
Thank you every one for following up and words of encouragement. This has been by far one of the most rewarding little projects I have done, and I still can't get over how great it has come out with such little investment.
Very pleased with the results again.
The stop light recess' and bottom side under the license plate were all faded and clear was starting to flake off.
On the top side of the bumper were it meets the body, the clear was flakingboff all over the place in tiny bits.
I took the rear wing off hoping to leave it that way, but unfortunately the holes on the body would require a larger body and paint repair on the rear quarters, so I just masked all the borders on the body that I did not want to sand off, and sanded the clear off from the bumper with 800 / 1000 grit, and then washed it really well with dish soap.
After dry time, masking again and covering most of the rear of the car with two layers of paper ( I threw an old car cover over the top to help prevent overspray towards the front.)
I used some prep solvent and lint free tack cloth for final wiping, and shot several coats of 2K clear over the original base color.
I waited about 24 hours and did some final sanding with 2000/2500/3000 grit amd got rid of all signs of orange peel, and did one first polish with turtle wax rubbing compound. Very nice shine everywhere already, and I still need to do the final polishing with glaze and mirror glaze from Mother's. I bought Mother's power ball and power cone to help me polish the stop light recessed areas, and they are coming out very nice.
I did not take pictures of the process as I did with the front, but I will post some after the final polish has been completed once I return home from this trip.
The wing will be reinstalled for now, until I can get the full paint job and body work to cover the holes.
The last thing I need to finish my paint refinishing, will be to take off the door and aft of door moldings, sand, 2k prime, base color coat and 2k clear coat on them. After seeing the bumpers coming back to life so nicely, the faded moldings stick up like sore thumbs.
Thank you every one for following up and words of encouragement. This has been by far one of the most rewarding little projects I have done, and I still can't get over how great it has come out with such little investment.
Last edited by speedycat3; 09-28-2013 at 09:34 AM.


 09-23-2013, 12:17 AM
#46
Pro
Thread Starter
The primer was white in color. I did not want to use a red primer so as not to darken too much the base color coat.
Once I get back home I will be able to finish the polishing and also repaint and clear the belt moldings.
Once I get back home I will be able to finish the polishing and also repaint and clear the belt moldings.
09-27-2013, 06:51 PM
#47
Pro
Thread Starter
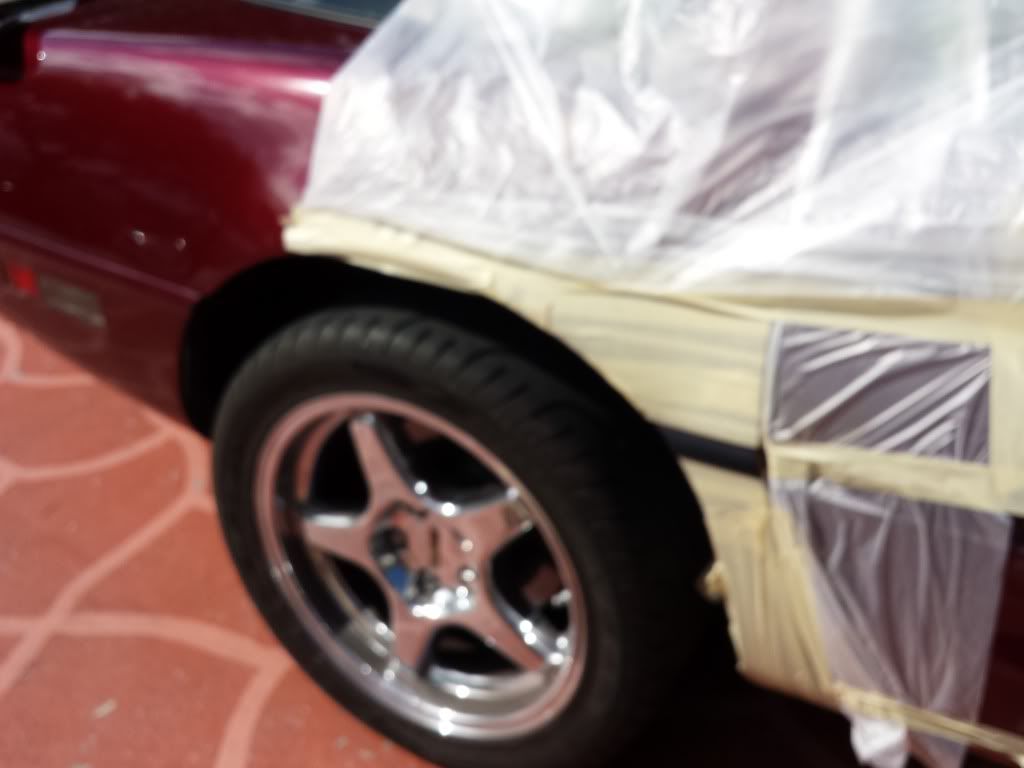
Ok... After a work trip, I was able to get some time off and complete the final sanding and polishing on both bumpers.
This concludes stage 2 of the appearance makeover, and I got to say I am quite satisfied.
I do not have "before" pictures of the rear bumper, but both corners were faded and the clear coat had started to peel pretty badly on the top end.
Please to not get hung up on why I kept the spoiler wing or how it would have been easier to take it off since I had to take it off anyway. I simply did not want to get involved in repairing the holes and extending the body work into the quarter panels since I did not have the time to do it correctly, and I will do that at a later date once I take the car in for a full paint job.
Anyway, here some pictures for you to see the end results.
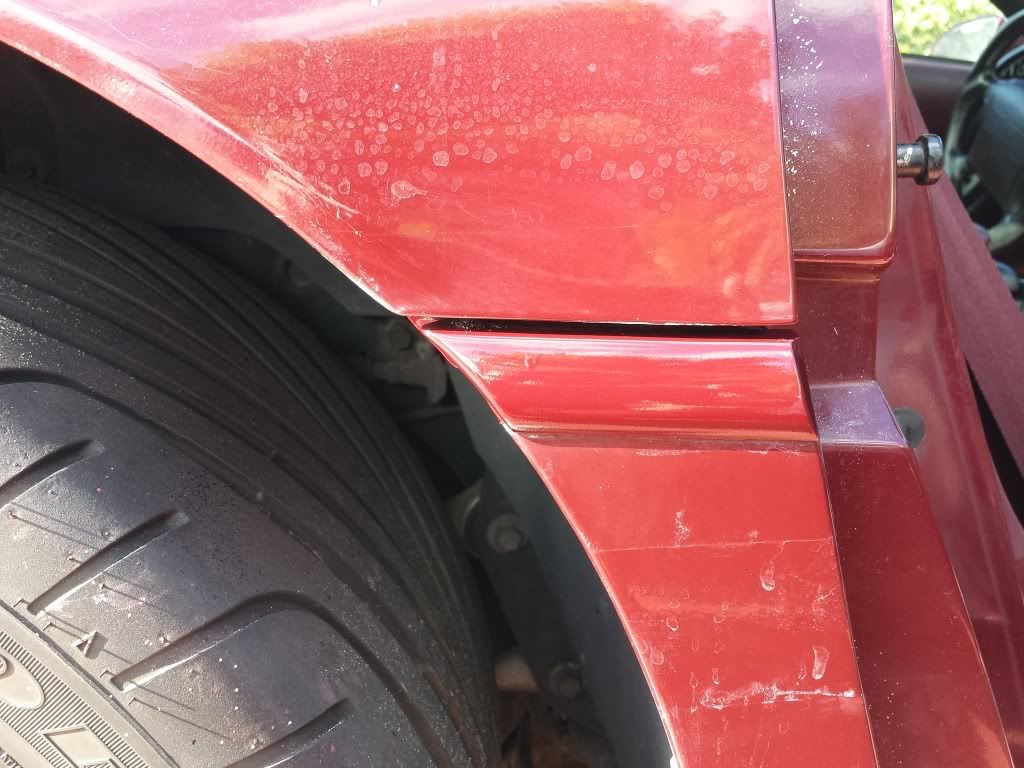
The bottom portion of every light hole as well as the recess where the plate sits in were faded and clear coat was super thin and brittle.
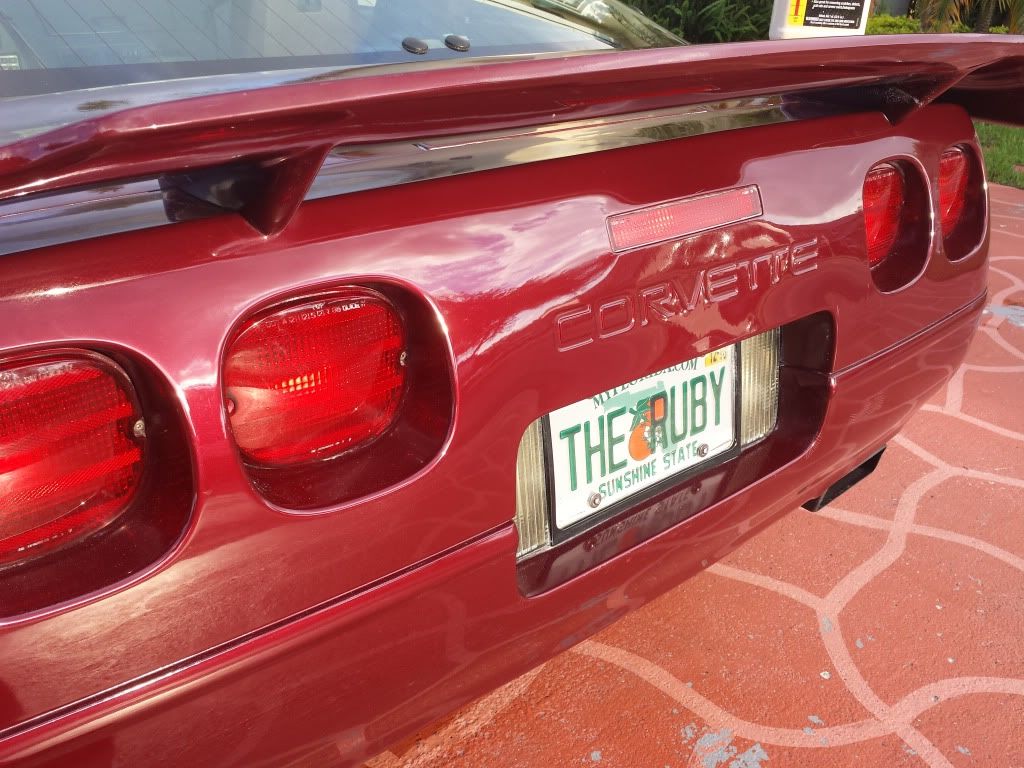

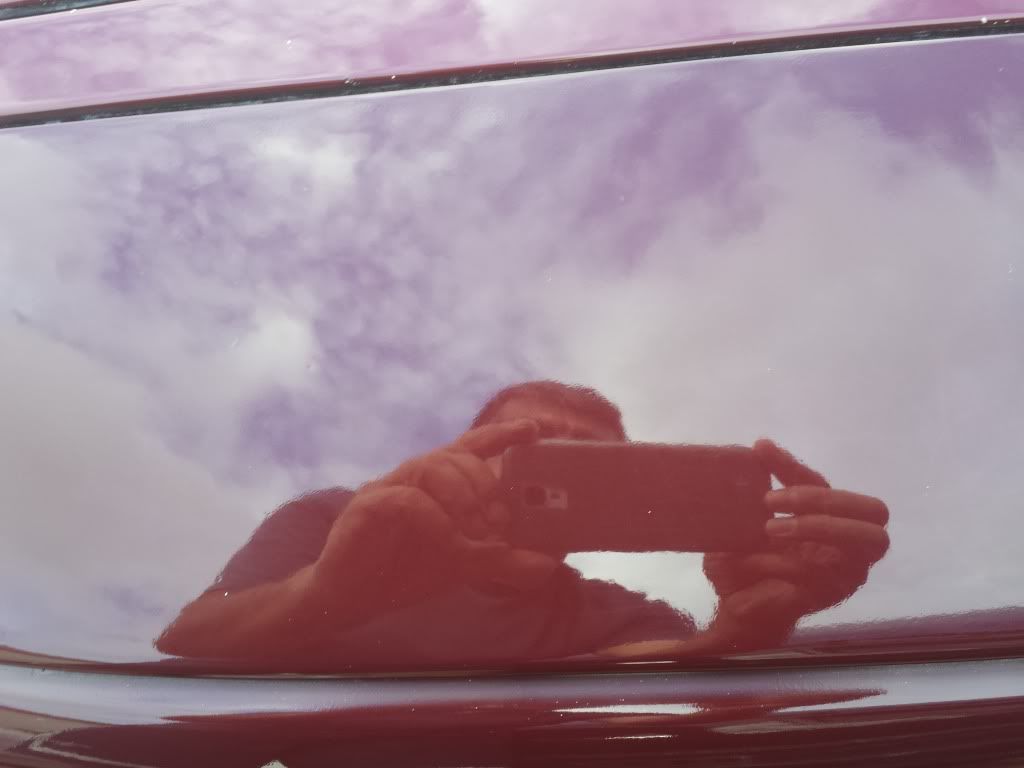
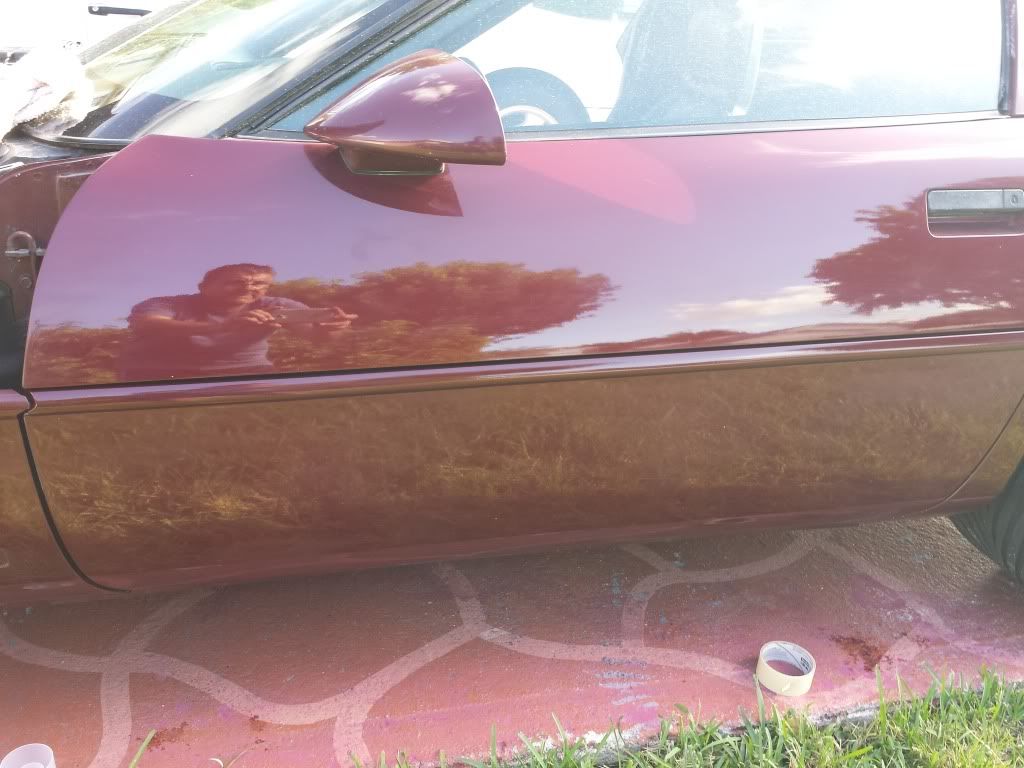
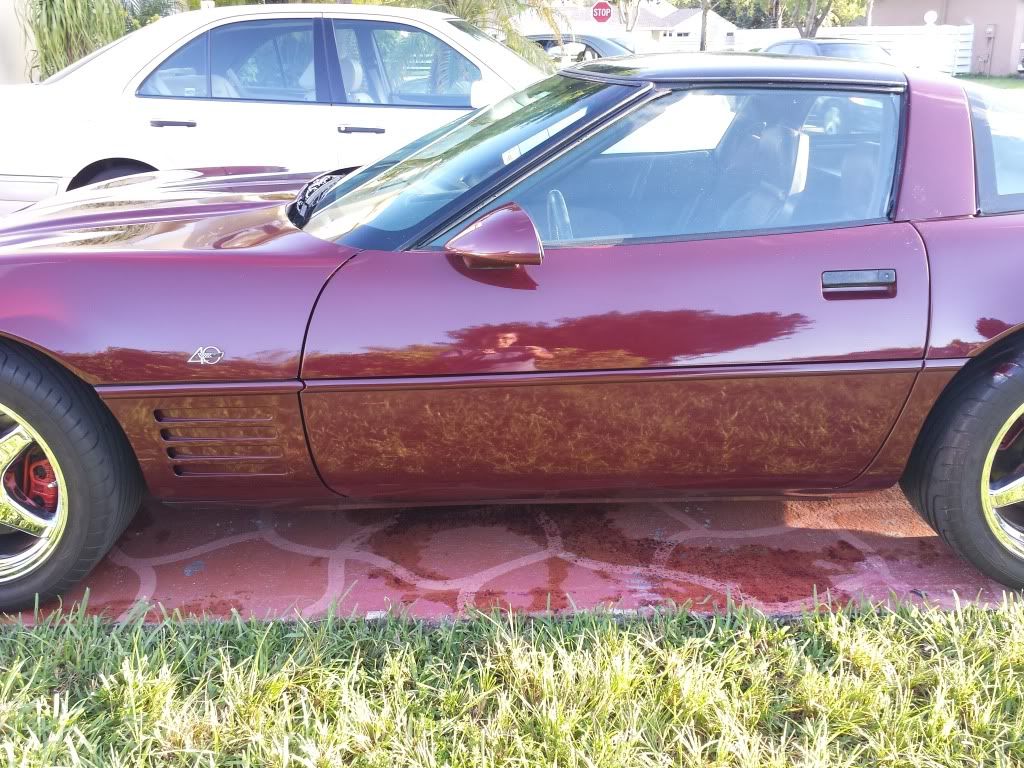
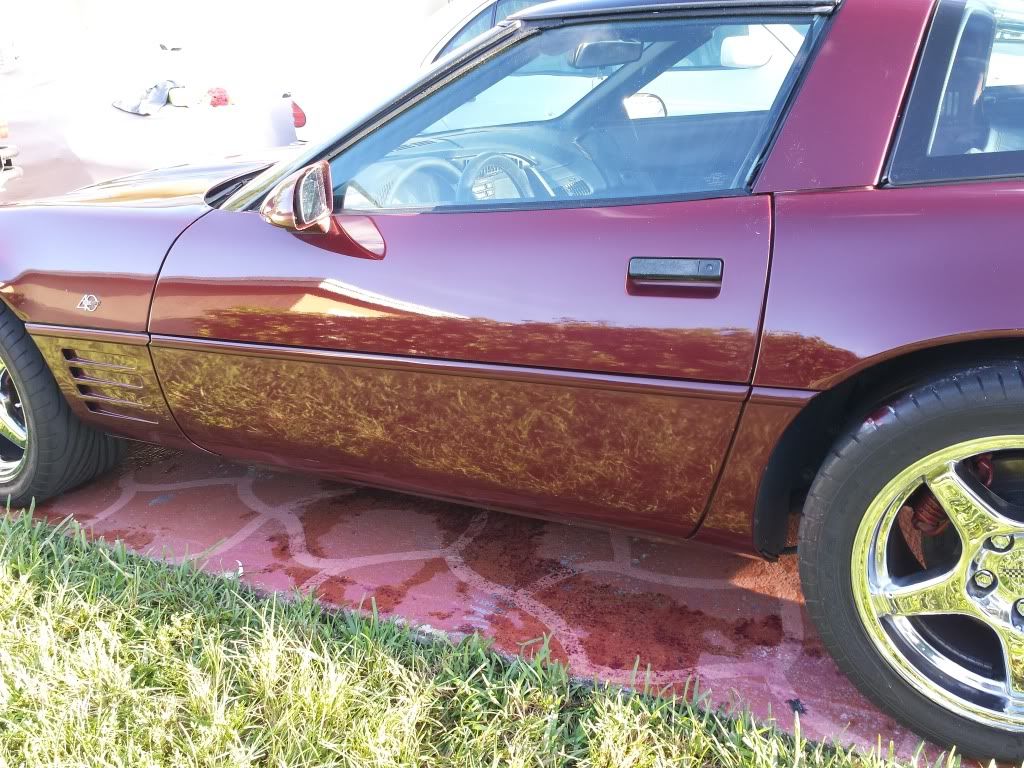
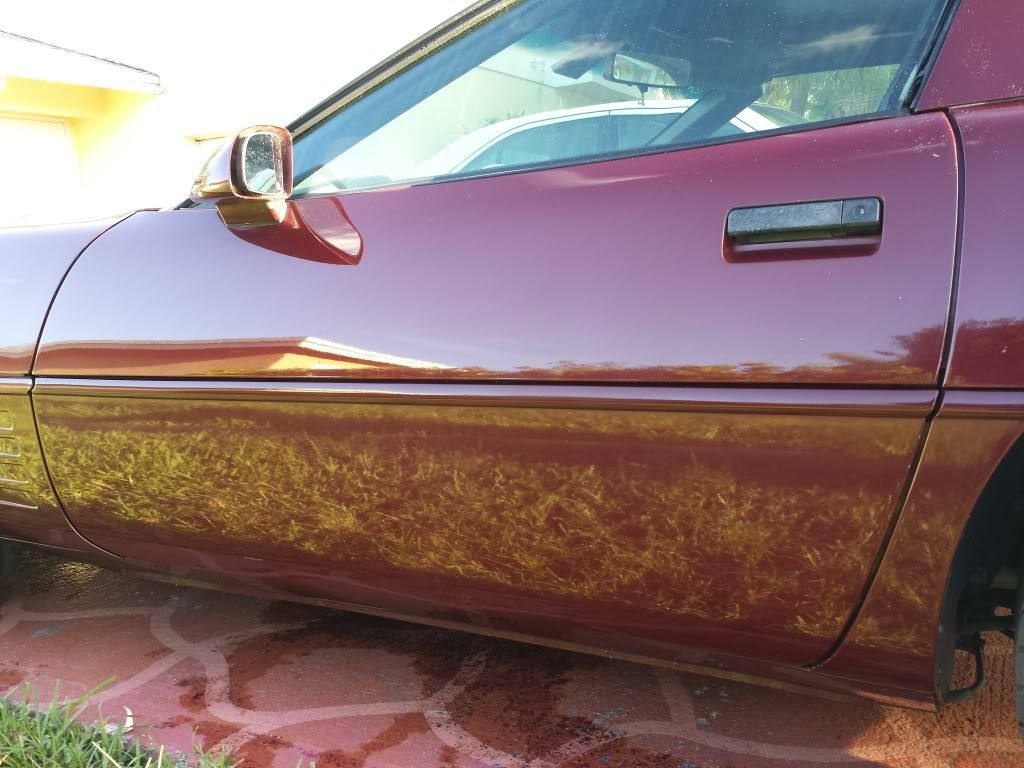
See the reflection.... Keep in mind that this shine is after compound 205, so I still need to do Mirror Glaze and wax. Shine should be much deeper once the whole car is detailed to match.
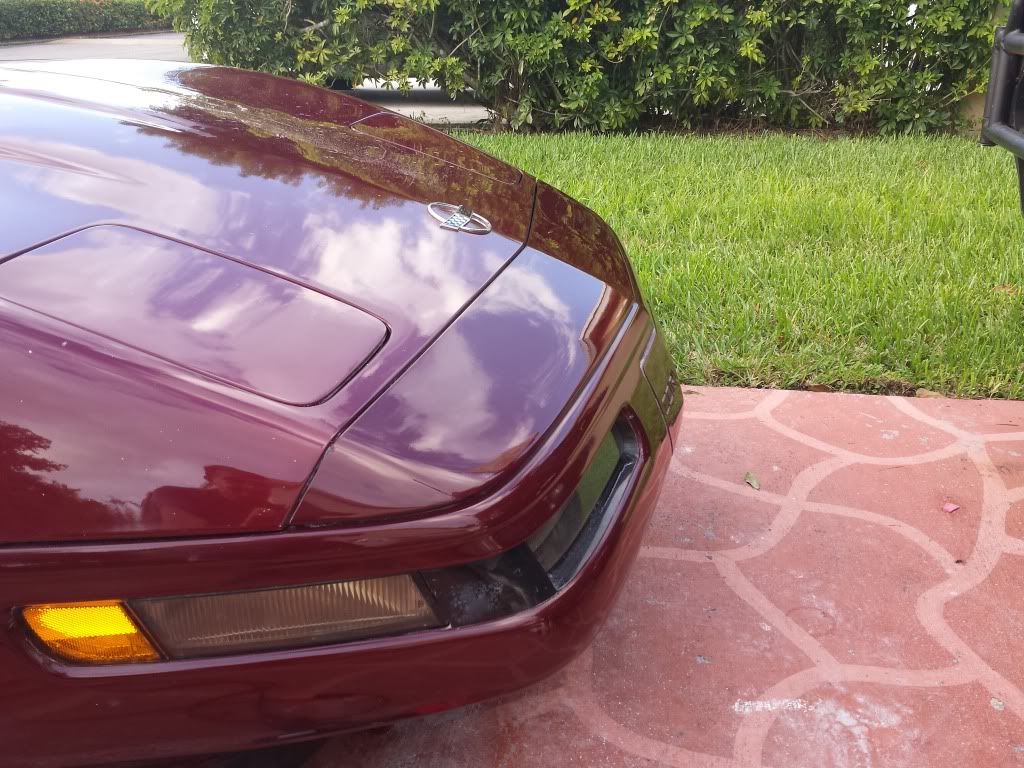
Front bumper... Final sanding with 2500/3000 to get rid of some minor orange peel that weas bothering me. Then, compound 105 and 205.
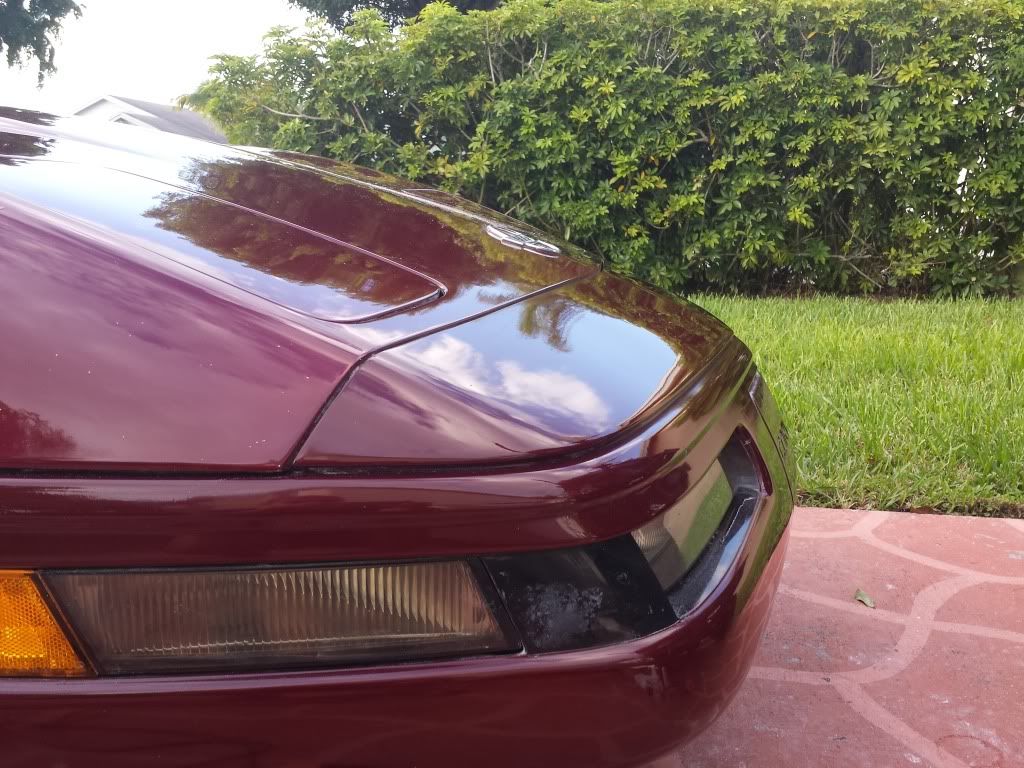
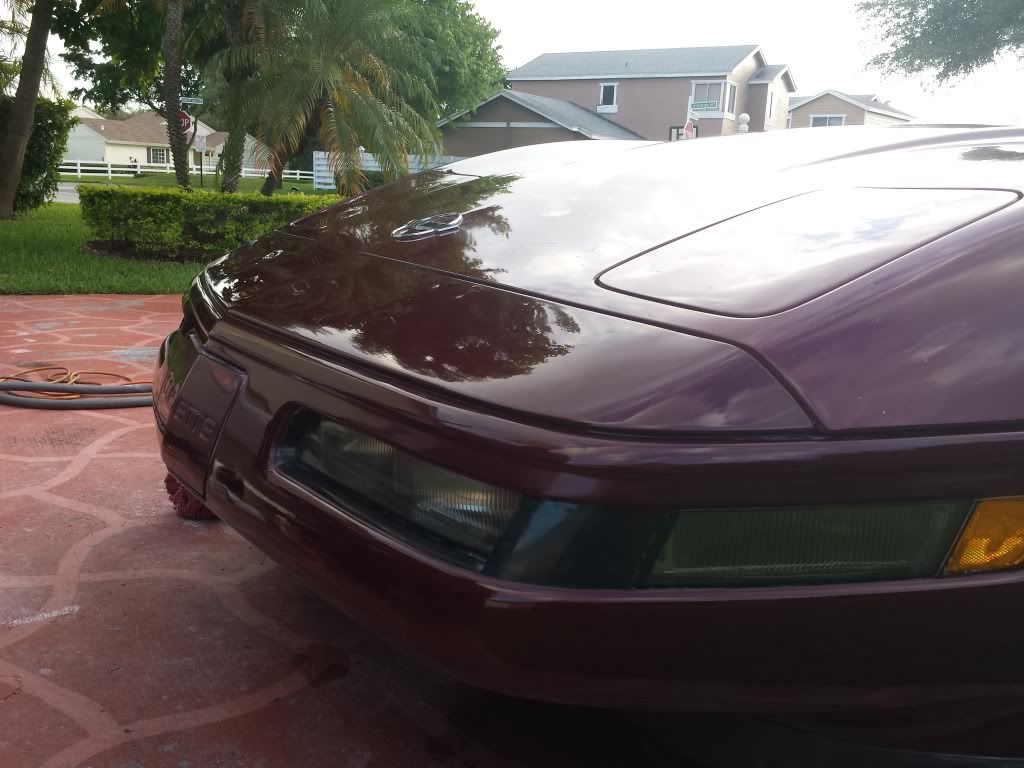
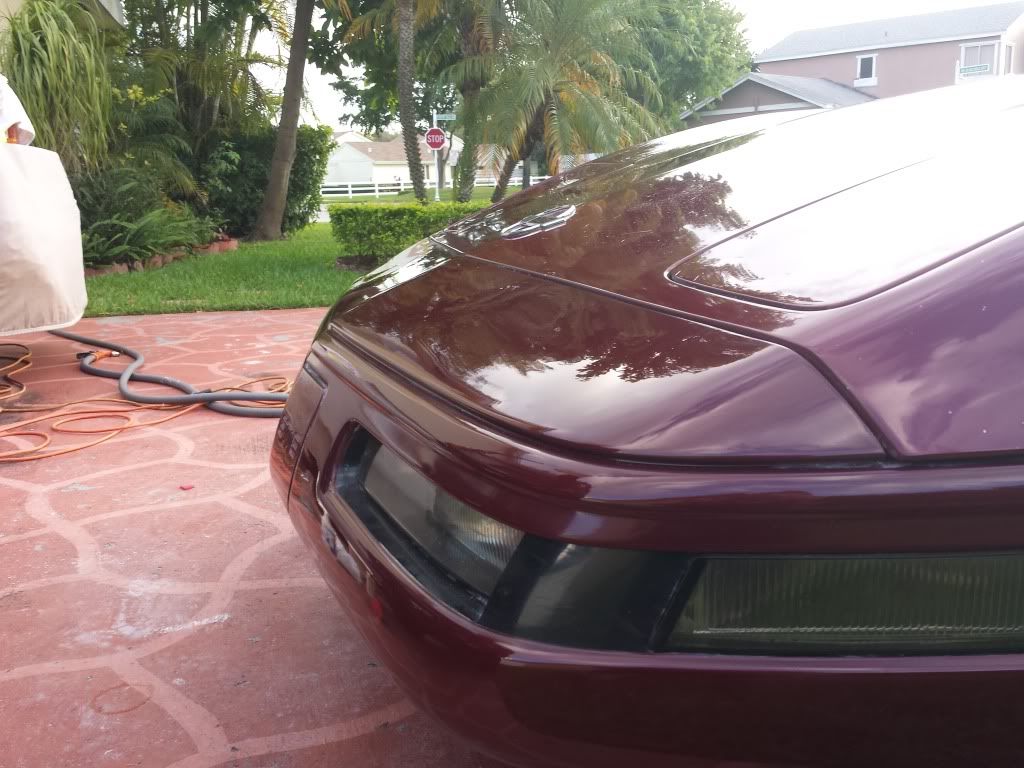
Materials in use for the polishing... Turtle rubbing compound... 105/205. Still to use mirror glaze and wax.
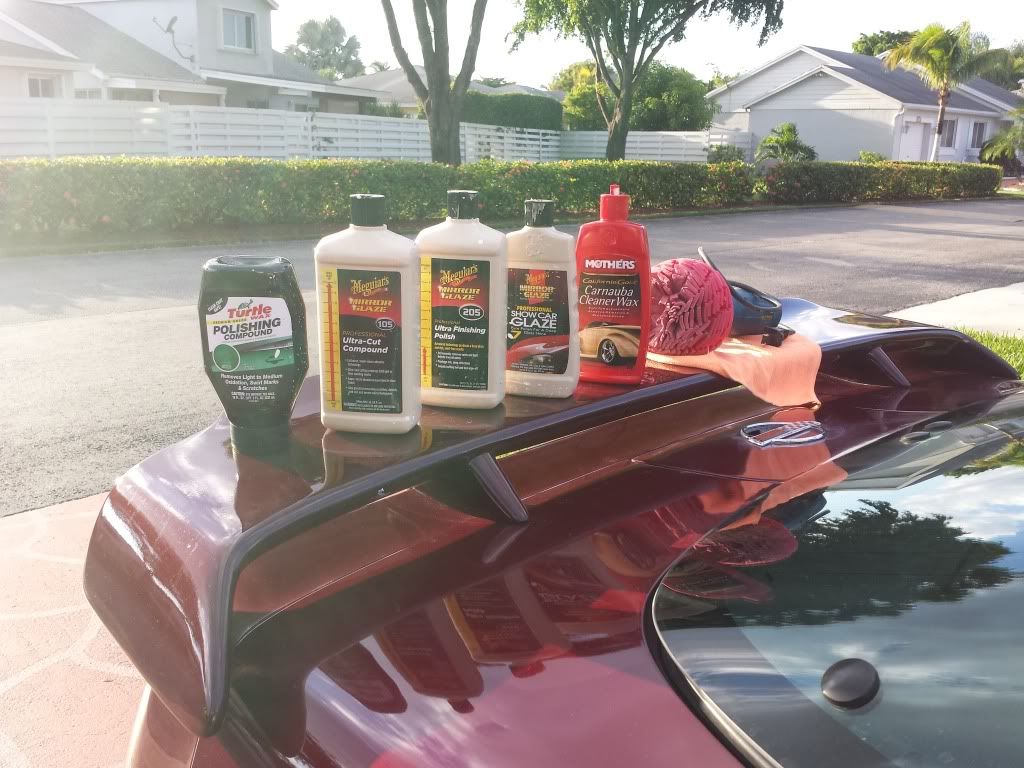
Sanding material.. all done by hand or using a small block.
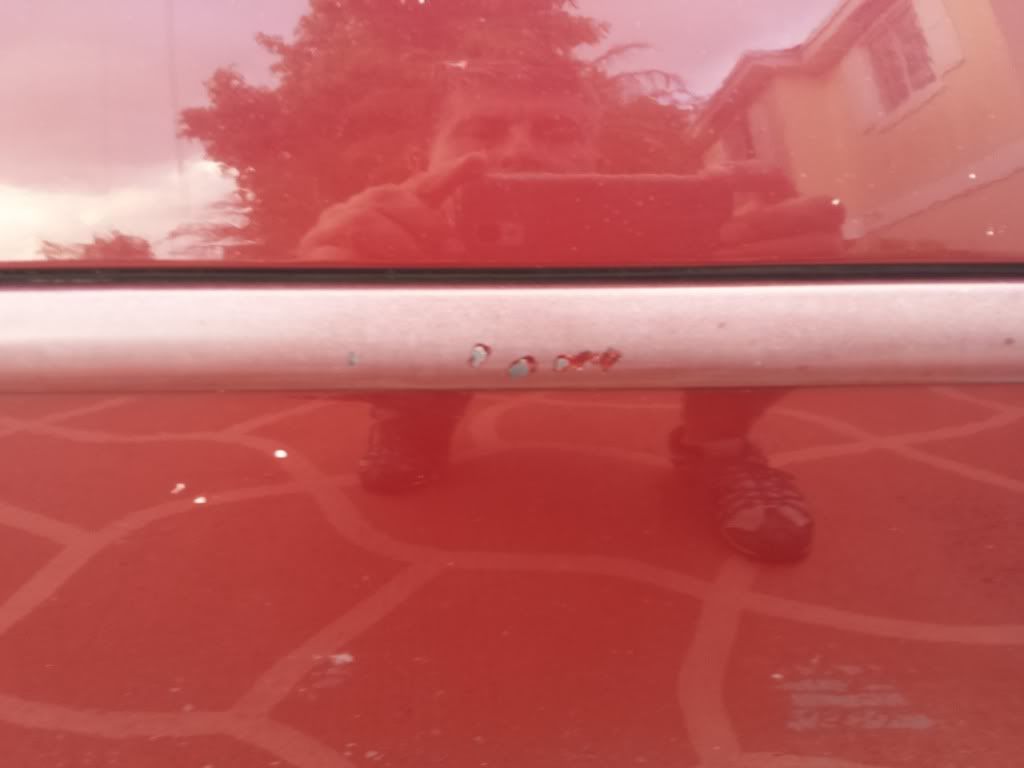
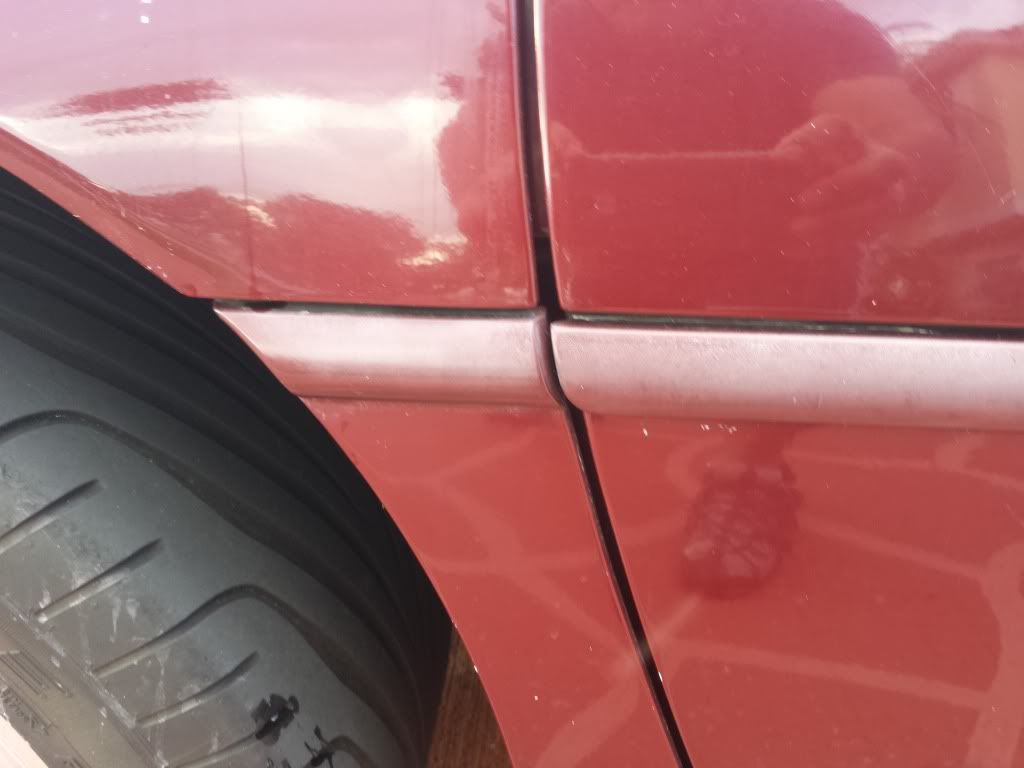
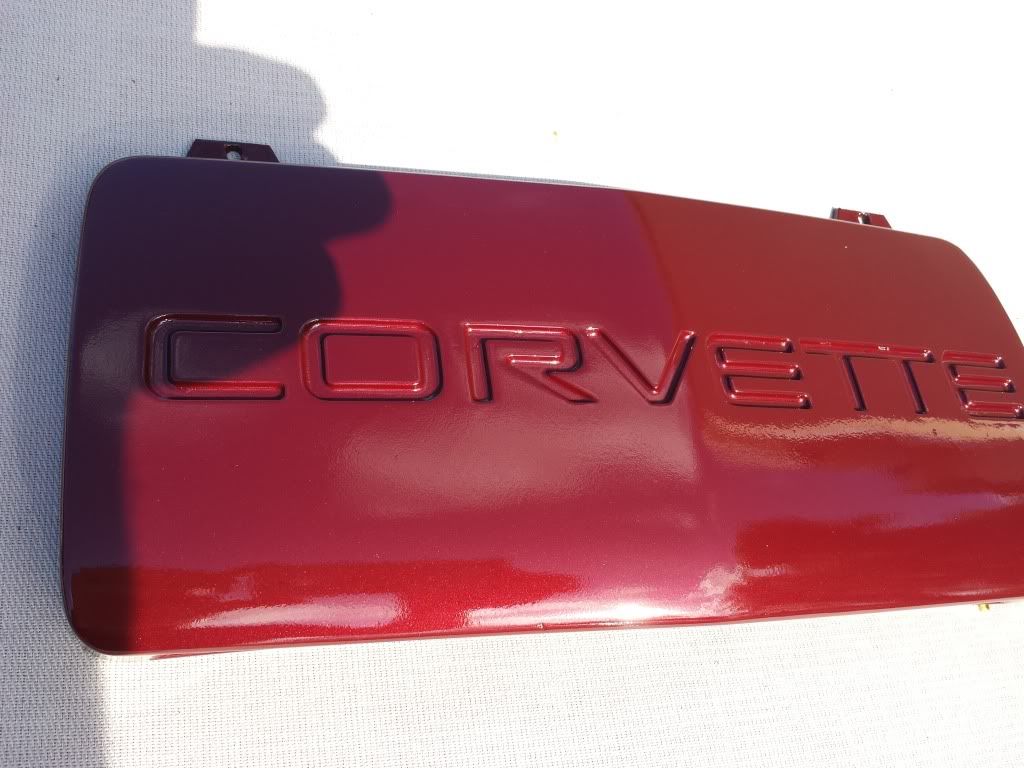
To give you an idea of how faded the taiil light and plate recesses were, please see the actual state of the belt moldings.
This will be the final stage, and hpe to complete it tomorrow by re painting and clearing my license plate cover, and belt line moldings.
So, what do you think of my " In-driveway make over to turn those bumpers into very goof 5 footers (probably even closer to see any imperfections really) ?
This concludes stage 2 of the appearance makeover, and I got to say I am quite satisfied.
I do not have "before" pictures of the rear bumper, but both corners were faded and the clear coat had started to peel pretty badly on the top end.
Please to not get hung up on why I kept the spoiler wing or how it would have been easier to take it off since I had to take it off anyway. I simply did not want to get involved in repairing the holes and extending the body work into the quarter panels since I did not have the time to do it correctly, and I will do that at a later date once I take the car in for a full paint job.
Anyway, here some pictures for you to see the end results.
The bottom portion of every light hole as well as the recess where the plate sits in were faded and clear coat was super thin and brittle.
See the reflection.... Keep in mind that this shine is after compound 205, so I still need to do Mirror Glaze and wax. Shine should be much deeper once the whole car is detailed to match.
Front bumper... Final sanding with 2500/3000 to get rid of some minor orange peel that weas bothering me. Then, compound 105 and 205.
Materials in use for the polishing... Turtle rubbing compound... 105/205. Still to use mirror glaze and wax.
Sanding material.. all done by hand or using a small block.
To give you an idea of how faded the taiil light and plate recesses were, please see the actual state of the belt moldings.
This will be the final stage, and hpe to complete it tomorrow by re painting and clearing my license plate cover, and belt line moldings.
So, what do you think of my " In-driveway make over to turn those bumpers into very goof 5 footers (probably even closer to see any imperfections really) ?
09-28-2013, 08:45 AM
#48
Race Director


Had you told me that project turned out this good without pictures I wouldn't have believed it. It looks good for a booth job but a driveway job is just amazing. I've tried a few driveway spray jobs but the results weren't nearly that good. Taking the time to do all the steps makes a big difference in the end 
09-28-2013, 01:30 PM
#49
Pro
Thread Starter
While getting ready to prep the side moldings, I realized that one has a crack going over half of the width.
Anyone has an extra that wants to sell or a full set for a god price?
Anyone has an extra that wants to sell or a full set for a god price?
09-28-2013, 09:43 PM
#50
Safety Car

Member Since: Mar 2005
Location: Fredonia WI
Posts: 3,562
Received 480 Likes
on
388 Posts
2023 C4 of the Year Finalist- Modified
Finalist 2020 C4 of the Year - Modified
C4 of Year Finalist (performance mods) 2019
2018 C4 of Year Finalist


Thanks for taking the time to detail your work for us.
How in the world did you keep dust particles and other junk off the wet paint?
09-29-2013, 07:08 PM
#51
Pro
Thread Starter
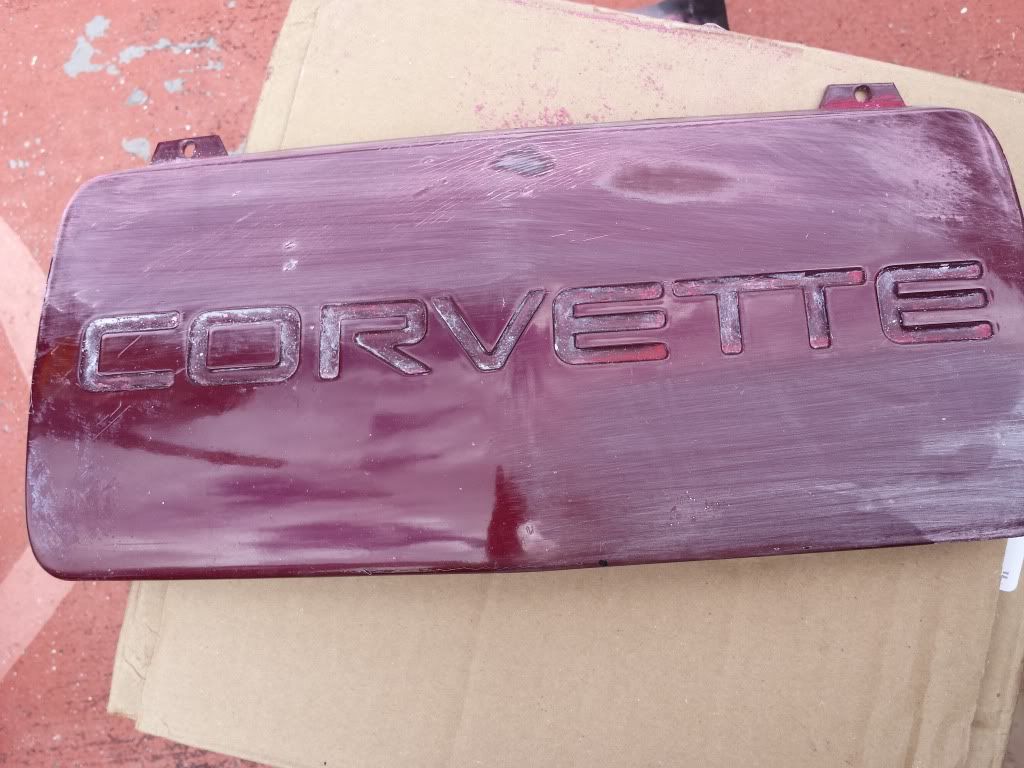
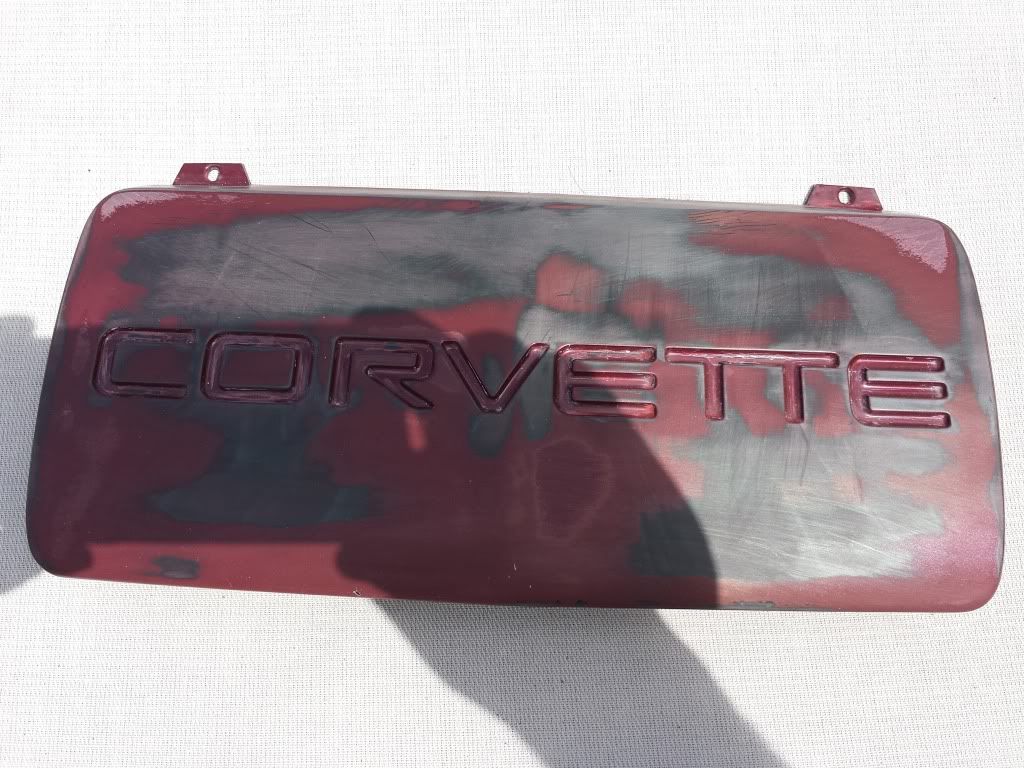
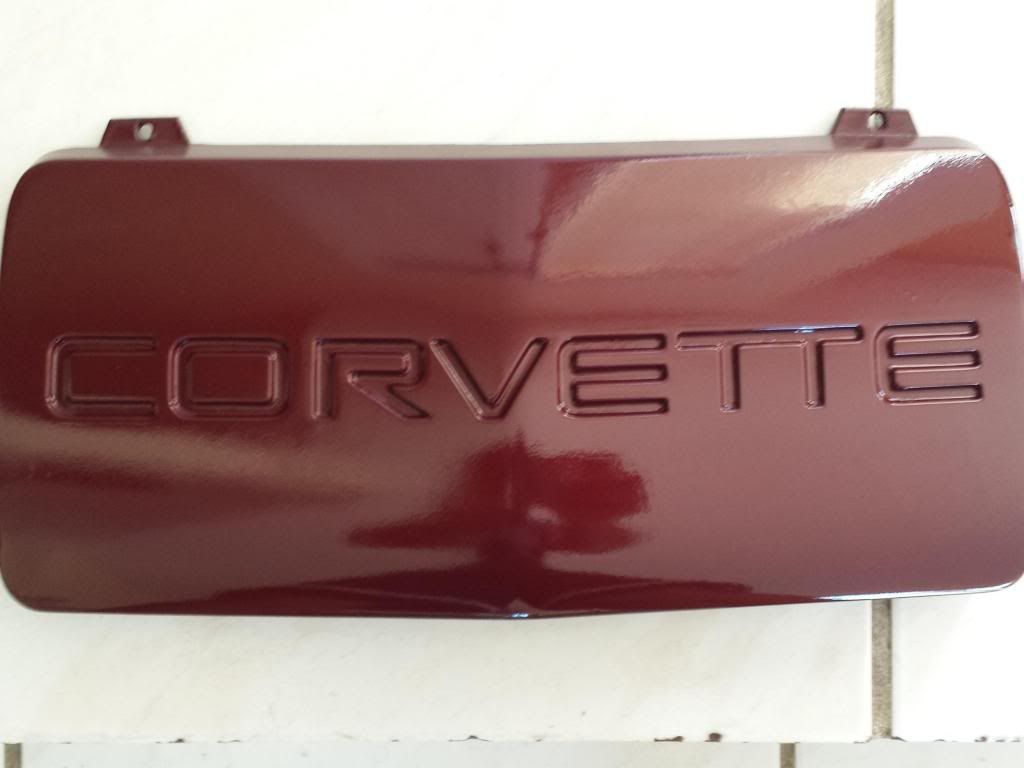
Final... (or almost final, since I will be replacing a molding this coming week, but here you go with the Sunday work.
Sanded and prepped the license plate cover and door moldings, coat of color and clear coat.
I did not get a chance to sand the clear and buff them yet, but they are all done and shiny.
I am one happy camper with mostly all the little buggy details that were always catching my eye.
Here some pictures.
I sanded all the color off after this picture, and smoothed it out with 600 grit sand paper.
Primered, not sanded yet.
One of the little moldings...
Driver side...
color coat on...
first coat of color on plate, not color sanded yet.
I believe this one was after sanding..
molding... Masking tape off.
Clear coat on opposite side.
Masking tape off....
Plate, clear on.
Assembled back on.
After clean up...
No need to tell you again how happy I am with the results.
 09-30-2013, 09:26 AM
#54
Burning Brakes

You really ought to do the door handles next!
Great job!
Great job!
09-30-2013, 09:48 AM
#55
Pro
Thread Starter
I wanted to get new door handles, or another set to strip and repaint outside the car.
I will try to at least get them cleaner and looking black again, since there is a lot of residue from polishing the doors this week.
I will try to at least get them cleaner and looking black again, since there is a lot of residue from polishing the doors this week.
09-30-2013, 11:20 AM
#56
Melting Slicks
When I paint, I wet the ground underneath where I am painting and for some reaon, it helps keep the dust to a minimum. I also use a tack cloth to wipe down the surface right before I paint and also use compressed air to blow off anything the cloth missed. A careful eye will catch anything sitting on the surface. Of course, stuff can always land on it when your painting or when it's drying. A quick wet sand will take care of that though. Just my 2 cents.
09-30-2013, 12:10 PM
#57
Pro
Thread Starter
Yes, keeping the floor wet helps to keep the dust to a minimum. Good prep cleaning is the key, but sanding in between oats for any imperfection will solve most tiny defects.
10-01-2013, 11:09 PM
#58
Burning Brakes
My mirrors have so many pits and nicks from years of stones, sand and other highway debris, that i considered doing a Plastidip job on them. This is giving me inspiration to paint them for real. My 93 is Polo Green. I think this would be a smaller easier job than the one that you tackled!!
My hat's off to you.
My hat's off to you.
10-01-2013, 11:58 PM
#59
Pro
Thread Starter
The mirrors are really not that difficult to take off if you want to do it that way, it will certainly help you get all the surfaces painted evenly, minimize overspray and get the buffing done right.
10-02-2013, 08:02 AM
#60
Burning Brakes
I would never have thought it possible!!