Repainting my front bumper, 1993 Ruby Red Saturday project.
 08-10-2013, 04:42 PM
#1
Pro

Thread Starter
Time was due for this repair.
A couple of numbnut parking lot encounters left me a few scratches and clear coat cracks that were bothering me beyond reason.
I had asked around for repaint of the front bumper, and the lowest quote was for $1200, the higest for $2500.
Since I am a bit too old to let myself be raped without resistance, I put the bra on for some time and set myself to read and watch as many videos as possible to tackle the project myself.
I am a fair wrench in most respects, and do all my maintenance at home since it is something I enjoy.
The last time I did some body work though, was in 1997, and that was a Ford Bronco that, though it came out very nice, it was not nearly in the condition than the Ruby is.
After ordering the touch up paint and 2k primer and 2k clear coat, this morning I had to convince myself that the moment was right, and that I would not get any more courage no matter where I looked for it, so I set out to sand, prime, paint and clear.
This was a whole day project, and I did all the sanding by hand, starting at 320 and final prep with 800, priming and wet sanding again with 800 grit, 5 coats of color (approximately) using the 2 rattle cans that I had ordered, and finally approximately 5 coats of 2K clear coat, (2 cans too)
I waited anywhere from 15 to 25 minutes between coats, longer whenever I did wet sanding.
I am very pleased with the results, and have to say I am much more confident now to even buy my own compressor and gun for future projects.
And without further ado, here are some pictures, since
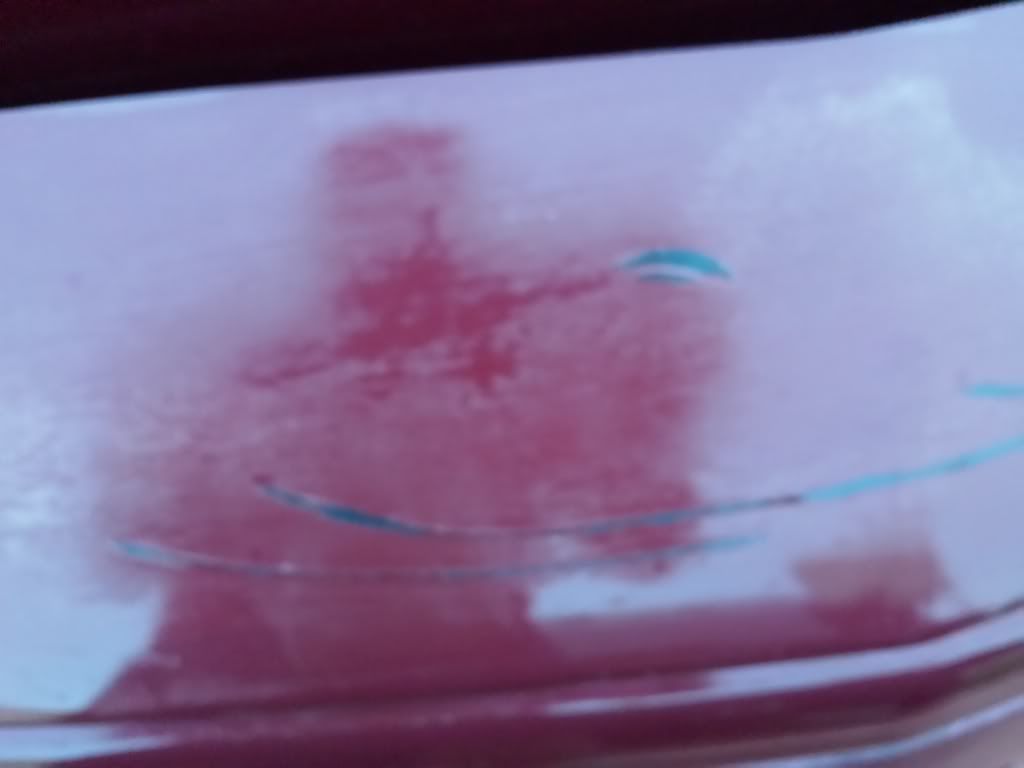
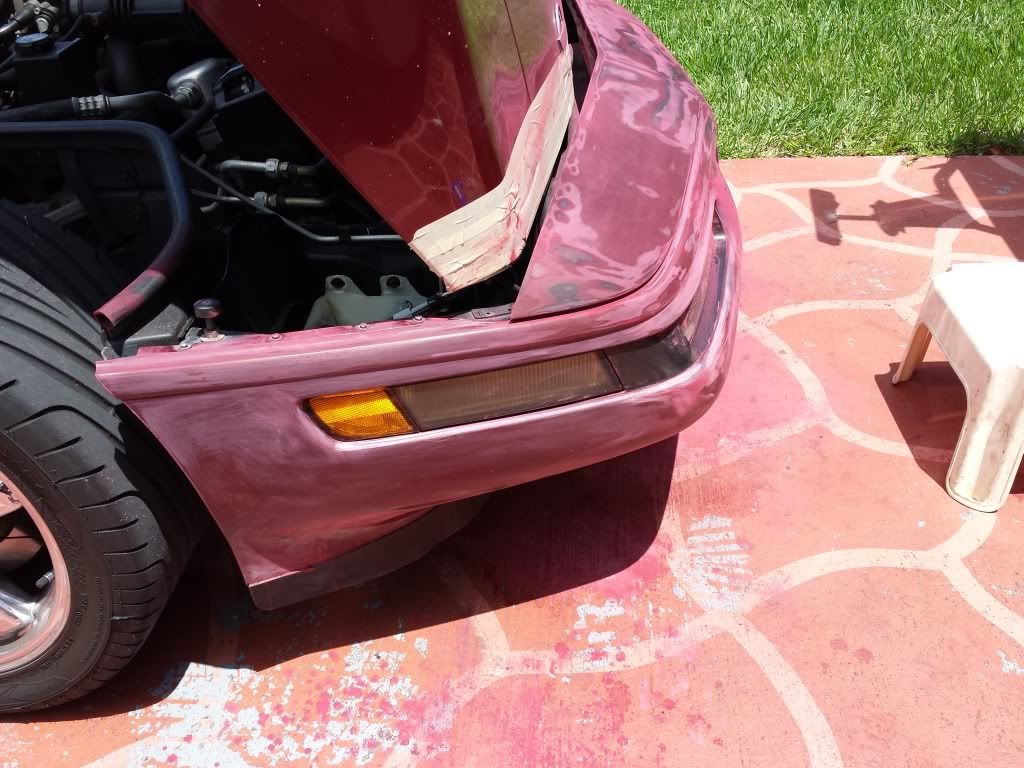
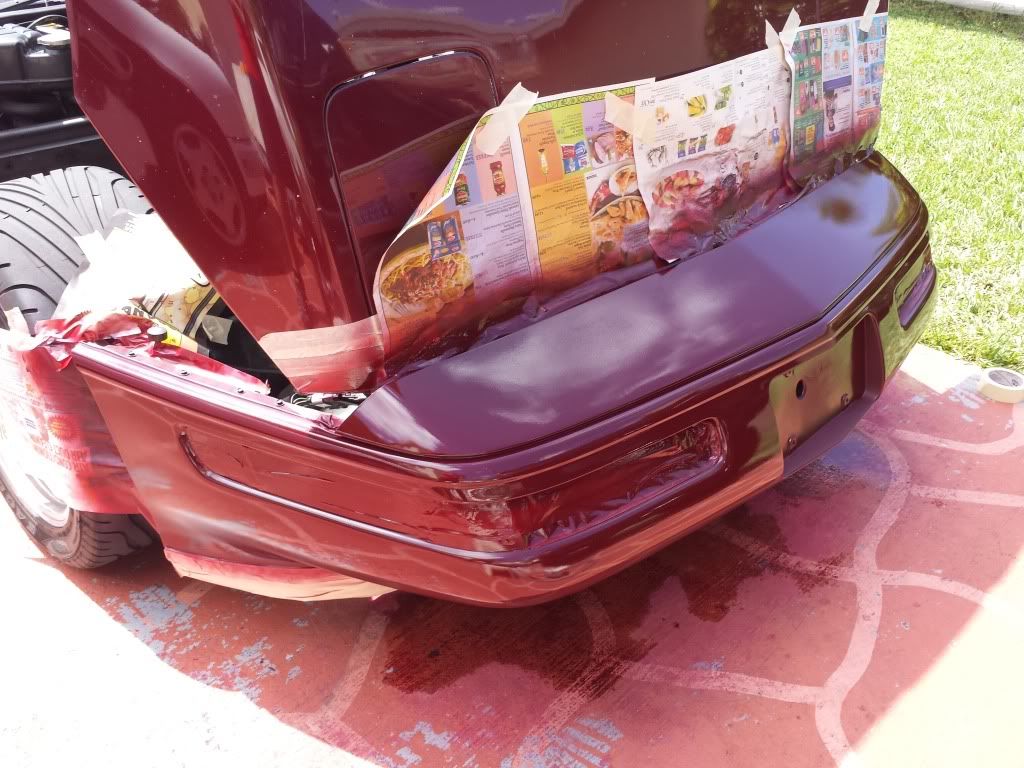
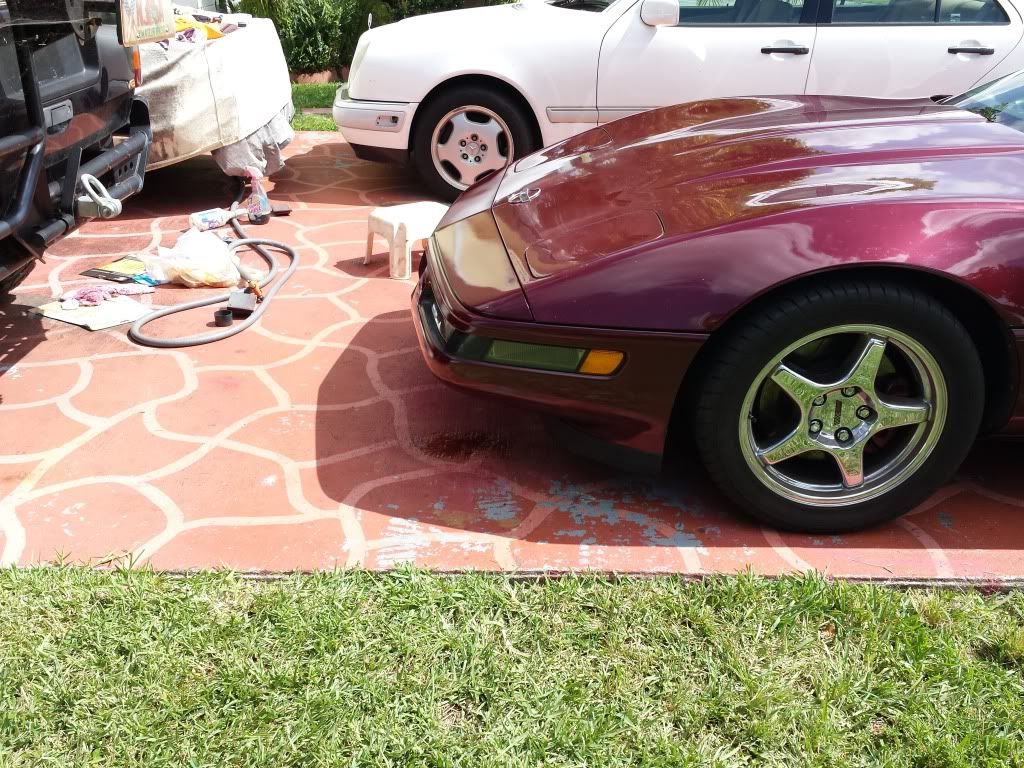
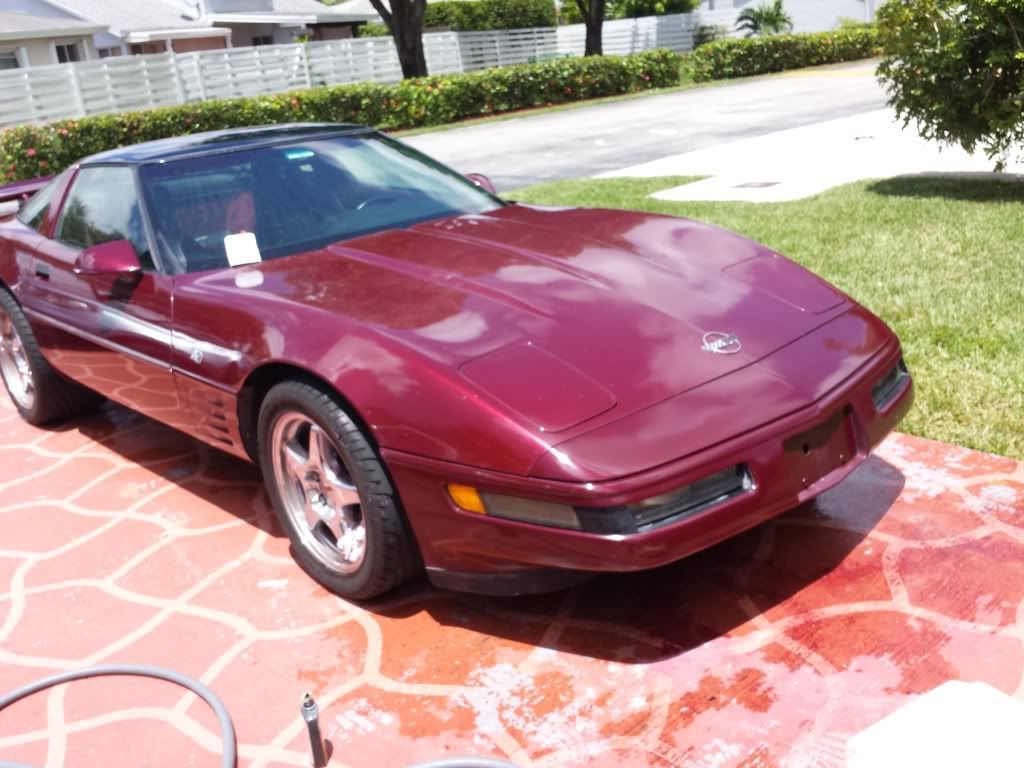
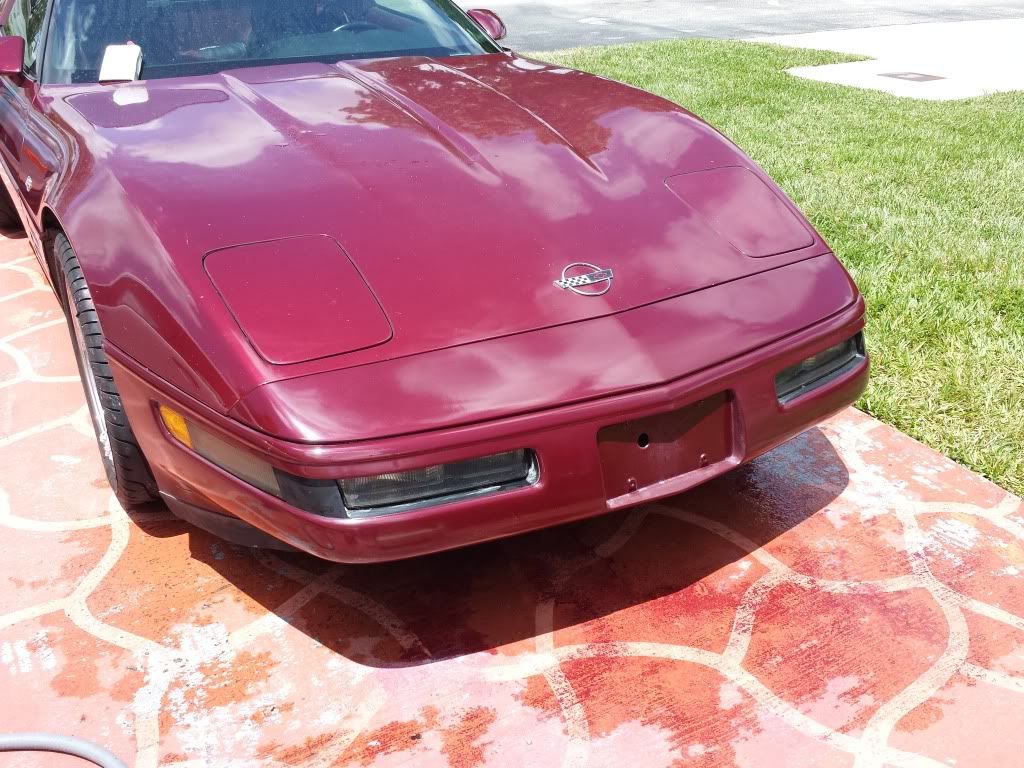
This is what I started with
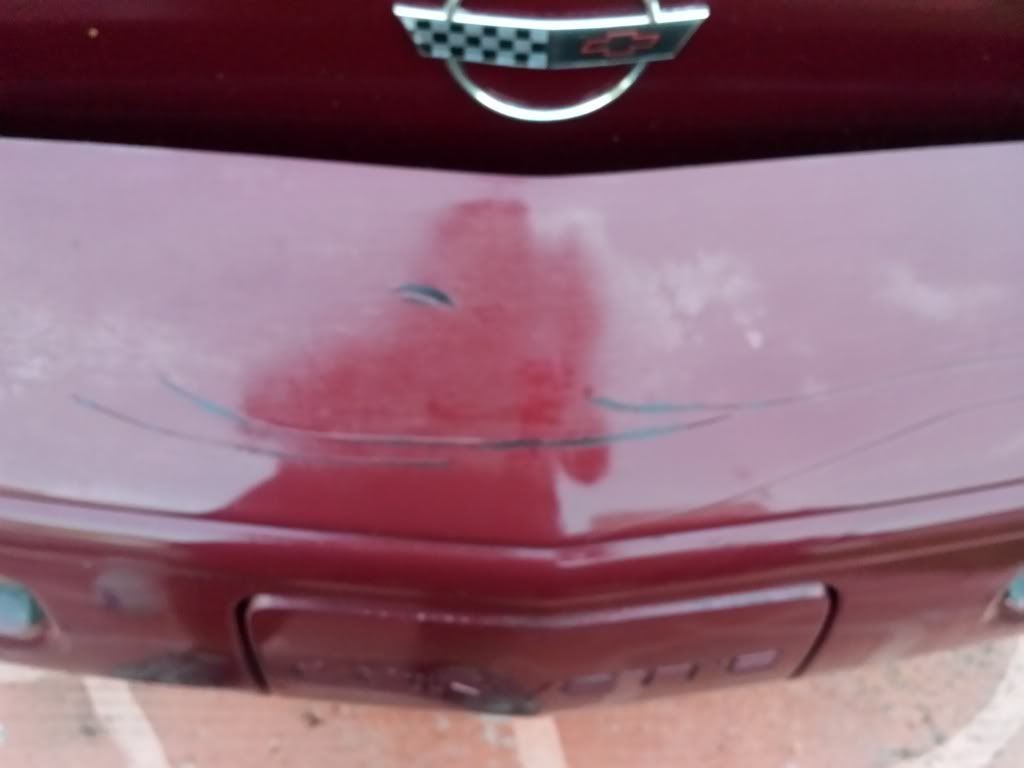
Starting to wash and clean before sanding
At this point the wife showed up and shouted "Oh my god, are you crazy?"
I have to say that I normally tend to disagree with her, but this time I gave her the upper hand.
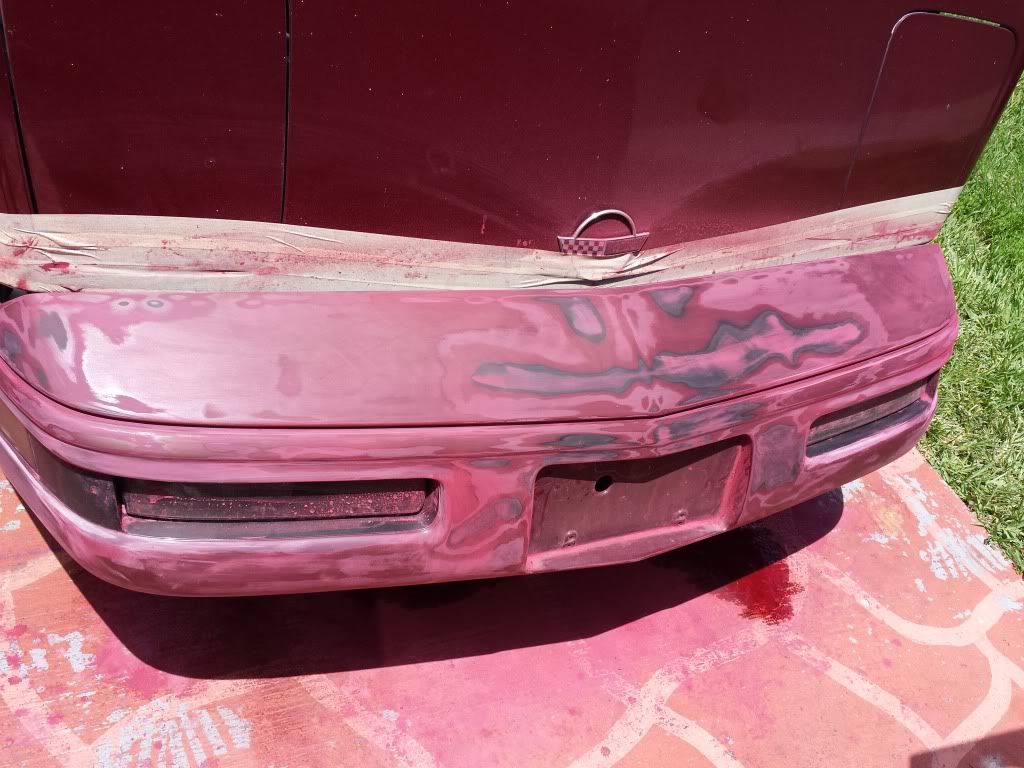
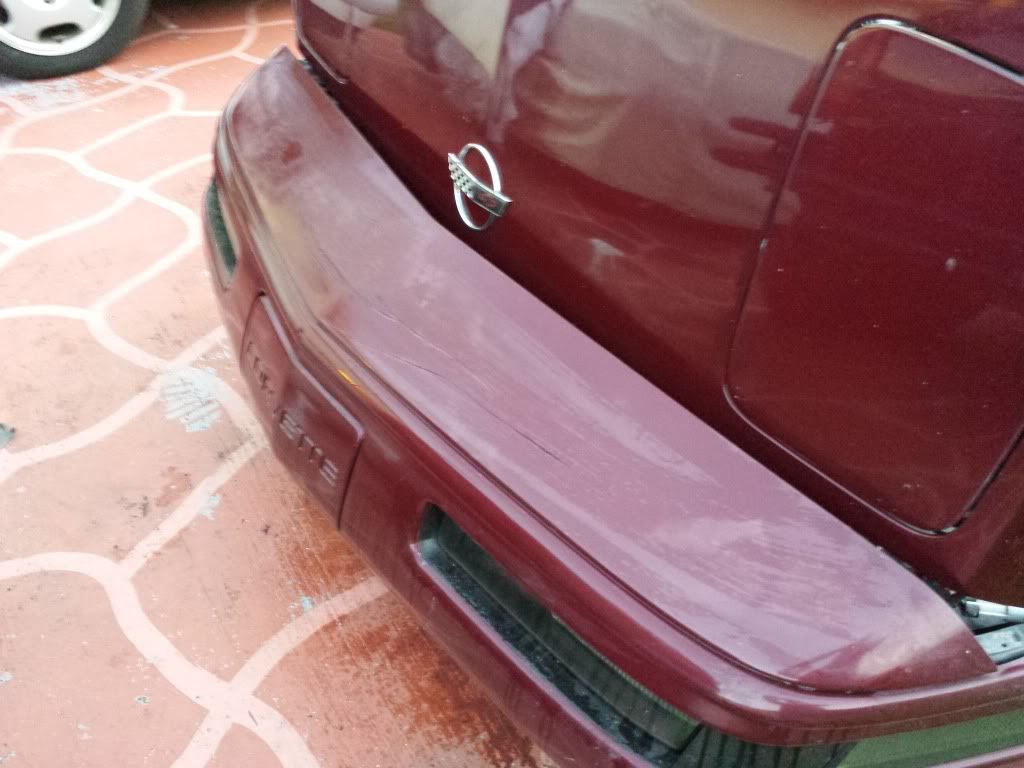
side view... sanding the bottom was a bit of a pain, but I did get all the old clear coat off.
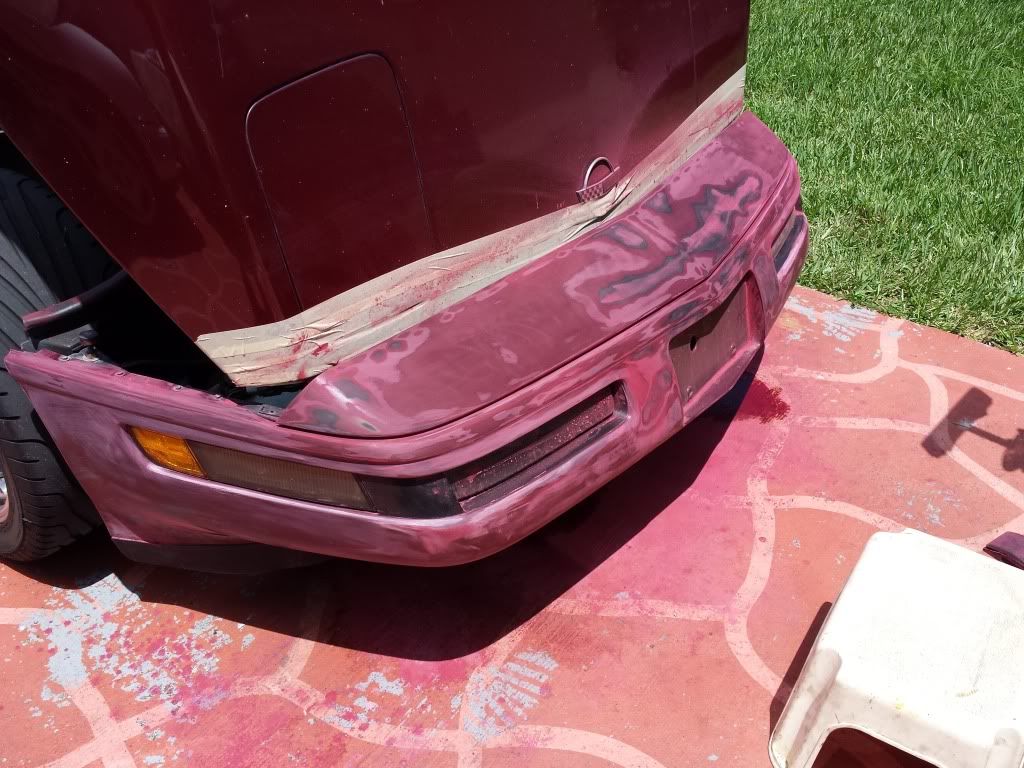
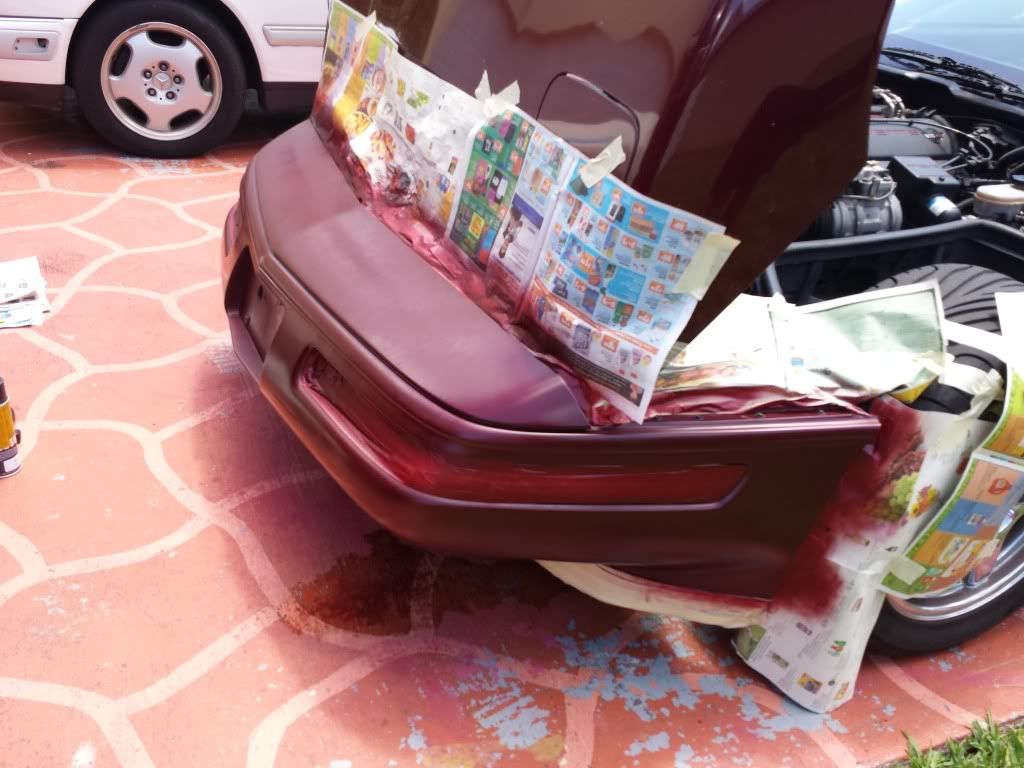
After the primer, and the 2 first coats of color. I did not take pictures of the primer, since I forgot.
A couple more coats. The day was pretty sunny and the bumper was pretty hot. In retrospect, I would do it with some kind of shade next time, since the paint was drying a bit too soon, and left a bit of a rough texture, and that's why I needed to wet sand the color coat.
you can see in the middleof the top flat side where the paint was drying too fast.
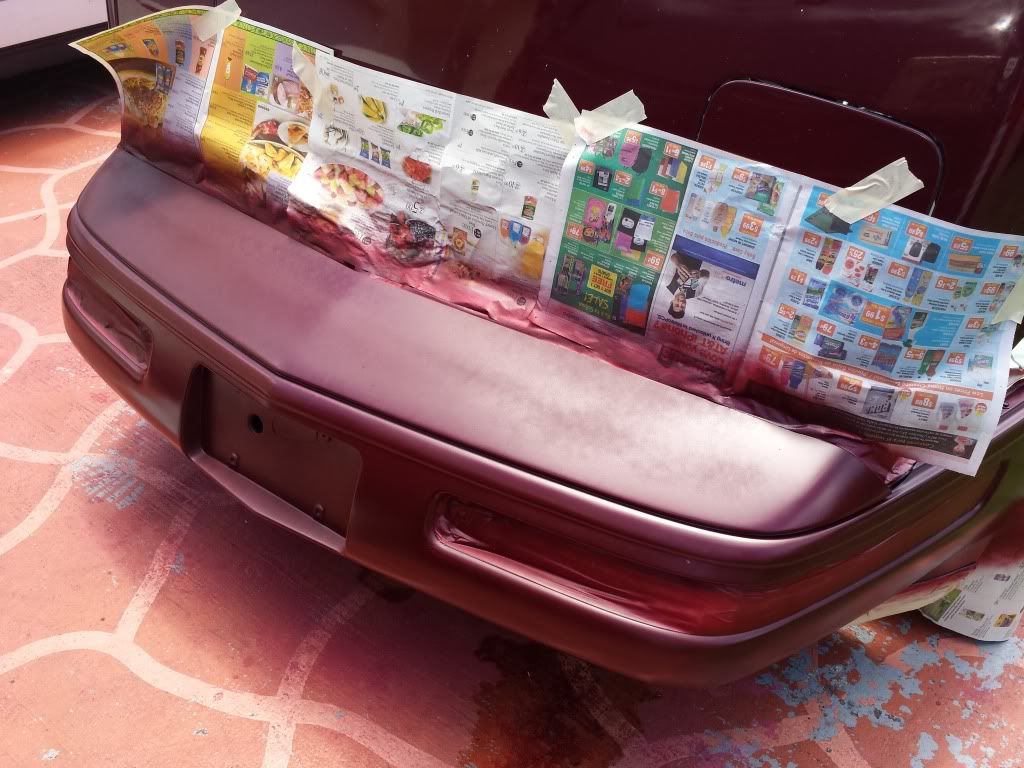
after wet color sanding, and 2 coats of clear already.
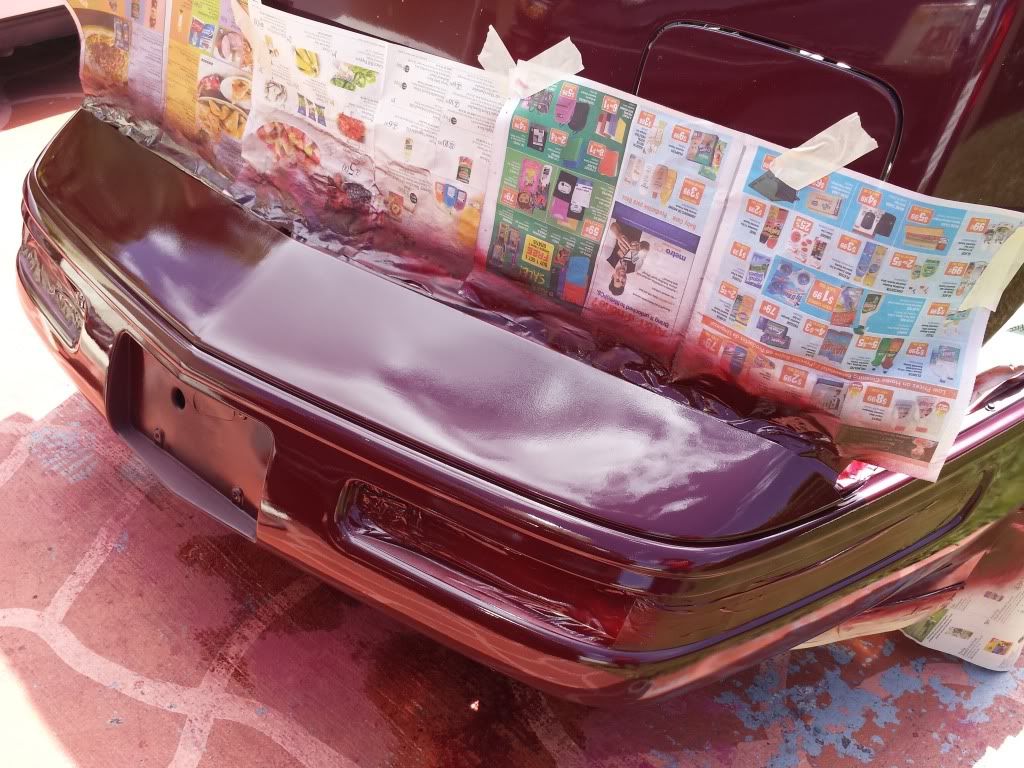
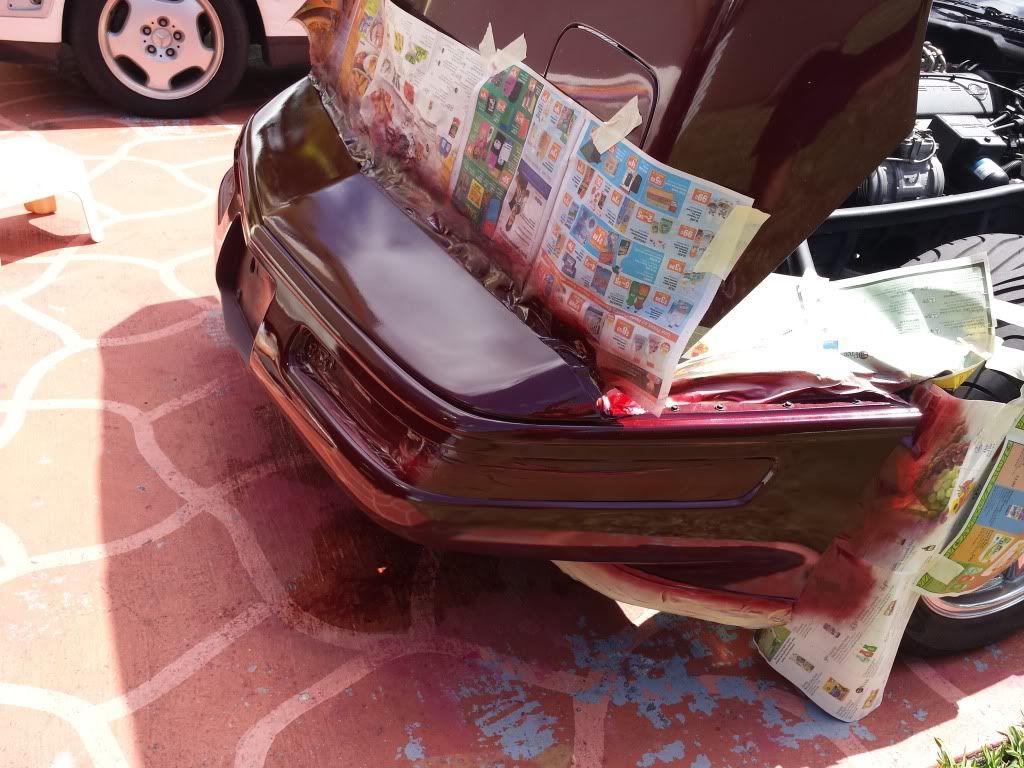
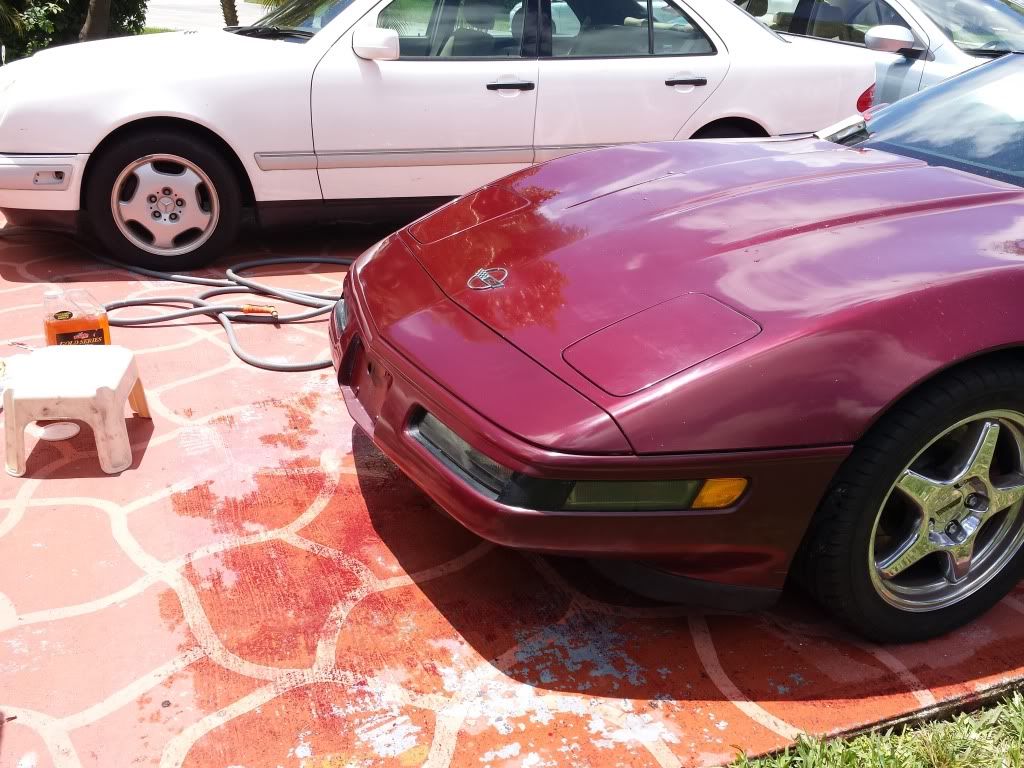
a couple more coats, and almost ready.
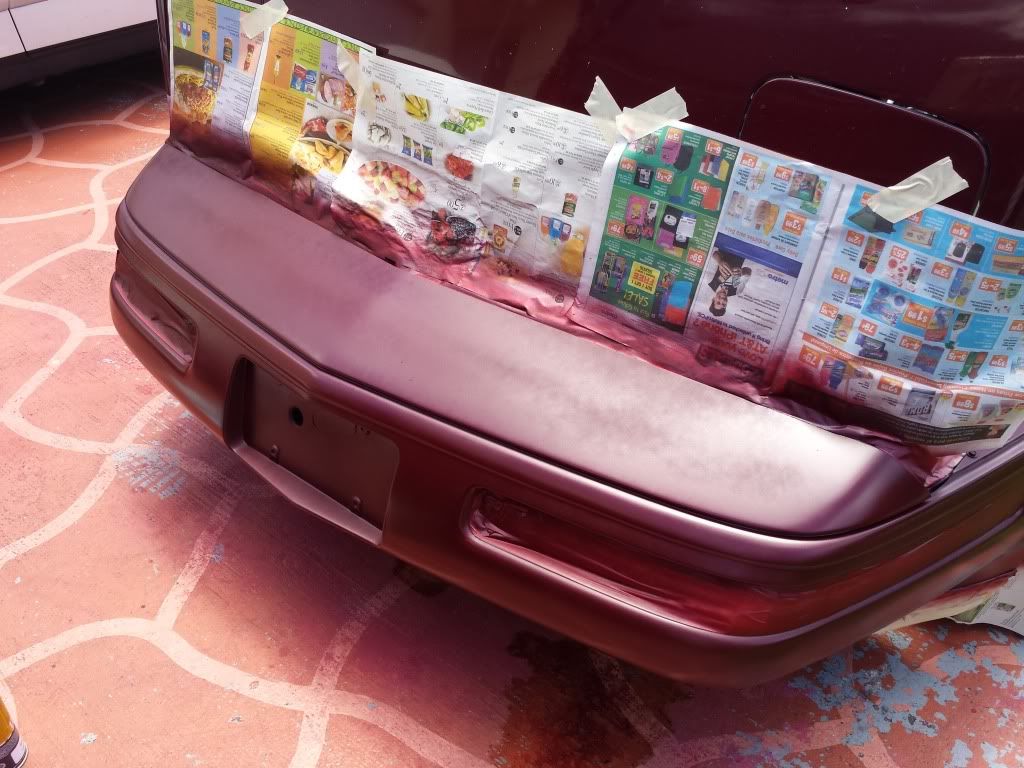
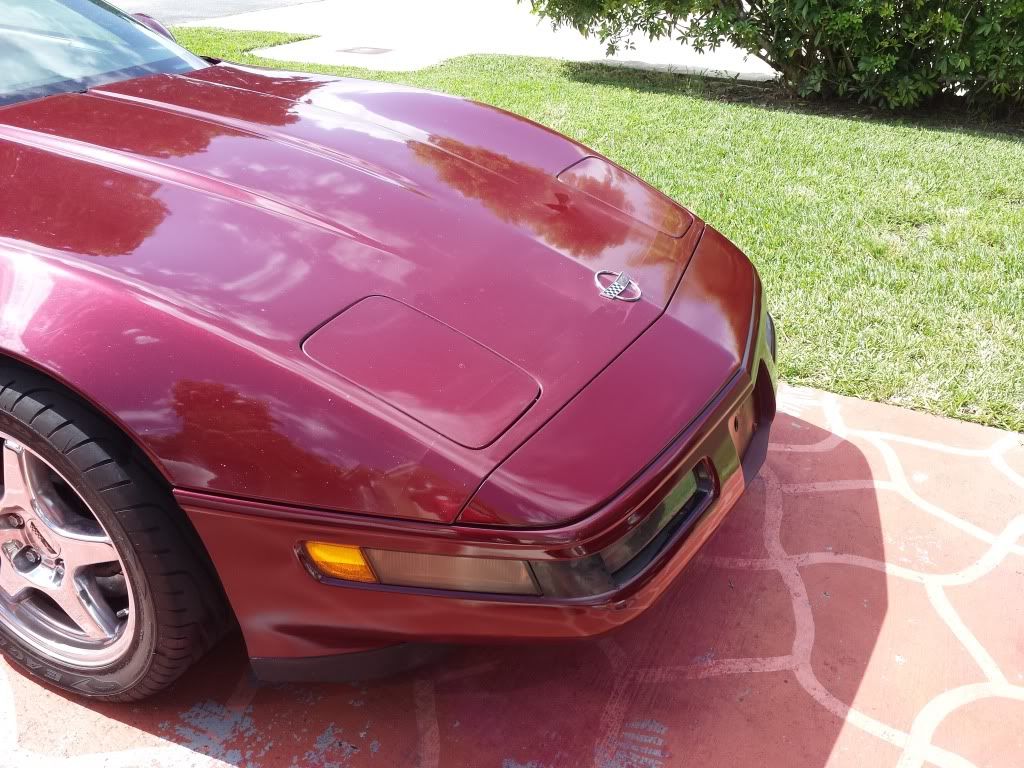
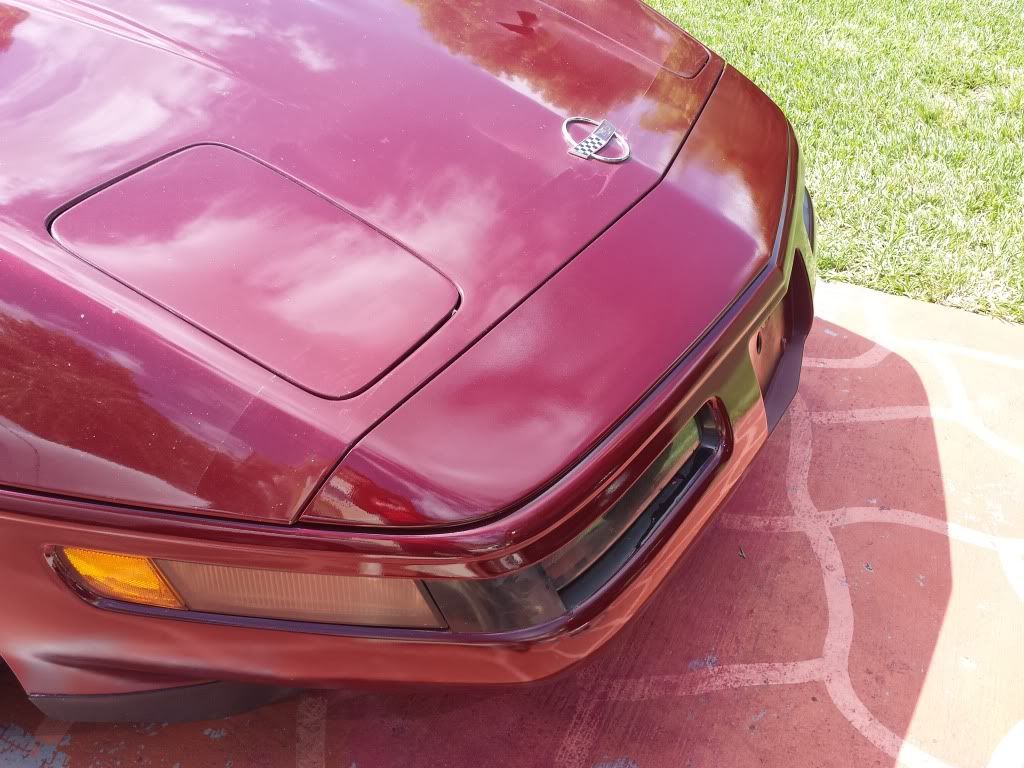
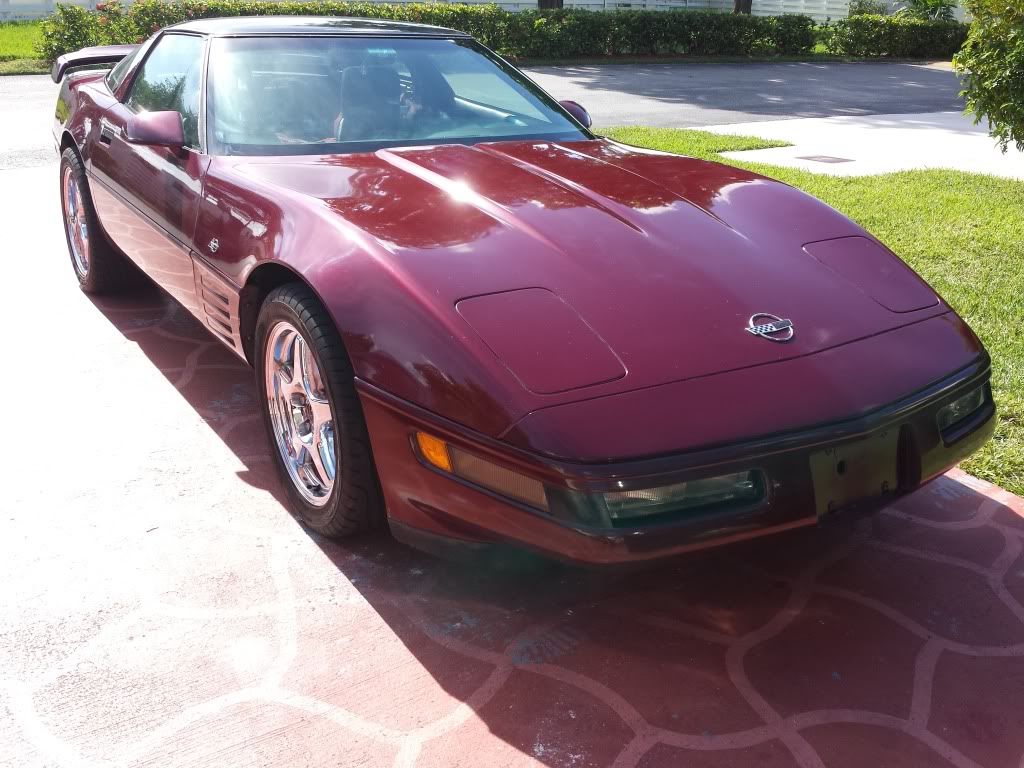
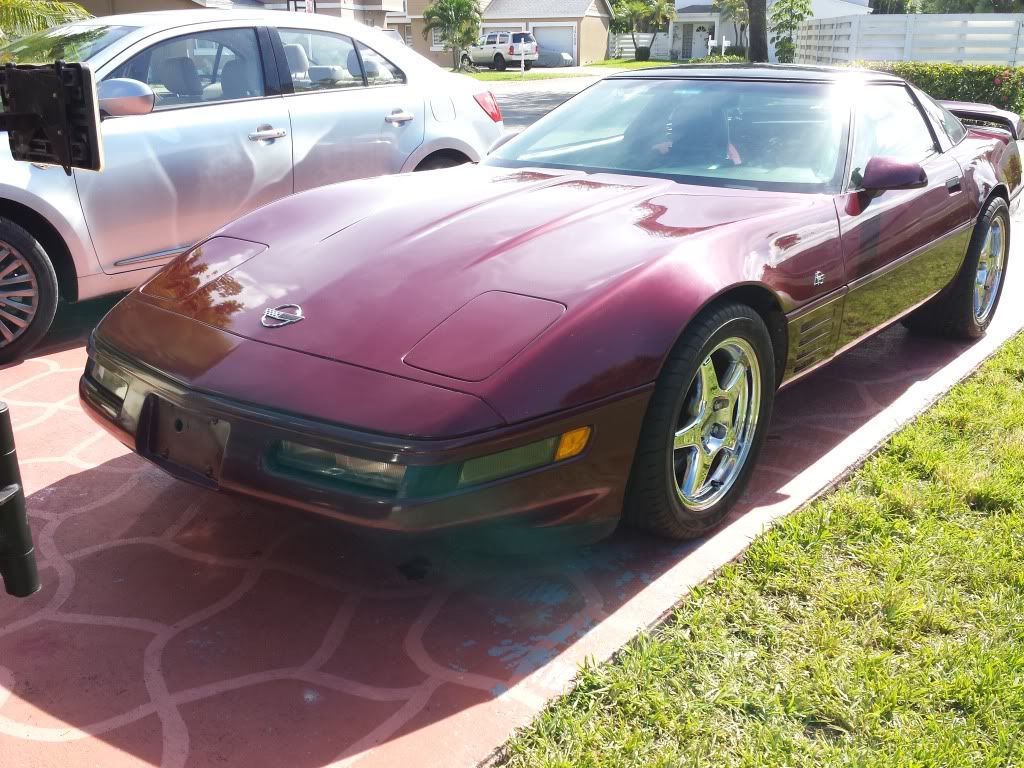
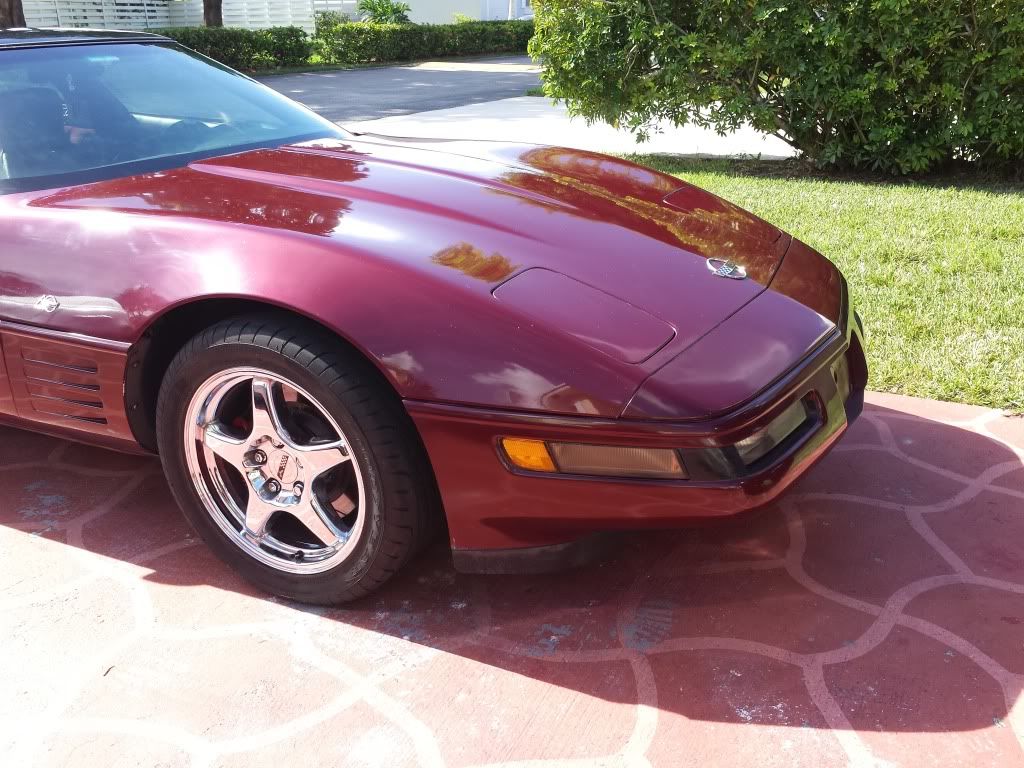
and this is already done and waiting for buffing.
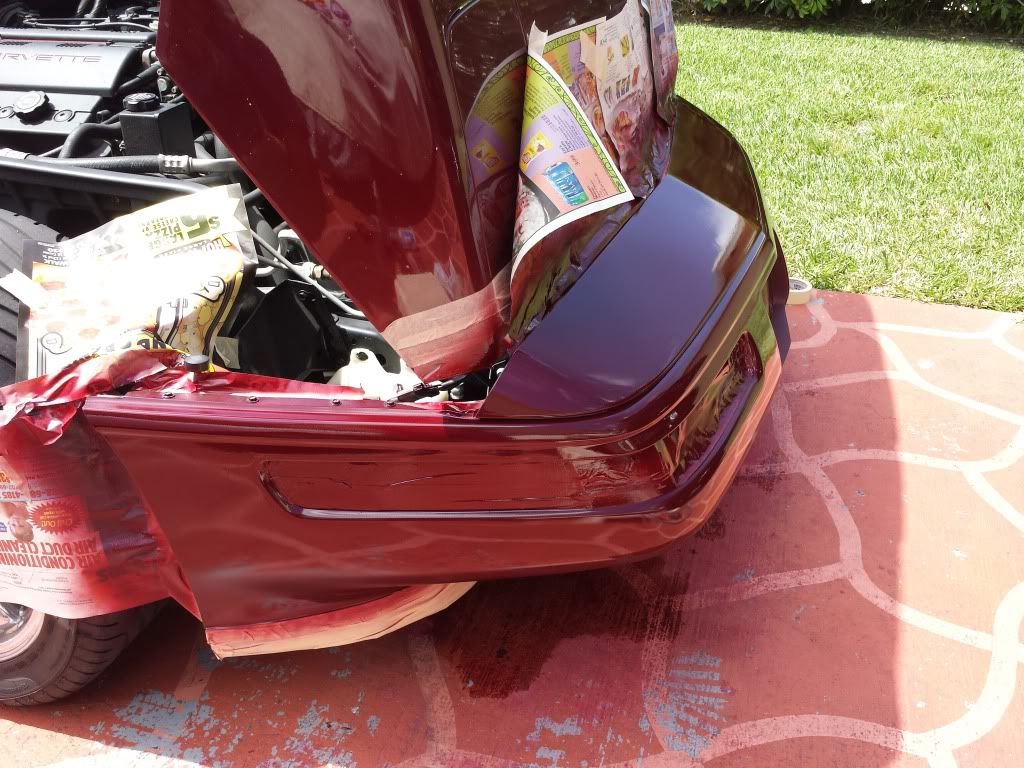
I doubt that I will wet sand the clear, as it does not seem to need it, but I will see after the first cut of buffing.
I will do it by hand, as I am still not comfortable with applying an electric buffer to clear that is so new. At any rate, I will let it rest and dry for a few days before Y start buffing and polishing by hand, but I am very satisfied with the results. The color is basically a perfect match, the metal flake looks great, and the 2k cleat shine is excellent even before any buffing.
This is in no way replacing a well done paint job that I have planned for the future, but it certainly helped me get rid of the scratches that where bothering more than I could take.
Enjoy.
A couple of numbnut parking lot encounters left me a few scratches and clear coat cracks that were bothering me beyond reason.
I had asked around for repaint of the front bumper, and the lowest quote was for $1200, the higest for $2500.
Since I am a bit too old to let myself be raped without resistance, I put the bra on for some time and set myself to read and watch as many videos as possible to tackle the project myself.
I am a fair wrench in most respects, and do all my maintenance at home since it is something I enjoy.
The last time I did some body work though, was in 1997, and that was a Ford Bronco that, though it came out very nice, it was not nearly in the condition than the Ruby is.
After ordering the touch up paint and 2k primer and 2k clear coat, this morning I had to convince myself that the moment was right, and that I would not get any more courage no matter where I looked for it, so I set out to sand, prime, paint and clear.
This was a whole day project, and I did all the sanding by hand, starting at 320 and final prep with 800, priming and wet sanding again with 800 grit, 5 coats of color (approximately) using the 2 rattle cans that I had ordered, and finally approximately 5 coats of 2K clear coat, (2 cans too)
I waited anywhere from 15 to 25 minutes between coats, longer whenever I did wet sanding.
I am very pleased with the results, and have to say I am much more confident now to even buy my own compressor and gun for future projects.
And without further ado, here are some pictures, since
This is what I started with
Starting to wash and clean before sanding
At this point the wife showed up and shouted "Oh my god, are you crazy?"
I have to say that I normally tend to disagree with her, but this time I gave her the upper hand.
side view... sanding the bottom was a bit of a pain, but I did get all the old clear coat off.
After the primer, and the 2 first coats of color. I did not take pictures of the primer, since I forgot.
A couple more coats. The day was pretty sunny and the bumper was pretty hot. In retrospect, I would do it with some kind of shade next time, since the paint was drying a bit too soon, and left a bit of a rough texture, and that's why I needed to wet sand the color coat.
you can see in the middleof the top flat side where the paint was drying too fast.
after wet color sanding, and 2 coats of clear already.
a couple more coats, and almost ready.
and this is already done and waiting for buffing.
I doubt that I will wet sand the clear, as it does not seem to need it, but I will see after the first cut of buffing.
I will do it by hand, as I am still not comfortable with applying an electric buffer to clear that is so new. At any rate, I will let it rest and dry for a few days before Y start buffing and polishing by hand, but I am very satisfied with the results. The color is basically a perfect match, the metal flake looks great, and the 2k cleat shine is excellent even before any buffing.
This is in no way replacing a well done paint job that I have planned for the future, but it certainly helped me get rid of the scratches that where bothering more than I could take.
Enjoy.
Last edited by speedycat3; 08-10-2013 at 04:45 PM.


 08-10-2013, 10:30 PM
#10
Melting Slicks

That looks awesome! Great job.
Quick question, was this done with a paint gun, and all the needed materials, or was this a rattle-can job? Sorry for the ignorance, I only ask because some places color match paint into a can for you.
Quick question, was this done with a paint gun, and all the needed materials, or was this a rattle-can job? Sorry for the ignorance, I only ask because some places color match paint into a can for you.
08-10-2013, 10:46 PM
#11
Pro
Thread Starter
All done with rattle cans, but not the typical auto parts type.
I got them from an internet website and. The color matching and quality of the paint and spray pattern is excellent. The clear is 2k with hardener, (same type that you'd get if you had your car painted at a body shop) The 2k can create respiratory problems, so you have to use it in a well ventilated area and use a repiratory mask. You can get the mask when you order too. I used one can of adhesion promoter, 1 can of primer, 2 cans of color coat and 2 cans of clear coat. I sanded with 320 grit to get all the clear off and down to primer on top to get the scratches off. Sanded again with 400 and 600 grit to soften up, and then primered the whole bumper. Sanded the primer with 800 grit, and then color coated with about 4 to 5 coats. Color sanded with 1000 and 1500 and then cleared with about 5 coats (2 full cans) you have to use the cans completely within 24 hours. You need one roll of masking tape. Prep is time consuming, but the careful sanding and masking, cleaning and final cleaning with tack cloth makes all the difference. I took my time and applied everything I read in the internet and all the videos I watched.
I got them from an internet website and. The color matching and quality of the paint and spray pattern is excellent. The clear is 2k with hardener, (same type that you'd get if you had your car painted at a body shop) The 2k can create respiratory problems, so you have to use it in a well ventilated area and use a repiratory mask. You can get the mask when you order too. I used one can of adhesion promoter, 1 can of primer, 2 cans of color coat and 2 cans of clear coat. I sanded with 320 grit to get all the clear off and down to primer on top to get the scratches off. Sanded again with 400 and 600 grit to soften up, and then primered the whole bumper. Sanded the primer with 800 grit, and then color coated with about 4 to 5 coats. Color sanded with 1000 and 1500 and then cleared with about 5 coats (2 full cans) you have to use the cans completely within 24 hours. You need one roll of masking tape. Prep is time consuming, but the careful sanding and masking, cleaning and final cleaning with tack cloth makes all the difference. I took my time and applied everything I read in the internet and all the videos I watched.
08-11-2013, 03:38 AM
#12
Melting Slicks
All done with rattle cans, but not the typical auto parts type.
I got them from an internet website and. The color matching and quality of the paint and spray pattern is excellent. The clear is 2k with hardener, (same type that you'd get if you had your car painted at a body shop) The 2k can create respiratory problems, so you have to use it in a well ventilated area and use a repiratory mask. You can get the mask when you order too. I used one can of adhesion promoter, 1 can of primer, 2 cans of color coat and 2 cans of clear coat. I sanded with 320 grit to get all the clear off and down to primer on top to get the scratches off. Sanded again with 400 and 600 grit to soften up, and then primered the whole bumper. Sanded the primer with 800 grit, and then color coated with about 4 to 5 coats. Color sanded with 1000 and 1500 and then cleared with about 5 coats (2 full cans) you have to use the cans completely within 24 hours. You need one roll of masking tape. Prep is time consuming, but the careful sanding and masking, cleaning and final cleaning with tack cloth makes all the difference. I took my time and applied everything I read in the internet and all the videos I watched.
I got them from an internet website and. The color matching and quality of the paint and spray pattern is excellent. The clear is 2k with hardener, (same type that you'd get if you had your car painted at a body shop) The 2k can create respiratory problems, so you have to use it in a well ventilated area and use a repiratory mask. You can get the mask when you order too. I used one can of adhesion promoter, 1 can of primer, 2 cans of color coat and 2 cans of clear coat. I sanded with 320 grit to get all the clear off and down to primer on top to get the scratches off. Sanded again with 400 and 600 grit to soften up, and then primered the whole bumper. Sanded the primer with 800 grit, and then color coated with about 4 to 5 coats. Color sanded with 1000 and 1500 and then cleared with about 5 coats (2 full cans) you have to use the cans completely within 24 hours. You need one roll of masking tape. Prep is time consuming, but the careful sanding and masking, cleaning and final cleaning with tack cloth makes all the difference. I took my time and applied everything I read in the internet and all the videos I watched.
08-11-2013, 03:46 AM
#13
Pro
Thread Starter
Shipping was quick, and I found the prices to be very reasonable given the good quality of color match and spray pattern flow.
http://www.automotivetouchup.com/ind...Ku4MxXEcvpMQ.1
08-11-2013, 01:03 PM
#14
Pro
Thread Starter
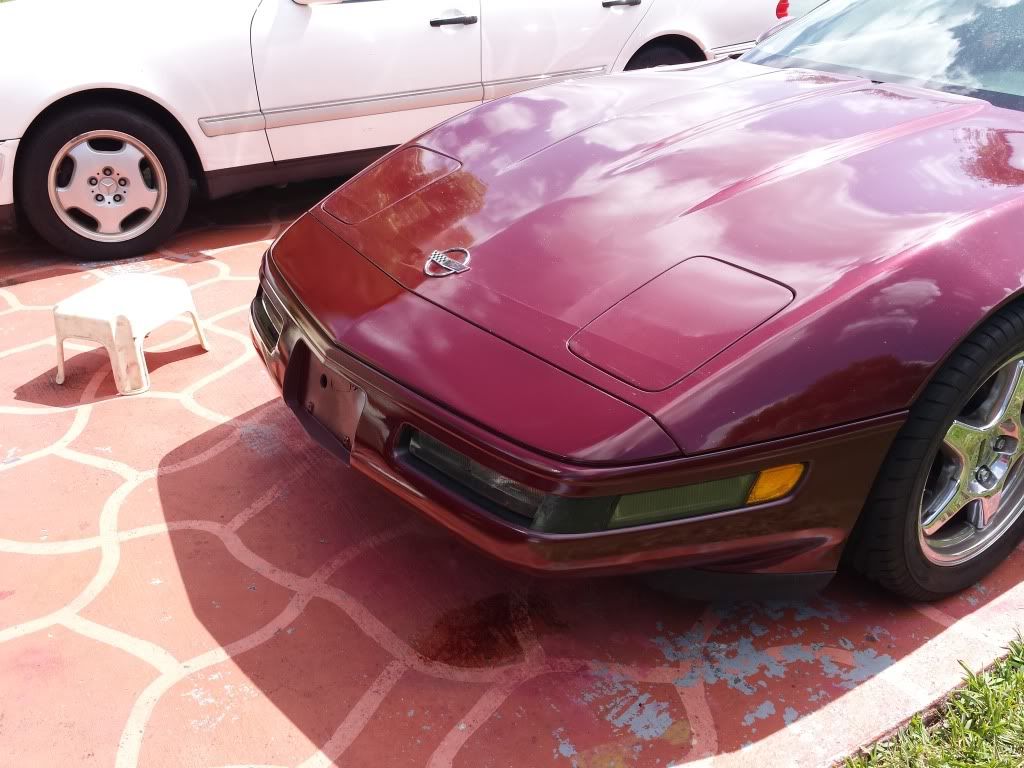
A couple more pictures after sanding 1500/2000/2500 grit and hitting it with rubbing compound/ 3m scratch remover and still needing a final coat of mirror glaze.
I am sure I will end up getting a buffer so I can do the rest of the car now.....
I am sure I will end up getting a buffer so I can do the rest of the car now.....
08-11-2013, 03:02 PM
#15
Team Owner


Member Since: Aug 2005
Location: Riverside County Southern California
Posts: 34,988
Received 501 Likes
on
342 Posts
Co-winner 2020 C4 of the Year - Modified
2018 Corvette of Year Finalist
2017 C4 of Year
2016 C7 of Year Finalist
St. Jude Donor '09-'10-'11-'12-'13-'14-'15-'16-'17-'18-'19-'20


It looks good from here. People have gone nutz. $1,000-$2,500 to paint the front bumper fascia. What a bunch of xucks.
08-11-2013, 04:30 PM
#16
Drifting

What a great job and not to mention the money you saved doing it yourself, and the satisfaction of doing a great job that sounds like scared you a little bit to start. Congrats on a job well done....
08-11-2013, 06:16 PM
#17
Pro
Thread Starter
It was quite intimidating. Even after much reading and video watching, the thought of stripping the paint to a point of no return, if I screwed up I would still need to get it fixed at a body shop. I have done quite a bit of rattle can painting and I am pretty good at not getting runs or spotting, but that has been mostly in my jeep add on parts, tube bumpers, armor plating, etc. This was a completely different job from anything else I had done. I will complete the detailing of the whole car now, I am pretty happy with the outcome.
08-11-2013, 06:23 PM
#18
Burning Brakes


Well done!
08-11-2013, 08:42 PM
#19
Pro
Thread Starter
We all know that is all a bunch of bull nowadays, but that is what the corvette tax is for.
As an example, we had an insurance repair on our kids E420, and it all came out for $2750.00 including a used but original door, and a used but original fender. The shop painted the whole front bumper and moldings, fender, front and rear right doors and moldings. The match was perfect and you cant tell what was changed. I took the Vette to the same place, and they were the ones at $2350 for just the front bumper, with removal and reinstall, and paint. Had that price included the hood and fender gills, it would have seemed more appropriate.
By the way, I read several reviews about automotive touch paint and they were all great on the color match, besides of being one of the few places that package 2k clear coat in cans too.
My total repair including the sanding and buffing materials came to $140.00 including shipping, plus the 8 hours on saturday, and 3 hours polishing on Sunday.
I think that is very fair.
08-12-2013, 05:05 PM
#20
Pro
Thread Starter
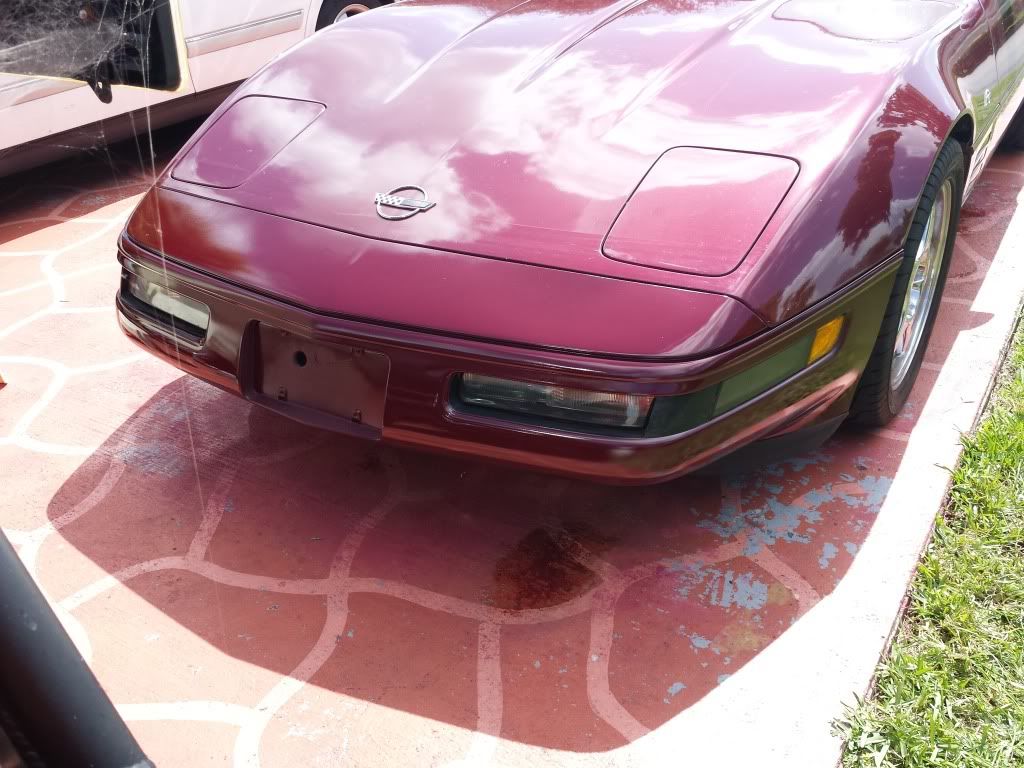
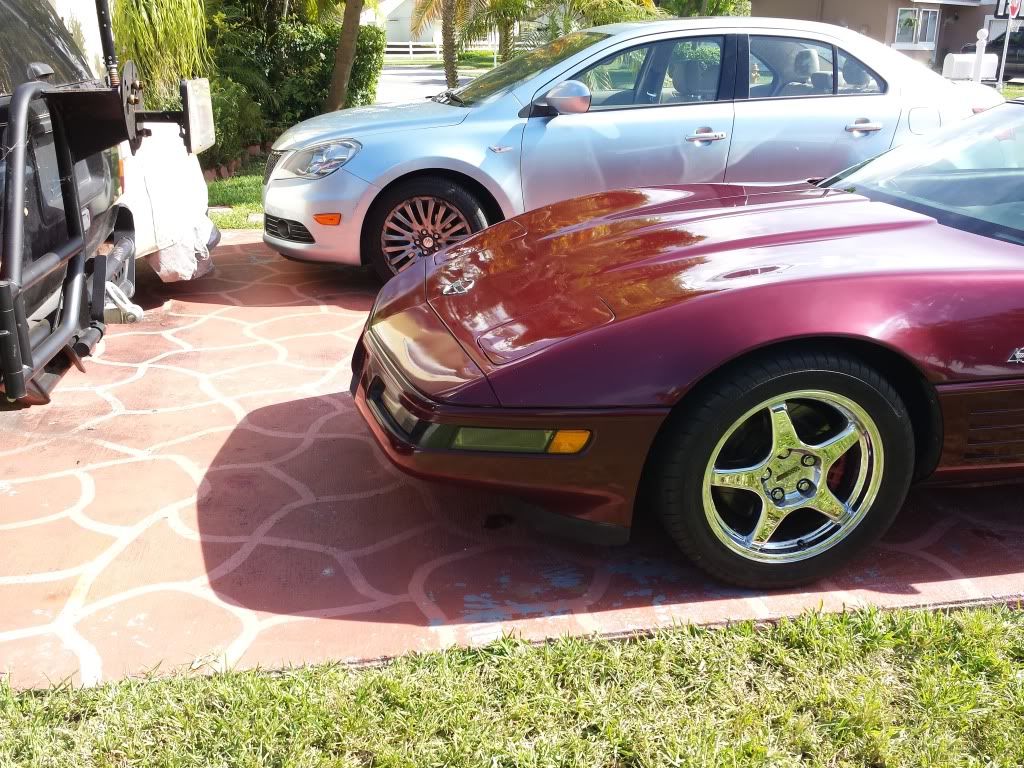
Final compound rubbing with 205 and mirror glaze after that.
I stopped once I run out of shade, but was able to do a once over with the DA to the whole car. I am surprised at how good the rest of the paint came out with the DA.
I stopped once I run out of shade, but was able to do a once over with the DA to the whole car. I am surprised at how good the rest of the paint came out with the DA.