1985 Corvette Project


 09-26-2015, 12:19 AM
#22
Le Mans Master


I too love these threads! Good job on color choice! 

 09-27-2015, 10:03 AM
#24


Great thread, and project!!
I asked to keep us posted and you certainly did, making it entertaining to see the progress! What a difference! I like the color and pleased to see the patience on this once neglected 85!
You never know how these threads will turn out, some give up, some have more problems than they want to post and you never hear back, but this one looks like it made it to the finished line.
09-28-2015, 12:38 PM
#25
Burning Brakes

Thread Starter
Member Since: Jan 2014
Posts: 874
Received 209 Likes
on
114 Posts
2023 C4 of the Year Finalist- Modified
2022 C4 of the Year Finalist - Modified
2021 C4 of the Year - Modified Finalist
C4 of Year Finalist (appearance mods) 2019
2016 C4 of the Year Finalist

Thanks to all!
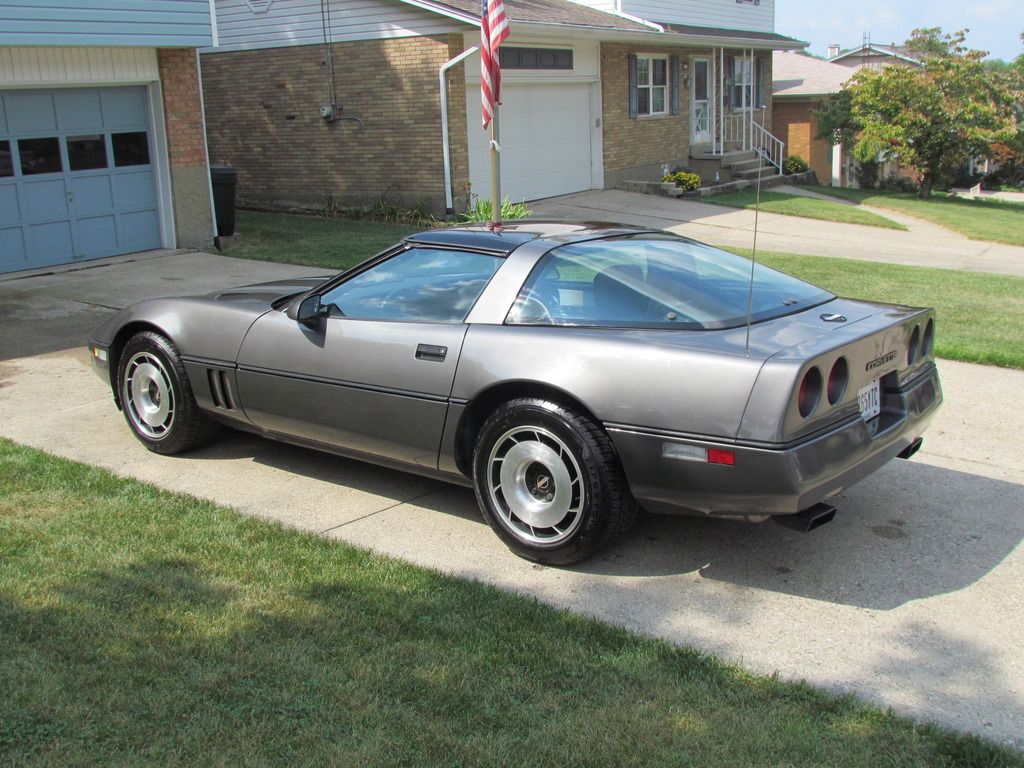
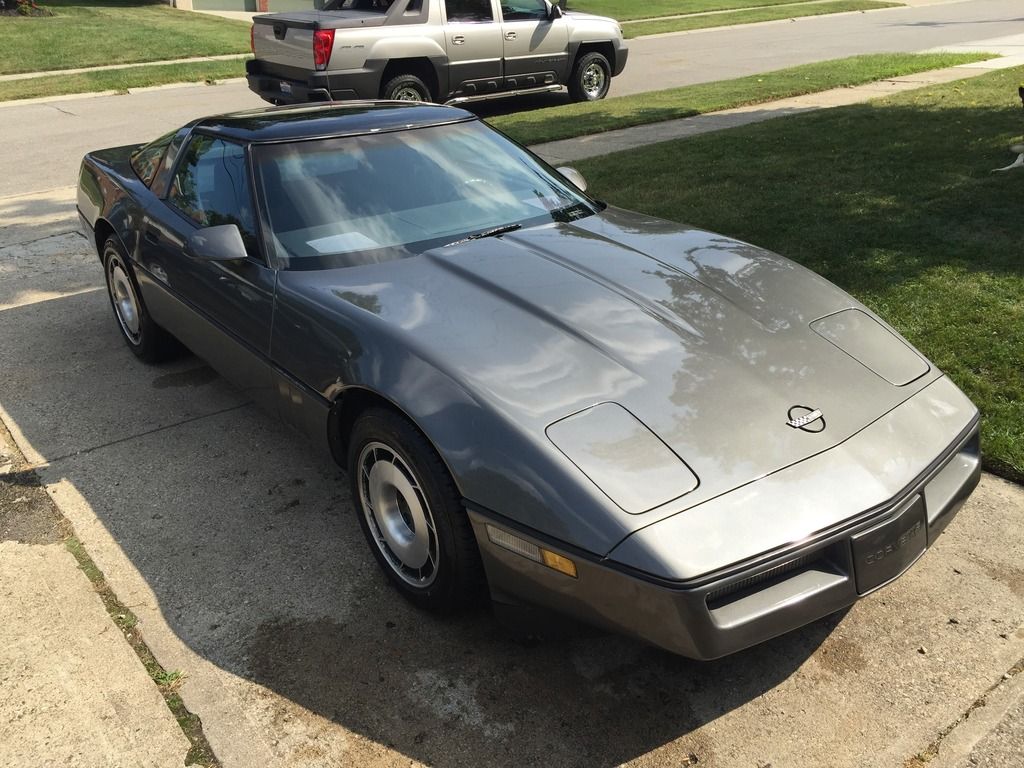
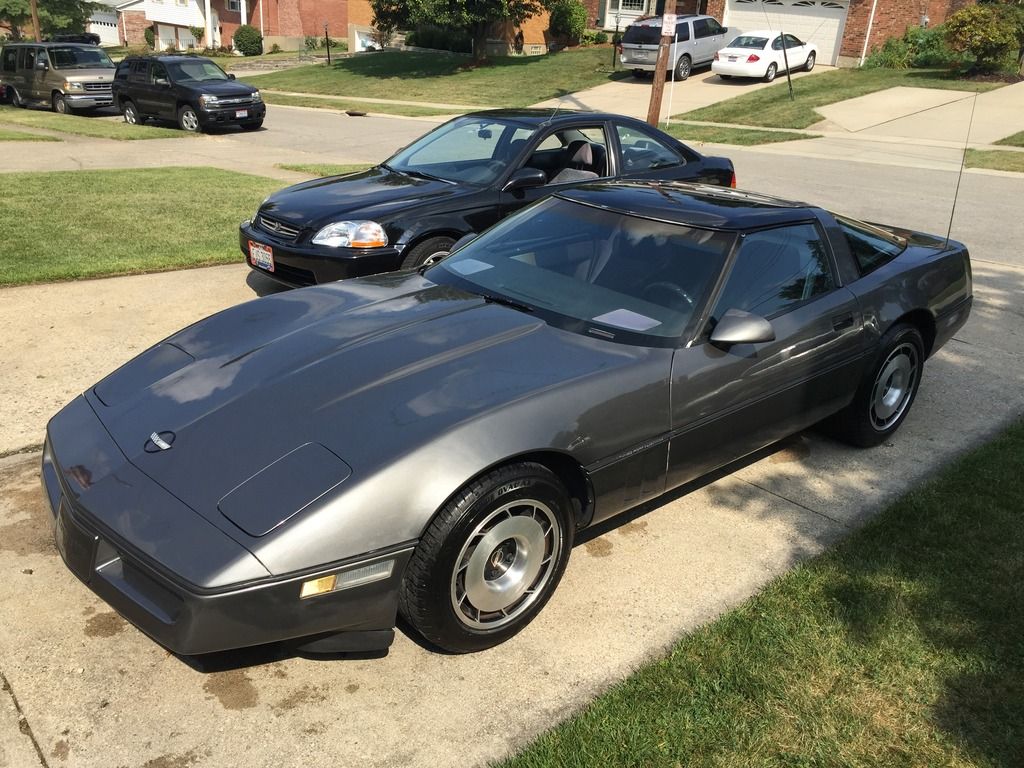
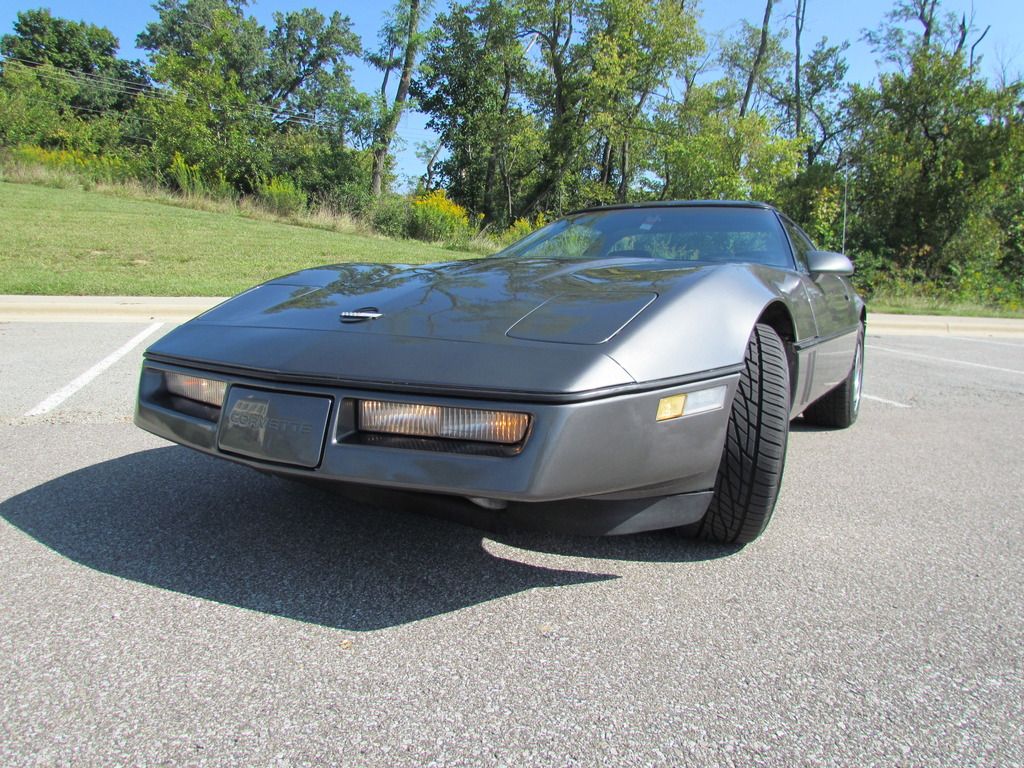
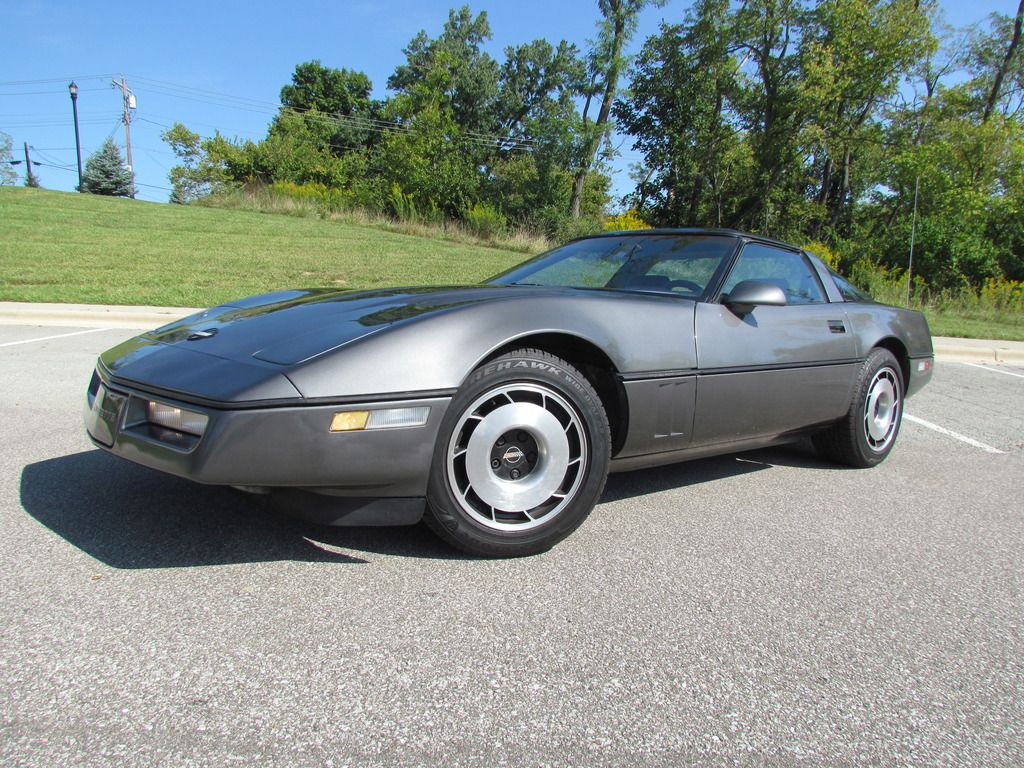
It has certainly been a ride and I do think the color looks pretty awesome on the car. It gets really dark in places, and really bright under the light. After we painted the car, we did some wet sanding and buffing to bring the shine out and take any orange peel/ texture away. It isn't perfect, but looks pretty good.
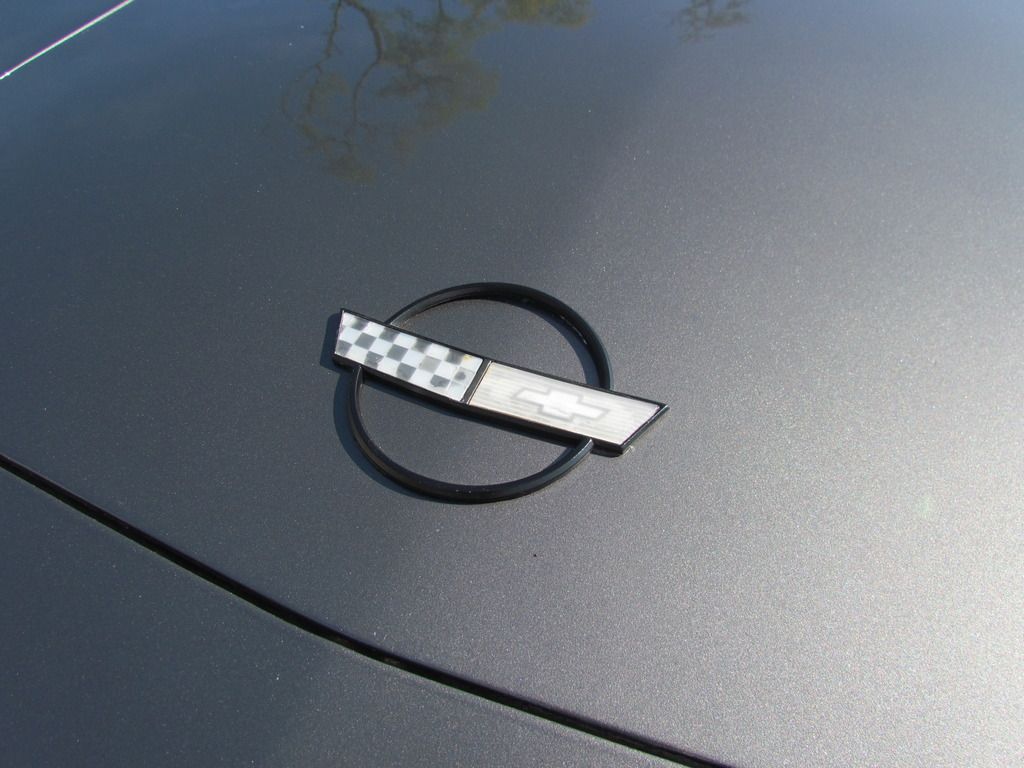
We installed the Willcox weatherstrip after paint, and as some others have reported the hatch corners split but all of the others fit perfectly and are high quality. I repainted the emblems with a flat black to make them more presentable, but eventually it will need new ones.
Here are better pictures of the car cleaned up
It has certainly been a ride and I do think the color looks pretty awesome on the car. It gets really dark in places, and really bright under the light. After we painted the car, we did some wet sanding and buffing to bring the shine out and take any orange peel/ texture away. It isn't perfect, but looks pretty good.
We installed the Willcox weatherstrip after paint, and as some others have reported the hatch corners split but all of the others fit perfectly and are high quality. I repainted the emblems with a flat black to make them more presentable, but eventually it will need new ones.
Here are better pictures of the car cleaned up


 09-28-2015, 02:17 PM
#26

Wow really nice, and I like the color, turned out great
09-28-2015, 03:49 PM
#27
Drifting


Looks great. You and your family do quality work. Makes me wish I had family in the business.
With regard to the corners of the weatherstrip in the hatch -
I had the same problem (among others) with corners being separated. I took some duct tape and ripped it to approximately the width of the weatherstrip and about four inches in length. Then I wiped the weatherstrip edges with "OOPS" adhesive cleaner (Home Depot carries it). A few minutes later I wiped it again with alcohol and let it dry.
Then I took 3M weatherstrip adhesive and put it on each edge of the ends.
Now the hard part, I pushed them together and held them for a few minutes then carefully put the strip of duct tape on the outer edge to hold them together. I left the hatch open for most of the day and left the tape on after I closed it for the night. The next day I pulled off the tape and it has held for two years.
09-28-2015, 04:21 PM
#28
Safety Car

I've seen some installation procedures for the hatch weatherstrip that say to start the installation in the middle of the hatch. When you do this, you end up stretching the weatherstrip in the corners. Not good!
It's much better to start the installation in the corners to minimize any stress in the corners. Let the adhesive cure in the corners before installing the center areas at the top and at the rear of the hatch. The weatherstrip is much more tolerant of stress in the center areas than in the corners! It works for me!

It's much better to start the installation in the corners to minimize any stress in the corners. Let the adhesive cure in the corners before installing the center areas at the top and at the rear of the hatch. The weatherstrip is much more tolerant of stress in the center areas than in the corners! It works for me!
09-28-2015, 06:30 PM
#29
Burning Brakes
Thread Starter
Member Since: Jan 2014
Posts: 874
Received 209 Likes
on
114 Posts
2023 C4 of the Year Finalist- Modified
2022 C4 of the Year Finalist - Modified
2021 C4 of the Year - Modified Finalist
C4 of Year Finalist (appearance mods) 2019
2016 C4 of the Year Finalist
Thanks for all of the suggestions and compliments!
Our solution to the weatherstrip issue was to take some of old weatherstrip, slip it in the gap, then use the 3M weatherstrip adhesive to seal it off. It seemed to work well and after a few showers nothing has leaked in. Soon we might tint it, something light enough to not have the limo look to stay stock looking, but something dark enough to keep all of the heat out. Its a greenhouse with the acrylic top and no air conditioning. In July, the compressor clutches locked up so that hopefully will get done eventually. But now is a great time of year just to drive and enjoy it, especially with the top off
Our solution to the weatherstrip issue was to take some of old weatherstrip, slip it in the gap, then use the 3M weatherstrip adhesive to seal it off. It seemed to work well and after a few showers nothing has leaked in. Soon we might tint it, something light enough to not have the limo look to stay stock looking, but something dark enough to keep all of the heat out. Its a greenhouse with the acrylic top and no air conditioning. In July, the compressor clutches locked up so that hopefully will get done eventually. But now is a great time of year just to drive and enjoy it, especially with the top off
09-28-2015, 10:32 PM
#30

Noce color. is it like cyber grey? nm, i googled and got this:http://blog.kerbeck.com/2014/09/compare-new-shark-gray-to-cyber-gray.html?m=1
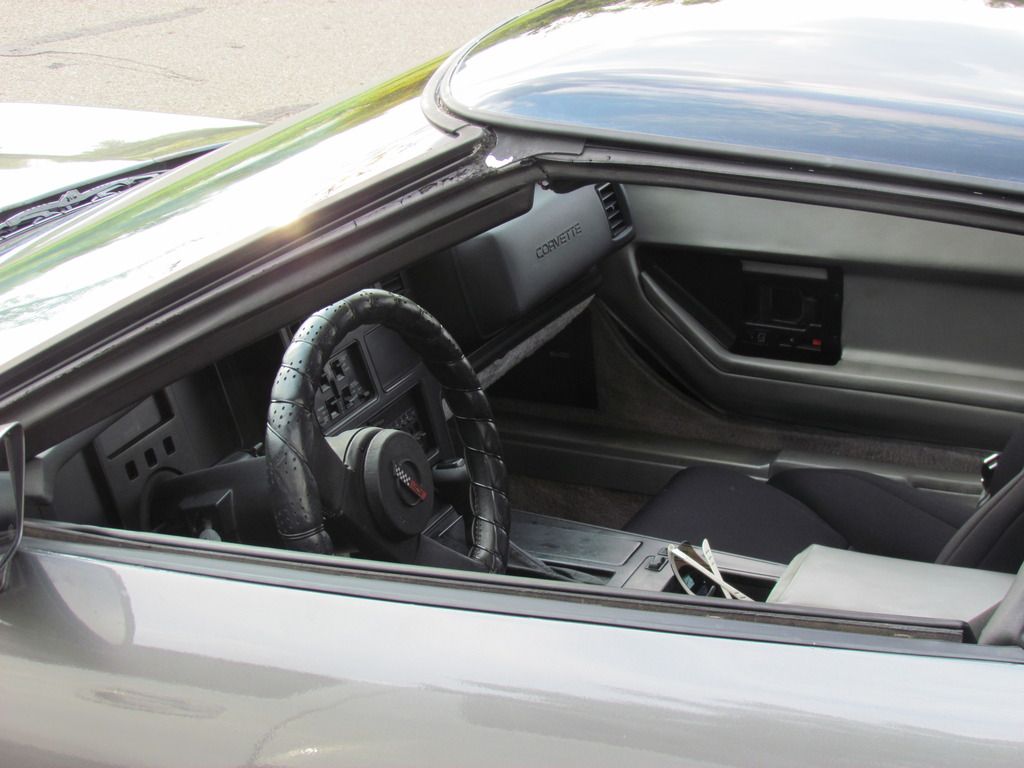
is it possible to show us the seat covers you used with some pics of the front and sides and back ?
is it possible to show us the seat covers you used with some pics of the front and sides and back ?
Last edited by VikingTrad3r; 09-28-2015 at 10:36 PM.
09-29-2015, 12:24 AM
#31
Safety Car
It's much better to start the installation in the corners to minimize any stress in the corners. Let the adhesive cure in the corners before installing the center areas at the top and at the rear of the hatch. The weatherstrip is much more tolerant of stress in the center areas than in the corners! It works for me!
09-29-2015, 11:50 AM
#32
Racer

Thanks for the great thread. After setting for three years the car finally got into the right hands. Nice car and a great job. I really like the color
Have you had any trouble from the law for driving around with historic plates? I'm thinking about putting them on mine.
Have you had any trouble from the law for driving around with historic plates? I'm thinking about putting them on mine.
09-29-2015, 12:47 PM
#33
Burning Brakes
Thread Starter
Member Since: Jan 2014
Posts: 874
Received 209 Likes
on
114 Posts
2023 C4 of the Year Finalist- Modified
2022 C4 of the Year Finalist - Modified
2021 C4 of the Year - Modified Finalist
C4 of Year Finalist (appearance mods) 2019
2016 C4 of the Year Finalist
Noce color. is it like cyber grey? nm, i googled and got this:http://blog.kerbeck.com/2014/09/comp...-gray.html?m=1
is it possible to show us the seat covers you used with some pics of the front and sides and back ?
is it possible to show us the seat covers you used with some pics of the front and sides and back ?


 10-07-2015, 09:17 AM
#35
Burning Brakes
Thread Starter
Member Since: Jan 2014
Posts: 874
Received 209 Likes
on
114 Posts
2023 C4 of the Year Finalist- Modified
2022 C4 of the Year Finalist - Modified
2021 C4 of the Year - Modified Finalist
C4 of Year Finalist (appearance mods) 2019
2016 C4 of the Year Finalist
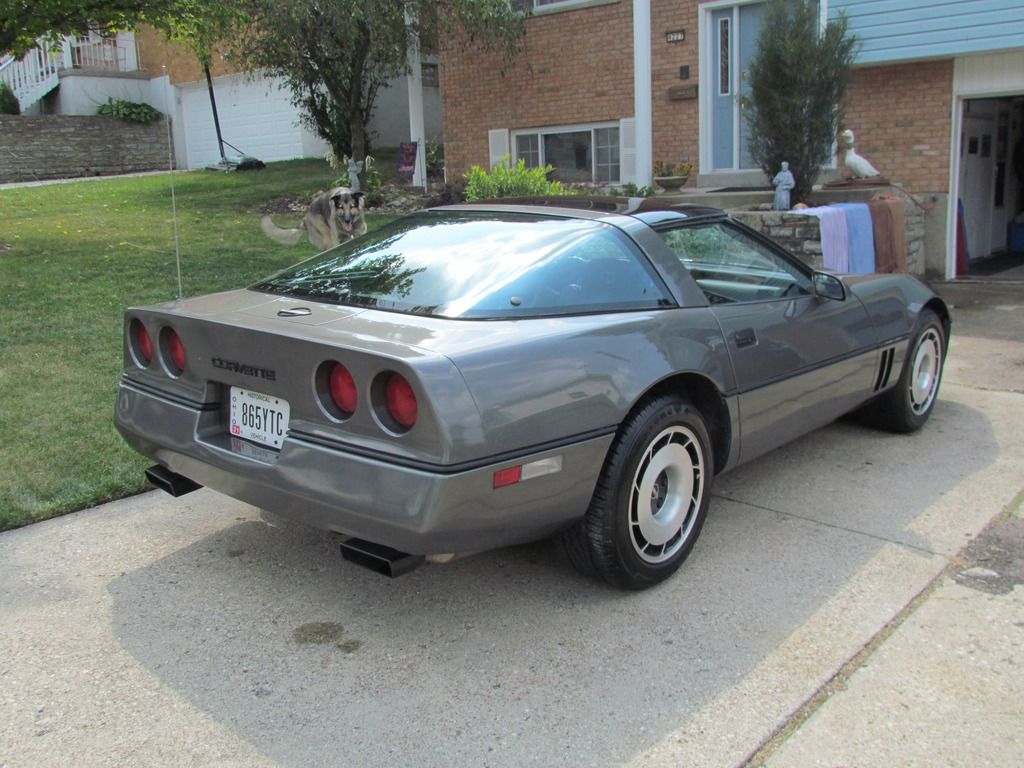
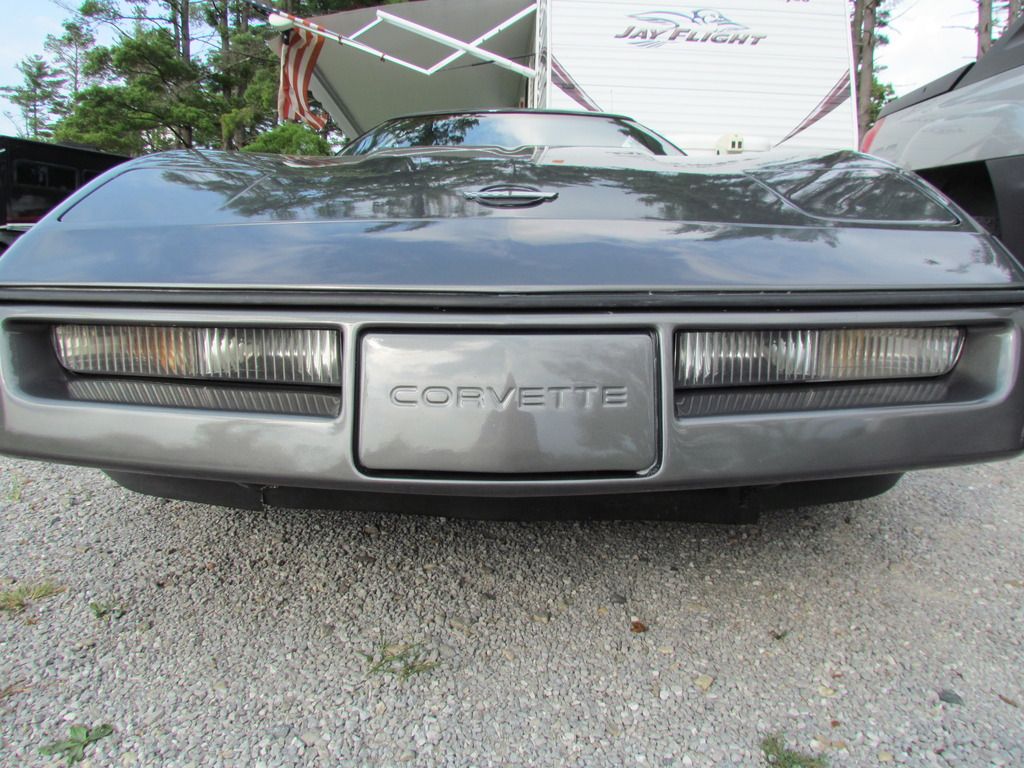
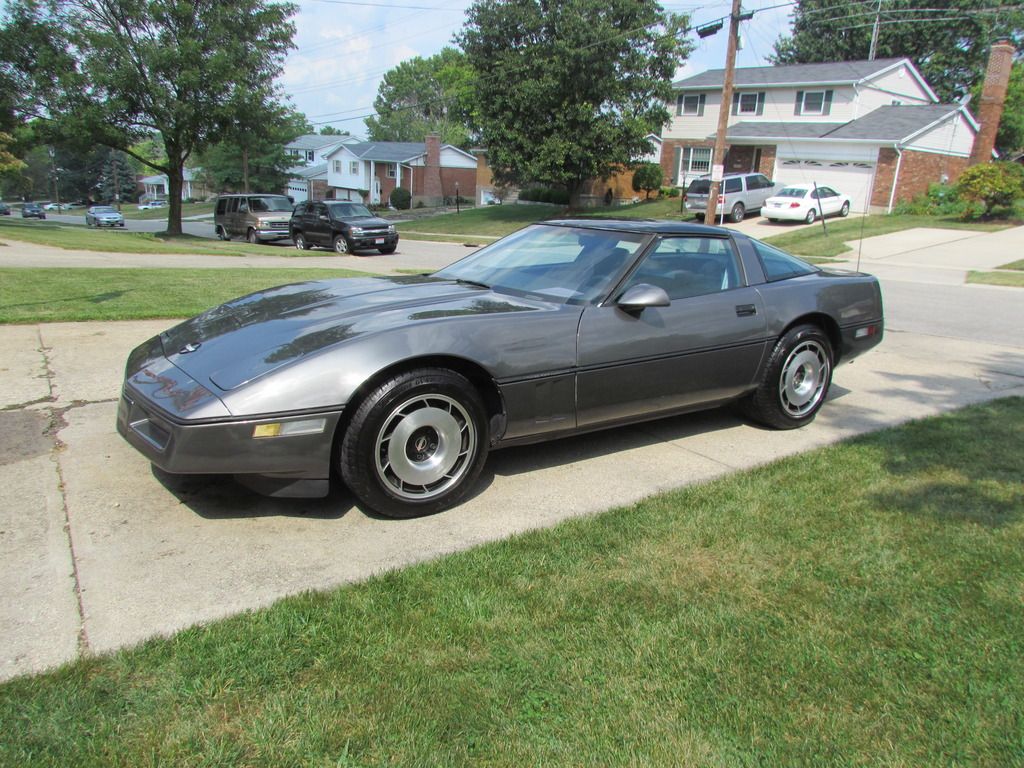
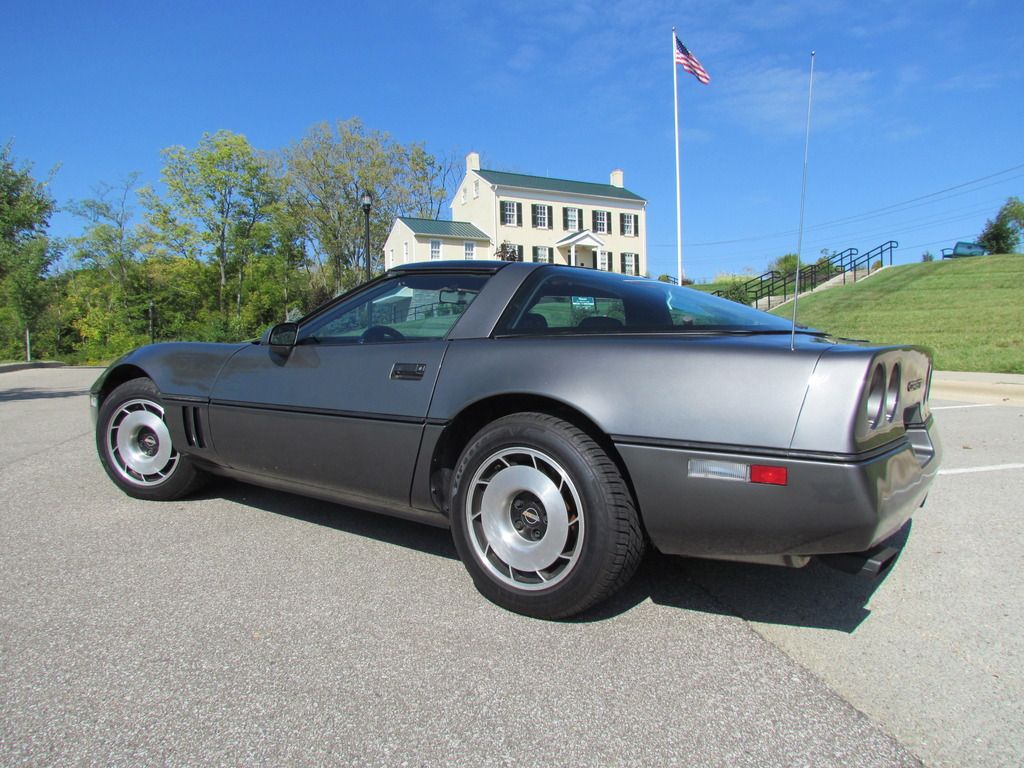
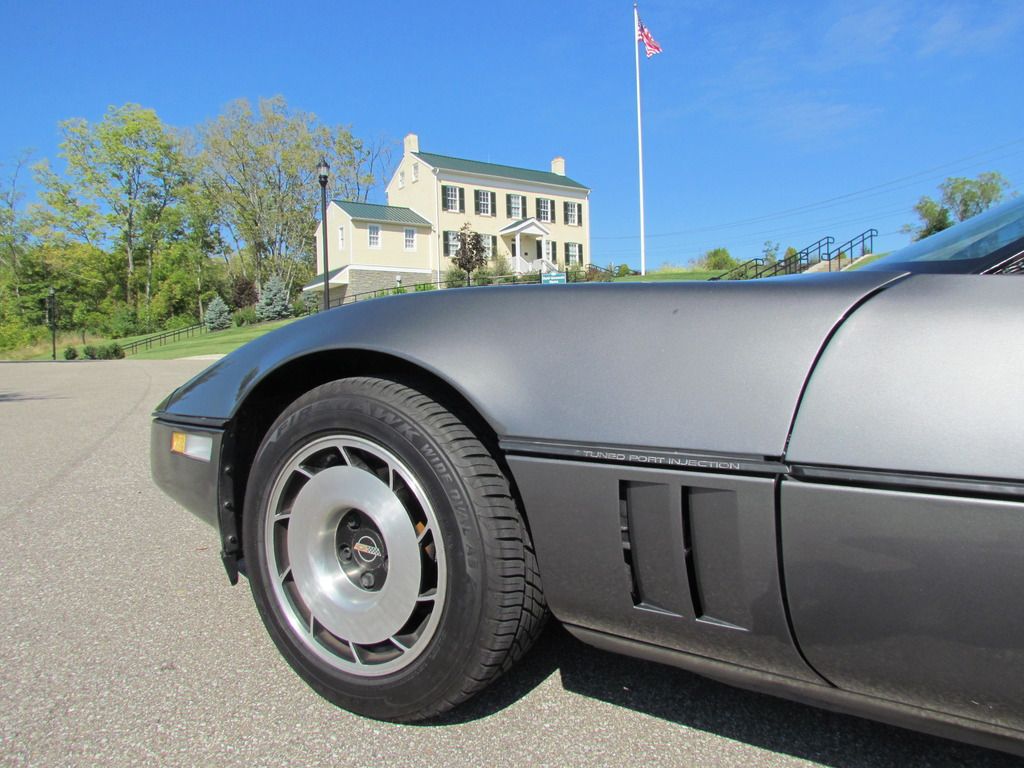
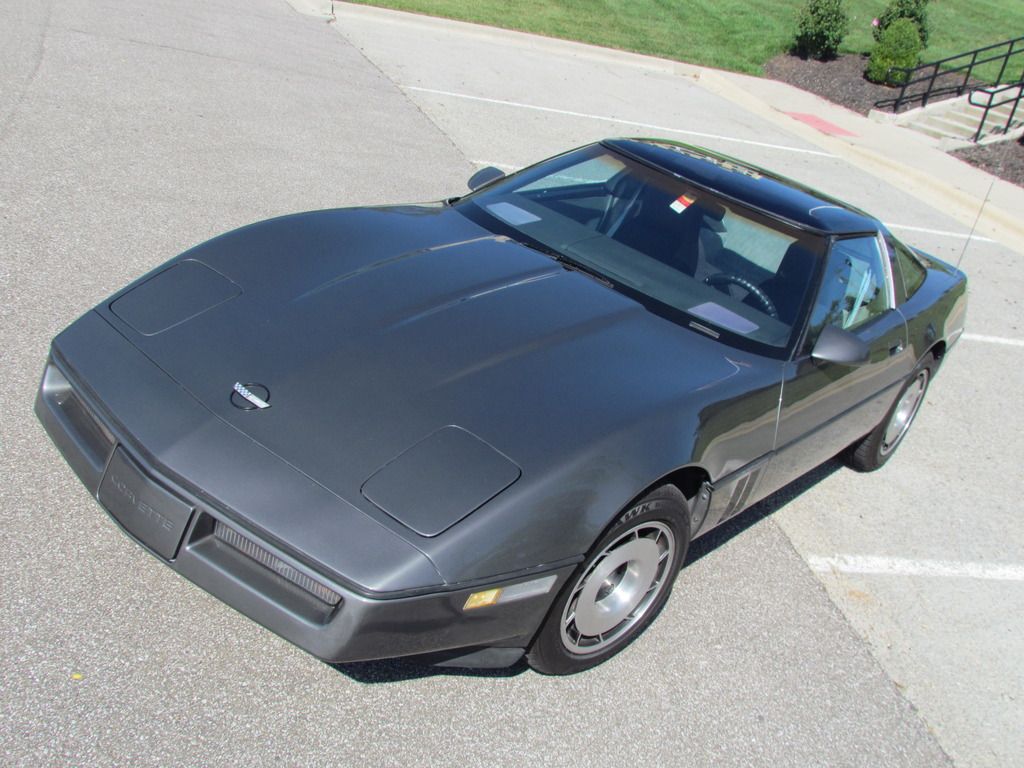
Here are some pictures of the car cleaned up and at the local park, and shot with a camera much better than an iPhone


 10-07-2015, 10:29 AM
#36
Safety Car
Looks really great! Watching a project come together helps motivate folks to get out there and dive into what they have waiting to do. I recently retired my '85 and as the funds become available I will be heading along your same lines.
Congrats to you and your dad!
Congrats to you and your dad!
10-21-2015, 01:01 PM
#37
Burning Brakes
Thread Starter
Member Since: Jan 2014
Posts: 874
Received 209 Likes
on
114 Posts
2023 C4 of the Year Finalist- Modified
2022 C4 of the Year Finalist - Modified
2021 C4 of the Year - Modified Finalist
C4 of Year Finalist (appearance mods) 2019
2016 C4 of the Year Finalist
Thanks for all the compliments and advice!
So I have a few questions:
Does anyone have recommendations for an inexpensive indoor car cover for the winter?
The compressor clutches for the A/C locked up towards the end of summer, what are some recommendations for a new compressor/accessories that need to be replaced? Rock Auto has the cheapest and other CF vendors have it as well. FWIW We plan on using R4 because we have access to it.
What is the best way to clean up the wheels? I wet sanded all 4 and the drivers side turned out fine, but the passenger side where the sun was when it sat still look bad because of the clear coat.
The radio (Bose) is an issue, as they all seem to be. It has been working better as of late, and the speakers sound fine when they get the signal but other times it goes out. Pushing between the ***** seems to bring it back occasionally or a numb in the road will do it. Is this an issue with the receiver itself? Ideally we would like to buy an adapter for the Bose and the new head unit and keep the old speakers in to avoid rewiring the system.
Where does everyone recommend the cluster get rebuilt? I have heard of batee and also looked into Keen Parts where it gets sent out through them for a rebuild. Currently the system flickers on occasion, doesn't light up at all(Did it for a week then stopped), only works when the headlights or marker lights are on (dim only, could see the numbers with enough sun), and occasionally works right.
Thanks in advance!
11-03-2015, 01:36 PM
#38
Burning Brakes
Thread Starter
Member Since: Jan 2014
Posts: 874
Received 209 Likes
on
114 Posts
2023 C4 of the Year Finalist- Modified
2022 C4 of the Year Finalist - Modified
2021 C4 of the Year - Modified Finalist
C4 of Year Finalist (appearance mods) 2019
2016 C4 of the Year Finalist
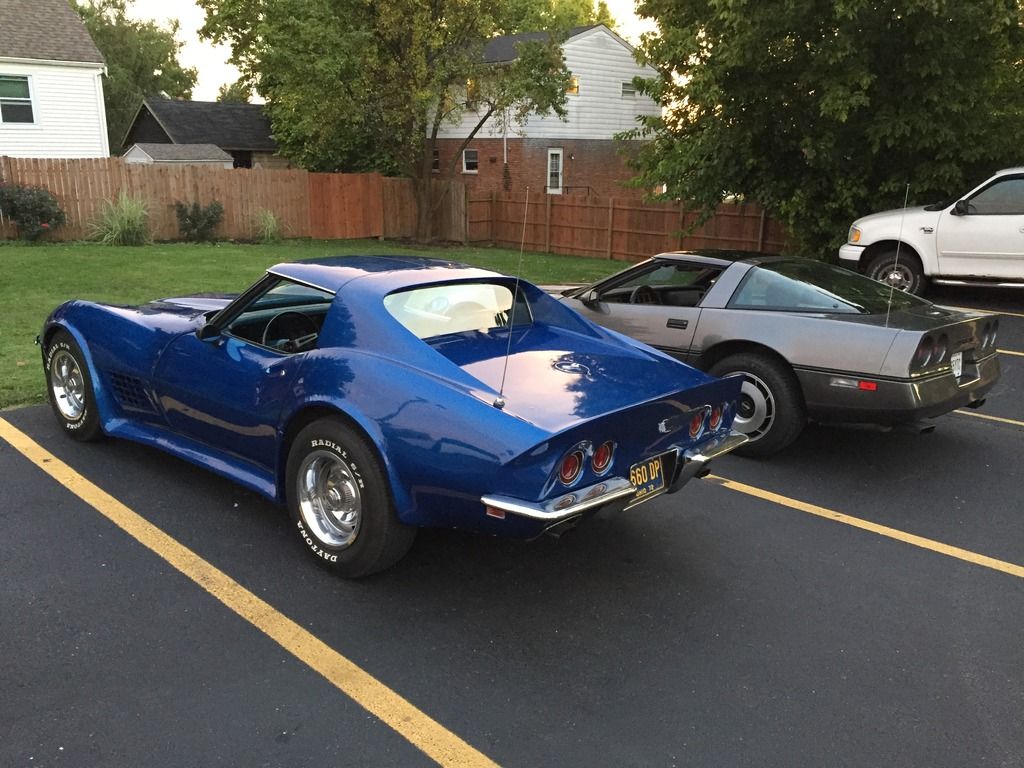
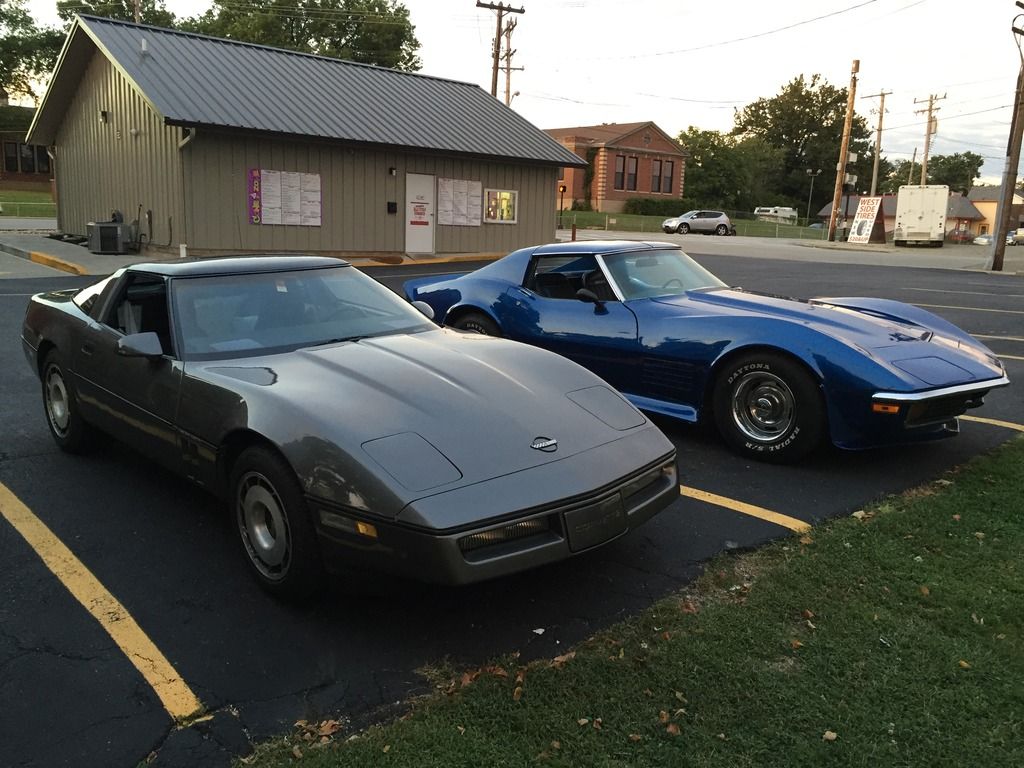
So in addition to the questions above, I have some pictures from a couple weeks ago. My dad drove his '72 and I drove our '85 for a little cruise and then to grab some ice cream. It was definitely one of the highlights of the project by far! Also, any help with the questions above would be awesome


 12-12-2015, 07:10 PM
#39
Burning Brakes
Thread Starter
Member Since: Jan 2014
Posts: 874
Received 209 Likes
on
114 Posts
2023 C4 of the Year Finalist- Modified
2022 C4 of the Year Finalist - Modified
2021 C4 of the Year - Modified Finalist
C4 of Year Finalist (appearance mods) 2019
2016 C4 of the Year Finalist
12-12-2015, 07:18 PM
#40
Burning Brakes
Thread Starter
Member Since: Jan 2014
Posts: 874
Received 209 Likes
on
114 Posts
2023 C4 of the Year Finalist- Modified
2022 C4 of the Year Finalist - Modified
2021 C4 of the Year - Modified Finalist
C4 of Year Finalist (appearance mods) 2019
2016 C4 of the Year Finalist
SO something interesting happened when driving tonight. I was in traffic for around an hour and coolant temps climbed to around 225 at the highest point, but then I got out of traffic and temps dipped to 200 before I parked it a few minutes later. After I parked it, about 15 minutes later I came back to the car and tried to start it, it cranked ran for a second or two, and died. I gave it gas and it started, ran rough for a few seconds and then ran fine. After that I drove on the highway, temps cooled to 175-180 and then parked it for an hour while busy. When I came back out, the same issue occurred. It acts like a carbureted motor on cold start on start and then runs fine afterwards. So if anyone has any ideas on whats up, I would greatly appreciate it.