When you click on links to various merchants on this site and make a purchase, this can result in this site earning a commission. Affiliate programs and affiliations include, but are not limited to, the eBay Partner Network.
Since I was not going to be running an AIR pump anymore, I took my old Long tube headers down to my friend Kurt who is a welder/ fabricator and had him remove the AIR tubes, he did a nice job.
The headers were then sent out to be ceramic coated.
My original header bolts were trashed luckily I found these sweet little bolts in a 'random bolts' bin at a local auto parts store. the are Stainless Steel and have both a hex head and an allen key slot in the center. They worked with the headers perfectly and only cost 25cents each
There was no way I was putting my nice new motor back in this mess of an engine bay!
So I got busy and removed all the flaking original paint and repainted the engine bay with some catalysed black automotive paint using my paint gun. Here's the result...
It as a bit challenging to paint around all the wires but in the end it came out pretty decent and certainly is way better than before.
The frame support bars also looked pretty tired...
I also sandblasted them
And primed + painted them with the same paint as the engine bay...
This was my first use of my new sand blaster which is an awesome tool for restoration work!
I know this thread is about my Corvette build but thought you guys might be interested in how I customized a 'generic sandblasting cabinet to work better...
Here's my 'custom' sand blaster...
I picked it up for a 'steal' because Princess auto had put the wrong price tag on it and the dust collector so I made them sell it to me for that price!
I added 1 micron bags to the dust collector and put cheap puck lights in the cabinet that I built sealed enclosures for - they make it easy to see in there!
The fresh air inlet I built has several small opening right above the window to help keep dust from collecting on the window since the air down drafts to the exhaust outlet near the bottom.
I also designed and built a pre-filter system between the blasting cabinet and the dust collector which works quite nicely and is easy to clean.
Finally, I set it up to run using my pressure pot blaster.
If you guys are interested I can take more pictures of may modified sand blaster and how I made it work better...
This sand blaster would be well used during the rest of my built as you will see.
Really enjoy reading the updates, very creative way of doing things, really awesome.
I appreciate that Branden. It is really nice to get to share my build with other enthusiasts who appreciate the project. Hope your build is going well.
While I was painting the engine bay I had noticed that the hood release cable was deteriorated and I did not want to risk the hood getting stuck closed so I ordered a new hood release cable..
I then removed the cable ends from the hood latches on either side of the hood...
Unfortunatly, the little retaining clips that hold the cable ends were very brittle and broke. Local dealer said they were discontinued... however a dealer in white rock (35min away) still had a few on thier shelf. so I got the clips from them and continued.
Next step was to remove the hood release latch, mine was held in by the two screws that I have arrows pointing to in the pictures...
The cable is then easily disattached fron the latch and can be pulled through the firewall.
I then pulled the new cable through the fire wall and re-attached it to the relase latch..,
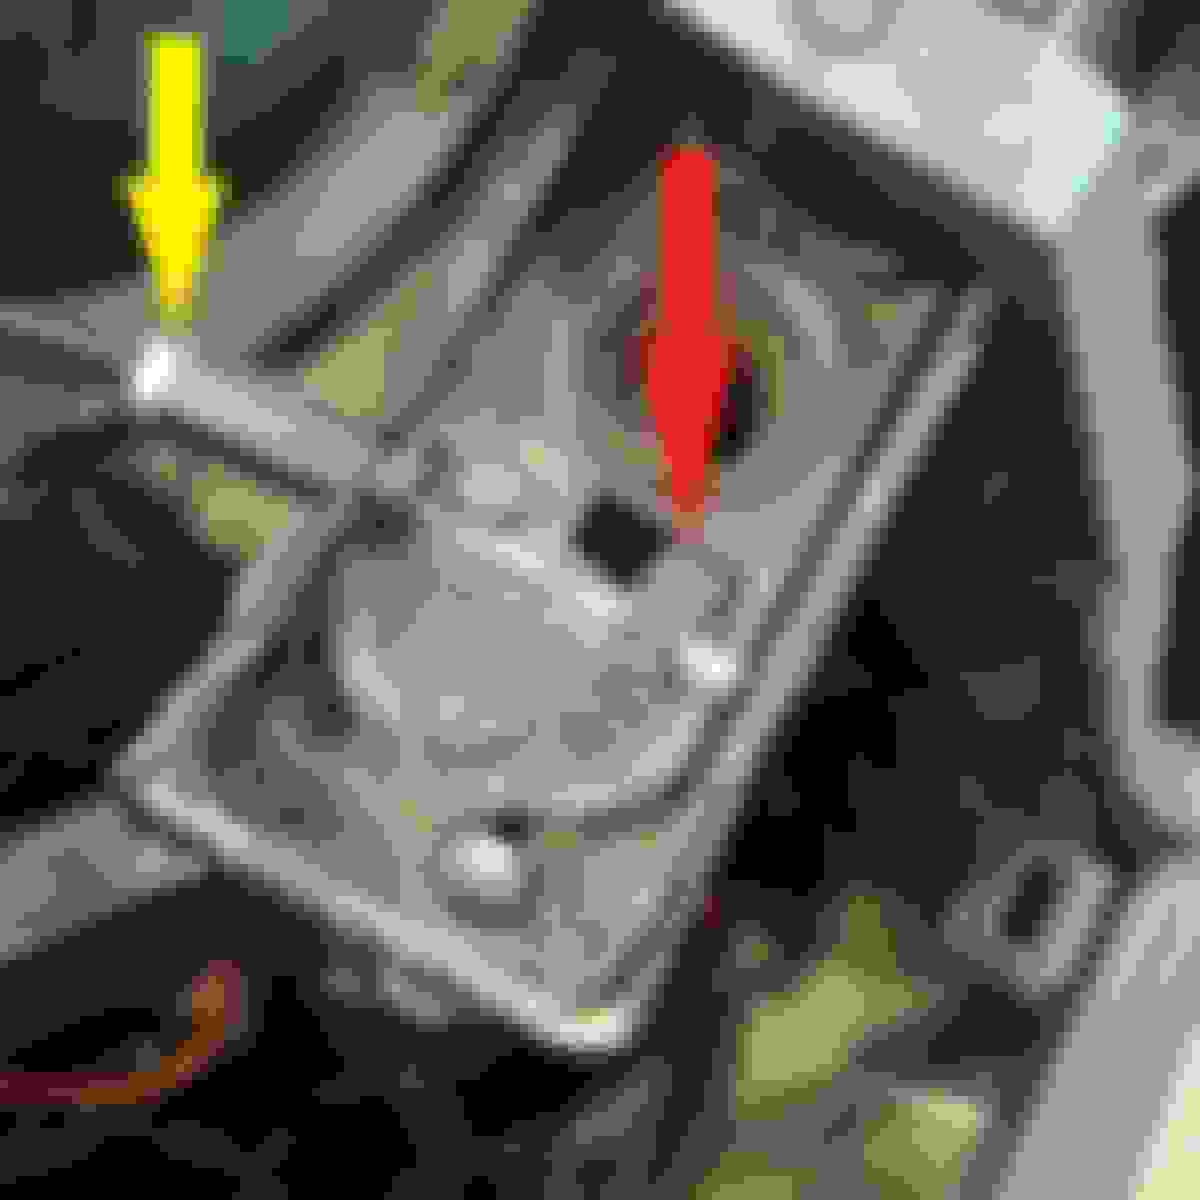
re-attached the cable ends to the hood relases using the new clips. The clips with the red arrow retain the cable and the nut with the yellow arrow is used to adjust the cable to proper tension...
That's all there is too it! now I won't have t worry about my hood release cable.
Man! I wish you were my next-door neighbor! The stuff I could learn just offering you to lend a hand would be amazing!
That's very kind of you to say. It would be cool if we were neighbors!
I'm sure there is many more knowledgeable people on this forum than me. However I did really enjoy the opportunity to learn about my car during this build, although it was a steep learning curve at times!
Jeeze the more I follow this thread the more I see things I like and want to do to mine! Really like the cover for the wire compared to the stock plastic covers, at the VERY bottom of the list of things my car will get (if ever) But i'm sure it looks amazing and much sleeker, awesome work as always!
Jeeze the more I follow this thread the more I see things I like and want to do to mine! Really like the cover for the wire compared to the stock plastic covers, at the VERY bottom of the list of things my car will get (if ever) But i'm sure it looks amazing and much sleeker, awesome work as always!
Thanks Branden. Ya I think the new wire looms look nicer than the tired old ones, since I had the engine and trans out it was a good time to put them on the harness.
How do you install those looms? There continues without a seam, right?
They do have a seam, however it is not very visible because the new looms have a pretty significant overlap where the seam is. So installation is the same as standard plastic wire looms. I also used black S/S zap straps every so often to make sure the looms stay secured.
They do have a seam, however it is not very visible because the new looms have a pretty significant overlap where the seam is. So installation is the same as standard plastic wire looms. I also used black S/S zap straps every so often to make sure the looms stay secured.
Here's a few pictures of how the new looms look on the harness, sorry I can't get any better pictures, because I have re-routed a lot of the harness so it is hidden from view so only a few areas like in the pictures are now visible.
I appreciate the encouragement, it's nice to share my build with other enthusiasts who appreciate the project.
I certainly have been inspired by many of the fantastic builds others on this forum have done.
Hopefully mine will become one of those fantastic builds someday keep up the great work, lot more interesting then glueing cracks in door panels if you ask me! Definitely one of the most useful and well explained builds out there.
 03-17-2016, 05:38 PM


 keep up the great work, lot more interesting then glueing cracks in door panels if you ask me! Definitely one of the most useful and well explained builds out there.