When you click on links to various merchants on this site and make a purchase, this can result in this site earning a commission. Affiliate programs and affiliations include, but are not limited to, the eBay Partner Network.
Awesome write-up buddy. You have any pictures of that intake in pieces? Curious if there is any baffling inside the plenum. Looks like to me that it adds a bunch more plenum area above the runner than the previous intake. You have access to a flow bench? Any dyno pulls with the previous engine configuration.
I have a buddy in the Abby area that has a flow bench, just in case.
That intake looks similar to the cross ram used in those old dodge max wedge 426 drag cars.
I definitely have a few pictures of the intake taken apart.
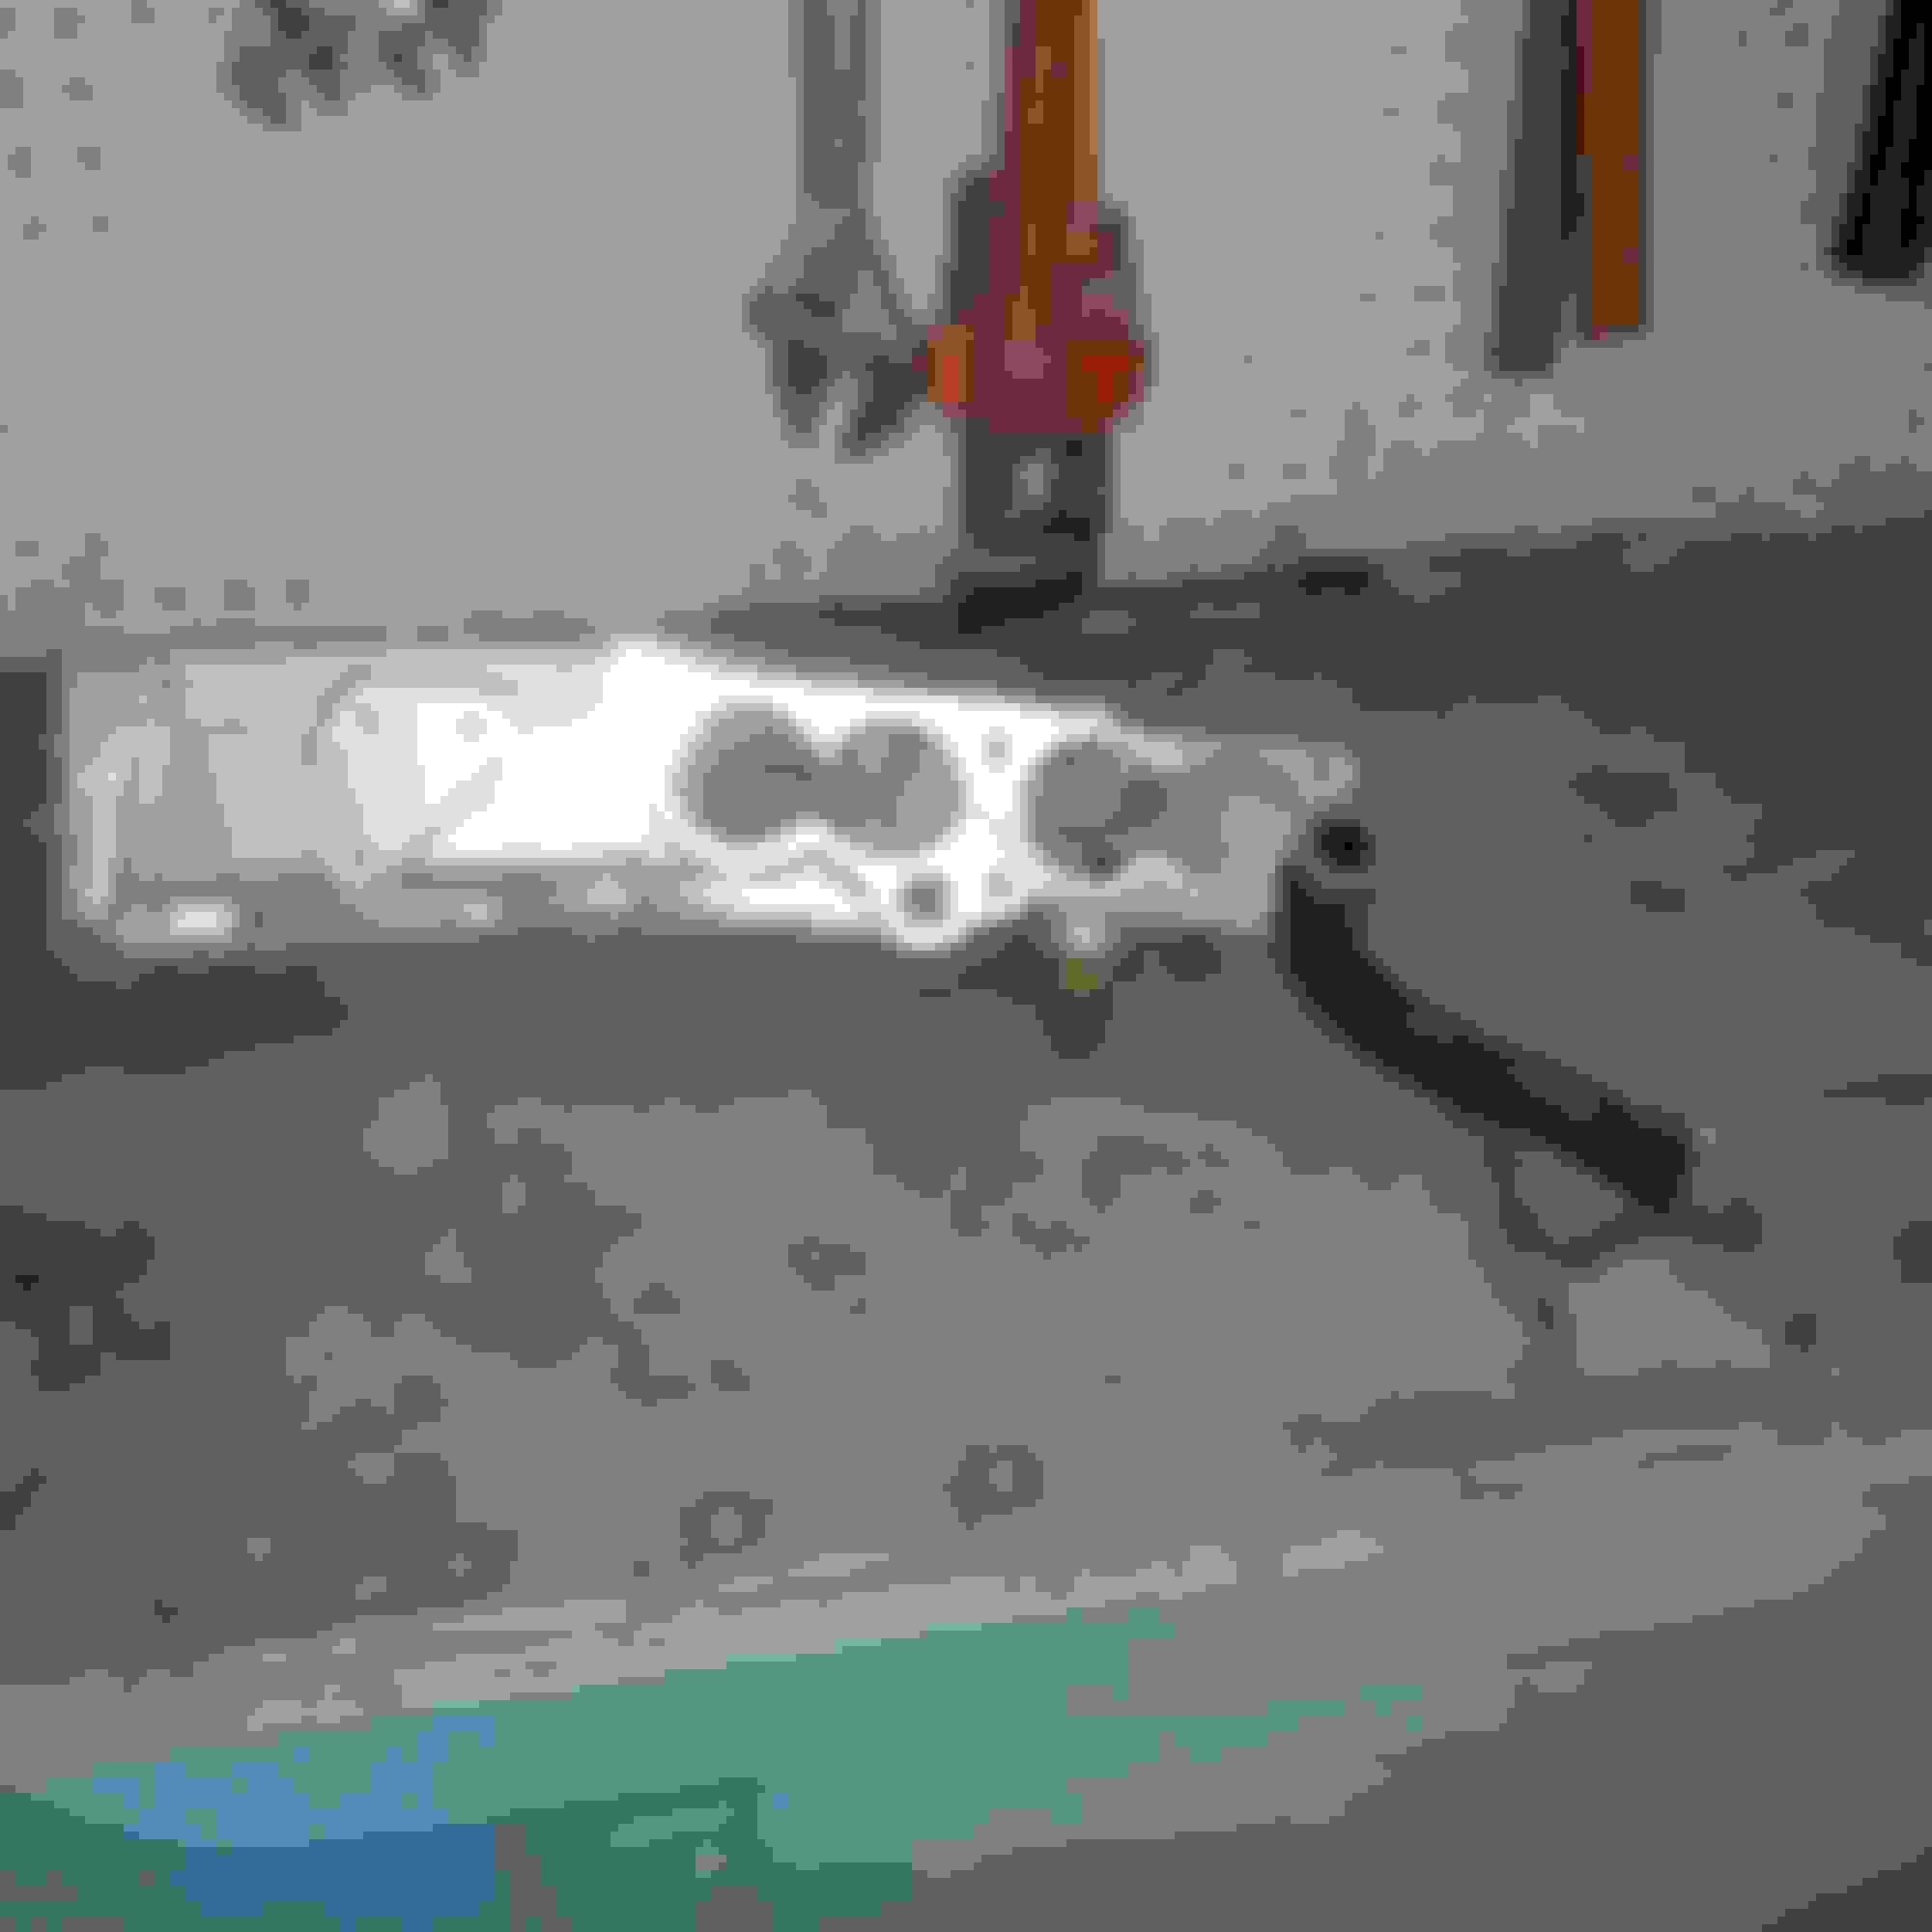
So basically, I am reusing my ported Edelbrock base, the runners are quite large in diameter and are one piece cast aluminum. They curve upwards from the base and mount directly to the underside of the large plenum. Rather than curving up and connecting to the side like the stock ones.
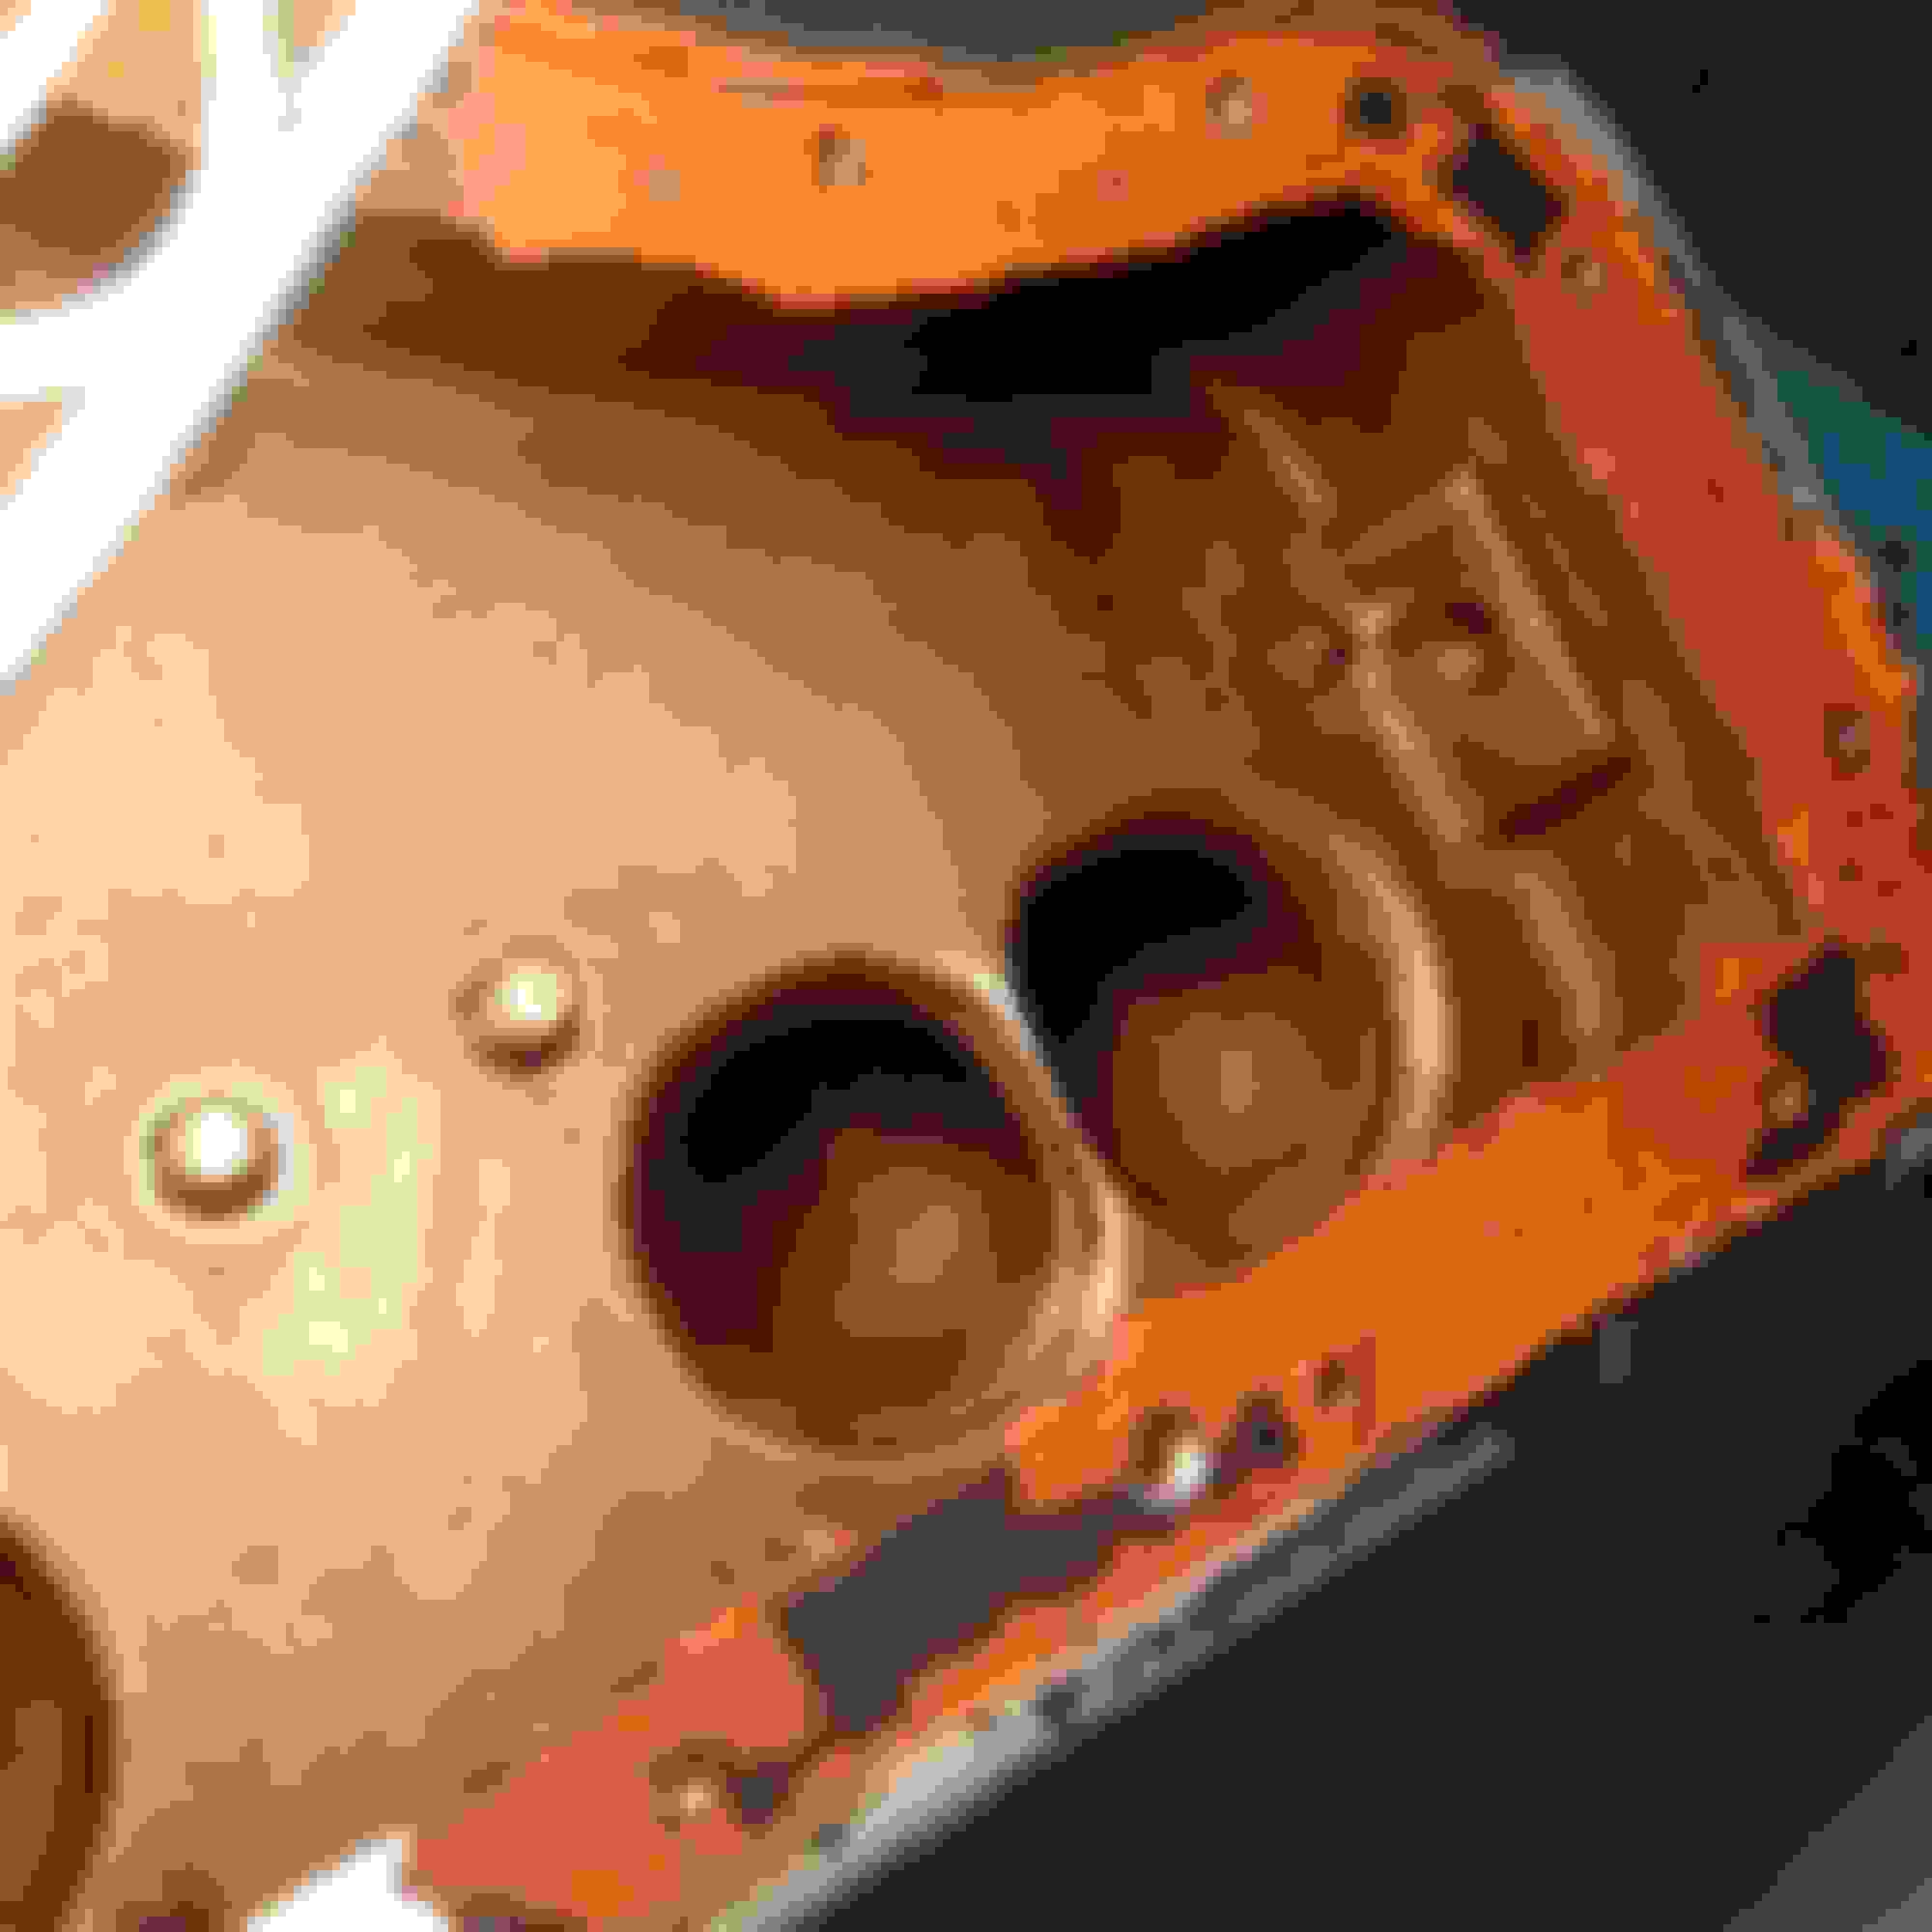
The plenum is quite large and has no baffling its basically a big aluminum box with 8 runner opening on the bottom (4 on each side of the bottom) and EGR provisions.
Here's a picture of the plenum and runners part way through my restoring them:
EDIT: forgot to mention, no I unfortunately don't have any dyno runs etc.. from the old combo. But the old intake was pretty heavily ported an at least looked like it flowed well, so I guess we will see if the theory behind super ram's large plenum and shorter runner will work in reality.
So now it was time to start cleaning up my Old nasty Super Ram.
I was a little worried before I started to take apart the intake that it might be a victim of some hack-job porting, However I was pleasantly surprised to find it was basically untouched aside from a nice extrude hone on the runners
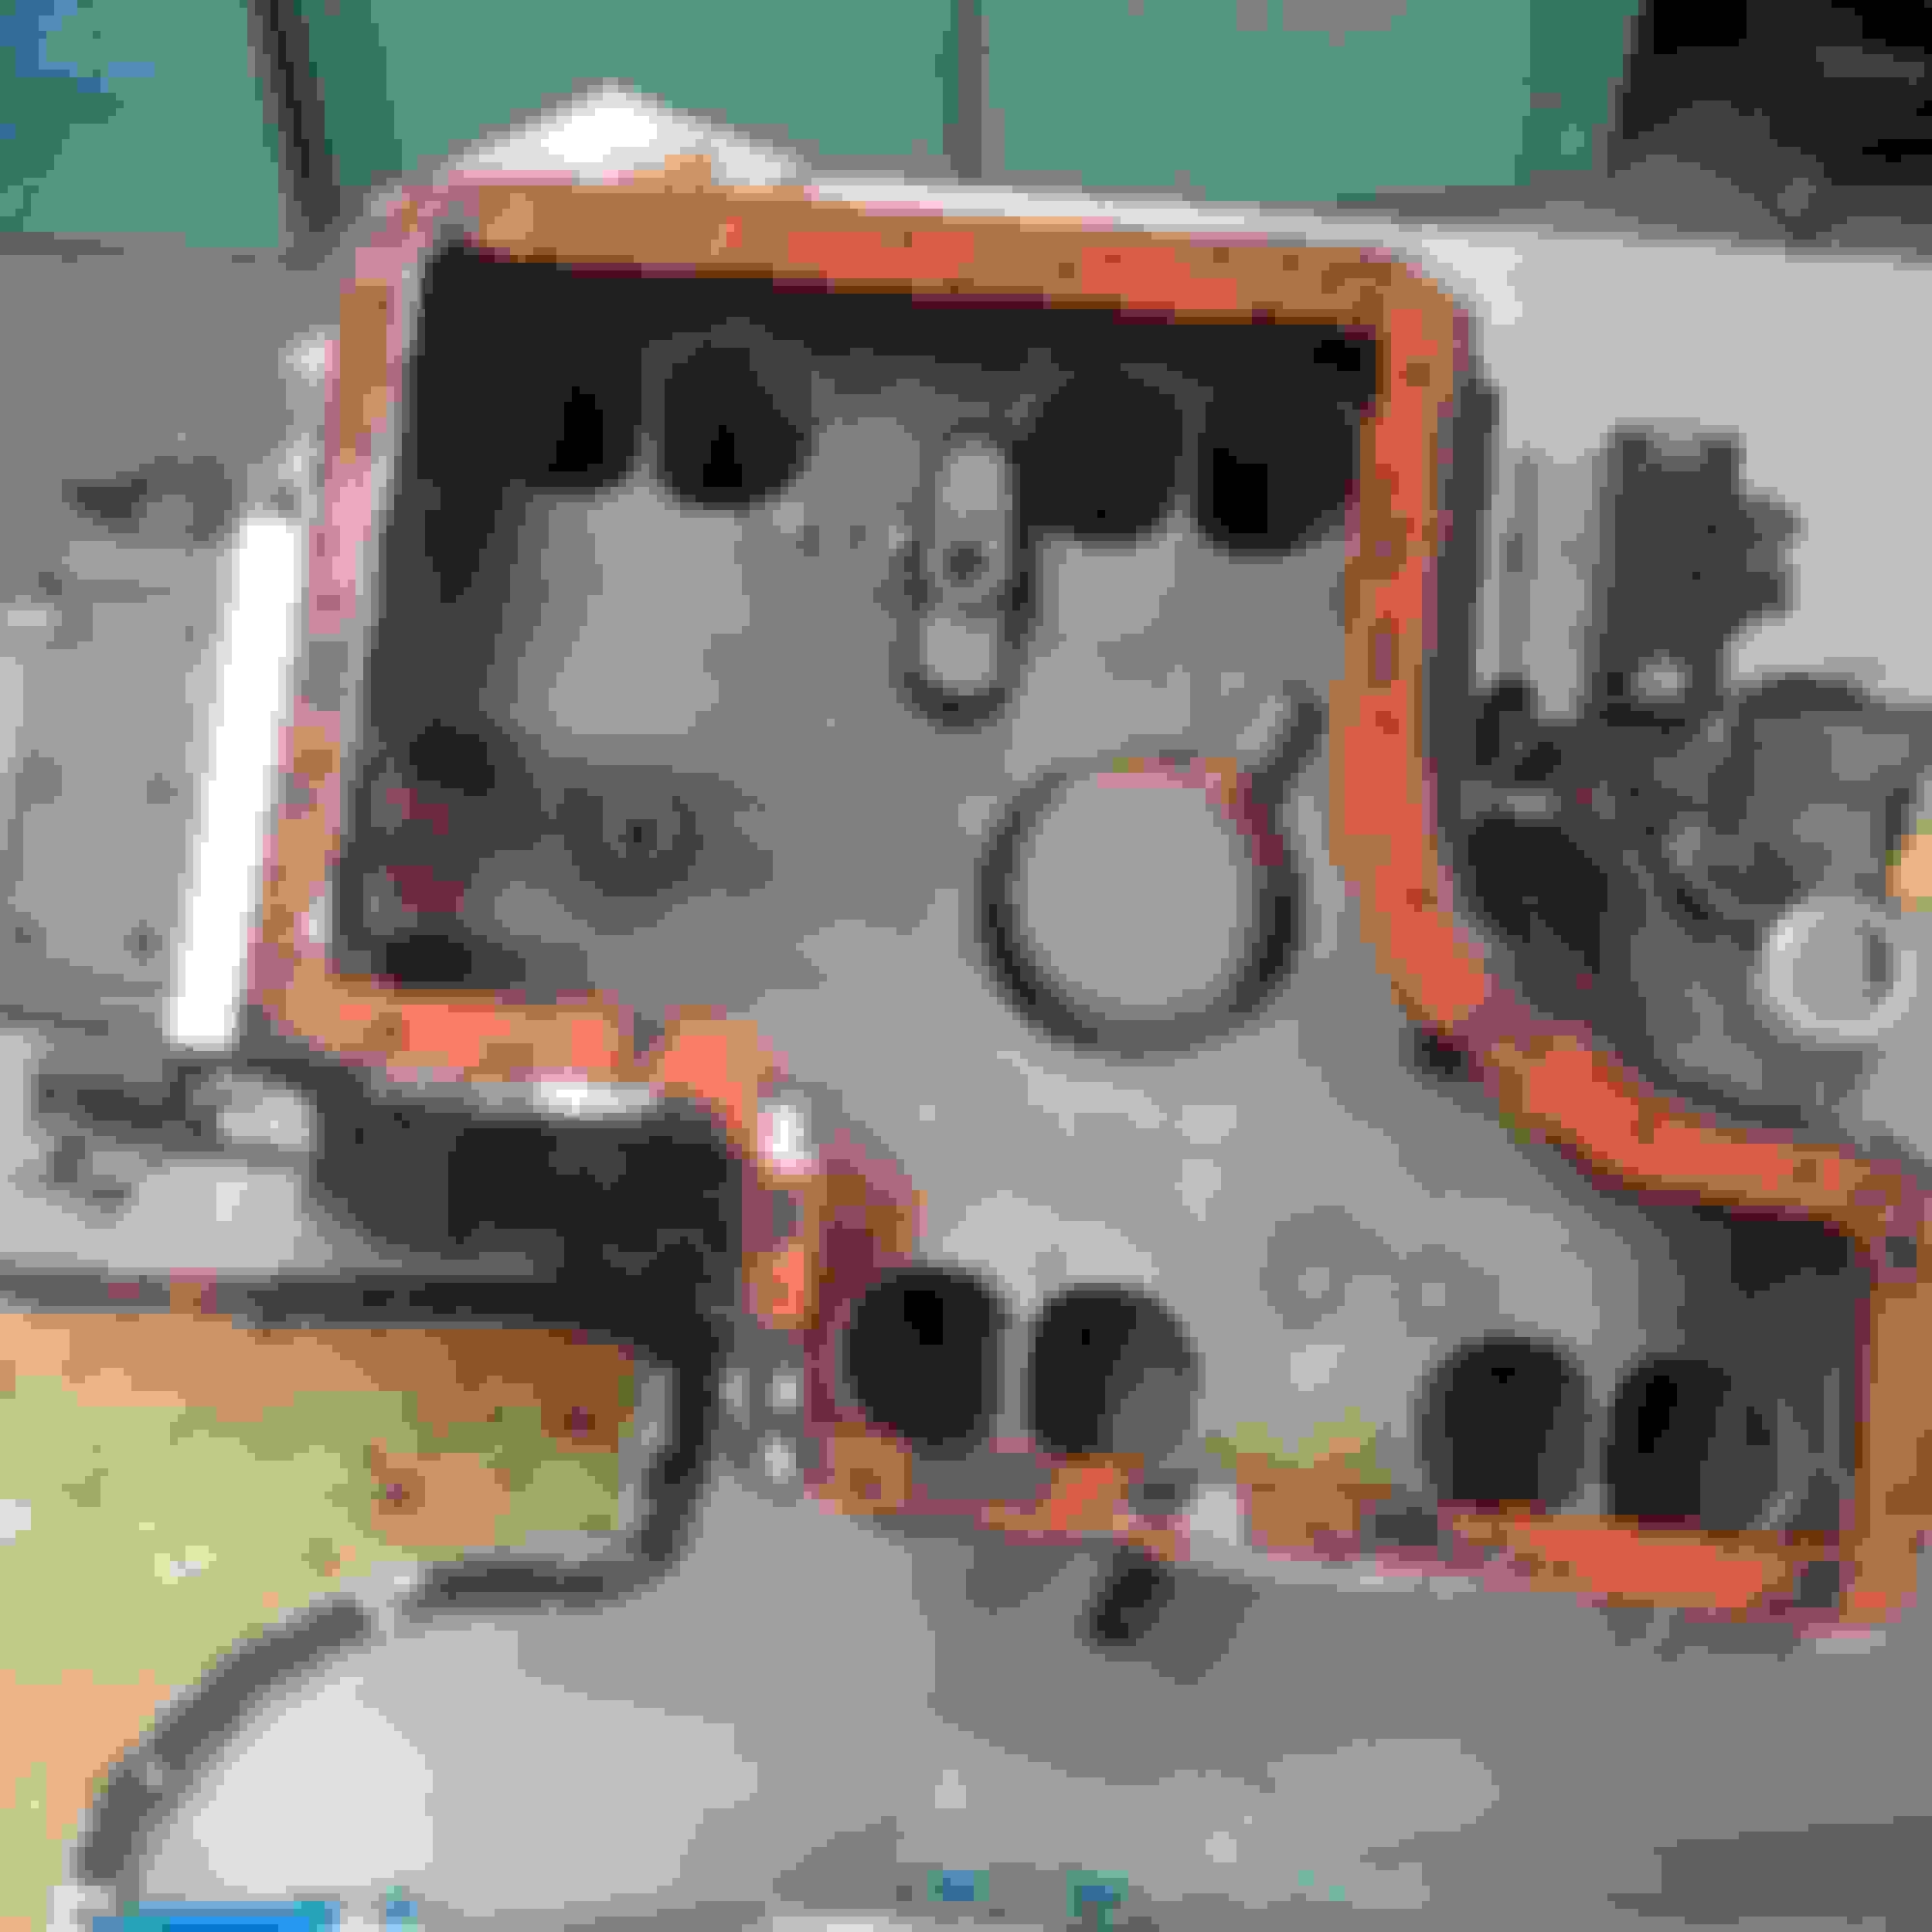
First look at the runner with the lid off.
Super Ram taken apart:
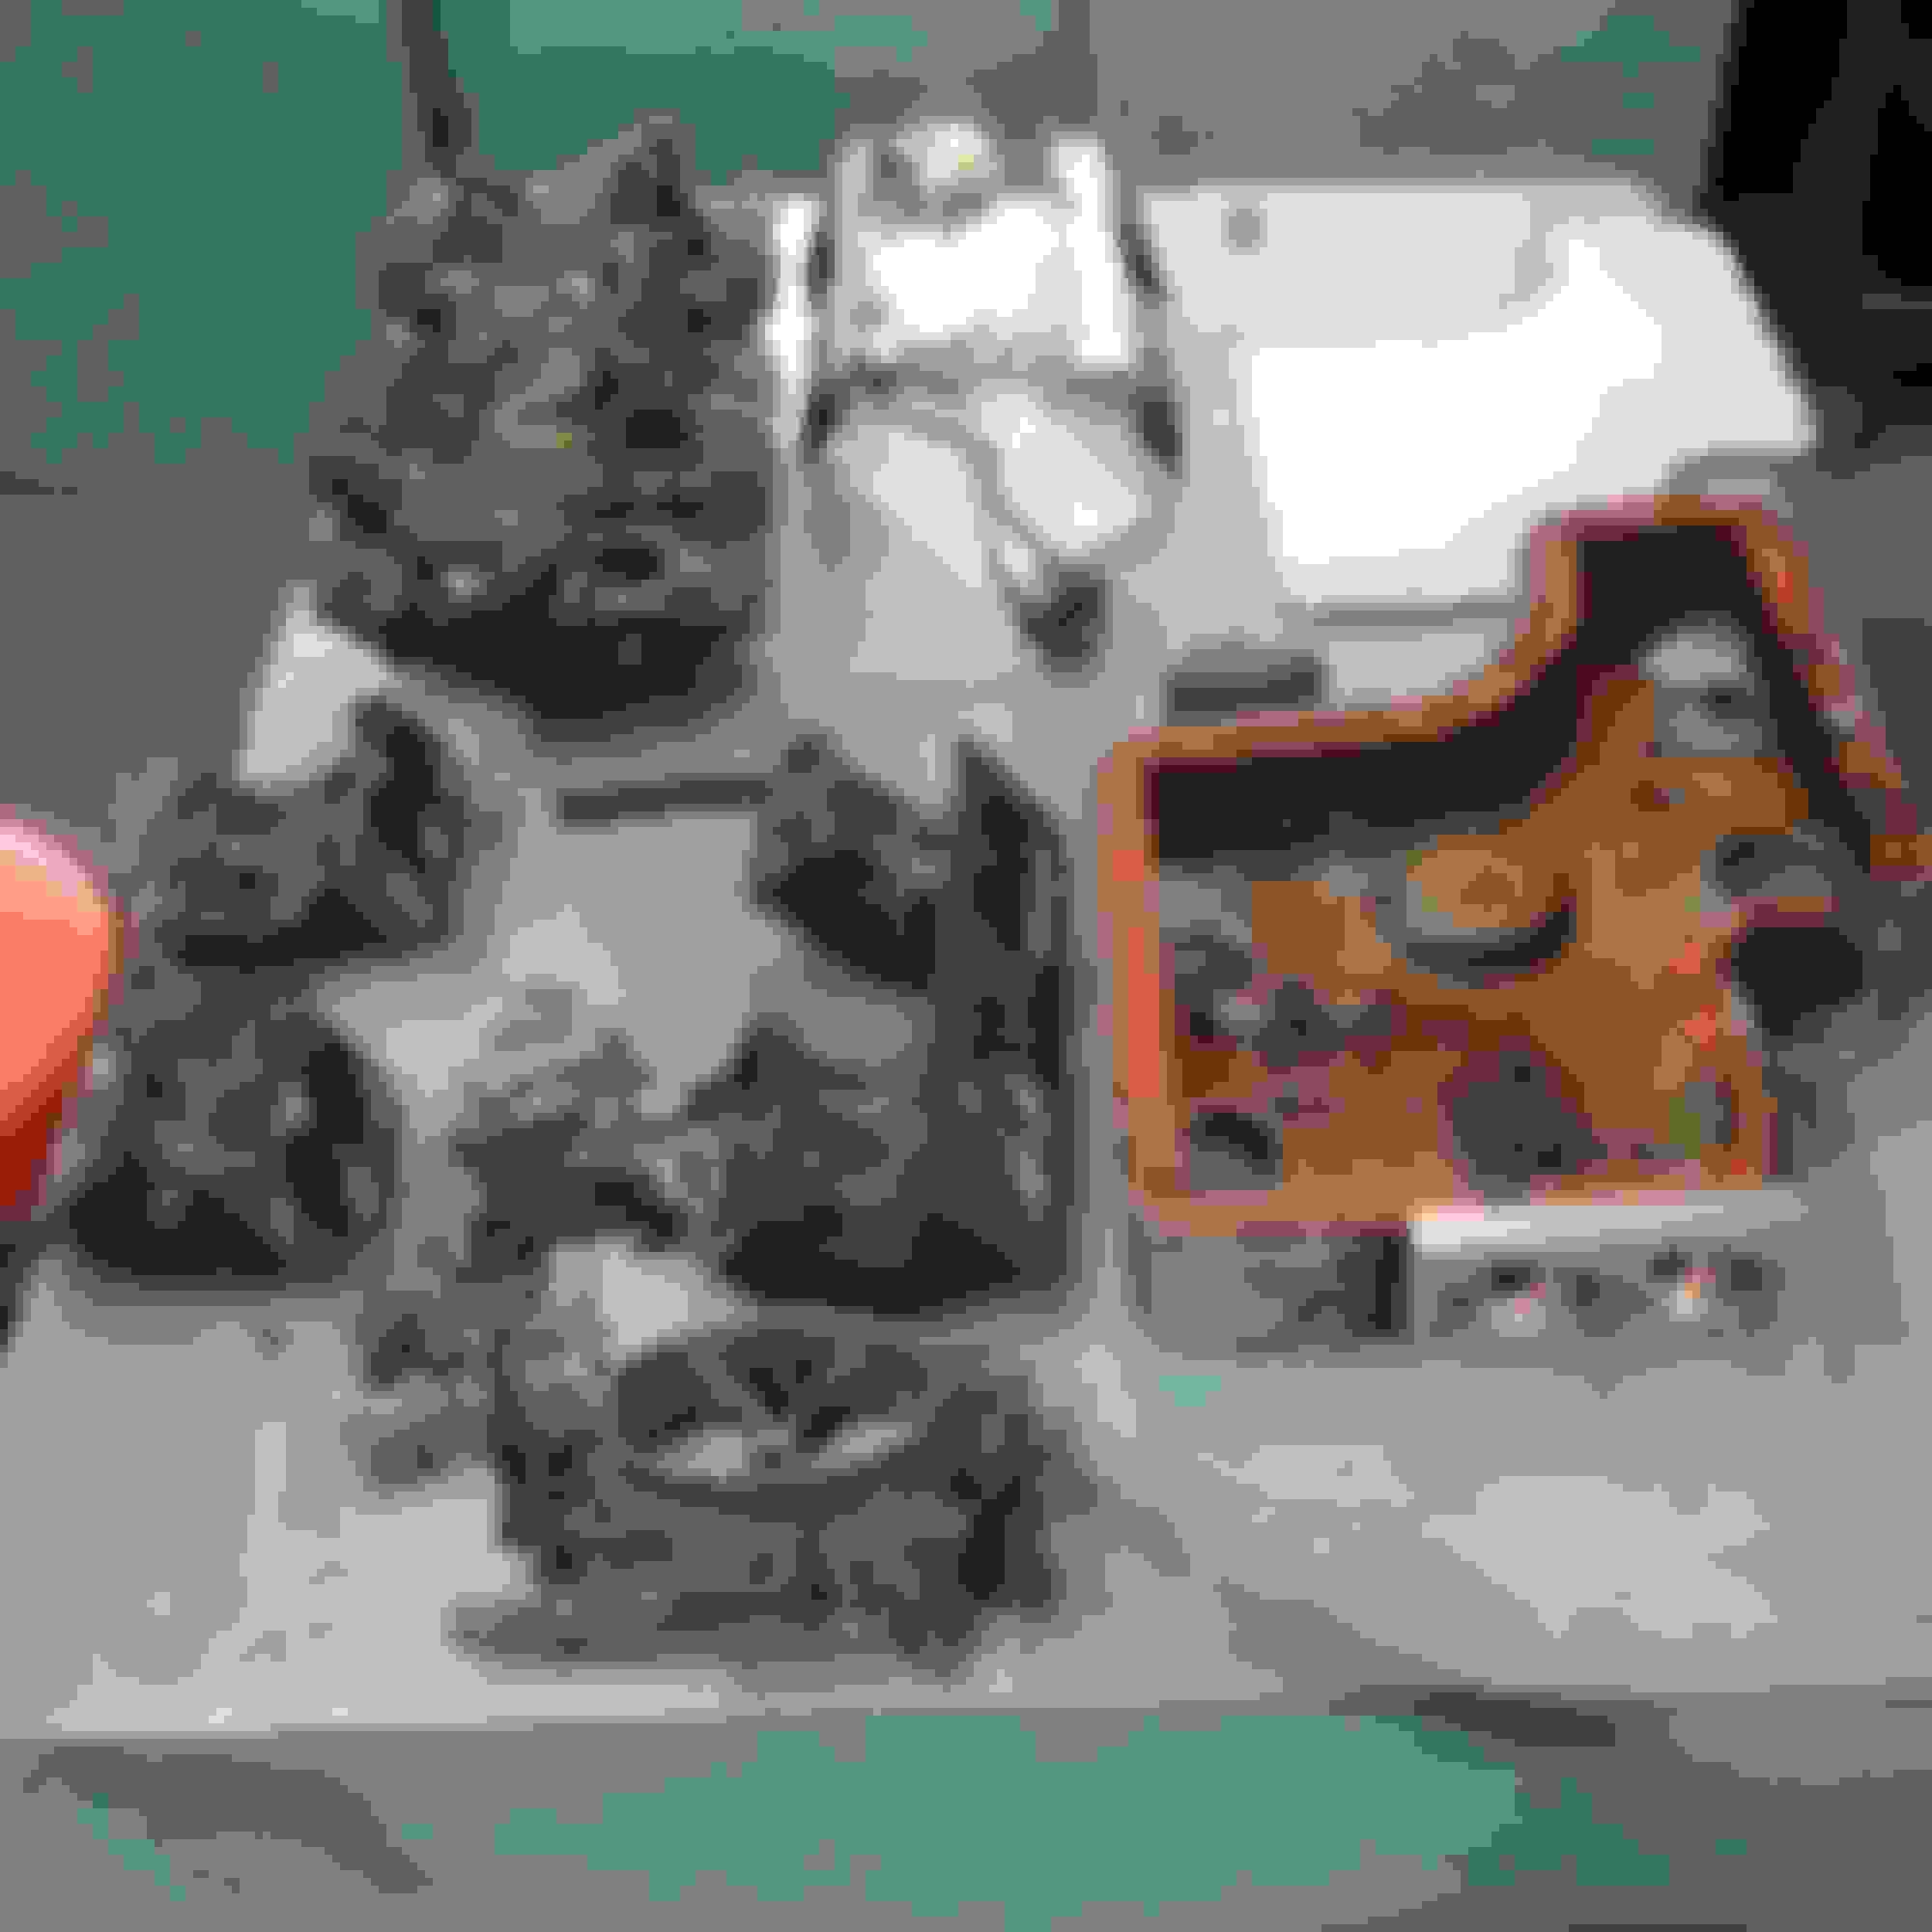
This thing was a mess but nothing I can't restore. The only bad part is the original lid is missing and someone just made one out of 1/8 aluminum plate and for some reason drilled a different bolt pattern for the lid using very small bolts. The good news is all the original bolt holes are fine and the threads are even fine in them.
The next step in getting this super ram up to par is a good cleaning. I took it outside and gave it a good soaking in engine degreaser and also used a wire brush on the intake followed by a rinse with the garden hose. I did this 2 or 3 times til I got the worst of the grime off.
Next I put the plenum and runners in my media blasting cabinet, here's the result:
Oh, in case I didn't mention this the base that came with the intake is a stock GM piece so I will just use my ported Edelbrock base that is currently on the car as it is compatible with the super ram runners.
As you may have noticed I didn't bother cleaning up the 'homemade' lid that came with the super ram. I talked to a friend who is a fabricator and he agreed to make me a custom lid. We have come up with a nice looking design so I just have to wait for him to have time to make it.
Super Ram Polishing:
I have decided to go with a polished finish on the Super Ram. Since I have never done polishing it will be a good learning experience for me.
This intake was in pretty rough shape so I decided to start with 120grit to get rid of some gouges and pitting.
I used a air sander for the large surfaces for the harder to get at spots on the runners I used a flapper wheel on a die grinder.
Here is the intake after 120grit sanding, lots of work!
The 120 sanding took a long time since I had to remove the cast finish, several gouges and some pitting. After that I moved on to 180, 220, 320, 400 & 600 grit. These went quicker but still took a long time.
pictures of the intake as sanding progressed:
Since I haven't done polishing before I don't have a fancy bench mounted polisher so I made do by using some polishing attachments for my drill.
Start of polishing:
The final result:
I'm pretty happy with the way the polishing turned out.
Since I don't want to worry about having to re-polish the intake to maintain its appearance I decided to clear powder coat it. I will lose a small amount of shine doing this but I think the reduced maintenance is worth the trade off.
intake ready for powder coating:
My oven is nothing special but it gets the job done!
Here's the finished product, a fully restored, polished, clear powder coated Super Ram:
Brother, you are truly, truly, the king of refinishing.
furthermore, i ache to see green grass again. im so crazy envious of your location where you live. cold, slushy, icy, roads covered in gravel here in cow town.
my business (oil and gas) has really ramped up in the past two months and i think it is going to be a long time before i get to polish anything. you are inspiring and i will get my restore fix vicariously through you for the time being.
VT, a friend in cowtown.
Originally Posted by DMITTZ
Hi everyone, here's another update.
Super Ram Lid:
As you may have noticed I didn't bother cleaning up the 'homemade' lid that came with the super ram. I talked to a friend who is a fabricator and he agreed to make me a custom lid. We have come up with a nice looking design so I just have to wait for him to have time to make it.
Super Ram Polishing:
I have decided to go with a polished finish on the Super Ram. Since I have never done polishing it will be a good learning experience for me.
This intake was in pretty rough shape so I decided to start with 120grit to get rid of some gouges and pitting.
I used a air sander for the large surfaces for the harder to get at spots on the runners I used a flapper wheel on a die grinder.
Here is the intake after 120grit sanding, lots of work!
The 120 sanding took a long time since I had to remove the cast finish, several gouges and some pitting. After that I moved on to 180, 220, 320, 400 & 600 grit. These went quicker but still took a long time.
pictures of the intake as sanding progressed:
Since I haven't done polishing before I don't have a fancy bench mounted polisher so I made do by using some polishing attachments for my drill.
Start of polishing:
The final result:
I'm pretty happy with the way the polishing turned out.
Since I don't want to worry about having to re-polish the intake to maintain its appearance I decided to clear powder coat it. I will lose a small amount of shine doing this but I think the reduced maintenance is worth the trade off.
intake ready for powder coating:
My oven is nothing special but it gets the job done!
Here's the finished product, a fully restored, polished, clear powder coated Super Ram:
Brother, you are truly, truly, the king of refinishing.
furthermore, i ache to see green grass again. im so crazy envious of your location where you live. cold, slushy, icy, roads covered in gravel here in cow town.
my business (oil and gas) has really ramped up in the past two months and i think it is going to be a long time before i get to polish anything. you are inspiring and i will get my restore fix vicariously through you for the time being.
VT, a friend in cowtown.
Thank you VikingTrad3r that is very kind of you to say.
Refinishing/refurbishing old stuff is what I enjoy the most about working on cars.
I am also happy to see the grass again we had a month long cold snap here where it was -5 to -10C and snowed every few days. Thankfully a few days back it warmed up and started raining again. So all the snow is gone and its about 10C (50F) outside now. The long range forecast is for mild temperatures and rain, so I'm glad to get back to the normal mild winters we usually have here.
I'm glad to hear business is picking up in the oil/gas sector as I know the last couple years have not been the best.
All the best and you have a friend here in Langley also.
You sir are a great builder of C4s, my hat is off to you.
Thank you. That is very kind of you and thanks for following my build. It certainly has been a fun project and it has been nice getting to share I with my fellow enthusiasts.
further to your explanation on how the super ram functions, does a person need to have ported heads and have swapped out the stock L 98 exhaust manifolds in order for the extra power ?
like is it a situation where the super ram is capable of more power but restrictions in other parts of the system need to be eradicated in order for the super ram to make a difference?
I have heard of people taking LT one exhaust manifolds and putting them on an L 98 engine for this reason.
I have an early 86 which has the iron heads. I assume I would not want to port those heads! that would mean picking up a set of 87 or 86 aluminum ported heads and putting them on. Plus swapping out the restrictive L 98 exhaust manifolds.
Or would the super ram make a big difference with everything else stock?
Last edited by VikingTrad3r; 01-19-2017 at 03:28 PM.
further to your explanation on how the super ram functions, does a person need to have ported heads and have swapped out the stock L 98 exhaust manifolds in order for the extra power ?
like is it a situation where the super ram is capable of more power but restrictions in other parts of the system need to be eradicated in order for the super ram to make a difference?
I have heard of people taking LT one exhaust manifolds and putting them on an L 98 engine for this reason.
I have an early 86 which has the iron heads. I assume I would not want to port those heads! that would mean picking up a set of 87 or 86 aluminum ported heads and putting them on. Plus swapping out the restrictive L 98 exhaust manifolds.
Or would the super ram make a big difference with everything else stock?
That brings up a good point I probably should have talked about iron vs aluminum heads on L-98's.
L-98's were offered with different 3 heads through thier production run in the Corvette. 1985 and 86' coupes had iron heads that did not flow that well.
1986 convertibles and all 1987 models had the 'first design' of aluminum heads which were better than the iron ones but still not amazing. (128 casting, I think???)
1988-1991 L-98's had a 'second design' of aluminum heads which are known as the 113 casting heads. These are the best L-98 heads offered from the factory and the same heads that were on the ZZ4 crate engine that GM offered for many years. These heads have thier limits but are pretty decent when ported and when using good valves with a good valve job. This is what I have. As a side note Lingenfelter offered and I think they still sell ported 113 casting heads, so theses heads are a great match to a stock super ram intake as they are what lingenfelter designed the intake to use.
So you are correct the Iron L-98 heads like you have are not that good and likely not worth porting. You could pick up some 113 casting heads/ZZ4 heads if you could get a good price on them and see an improvement however you could also go with something like AFR 180 Etc... if you had more $$$ which would flow even better.
If you upgrade the heads (or even if you don't) a new cam will make a BIG difference, in fact I would put this at the top of the list for any modified L-98. I am using a comp cam with the specs of 218/224@.050 but I hear the LPE 219/219 works really well with the super ram. My cam isn't far off that so I'll leave it.
As for headers, I haven't heard of anyone using LT1 manifolds before, so I'm not sure how that would work performance wise. I use hooker long tube headers and they work great and were worth 3 tenths (1/4 mile) on a my near stock engine (intake only)
To answer your question about a Super Ram on a stock engine. You could put a Super Ram on a stock L-98 and you would see some gains I think. But you won't realize its potential until you do the complimentary upgrades. Having said that I feel the intake is a major restriction on our cars, when I put my Edelbrock intake on (before it was ported) years ago it took off 5 tenths (1/4 mile) on an otherwise stock engine so it goes to show you how bad the stock intake is!
My advise would be that a Super Ram is a good intake if, in the future you want to do better heads, cam and headers but you don't want to have to do a high dollar bottom end or play with the computer to much (just a custom PROM), as it will give gains on a stock engine but it has lots of potential for future complimentary upgrades. Just be aware that to get the best gains it will need the other upgrades to compliment it. If you want to be closer to stock, I would say a Larger long tube runner intake is a better choice as they are easier to find, cheaper and easier to install and give good gains on a stock engine.
In order to run the Super Ram on my engine I need to have a custom PROM burned for my car. This will also take care of the issue of the Super Ram not having provisions for a 9th Cold start injector. The tune will be adjusted so that the cold start enrichment is done by the 8 main fuel injectors.
I called Scott Hansen of tuned port induction programing service and asked him to burn me custom PROM he is already familiar with my setup as he has done the tuning earlier this year. Scott is a great guy and has very reasonable prices, he had the PROM delivered to me within 2 days of my talking to him.
PROM Replacement
To replace the prom take off the passenger's side hush panel. Then unbolt the ECM there is one bolt on each side. You can then lower it into the footwell and disconnect the wiring harness.
Next unbolt the cover on the ECM and remove the old PROM and install the new one.
Installation is the reverse procedure.
A few details on my tune:
-Cooling fan on at 200F off at 185F
-No air pump
-Yes, EGR and charcoal canister
-stock injector size, 42psi fuel pressure
-Rev limiter set to 5,600RPM
With the new tune my engine should run just as well as my old combo and I am also excited to be adding in a rev limiter so that I don't have to worry about accidentally over reving the engine. 5,600RPM is conservative but Better safe than sorry!
While I was in the interior replacing the PROM i decided to re-dye my console lid black as the saddle color was starting to show through. One day I may buy a black colored one but $100 USD for a new one can buy a lot of vinyl dye. I only have to do this maybe once every couple years so it's not a big deal.
Before re-dying it I did a light sanding followed a solvent cleaning. Then I re-sprayed the console door.
So was your interior a different color originally or just the console lid?
I have a grey interior on a silver car and am debating changing my interior color to black. That dye might come in handy.....
My interior was originally Saddle color. The P.O had half converted it to black when I got the car. I finished the conversion when I got it in 2003.
I have a picture of the interior in its saddle form from before I owned the car that the P.O gave to me. Saddle isn't my cup of tea so I decided to stay with black.
On high contact surfaces like the console door or the armrest on the doors the dye does wear off but it takes at least a couple years before that happens and the dye is cheap and easy to apply. Anywhere else the dye should last many many years.
Just be sure to lightly sand and thoroughly clean before applying it and you won't have any issues with the dye.
I already plan on replacing the carpet and recovering the seats so it's not a big step to change colors. All my interior pieces are in good condition but the grey color has aged and looks a bit dingy. Do you order the dye online or do you have a local source?
I already plan on replacing the carpet and recovering the seats so it's not a big step to change colors. All my interior pieces are in good condition but the grey color has aged and looks a bit dingy. Do you order the dye online or do you have a local source?
Sounds like it is a good time to do a color change then, since you'll already be changing the carpet and seat leather. A black interior on your silver car will add a nice contrast for sure.
I just used a Dupont brand of vinyl dye it seems to work well but it was what the local Lordco had on the shelf. I have for been using gloss black because that was the only choice that the parts place had for black dye but I think a semi-gloss black is a better match to the factory black color in retrospect.
Looking good buddy. You running a hydraulic roller or hydraulic flat tappet? Curious on what ratio your roller rocker are?
I picked up a set of cnc LS3 heads, LS3 intake, roller rockers and camshaft when our dollar conversion was better.
My cam is a hydralic roller cam. I also have a double roller timing chain, I'm using comp thick walled pushrods with 1.5:1 scorpion roller rockers and Comp cams springs that match my cam.
Here's a picture of them, from when I swapped the valve covers:
Sounds like your LS engine is going to be awesome! I have a cammed LS3 in my 05' CTS-V Daily Driver and it hauls! So you will have a very fast C4 when your done not to mention the uniqueness. Glad you got the parts when the exchange rate was better, it sure sucks now, its kind of a bummer when all the parts cost 35-40% more than they did a couple years ago for us Canadians. Wish we had more or basically any C4 parts places that were based in Canada, so we wouldn't have to pay so much eveytime the USD goes up.
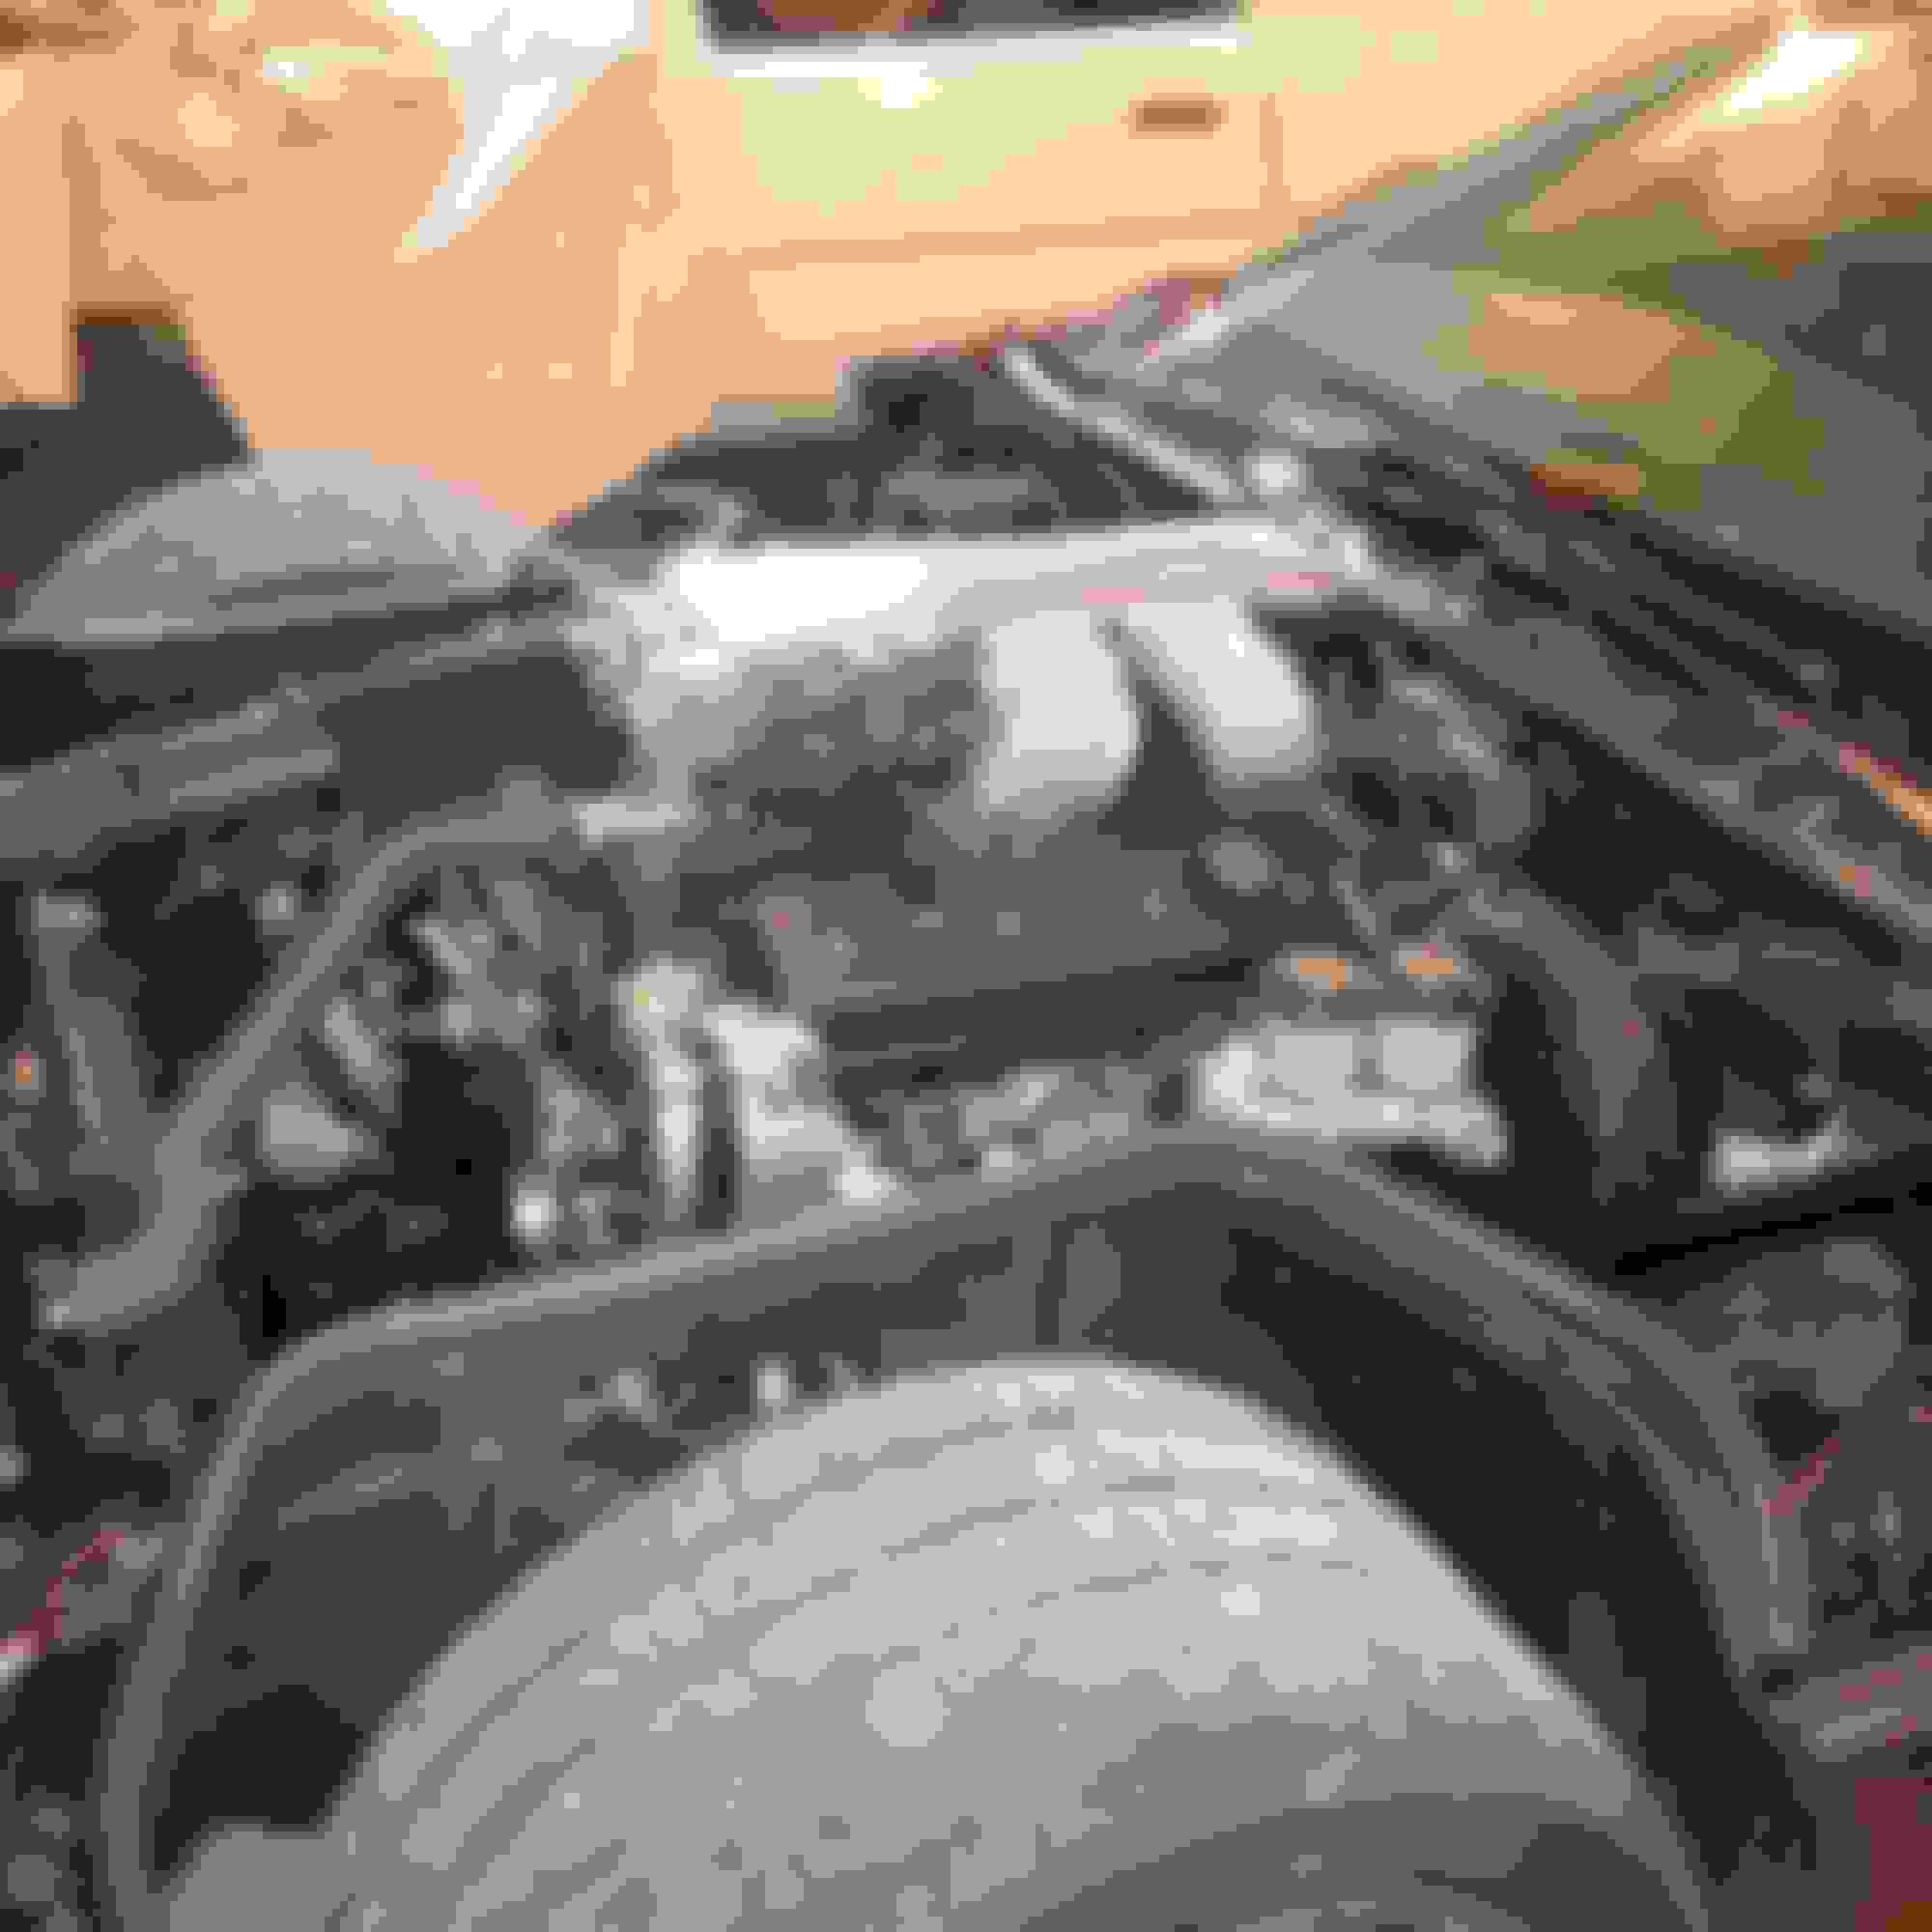
So it was time to start tearing the Edelbrock intake off and start installing the Super Ram intake!
I know this won't be too easy so please be bear with me as I work through all the issues that may arise.
Last look at my 'old intake':
Tear down was a breeze, as this I a fresh motor so no stuck bolts etc...
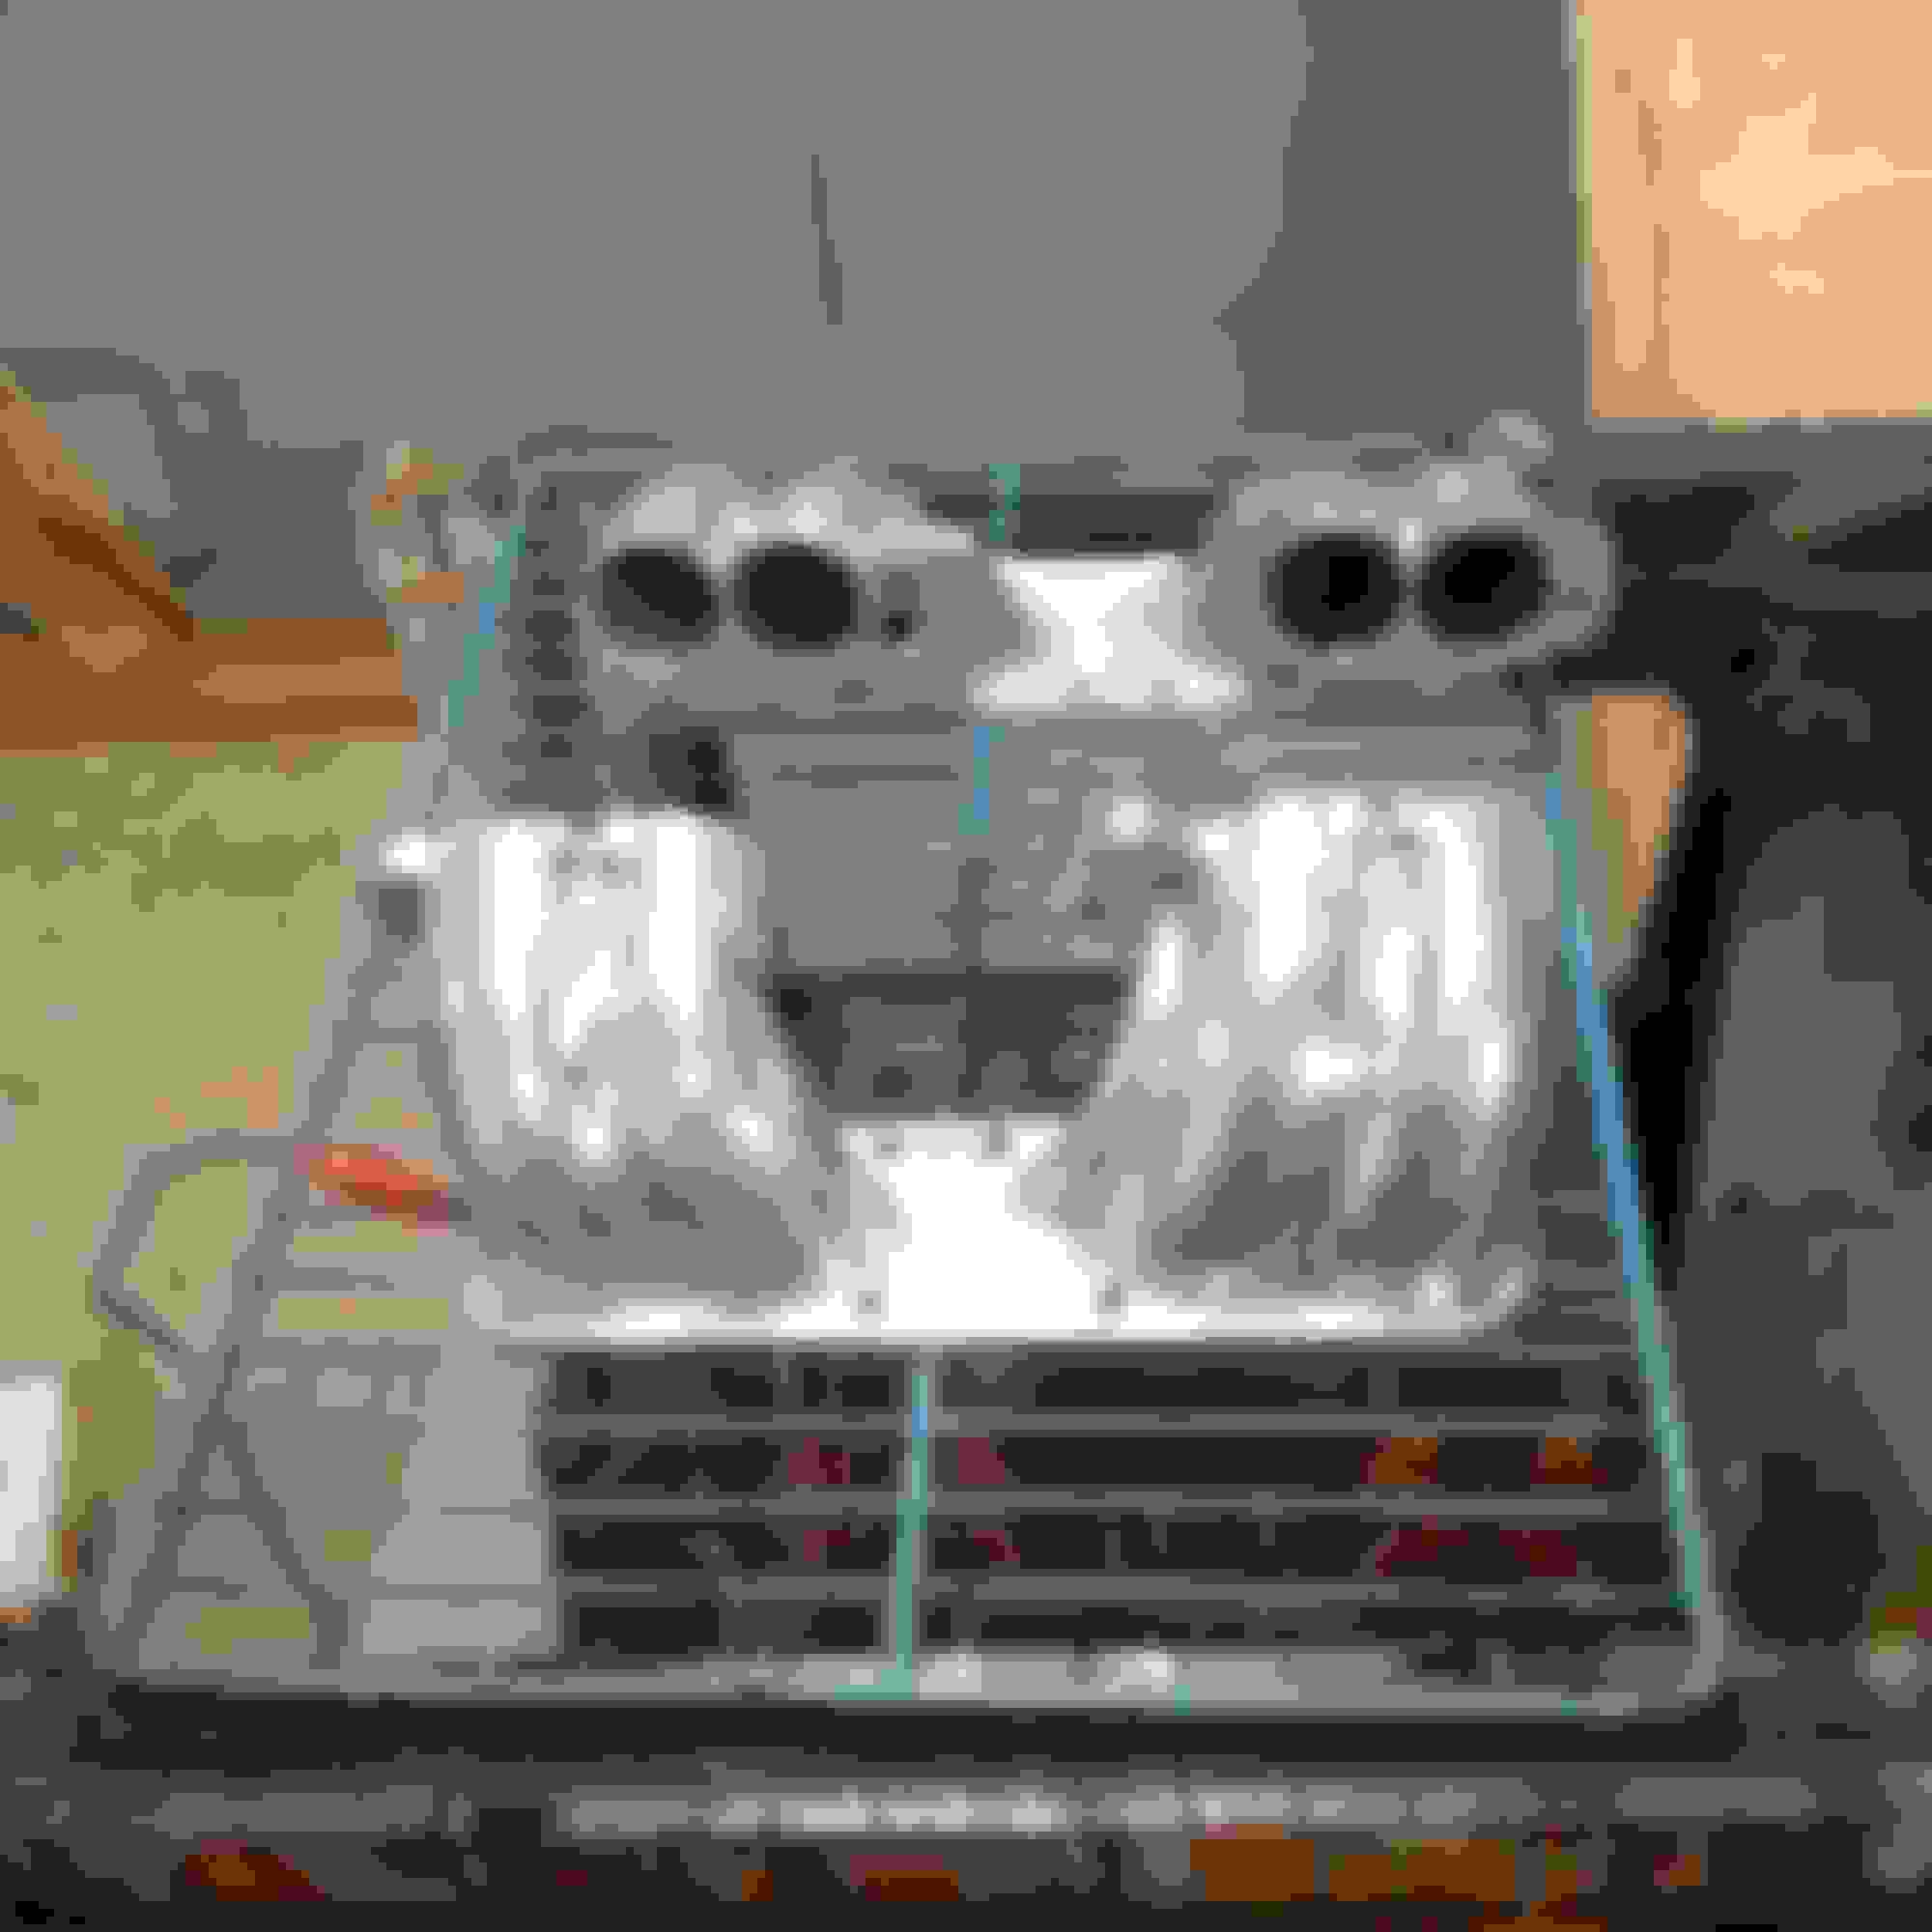
I removed the throttle body followed by the Plenum:
My heavily ported Plenum removed:
Next I removed the runners and valve covers:
So here's the first challenge, you have to remove 2 rocker arms on each side to install the runners since you can't tighten the bottom bolts otherwise.
This of course meant I had to also redo the valve lash adjustment afterwards.
Here's the engine with the runners installed:
The next challenge was the valve covers:
The Runners are so large the valve covers won't go on without doing some grinding! That rubbed me the wrong was since I just powder coated them, I will have to grind carefully...
After some grinding I got the valve covers on. I taped up the top of the runners to make sure nothing got in and called it a day.
 01-18-2017, 10:14 AM


 You running a hydraulic roller or hydraulic flat tappet? Curious on what ratio your roller rocker are?


 That rubbed me the wrong was since I just powder coated them, I will have to grind carefully...


