700R4 Transmission Rebuild (Lots of Pics Inside, Maybe Too Many for Dial-Up)
 06-20-2008, 09:58 PM
#41
Advanced


Member Since: Oct 2004
Posts: 92
Likes: 0
Received 0 Likes
on
0 Posts

Also, if you put the input sprag in upside down, it will burn the torque convertor out - you will realize you did this if you have NO overdrive!! This will not hurt the torque converter, but you will not have any movement in the OD position. And if you drive it like this it will destroy the overrun clutches.
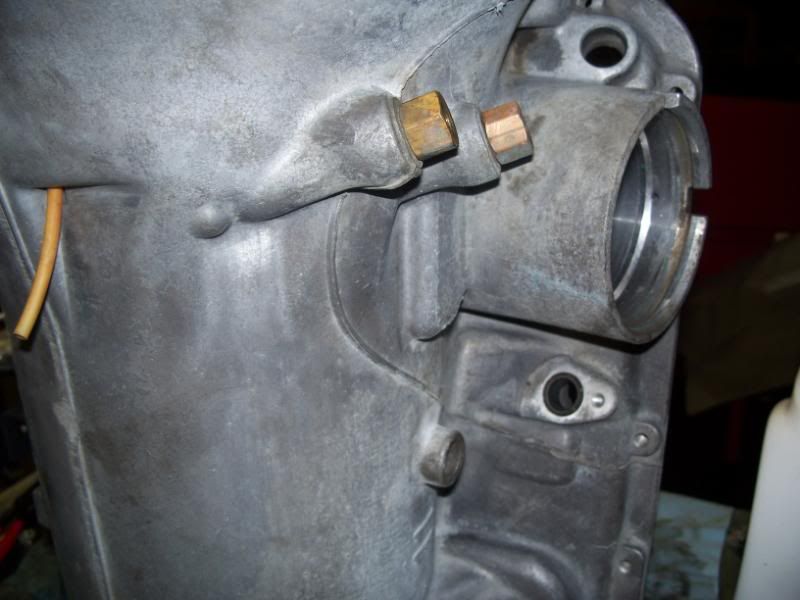
New (blue) governor cover o-ring (DO NOT install until AFTER checking the 2-4 band for sufficient wiggle room). This is the 2-4 servo cover, and not the governor cover.
These are some great pictures here.......
New (blue) governor cover o-ring (DO NOT install until AFTER checking the 2-4 band for sufficient wiggle room). This is the 2-4 servo cover, and not the governor cover.
These are some great pictures here.......
 06-20-2008, 10:28 PM
#42
Burning Brakes

Thread Starter
Also, if you put the input sprag in upside down, it will burn the torque convertor out - you will realize you did this if you have NO overdrive!! This will not hurt the torque converter, but you will not have any movement in the OD position. And if you drive it like this it will destroy the overrun clutches.
New (blue) SERVO cover o-ring (DO NOT install until AFTER checking the 2-4 band for sufficient wiggle room). This is the 2-4 servo cover, and not the governor cover.
These are some great pictures here.......
New (blue) SERVO cover o-ring (DO NOT install until AFTER checking the 2-4 band for sufficient wiggle room). This is the 2-4 servo cover, and not the governor cover.
These are some great pictures here.......


There are so many more pics that I have and they take some time to post and then comment on.
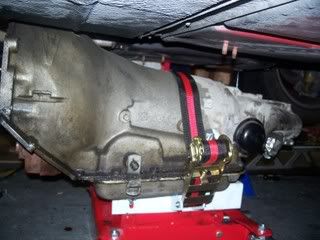
Everything is ready to go back in the case tonight or tomorrow morning. I'm hoping I can get the ext. tranny cooler in tomorrow too after a line and radiator trans. cooler flush.
And man are these new bushings a PITA for a first-timer like me. I had to use one of my Craftsman sockets to press out the input sun gear 2 bushings. I'm also glad I found out that the reaction sun gear bushing could be pressed out with the extension housing bushing driver (I have some pics of this). I was trying for 20 min. to tap it out with a 1/4 in. drift, flathead screwdriver, pick, and even a small pin punch. Didn't scratch any of the hardened sun gear either (it would have been pretty hard).
Thanks for the comments - I really enjoy reading what other people have to say,
Jonathan
Last edited by janarvae; 06-23-2008 at 12:06 AM.
06-20-2008, 11:02 PM
#43
Burning Brakes
Thread Starter
07-01-2008, 09:33 PM
#44
Burning Brakes
Thread Starter
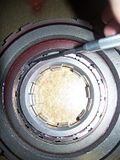
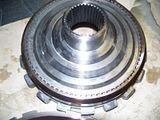
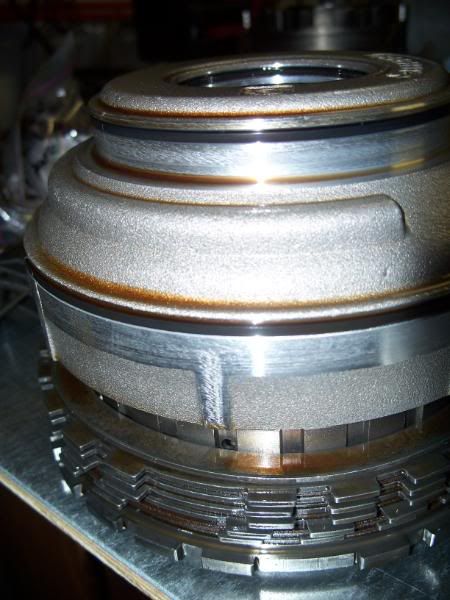
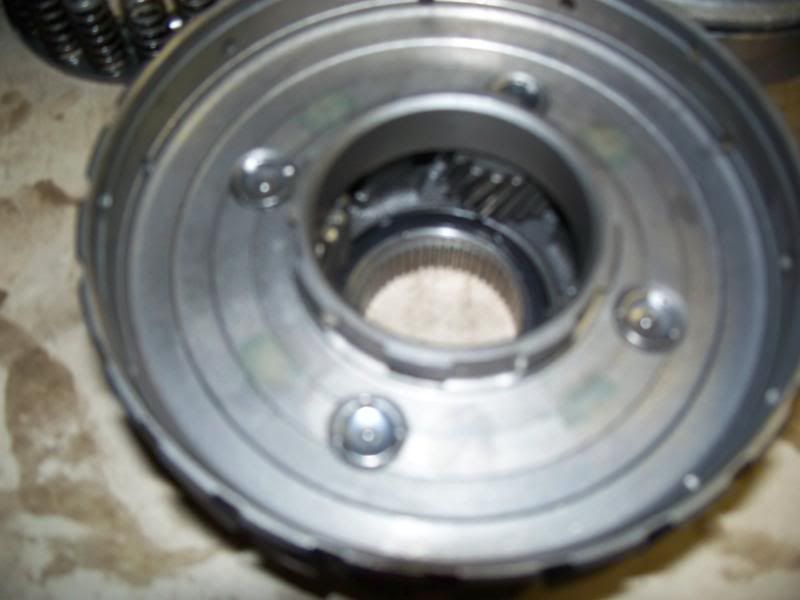
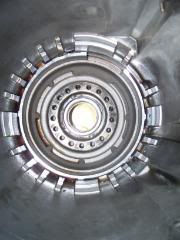
Here are some pics of the low/reverse assembly...Click on them to enlarge.
1.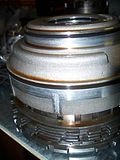
The uncleaned low/reverse assembly. Visible is the piston and clutches.
2.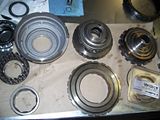
Entire assembly in pieces and dirty. Clean with brake cleaner and compressed air. The brakleen started getting VERY expensive for parts cleaning, so I switched to the MUCH cheaper AutoZone brand and it works just as well for this purpose.
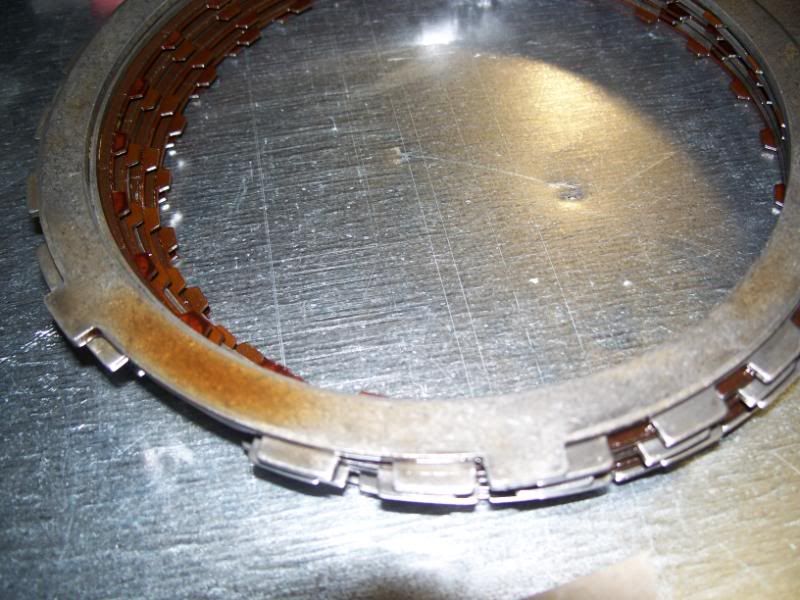
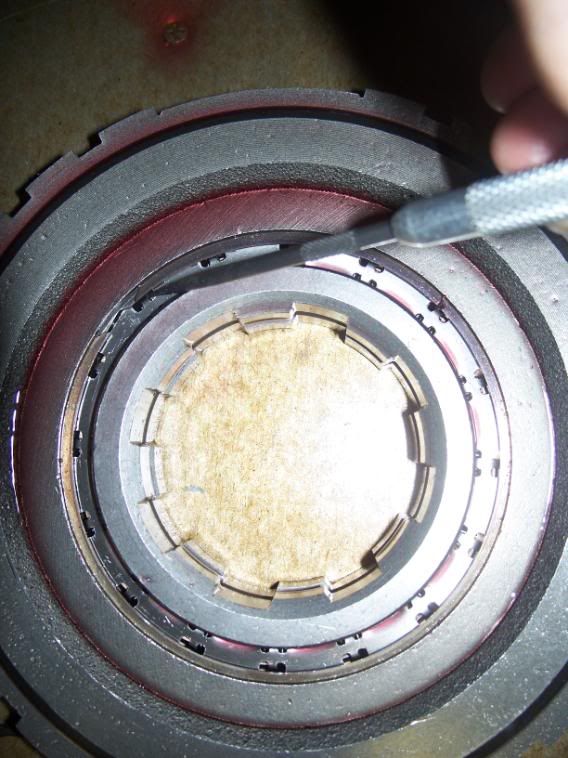
3.
Old clutches. Some of the new clutches and steels DO NOT have the little notches that the stock clutches, steels, and waved steel have. Reuse the waved steel (goes to the bottom/rear of the case) then a steel, clutch, steel, clutch, etc.
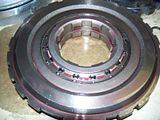
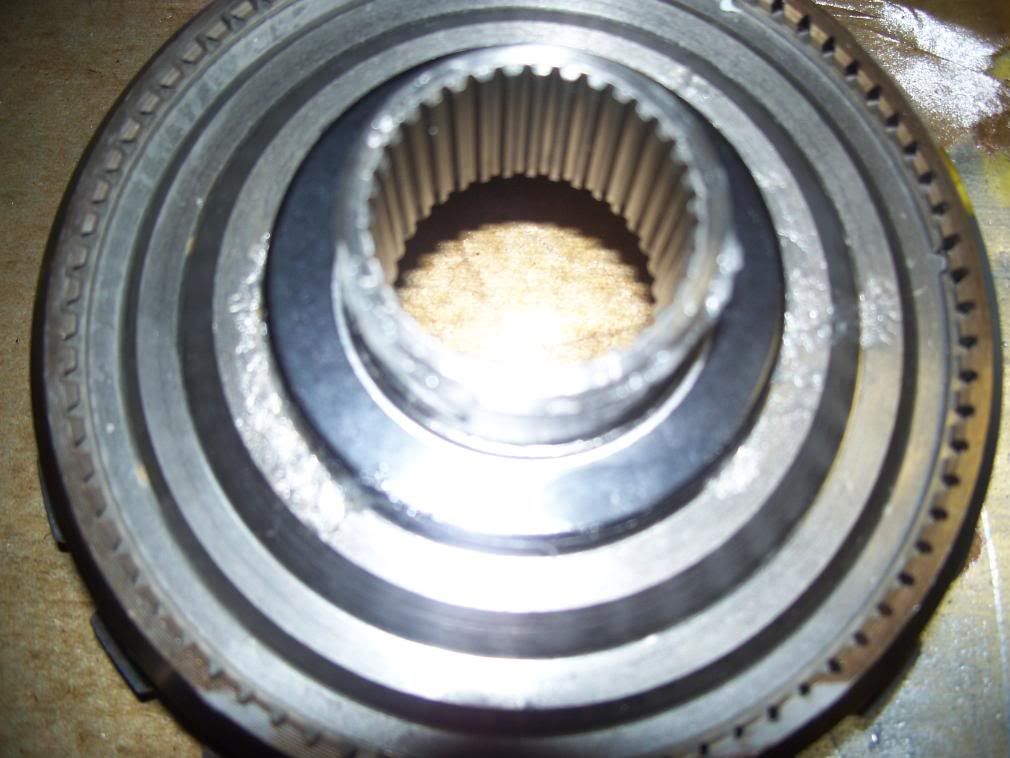
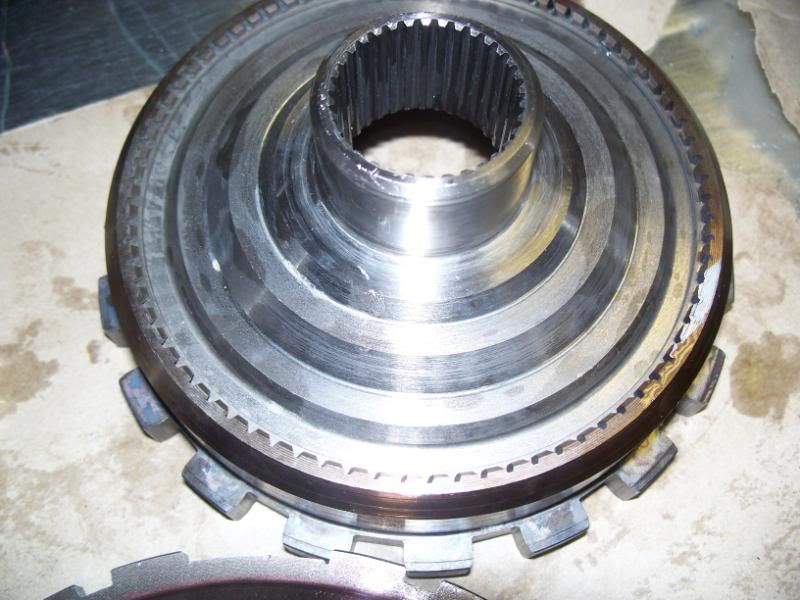
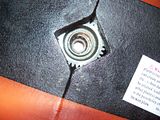
4.
Internal reaction gear support. The teeth on this part are what lock the car in Park. If they are very round, buy a new one. To clean it thoroughly I removed the snap ring (visible in the blown-up pic) and separated the two pieces (it took a rubber mallet and a gently blow to separate them). I was also able to dremel out the bushing inside (VERY CAREFULLY!!).
5.
Other view of 4.
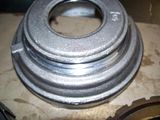
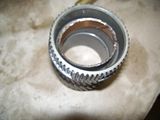
6.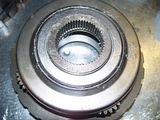
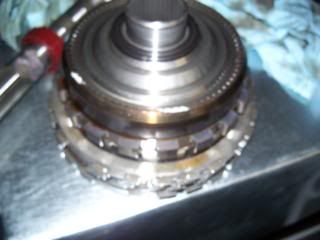
Here you see the reaction carrier assembly, aka the reaction planetary. It is shown with a new torrington bearing installed on top held in with vaseline. The play in the pinion ends for both planetaries should be between .008" and .024 ". Make sure that the teeth aren't chipped.
The reaction sun gear should ride smoothly on the interior torrington bearing or replace (I did not have to, but you must take the planetary apart to do so).
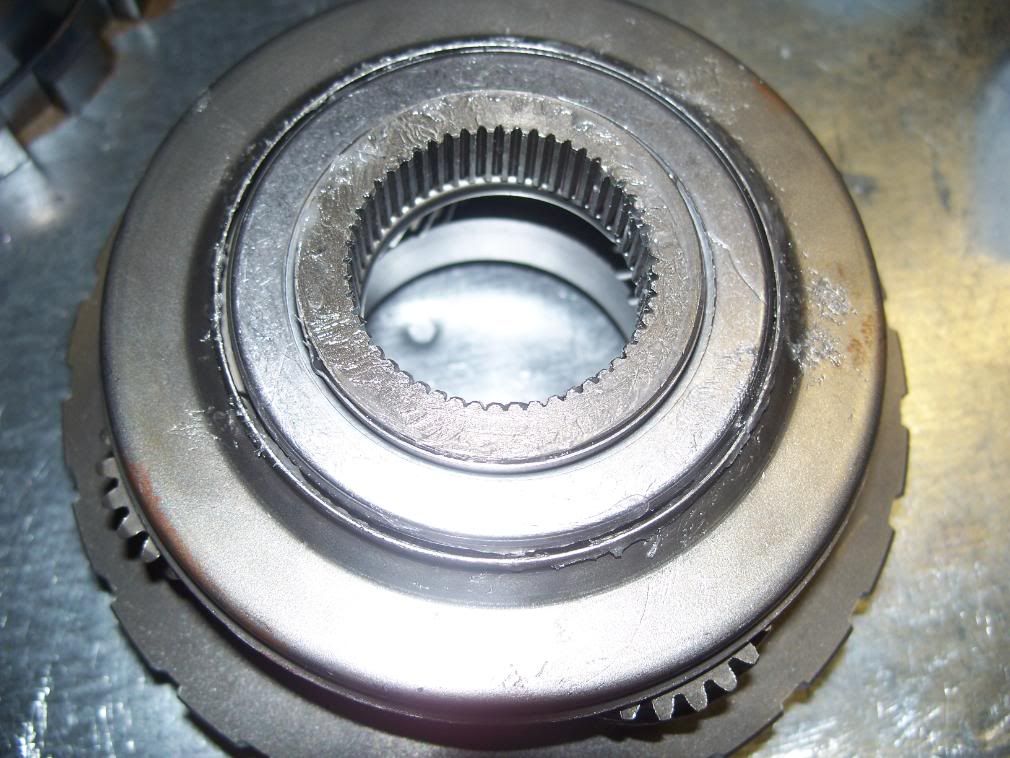
7.
Here the upside down view of 6. Remember 6/7 fits into 4/5/12.
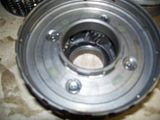
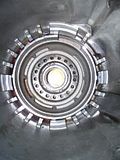
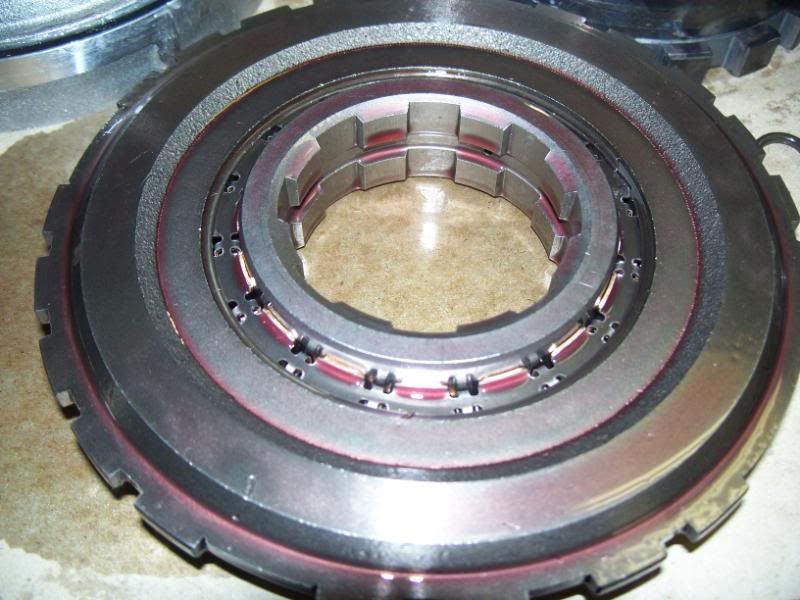
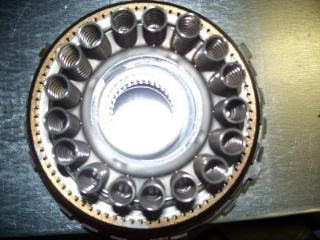
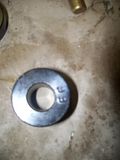
8.
The finished low/reverse clutch support with new Borg-Warner Low/reverse roller assembly. Be careful when replacing not to lose any of the little springs or rollers!Remove the two snap rings on either side of the clutch support and then remove the inner race from the support assembly. Clean and install new one, replace snap rings, and lube with trans fluid. The fit was much tighter than the input sprag. I had to push the inner race (pictured with teeth facing the inner circle) slightly into the clutch assembly and then push the entire thing into the support assembly. With the setup oriented as it is in the picture, the inner race should lock in the counter-clockwise direction and move freely in the clockwise direction. You may hear some squeaking if you did not lubricate it enough. Just add more trans fluid.
9. Duplciate of 4.
10.
Piston cleaned with three new SQUARE rings. Two go on the outside and one on the inside. This piston is simply tapped into the case with the handle of a rubber mallet using the locating lug on the bottom of the case and the bottom of the piston (the lug is seen on the left side of the piston).
11.
The old 3 square o-rings I spoke of in 6.
12.
Clean internal reaction gear support.
13.
In removal and reinstallation, a snap ring must be removed with the special low/reverse spring retainer compressor. Don't forget to check the springs in the retainer!
14.
The piston, spring compressor installed in the case.
15.
Old setup again, same as 1.
16.
The 'anti-clunk spring that you should have kept track of in disassembly. It is oriented a specific way in the case and with the large snap ring in a certain position.
17.
The bottom of the spring retainer with the shaft of the internal reaction gear coming through the center. Also notice the torrington bearing that goes on the bottom of the case for this supprot to ride on.
1.
The uncleaned low/reverse assembly. Visible is the piston and clutches.
2.

Entire assembly in pieces and dirty. Clean with brake cleaner and compressed air. The brakleen started getting VERY expensive for parts cleaning, so I switched to the MUCH cheaper AutoZone brand and it works just as well for this purpose.
3.
Old clutches. Some of the new clutches and steels DO NOT have the little notches that the stock clutches, steels, and waved steel have. Reuse the waved steel (goes to the bottom/rear of the case) then a steel, clutch, steel, clutch, etc.
4.
Internal reaction gear support. The teeth on this part are what lock the car in Park. If they are very round, buy a new one. To clean it thoroughly I removed the snap ring (visible in the blown-up pic) and separated the two pieces (it took a rubber mallet and a gently blow to separate them). I was also able to dremel out the bushing inside (VERY CAREFULLY!!).
5.

Other view of 4.
6.
Here you see the reaction carrier assembly, aka the reaction planetary. It is shown with a new torrington bearing installed on top held in with vaseline. The play in the pinion ends for both planetaries should be between .008" and .024 ". Make sure that the teeth aren't chipped.
The reaction sun gear should ride smoothly on the interior torrington bearing or replace (I did not have to, but you must take the planetary apart to do so).
7.
Here the upside down view of 6. Remember 6/7 fits into 4/5/12.
8.
The finished low/reverse clutch support with new Borg-Warner Low/reverse roller assembly. Be careful when replacing not to lose any of the little springs or rollers!Remove the two snap rings on either side of the clutch support and then remove the inner race from the support assembly. Clean and install new one, replace snap rings, and lube with trans fluid. The fit was much tighter than the input sprag. I had to push the inner race (pictured with teeth facing the inner circle) slightly into the clutch assembly and then push the entire thing into the support assembly. With the setup oriented as it is in the picture, the inner race should lock in the counter-clockwise direction and move freely in the clockwise direction. You may hear some squeaking if you did not lubricate it enough. Just add more trans fluid.
9.
 Duplciate of 4.
 10.

Piston cleaned with three new SQUARE rings. Two go on the outside and one on the inside. This piston is simply tapped into the case with the handle of a rubber mallet using the locating lug on the bottom of the case and the bottom of the piston (the lug is seen on the left side of the piston).
11.

The old 3 square o-rings I spoke of in 6.
12.
Clean internal reaction gear support.
13.

In removal and reinstallation, a snap ring must be removed with the special low/reverse spring retainer compressor. Don't forget to check the springs in the retainer!
14.
The piston, spring compressor installed in the case.
15.
Old setup again, same as 1.
16.

The 'anti-clunk spring that you should have kept track of in disassembly. It is oriented a specific way in the case and with the large snap ring in a certain position.
17.
The bottom of the spring retainer with the shaft of the internal reaction gear coming through the center. Also notice the torrington bearing that goes on the bottom of the case for this supprot to ride on.
Last edited by janarvae; 07-01-2008 at 10:05 PM.
07-01-2008, 10:18 PM
#45
Burning Brakes
Thread Starter
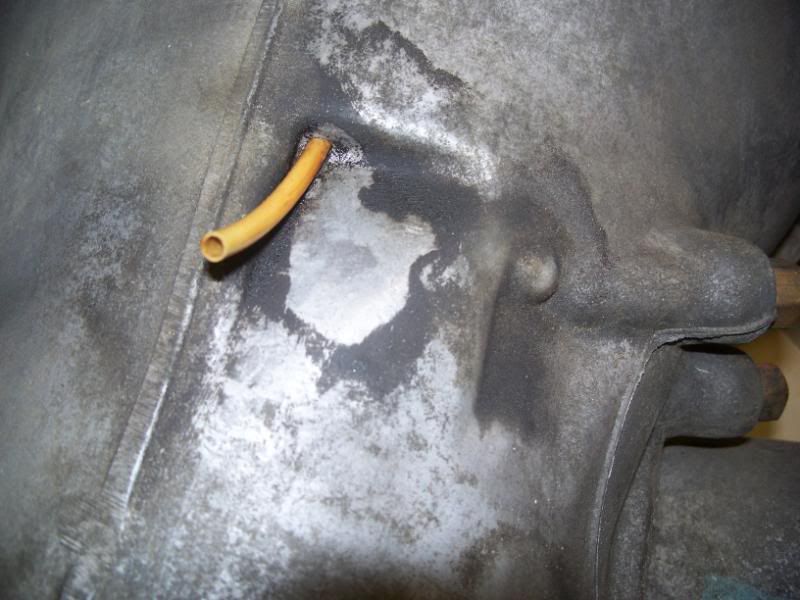
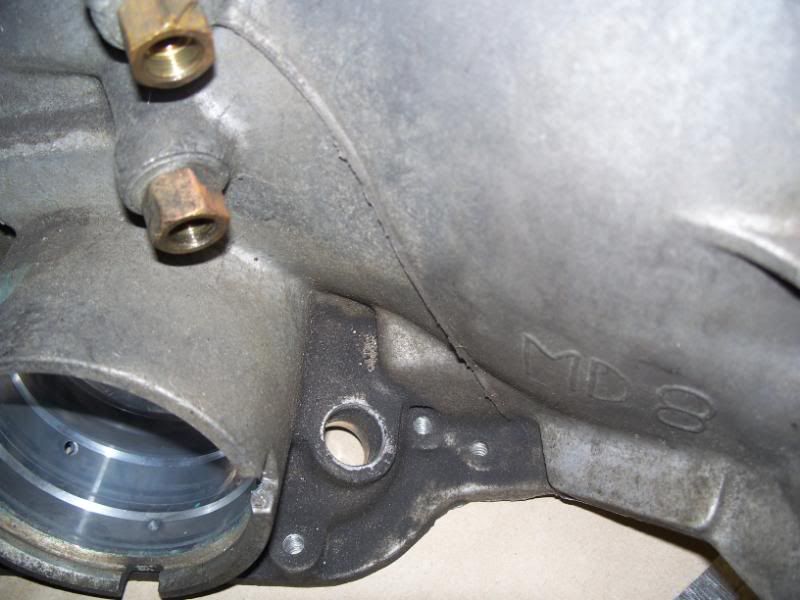
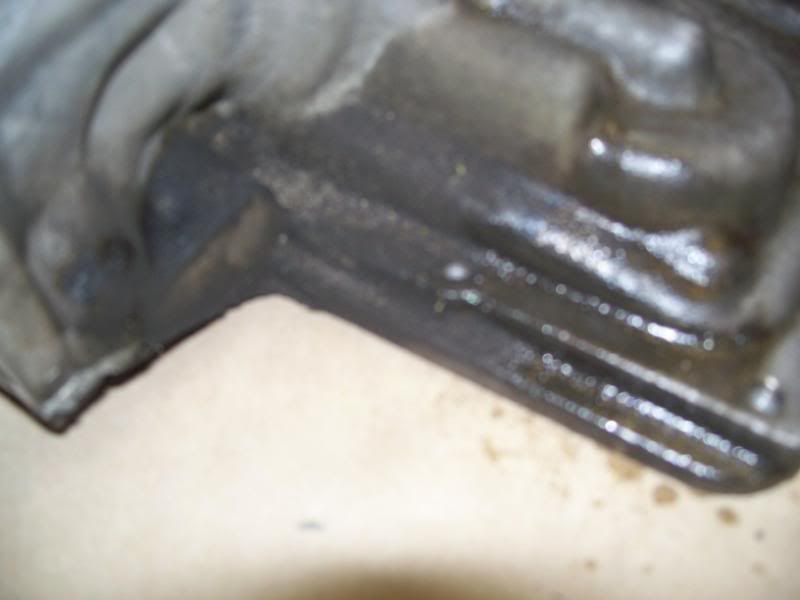
Like the title says...Used concentrated Purple Power, plastic parts cleaner brush (with non-metal bristles), GLOVES, and eye protection. Then cleaned with brake cleaner and compressed air to remove any residue.
BEFORE
1
2
3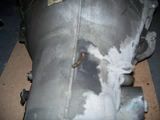
4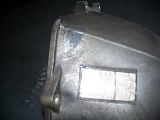
5
6
7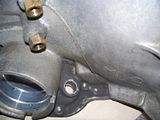
8
9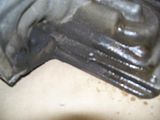
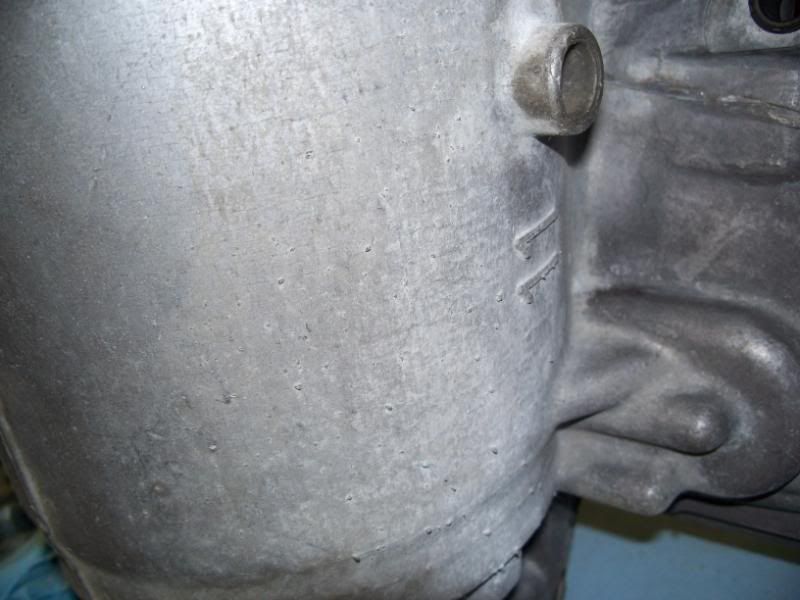
AFTER
10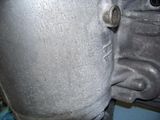
11
Doesn't look like a big difference, but I could run my fingers over it without getting them dirty at all. My hands would be black before the cleaning.
BEFORE
1
2

3

4
5
6
7
8

9
AFTER
10
11
Doesn't look like a big difference, but I could run my fingers over it without getting them dirty at all. My hands would be black before the cleaning.
07-01-2008, 10:39 PM
#46
Burning Brakes
Thread Starter
Sorry for going a little out of order - when I finish posting all the pictures I will come back and add MANY more details, more pics if wanted, and change the order up...
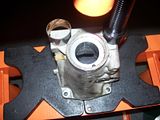
Bushing replacement in rear extension housing, sun gears, etc.
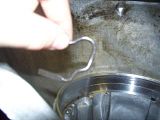
1.
Old rear seal/extension housing seal. This seal and the front seal seem to be replaced by themselves without a rebuild. I had to take a screw driver and rest it on the top of the seal and position the end of it under the seal itself. I then hit (a couple times) the screwdriver with a rubber mallet until the seal came out.
2.
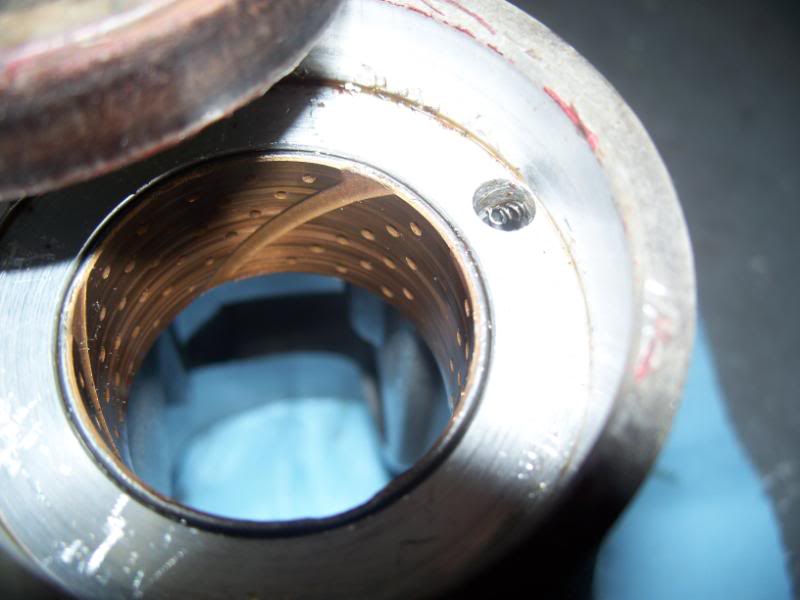
Here is the old bushing also. When you install the new one, it is preferential that where the bushing joins (this one doesn't look like a puzzle piece joint, but a straight cut joint) faces upwards into the cabin of the car when the trans is installed. The one included in my rebuild kit from Dana at ProBuilt / 700r4l60e.com was teflon and grey in the inside, not brass as the old one is.
3.
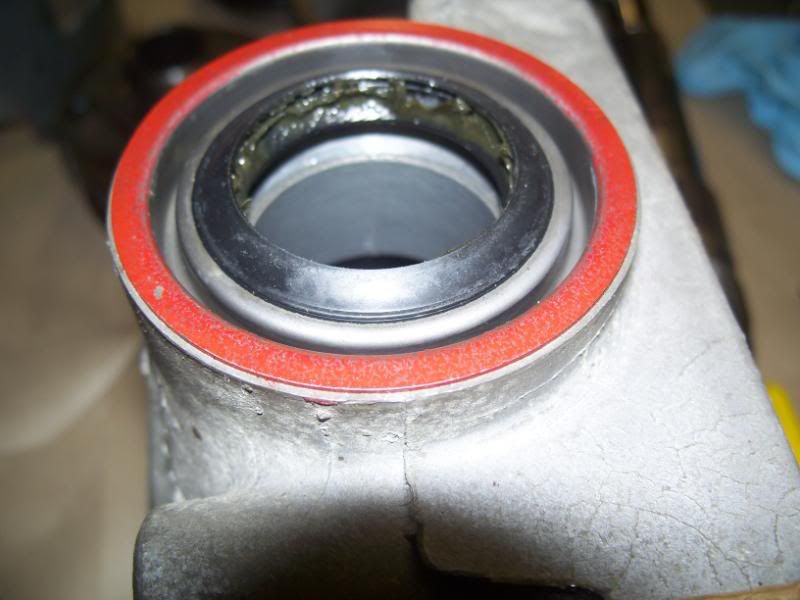
The new seal on the extension housing...
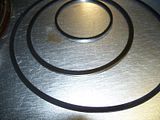
4.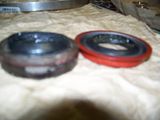
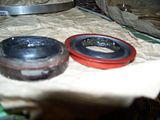
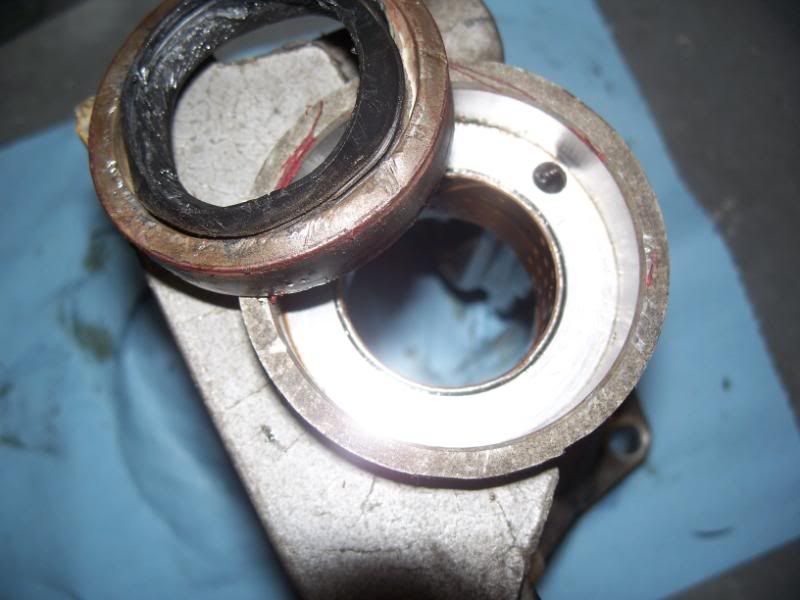
Comparison of the old seal to the new one. See how the old one has no outer lip/rim like the new front pump and rear extension housing do?
5.
Same as 4.
6.
Use the bushing driver for the rear extension housing to drive the old one out.
7.
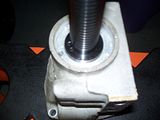
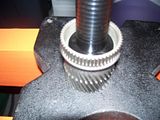
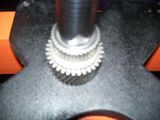
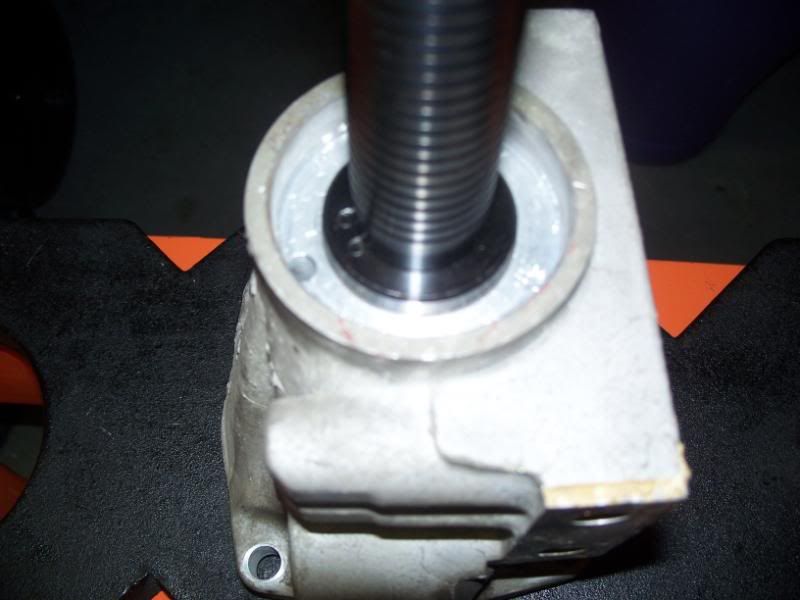
Using my Craftsman socket to remove the 2 identical sized bushings from the smaller input sun gear. I figured this out after using a drift, screwdriver and pick for 45 min trying to remove them like that. The driver will NOT work for removing them, only pressed them IN.
8.
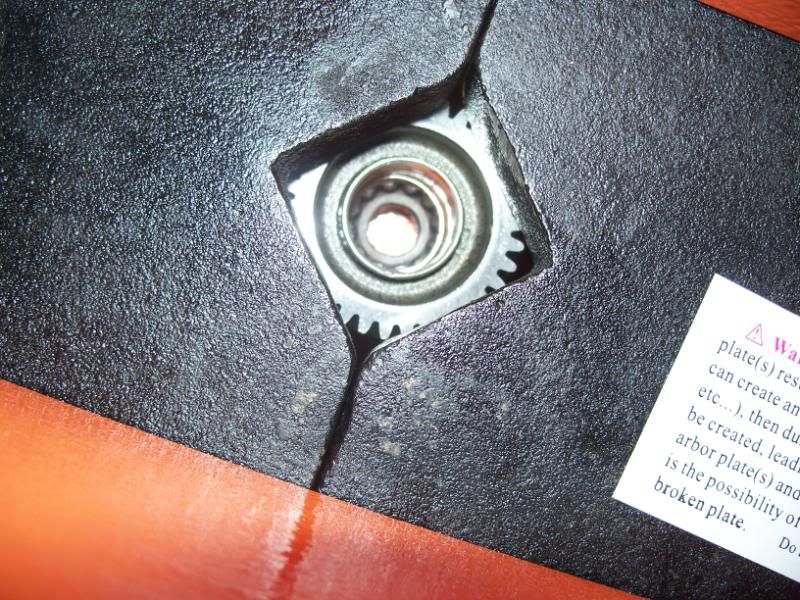
View from underneath the arbor plates and input sun gear. This was the smallest hole I could make with my arbor plates and I was trying to really center the sun gear.
9.
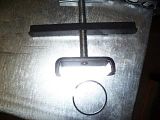
The sungear driver that doesn't remove them.
10.
Rear extension housing driver.
11.
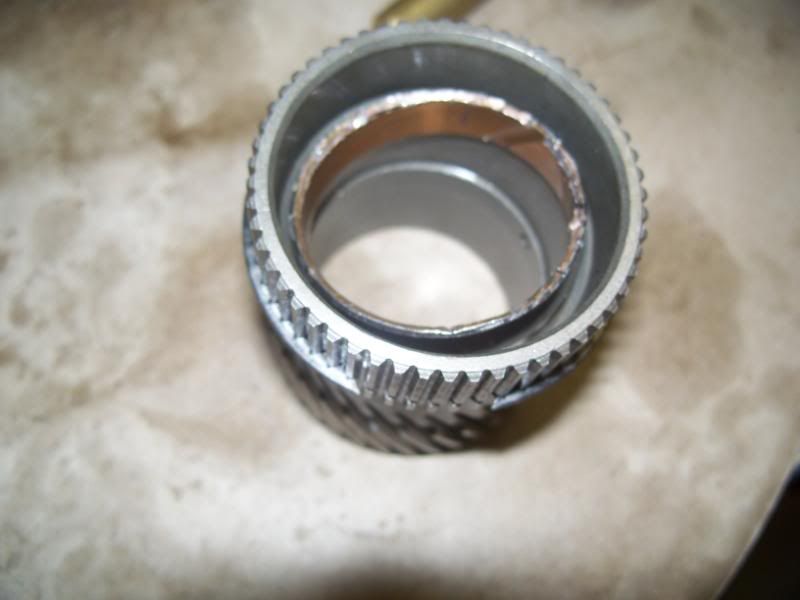
Use the rear extension housing DRIVER to remove the reaction sun gear bushing from the sun gear. I'm glad I found this out too...
12.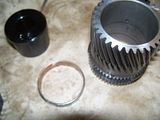
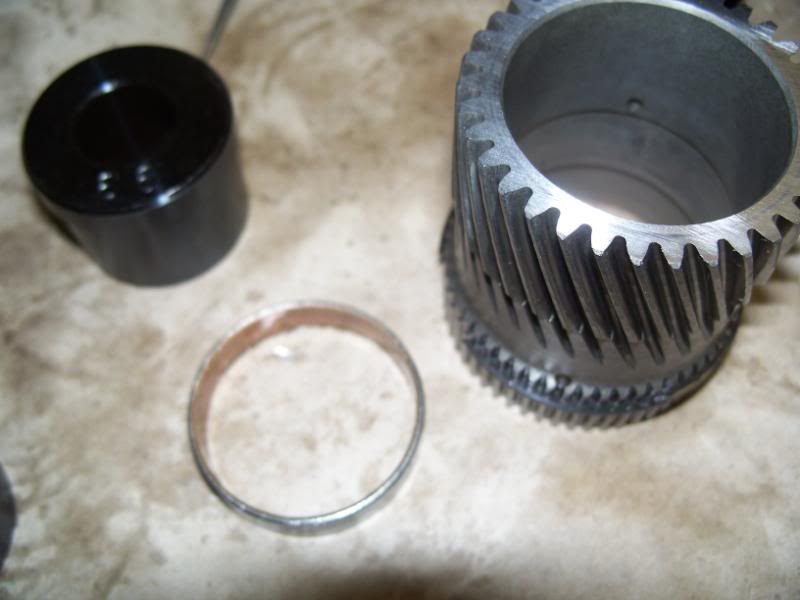
A pic of the rear extension bushing driver, reaction sun gear, and reaction sun gear bushing.
13.
Drive the rear extension housing teflon bushing in. It should lay flush on both sides of the housing.
14.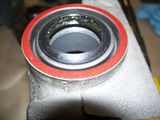
New seal tapped on with a mallet and a block of wood. For some reason I really like the new front and rear seal...
This is a 3 seal piece and is not available any longer. It came prelubed to help lube everything up on start-up.
**Use a razor blade and carefully remove and paint from the seal or what looked like red loctite from the factory. Be as careful as you were remove the paint from the front pump seal surface.
15.
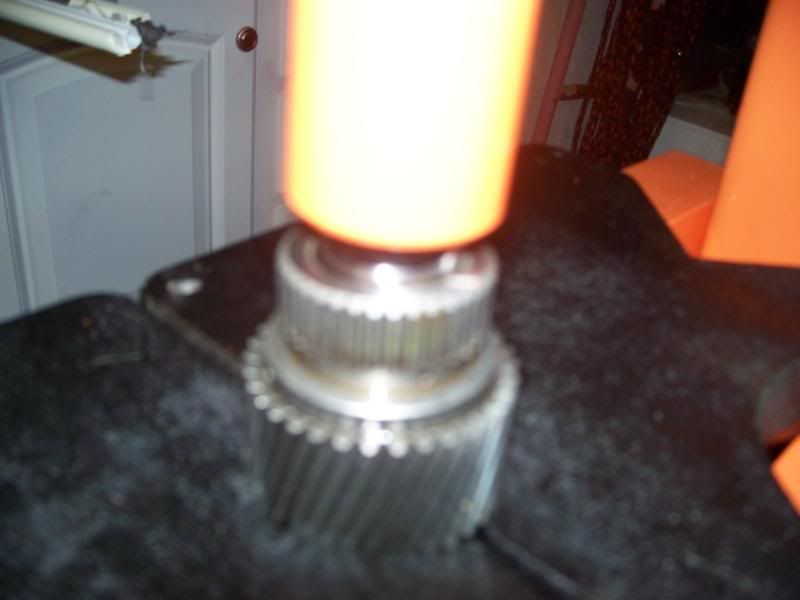
Driving the bushing into the reaction sun gear.
16.
Same as pic 7.
Bushing replacement in rear extension housing, sun gears, etc.
1.
Old rear seal/extension housing seal. This seal and the front seal seem to be replaced by themselves without a rebuild. I had to take a screw driver and rest it on the top of the seal and position the end of it under the seal itself. I then hit (a couple times) the screwdriver with a rubber mallet until the seal came out.
2.
Here is the old bushing also. When you install the new one, it is preferential that where the bushing joins (this one doesn't look like a puzzle piece joint, but a straight cut joint) faces upwards into the cabin of the car when the trans is installed. The one included in my rebuild kit from Dana at ProBuilt / 700r4l60e.com was teflon and grey in the inside, not brass as the old one is.
3.

The new seal on the extension housing...
4.

Comparison of the old seal to the new one. See how the old one has no outer lip/rim like the new front pump and rear extension housing do?
5.

Same as 4.
6.

Use the bushing driver for the rear extension housing to drive the old one out.
7.
Using my Craftsman socket to remove the 2 identical sized bushings from the smaller input sun gear. I figured this out after using a drift, screwdriver and pick for 45 min trying to remove them like that. The driver will NOT work for removing them, only pressed them IN.
8.
View from underneath the arbor plates and input sun gear. This was the smallest hole I could make with my arbor plates and I was trying to really center the sun gear.
9.

The sungear driver that doesn't remove them.
10.

Rear extension housing driver.
11.
Use the rear extension housing DRIVER to remove the reaction sun gear bushing from the sun gear. I'm glad I found this out too...
12.
A pic of the rear extension bushing driver, reaction sun gear, and reaction sun gear bushing.
13.
Drive the rear extension housing teflon bushing in. It should lay flush on both sides of the housing.
14.
New seal tapped on with a mallet and a block of wood. For some reason I really like the new front and rear seal...
This is a 3 seal piece and is not available any longer. It came prelubed to help lube everything up on start-up.
**Use a razor blade and carefully remove and paint from the seal or what looked like red loctite from the factory. Be as careful as you were remove the paint from the front pump seal surface.
15.

Driving the bushing into the reaction sun gear.
16.

Same as pic 7.
Last edited by janarvae; 07-01-2008 at 10:45 PM.
07-30-2008, 09:13 PM
#47
Jonathon -
Where did you get the manual/dvd and the specialized tools? (spring compressors, etc)
I've ordered a floor jack and stands and will probably be removing my 4l60e transmission within the next week or so. I'd prefer to do the rebuild myself . Obviously one can spend much more time on detail than someone doing it for a living. However I can see that a good service manual is essential. Your transmission looks much more complicated than the older ones I used to fool with. (th 350 days)
- Tony
07-30-2008, 10:46 PM
#48
Burning Brakes
Thread Starter
Jonathon -
Where did you get the manual/dvd and the specialized tools? (spring compressors, etc)
I've ordered a floor jack and stands and will probably be removing my 4l60e transmission within the next week or so. I'd prefer to do the rebuild myself . Obviously one can spend much more time on detail than someone doing it for a living. However I can see that a good service manual is essential. Your transmission looks much more complicated than the older ones I used to fool with. (th 350 days)
- Tony
Where did you get the manual/dvd and the specialized tools? (spring compressors, etc)
I've ordered a floor jack and stands and will probably be removing my 4l60e transmission within the next week or so. I'd prefer to do the rebuild myself . Obviously one can spend much more time on detail than someone doing it for a living. However I can see that a good service manual is essential. Your transmission looks much more complicated than the older ones I used to fool with. (th 350 days)
- Tony
Just FYI, I already finished the rebuild, but had a little problem with smoke from the engine bay (posted it in a thread on the forum) and have not had the time yet to finish updating the pictures and comments. I have close to 800 pictures and it takes a while to go through them all.
I bought the DVD and transmission tools from Dana at ProBuilt Automatics - visit https://www.700r4l60e.com/store/home.php?cat=63 for the tools and he also sells excellent rebuild kits. His customer service is next to none and he will talk you through any step of the rebuild process.
Personally, I hardly used the manual I bought, and instead used the DVD and Dana at ProBuilt Automatics and forum members (JimiHendrix, PeteK, Vic'89, 86pacer, Frizlefrak and more) for the rebuild. The blue book that I bought I opened maybe once or twice because it literally copies most of its pages out of the '91 FSM. If you have an FSM, I don't think you need the book. I also don't think it has all of the torque values the FSM has....This is yet another example of how the Factory Service Manual pays for itself over and over again.
I recommend getting all of your parts from Dana. You may be able to beat his prices by a tiny bit, but it is not worth it, in my honest opinion. I would have not been able to rebuild it without him, period.
When you start your removal, I may be able to help some, but our engines are so different much may not apply.
It is really good to hear other people not afraid to tackle our auto transmissions.
Good luck and keep us posted,
Jonathan N
Last edited by janarvae; 07-31-2008 at 08:42 PM.
07-31-2008, 01:02 PM
#49
Drifting

I see that you're done with the rebuild. Is everything O.K.?
07-31-2008, 06:25 PM
#50
Burning Brakes
Thread Starter
Wish me luck and I'll update this post soon - I've been saying that for a while now!
Jonathan

 08-01-2008, 09:55 AM
#52
Burning Brakes
Thread Starter
No, not yet.  I was running it through the break-in process. I had run it for 20 sec in Park, shut it off, added 4 more quarts. Then I restarted and had it in park for 30 sec, Reverse for 30 sec, and when I was in the 30 sec period of neutral, I noticed smoke from the engine bay (I had the hood open). I immediately shut the car off and grabbed my fire extinguisher. No need for it though.
I posted a thread concerning it and it was suggested I may have spilled tranny fluid - which I did while I was pumping out fluid out of the old pan once it was finished and reinstalled because the old pan had a leak because it was bent somehow. When I was pumping out the fluid I had poured into the old stock pan (before realizing it was bent) I started pumping faster towards the end to get as much out as possible and I blew a hose off the hand pump I was using. I am hoping it was the spilt tranny fluid which caused the smoke.
However, I also noticed I had a low coolant warning and subsequently checked the coolant and it was very low as it had been leaking for the 2 months it was up on stands and I never thought to check the level (stupid , I know).
Right now I'm busy with my studies and have taken off the throttle body to change the gaskets and am thinking that the intake gasket is leaking the coolant? Does the intake gasket keep coolant in? I need to run a compression check to be sure its not a head gasket, but I also have a large vacuum leak (indicated by VERY high idle) and was thinking it was the intake gasket.
To wrap this up, I may change the intake gasket this weekend if coolant can come out of there. I'll reinstall the TB (all new gaskets and new IAC) and then fill with coolant and give it another go.
Jonathan
I was running it through the break-in process. I had run it for 20 sec in Park, shut it off, added 4 more quarts. Then I restarted and had it in park for 30 sec, Reverse for 30 sec, and when I was in the 30 sec period of neutral, I noticed smoke from the engine bay (I had the hood open). I immediately shut the car off and grabbed my fire extinguisher. No need for it though. I posted a thread concerning it and it was suggested I may have spilled tranny fluid - which I did while I was pumping out fluid out of the old pan once it was finished and reinstalled because the old pan had a leak because it was bent somehow. When I was pumping out the fluid I had poured into the old stock pan (before realizing it was bent) I started pumping faster towards the end to get as much out as possible and I blew a hose off the hand pump I was using. I am hoping it was the spilt tranny fluid which caused the smoke.
However, I also noticed I had a low coolant warning and subsequently checked the coolant and it was very low as it had been leaking for the 2 months it was up on stands and I never thought to check the level (stupid
, I know). Right now I'm busy with my studies and have taken off the throttle body to change the gaskets and am thinking that the intake gasket is leaking the coolant? Does the intake gasket keep coolant in? I need to run a compression check to be sure its not a head gasket, but I also have a large vacuum leak (indicated by VERY high idle) and was thinking it was the intake gasket.
To wrap this up, I may change the intake gasket this weekend if coolant can come out of there. I'll reinstall the TB (all new gaskets and new IAC) and then fill with coolant and give it another go.
Jonathan
08-03-2008, 02:37 AM
#53
Safety Car


Member Since: Oct 2007
Location: :45 minutes from everywhere / E-I-E-I-O
Posts: 3,816
Likes: 0
Received 0 Likes
on
0 Posts
Yup. (L98)
I don't think vacuum leak will cause high [steady] idle - I think only a loping idle...
How much does tranny weigh? I used to pull my CJ7 T5 5sp/Dana 300 T/Case together by lowering them to my chest, then rolling them to the floor. Of course, they didn't go up together , but I did it 3 times no problem.
Now my Jimmy 4l60e needs to come down...
but I also have a large vacuum leak (indicated by VERY high idle) and was thinking it was the intake gasket.
Jonathan
Jonathan
How much does tranny weigh? I used to pull my CJ7 T5 5sp/Dana 300 T/Case together by lowering them to my chest, then rolling them to the floor. Of course, they didn't go up together
, but I did it 3 times no problem.Now my Jimmy 4l60e needs to come down...
08-03-2008, 05:07 PM
#54
Burning Brakes
Thread Starter
Yup. (L98)
I don't think vacuum leak will cause high [steady] idle - I think only a loping idle...
How much does tranny weigh? I used to pull my CJ7 T5 5sp/Dana 300 T/Case together by lowering them to my chest, then rolling them to the floor. Of course, they didn't go up together , but I did it 3 times no problem.
Now my Jimmy 4l60e needs to come down...
I don't think vacuum leak will cause high [steady] idle - I think only a loping idle...
How much does tranny weigh? I used to pull my CJ7 T5 5sp/Dana 300 T/Case together by lowering them to my chest, then rolling them to the floor. Of course, they didn't go up together
, but I did it 3 times no problem.Now my Jimmy 4l60e needs to come down...
I mention this because I could also pick it straight up out of the hole with all internals in it. A helper would NOT hurt for this process, but it CAN be done by yourself as long as you are capable of lifting 150+ pounds safely.
Oh, and I decided I'm replacing the intake manifold gasket and runner gaskets + misc gaskets (like EGR). Plenum and TB are off as well as all vac. and electrical connections/sensors. I've taken plenty of pics as of yet and will post those after the job is done and I have updated the photos in this thread.
Right now I'm busy finishing up my thesis so I can graduate next weekend!
From reading all your past posts and the stuff you've done, you'll have no problem with the removal.
Good luck,
Jonathan
Last edited by janarvae; 08-03-2008 at 05:09 PM.
12-31-2008, 12:43 AM
#55
Pro

I have almost completed the rebuild of my 93 automatic. I have run into a snag though. My kit did not have the replacment valve and spring for the pump rebuild. The marked instructions clearly states to use the supplied parts for this task. I believe it is called the PR valve.
Also, In completing the Input Drum assembly I noticed that the last set of replacement clutched and steel plate is about twice that of the stock clutch stack up. I used the supplied snap ring as well and this gave me a clearance of .12" between the last clutch and steel backing ring. The DVD says that .09" is the maximum clearance but he also adds that .010" per clutch is required. Could you comment on your experiecne with this? I have installed the input drum in the case but I can go back macke changes if required. I am stuck until I get the PR valve problem resolved.
Thanks,
93cruiser
12-31-2008, 09:43 AM
#56


I have almost completed the rebuild of my 93 automatic. I have run into a snag though. My kit did not have the replacment valve and spring for the pump rebuild. The marked instructions clearly states to use the supplied parts for this task. I believe it is called the PR valve.
Also, In completing the Input Drum assembly I noticed that the last set of replacement clutched and steel plate is about twice that of the stock clutch stack up. I used the supplied snap ring as well and this gave me a clearance of .12" between the last clutch and steel backing ring. The DVD says that .09" is the maximum clearance but he also adds that .010" per clutch is required. Could you comment on your experiecne with this? I have installed the input drum in the case but I can go back macke changes if required. I am stuck until I get the PR valve problem resolved.
Thanks,
93cruiser
Also, In completing the Input Drum assembly I noticed that the last set of replacement clutched and steel plate is about twice that of the stock clutch stack up. I used the supplied snap ring as well and this gave me a clearance of .12" between the last clutch and steel backing ring. The DVD says that .09" is the maximum clearance but he also adds that .010" per clutch is required. Could you comment on your experiecne with this? I have installed the input drum in the case but I can go back macke changes if required. I am stuck until I get the PR valve problem resolved.
Thanks,
93cruiser
As far as the 3-4 clutch, my experience shows me that .045-.060 will yield the best results, regardless of plate count.
You mus add a steel, or use a selective thickness pressure plate to achieve your goal. Regardless, focus on the 3-4 pack. If you leave it at .120, it will not live long.
 06-23-2009, 07:18 PM
#58
Burning Brakes
Thread Starter
10-20-2009, 07:07 PM
#59
Burning Brakes
Thread Starter
I just wanted to give you all an update.
I started this transmission rebuild after I was unable to exceed 87 mph. It was suggested the 3-4 clutches were worn out, and that I only had 1st and 2nd gears working properly. I was ambitious and decided to go ahead with the rebuild.
What I know now is this:
- My tachometer was VERY broken. I have since upgraded to a '92 or '93 tach from an LT1 car - you can see that install thread by searching my name.
- My TCC solenoid was CRACKED down the middle. I just replaced it 2 weeks ago with one from AutoZone. The symptom that gave it away was that the TC would lock-up when the car was cold and it wouldn't work once the ATF was warmed up. The crack would expand in the heat and not allow the solenoid to function properly. This caused crappy gas mileage and I don't think I was shifting out of 2nd gear either.
It figures the one part I didn't replace in the rebuild was the broken one.
- All that was broken was my TCC solenoid, a bad '91 tachometer ('90-'91 had the new LT1 tach), and 2 spark plug wires. I learned a hell of a lot about my car though in the process and would do it all over again.
I started out with the low top speed. Rebuilt the tranny. Had a coolant leak during the rebuild. Replaced the intake gaskets, but not before BREAKING not one, but TWO square extractors inside drilled intake manifold bolts. I ended up helicoiling ALL of the intake manifold bolts.
Then I had smoke from the valve covers on my first start-up. Turns out this was normal. I ended up replacing the valve cover seals and the valve covers. However, I used some shiny, tall Pro-Form aluminum valve covers that were a PITA to install and one cover cracked when torquing the valve cover bolts to the FSM torque spec.
After this I removed the new ones, another PITA, refinished and painted the original ones and reinstalled them.
Then came the discovery that my tach was bad. Sure enough I bought a USB cable to connect to the ALDL port and the tach was WAY off. It was reading almost twice the RPM of what the engine was actually rotating.
Then my power-steering pump went bad. Changed that in one night, but that was difficult. The next week was when the plastic neck of the upper radiator cracked and I had a terrible overheating problem lingering after the rebuild. I installed a Dewitts radiator soon after (JB weld didn't cut it ). The overheating problem has since vanished and now the gauge is never past the half-way mark (IN FLORIDA at temps above 98F in TRAFFIC).
You would think I would get tired with all of this, but then I had a running rough/rich problem. It turns out two of my spark plugs wires were eaten almost all the way through! Replaced those. Now the car is running better than new and my top speed is no longer 87 MPH.
Thanks and PM me if you want the photobucket password. Or, send me your e-mail address and I'll send you a compressed .zip file of all the pictures I have of the rebuild.
-Jonathan
I started this transmission rebuild after I was unable to exceed 87 mph. It was suggested the 3-4 clutches were worn out, and that I only had 1st and 2nd gears working properly. I was ambitious and decided to go ahead with the rebuild.
What I know now is this:
- My tachometer was VERY broken. I have since upgraded to a '92 or '93 tach from an LT1 car - you can see that install thread by searching my name.
- My TCC solenoid was CRACKED down the middle. I just replaced it 2 weeks ago with one from AutoZone. The symptom that gave it away was that the TC would lock-up when the car was cold and it wouldn't work once the ATF was warmed up. The crack would expand in the heat and not allow the solenoid to function properly. This caused crappy gas mileage and I don't think I was shifting out of 2nd gear either.
It figures the one part I didn't replace in the rebuild was the broken one.
- All that was broken was my TCC solenoid, a bad '91 tachometer ('90-'91 had the new LT1 tach), and 2 spark plug wires. I learned a hell of a lot about my car though in the process and would do it all over again.
I started out with the low top speed. Rebuilt the tranny. Had a coolant leak during the rebuild. Replaced the intake gaskets, but not before BREAKING not one, but TWO square extractors inside drilled intake manifold bolts. I ended up helicoiling ALL of the intake manifold bolts.
Then I had smoke from the valve covers on my first start-up. Turns out this was normal. I ended up replacing the valve cover seals and the valve covers. However, I used some shiny, tall Pro-Form aluminum valve covers that were a PITA to install and one cover cracked when torquing the valve cover bolts to the FSM torque spec.
After this I removed the new ones, another PITA, refinished and painted the original ones and reinstalled them.
Then came the discovery that my tach was bad. Sure enough I bought a USB cable to connect to the ALDL port and the tach was WAY off. It was reading almost twice the RPM of what the engine was actually rotating.
Then my power-steering pump went bad. Changed that in one night, but that was difficult. The next week was when the plastic neck of the upper radiator cracked and I had a terrible overheating problem lingering after the rebuild. I installed a Dewitts radiator soon after (JB weld didn't cut it
). The overheating problem has since vanished and now the gauge is never past the half-way mark (IN FLORIDA at temps above 98F in TRAFFIC). You would think I would get tired with all of this, but then I had a running rough/rich problem. It turns out two of my spark plugs wires were eaten almost all the way through! Replaced those. Now the car is running better than new and my top speed is no longer 87 MPH.
Thanks and PM me if you want the photobucket password. Or, send me your e-mail address and I'll send you a compressed .zip file of all the pictures I have of the rebuild.
-Jonathan
01-11-2011, 12:25 PM
#60
Racer
Member Since: Dec 2003
Location: Hong Kong
Posts: 349
Likes: 0
Received 0 Likes
on
0 Posts

Hi Janarvae, Im about to embark on the transmission rebuild on my 91.
Your post is fantastic and I would like to have a look at your pictures. Was wondering if you would be so kind as to share your password with me?
Was Danas kit complete with everything you needed? I live in Hong Kong and dont want to find out I need additional parts half way through the build.
Cheers mate!