How do I properly bleed the coolant system on an LT1?
 01-01-2009, 02:02 PM
#1
Burning Brakes

Thread Starter
My car is a '93 LT1. I have flushed my coolant system, and I know I removed more coolant than I could put back in (coolant added came to the top of the tank). According to the FSM, there are two bleed points - I found one on the neck of the thermostat outlet. Can't find the second. The manual also says to refill the coolant until a stream of water/coolant comes out the bleed points. When I put the antifreeze in, followed by water, I didn't get any overflow out of the thermostat bleed point before I couldn't add any more water - it would flow out the fill point first.
I'm convinced I don't have enough coolant in the system. I've read comments - no instructions - on "burping" the system. How is this done?
Thanks,
Stephen
I'm convinced I don't have enough coolant in the system. I've read comments - no instructions - on "burping" the system. How is this done?
Thanks,
Stephen

The following users liked this post:
Jsal13 (12-02-2023)
01-01-2009, 06:10 PM
#2
Instructor

Member Since: Feb 2008
Location: Houston TX
Posts: 158
Likes: 0
Received 0 Likes
on
0 Posts
I had to run my '95 LT1 engine a little while bleeding to get water to flow (and thus to come out the bleed port). Once I started the engine, I was able to add a bit more water to the top tank.
Hope this helps.
Hope this helps.
01-01-2009, 06:42 PM
#3
Melting Slicks

There is only one bleed screw for "burping" out the air, and you found it. You need to have the engine running while you are refilling the system. The engine needs to reach a temp. where the T-stat is open so that water can flow through entire system. Also turn on your heater so coolant/water mix flows through this system as well. With engine running, continue to top off coolant tank.
Put a bunch of shop towels beneath the area where the bleed screw is. This will keep any coolant from making its way down to the Opti. Loosen the bleeder screw until you see a steady stream of coolant coming out of it. Tighten screw up. Again, this procedure is done with engine running. Button everything back up and your done.
Drive the car for 10 or 15 minutes. After the engine has completely cooled down, remove cap and add as necessary. I usually repeat this procedure 2 times after initial refill to ensure adequate coolant is in the system. Don't forget to fill your plastic overflow resevoir to proper level. I can almost guarantee that you will need to add more coolant after your initial refill.
Use distilled water to obtain your 50/50 coolant/water mix. Prestone actually sells a 50/50 mix....one less thing.
Last edited by MikeC4; 01-01-2009 at 06:45 PM.
The following users liked this post:
Jsal13 (12-02-2023)
01-01-2009, 06:47 PM
#4
Team Owner


When you did the flush. did you remove the knock sensors? There is a fair amount of coolant in the block that will not drain unless you pull the sensors.
The second bleed valve is on the driver's side of the throttle body next to the small hose just to the inside.
With the block and radiator empty, you should have been able to get two gallons of antifreeze concentrate in before anything would come out of the bleed valves. Then you add some distilled water until the mix comes out the valves.
Once you close the bleed valves, fill the expansion tank to the top. Start the engine and let it run at about 1000-1200 RPM. Once the thermostat opens, the level will drop and you can add the rest of the distilled water. Just keep an eye on the temp! Once the coolant level stabilizes at the bottom of the filler neck, replace the pressure cap. Fill the overflow tank to the proper level.
The FSM for my 92 says to not do any full-throttle operation until the engine has gone through 3 complete heating/cooling cycles. This means going to normal operating temps, cooling down to >100 degrees and repeat twice more. That cycling will remove any air pockets and extra coolant will be pulled from the expansion tank as needed.
01-01-2009, 07:22 PM
#5
Team Owner

Member Since: Aug 2005
Location: Riverside County Southern California
Posts: 34,988
Received 501 Likes
on
342 Posts
Co-winner 2020 C4 of the Year - Modified
2018 Corvette of Year Finalist
2017 C4 of Year
2016 C7 of Year Finalist
St. Jude Donor '09-'10-'11-'12-'13-'14-'15-'16-'17-'18-'19-'20


 There is a lot of dirt and rust in that area. If you did not remove the KS, old coolant and other contaminants will mix with the new coolant.
 01-01-2009, 09:34 PM
#6
Drifting


Member Since: Sep 2003
Location: 1994 LT1 Coupe 6-speed with FX3 & 2000 LS1 Vert 6-Speed with F45 Hunterdon County, NJ
Posts: 1,363
Likes: 0
Received 5 Likes
on
5 Posts

StephensblackL98,
now that you know where the 2nd bleed screw is, here's some info to help further:
Whereas the FSM suggests the bleed screws are 'very important', realitity is that very little 'air' will come out, especially if you gently squeeze numerous times the radiator hose while adding anti-freeze/water to the pressure tank (before starting the engine).
So, if your thinking that using the 'bleed screws' will allow lots more fluid to be added, sorry, but it will not...
Also, the bleed screw over the thermostat housing obvously helps eliminate air from that high-point (which can be minimized by squeezing the hose while adding fluid), but by contrast the other bleed screw (driver side under the throttle-body) is only for that bypass hose and the throttle-body, so there's alot less air that can be removed here.
I would suggest adding fluid (pure anti-freeze first, followed by distilled-water) slowly and while squeezing the lower radiator hose -- don't rush it, take your time -- then once it is topped-off, try openning the bleed screws one at a time (remember to protect the opti, use lots of paper towels) to remove any excess air, then re-close the bleed-screws.
Then start the engine, which should cause the level in the pressure tank to drop, add water to top it off, raise the RPM's to about 1500 rpm.s, top off, then put the cap on, and allow the system to build pressure and move air around to the pressure tank -- watch the temps, but consider taking it for a small drive too.
Then let it cool-down, but while it is still pressurized, try openning the bleed-screws again, one a time (protect the opti), to remove any trapped air.
Thereafter, heed the prior member's suggestions about adding water and adding 50/50 mix to overflow and taking it easy until 3 complete drive cycles.
Remember the LT1's cooling system is self bleeding (scavenges to the pressure tank), but it requires pressure to work, so leaving the cap off too long when filling/running will allow spot-boiling, trapping air pockets and not moving them around to the pressure tank due to insufficient pressure build-up. I believe many over-heating problems during system flushing are caused by leaving the cap off too long, preventing the natural movement of trapped air pockets to the pressure tank.
BTW, if you didn't change the thermostat, its not too late, and always a good idea -- but remember to get a stat designed for the LT1 (special lower plate to cover the internal chamber in the water pump).
Also, regarding doing a good flushing, I didn't remove the knock-sensors, but what worked great for me was to only drain the radiator, add 2 gallons of distilled water, run (with heater on), drain, add distilled water, run, etc, about 5 times -- only cost $10-$20 but when final drain, had real nice clean water, and pure distilled water remaining in the engine, and only pure water to leak out on the opti when changing the thermostat, and then adding pure anti-freeze, and then top off with more distilled-water. much easier than trying to remove the knock sensors.
01-14-2009, 09:17 PM
#7
Navigator

Member Since: Jan 2009
Posts: 9
Likes: 0
Received 0 Likes
on
0 Posts
1st, please let me say THANKS! I was sent here by my brother-he found the place for me. Anyway,I got trouble.
I got a 94 LT1,about 105,000 mi. good shape for the year,burns no oil.
The other day I'm driving it about 65mph on the interstate and I notice it's getting HOT... I peel off the exit, hit a parking lot and assume I got a stuck thermostat. Call my son, brings me 2 gals of antifreeze and a thermostat. I slap the new one in, refill the upper tank. hit the road and she immeadiately gets HOT... overflow tank is FULL-but I think it was full when I originally stopped...ok...maybe my 'stat WASN'T bad?
I now know I gotta bleed the system...anybody got any ideas?
I let it set for a couple days, and the overflow tank was EMPTY...
Filled the top tank, let it run with the cap off(I now know that was wrong) it DID get hot and circulate, put the cap on tight, it wants to get HOT...get the cap off and it spews and squirts and spews out the filler cap...hot, steamy spew....Anybody got any ideas???
OH, the analog guage would peg at hi limit and not move...the dig readout would start at like 155 and go up to like 245, then cycle down to maybe 220, then 255, then down to 220... I shut 'er down because I figgured something BAD was gonna happen with the temp that Hi....
The analog never moved while all that was going on...
HELP!
01-15-2009, 12:19 AM
#8
Drifting
Member Since: Sep 2003
Location: 1994 LT1 Coupe 6-speed with FX3 & 2000 LS1 Vert 6-Speed with F45 Hunterdon County, NJ
Posts: 1,363
Likes: 0
Received 5 Likes
on
5 Posts
34oSc,
Since it happened while you were driving there are only a few things it could be (presume it had been fine for months/years before hand).
If we presume your original diagnosis was correct, are you sure the replacement thermostat you installed on the road was the correct one and wasn't defective (remember the LT1 thermostat is unique and special for the LT1 with the extra plate on the bottom to close off the internal passageway and specific height requirements -- was it an AC/Delco brand or some other)?
When you added the anti-freeze, was it pure anti-freeze or a pre-mix -- because sometimes adding straight anti-freeze, because it is so thick, can trap air in the back of the engine, especially if the engine is hot or the anti-freeze is added quickly. If it was pure anti-freeze, consider draining the radiator and adding back the equivalent amount of distilled-water, it might dilute and help eliminate any air pockets.
The next possible problem is the water pump. Though you mentioned seeing flow in the pressure tank, was it water coming out of the upper connector hose which runs to the top passenger side of the radiator? Did the flow continue when pumping the gas pedal? If not, or if no flow, perhaps the water pump impeller has spun free on the shaft, or the pump drive gear has stripped (gears to a cam gear behind the timing chain cover).
Next is fans. Based on digital dash temps, the primary (driver side) fan should come on at 228 degrees F and the secondary (passenger side) fan come on at 238 F. If they are not operating this way, it could be either a relay problem (both relays are on driver side of radiator housing) or an freon charge in the Air Conditioning (a low AC charge can prevent the secondary fan from coming on, even when the AC is not turned on).
Since you noted the analog temp gauge is pegged, it could imply a blockage or a bad temp sender. If we presume the gauge moves, but goes hot quickly, then it's likely not the sender, but either a blockage in the vapor take-off tubes (metal pipe from the back of both heads to a 'T' on the passenger side, which connect to the throttle-body coolant hose and then the 'pressure' tank lower hose) -- or -- the head gasket has a small rupture and is leaking compression into the coolant jacket.
BTW, bleeding of the coolant, albeit providing little benefit and doubtful it will fix your problem, and requiring protecting the OPTI from the bleed-out coolant, is done via the small bleed screws (regular screw-driver needed) above the thermostat cover (passenger side) and just below the throttle-body, just above the small coolant hose which "T"'s off the upper radiator hose -- runs between water pump and driver side of the radiator.
BTW, To define some components -- the upper tank passenger side near the windshield, black, non-see through, with the radiator cap, is also known as the 'pressure tank'n and is designed as a air scavenging container and should/will always have a small air bubble inside which heats up and adds to the pressurization. Do not overfill this tank, keep it 1/2" below the bottom of the lower lip. Whereas the partially see-through plastic container tank forward of the passenger side wheel behind the bumper is also known as the 'overflow tank' and should be kept between hot and cold and provides a storage place and siphon place for coolant pushed out from and pulled back into the 'pressure tank'.
01-15-2009, 12:22 AM
#9
Le Mans Master

Member Since: Jan 2006
Location: Woodstock Georgia
Posts: 6,564
Likes: 0
Received 6 Likes
on
6 Posts
34oSc--Do all the bleeding as described above. Car running, turn on the AC and check to be sure the fans are coming on. From pass side look in the little opening in the radiator shroud to see if it is clogged with trash. ps--stock main fan comes on at 227-228*F and the second fan at 236*F or so. Analog gauge reads temps in the right head, digital reads temps at the water pump.
 01-15-2009, 01:08 PM
#11
Burning Brakes
He has removed the knock sensors from each side of the block. The sensors are NPT (national pipe thread), so he just bought some male hose barb adapters (from a plumbing supply store, Home Depot, or PepBoys, etc), screwed them into the knock sensor holes, and used tubing to direct the flushing liquid (water) away from the block for a cleaner set-up. I just used aluminum foil to cover the exhaust, starter, O2 sensor, etc, but his way is much cleaner. Just be sure to stick a screwdriver or a 90* angled pick (and turn it around to get around the sides of the knock sensor hole in the block interior) into the block holes to loosen all the crud that accumulated over the years.
-Jonathan
-Jonathan
Last edited by janarvae; 01-15-2009 at 01:12 PM.

 That's what I love about this place, you can pick upa new trick every day. Thanks
01-15-2009, 04:18 PM
That's what I love about this place, you can pick upa new trick every day. Thanks
01-15-2009, 04:18 PM
#13
Instructor

Member Since: Jul 2007
Location: Austin Texas
Posts: 132
Likes: 0
Received 0 Likes
on
0 Posts
 01-15-2009, 04:20 PM
#14
Team Owner
Member Since: Aug 2005
Location: Riverside County Southern California
Posts: 34,988
Received 501 Likes
on
342 Posts
Co-winner 2020 C4 of the Year - Modified
2018 Corvette of Year Finalist
2017 C4 of Year
2016 C7 of Year Finalist
St. Jude Donor '09-'10-'11-'12-'13-'14-'15-'16-'17-'18-'19-'20
 01-15-2009, 05:27 PM
#15
Navigator
Member Since: Jan 2009
Posts: 9
Likes: 0
Received 0 Likes
on
0 Posts
Man oh Man! Don't know how I can ever thank you guys!
right now I got the offender in a heated garage in town(it's 2 below here). when it gets warmer -next week I hope- I'll start in on it- I DO have the thermostat that came out of it. My boy just bought one from O'reilly's... so that is the first thing I'll do, pull the one out I installed and check it against the original. While I got it opened up I will completely drain the system- because I DID add straight antifreeze,probably locking air in it. I'll post my results here-
One of these days I'll catch up with you all and buy you a coke-sure appreciate the help!
01-15-2009, 06:28 PM
#16
Burning Brakes
The magnet is for a light. The magnet clips onto the light so you have greater flexibility in putting it on stuff. I have a similar craftsman fluorescent light...
01-15-2009, 06:46 PM
#17
Burning Brakes
Man oh Man! Don't know how I can ever thank you guys!
right now I got the offender in a heated garage in town(it's 2 below here). when it gets warmer -next week I hope- I'll start in on it- I DO have the thermostat that came out of it. My boy just bought one from O'reilly's... so that is the first thing I'll do, pull the one out I installed and check it against the original. While I got it opened up I will completely drain the system- because I DID add straight antifreeze,probably locking air in it. I'll post my results here-
One of these days I'll catch up with you all and buy you a coke-sure appreciate the help!
right now I got the offender in a heated garage in town(it's 2 below here). when it gets warmer -next week I hope- I'll start in on it- I DO have the thermostat that came out of it. My boy just bought one from O'reilly's... so that is the first thing I'll do, pull the one out I installed and check it against the original. While I got it opened up I will completely drain the system- because I DID add straight antifreeze,probably locking air in it. I'll post my results here-
One of these days I'll catch up with you all and buy you a coke-sure appreciate the help!
CLICK HERE to check out some more tips on draining the system. Please note that the directions are for an L98, an LT1 will have an additional knock sensor on the driver's side. The fill protocol is different also as you have a bleed-off valve.
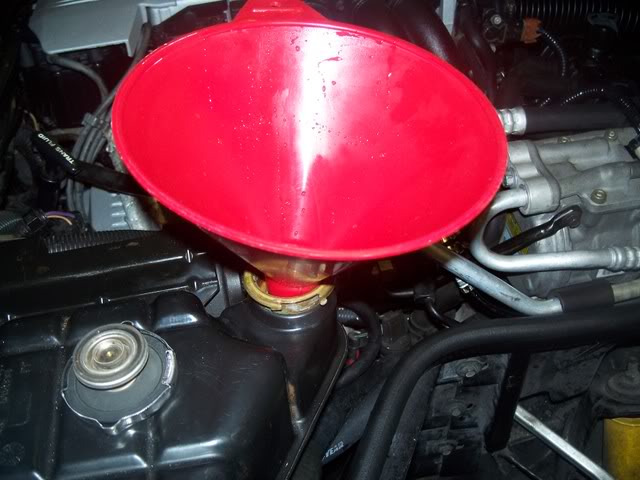
Mix your antifreeze this time first in a 1:1 ratio with DISTILLED water. You can buy this for about $0.79-$1/gallon at your local grocery store. I used brands distilled using a steam and filtration process. Don't waste your money on the pre-mixed ones. All I did was take a gallon of water and a gallon of coolant, pour them in a standard 5 gallon bucket, and then use a funnel to pour the now 50:50 mixture back into the coolant bottle. That way I could measure how much I was putting in. I connected a spout-controller to the coolant bottle and poured it into the funnel and high-fill reservoir.
Pictures:
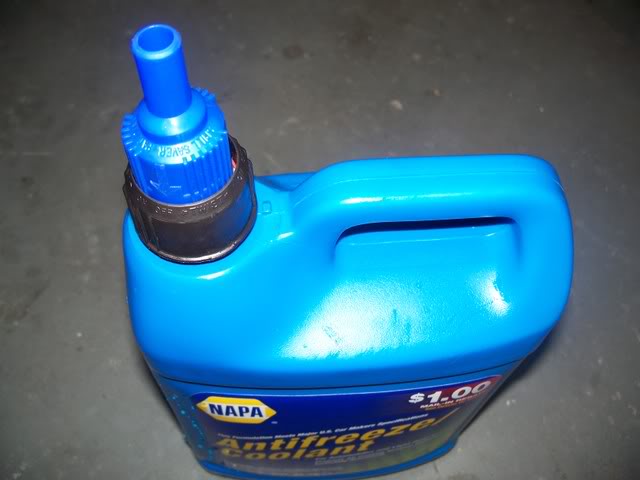
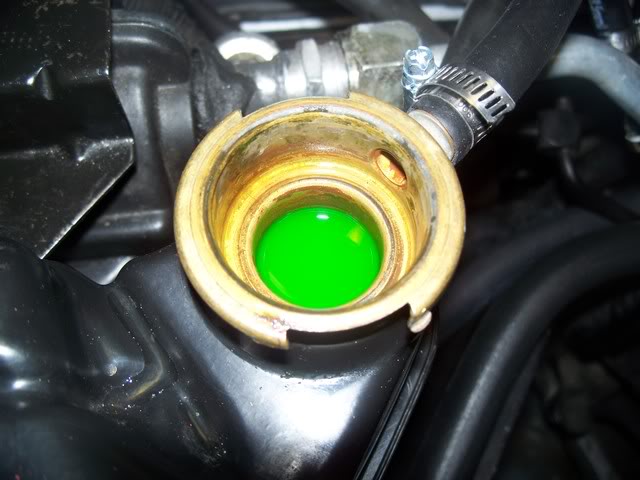
If you have a pre-DexCool vehicle (pre-1995), the original coolant was the old green style that is hard-to-find. NAPA was the only place I could find it.
-Jonathan

 01-16-2009, 10:37 PM
#19
Melting Slicks

Concerning the topic of replacing the coolant: It has always taken me several hot/cool cycles to get it topped up. Let is sit for a night and pop the cap and fill to the top-drive it and let is sit...etc. I assume one wants max amount of fluid in the system (air doesn't do anything) so keep doing it until nothing more to add. The overflow tank is kept a proper level too as it sucks some back in on each cool down as well.
Also I don't run the engine during top up...loosen the single screw (on 96's) near the TB and fill it until no more goes in.
These things are a bit finicky, but otherwise the cycling of very hot and normal...is typical of air in the system/low coolant.
Good Luck!
Also I don't run the engine during top up...loosen the single screw (on 96's) near the TB and fill it until no more goes in.
These things are a bit finicky, but otherwise the cycling of very hot and normal...is typical of air in the system/low coolant.
Good Luck!
01-20-2009, 07:29 PM
#20
Instructor
Member Since: Mar 2007
Location: Sugar Land, TX (suburban Houston area) U.S.A.
Posts: 129
Likes: 0
Received 0 Likes
on
0 Posts
St. Jude Donor '09, '13
I did this in the fall & read about a zillion threads & did the following w/ great results:
1 Follow the service manual
2 To drain the fluid in lieu of removing the knock sensors (real P.I.A.), bought a 6 HP shop vac from Sears w/ reverse flow...trust me, when you put that thing on your coolant fill neck it blow from the radiator drain plug big time...it really seemed to work
3 use distilled water for about 3-4 cycle flushes (its cheap!) & that way even if you are not able fill system w/ complete capacity until burp cycles, etc, once I added the 50% capacity of coolant I knew I then had perfect mix
Only question I have is by not removing knock sensors yes there is some crud in bottom that may have settled but I tell you a 6HP shop vac blowing out that system moves out a lot of stuff & my 4th flush cycle w/ distilled water was clear as a bell.
Also took the opp to replace upper hoses for hell of it (they wear the quickest) & new thermostat & coolant tank cap. Also took off the overflow reservoir & bought a $2 dish flexible scrubby brush to clean all the gunk out.
Hope this helps...if I sound off base on anything please let me know...I'm here to learn always!
JK

