When you click on links to various merchants on this site and make a purchase, this can result in this site earning a commission. Affiliate programs and affiliations include, but are not limited to, the eBay Partner Network.
Gang
My 91 tilt steering needed repairing. Symptoms included:
1. Loose tilt function
2. Movement of the wheel “down and to the left” By this I mean off-axis movement, not radial. I had at least an inch or two of play.
3. Possibly related, the headlight dimmer rod was binding, prevent operation of the high beam headlights
I removed the steering wheel and airbag while the column was still in the car. I think this is the best approach, no good way to secure the column on the worktable once it is out of the car.
I intend this thread to be a useful source of info, but not to replace the procedures in the FSM. So be careful!
From here:
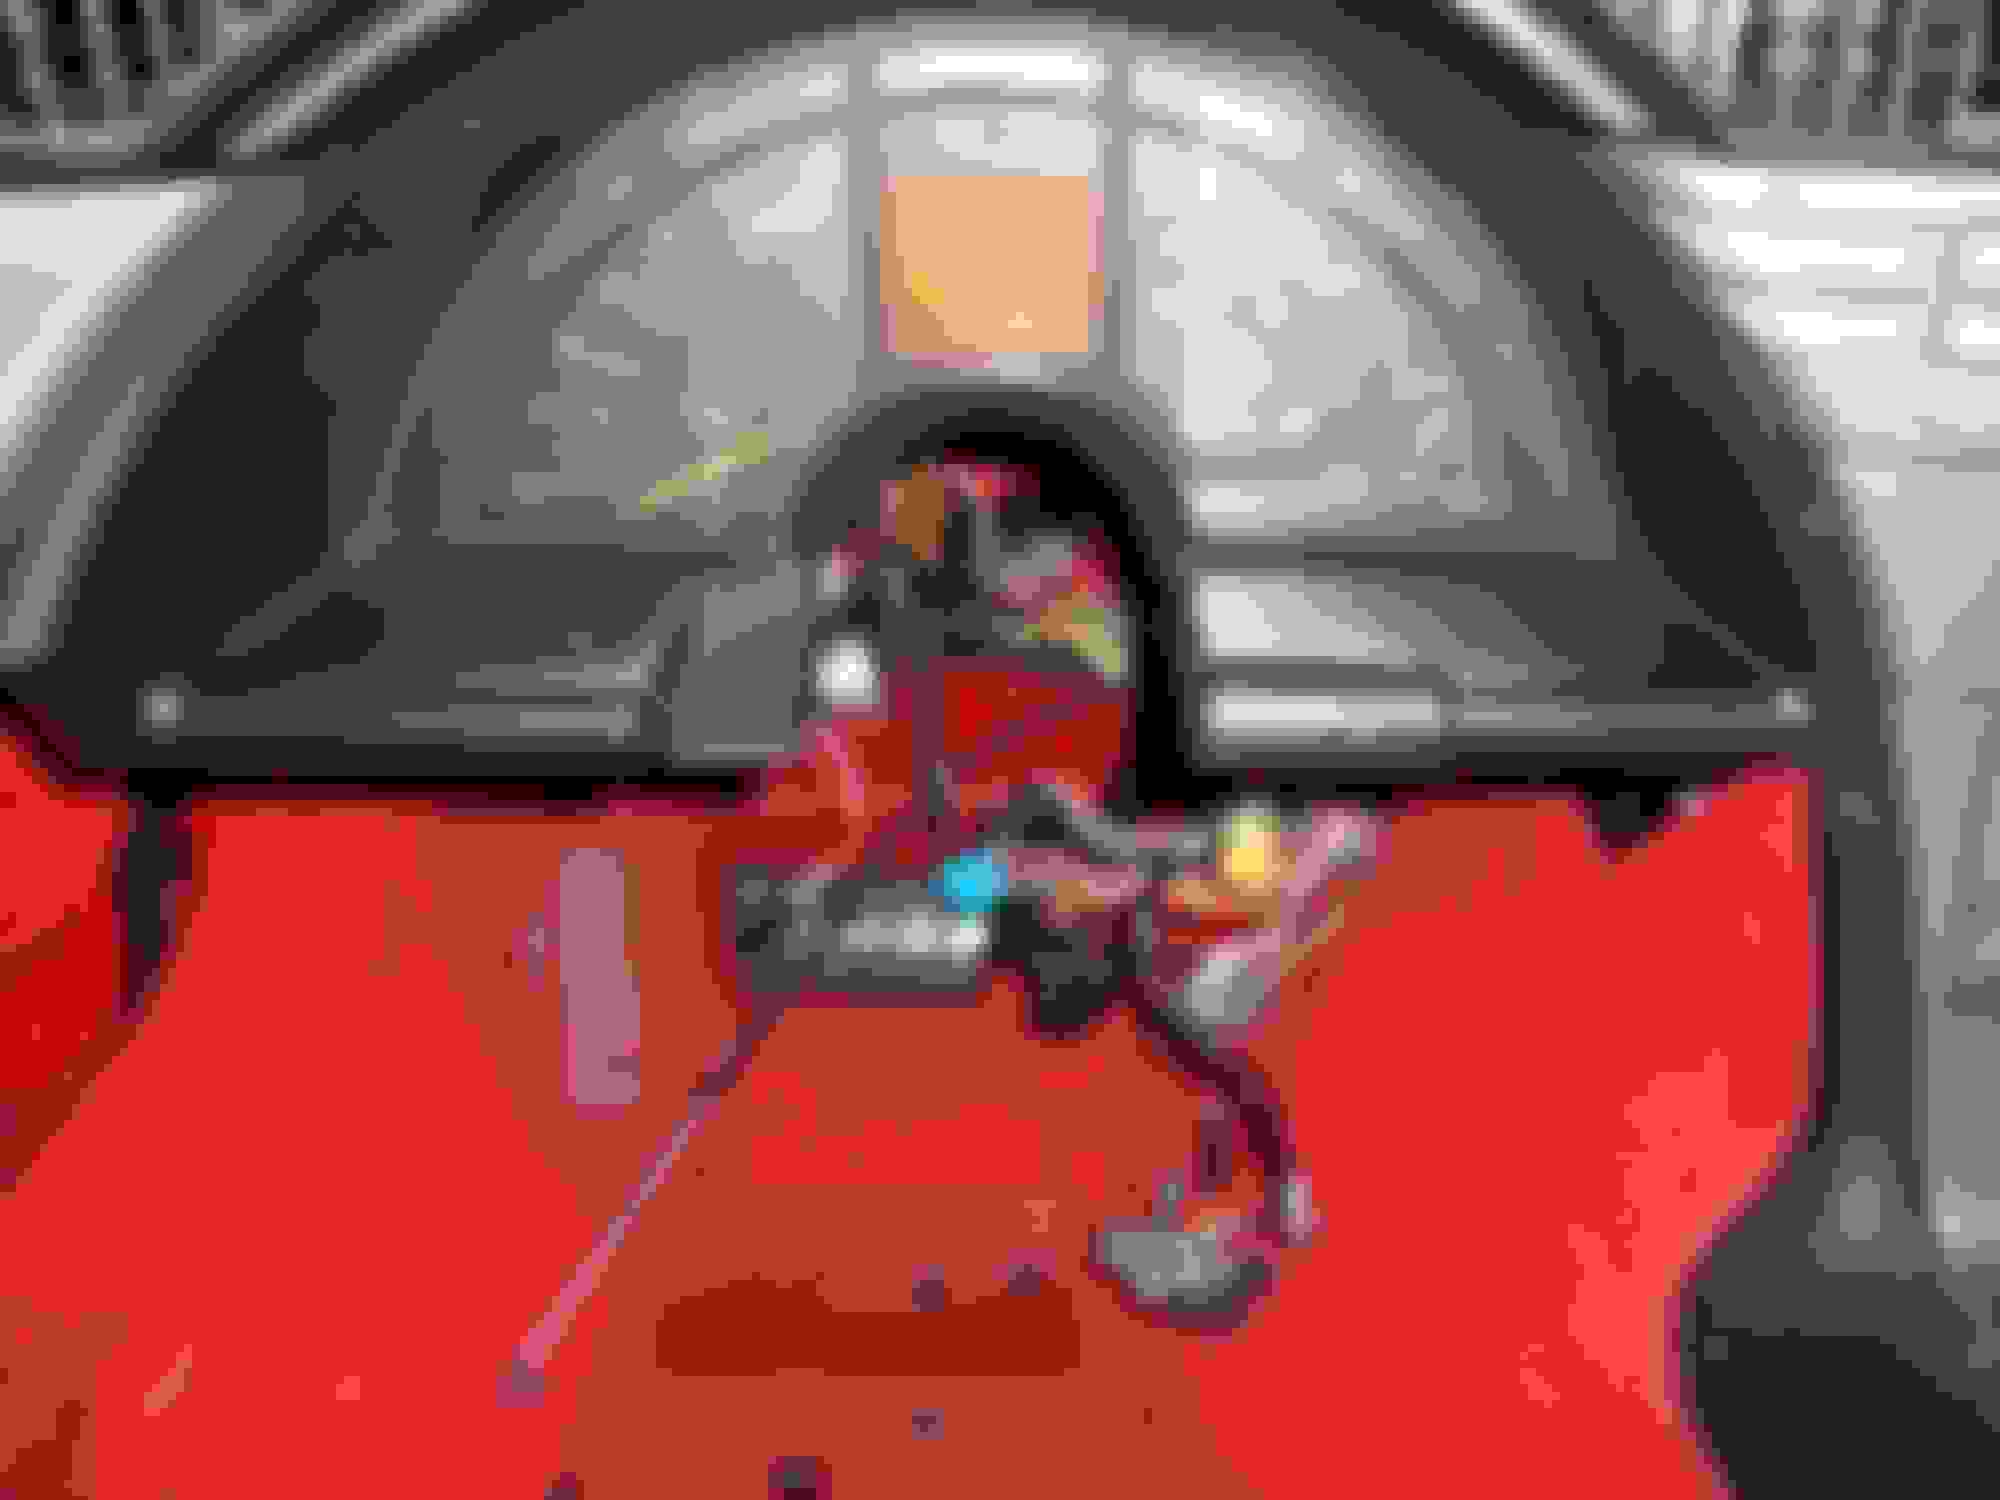
To heres the column out of the car:
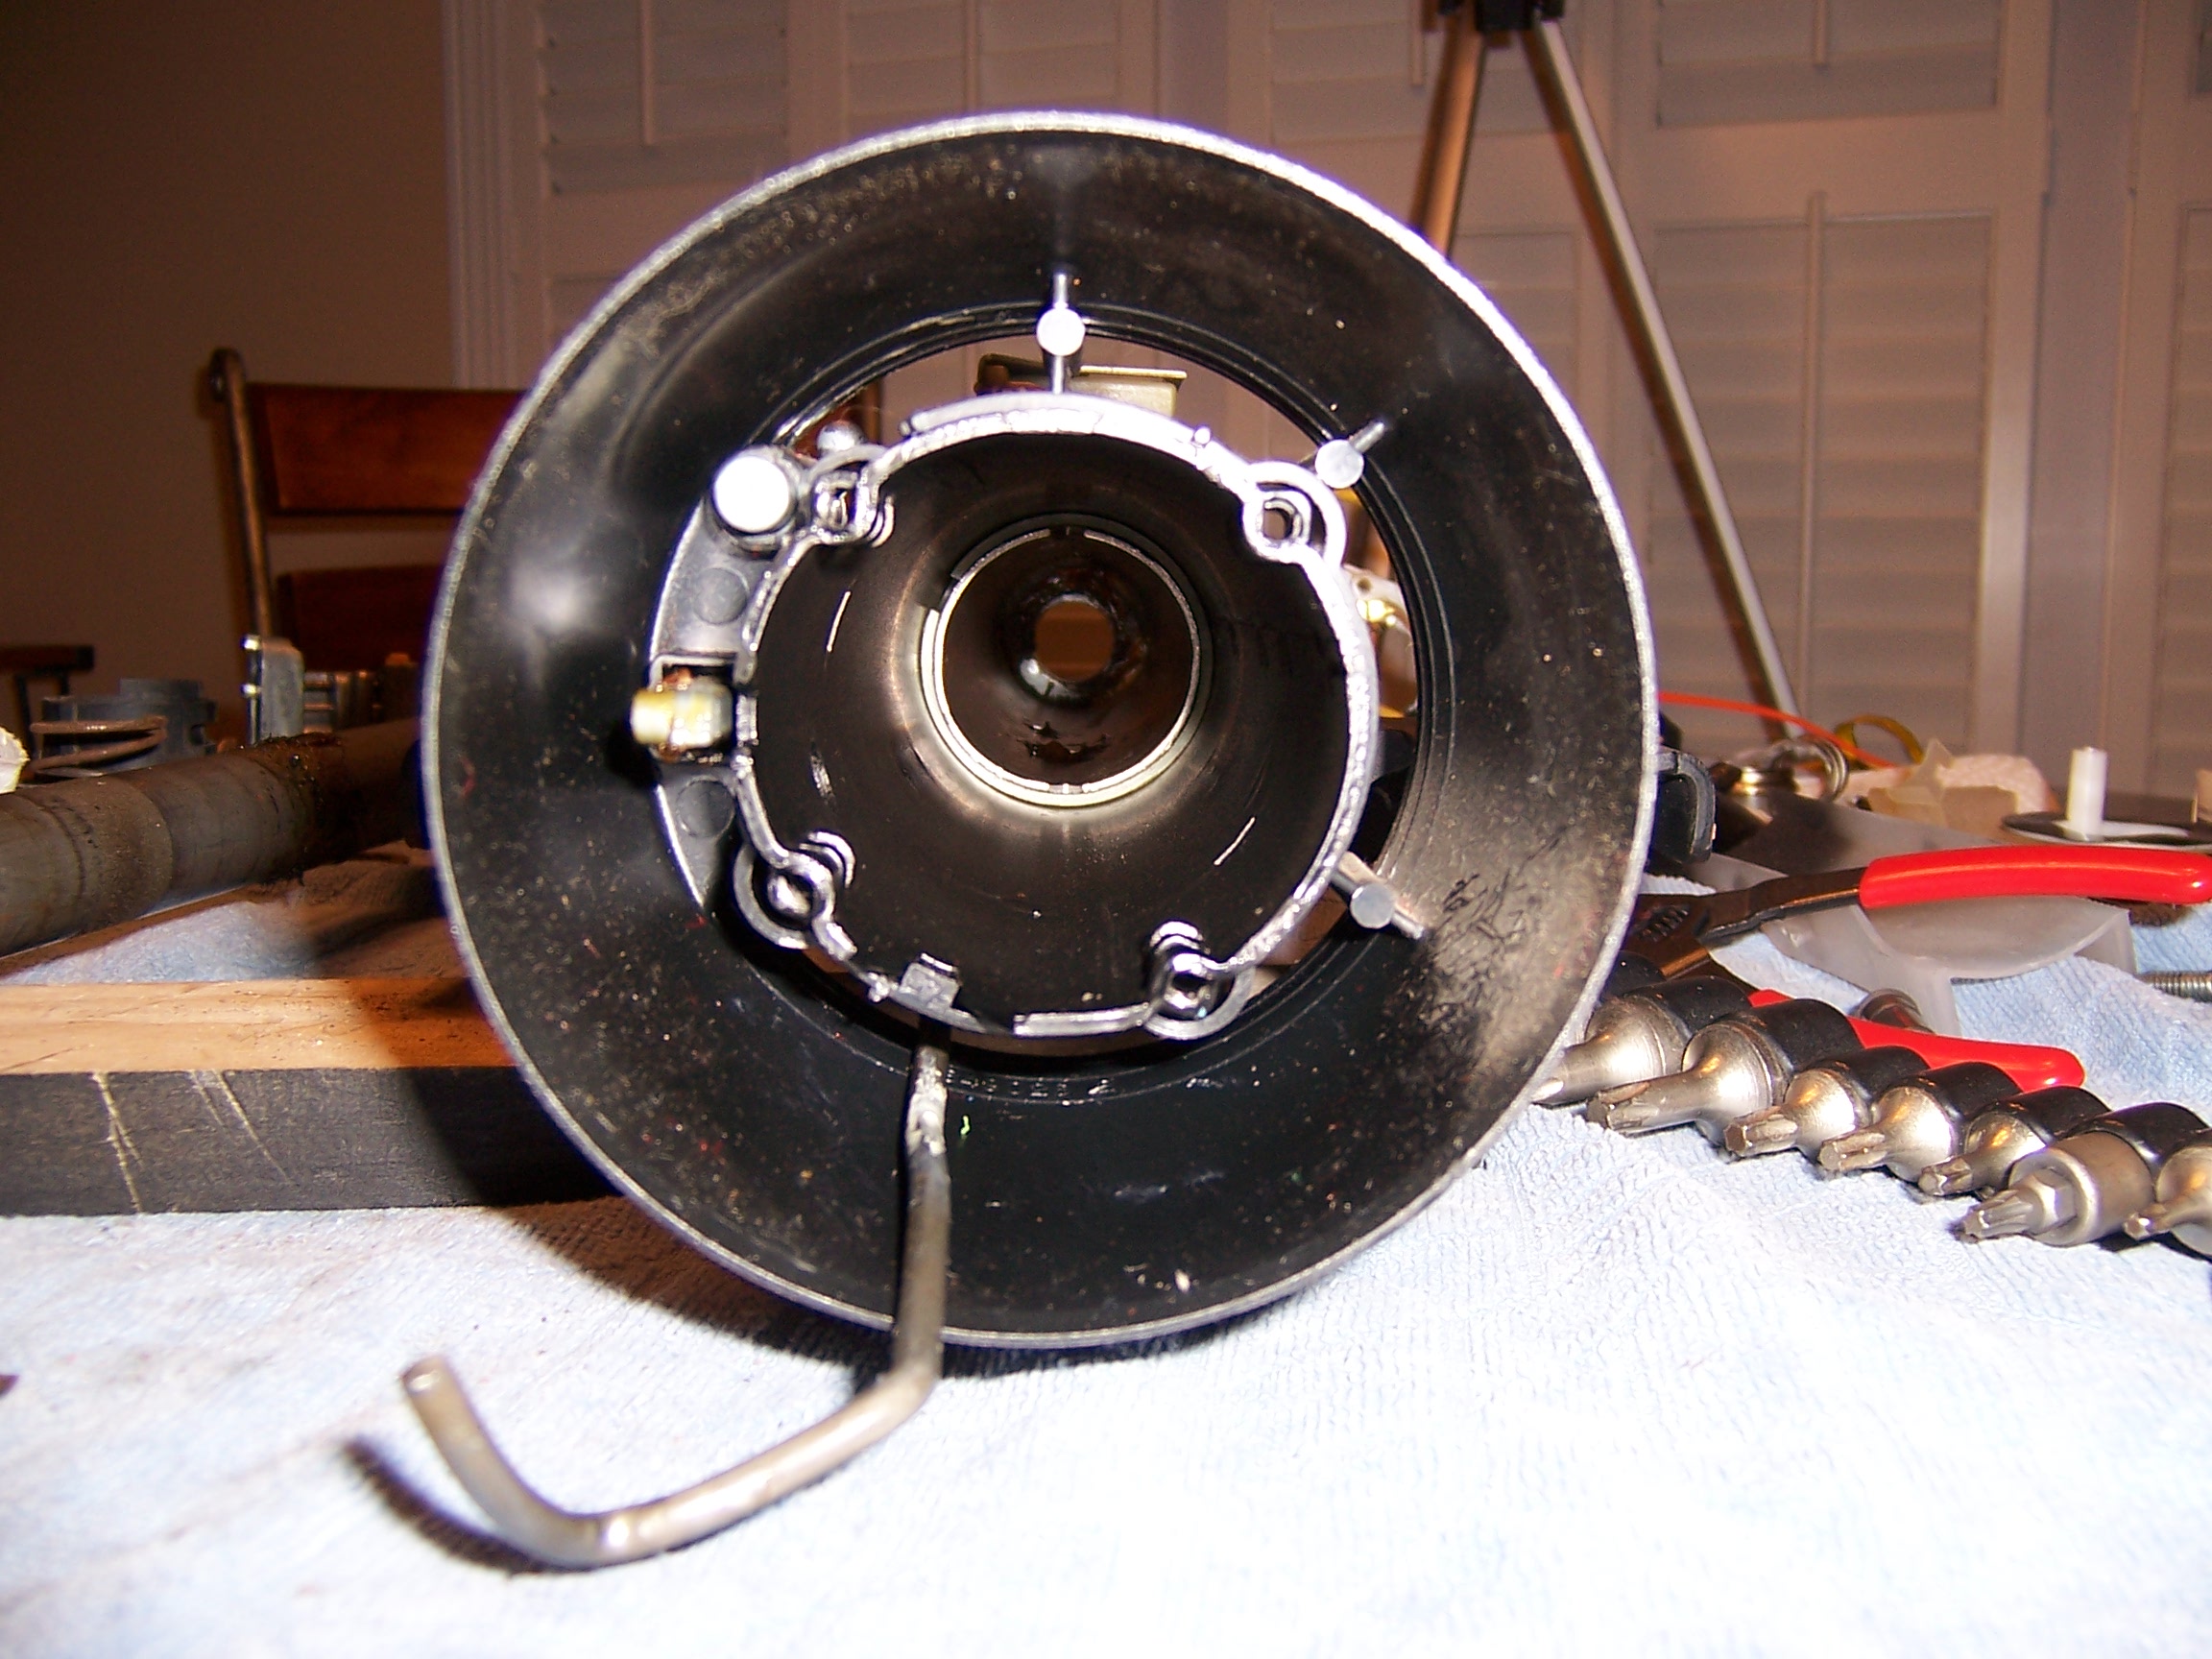
Things are starting to get interesting (Column is upside down in this shot). If you notice closely, one of the pins is already starting to come out of the tilt housing.
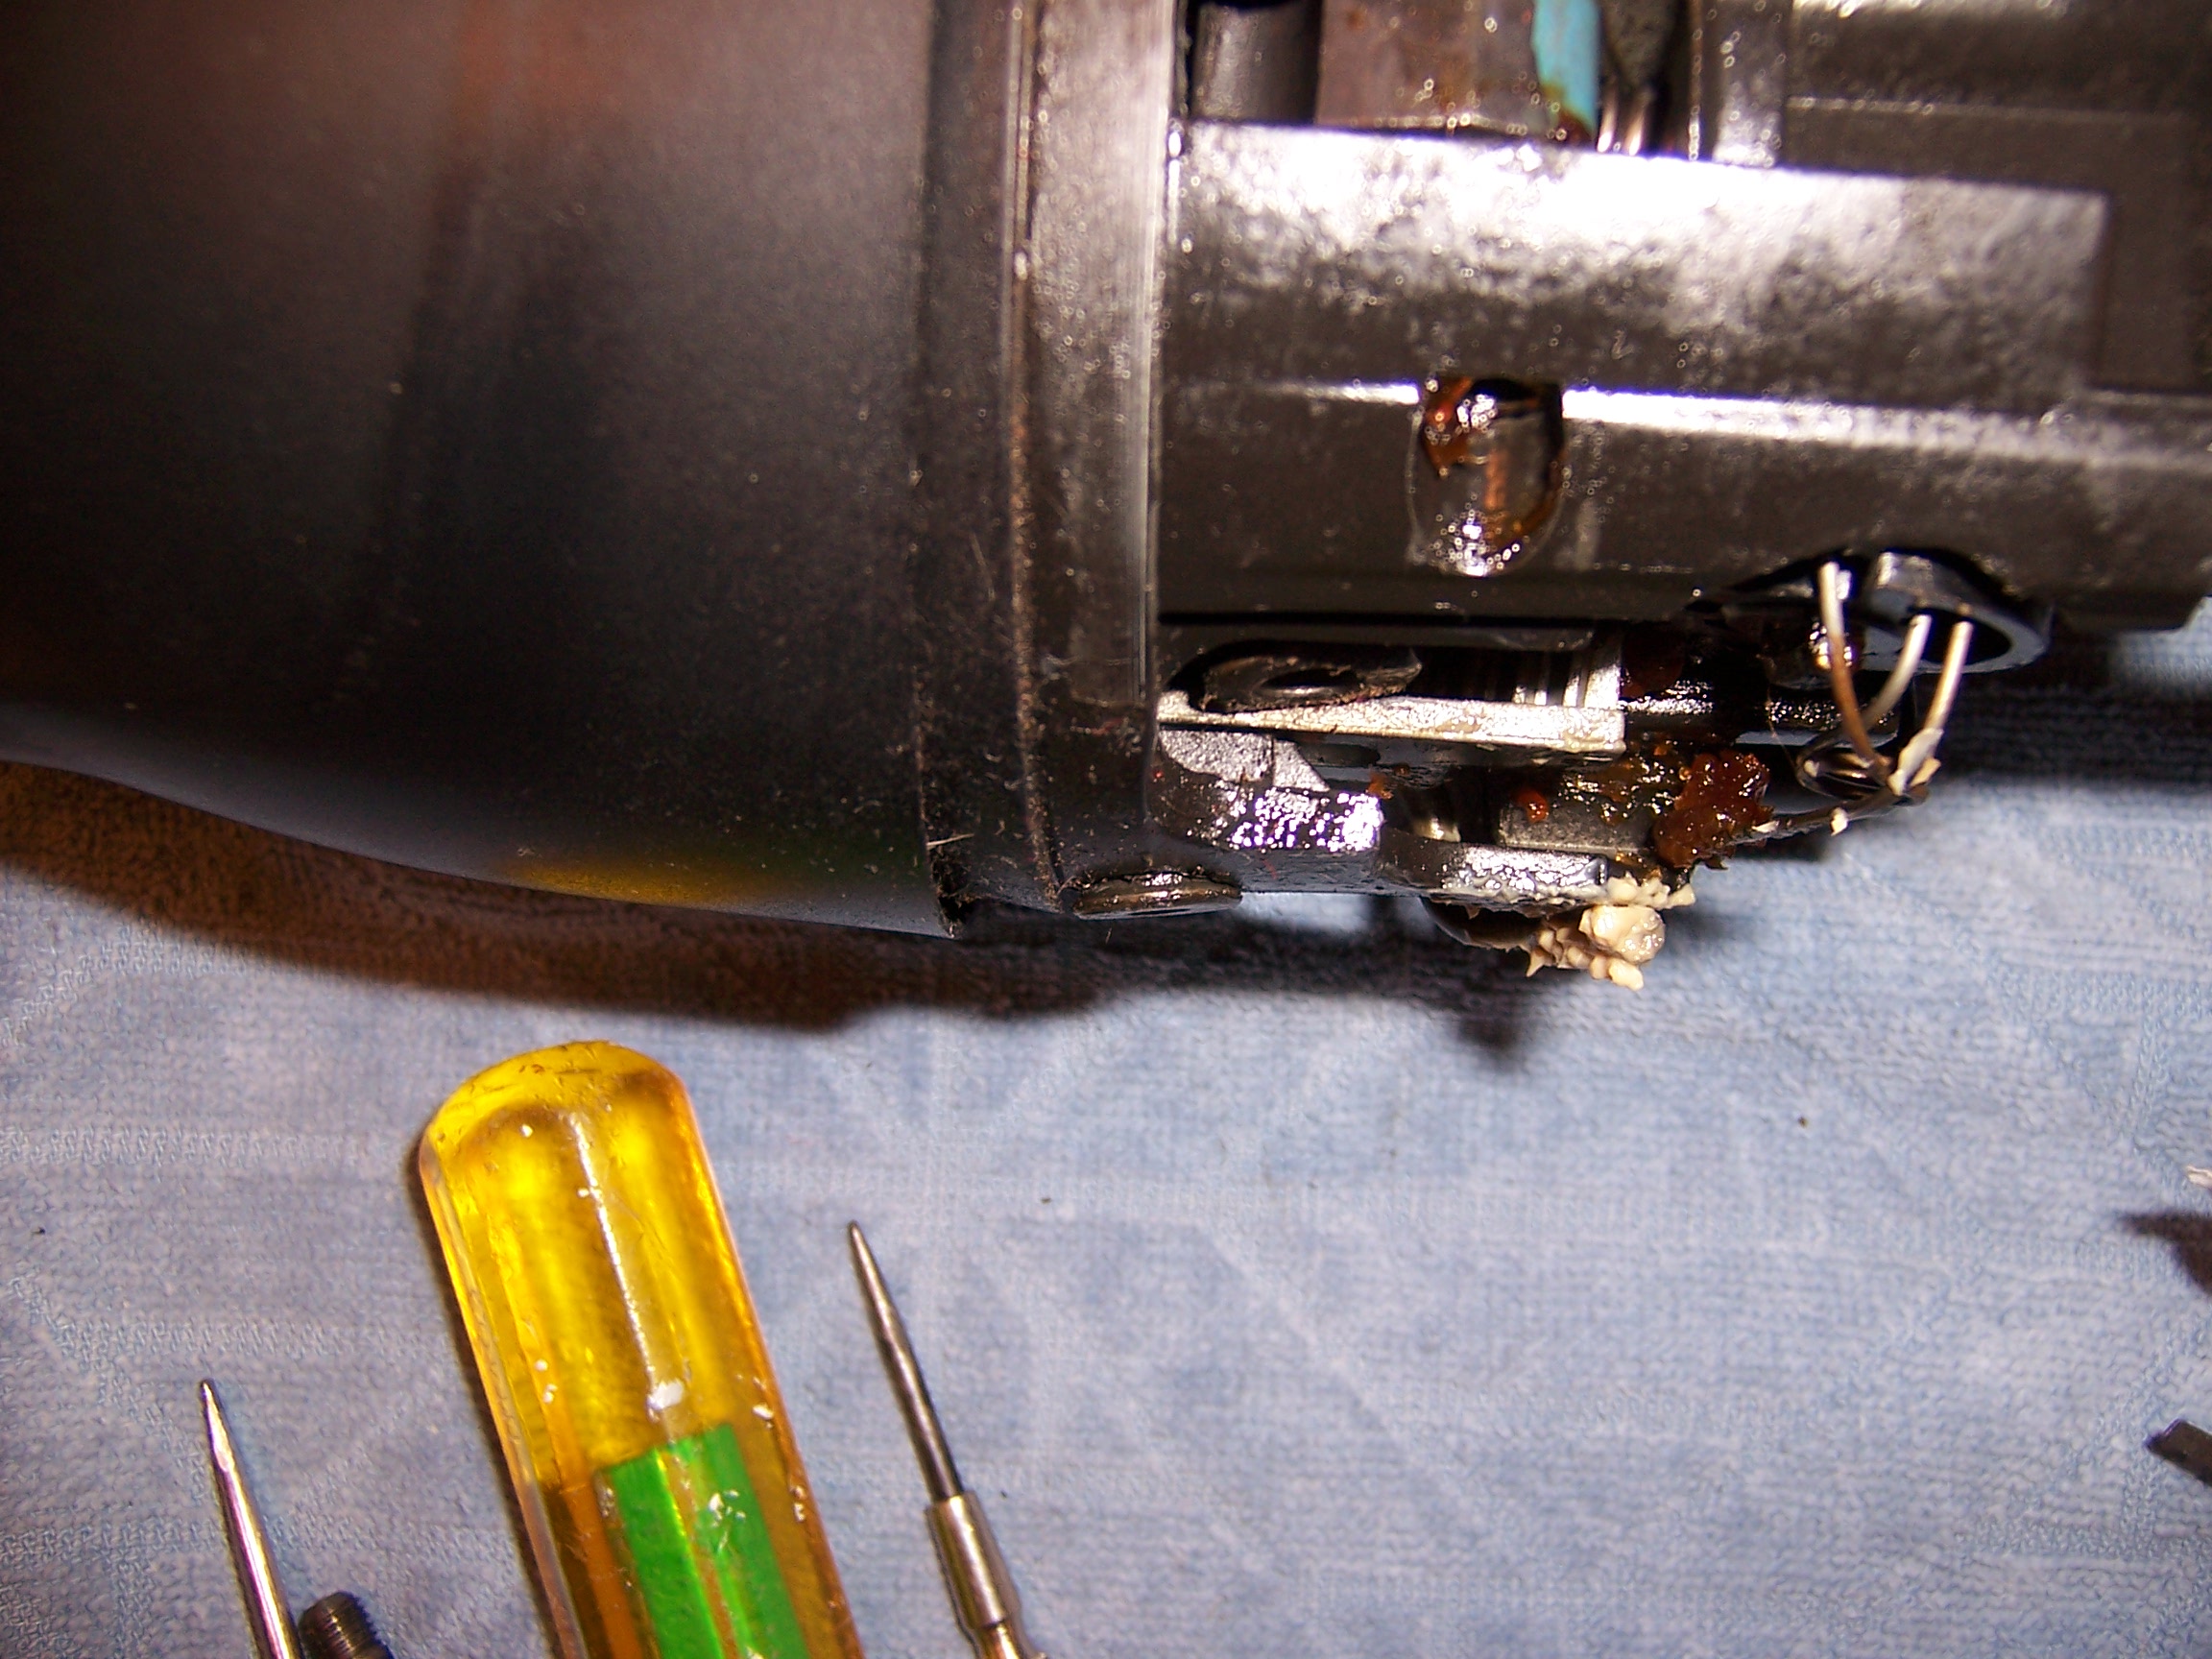
Heres another closeup, the bore was so worn, the pin doesn’t sit perpendicular to the housing anymore.
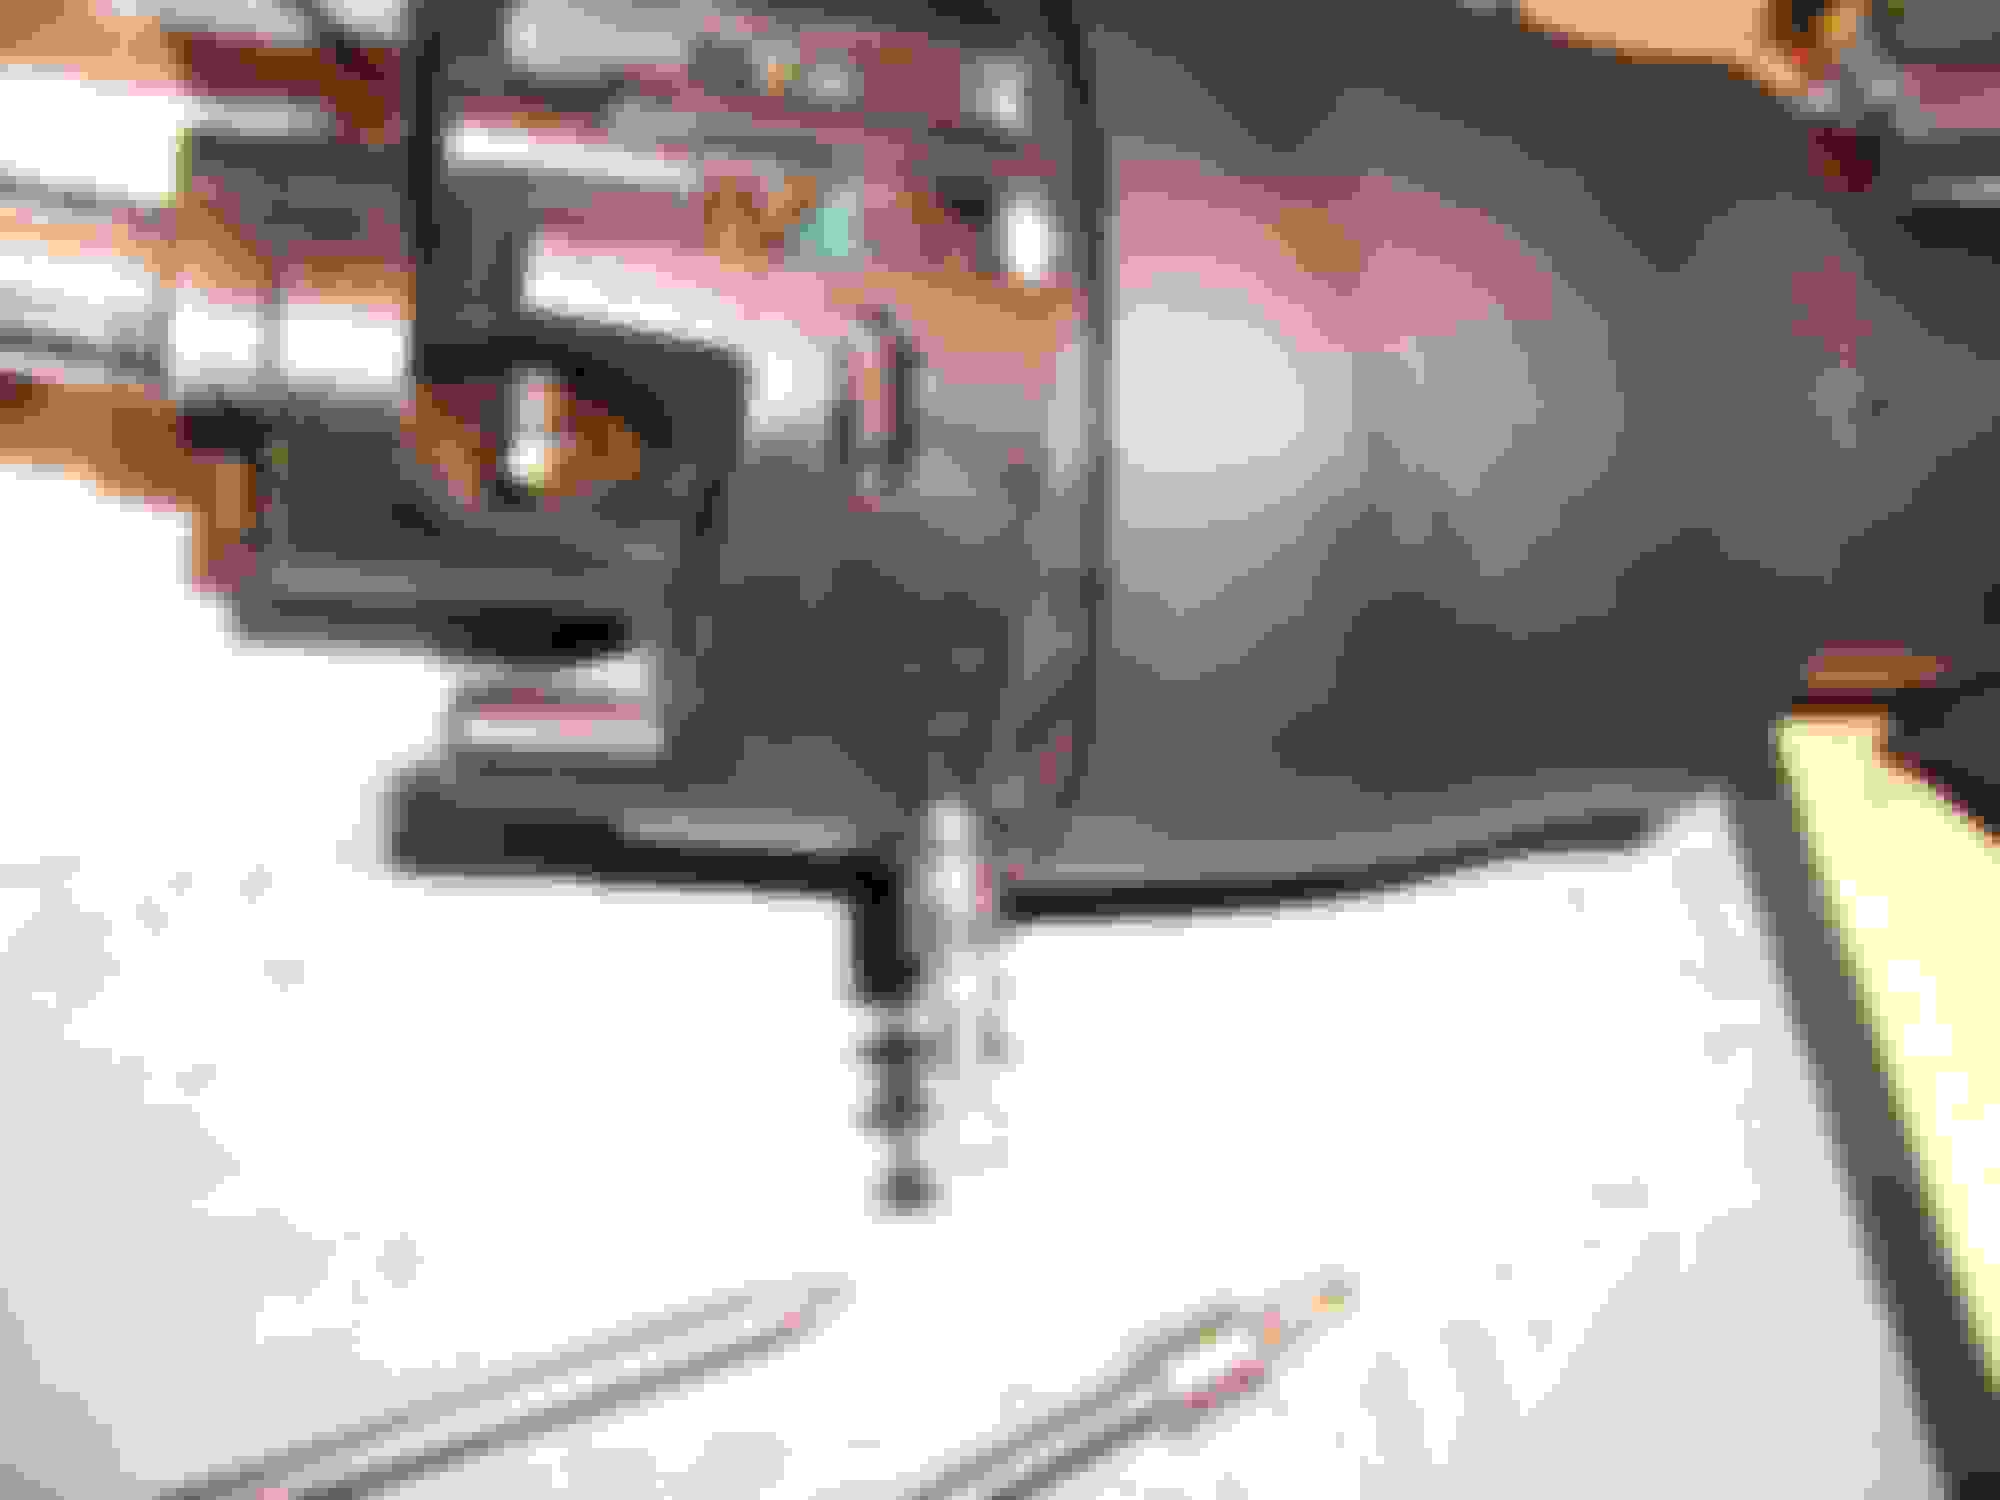
Ordinary screw I used to pull the pivot pins out. They were not tight in the housings.
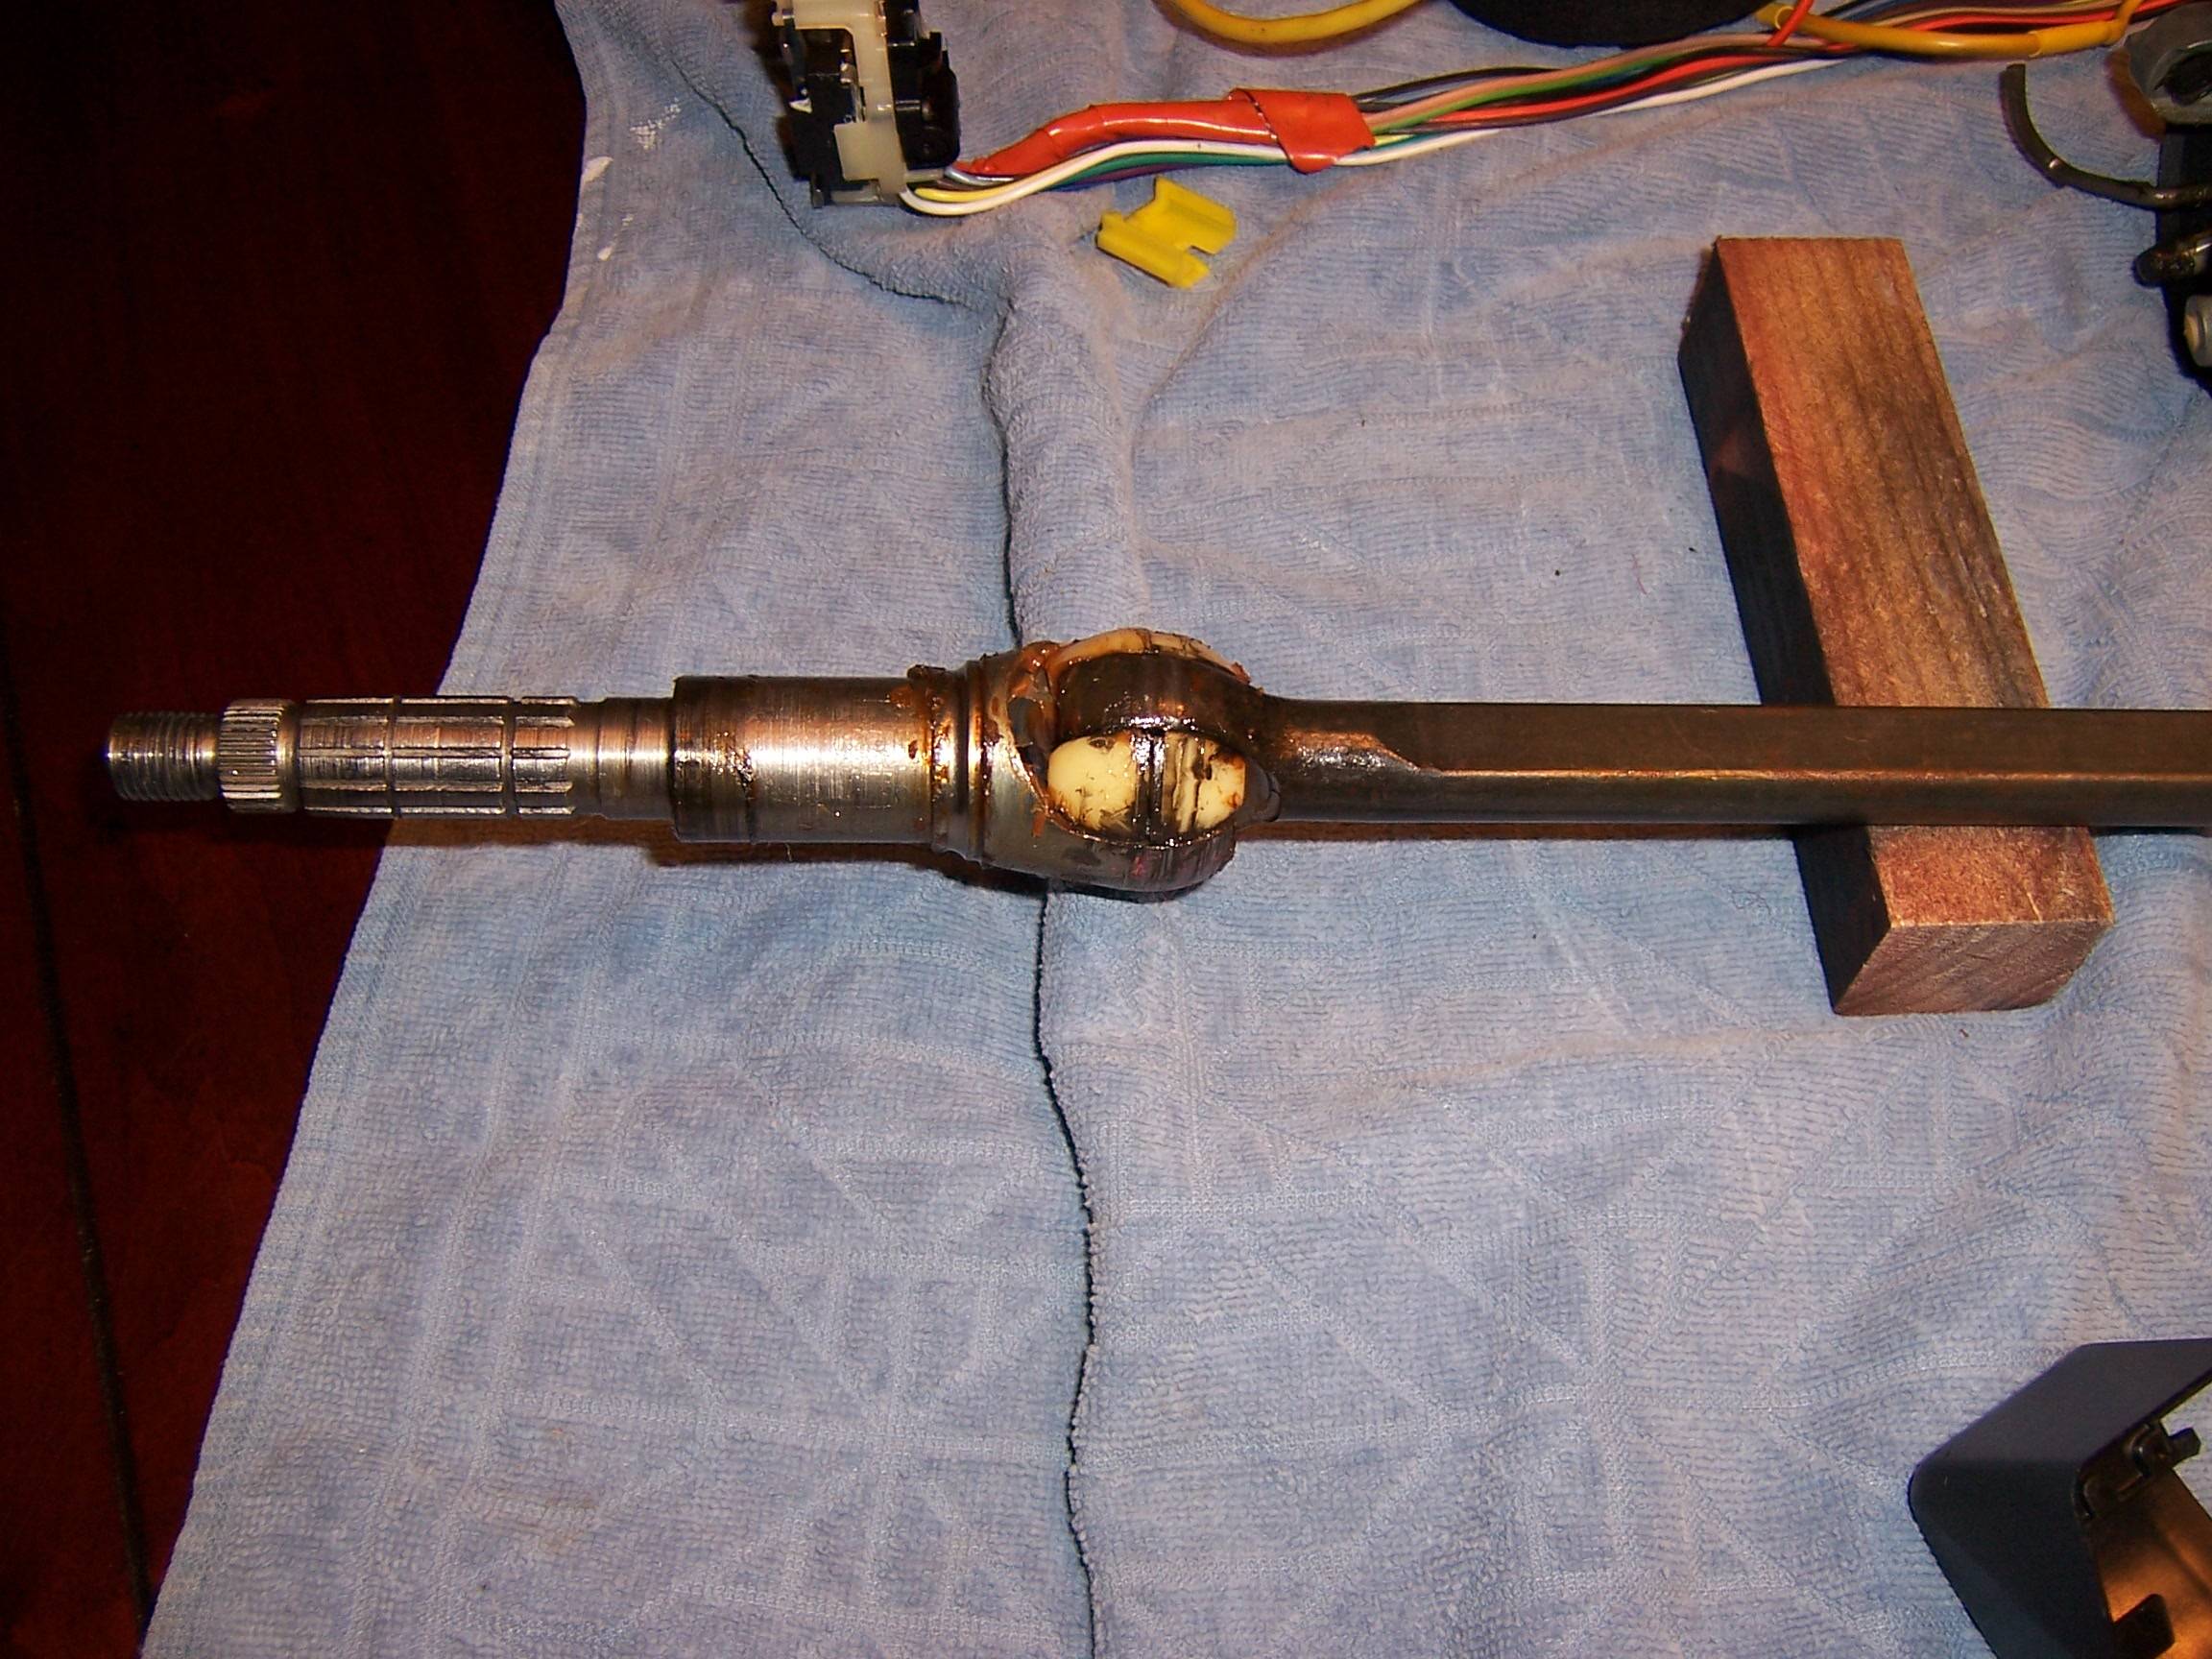
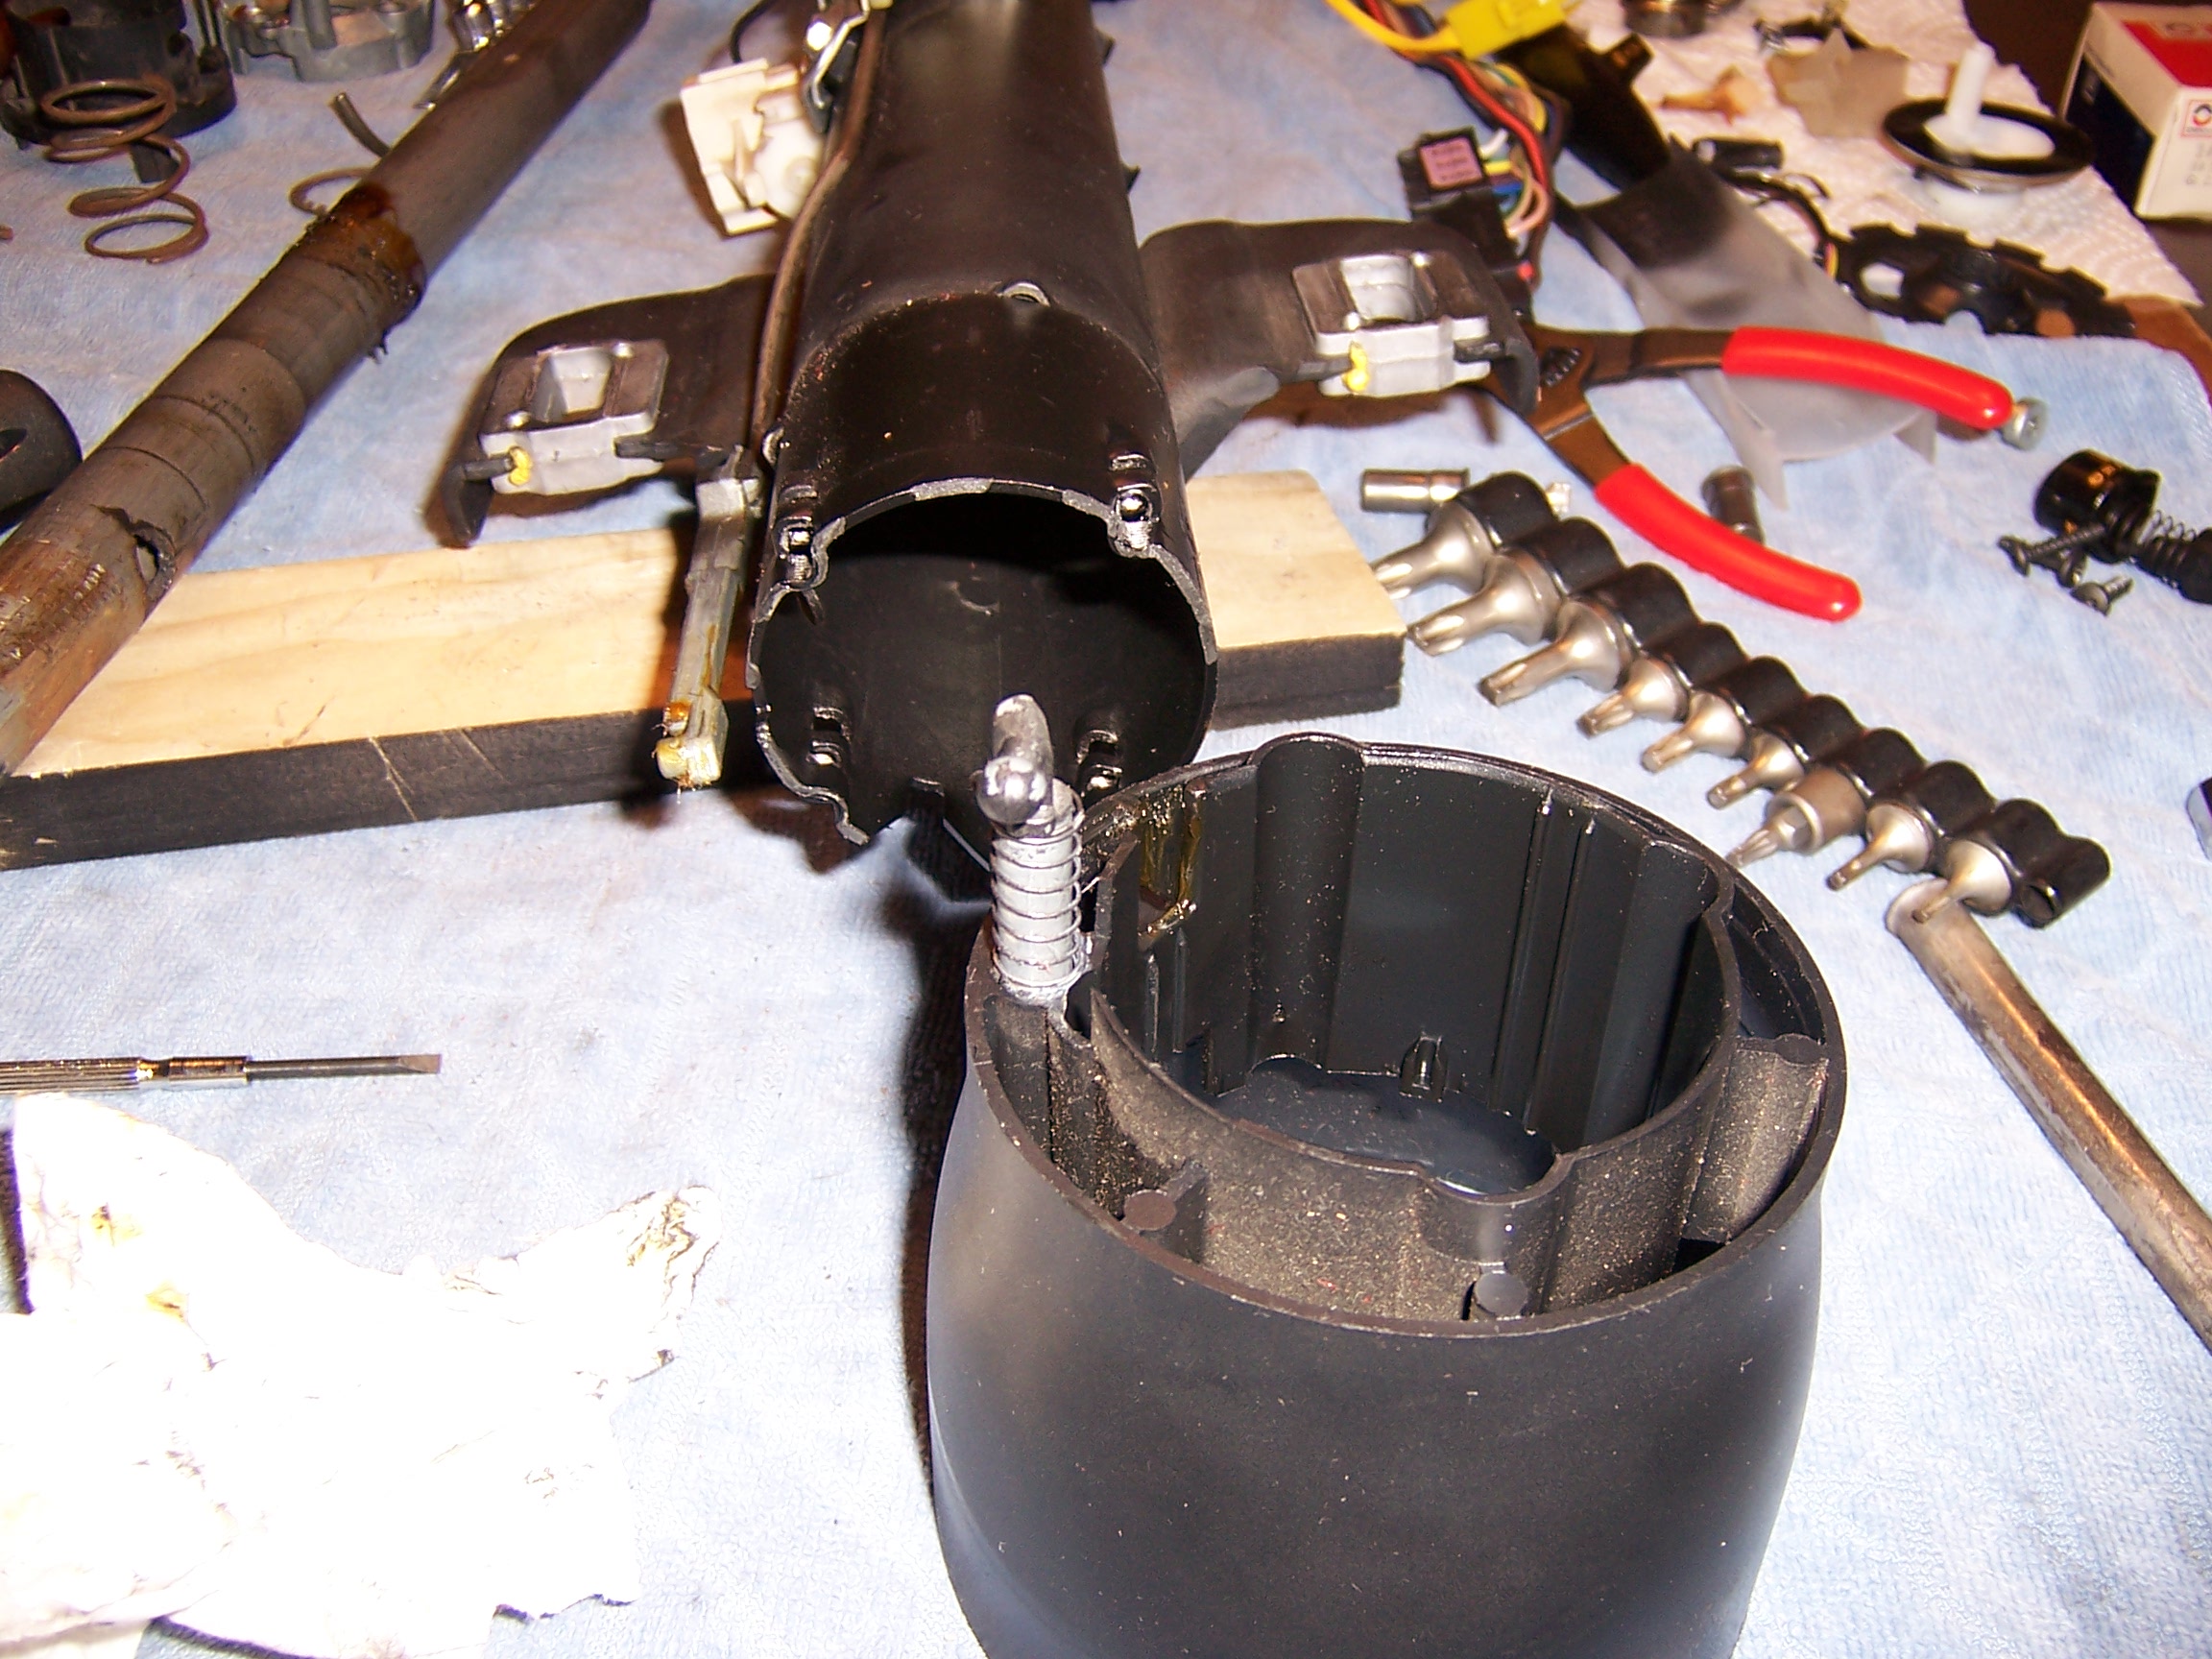
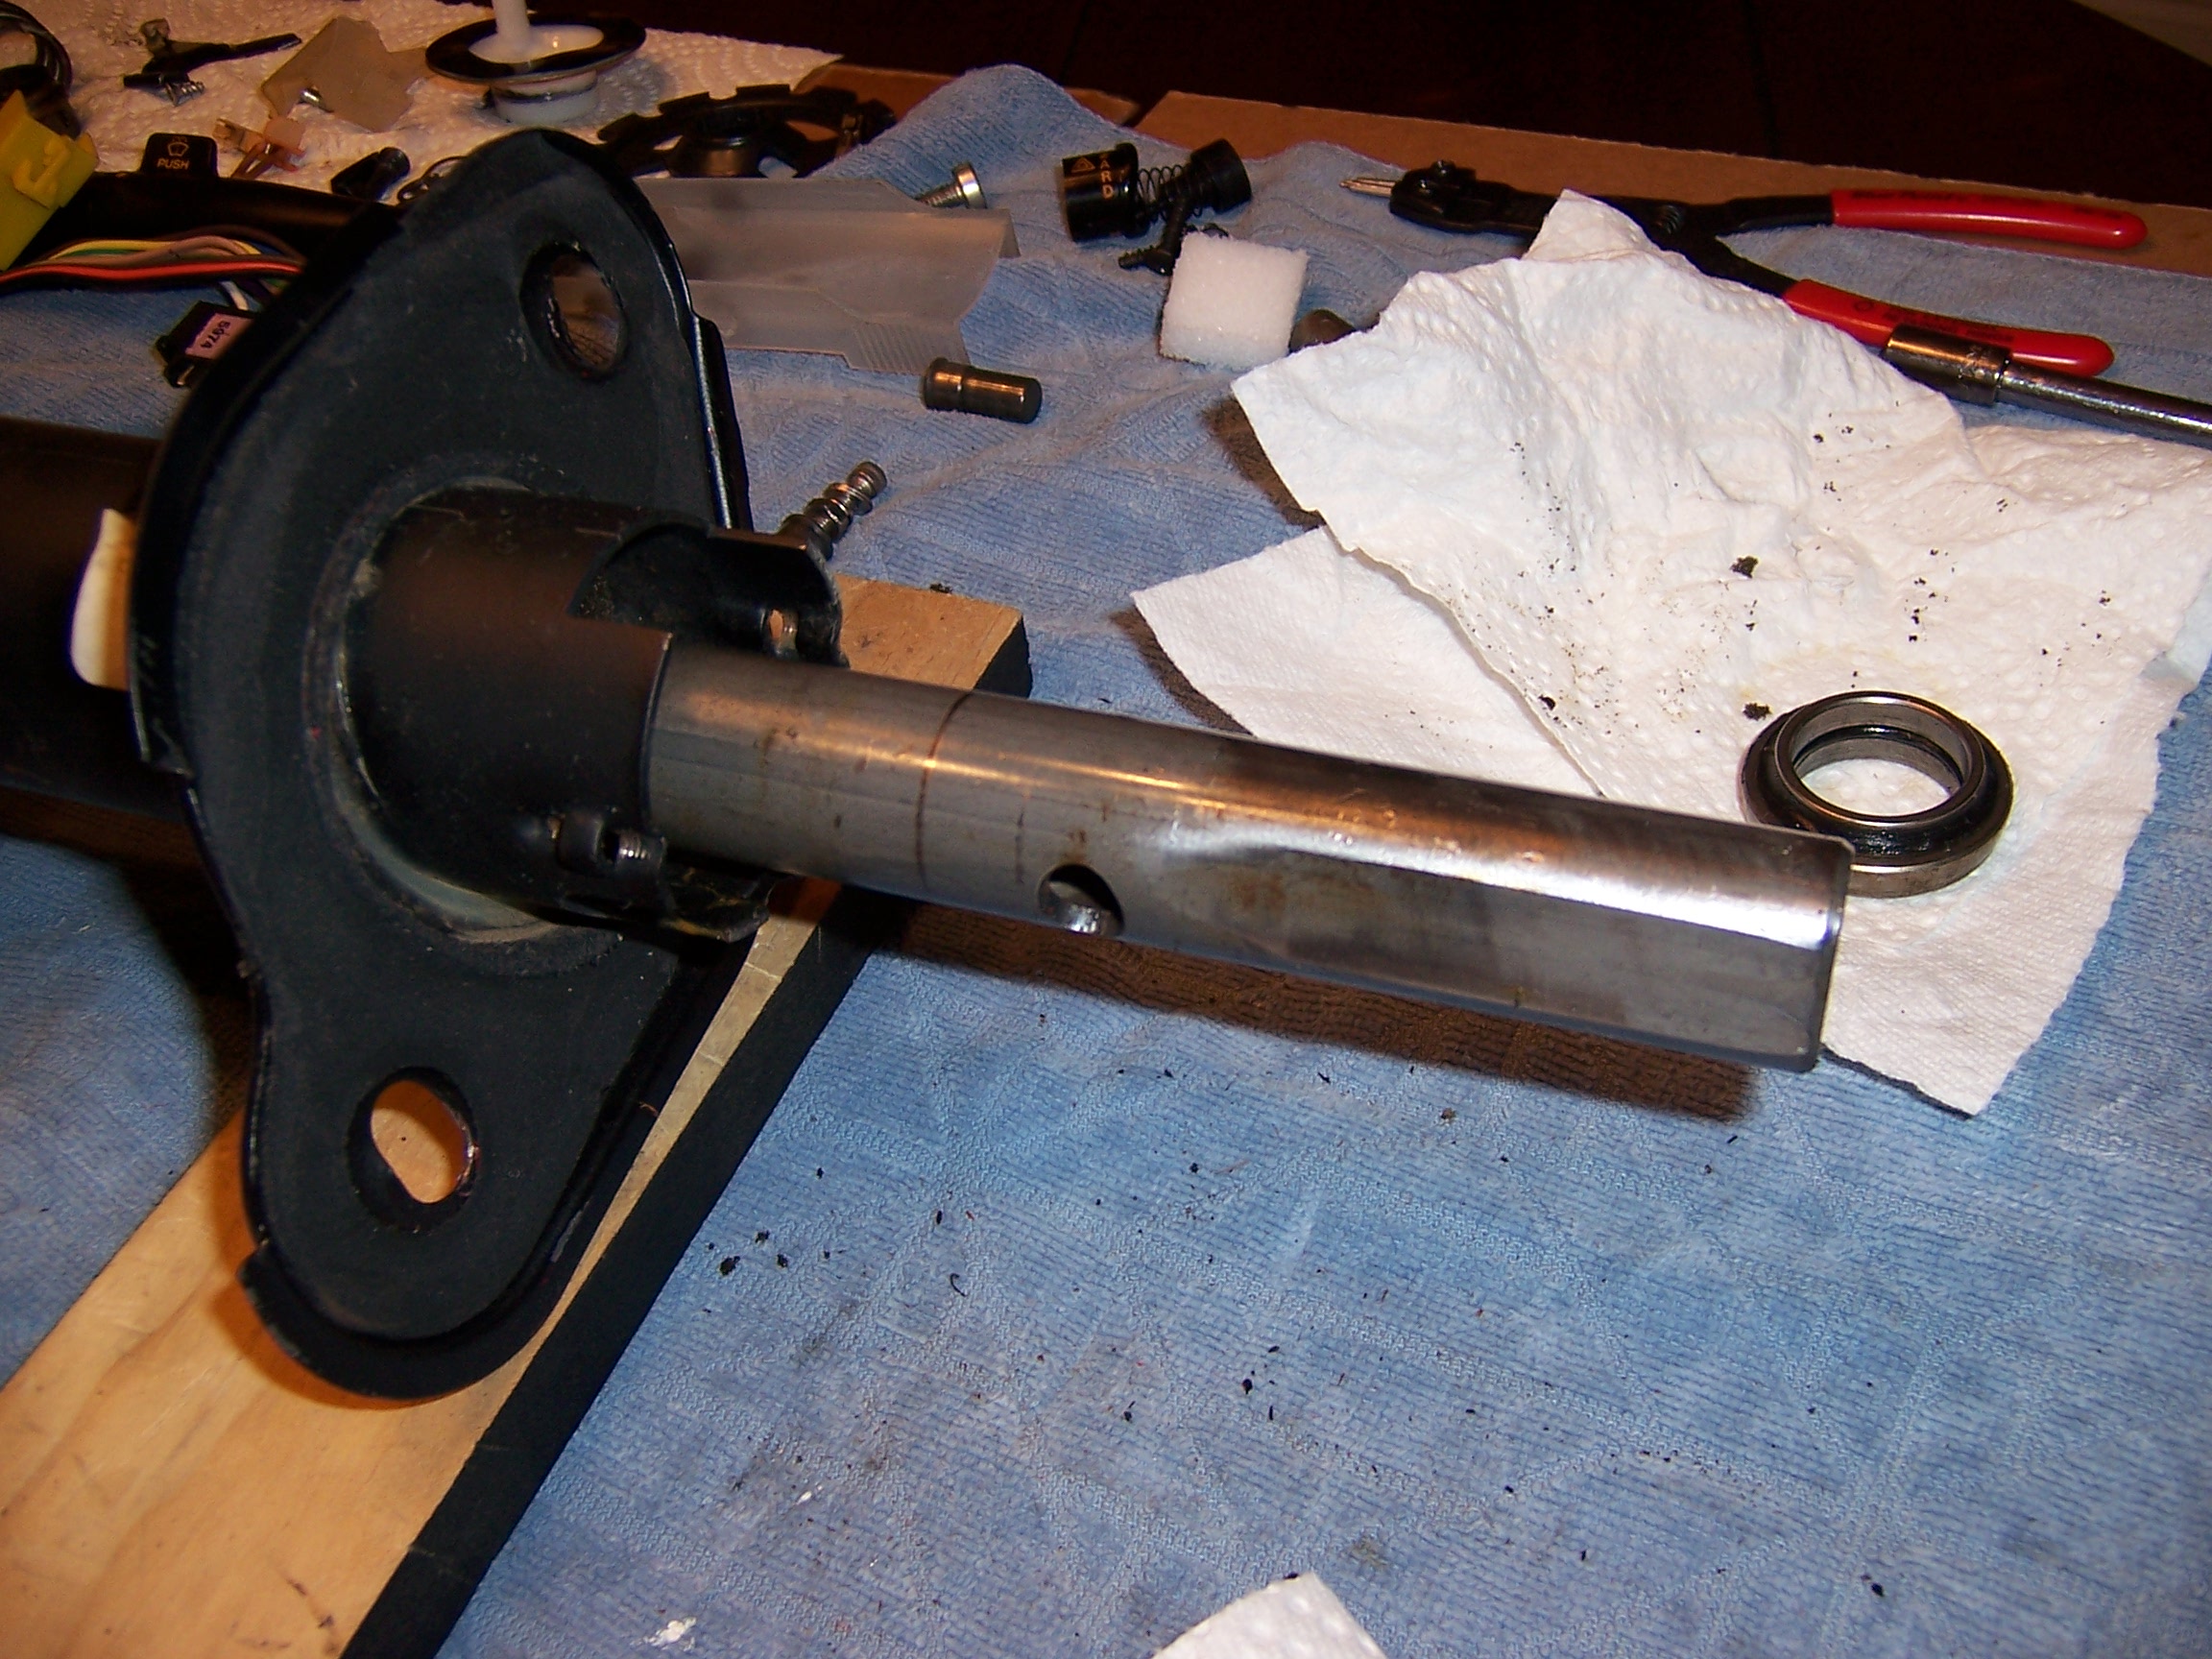
Close up of the bottom steering shaft. Not pictured is the spring retainer ring. My column had two of them, but I broke one removing it. You will have to remove the shaft in order to remove the lower tilt housing.
Shaft is now out of the column
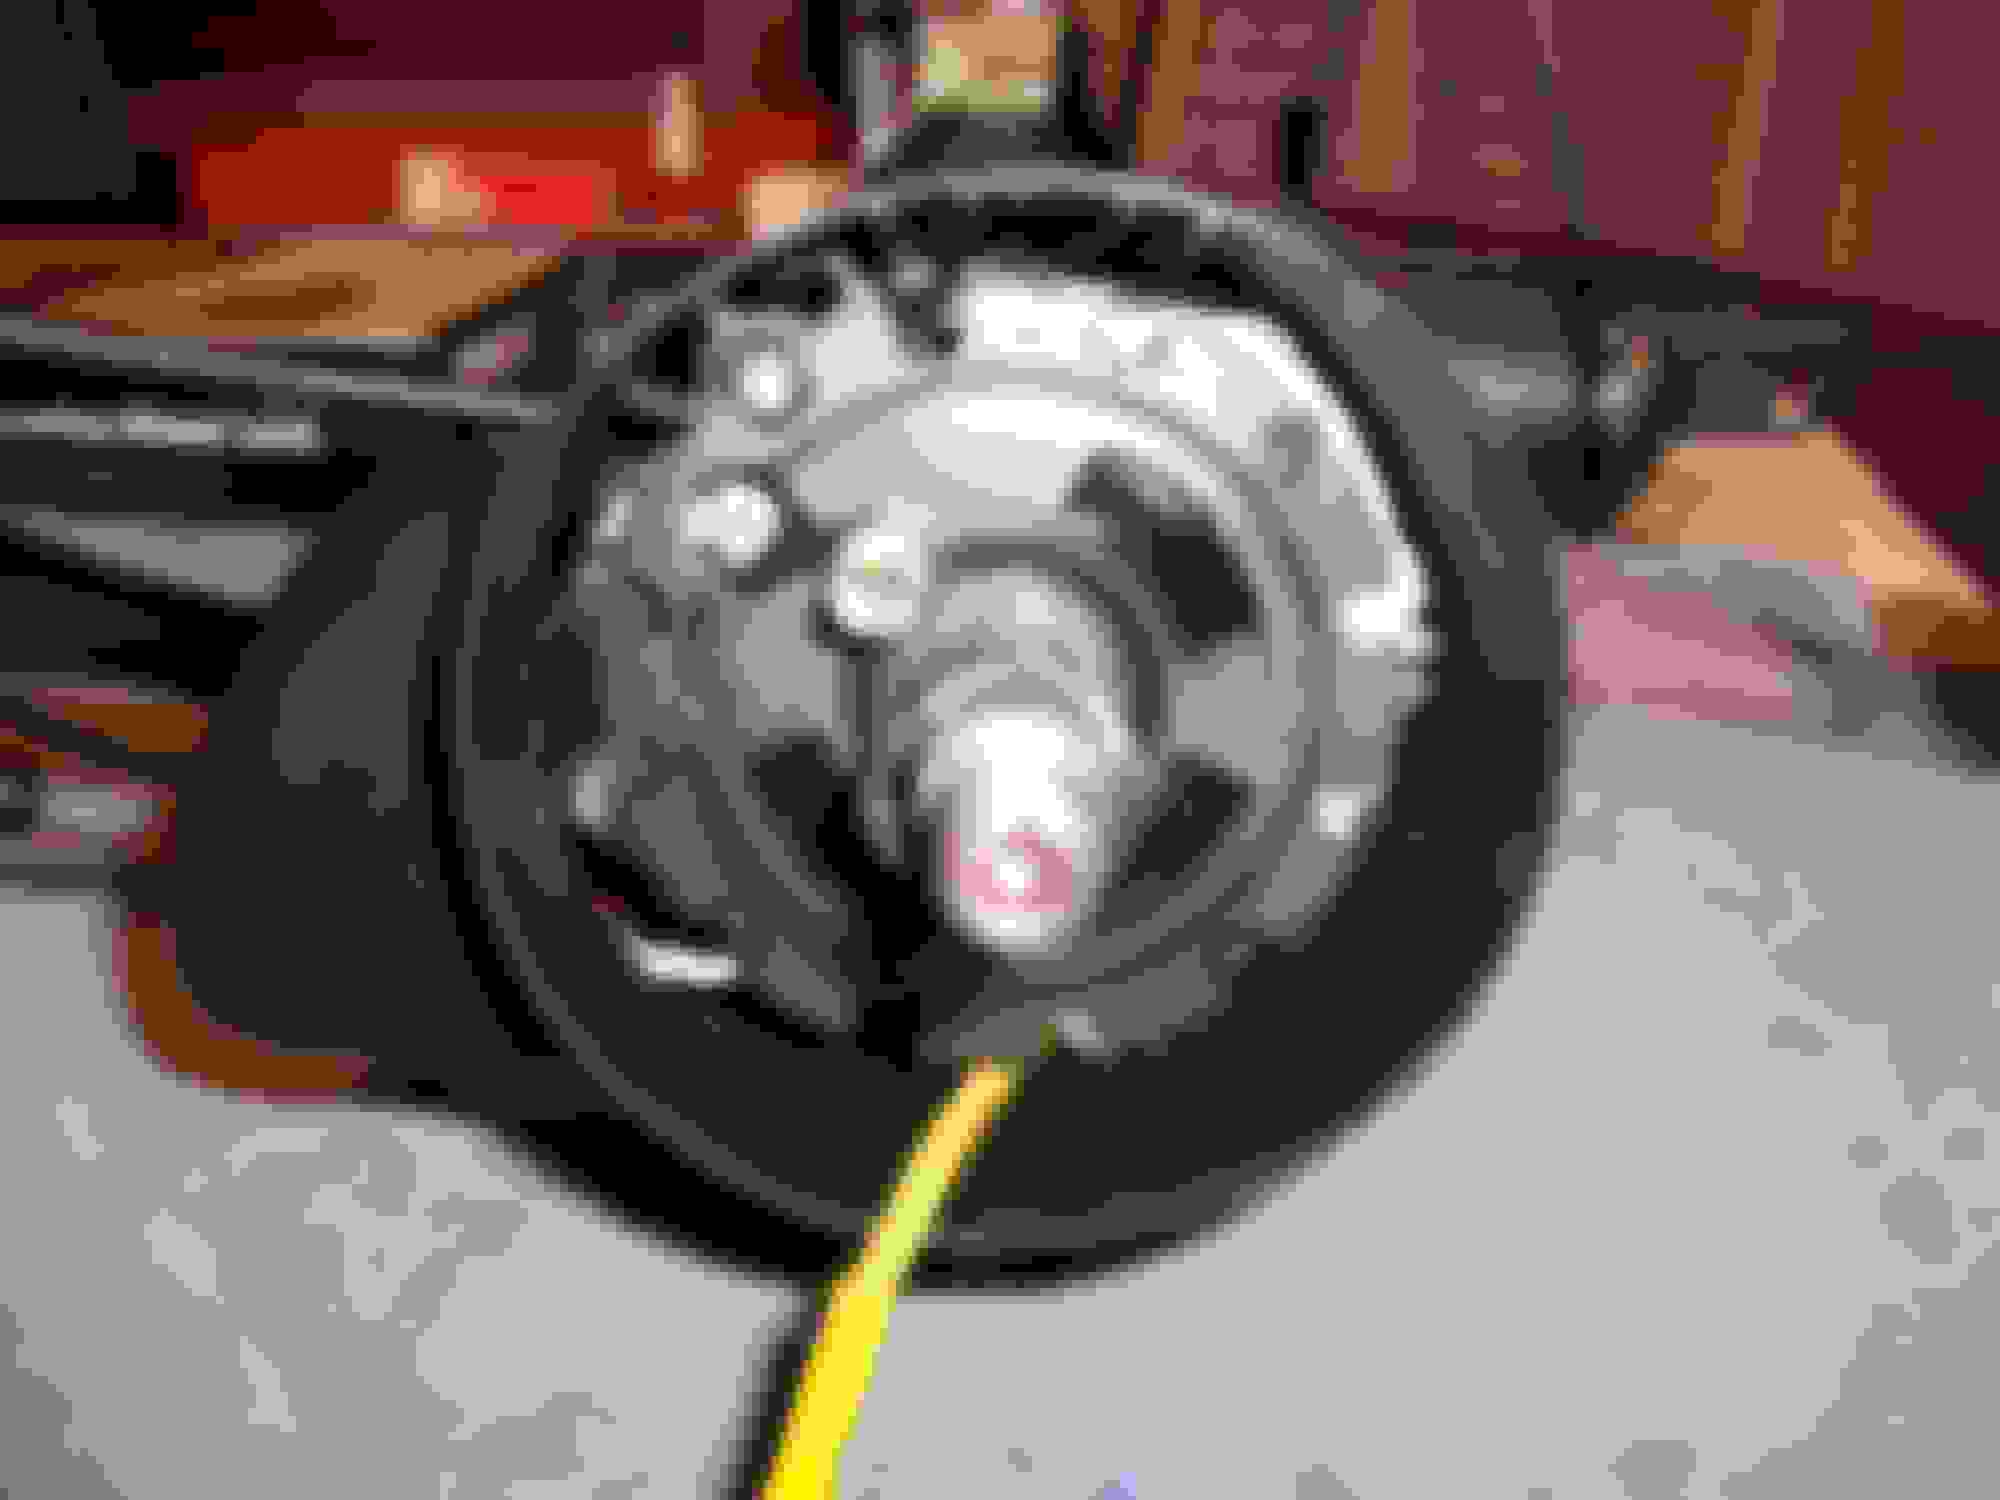
Lower tilt housing. The rod is the dimmer actuator rod. I previously did some work on the upper column about a year ago, during that time, I tightened the 2 bolts I could reach. But none of the 4 bolts were loose on my lower tilt housing. Some people might have this issue, but I didn’t. I had to go the expensive route.
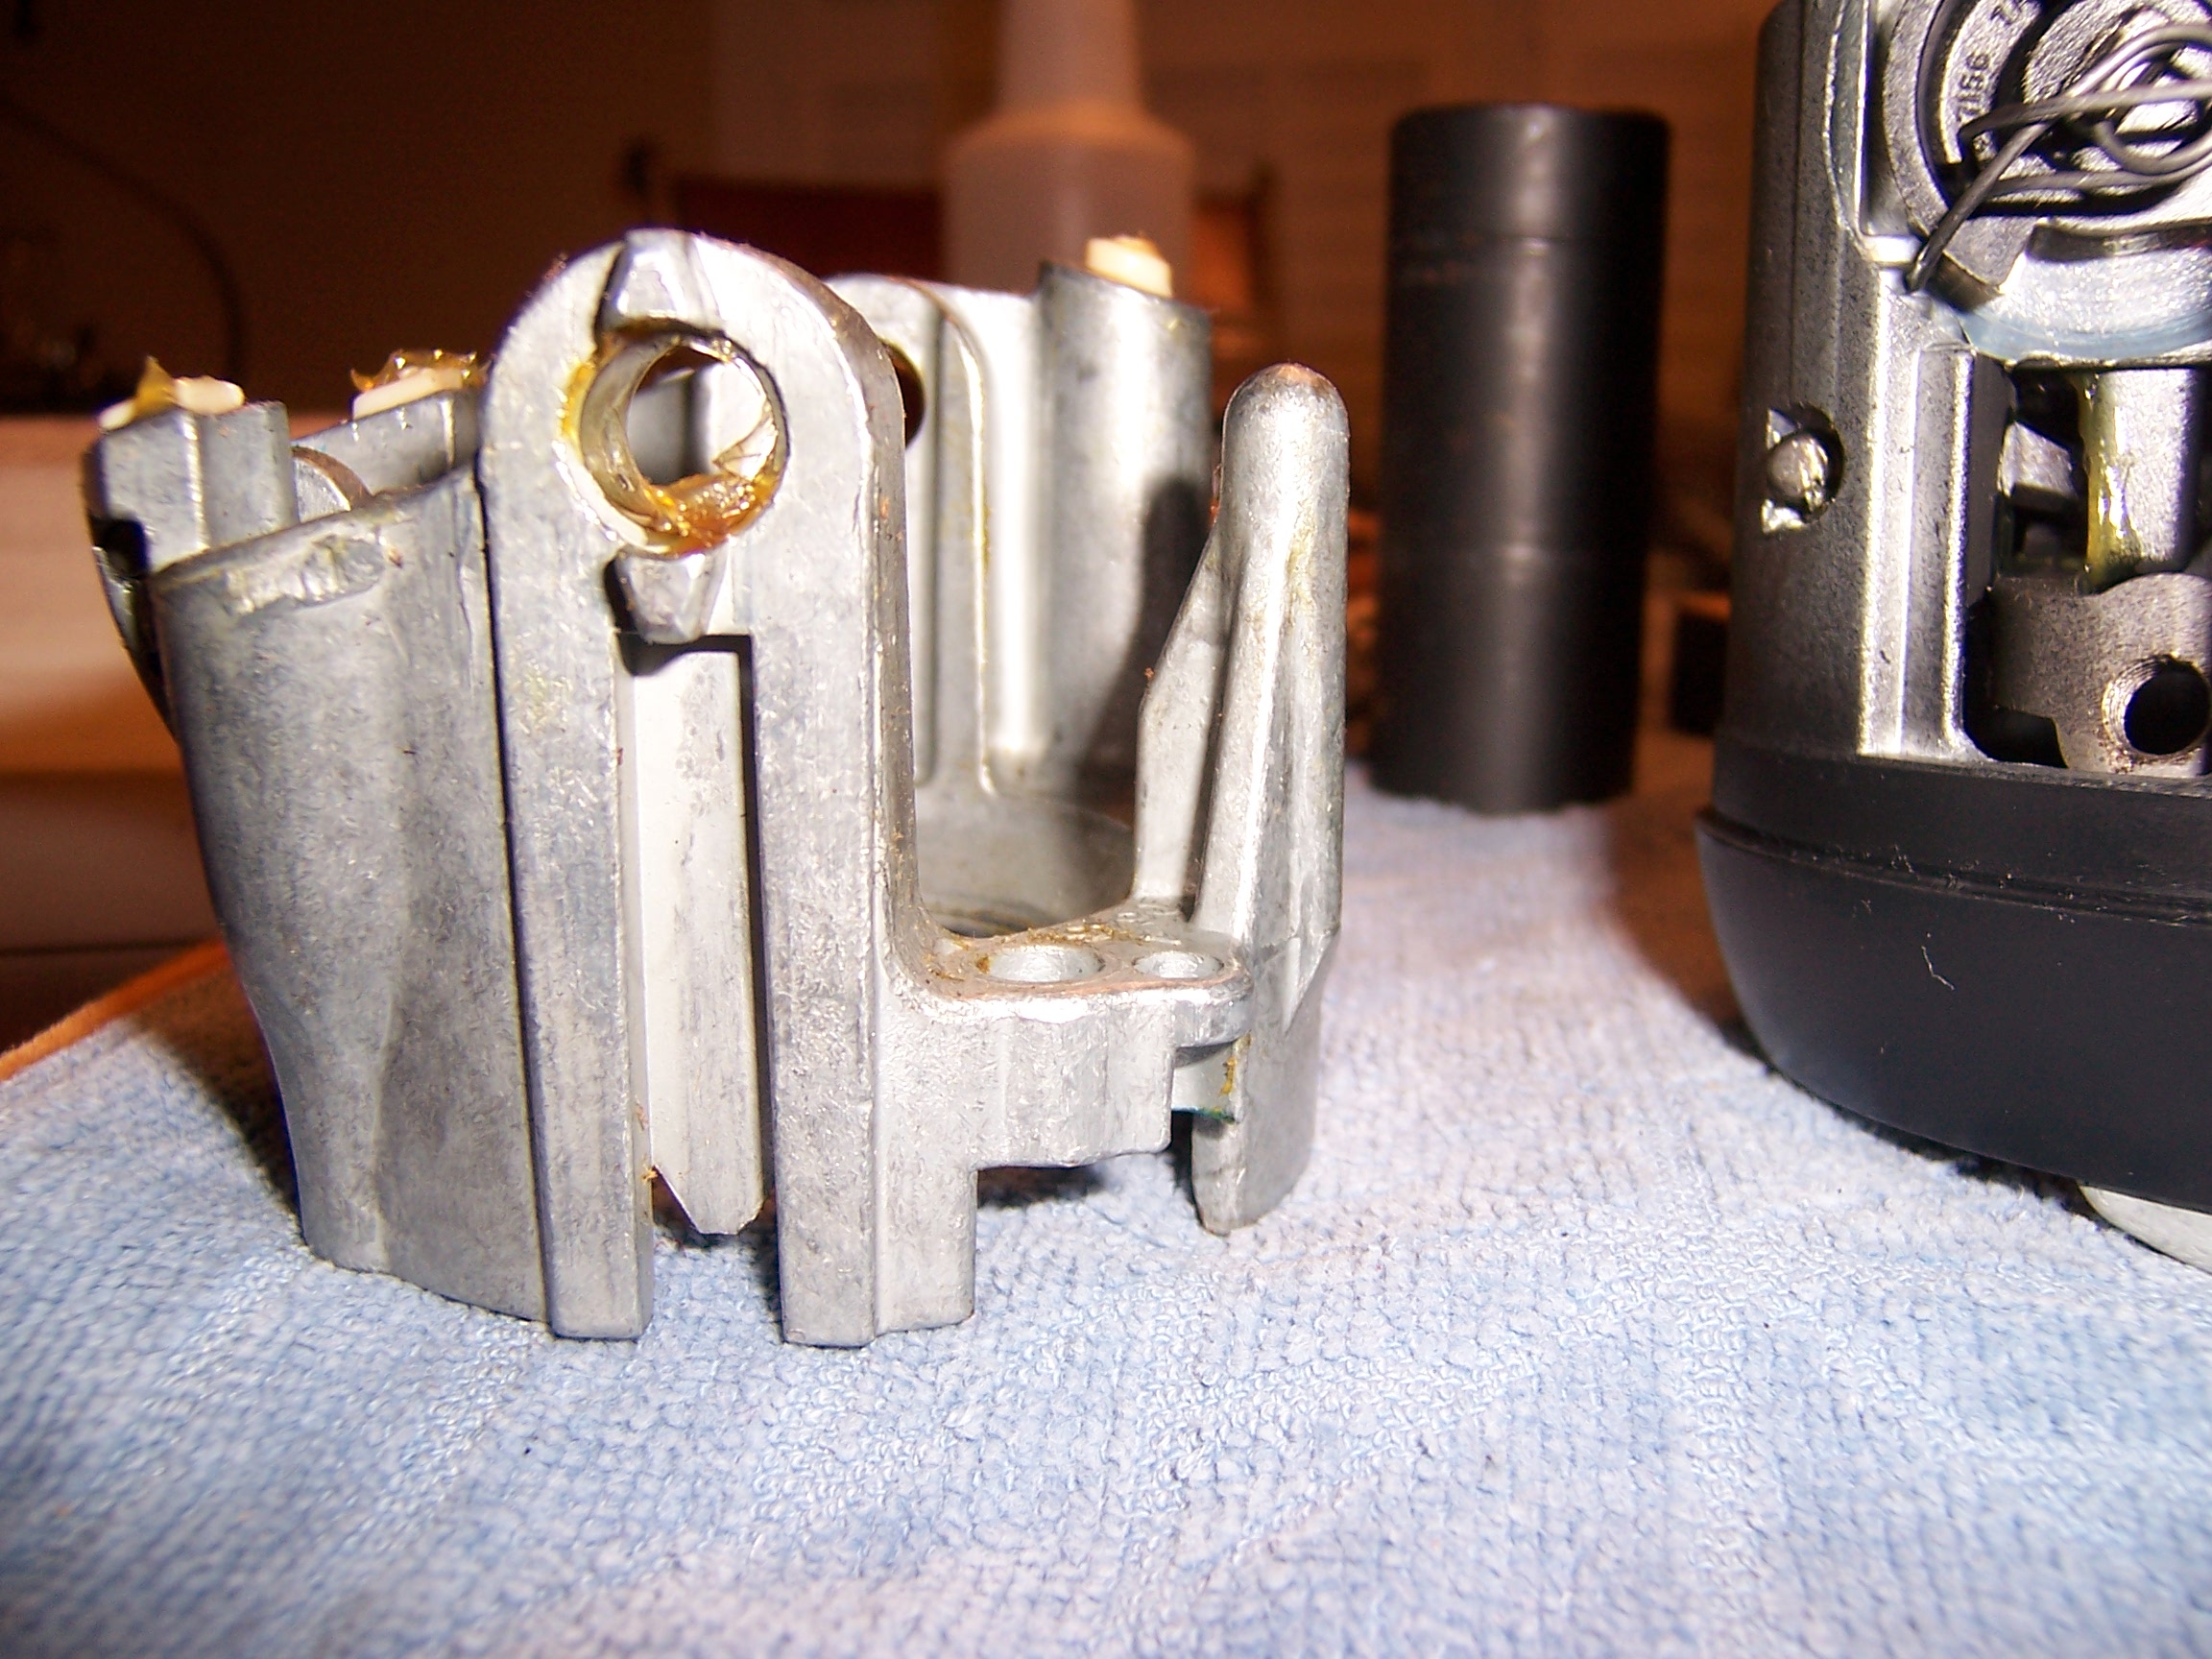
You cant tell from the photos above, but the spring perch (for the tilt sping) was bent outwards.
Empty column
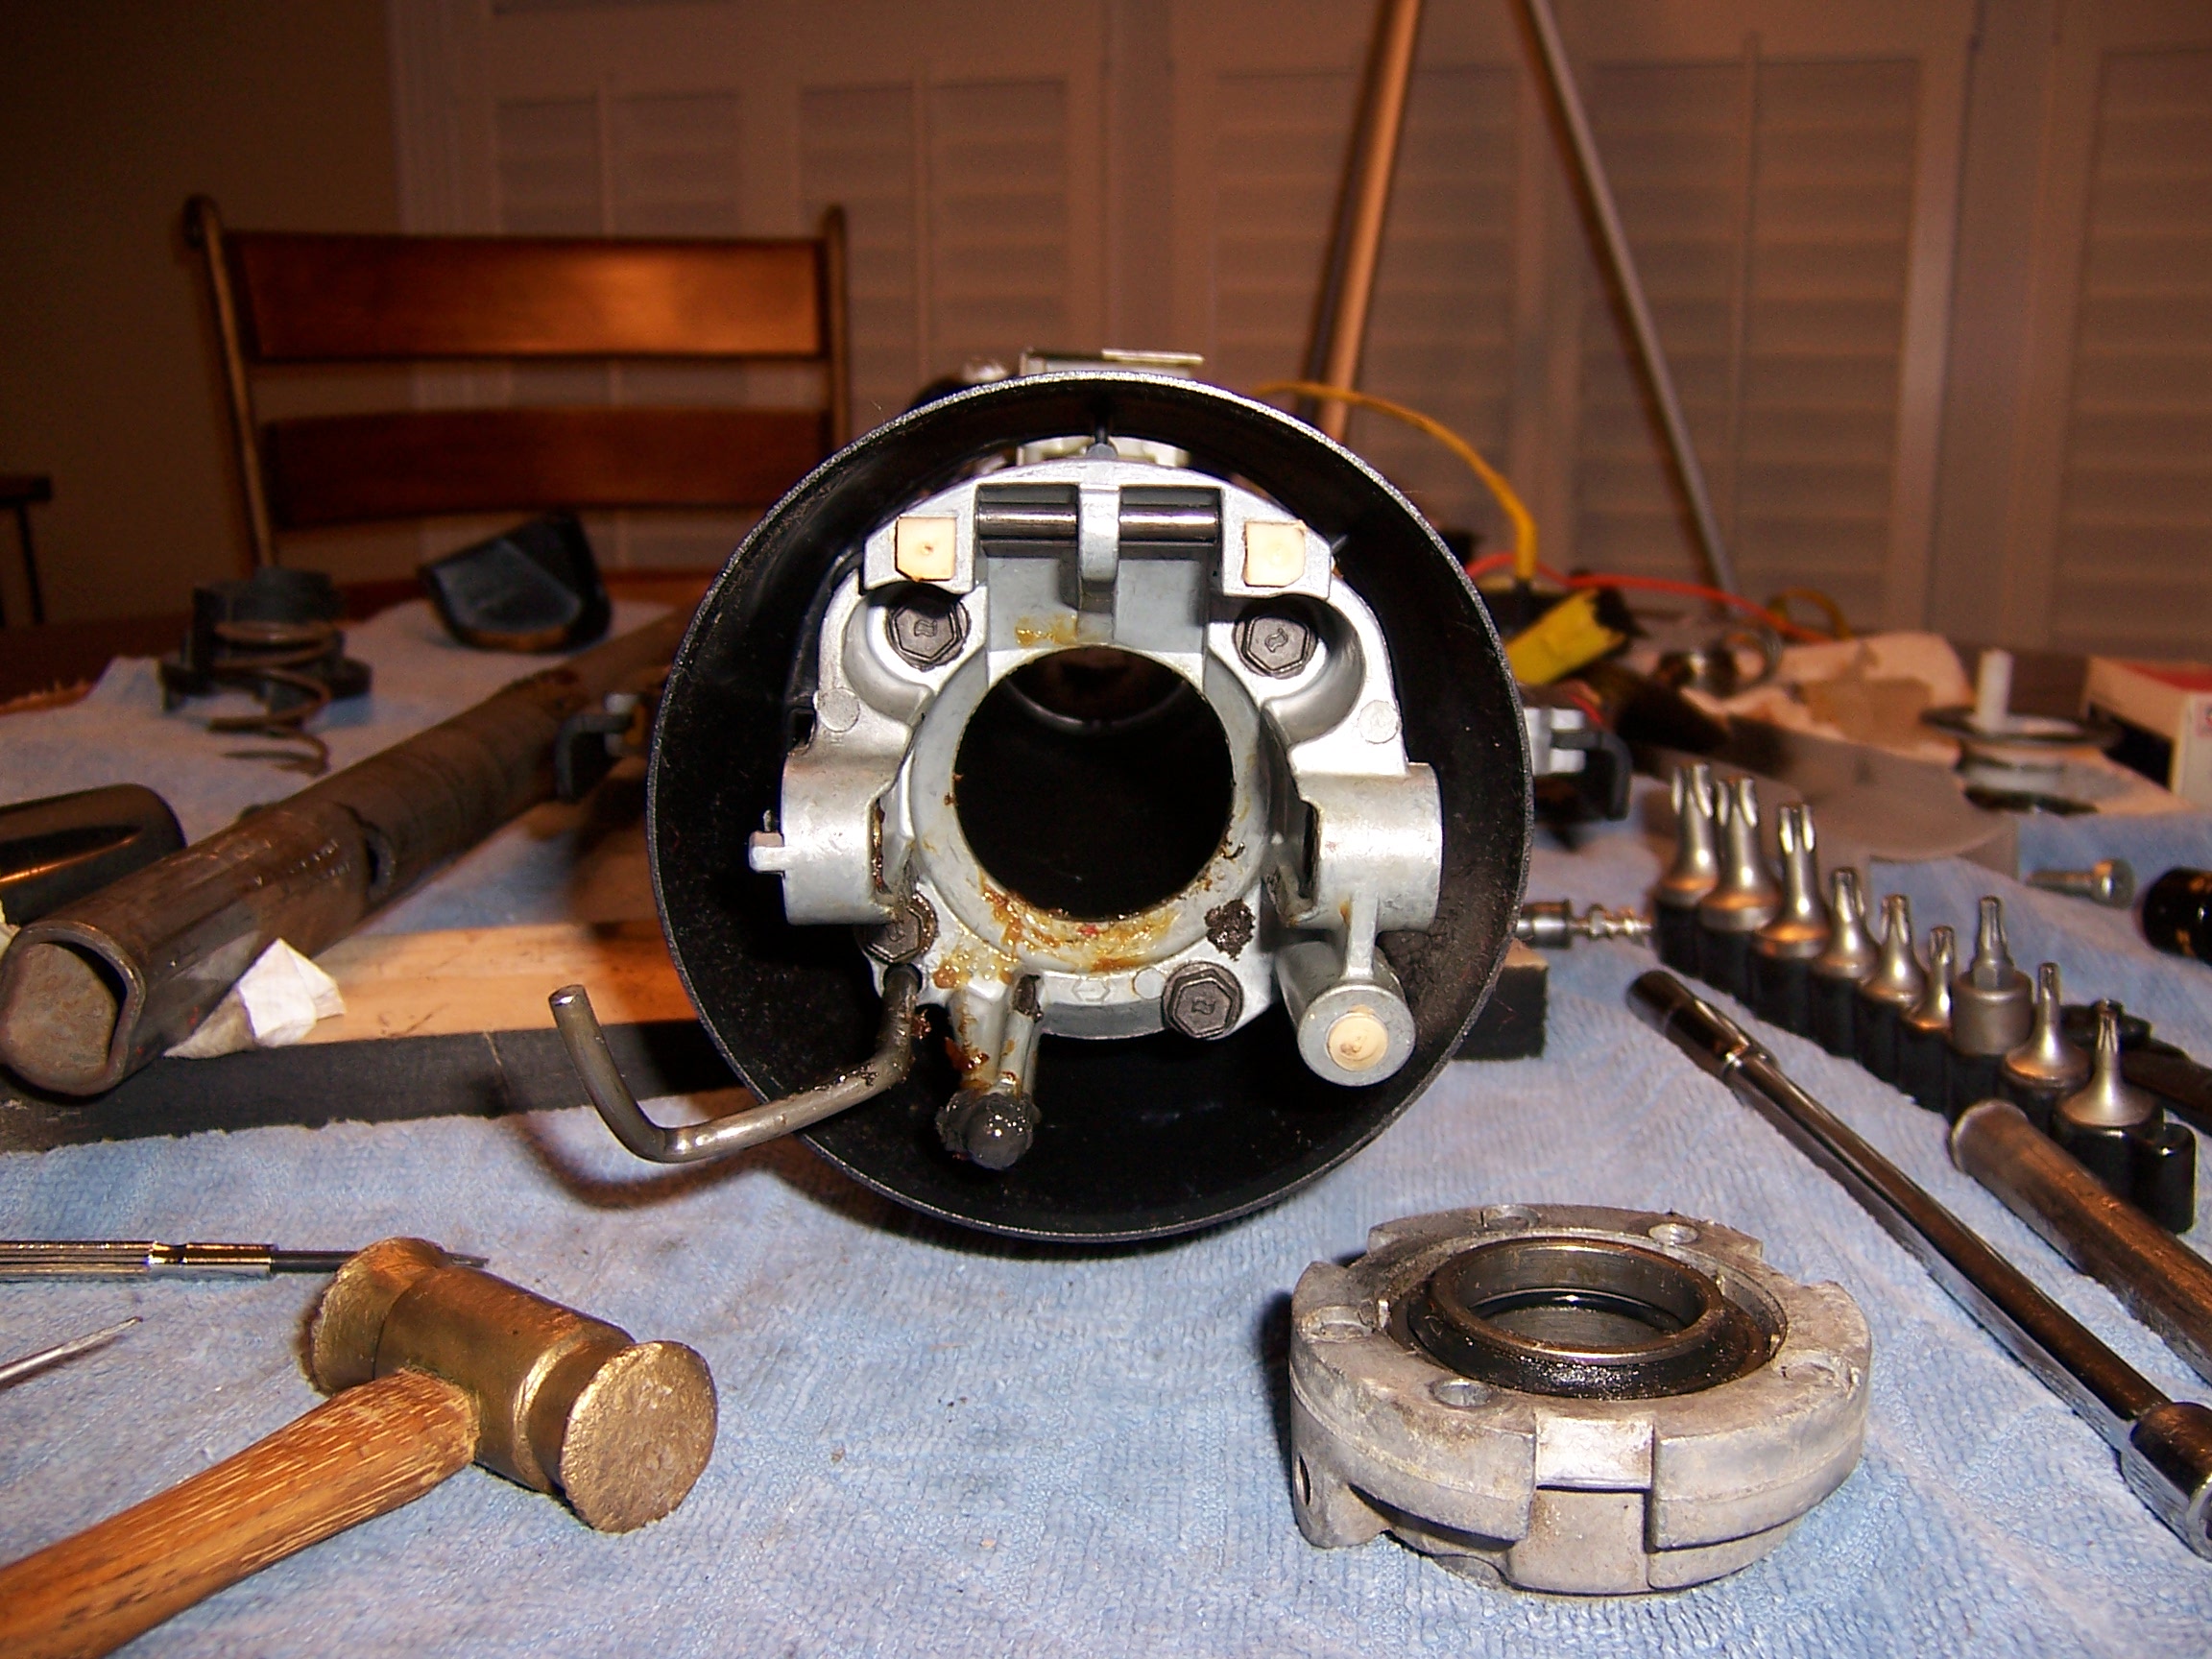
NOS housings from Corvette Steering! Pricey, but they did the trick!
Shaft reinstalled, close up the bottom cleaned up and clear coated to prevent rust. Thats the broken retained in the 2nd picture background (more on that later)
Heres the spring retainer I mentioned. My vette had two of them, I broke one while removing it.
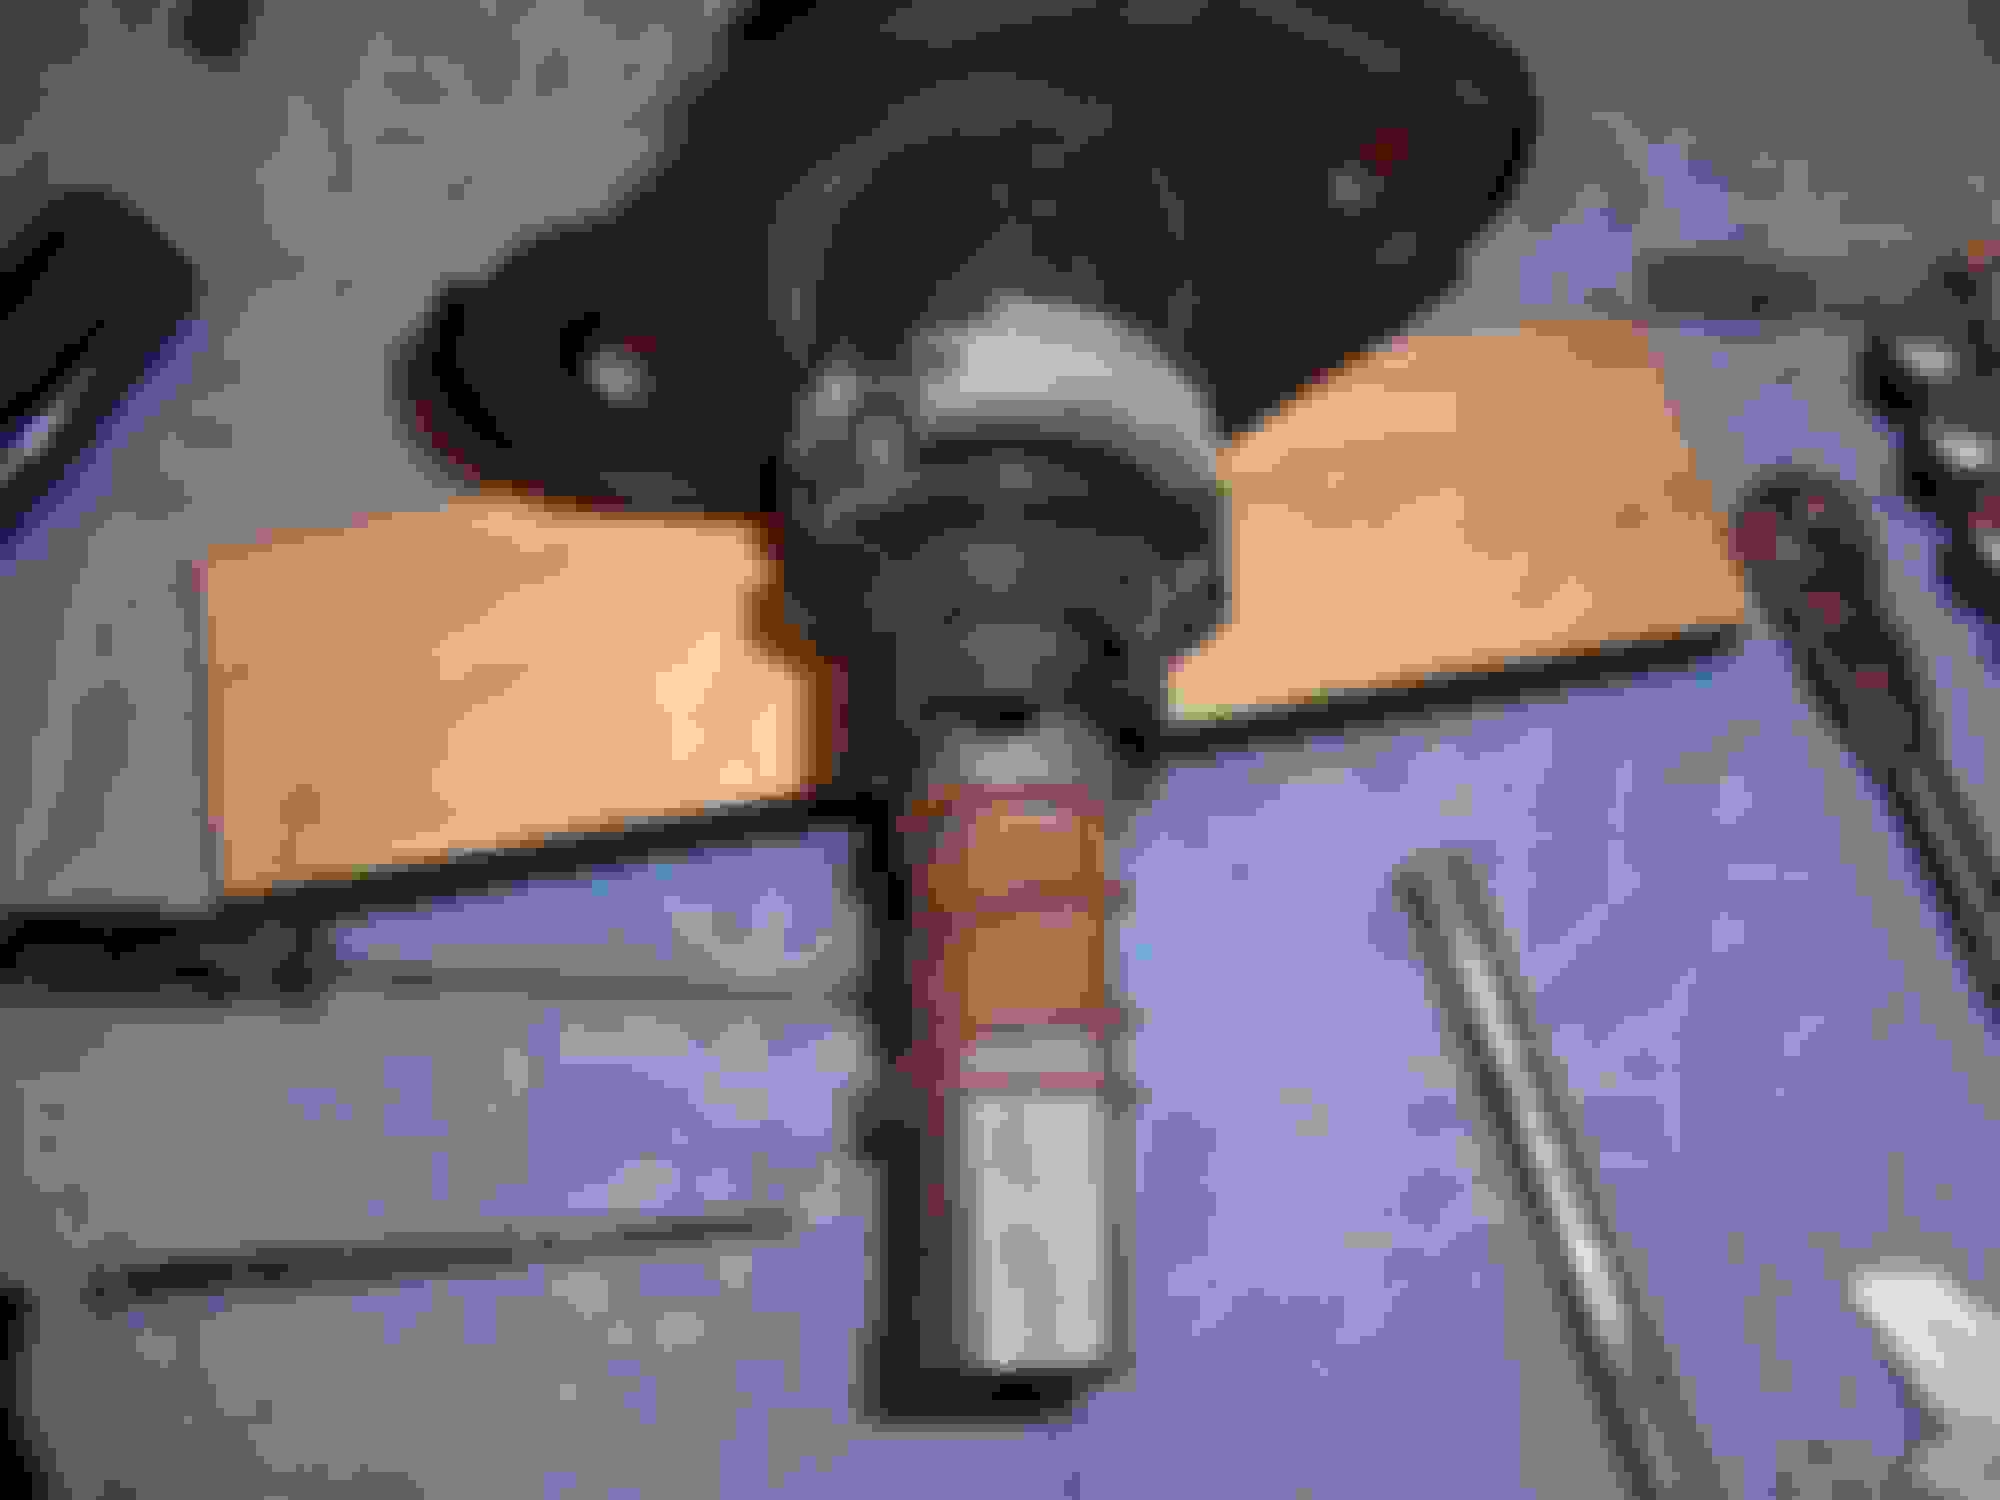
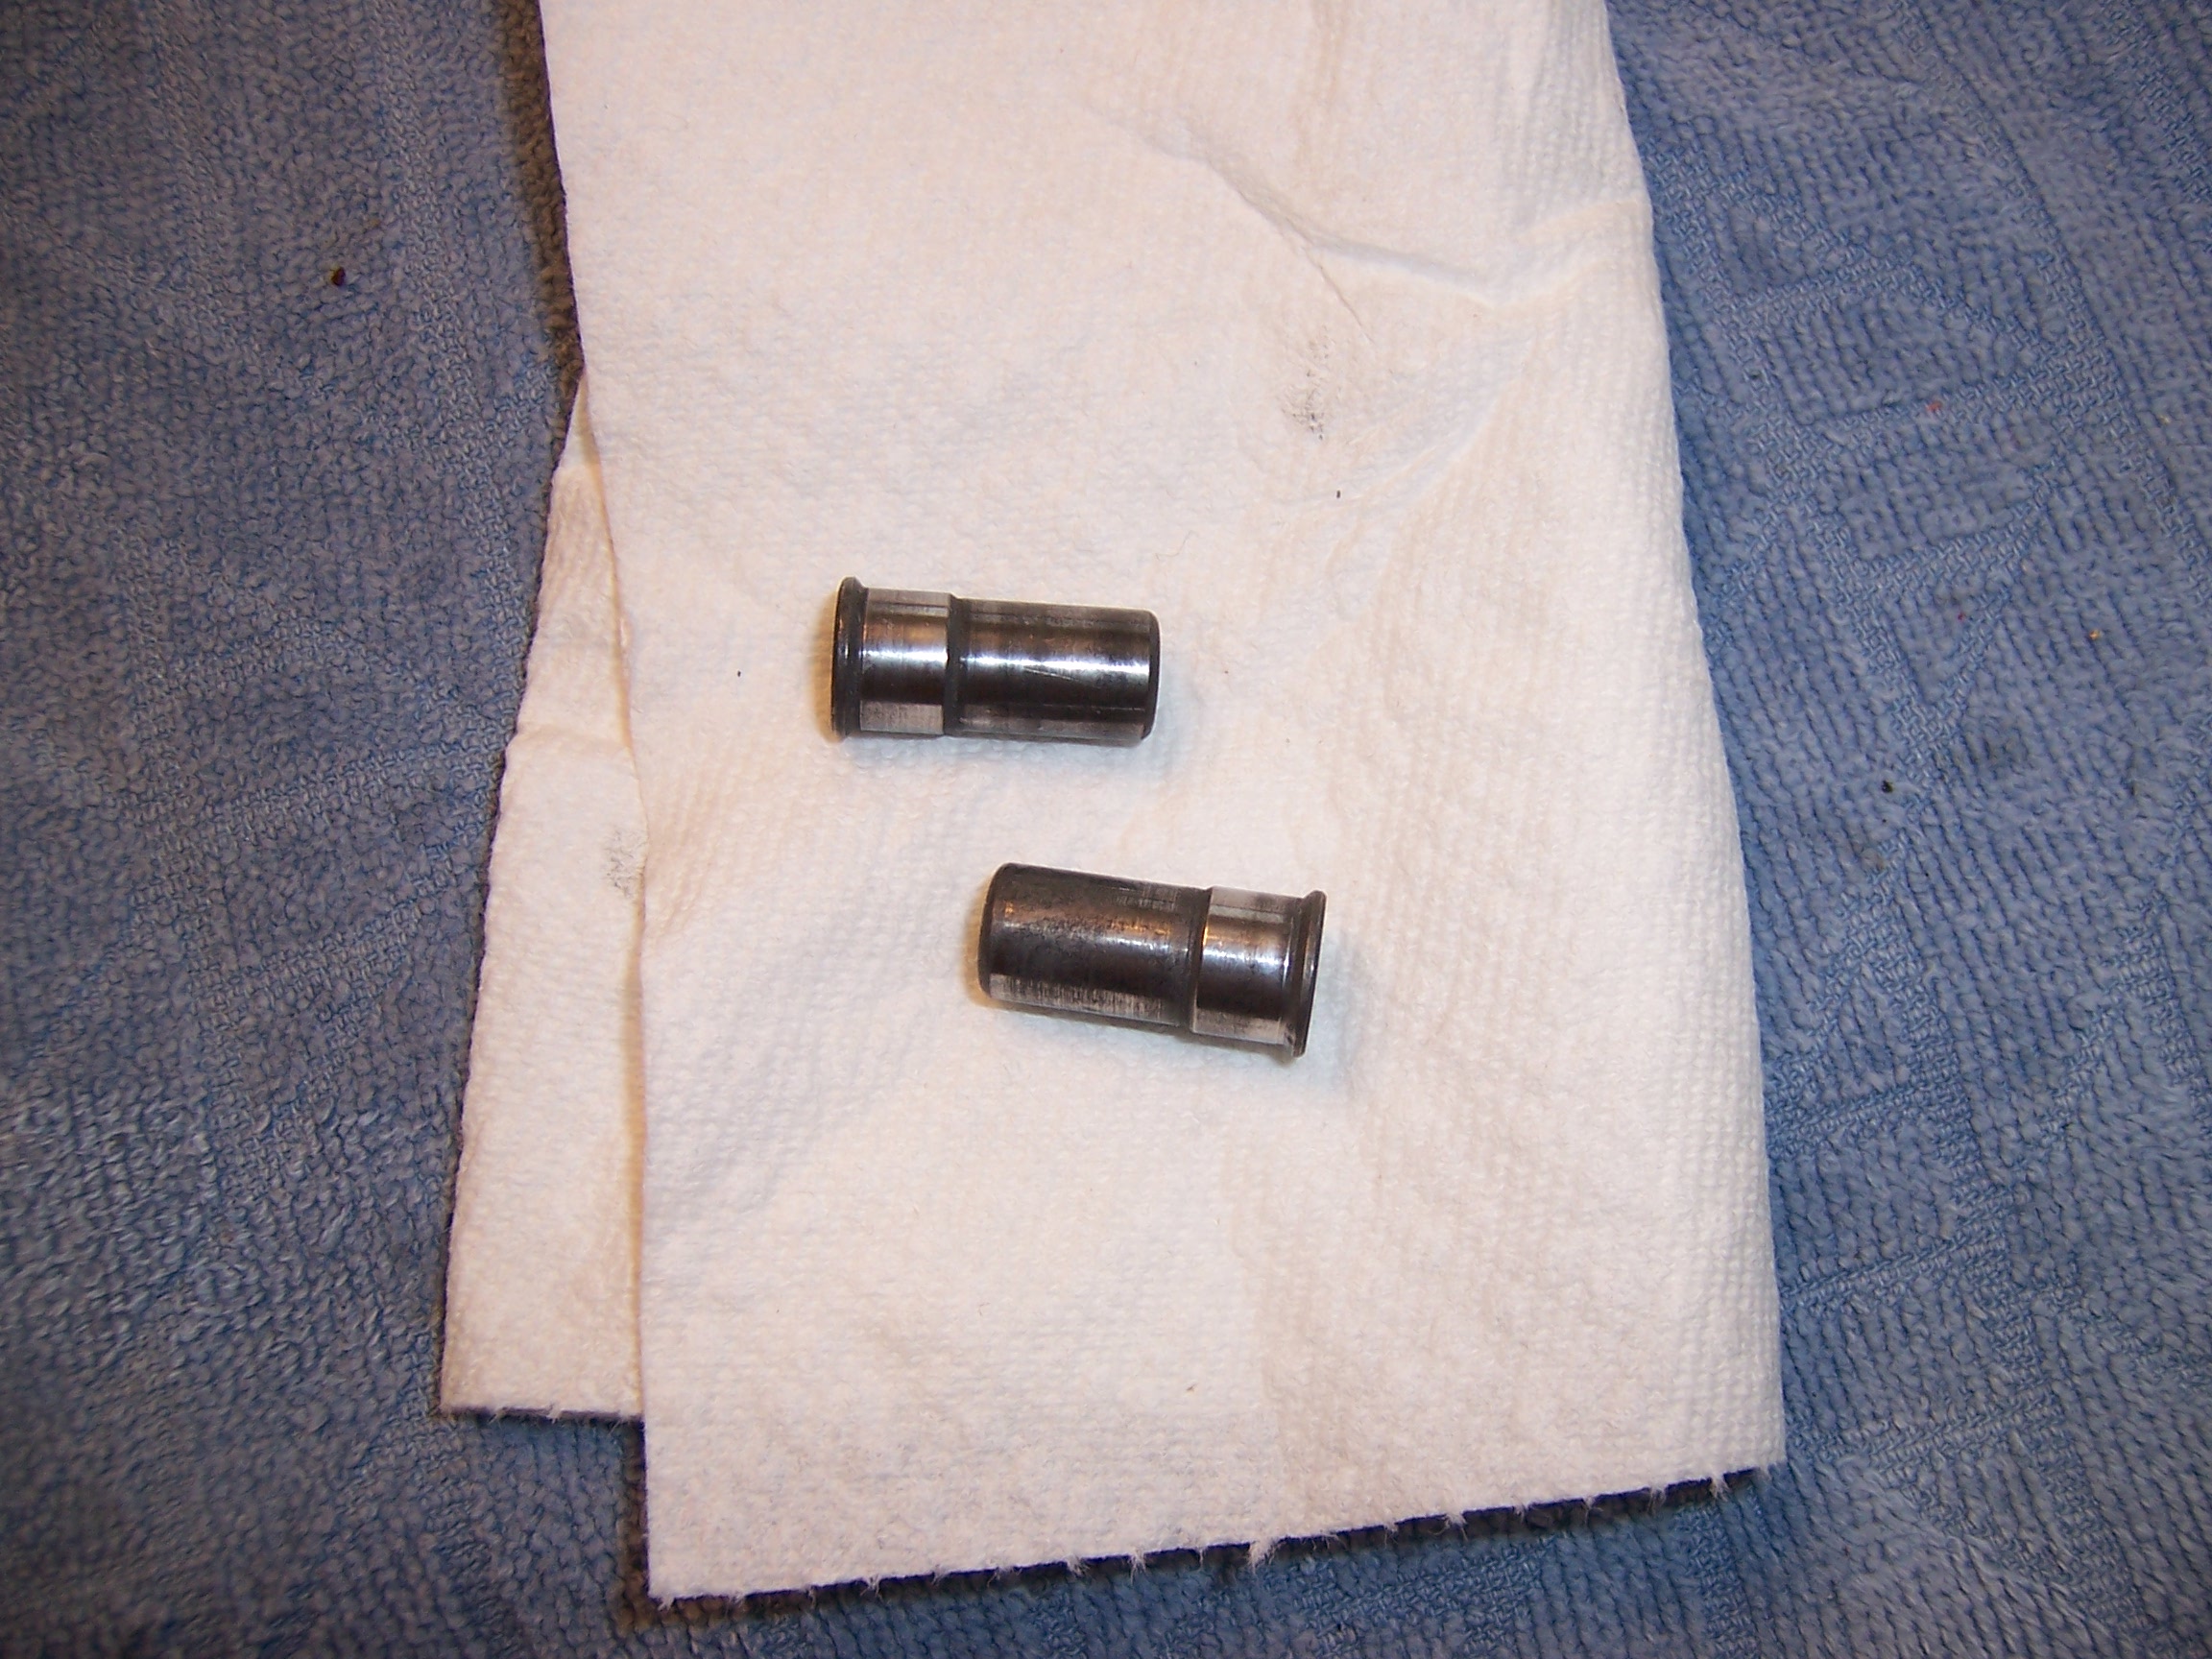
Infamous pivot pins. Apparently they can wear down too. However, I gambled a bit and reused my old ones.
Recommendation is to coat Locktite 609 in the bore of the upper (or outer) housing and the upper 1/3 of the pin. Locktite 609 is hard to find. None of the local autoparts stores had it. I had to special order it from a fastener supply warehouse.
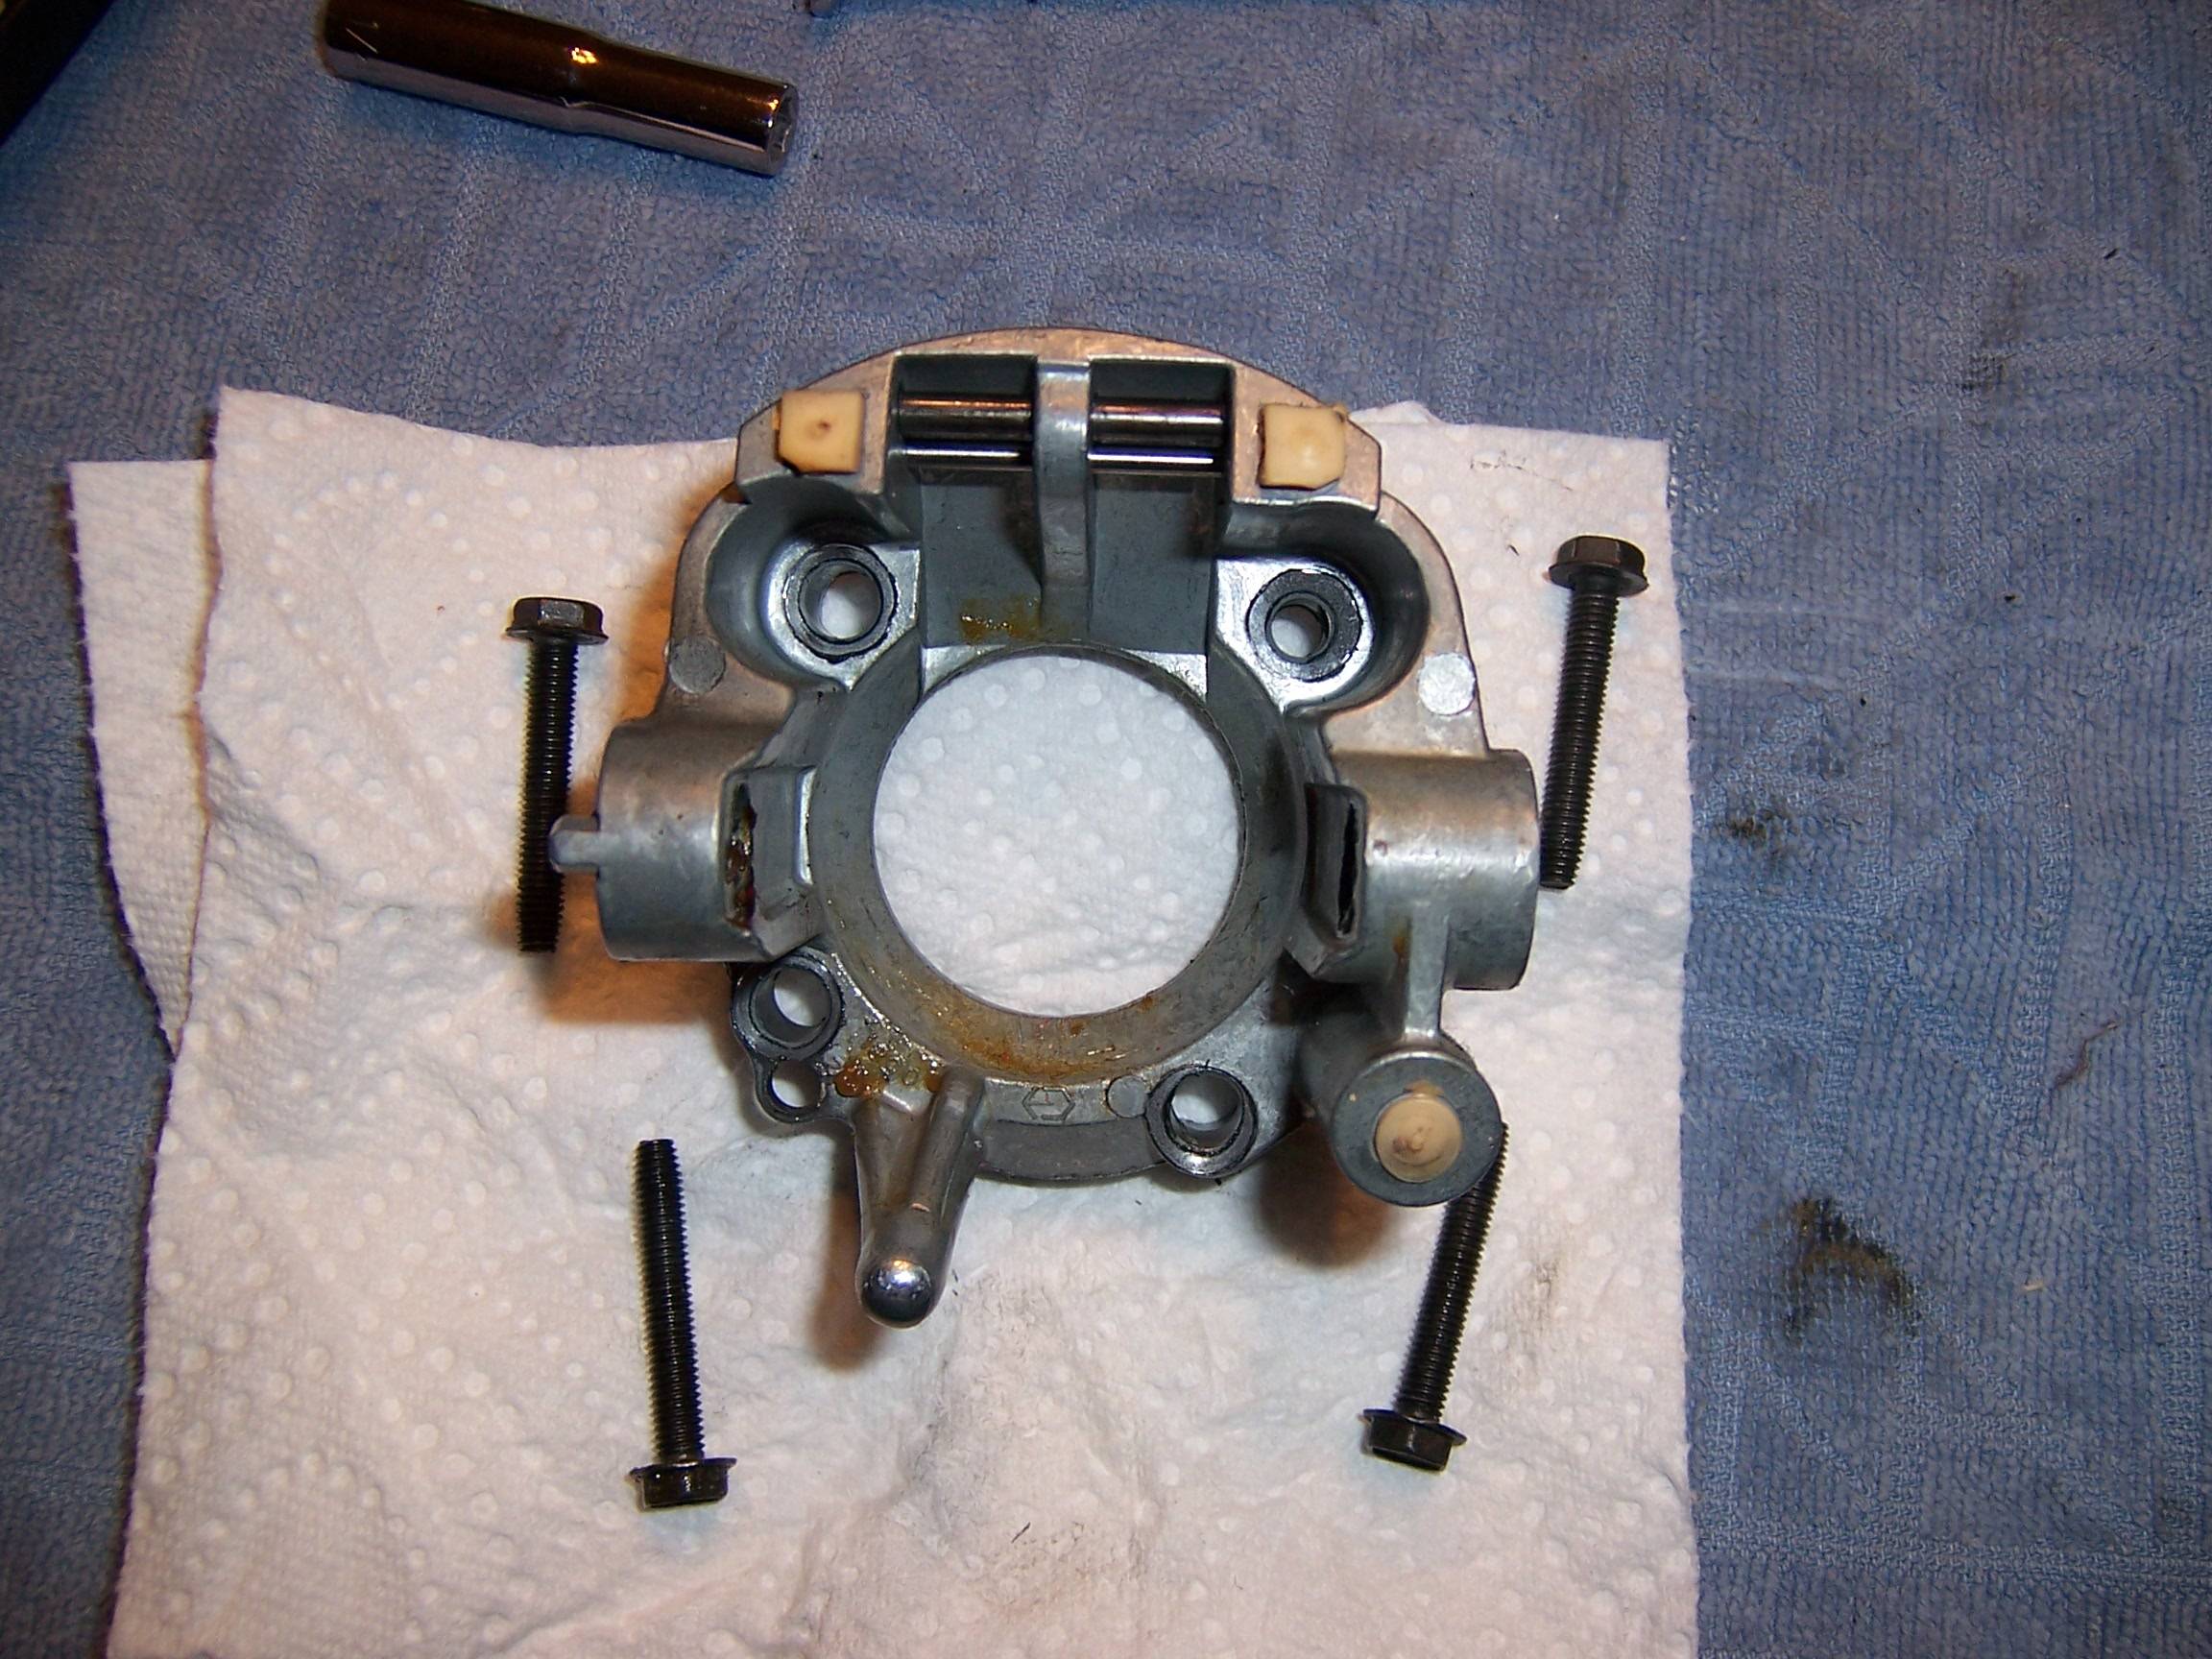
This is bore you want to coat with Locktite 609 is circled with green, just be careful not to get it on the other housing:
Pin is back in its home, took a fairly good whack to get it all the way seated (a good thing).
Now the tedious re-assembly. Worst part is fishing the wires through the column, even with it out of the car!
I put in a new ignition cylinder that I had re-keyed to match my original keys. The VATS wire on the original one broke. I had the VATS bypassed with a resistor as a temporary solution.
At this point, I probably should have re-installed the column in the car. Compressing the lockplate spring was difficult, even with the compressor tool, as the column wants to move around as you work on it. I re-used the c-spring, even tho FSM says use a new one. I just rebent it back into shape so it would fit evenly in its groove.
Tada!!
Closing thoughts:
Steering is super tight again!!
And I didn’t even do anything with the suspension. My impression might be biased abit, but I really do think the new housings removed some of the steering slop. Of course, theres absolutely no slop anymore for the tilt.
And because I mentioned it, the dimmer switch works again.
But in hindsight, I think my dimmer switch was not properly adjusted. Too much slop, combined with a bit of deflection in the dimmer rod, prevent the dimmer switch from being depressed far enough, to switch highbeams. No matter how hard I pulled on the lever. Im surprised I didnt break it. So if your dimmer switch isn’t working, double check the adjustment (the procedure is in the FSM).
I hate not having everything on hand to complete a task.
Suggestions to make this easier:
1. Go ahead and get another spring retainer – GM 7847029. You’ll probably break one removing it. They’re not too expensive if you can find them. I got mine off fleabay for about $6.
2. Find locktite 609 before starting, unless you can get it locally.
3. Now I am super-**** about *not* hoisting myself up and outta of the car by the steering wheel.
The pivot pin design is marginal with the 90+ cars, due to the added mass of the airbag. PLus being 20 years old cant help either. Hopefully this repair, plus being careful about not using the steering wheel to lift myself out of the car, will outlast me owning this car.
Last edited by Gear Jammer; 03-15-2015 at 01:59 PM.
Reason: updated pictures - Forum now hosting pics?
*Subscribed* I will have to do this at some point. My High beam pull is as you mentioned, sometimes feels like if I were to pull any harder Im going to break the lever. And my tilt has the same out of axis play (down and to the left). Seems like quite the task but I can only imagine how TIGHT it would make the steering feel.
Other then the parts listed at the bottom do you have part#'s for any of the pins you replaced?
Even tho it is a worn-out cliche, just take it one step at a time for the column & pins R&R. Really wasnt all that hard.
drmrman, I didnt replace the pivot pins. Tom at Corvette Steering didnt seem to think the pins wear out, and it makes sense. The pins are hardened steel, the housings they rotate in are made of cast aluminum. The aluminum will easily wear out before the steel.
The parts manual I have does not list the pivot pins separately, it says the pins are part of a "kit" 26002678 (looks like it includes the big tilt spring and retainer, upper bearing seat and retainer, and the two pivot pins)
Im pretty sure 26002678 is long ago discontinued, may try hitting up one the speciality houses (i.e Corvette Steering)
Regarding the dimmer switch, you can try adjusting out all the lash between the dimmer switch (base of column) and the dimmer-actuator rod. Its fairly straightforward, worst part is removing the lower dash hush panel to get to the switch. Loosen the switch on the column, insert drill bit in the receptable in the switch (you'll see what Im talking about), FSM sez 3/32 bit, with switch locked, move switch up against the dimmer rod and re-tighten. Thats probably all I needed to do, but the loose tilt certainly didnt help things.
Also, heres the contact info:
Corvette Steering Service Inc
2215 Mullinax Drive
Anderson SC 29625
864-287-9990
Last edited by Gear Jammer; 02-22-2011 at 06:44 PM.
Reason: And another thing....
Kudos to you Gear Jammer! It looks like you put as much time into the write-up as you did in the repair......just for the benefit of others. It's stuff like this that makes the forum so great!
Thanks!!
Even tho it is a worn-out cliche, just take it one step at a time for the column & pins R&R. Really wasnt all that hard.
drmrman, I didnt replace the pivot pins. Tom at Corvette Steering didnt seem to think the pins wear out, and it makes sense. The pins are hardened steel, the housings they rotate in are made of cast aluminum. The aluminum will easily wear out before the steel.
The parts manual I have does not list the pivot pins separately, it says the pins are part of a "kit" 26002678 (looks like it includes the big tilt spring and retainer, upper bearing seat and retainer, and the two pivot pins)
Im pretty sure 26002678 is long ago discontinued, may try hitting up one the speciality houses (i.e Corvette Steering)
Regarding the dimmer switch, you can try adjusting out all the lash between the dimmer switch (base of column) and the dimmer-actuator rod. Its fairly straightforward, worst part is removing the lower dash hush panel to get to the switch. Loosen the switch on the column, insert drill bit in the receptable in the switch (you'll see what Im talking about), FSM sez 3/32 bit, with switch locked, move switch up against the dimmer rod and re-tighten. Thats probably all I needed to do, but the loose tilt certainly didnt help things.
Also, heres the contact info:
Corvette Steering Service Inc
2215 Mullinax Drive
Anderson SC 29625
864-287-9990
1st thanks for corvette steerings contact info! That is invaluable! Thank you!
#2! Which part did you replace to eliminate the off axis slop? Was that the aluminum housing that you replaced the culprit?
#2! Which part did you replace to eliminate the off axis slop? Was that the aluminum housing that you replaced the culprit?
Yes, maybe I wasnt clear...the new housings are what cured the off-axis movement, theres wasnt anything else to blame. The 4 bolts that hold the lower (support) housing to the column were tight, so that wasnt root cause. I assumed both upper and lower housing were equally worn so I went ahead and bought both as a pair. You can sometimes find either one separately on fleabay, but I figgered it would be less hassle to buy both of them from the same place. Plus they are NOS. And I didnt see the point in buying used housings that probably are worn out also. And you dont want to go to all this trouble to only replace 1/2 of the worn parts. During my research I never found anybody saying its the upper or lower housing that predominately wears out.
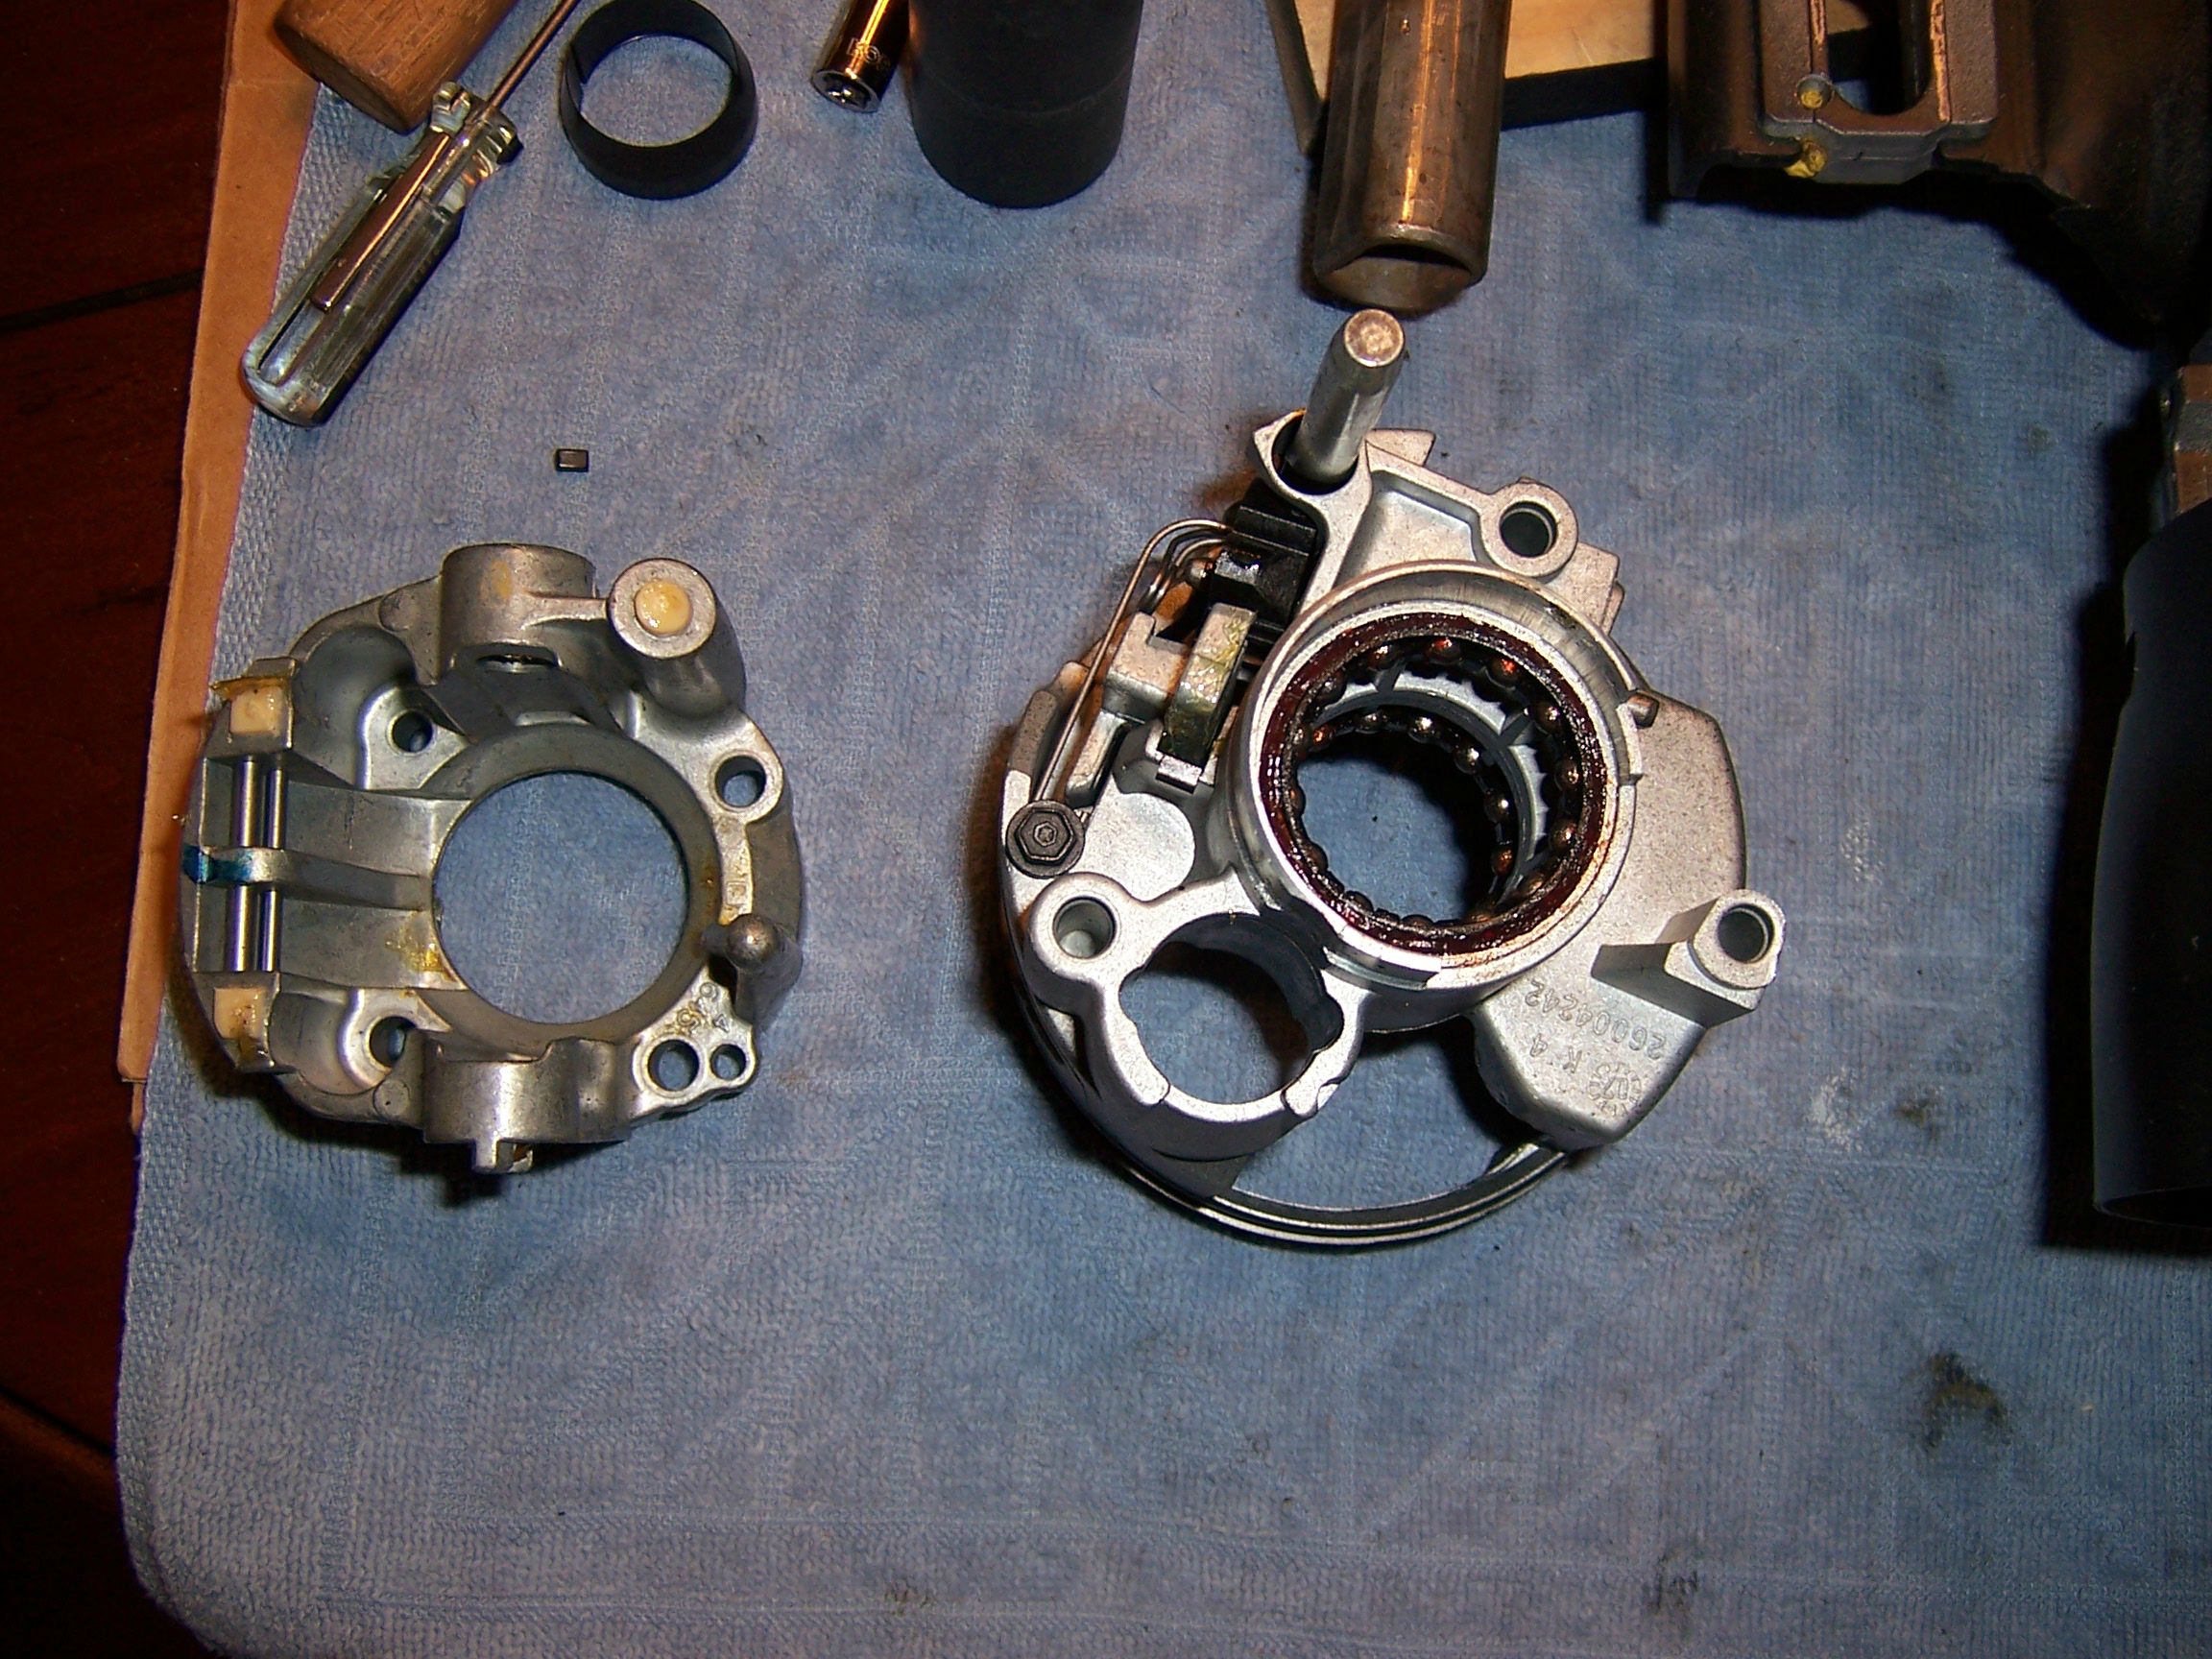
Heres the NOS lower (support) housing I bought:
And heres the NOS upper tilt housing I bought:
hope this clears things up.
Oh yeah, I want to add, one of the reasons I did this, is this is a repair that you benefit from everytime you use the car. Driver-feedback / user interaction kind of thing. The slop in the tilt was something that bothered me anytime I got in the car, whether it was around the block or driving across state.
john
Last edited by Gear Jammer; 03-15-2015 at 02:01 PM.
Reason: updated pictures - Forum now hosting pics?
So I assume the slop is from using the steering wheel to help yourself in and out of your car? I have some up and down play in mine also, can it become dangerous in time? Thanks and great write up.
Yes, maybe I wasnt clear...the new housings are what cured the off-axis movement, theres wasnt anything else to blame. The 4 bolts that hold the lower (support) housing to the column were tight, so that wasnt root cause. I assumed both upper and lower housing were equally worn so I went ahead and bought both as a pair. You can sometimes find either one separately on fleabay, but I figgered it would be less hassle to buy both of them from the same place. Plus they are NOS. And I didnt see the point in buying used housings that probably are worn out also. And you dont want to go to all this trouble to only replace 1/2 of the worn parts. During my research I never found anybody saying its the upper or lower housing that predominately wears out.
Heres the NOS lower (support) housing I bought:
And heres the NOS upper tilt housing I bought:
hope this clears things up.
Oh yeah, I want to add, one of the reasons I did this, is this is a repair that you benefit from everytime you use the car. Driver-feedback / user interaction kind of thing. The slop in the tilt was something that bothered me anytime I got in the car, whether it was around the block or driving across state.
john
Excellent! You clearified all my questions! Thank you very much for all your help and knowledge!
I did a partial fix on my 95 once in the car- I'm pretty sure this time on my 91 I'm going the bench-top route.
The only question I would pose is if there is anyway to do a bushing insert to \restore the original worn housing rather than have to pop for a new one. btw, how much is a new one? about $350?
I'm also somewhat considering a good used column if I ever find one. Can you steal parts from an F-body one?
Thanks for taking the time to post this for us. I had the exact same problem you described with the tilt mechanism. I took the easy way out and JB Welded the pins. It fixed my problem for now but not sure how long it will last. Your replacement of the source problem is a more permanent solution and should last you for years.
Last edited by 93VettePilot; 02-24-2011 at 04:25 AM.
The only question I would pose is if there is anyway to do a bushing insert to \restore the original worn housing rather than have to pop for a new one. btw, how much is a new one? about $350?
I have the same thoughts, ream the bore oversize and then insert sometype of self-lubricating bushing.
The cost to do this will probably be similar (if not more) than replacement housings. But I suppose theres a limited supply of NOS housings until they're all gone. I got mine for around $300.
'92 six speed coupe.
Just finished mine. My slight wobble turned out to be the upper shaft bearings.
There is a GM "kit" but, it comes with parts that have nothing to do with the bearings? And, you only get one race? The ignition black plastic gear, the geared pot metal shaft, and that goofy wire spring. No wonder GM went **** up!
My pretension spring under the geared pot metal shaft popped out. Couldn't for the life of me figure out where it went 'til I ran across you excellent post.
Just wanted to say thanks for the pics.
 02-21-2011, 10:30 PM