Pro Street 89 Build
 01-30-2012, 04:33 PM
#41
Advanced

Thread Starter

Member Since: Oct 2010
Location: Huntsville Alabama
Posts: 87
Likes: 0
Received 0 Likes
on
0 Posts
 [/IMG]
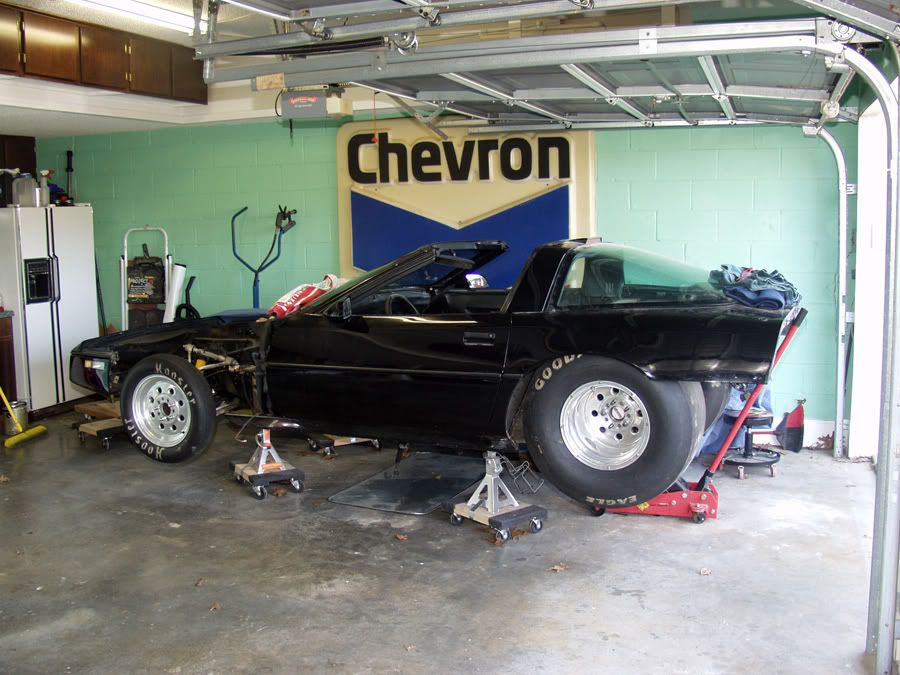
Here is the side view with the rear end dummied up to check for clearance and to take measurements for new sub frame
Last edited by SpeedRacer61; 01-30-2012 at 04:35 PM.

 [/IMG]
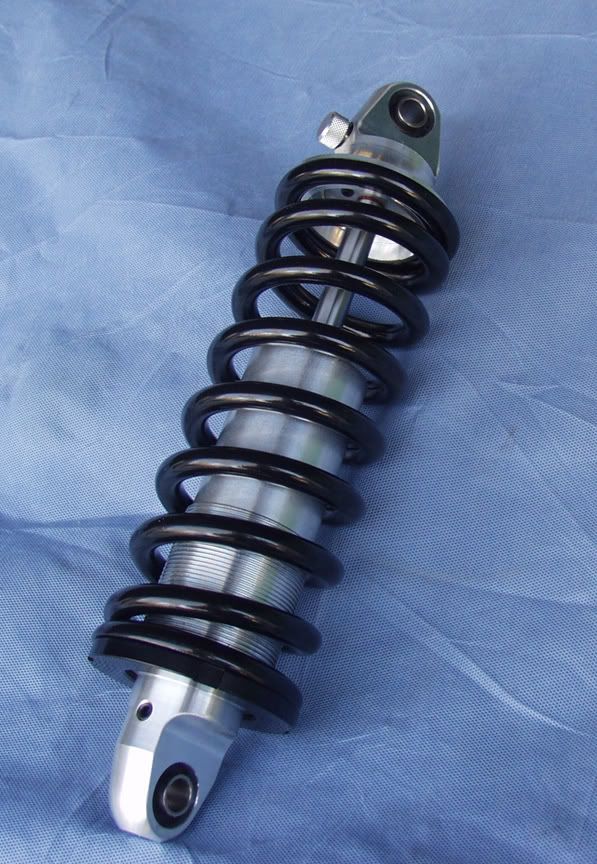 [/IMG]
04-13-2015, 04:41 PM
[/IMG]
04-13-2015, 04:41 PM
#44
Advanced
Thread Starter
Member Since: Oct 2010
Location: Huntsville Alabama
Posts: 87
Likes: 0
Received 0 Likes
on
0 Posts
WE ARE BACK! I am sure after this long everyone assumed this was a build that fell to the wayside, but it hasn�t. We experienced extreme delays due to bad luck, bad timing, and a bad vendor.
The plan was to have someone build a back half and then I would put it in. Originally the back half was to be built by a friend of mine and I was going to be involved as much as I could. Reason for this was that this friend, at one time, had a professional chassis shop, and has built many world class cars and I wanted the opportunity to learn. I knew anything he did would be first rate and of course I played the friend card to keep my cost low! I also knew it might take a while as he now had a full time job and just did the chassis work when time allowed.
Well as fate would have it, he had a death in the family and I knew this would probably occupy much of his time for at least a year so I looked at alternatives. In order to push things along I decided to have another shop build the back half and I found someone that I thought would do a good job at a reasonable price. They are a full time established shop so I assumed they would know how to build what I wanted. I didn�t want a generic 4 link chassis as a generic 4 link has a front frame rail that is completely vertical. As many Vette owners know the rear bulkhead, where the chassis attaches, is at about a 15 degree angle. I am a big tall guy and I wanted to maintain that angle for seat adjustability.
I talked to a shop, told them what I was trying to achieve, sent multiple pictures and measurements and asked if they could build what I wanted, of course they said yes. A month or two later they had finished the piece and since they were going to be near me on the way to a show I picked it up at a gas station at the interstate. Immediately I saw problems, the driveshaft loop was in the wrong position. I said something to them and coincidently they had another loop with them! I had a problem with this as my thoughts were being a professional shop it should have been obvious from where the pinion was that the loop location was wrong. Instead of questioning it or fixing it they sent another piece. I took the item thinking that if all I had to do was cut out and fix that one piece then I would be ok.
Once home I took a closer look and saw multiple problems. I got out my tape measure and square and was shocked at how poorly everything was built. The frame section was not square, the 4 link brackets were not square, cross members were not square, as I said the loop was in the wrong location and so where the shock mounts. The anti roll bar was crooked, the tabs on the housing were crooked and the anti roll bar itself was a home made piece of crap that had 1� of play before the housing even moved!
I sent an email addressing all the problems and didn�t hear anything for a week or so. I then got an email back simply saying �let me look into it�. After a couple of more weeks and emails I had heard nothing so I felt they were going to try and ignore the problem so I called my credit card company and filed a dispute. Once the credit card company notified them I miraculously got another email and I explained to them all the problems. They tried to say that is not what I asked for so I told them to look at the drawings that had been sent. They were unable to find them so I sent them a copy of mine as I keep EVERYTHING in these type of situations. They finally confessed to doing some things wrong but their solution was to send me new parts to fix myself. I said hell no, for one that only fixed part of the problem and two why should I fix something I paid someone else to do for me?
It all ended up being a long drawn out battle with the credit card company. The builder sent in a one page letter that made all kinds of false claims saying such things as that is what I asked them for, brackets are out of square so that when you bolt them down you will pull them back inline, ect. I then replied back with a 23 page document of pictures, emails admitting fault from them, and a professional opinion from a chassis builder who made a list of the problems. I think it was after 45 days they did not respond back so I was awarded the claim.
About a month later they called and claimed they could have won but they made a mistake and didn�t respond in time (yea right). They then asked when I was going to ship the frame back to them and I said once they arranged shipping. They expected me to ship and incur the cost of their mistake and I told them it wasn�t going to happen. I told them their mistake and incompetence wasn�t going to cost me money. They were more than welcome to have someone pick it up, arrange shipping or whatever but I wasn�t going to pay for their mistakes. Their response was �so you not going to give us back our stuff?�. I told them that is not what I said and I repeated that they were more than welcome to arrange pick up or shipping. Their next response? �So you not going to give us back our stuff?�. After this happened several times I told them I wasn�t going to play word games with them and I hung up.
A few weeks later I had not heard anything so we had our attorney send them a letter saying they had 10 days to remove their items. They proceeded to once again make false claims as to everything that was done so I sent my attorney all the previous information and he agreed they didn�t have a leg to stand on and once again told them they had 10 days. They wrote back saying they were going to take it to court. My attorney basically laughed and said he felt they were full of crap and idiots because at this amount it would be a small claims case which they would have to come to my county to file. If they drove 6 hours to file the case they could have pick up their items! He said hold on to the items six month and then do what I wanted.
Six month actually fell during the holidays so I actually waited about 8 months before I scrapped their junk. By this time it had been almost 2 years so I went back to my friend to see if he would be interested again. He was but the problem now was that he worked government contracts, his contract was over and in order to keep a job he had to travel out of state months at a time. He thought he would be back home at the end of the year if I wanted to wait. I decided to do so because I didnt want to take the chance of having it all screwed up again and I knew what he did would be right and I could help along the way.
I also made another decision along the way. At first my intent was to have the back half built and me install it in my garage, but with all that had gone on, some additional research and my concern with a proper tie in to the frame on a high horsepower car, I decided to take the whole car to his shop so that we could build it all on his jig. I took the car up to his shop in February and so far the progress has been good and everything looks so much better than before. I am seeing more and more where it had been done totally wrong and how it should have been done. I will start posting some of the current pics soon.
I had hoped to have the car up and running by now, much less just getting started, but at least the time hasn�t been a total waste. We did acquire a few more pieces at great prices, such as a set of Mickey Thompson 21.5 tires on Weld rims, still with the rubber knubs on them, for $500. Also got a set of matching front rims but have to find some tires. Got a set of wheelie bars for $200 and a set of Wilwood rear brakes for $300. Not a lot of parts but great deals on good quality parts to help stay with the theme of quality car at minimal cost!
All this time has also allowed me to research my drivetrain selection. As much as I would like to be unique the streetability and power potential vs cost of a twin turbo LS is just too much to resist. I am in search of the 6.0 iron block LQ4, LQ9 or LY6 and the 4L80E transmission. It is my understanding the 4L80e is essentially a Turbo 400 with a lock up converter. I figure since we want to see a lot of street duty the lock up will be a necessity with a stall converter.
My biggest unknown at this time is the electronics. I love some of the systems like Holley�s predator but that is going to be cost prohibitive. I have read about some really good combinations using factory ECU�s but I have a lot to learn on that front as I have never tuned an engine on a laptop. If anyone has a lot of knowledge on this subject or has some good parts at a good price please let me know!
04-13-2015, 09:50 PM
#45
Melting Slicks


sorry to hear that it all turned to s***t !
hopefully your friend the chassis builder will feel bad for you and fix things up !
keep us posted
hopefully your friend the chassis builder will feel bad for you and fix things up !
keep us posted
04-16-2015, 04:12 PM
#46
Advanced
Thread Starter
Member Since: Oct 2010
Location: Huntsville Alabama
Posts: 87
Likes: 0
Received 0 Likes
on
0 Posts
The process has begun! After much thought, consideration, measurements, etc we decided to tie in the new rear frame a bit different than originally anticipated. At first I was just looking at tying into the factory frame at the point that the rails come up behind the bulkhead. It was decided that there just wasnt enough tire clearance and there were some strength concerns. We ended up cutting out the entire frame to the quarter panels, cut out the bulkhead and then boxed in the quarters and ran the main cross rail all the way to the quarters. We will then replace the bulkhead with a thin steel plate that will tie in both quarters, the bulkhead and the new sub-frame. Should be as strong as we will ever need and we can put a super large tire underneath.
It also produces a nice corner at the corner and bulkhead for the main hoop of the roll cage.
In these pictures we see the 4 link bracket set up. Both the botched version and the current correct versions
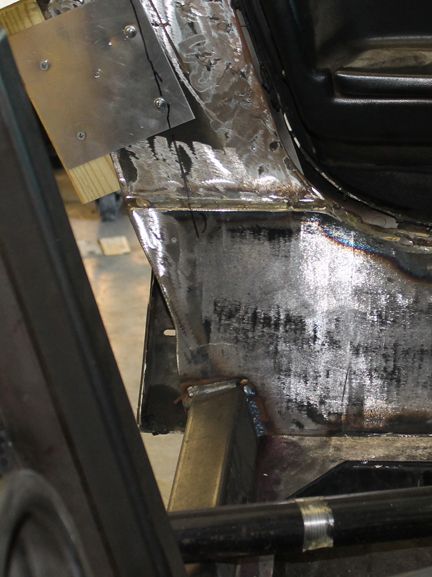
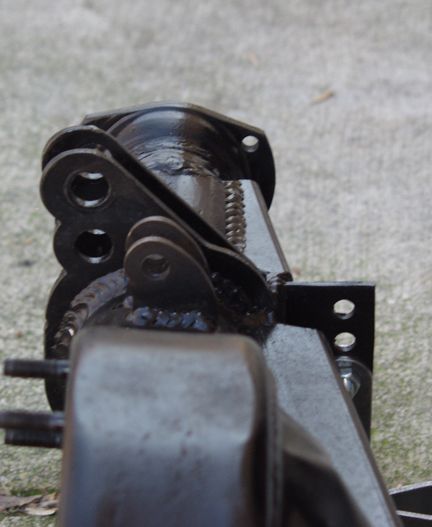
In this picture you can see the 15 degree angle of the upright that will run like the original bulkhead behind the seats. Problem is that they use a standard bracket designed for an verticle upright. This throw the 4 link into an unequal bar set up (not desireable) and changes the arc of the holes making adjustments a nightmare. Not to mention that at the top part of the bracket is just kind of handing in the air and it is only welded along the length.
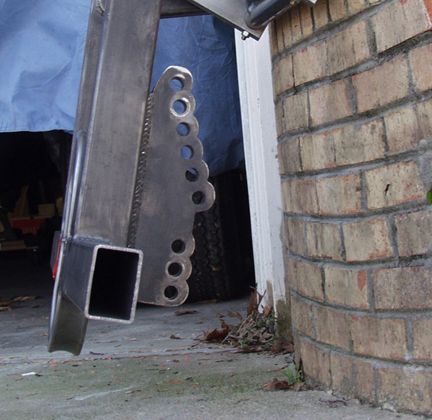
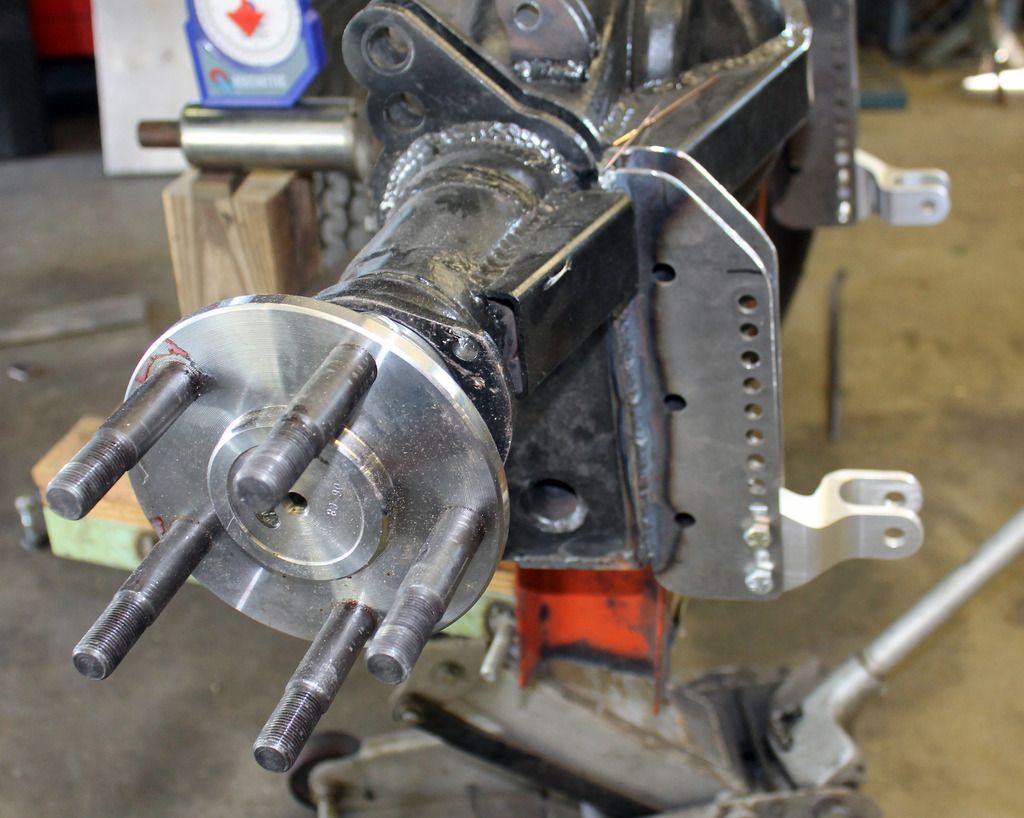
Here is the current set up, as you can see the new bracket is kicked out on the bottom to account for the 15 degree rake which brings back all the bars to equal lengths. Also the bracket extends all the way to the top so that it can tie in to the horizontal rail making it stronger. All this together puts the holes in the proper arc for easy adjustments.
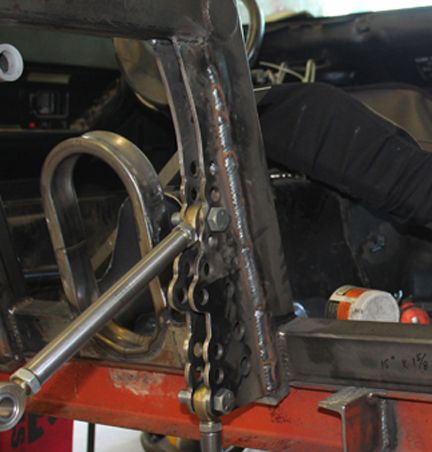
As if the origianl 4 link bracket wasnt enough of a disaster take a look at the angle they were welded. The builder tried to claim this was intentional yet the other side was different. But as I stated before there was not a single piece on that frame that was square with another!
Also go back and look at the drive shaft loop on the 2 different frame sections. The one done correctly is flush with the bottom rail which makes it flush with the floorpan of the car right behind the driver. The other frame has the loop hanging about 5" below. I think total ground clearance at that point is about 9" and this would have taken up 5" of it! I have images of going over a speed bump and ending up trapped teetering on the driveshaft loop! lol
It also produces a nice corner at the corner and bulkhead for the main hoop of the roll cage.

In these pictures we see the 4 link bracket set up. Both the botched version and the current correct versions
In this picture you can see the 15 degree angle of the upright that will run like the original bulkhead behind the seats. Problem is that they use a standard bracket designed for an verticle upright. This throw the 4 link into an unequal bar set up (not desireable) and changes the arc of the holes making adjustments a nightmare. Not to mention that at the top part of the bracket is just kind of handing in the air and it is only welded along the length.

Here is the current set up, as you can see the new bracket is kicked out on the bottom to account for the 15 degree rake which brings back all the bars to equal lengths. Also the bracket extends all the way to the top so that it can tie in to the horizontal rail making it stronger. All this together puts the holes in the proper arc for easy adjustments.

As if the origianl 4 link bracket wasnt enough of a disaster take a look at the angle they were welded. The builder tried to claim this was intentional yet the other side was different. But as I stated before there was not a single piece on that frame that was square with another!

Also go back and look at the drive shaft loop on the 2 different frame sections. The one done correctly is flush with the bottom rail which makes it flush with the floorpan of the car right behind the driver. The other frame has the loop hanging about 5" below. I think total ground clearance at that point is about 9" and this would have taken up 5" of it! I have images of going over a speed bump and ending up trapped teetering on the driveshaft loop! lol
Last edited by SpeedRacer61; 04-16-2015 at 04:47 PM.
04-16-2015, 05:04 PM
#47
Advanced
Thread Starter
Member Since: Oct 2010
Location: Huntsville Alabama
Posts: 87
Likes: 0
Received 0 Likes
on
0 Posts
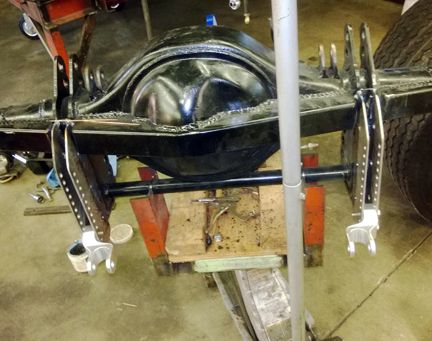
Something else we have done differently is that top horizontal bar on the back half is flat all the way to the rear. This was done with the thought that in the back we may just build a flat tray to extend from the bulkhead to the rear instead of having wheel tubs and having to make a dozen custom fit panels. That one is up in the air but still a thought.
The fuel cell is going to be mounted far enough back that I hope to utilize the original fuel filler cap with dual batteries to the side and accessed from underneath. Might be a bit of a pain but should be a clean look.
Interior is were I am really up in the air. I dont plan on maintaining much of the original interior. I just really didnt like it. Might keep the upper dash pad and then build a new face and counsole. Duramat the interior and re-carpet. Not sure about door panels, originals seem cheap and flimsy. Want to maintain power windows but might move all switches into console and out of doors.
Any one have any suggestions for seats? I havent been able to find much that says it will fit a Vette. Looking for a sport seat that will provided some cruising comfort as well as the proper stability for racing. One I have seen and kind of like is the ProCar Evolution. Carbon Fiber back and narrow but for a budget project the price is hard to swallow!
I am open to any and all suggestions! Any ideas on the steering rack? Can you go manual with existing rack or replace it? Brake master cylinder, smaller, better, no booster? Anyone ever tried one of the 90 degree angled brake systems that hides the booster under the dash? Looked interesting but would rather hear from someone with personal knowledge!
04-22-2015, 10:38 PM
#48
Advanced
Thread Starter
Member Since: Oct 2010
Location: Huntsville Alabama
Posts: 87
Likes: 0
Received 0 Likes
on
0 Posts
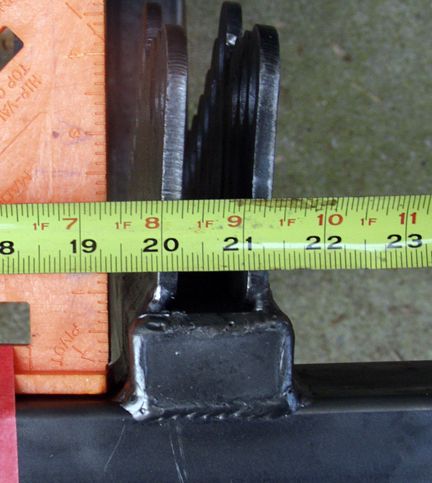
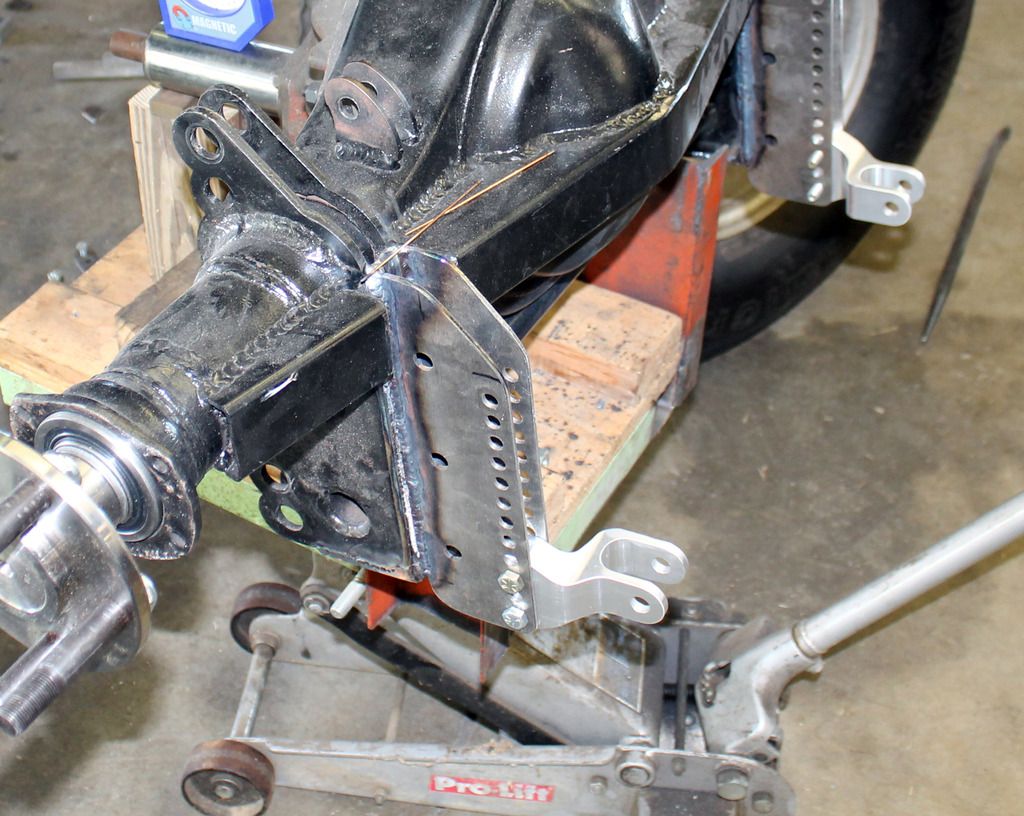
The first 2 pics are what the original shock bracket looked like. First off it was in the wrong place and second it looked like a single piece of flat steel stock with holes drilled in it.
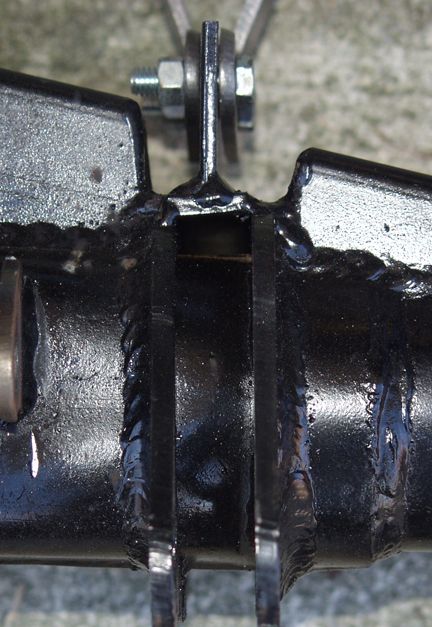
This is what it looks like now! Double brackets instead of one and an offset hanger to bring the shocks away from the tires. With it going to see street duty we wanted to get the extra clearance from the tires in case of tire sidewall flex in corners


This is what it looks like now! Double brackets instead of one and an offset hanger to bring the shocks away from the tires. With it going to see street duty we wanted to get the extra clearance from the tires in case of tire sidewall flex in corners


