85 corvette 4+3 to ls6 swap
 08-22-2011, 09:31 PM
#1
Instructor

Thread Starter
Originally I wanted to do a step by step thread documenting the steps I took on this project and the problems I encountered as I went along but a computer virus wiped out my pictures last spring. The car now is near completion. I still have to install the exhaust and start on the body and paint but it the engine and drivetrain is installed and running.
Heres what what I used for the project-
1985 corvette 4+3 I picked up last fall
Performabuilt level 3 4l60e transmission
ls6 corvette engine with 31,000 miles from corvette recyling (arrived clean as a new one)
Vettaid dash kit and wiring harness
performabuilt 10 inch billet convertor with 3500 rpm stall
Melrose c4 lsx swap headers
speedhound motor mount adapter plates purchased from vettaid
Hughes ls 168 tooth flexplate
racetronix c4 high volume fuel pump
b&m pro ratchet shifter
b&m super cooler transmission cooler
beam plates from zfdoc
tpis air intake
richmond 3:75 dana 44 ring and pinion set
F-body oil pan, pickup tube and windage tray
Car was tuned by Steve at tunedbyfrost who configured the pcm that came with my ls6 to run my
automatic 4l60e as opposed to the manual on the z06. He also eliminated vats, evap codes, and made some
performance changes as well.
Last edited by cttech455; 08-23-2011 at 10:45 AM.
 08-22-2011, 09:35 PM
#2
Instructor
Thread Starter
Heres a picture of the engine. The heater box and airconditioning has been eliminated and the battery was located to the trunk. I used the TPIS reverse flow air intake I purchased from a fellow forum member (since it is no longer made) and adapted it with some couplers and 4 inch aluminum tubing. Upper radiator hose is from a 1996 cadillac deville and the lower hose from a 2000 z28. I used a jegs 1 1/4 inch radiator drain petcock to attach the steam line to the upper radiator hose.
Last edited by cttech455; 08-22-2011 at 10:48 PM.
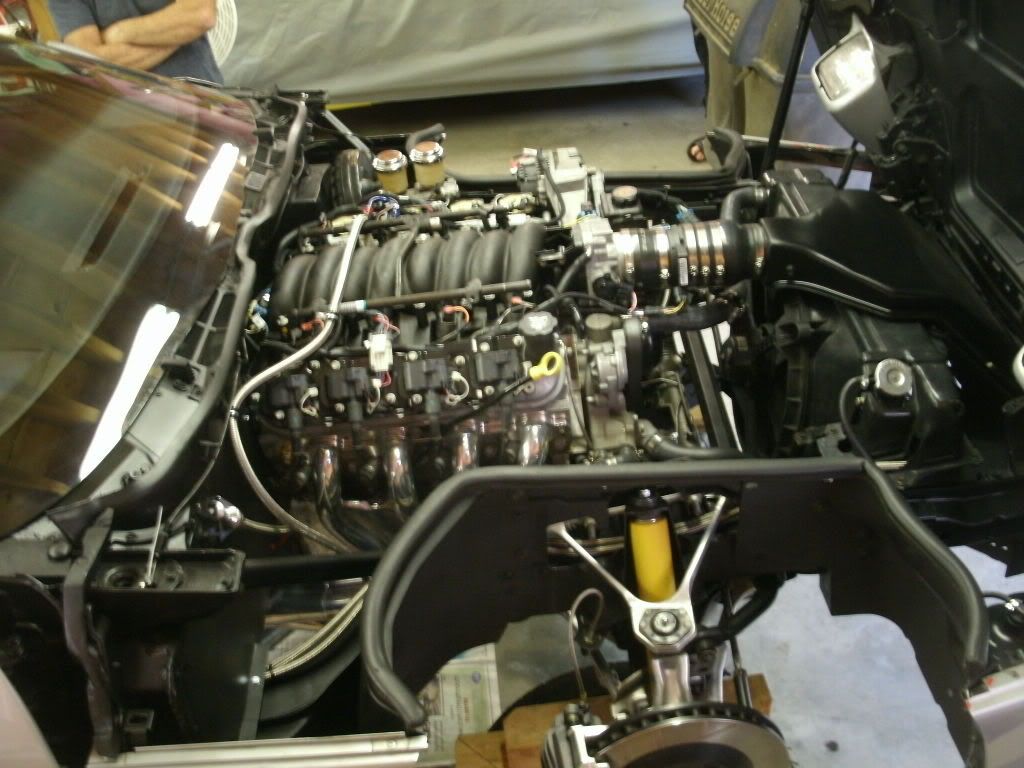
08-22-2011, 09:39 PM
#3
Instructor
Thread Starter
My power steering hose was shot. I replaced it with a braided unit from drm motorsports. While I was at it I also replaced the leaking steering rack with a rebuilt unit. The braided power steering hose fit perfectly and eliminated all the bending others have had to do to get the oem power steering hose to work. 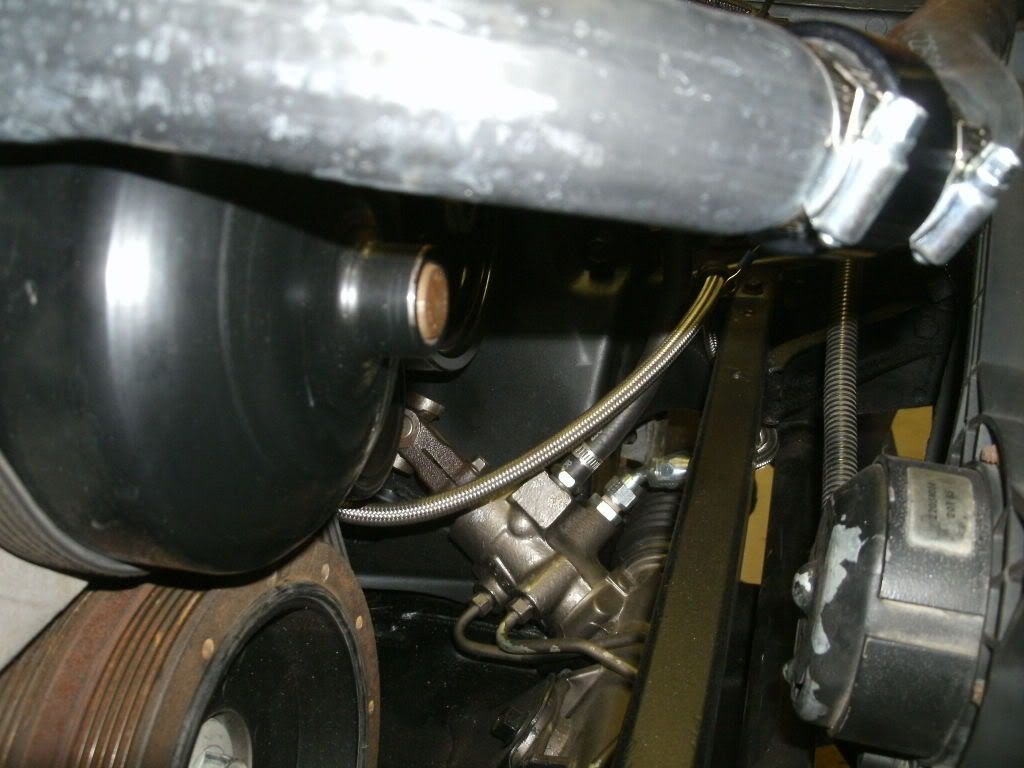
08-22-2011, 09:45 PM
#4
Instructor
Thread Starter
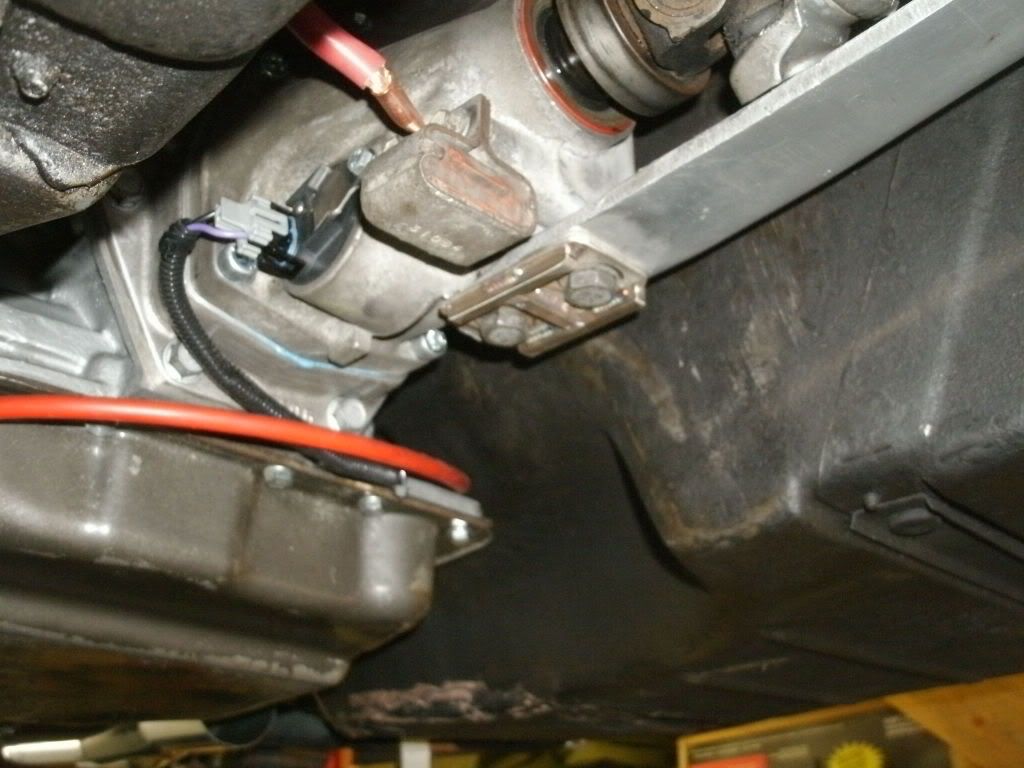
Here you can see the melrose headers. Other things I have here are braided -6an lines to my transmission cooler, a stock c5 fuel pump+regulator with braided -6an lines and russell fuel fittings as well as a lokar firewall mount 4l60e transmission dipstick. Originally I bought a rigid locking dipstick that mounts on the bellhousing from another company, but I'm not sure I would be able to make it fit and since I had so much space on the firewall anyway without the ac/heater box I decided to utilize the firewall mounted braided dipstick instead. Underneath the spark plug nearest the firewall you can almost see the autometer 2277 adapter and 2259 water temperature sending unit I used to send the signal to the temperature gauge. The Pcm gets its signal from the stock sending unit located towards the front on the drivers side cylinder head. Because I had no heater box in the way I had plenty of room to put the auto meter adapter and sending unit on the passenger side. No drilling or thread taping was required with the adapters. 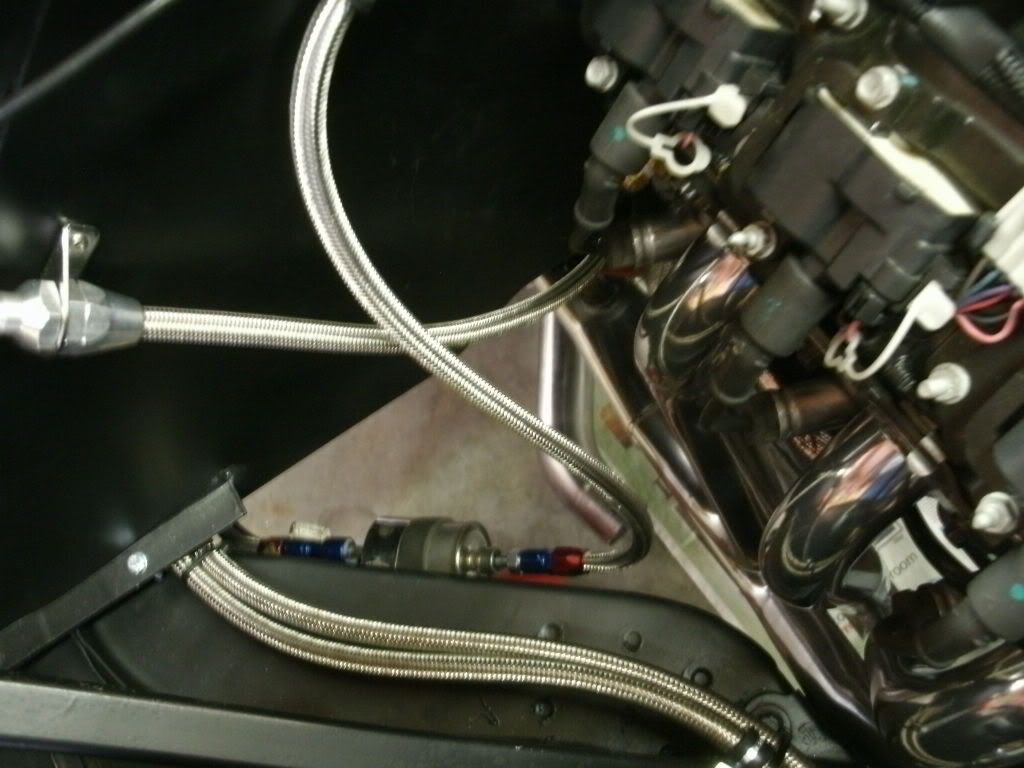
Last edited by cttech455; 08-22-2011 at 10:54 PM.
08-22-2011, 09:54 PM
#5
Instructor
Thread Starter
Heres a view from under the car. I used an advance adapters 6 to 4 bolt adapter to mount a standard corvette 700r4 tailhousing to my 4l60e. The speed sensor is a 94-96 corvette vss that works with the standard 40 tooth 4l60e reluctor ring. I did have to remove a little material from the tailhousing so the reluctor would not rub and also used a 3 jaw gear puller to pull the reluctor ring back about a 1/4 inch. I also used a cutoff wheel to shorten the 4l60e tailshaft 3/4 of an inch. The driveshaft is the stock 1985 manual unit and the c beam is as well. I did need to redrill the holes on the c beam 1/2 inch shorter as the holes in the beam were too long. (spacing to far between holes at tailhousing and holes at differential. Note the beam plates purchased from zfdoc
Last edited by cttech455; 08-23-2011 at 10:46 AM.
08-22-2011, 09:57 PM
#6
Instructor
Thread Starter
The dana 44 was rebuilt with 3:75 gears. Good thing to as one of the bearing caps was cracked unknown to me. some of the suspension components were replaced by parts from vbp. (strut rods, stabilizer bars) Note the magnaflow 92-96 corvette 3 inch exhaust kit I will install this week.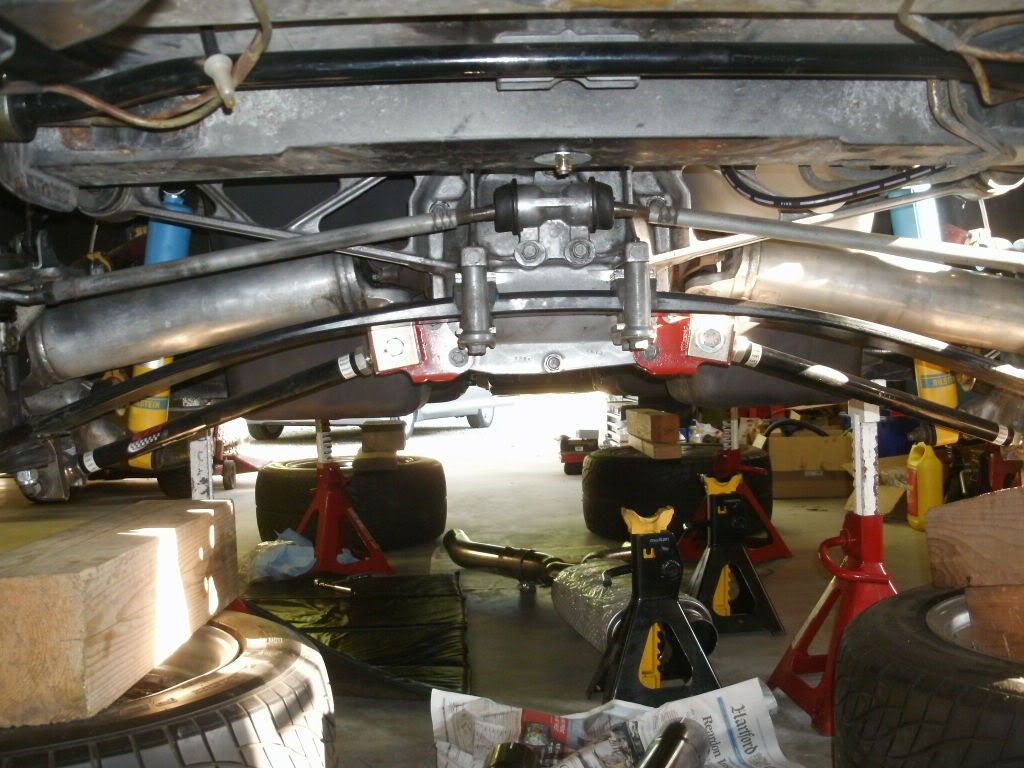
 08-22-2011, 10:03 PM
#9
Instructor
Thread Starter
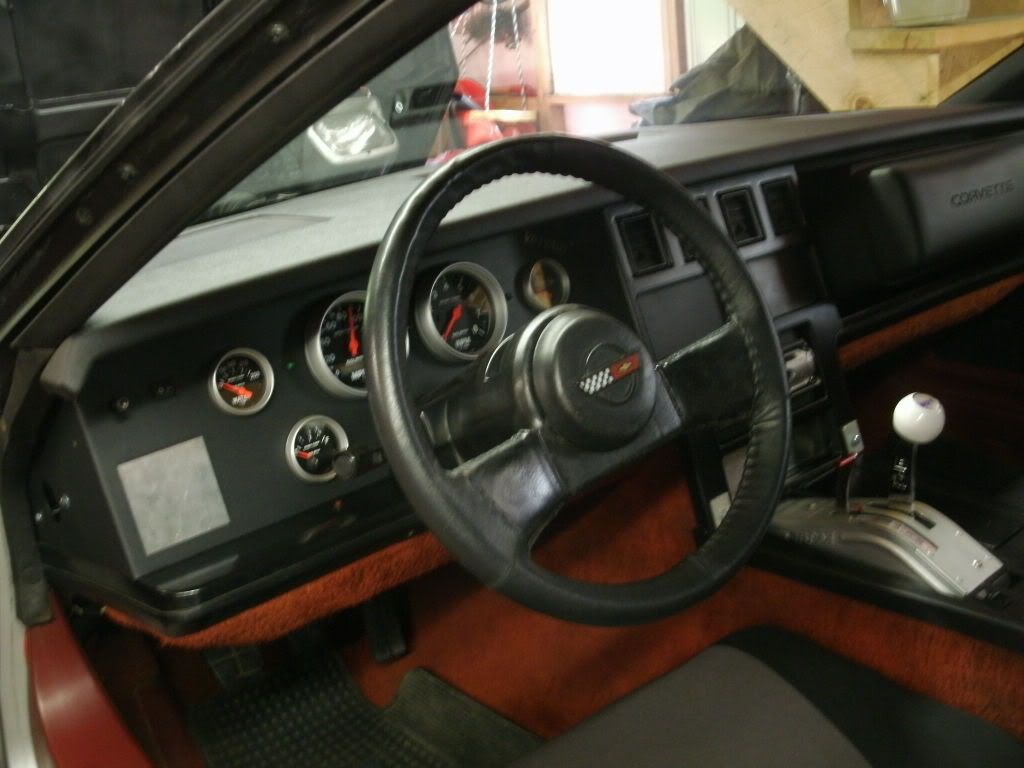
Vettaid gauge cluster. Not quite done with the interior. I used a b&m pro ratchet shifter. Some of the interior pieces are cracked. I put a dash cap over the original dash. Jody at vettaid constructed my wiring harness to work with this guage kit.
Last edited by cttech455; 08-31-2011 at 10:22 AM.
08-22-2011, 10:09 PM
#10
Instructor
Thread Starter
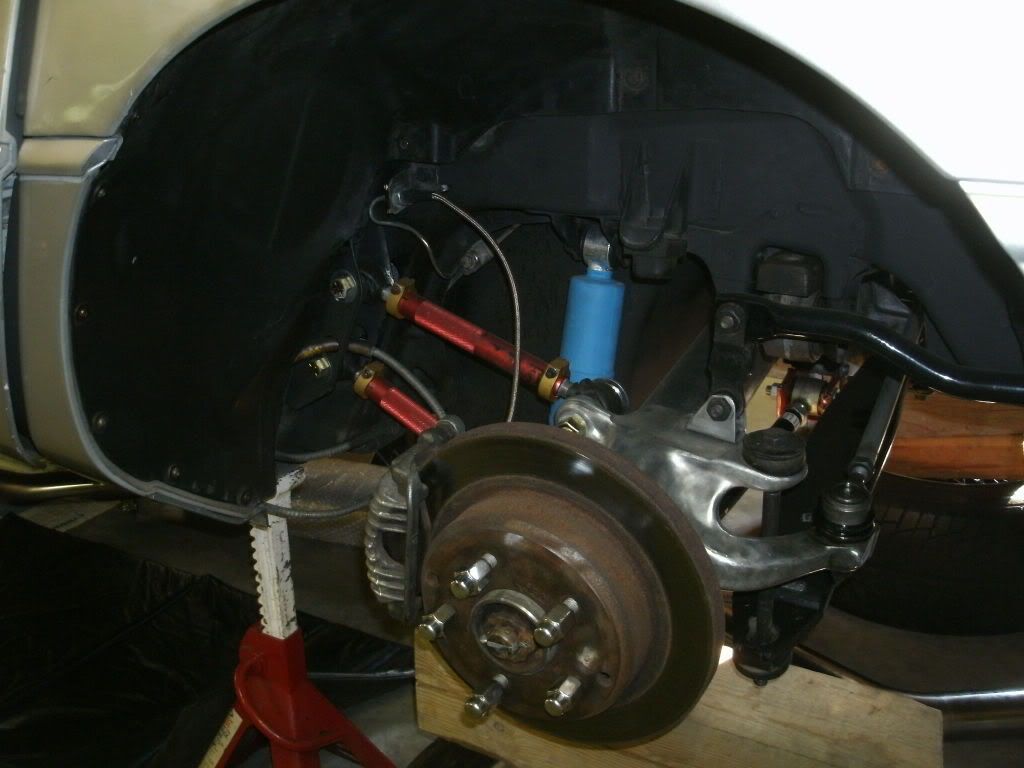
Picture from the front- I upgraded the front brakes with c5 rotors and calipers, braided lines, and a drm brake bias spring. I also installed a 32 mm front swap bar and global west upper and lower delrin control arm bushings. Relays for the fans are located on the firewall near where the battery used to be. 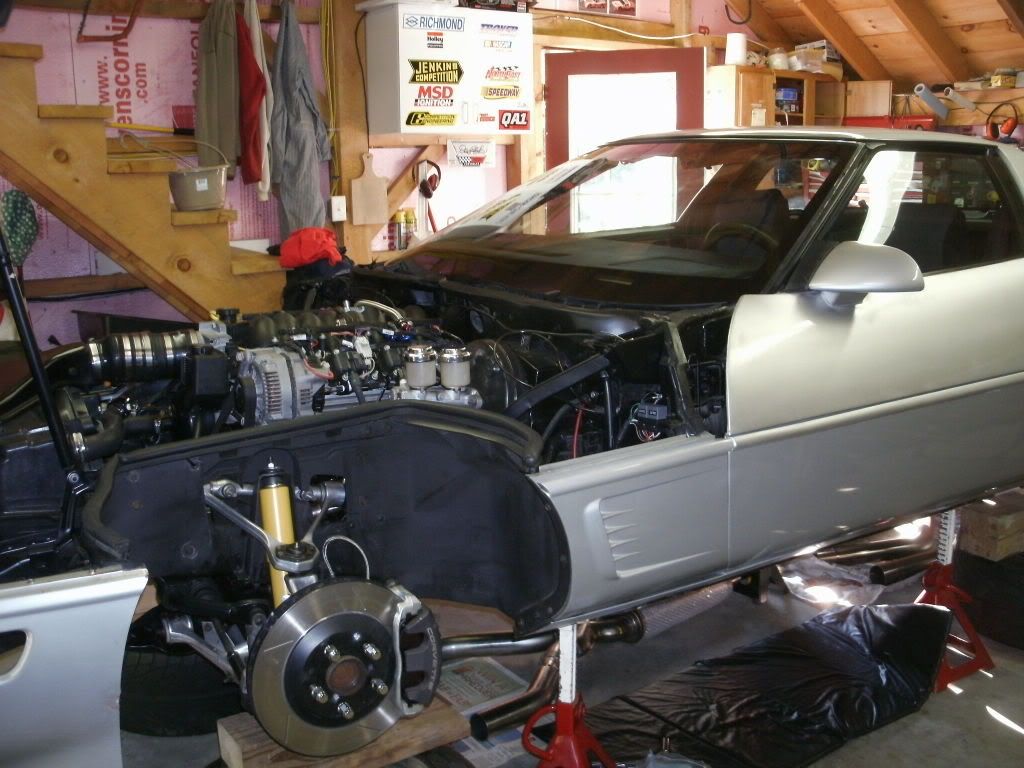
08-22-2011, 10:15 PM
#11
Instructor
Thread Starter
View from the rear of the vehicle. The wheels in the pictures are going to be replaced by a set of ccw classics I had built for me to the correct offsets of an 84-87 corvette. I am going to be running 275 width in the front and 315 in the rear. I will take some pictures of these wheels on the car after I install the exhaust and lower it to the ground.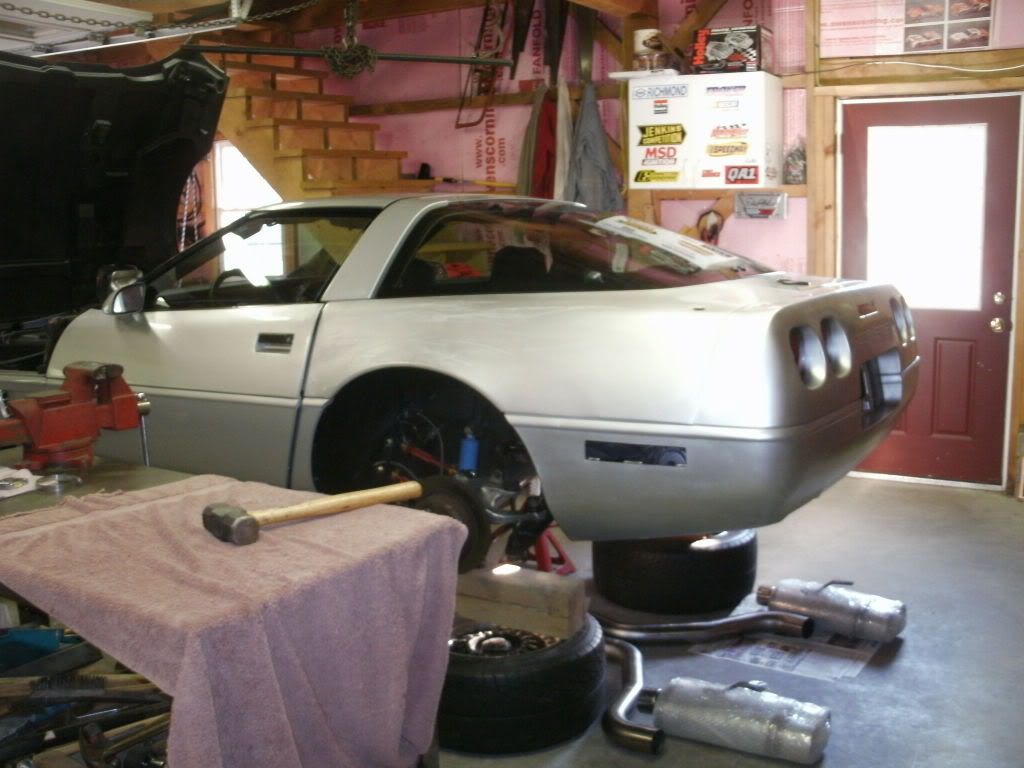
08-22-2011, 10:23 PM
#12
Team Owner


Member Since: Aug 2005
Location: Riverside County Southern California
Posts: 34,988
Received 501 Likes
on
342 Posts
Co-winner 2020 C4 of the Year - Modified
2018 Corvette of Year Finalist
2017 C4 of Year
2016 C7 of Year Finalist
St. Jude Donor '09-'10-'11-'12-'13-'14-'15-'16-'17-'18-'19-'20


Looks like a great project and I know you have a smile from ear to ear. I see you bought the Magnaflow Performance Exhaust. Soon, you will wish you bought the Corsa. It drones at low RPMS or highway speeds. I know the LS6 has a different firing order or it is a different engine and it may not do it.
Good luck with the build up, keep this up and Im subscribed.
Good luck with the build up, keep this up and Im subscribed.
08-22-2011, 10:32 PM
#13
Instructor
Thread Starter
A few notes:
I decided to use the corvette drive by wire system for throttle control. I had no problems obtaining a used used 1997-2004 pedal, but the 1997-2004 tac module was another story. I called multiple corvette salvage yards, searched parts for sale sections of this and other forums and even placed 2 orders for the part new. They are on a nation wide back order from gm and I wonder if they what is going to happen with the part support on these c5 corvettes since they will be past the 8 year old mark soon. Jody from vettaid was nice enough to part with the last one he had to complete my project. He was a huge help in the completion of this vehicle and answered any questions I had sometimes spending upwards of an hour on the phone. In addition to the wiring harness and gauge kit, he also sent me brackets for my tac module, pcm, fan relays, and a block off plate for the center dash that replaced the panel on the left of the tell tale section that had the switches for the digi dash.
I decided to use the corvette drive by wire system for throttle control. I had no problems obtaining a used used 1997-2004 pedal, but the 1997-2004 tac module was another story. I called multiple corvette salvage yards, searched parts for sale sections of this and other forums and even placed 2 orders for the part new. They are on a nation wide back order from gm and I wonder if they what is going to happen with the part support on these c5 corvettes since they will be past the 8 year old mark soon. Jody from vettaid was nice enough to part with the last one he had to complete my project. He was a huge help in the completion of this vehicle and answered any questions I had sometimes spending upwards of an hour on the phone. In addition to the wiring harness and gauge kit, he also sent me brackets for my tac module, pcm, fan relays, and a block off plate for the center dash that replaced the panel on the left of the tell tale section that had the switches for the digi dash.
08-22-2011, 10:37 PM
#14
Instructor
Thread Starter
I like the 3 inch stainless tubing of the magnaflow unit. I am going to be replacing the resonator in the kit with sections of straight 3 inch stainless tubing I bought. Not sure what it will sound like yet but if its bad I suppose I can always make changes down the road.
Last edited by cttech455; 08-22-2011 at 10:59 PM.
08-23-2011, 10:28 PM
#15
Le Mans Master


Member Since: Feb 1999
Location: levittown pa. usa Even a bad day with my `Vette, is better than a good day at work
Posts: 6,470
Likes: 0
Received 2 Likes
on
2 Posts
St. Jude Donor '10
Very impressive! 

PS: I wish I was half as talented as you & many others on this great forum.
PS: I wish I was half as talented as you & many others on this great forum.

 08-24-2011, 07:51 PM
#18
Instructor
Thread Starter
Thanks guys. I ordered all the exhaust hangers from a 92-96 car to mount the exhaust, unfortunately much of it is back ordered untill september 1. Thats delaying things a bit.
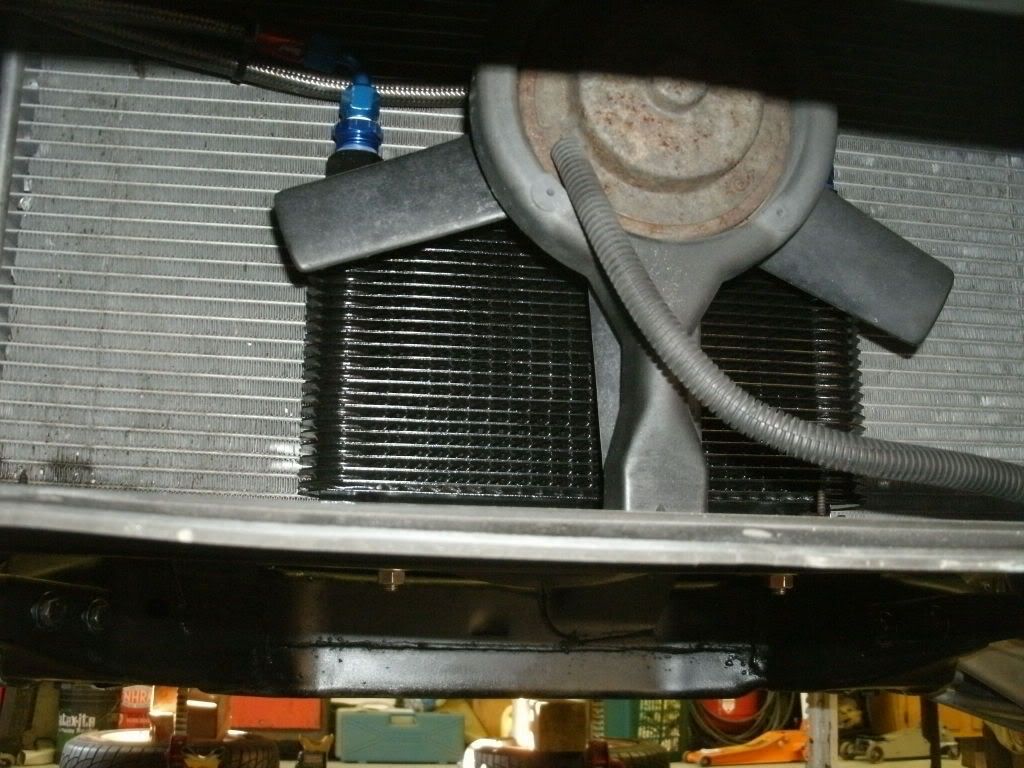
08-24-2011, 09:13 PM
#19
Instructor
Thread Starter
Heres an ugly picture. My car came with the optional auxillary fan. I mounted the transmission cooler behind it, using the fan to create additional airflow. Despite its rickety appearance the fan works just fine. The B&M super cooler uses 1/2 npt fittings. I used 1/2 inch to -6an adapters and 90 degree -6an hose ends.