Replacing 85 Corvette Steering Wheel
 02-29-2012, 09:56 PM
#1
Heel & Toe

Thread Starter

Member Since: Feb 2012
Posts: 24
Likes: 0
Received 0 Likes
on
0 Posts
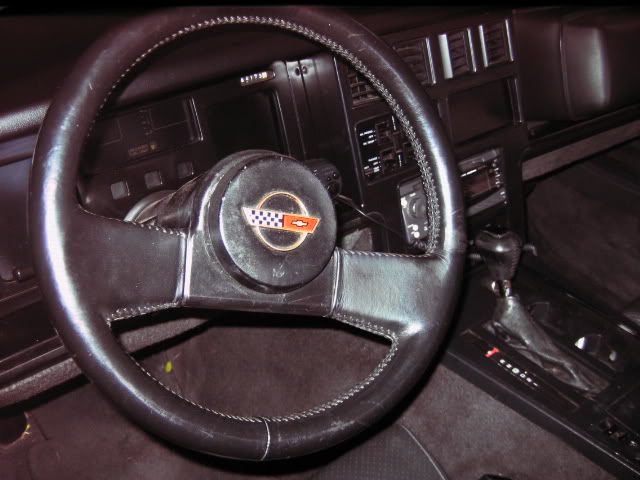
Hi all, my 1985 corvette has a pretty worn out steering wheel.
I could just buy a replacement for it but I was wondering it its possible
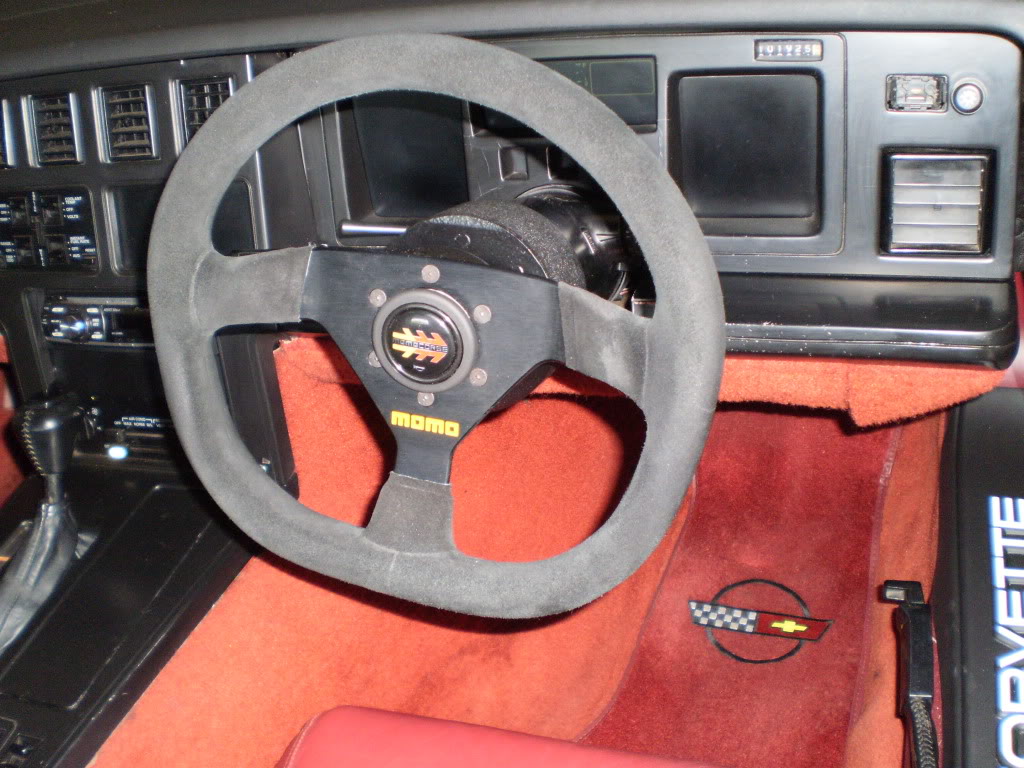
to mount a new style steering wheel, like a momo model?
I think these look way nicer/have a better feel.
Has anyone done this? Or can anyone point me in the right direction for this?
Thanks
I could just buy a replacement for it but I was wondering it its possible
to mount a new style steering wheel, like a momo model?
I think these look way nicer/have a better feel.
Has anyone done this? Or can anyone point me in the right direction for this?
Thanks
 03-01-2012, 12:21 AM
#3
13/16 socket remove steering wheel nut
UN hook the horn lead
You need a 2 slot puller
The steering wheel is off.. I have a moma corse had it in my TA
No problem in your 85 if I did not have a air bag setup I would install it in my 94
UN hook the horn lead
You need a 2 slot puller
The steering wheel is off.. I have a moma corse had it in my TA
No problem in your 85 if I did not have a air bag setup I would install it in my 94
 03-03-2012, 12:29 PM
#7
Le Mans Master


I put a momo on my 86, potentially the easiest thing I have ever done on the car. Only one problem, the new wheel looks so good the rest of the car looks older... 
03-03-2012, 12:56 PM
#8
Heel & Toe
Thread Starter
Member Since: Feb 2012
Posts: 24
Likes: 0
Received 0 Likes
on
0 Posts
03-03-2012, 01:37 PM
#9
Le Mans Master
Momo 2702. Retains telescope. The only problem with it is it is rather large in diameter and with my 330mm steering wheel it looks a bit bulky (I believe larger steering wheels have larger center sections.) I have a Mod 78 for a wheel. I believe this is the same adapter pictured above.
How I remember the install
Set wheel perfectly straight
Remove horn button.
UN hook the horn lead
Remove the telescope handle screw, handle and retainer plate and two screws.
13/16 socket remove steering wheel nut Nice memory Admiral, it was a 13/16 socket IIRC, loosen the nut and then leave on the end of the shaft
You need a 2 slot puller If you have a balancer puller all you need is the right bolts, 5/16-18, I used a pair of 4" bolts. Make sure that the end of the puller doesn't go into the shaft and mess up the internal threads, it should sit flush against the end of the shaft/nut. After a few turns of very light torque the steering wheel should pop loose.
Take off the puller and remove the nut and the steering wheel.
Remove the spring from the back of the old steering wheel. This will install on the new adapter.
If 2702 there is a plastic piece on the bottom and you can press the wide end of the spring onto it while turning the spring so that it "locks in" (It will stay when bolted on and the spring is compressed." The spring has a piece on the end bent up. The adaptor has a small brass stud the spring needs to make contact with. Turn the spring until there is about 1/4" between the bent part of spring and the metal casting holding the brass stud. You want the spring touching the brass stud but not the body, if it touches the adaptor body your horns will constantly blow.
Install the adaptor onto the steering column and lightly set the nut. (You'll retorque after verifying that the wheel is straight. I believe GM says 40lbft of torque.)
Re-install the telescope handle. I set it so that it feels pretty firm with about 1/2" of travel left. This will make sense once you have it in your hands.
The steering wheel bolts to the adapter with some allen screws. These don't need to be crazy tight. Just german spec, guten tight.
Drive around and verify it is straight. Torque column nut.
Install the horn button. Mine came with a wire and no wire exposed. Ours function by connecting the wire from the adapter and making contact to ground through the adaptor. (1 wire style). There is gold wire inside the button that needs to be fed out and bent slightly so it makes contact with the side of the adaptor. Depress the tabs on the underside of the horn button to release the button cover and then you can feed some of the wire out and bend it. Your instructions should illustrate the bend shape and placement and also where the 1 wire should go. Replace the horn button cover, connect wire and check horn (key on).
Easy and you can do the whole thing just sitting in the seat with a 13/16" socket a couple of wrenches for the puller and phillips screw driver.
Enjoy.
Last edited by USAsOnlyWay; 03-03-2012 at 02:08 PM.
03-04-2012, 06:01 AM
#10
Melting Slicks

Momo 2702. Retains telescope. The only problem with it is it is rather large in diameter and with my 330mm steering wheel it looks a bit bulky (I believe larger steering wheels have larger center sections.) I have a Mod 78 for a wheel. I believe this is the same adapter pictured above.
I bought 2 and neither of them fitted, they came in the momo box etc but when i took them to an engineer i know he said they were prob made in asia somewhere, he re-machined the inside of one and it fitted, but I could not get the telescope lever to fit thru the top hole but i dont need it anyway with the flat bottom on the wheel
 03-04-2012, 11:48 AM
#11
Le Mans Master
That really stinks blackoz, I wonder if you actually have a different size spline on your steering column with it being right hand drive and all? That would be a pita!
03-05-2012, 06:25 AM
#13
Melting Slicks
it was only a poofteenth of an inch but enough to refuse to go on, apparantly thats what happens if they are taken out of the mould too quickly - they continue to cool and shrink too much (thats what i was told anyway !)
03-05-2012, 11:56 AM
#14
Le Mans Master
I hate poofteenth of an inch clearance issues! 
That really stinks, I wonder what the heck was going on that the telescope didn't fit as well. Did he try flipping the lever? I think it may have to install flipped 180 degrees, but it fits fine. I don't know or maybe they picked up QC since then.
Grant stuff was a lot cheaper but IMO you could see and feel the difference. But both should be a similar difficulty to install...assuming the parts aren't bad.
06-25-2012, 03:14 PM
#15
Instructor

Ok, figured out how to remove the horn button. The contact plate and arms had corrosion on them. Slid a piece of sand paper between the two pieces and the contact points in the steering wheel housing and now my horn works fine. Wimpy, but fine..
Last edited by hotrodbob01; 06-25-2012 at 04:01 PM.
06-25-2012, 05:18 PM
#16
Race Director


 06-26-2012, 08:18 AM
#17
Melting Slicks
 06-26-2012, 09:25 AM
#18
Race Director
07-02-2012, 05:22 PM
#19
Instructor
Member Since: Aug 2011
Location: Te Kauwhata New Zealand
Posts: 200
Received 0 Likes
on
0 Posts

I also have a steering wheel in poor condition.
I did a search on Ebay and found a few replacements including a brand new after-market, NRG/JDM.
I am wondering what your views are on this one? I have included a link to the page.
One concern is I don't know if the extend/colapse control on the column will work if I was to fit it.
Regards Kevin.
http://www.ebay.com/itm/NRG-JDM-COMB...42169640831197
