started out with widebody..now complete redo
 09-06-2014, 06:51 PM
#41

hey guys i could really use some help on the previous post regarding the bushings. I'm lost it just doesn't seem right.
i did some painting today. i took a part into the sunlight so you guys could see the color it is.
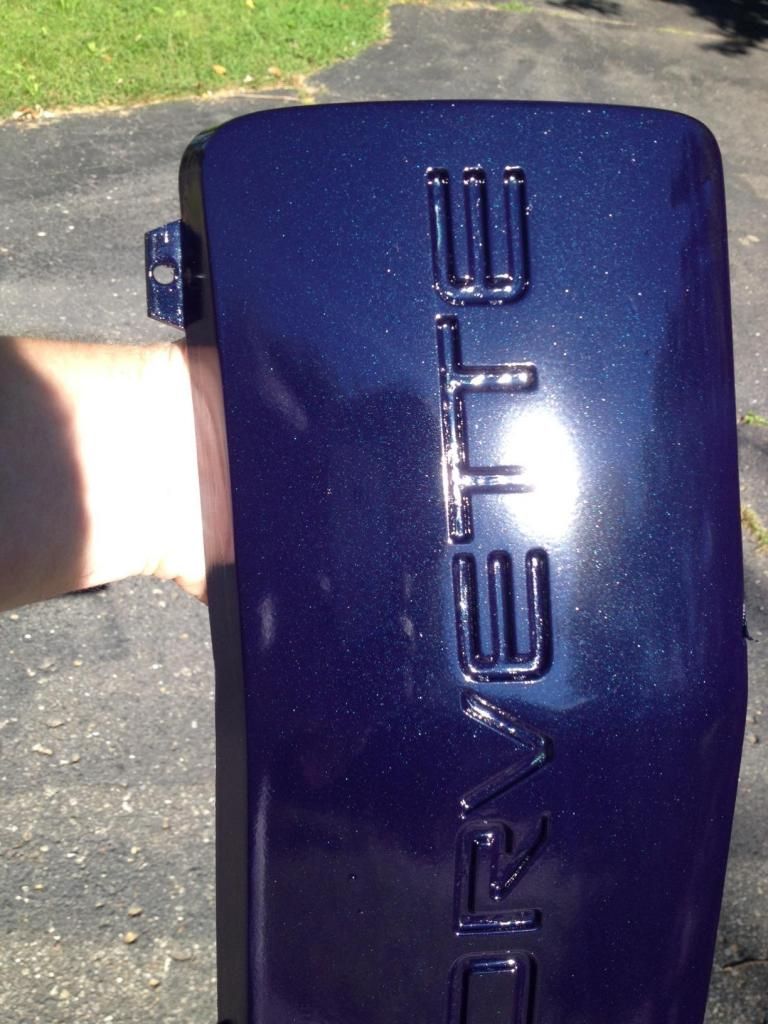
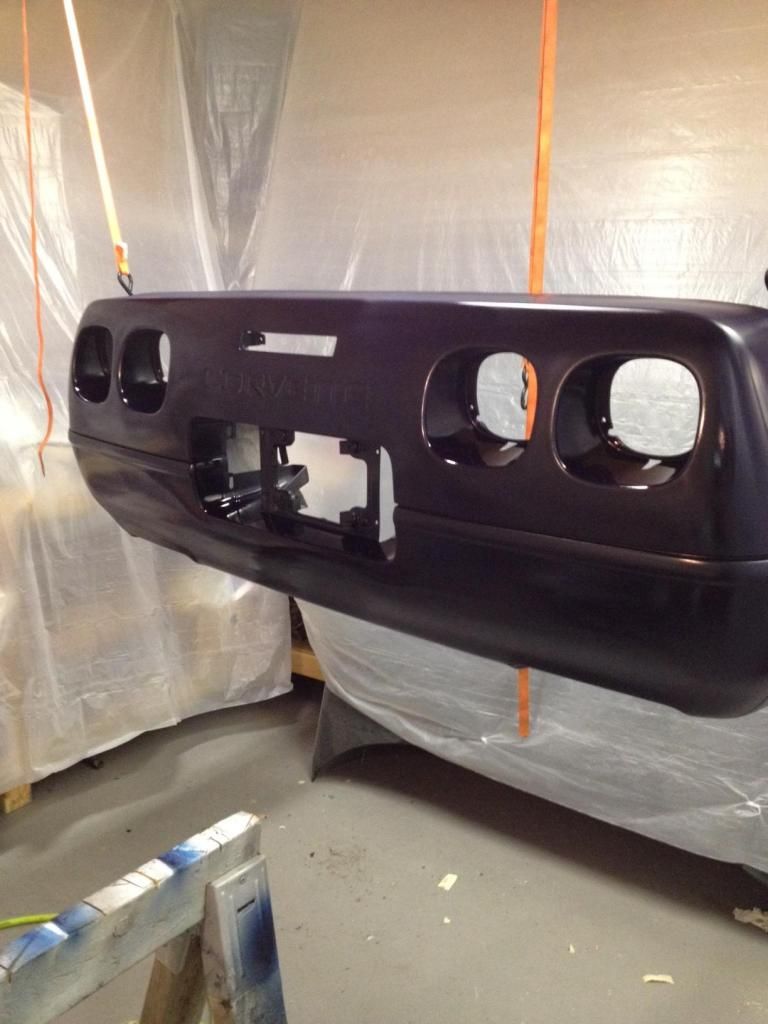
i did some painting today. i took a part into the sunlight so you guys could see the color it is.


 09-06-2014, 09:05 PM
#43
09-06-2014, 10:22 PM
#45
Instructor

As you might have guessed by now, most of us here have not gone as far as you have in re-doing the suspension. Been checking all over the internet for an answer for you, but believe four sleeves sounds right...upper control arms and rear spindle arms.
In your pictures, it looks like you have four sleeve bushings of similar diameter, but two different thicknesses. When you disassemble the existing ones, can you compare to see which ones match?
Wish I have better advice...hoping someone with experience will step up real soon.
In the meantime, here are some links I found on the net. Take a look through them and see if anything in these threads or pics might jog your memory as to how it goes together. With a little luck, your answer might become obvious. If not, I do apologize as I am no expert, just trying to help
Another possibility is to PM one of the posters in the following Corvette Forum threads (that claims to have done this) and see what input they might offer.
http://tech.corvettecentral.com/2013...sion-overview/
https://www.corvetteforum.com/forums...g-r-and-r.html
Front:
https://www.corvetteforum.com/forums...-bushings.html
Last edited by LANDSHARK1; 09-06-2014 at 10:25 PM.
09-06-2014, 10:26 PM
#46
09-06-2014, 10:31 PM
#47
As you might have guessed by now, most of us here have not gone as far as you have in re-doing the suspension. Been checking all over the internet for an answer for you, but believe four sleeves sounds right...upper control arms and rear spindle arms.
In your pictures, it looks like you have four sleeve bushings of similar diameter, but two different thicknesses. When you disassemble the existing ones, can you compare to see which ones match?
Wish I have better advice...hoping someone with experience will step up real soon.
In the meantime, here are some links I found on the net. Take a look through them and see if anything in these threads or pics might jog your memory as to how it goes together. With a little luck, your answer might become obvious. If not, I do apologize as I am no expert, just trying to help
Another possibility is to PM one of the posters in the following Corvette Forum threads (that claims to have done this) and see what input they might offer.
http://tech.corvettecentral.com/2013...sion-overview/
https://www.corvetteforum.com/forums...g-r-and-r.html
Front:
https://www.corvetteforum.com/forums...-bushings.html
In your pictures, it looks like you have four sleeve bushings of similar diameter, but two different thicknesses. When you disassemble the existing ones, can you compare to see which ones match?
Wish I have better advice...hoping someone with experience will step up real soon.
In the meantime, here are some links I found on the net. Take a look through them and see if anything in these threads or pics might jog your memory as to how it goes together. With a little luck, your answer might become obvious. If not, I do apologize as I am no expert, just trying to help
Another possibility is to PM one of the posters in the following Corvette Forum threads (that claims to have done this) and see what input they might offer.
http://tech.corvettecentral.com/2013...sion-overview/
https://www.corvetteforum.com/forums...g-r-and-r.html
Front:
https://www.corvetteforum.com/forums...-bushings.html
 if i do a search for the bushings i get the same bushings i got ... Ive gotta be missing something i just dont know what.
 I am just getting started with this car and im already getting hung up .... On bushing
lol
09-06-2014, 10:35 PM
#48
Safety Car

When I purchased my bushings I didn't buy a full set. I purchased them individually. Maybe your set covers different years and they give you different sizes? Just guessing there. Do you still have your old sleeves for comparison?
09-06-2014, 10:43 PM
#49
Safety Car
Also, I found it easier to install the sleeve into one of the bushing halves first. Then place it in the dogbone, trailing arm, whatever and then press the other bushing half on. Rather than putting both halves on and pushing the sleeve through.
09-06-2014, 10:50 PM
#50
I was thinking the same thing. So a bushing in a bushing .. I cant fit it into the bracket now because the lip on the inner bushing. This has got to be a child proof set up ... Thus my failure lol
09-06-2014, 11:10 PM
#51
Safety Car
When you go to re-assemble your suspension it will be a LOT tighter of a fit with the new bushings installed. Just be careful you don't tear any if you have some tight spots. I used the lube on both the outside of the bushing AND where they were sliding into to help it slide into place easier. Prying with a long screwdriver or 1/4" ratchet extension helps line up the bolt hole on tough ones.
09-07-2014, 04:00 PM
#53
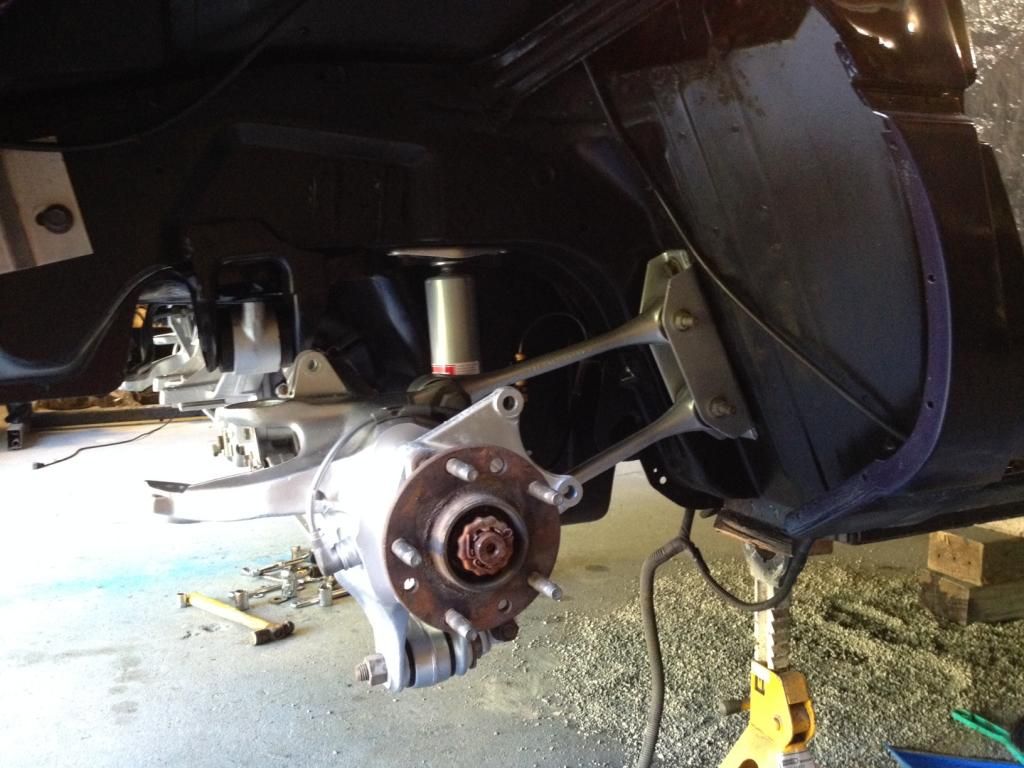
finaly figured it out... i'm an idiot. i went and dug out the old sleeves and they worked fine. not sure what all the other poly bushing are for that came with the kit now. anyway, put the rear back together and it is in the car  i like the silver against the black paint on the underbody
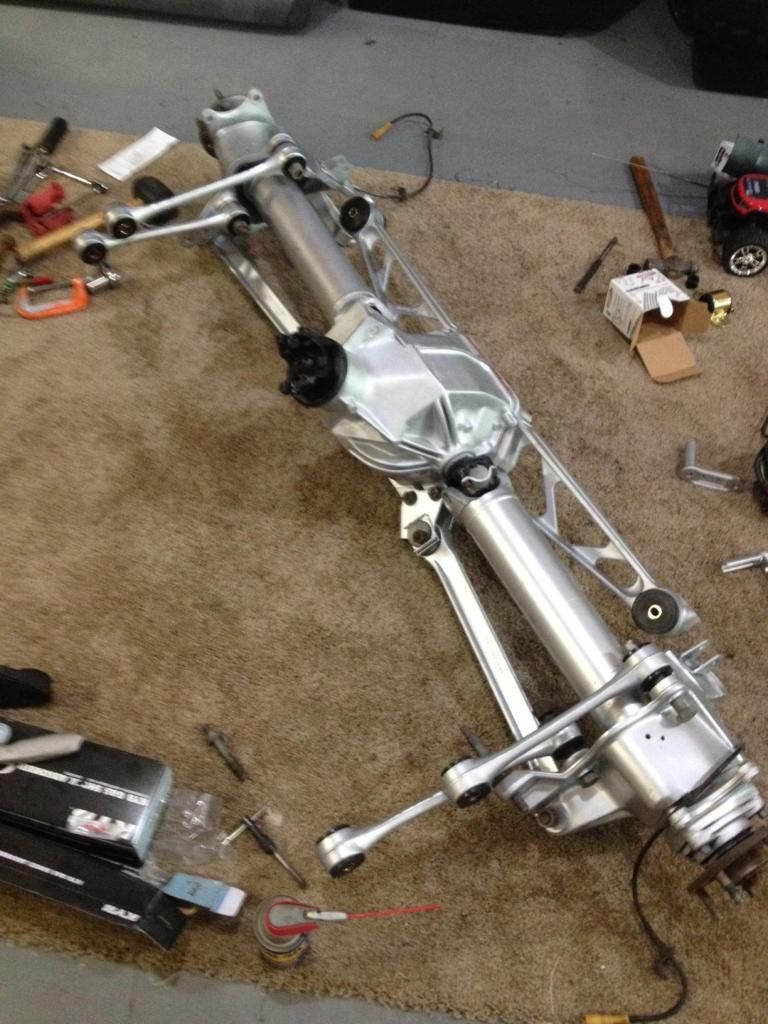
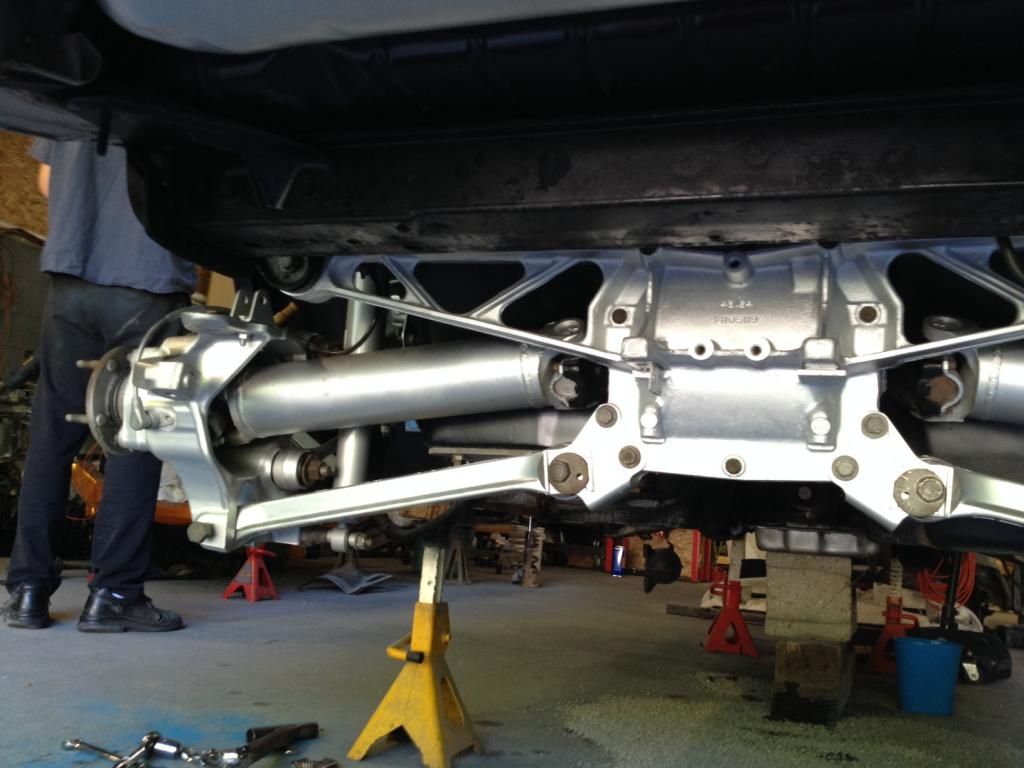
i like the silver against the black paint on the underbody 


 09-07-2014, 09:15 PM
#58


 09-08-2014, 06:20 PM
#60