86 sun visor repair vs replace
 07-31-2015, 12:18 PM
#1
Burning Brakes

Thread Starter

Go ahead, call me cheap, but $80 to replace the visors on my 86 is too steep. Anyone have experience replacing the cloth on them that rots out after the last 29 years?
 07-31-2015, 01:04 PM
#2
Le Mans Master


 07-31-2015, 01:55 PM
#4
Melting Slicks

I thought about that also for my 88. You can drive by a car/boat upholstery shop for a quote. The ridged material (the ears) on my 88 outer side flopped badly so I just bought a new set that came with LED lights but the manufacture that installed the electrical to the LED bulbs wired it differently so I had to spend an extra hour reversing the harness wiring on the car at the top of the A-pillar during installation . No way was I going to cut the visor wiring harness to reverse the 2 wires, kills any Warranty. The LEDs were put in such a way that they could not be removed, they were wired in. Just so you know if you buy new ones and the lights don't work. I paid close to $150 for a set, Vette Works International. Had I know all this before hand I would have gone an got a quote and changed the old bulbs to LEDs after new material was put on.
Last edited by HAD2HAV2; 07-31-2015 at 01:57 PM.
 08-03-2015, 12:47 PM
#6
Burning Brakes
Thread Starter
Not a pair for $80, sorry. ONE for $80. Yeah, so a pair is $160+shipping/tax. And it doesn't do a dang thing for performance or function. I hate to think of gluing something on there and it looking crappy, but it looks pretty bad (to me) now.
I may look for material and see if the wife would be willing to stitch something on. An upholstery shop MAY be able to beat that $80 price if I supply the material.
I may look for material and see if the wife would be willing to stitch something on. An upholstery shop MAY be able to beat that $80 price if I supply the material.

 08-03-2015, 06:16 PM
#9
Le Mans Master
08-03-2015, 10:51 PM
#10
Race Director


Remove those po$ and throw them in the garbage.
That's what I did on my 93 very and never been happier.
Just make sure you have sunglasses (and a backup pair of sunglasses).
You'll have to trust me the results are worth it. More field of view too under all driving. Conditions without those things in he upper quadrants of your sight
That's what I did on my 93 very and never been happier.
Just make sure you have sunglasses (and a backup pair of sunglasses).
You'll have to trust me the results are worth it. More field of view too under all driving. Conditions without those things in he upper quadrants of your sight

The following users liked this post:
krackenvette (12-03-2021)
08-04-2015, 04:24 PM
#11
Burning Brakes
Thread Starter
*gag*
08-04-2015, 04:27 PM
#12
Burning Brakes
Thread Starter
Remove those po$ and throw them in the garbage.
That's what I did on my 93 very and never been happier.
Just make sure you have sunglasses (and a backup pair of sunglasses).
You'll have to trust me the results are worth it. More field of view too under all driving. Conditions without those things in he upper quadrants of your sight
That's what I did on my 93 very and never been happier.
Just make sure you have sunglasses (and a backup pair of sunglasses).
You'll have to trust me the results are worth it. More field of view too under all driving. Conditions without those things in he upper quadrants of your sight
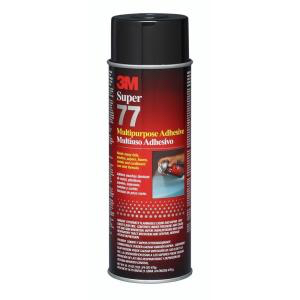
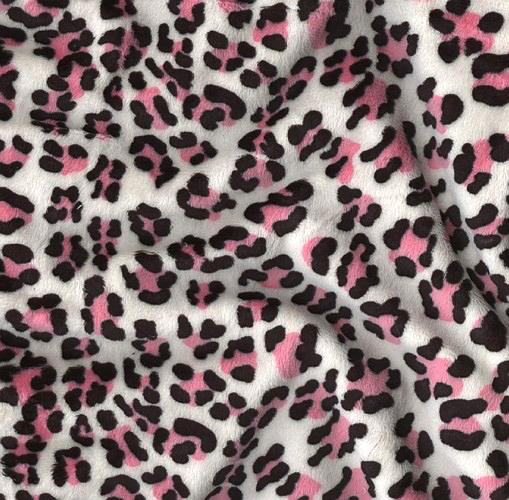
Although DT was joking about the pink cheetah print, I DO actually have a can of spray-on contact cement. Spray and pray, I say. In order to retain the original shape, I am thinking any replacement material should go over the original material and foam. The foam is deteriorating and coming out of a hole in the cloth, so I'm once again forced to fix something when I have 20 other projects to do first (ever restore a sailboat?).
08-04-2015, 06:12 PM
#13
Melting Slicks
I removed mine as well. I'm not overly tall, I'm 6'1" , but I definitely gained visibility with them removed. Don't want to go back.
Bring sunglasses
Also, most phones have forward facing cameras, so there's her vanity mirror!
Bring sunglasses
Also, most phones have forward facing cameras, so there's her vanity mirror!
08-04-2015, 06:41 PM
#14
Race Director
Member Since: Jan 2000
Location: Owings Mills, MD 21117
Posts: 16,872
Likes: 0
Received 3 Likes
on
3 Posts

 I have the "floopy ear" syndrome with the factory sun visors on my otherwise pristine Ruby. I think GM used a cardboard inside similar to what is in the packaging of a new shirt.
  I don't think I can even find the factory correct ones with the mirror and vanity light, so just dealing with it, unless someone has a fix similar to the lumbar support motors for less then a buck.
08-06-2015, 04:00 PM
I don't think I can even find the factory correct ones with the mirror and vanity light, so just dealing with it, unless someone has a fix similar to the lumbar support motors for less then a buck.
08-06-2015, 04:00 PM
#15
Burning Brakes
Thread Starter
I'd like one of those "less than a buck" fixes.
Wifey says glue felt on the bad side. Hmm. Pondering it.
Wifey says glue felt on the bad side. Hmm. Pondering it.
08-06-2015, 06:52 PM
#16


I've been working on a solution to floppy sun visors, I found that 00-05 Impala visors are a good match. I've been working on the mounting part. They do snap up strongly, I need that with my 84 z51.
08-12-2015, 10:20 AM
#17
Burning Brakes
Thread Starter
Good point, With the top off, it needs to be a little more firm than "normal" cars.
10-10-2015, 06:25 AM
#18
Melting Slicks

I just did one from an '85. It didn't have the mirror so re-covering it was easy. Since it didn't have the mirror the visor slid off the rod. I used a razor blade and cut the stitching between the front and back. It opens like butterfly wings. I removed the cardboard and traced the outline on some cardboard I got from a fabric supply shop that had the thin cardboard. I actually used an exacto knife and cut slits along the center of the cardboard. The slits are about a 1/4" long and about 1/2" wide along the center. If you click on the link below you see what it looks like where the visor spine folds over the hardboard. This made folding it over the visor hardboard easier. One thing I did learn was to fold the cardboard over the visor hardboard and trim the outline of the visor cardboard so the front and back are exactly the same. This makes sewing the visor closed easier. The entire edge or the visor match perfectly on the front and back with the stitches the same distance from the edge. Spray the 3M headliner adhesive per the instructions on the can and place the cardboard over the headliner material. I cut the headliner material about an inch larger than the cardboard and tried to follow the pattern from the old material. I had read in another post somewhere to separate the fabric from the foam backing on the headliner material. I did this and cut the foam flush with the cardboard. I sprayed some of the headliner adhesive in a small container and brushed the adhesive onto the cardboard about an inch or so all the way around the cardboard. I pulled the headliner fabric over the cardboard and stuck it to the glue. I didn't put any glue on the fabric. It held well. The rounded corners cause the fabric to bunch up a little but I was able to make it smooth around the corners. Place the hardboard back onto the cardboard and fold it over. The reason for removing the foam around the cardboard was to make the edges of the visor when it's folded over as thin as possible. I guess you don't have to trim the foam, the visor will just be thicker around the edge. I took it to an upholsterer and they stitched the visor around the 3 sides but didn't sew up the last inch where the visor folds over the hardboard. Once it's sewn you can cut a small slit where the visor rod is inserted in the hardboard clip. Just tuck the unsewn inch of the material into the visor like the original was. I know it's hard to follow what I've written but once you start to do this it makes sense. The fabric was about $15 for a yard but you only really need about 1/2 yard. It was cheap enough so I bought a yard in case I made a mistake. The cardboard is about $3 for an entire sheet which is way more than you need. You can probably use poster board from a craft store. The headliner adhesive spray is about $16 to $20 for a can at any parts store. This is an easy do it yourself project. If the visor has mirrors it's a little more work. I think I'm going to do one that has a mirror very soon so I might document it and post it here. I did the ones on my C5 with mirrors and they came out great. If you click here https://www.corvetteforum.com/forums...o-rebuild.html you'll see what I mean about not stitching the last inch and tucking in the fabric. On the C4 there is no rod sticking out the end near the mirror but it still needs to be tucked in.
Art
Art
Last edited by MrRenoman; 10-10-2015 at 06:42 AM. Reason: revision
The following users liked this post:
86C4Z51 (10-20-2015)
10-11-2015, 12:59 PM
#20
Melting Slicks

I got my pair for $115. I installed them and never looked back. Sometimes just spending the $$ and moving on is the best approach. Think of all the money that the time spent could bring you, if you focused on some other enterprise. Opportunity cost, they call it.