Doing your own paint
#1
Intermediate


Thread Starter

OK, So I have been able to get some solid help from thisforum, and I only find it fair that I give a little back. So this thread willdetail my painting adventures on my C4. Keep in mind a few things.
- I am not a professional painter, I am a Cop. Iam merely a goofball with a paint gun, some time, less experience, and a so so place to paint. This was my first repaint I have ever attempted on a car thatreally mattered to me. My background was dealing with custom choppers (smallareas), a couple jeeps (that were not super important because they were goingin the woods) and a few patrol Cars (not the entire cars, just the black partof the black and white paint scheme). So don’t beat me up too bad if you arereading this and are a professional painter.
- I am a horrible speller and can’t seem to catchmy own mistakes, so if you are a grammar professor or spell check police, I saysorry in advance, for this thread will frustrate you..lol
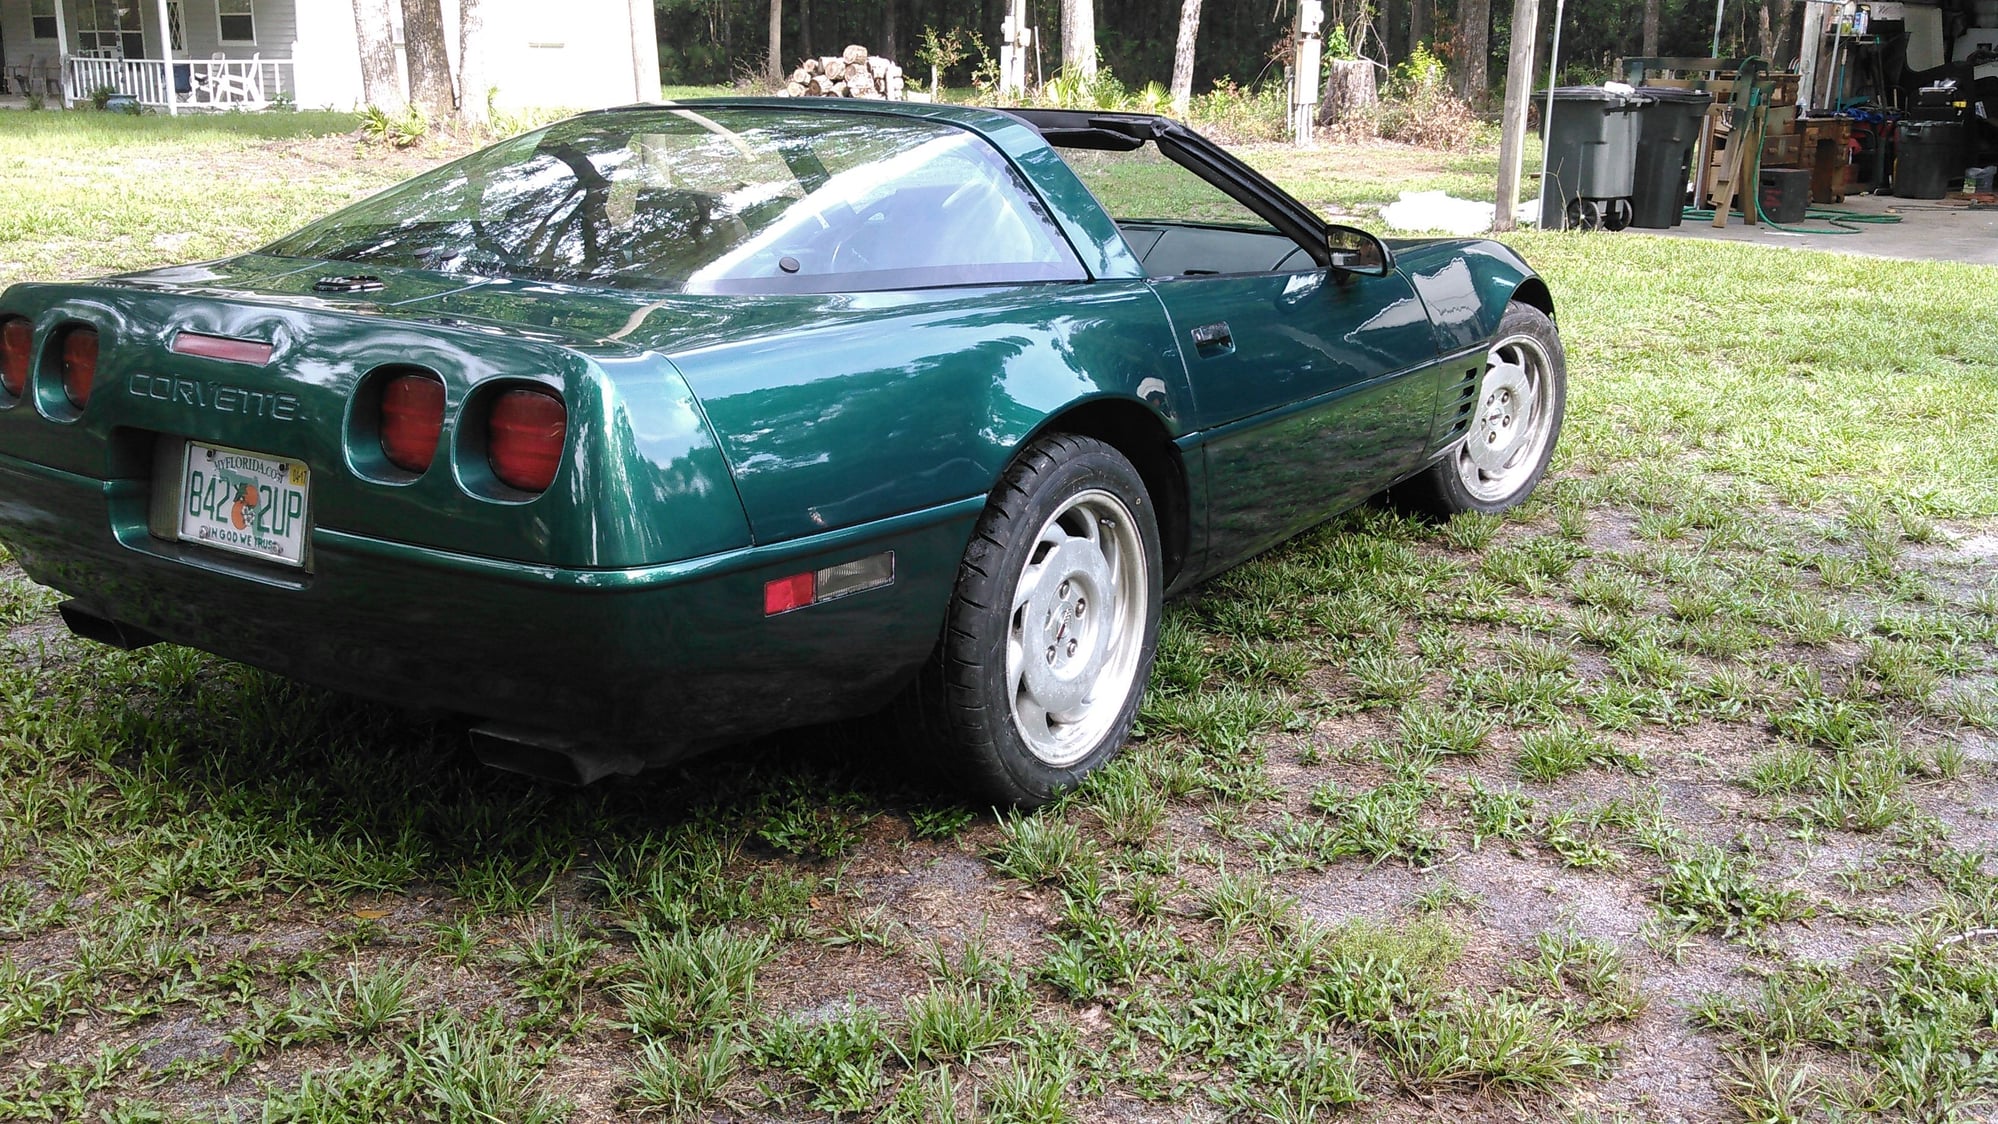
Once I got it home, two things happened. First I washed the car down and quickly learned that simply fixing the front bumper was not goingto help the value of the car. The paint on the car was a super quick cheapscratch and spray job that very little attention was paid to the scratch orspray part. There were places the paint was lifting and crow’s feet all overthe place where the paint. The clear coat was hazy in places and the thinglooked like an over ripe orange. Fixing the front bumper was only going to costmoney and yield no return.
The interior was in pretty good shape, but all the screwswere rusty, the carpet had a funky smell from being wet at some point, thepower seat didn’t work, couldn’t dim the headlights, and dash was coming loosearound the glove box. I knew I had some work in front of me. I also needed anew top as the acrylic was cracked and the last owner attempted a repair thatdidn’t help as evident by the funky wet carpet smell.
The second thing that happened was my wife saw the car andfell instantly in love. Apparently the corvette trumps her love for a Nova, andI could see the compassion in her eyes. I have told her that one day I wouldbuild her a car, and I realized this could be the one.
So I started negotiations with my dad as for purchase priceas it sat and we were able to strike a deal. Then the fun began.
I searched and found a new top, new seals, and other partsthat I needed to get the old girl up to speed, new shoes included. And then itwas off to the paint supply place that I deal with.
Lucky for me the folks at Automotive Paint and Supply inOcala are familiar with me through my past tinkering and tasks. They are alsovery patient and willing to help with good advice. I had never attempted topaint a fiberglass car before, nor had a rubber bumper that needed stripped tobare rubber and start over with. So I had a learning curve ahead of me andthese folks were great. The rest of this thread will be dedicated to thatadventure.
-To start things off, I had to strip the car. I pulled thefront and rear bumper, inner wheel wells, old top, weather stripping around thehatch and overhead at the rear of the top, headlights, door panels, lower frontfenders (Battery cover and opposite side) all the lights and markers, door moldingsand mirrors. This took the better part of a day. My arms and hands are notexactly small or even average and have been described as bear paws, so the backbumper was awesome to take off, but I made it work.
-I then began to strip the front bumper. I had to do thisbecause whoever did the paint job on the car didn’t prep it and the paint wascoming off in huge flakes. I also realized that this paint job was becausesomeone had some front end damage, and replaced the front bumper with a usedone. Which had been repaired in the past and not correctly.
To strip the bumper I had to use paint stripper made for urethanebumpers, do not use plain old paint stripper. This process took forever becauseof the several layers of paint and improper repairs. Once I got the bumperstripped most of the way down, I had to sand the remaining paint residue andbody work off using 180 grit paper. Of course this made the bumper a bit harryand less than smooth. I used a propane torch to lightly go over the littlehairs and singe them off. Careful not to overheat the bumper.
Then the fun really began. Once I made it to bare rubber, Ihad to do the repairs to it correctly. Someone found it a great idea to use anon-flexible material such as fiber glass to repair a crack. This doesn’t workbecause it will just stress a different area and create another crack near theedge of the rigid material. I used Bondo’s rubber bumper repair and mended theboo boos and smoothed them down.
The next step is super critical. I used a product calledPlas-Stick by Chromax. This is a paste that you use to scrub the bumper anywhere there is bare rubber. Use the gray scotch-bright pad as a scrubber.So, apply the paste, scrub, do NOT let the paste dry on the bumper, and rinseand let dry. Then repeat, but this time, when you rinse, see if the water beadsor sheens off of the bumper. If it beads anywhere, repeat again. Continue thisuntil the water sheens off of the bumper everywhere, but blow the bumper dry this time. The clock is now ticking. Within 15 minutes this needs to be primed,so have your stuff ready. Be sure to use an adhesion promotor such as bully dogbefore you prime. You can also use the bully dog as a flex agent in your primerso don’t just get the raddle can stuff. Get the liquid and use a spray gun toapply it to the bumper. It will be a better texture, and you will save somemoney on a separate flex agent for your primer. I used an epoxy primer for this job, simply because it will stick to anything, and it is needed on the fiberglass for adhesion. For the bumpers I used 25% bully dog after I mixed the primer to keep it flexible. (If you do not flex your primer you will get cracksin your paint job after it dries) The primer I used was an industrial epoxymade by Axalta. It is a high build and worked the same as a high build urethaneprimer that one would typically use to block out a paint job. This primer alsocomes in black and does not require a sealer before painting, which makes oneless layer of material to worry with. The down side to this is once this stuff dries, it is really tough. Which is good, but makes block sanding more difficult, but gives a tough base for your paint job. Once the bumper was primed, it was break time, and then time to move on to a different part of the car.
I got lucky in that I didn’t have to strip the rear bumper to bare rubber, so I simply was able to buzz it down with 180 grit to the factory primer, and then re-primed using the same steps above minus the scrubbing with the plas-stick stuff. Then break time again.
Then it was time to start with the car. I had a job in frontof me considering the condition of the paint. There was no way to just scuffand pray this car. I had to sand through the newer paint and past the factoryfinish. I was able to get it down to the original gel coat for the most partusing 180 grit and a Dual Action sander with burn through in a few places. Thisis when I found a crack in my hood and found the body work that was not done very well from the front end damage.
I repaired my fiber glass by grinding out the bad and replacing with new on front and back of the crack. Now, this is important. Do not just prime and paint bare fiberglass. There are pours in the glass that will trap air, and later in the sun, can cause a bubble to rise in your paint in that spot. There is a product called “Slick Sand” that is like a spray on bondo/primer that fills these small pours, and sands down really smooth. Once this is done, it is primer ready. As for the old body work, I was able to grindout some of the old bondo, and replace and then spray on the slick sand as with the crack. Once I had the body work tended to, and the entire car sanded down,it was time to tape her off.
The devil is in the details with paint. So take your time to mask off everything you don’t want paint on. Be sure to cover everything, for this stuff will drift into the darndest places and make a mess. Then it was primer ready. I sprayed on three good coats of the same epoxy primer onto the car. I didn’t have to flex it this time. Then it was break time again, and time to move on to the small parts such as the mirrors, lower fender panels, and headlight covers. I followed the same steps to prep and prime these as well.
I let the primer dry through for a day before I began thesanding process again. This is where you must take your time and be careful. Especially in places like that long, sweeping yet flat monster hood. If you get crazy you will have waves that will look like the Atlantic Ocean during astorm. I started the sanding process with 220 grit to knock down the orange peel. I then moved to 400 grit, and then finally wet sanded with 600 grit to leave a nice smooth surface to paint to. Remember if you burn through your primer, you can re prime in these areas, just take care to smooth it all backout with 600 grit before you paint. When sanding, use a sanding block to keep it smooth and even and without finger groves. On that big long hood, I used my 16” long board to keep things even until I made it to the 600 Grit. This made sure I didn’t have low and high spots. Like I said, this is where the work is,but it is what will make your paint look good or not. Take your time.
After sanding down the car, I sanded and prepped the smallparts. Some folks paint as they go, doing section by section, or prep a car and paint it, then prep the small parts and paint them, but I like to spray all my color at the same time. This way everything is consistent, especially with metallic paint where even deviating the gun pressure can cause the metal flakes to lie differently. The exception to this is the door jams. Before masking the car off for paint, I mask the interior to protect it, hit the jams with red scotchbright pad, wax and grease remove, spray a bit of bully dog adhesion promotor down, and then paint and clear the jams. I like to do this before I paint because when I paint, any paint the blows into the jams will blend and melt into the painted jams and you will not see the overspray marks.
After everything was sanded, washed, dried and prepped and jams painted and clear, I hung the small parts, papered back off the car, and verified any masking to be where I wanted it. I then wiped everything down withprep-all wax and grease remover. Another tip, especially when your skill level is like mine and you don’t need any extra bumps in your road, spend the money on the solvent resistant lint free towels. Do not use regular paper towels for the wax and grease remover. You will spend twice the money on paper towels, but have twice the chance of not being contaminated with lint and having problems.Remember, the devil is in the details.
Now the fun begins. After a short break, and almost throwing up from nerves, it was time to mix paint. I used Nason paint. It is not expensive, but yet has nice color. I chose a 2014 Dodge color called Timberland Green. It is a nice metallic green that is just a shade lighter than thefactory paint on the car. It also has some dry pearl in the paint which makes it pop in the sun. (Another note, you do not put any flex agent in your paint. Primer, and perhaps clear, but not paint.) I sprayed a nice even medium wetcoat on everything. Be sure to stay close enough to your surface that you are painting but not too close. The paint has to have time to atomize and blendoutside the tip to keep from getting light spots which create lines in yourpaint. Personally, I like to open up the tip a bit, and bump up the pressure a tad on my gun and run with it.
It is also a good time to point out this little fun fact. Agood paint gun can make a huge difference. I use a Develbis Finishline, which is not the best, but not the worst. I have painted with cheap kit guns, and they work, but when your skill level is not great like mine, you will need all the help you can get. And a nice even spraying, small atomizing gun can make agreat difference in the quality of your work. Also, spring for the high volumeair fittings and hose. Don’t skimp of these things. You can save a couple hundred bucks by being cheap on these things, but in the end, you can burn up acouple hundred bucks in material when you are having to re-do a job because it sucks. So spend the money and do it right the first time. Paint is not cheap,neither is sweat and blood.
Moving on- After my first coat flashes, I spray on a second wet coat. Watch your spray lines. Keep at least 50% overlap with your spray pattern. I tend to overlap more like 60%, but you will want to overlap to keepfrom having lines and stripes. I also change directions I am moving the gun when I can on the second coat to help make sure I do not line the paint. I probably do not have to do this, but it makes me feel better and turns out good for me, so I do it.
And last, when spraying metalics, spray a light coat like a misting coat, evenly over the entire vehicle and all the small parts. This helps control the way the last layer of metal flake in the paint lays and helpsit stand up a bit to give depth. I have neglected to do this in the past, and seeing the results now, regretted not doing it. So don’t hold too far away from the surface, but back off a bit from where you painted the wet coats. Take yourtime, and be sure it is even.
Now let the paint dry, and drink some water because clear is next.
After the paint flashes it is time for clear. Do not wait too long. You must spray your clear, as a rule, within 24 hours of painting. I have never waited longer than an hour or two. But if you wait, you will have to sand before you clear. By clearing within the window, it allows for a chemicalas well as mechanical adhesion between the paint and clear and will keep the clear from separating and pealing later.
I used a Chroma Base medium solids clear. I am not brave enough to attempt a high solids clear for my skill level will almost be sure to have solvent pop and ruin the paint job. The clear I used is not the best inthe world, but it is a mid-level clear coat that is a good medium between costeffective, but quality. This clear also maintains some level of flexibility therefore, under the guidance of the experts at my paint supply place, did not need a flex agent for this application. If you use a clear that will get rockhard be sure to flex it the same as you did your primer. Otherwise, the spider-webswill come to see you.
With this Medium solids clear, I was not able to spray a light “Tack Coat” like some like to do. For this, I had to spray the first coat just like I wanted the finished product to look. If I sprayed a light coat, it would have ended up with a haze. So, pour the coals to it. I sprayed the thing on the ragged edge of having runs. Scared the hell out of me, but turned out really nice. Remember, you can wet sand and polish out a run, but if it iscloudy, there is not much you can do to fix it other than re-do the thing.
So I got lucky, I didn’t run anything on the first coat.
The second coat was sprayed the exact same way. Be sure to give enough flash time between coats. I like to test a spot on the masking to see how dry or tacky it is. When I can leave finger prints but not lift clear from the tape, I am readyto hit the next coat.
I continued this for a third coat. Of course, my luck ranout, or rather ran in, and I was able to get a good hanger of a run in a smallplace on the door, and another on one of the headlight covers, but like I said,noting that couldn’t be cut out and polished later.
After clearing, it was time for a nap, well not really. I let the clear dry so dust wouldn’t stick (About 2 hours) and then peeled off my masking. I like to do this at this point so any clear between the tape edge and paint job with cut smooth and not pull ragged edges where the masking was, but be sure it is dry enough to be dust free before you do this and take your time. I let it sit for two full days and cure before I touched it again.
After the two days, it was more fun in the sun; time to wet sand. But first, I put the car back together. I find it easier to sand and polish parts when they are attached to something. The only exception to this was the mirrors. I mounted them after I was finished. Also remember not to wetsand any surface you cannot reach with the buffer. If you do, you will not beable to shine out the dull created by the sanding, and you will be unhappy.
I started the firstround with 1200 grit wet. Be sure to put a bit of dawn dish soap in your sanding water. It helps the paper glide over the surface. Another tip, when wetsanding, listen while you work. If you hear something that resembles an old vinyl record being scratched by the needle. STOP and rinse your area. This is a pieceof dirt or trash between your paper and painted surface. This can leave scratches that are hard to buff out.
After sanding, I dry and look to see if everything is smoothand level. If you have shiny spots, keep sanding, when everything is dull thehigh spots are gone you are there. I use a soft sanding block during wet sanding to keep from having finger marks and making sure the paper has even contact with the surface.
Then on to 1500 Grit. I do the same thing with the 1500grit. Just don’t do it as long. You are no longer leveling out anything, you are now smoothing out the 1200 sanding marks. Some folks move on to 2000 grit after 1500, but I chose not to this time. Buffing compound can scrub out 1500 marks with relative ease so I don’t.
Also Very important. Be super careful on the edges of panels.Remember, when the clear and paint hit a corner, they rap around that corner and the material is very thin. You can burn through on the edges superfast andthen you are in trouble. I avoid the edges with the 1200, and then lightly hitthem with the 1500 paying close attention and using little pressure. Go slow!Take your time!
After wet sanding, break out the buffer. Be careful with the buffer. With little try, you can burn the crap out of your paint. The system I use is by 3m and is marked 1,2,3. You start with 1, buffing compound. This is asuper light abrasive that polishes out the sand paper marks and starts the shine. Then wash rinse and dry the car. Then number 2, polishing compound. This is micro finishing compound that makes the buffing compound marks goaway. Then wash and dry the car again. Then good old number 3. Machine polish.This is a super micro polish that finishes things off nicely and leaves a nice coat of wax on the car. With this third step, do not let the polish dry on thecar when polishing. It is meant to polish while wet, and allowing it to dry andthen running over it with the wheel will cause swirl marks in your paint. Besure to change your buffing pads between the steps. Most of them are labeled 1,2, and 3 also and are color coated to keep from mixing them up as well as beingmade with the correct foam for the step you are doing. This is important so you don’t contaminate your pads. I use the foam pads, the wool ones make too much heat.
Final wash and dry and you are there. This process took me about 6 full days of work to do by myself. Of course I was unable to work on itevery day because of my job, but 5 or 6 days to complete.
I hope this helps anyone thinking about taking this task on.Like I said, I am no professional, and I have my boo boos in this paint. Mostly from contaminants floating into my clear due to painting in a barn, but one dayI will have a booth, and then I will have to find a different excuse to explainmy boo boos. Lol… Good luck and have fun. Take your time. And remember, no matterhow good of a painter you are, your paint job will only be as good as the preppedsurface under it. The devil is in the details of the prep.
Good luck. If I can figure it out, I will post pics of the process.
Last edited by RayTremblay; 06-21-2016 at 08:31 AM.
#6
Intermediate


Thread Starter
Thank you. Now I hope the wife likes it... Trying to get her imput on color without giving away that the car is hers was challanging to say the least.... Just a few more days, and she will have it and we will see.
Last edited by RayTremblay; 06-20-2016 at 10:23 PM.
#7
Intermediate


Thread Starter


First Sanding

Stripped Bumper... Pain in the a@$

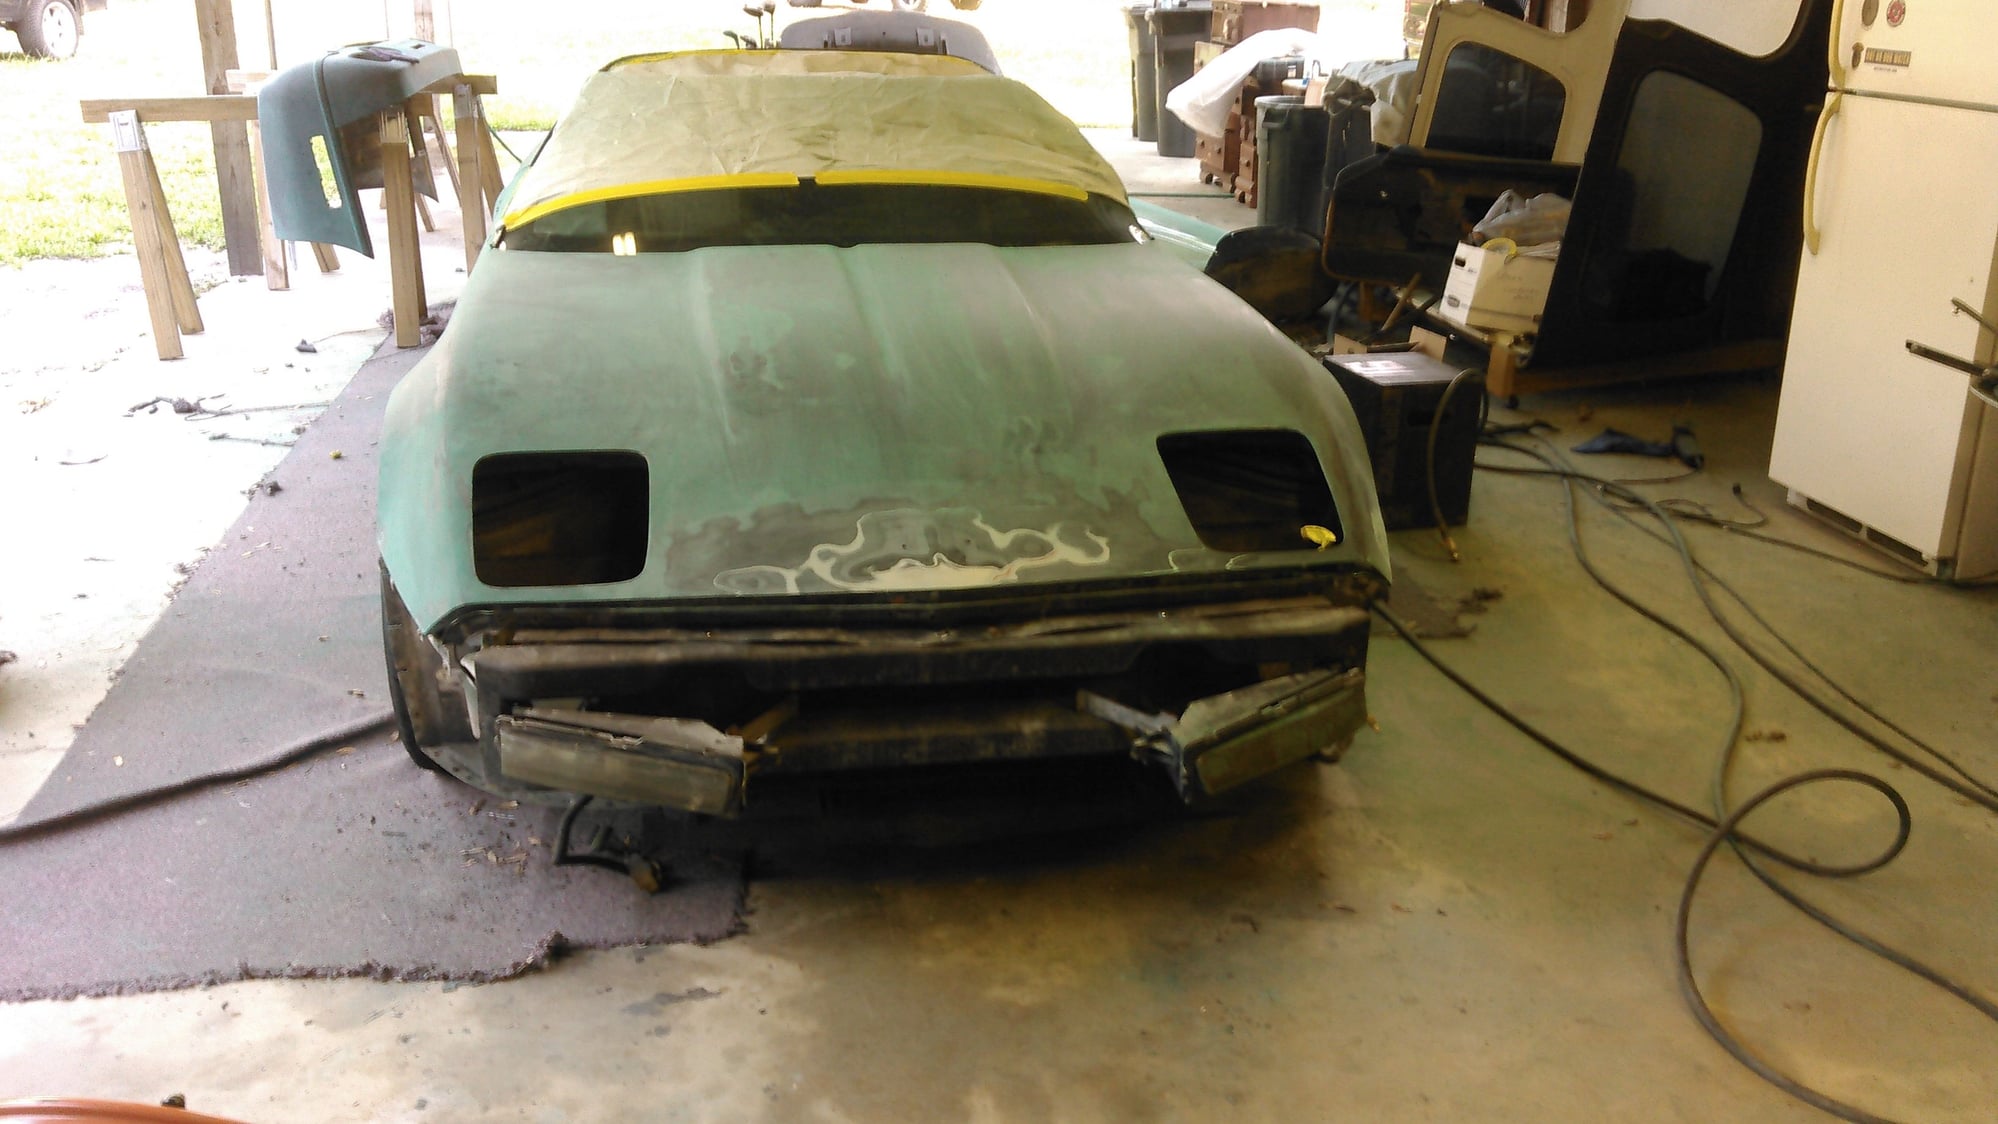
Body work to the hood

All Primed
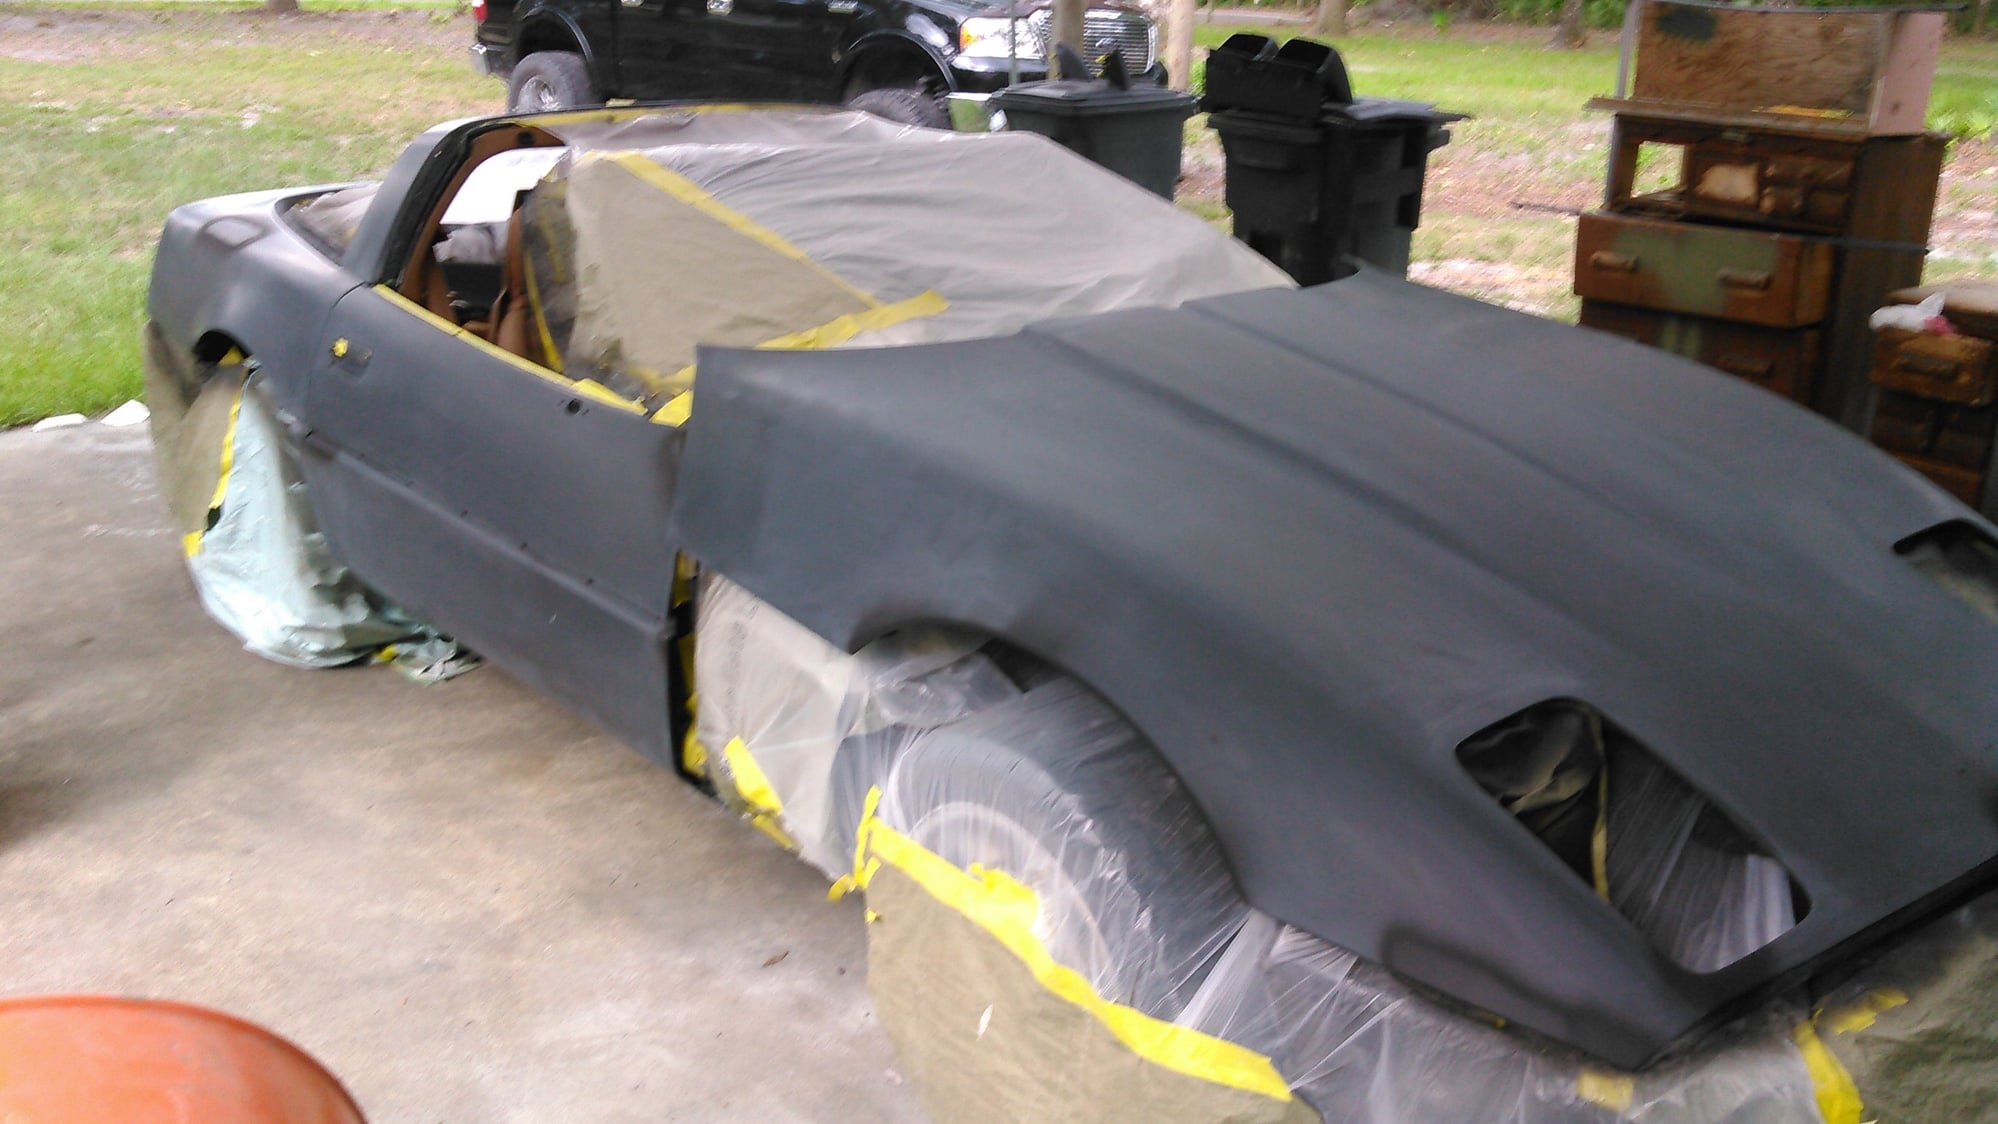
Sanded ready for paint
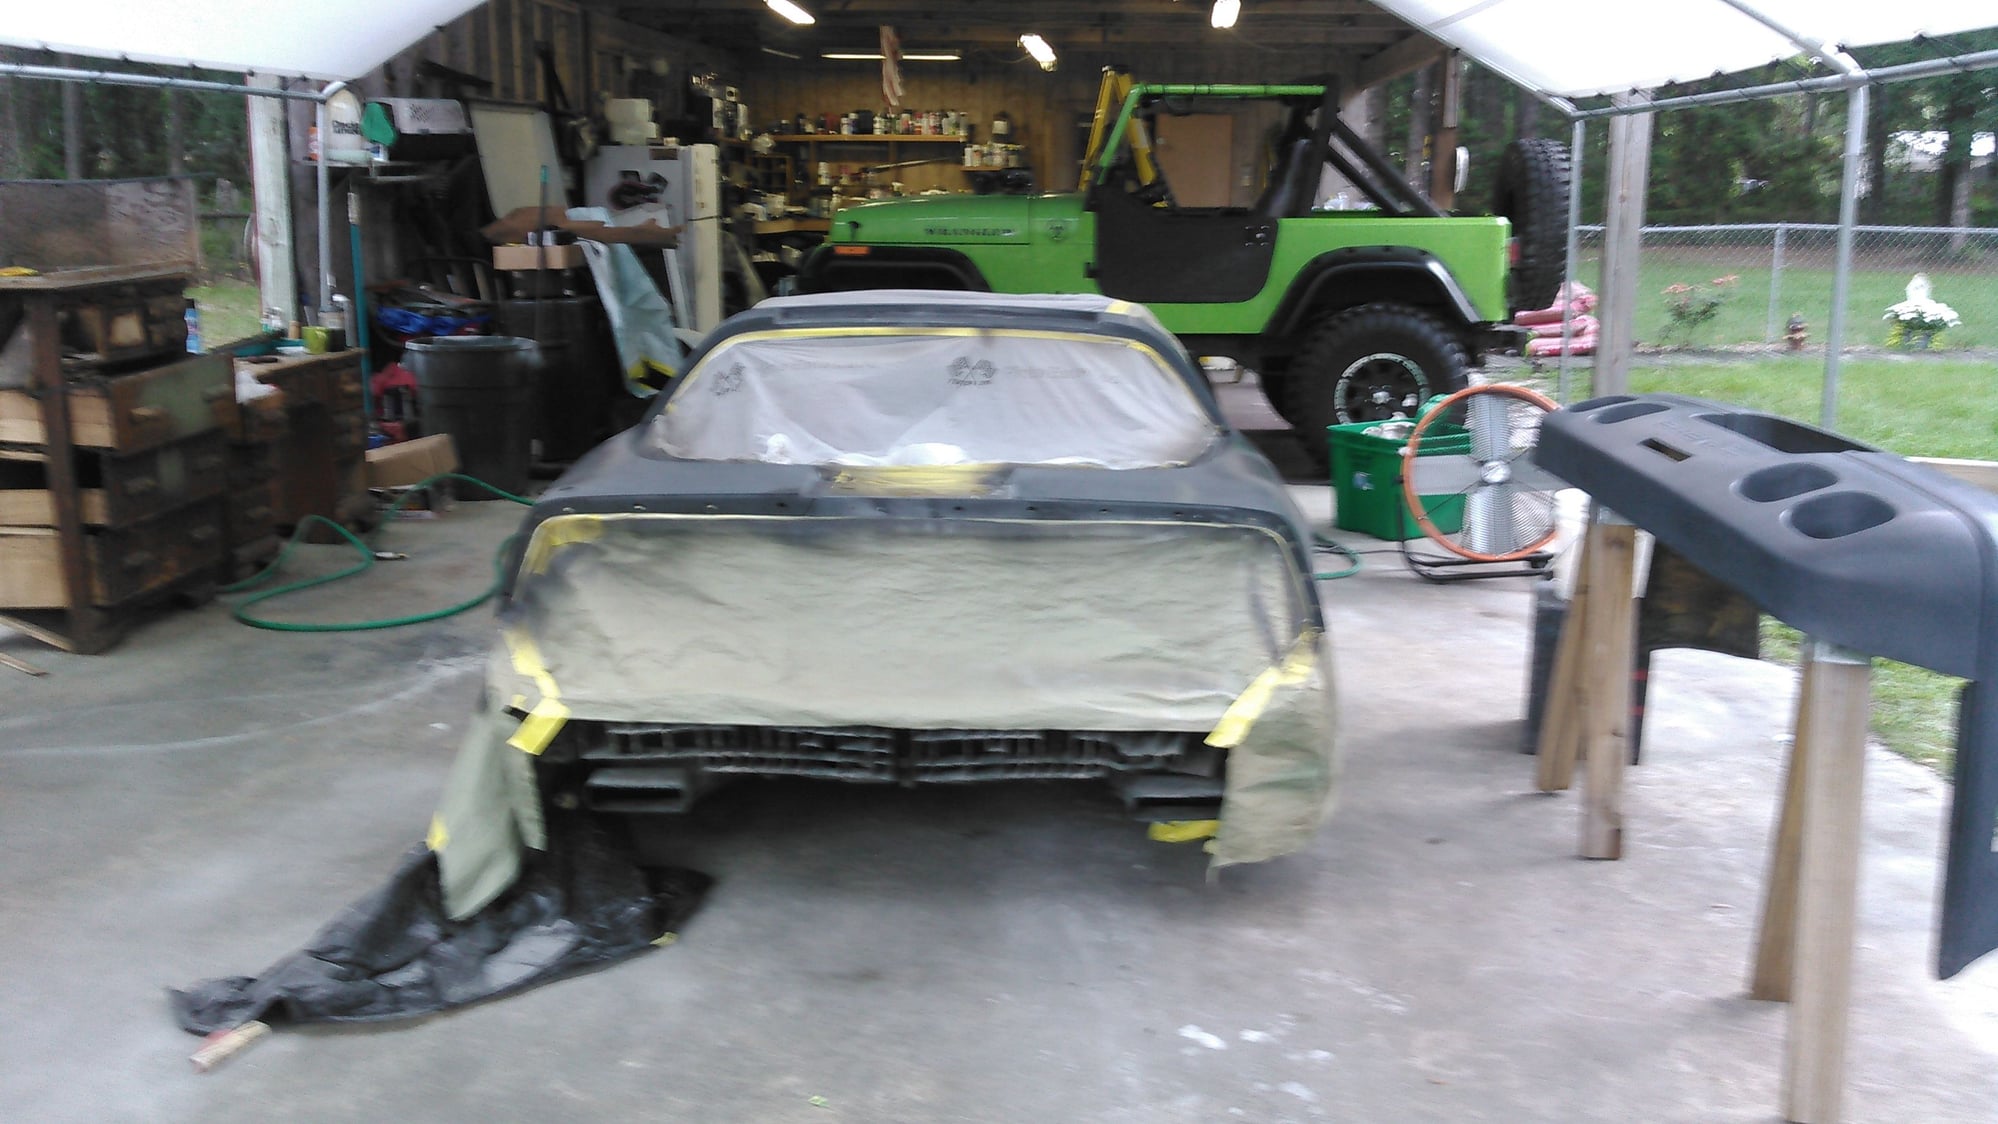

Freshly Painted
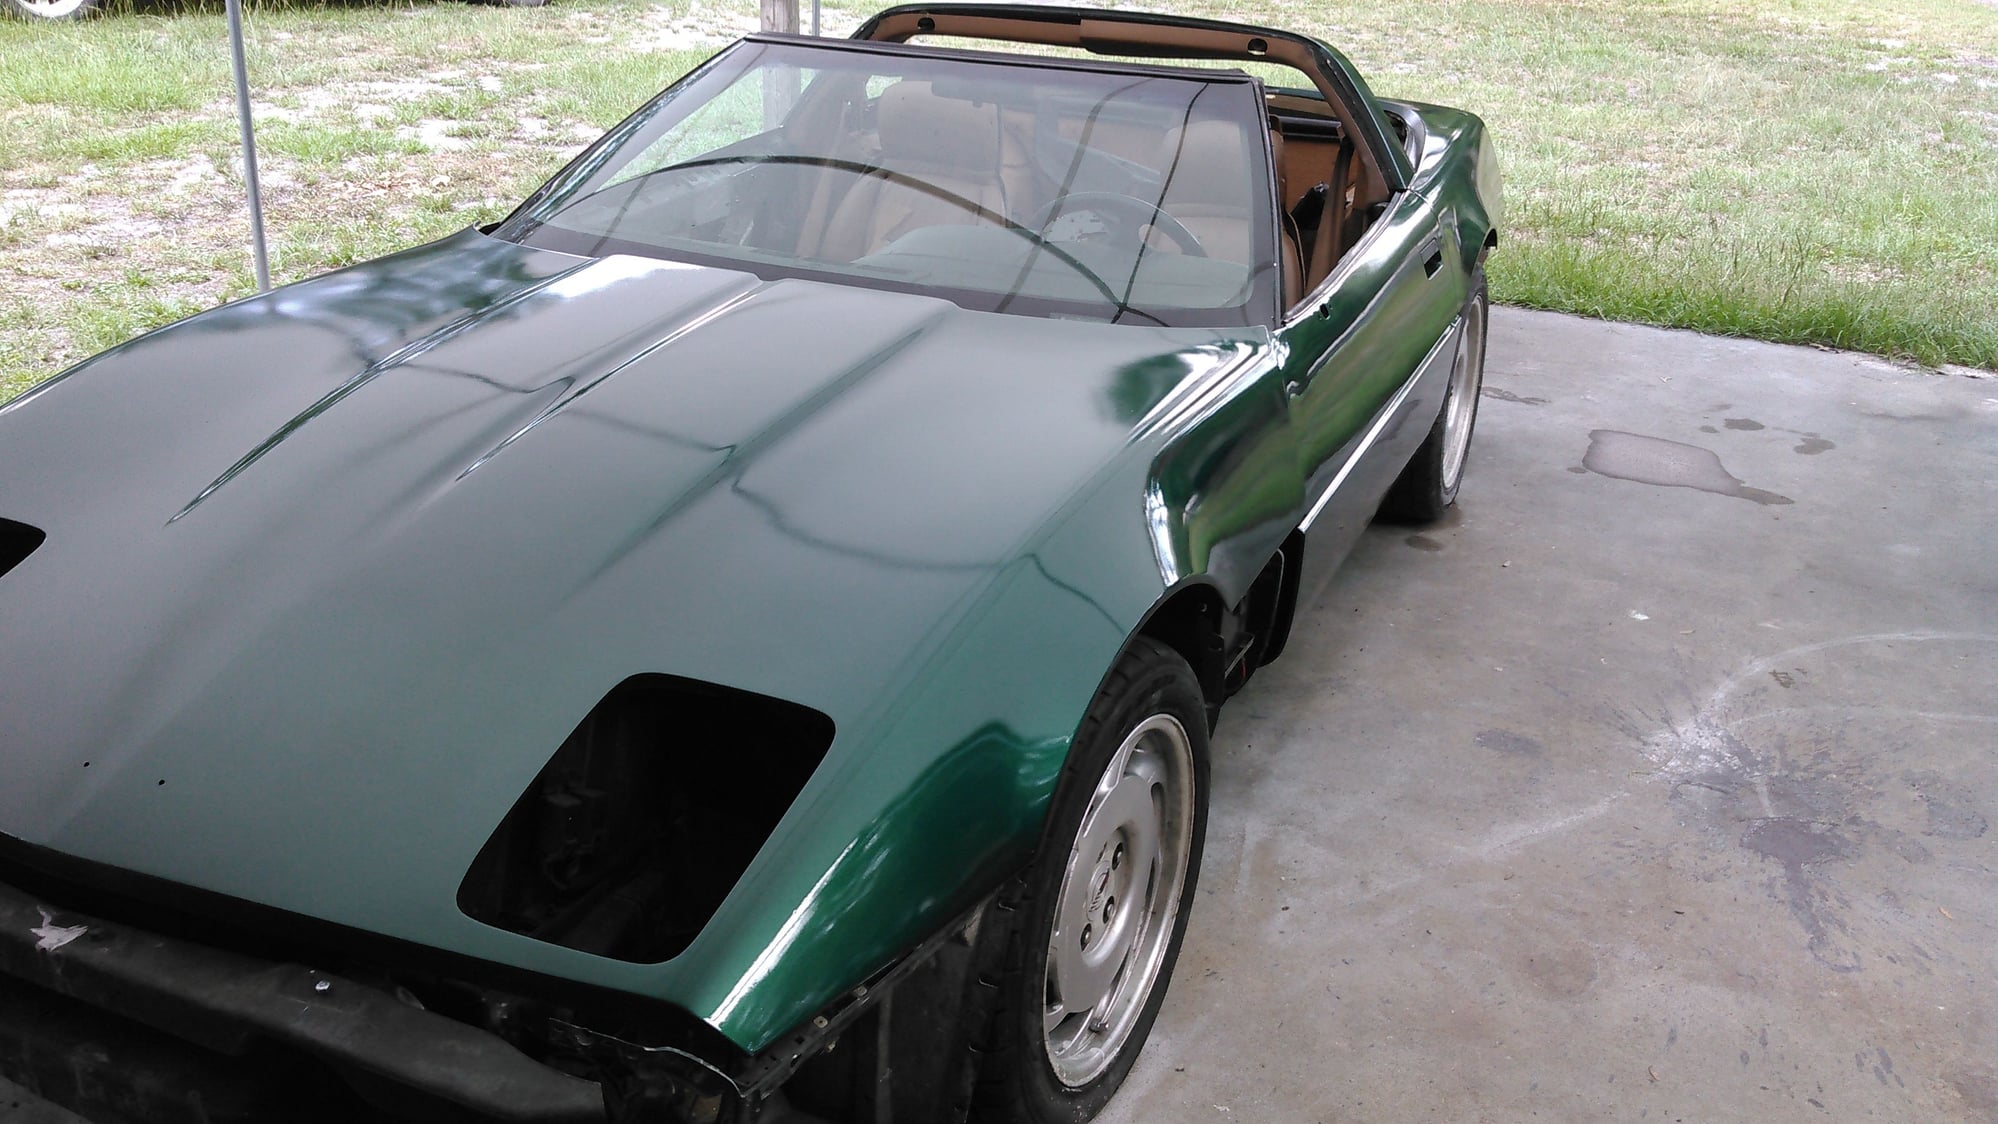
And unwraped

Final on the rear bumper

Final on the front Bumper
The following users liked this post:
RayTremblay (06-20-2016)
#9
Melting Slicks


Nice work. I've been doing my own for years. If you have patience, it's not all that bad. Also today's materials are a lot more forgiving.
That just painted gloss will dull a bit and as it cures more it will shrink a little and probably show a few more defects. Usually nothing that can't be sanded and buffed out though.
That just painted gloss will dull a bit and as it cures more it will shrink a little and probably show a few more defects. Usually nothing that can't be sanded and buffed out though.
#10
Intermediate


Thread Starter
Nice work. I've been doing my own for years. If you have patience, it's not all that bad. Also today's materials are a lot more forgiving.
That just painted gloss will dull a bit and as it cures more it will shrink a little and probably show a few more defects. Usually nothing that can't be sanded and buffed out though.
That just painted gloss will dull a bit and as it cures more it will shrink a little and probably show a few more defects. Usually nothing that can't be sanded and buffed out though.
Yea, I cut and buffed it once, and didn't put away the buffer yet...lol
#12
Not to nitpick but I found your first post a tad hard to read. Helps to separate paragraphs with a blank line.
But it doesn't matter. Your pictures speak for themselves.
You did one heck of a job! I'm sure your wife is going to love the car.
Keep painting like that and you will have nice second career option when you retire from the PD.
But it doesn't matter. Your pictures speak for themselves.
You did one heck of a job! I'm sure your wife is going to love the car.
Keep painting like that and you will have nice second career option when you retire from the PD.
The following users liked this post:
RayTremblay (06-21-2016)
#13
Team Owner


Member Since: Oct 2004
Location: altered state
Posts: 81,242
Received 3,043 Likes
on
2,602 Posts
St. Jude Donor '05

Looks great what did materials set you back approximately?
Is there a way to tighten up the DS bumper gap?
Car looks great, you can do mine next!
Is there a way to tighten up the DS bumper gap?
Car looks great, you can do mine next!
#15
Drifting


Looks great, I have been toying with the idea of doing this in my garage.
My car has the original paint, and the clear is starting to fail, on the hood alone it's getting pretty close to being free and clear of the original clear....
My car has the original paint, and the clear is starting to fail, on the hood alone it's getting pretty close to being free and clear of the original clear....

#18
Intermediate


Thread Starter
The bumper gap can be adjusted. I have to take it back off, and pull a shim out of it behind the crash guard where it bolts to the frame. I couldn't suck it in at the mounting surface any better than that. I didn't notice it before I painted and put it back together. I guess when they put the used bumper on it the first time, they didn't adjust it. I will take care of that in the near future after the paint has time to cure and shrink. For now I am going to leave it alone.
If you are in Florida, I will take a crack at it. Of course, I am the I will help you paint your car guy. So we can take care of it together. I like refining my skills on other people's stuff...lol
#19
Intermediate


Thread Starter
Give it a shot. Just take your time. Do not be in a hurry with the prep work.
#20
Intermediate


Thread Starter
Yea, that managed to stick in my edit attempts, but the word spacing didn't either time for some reason. I wrote it in word in attempts to catch some of my spelling errors and then copied and pasted it. For whatever reason, the format difference not only killed my paragraph spacing and indent, but also scrunched some of the words together. BUt I give up and will just take the hit looking like an illiterate moron, I am used to it...lol


