'92 ZR-1 Repair & Restoration


 10-25-2013, 02:44 AM
#23
Race Director

Nice work and good documentation. I parted a car that had the same kind of damage as the one detailed here. It is definately a big job when considering how much time is required to get it right as you have done here. Congratulations on a job well done ! 
10-31-2013, 07:22 PM
#25
Drifting

Thread Starter
Member Since: Jun 2007
Location: Prather, California -1990 ZR-1 White/Flame Red- -SOLD!!-
Posts: 1,261
Likes: 0
Received 2 Likes
on
2 Posts

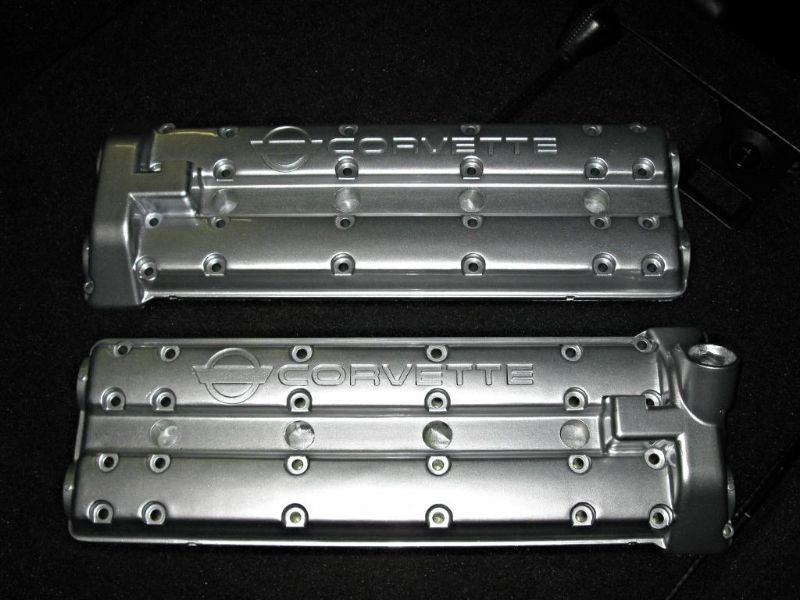
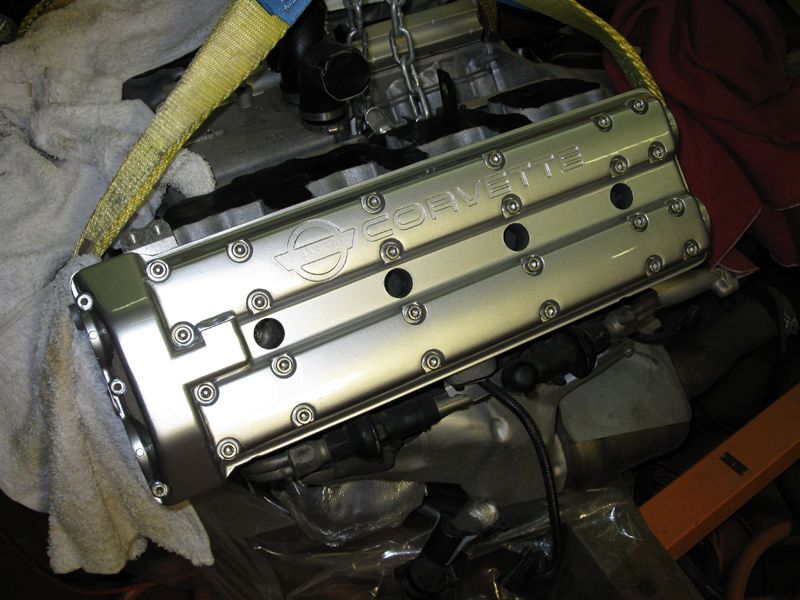
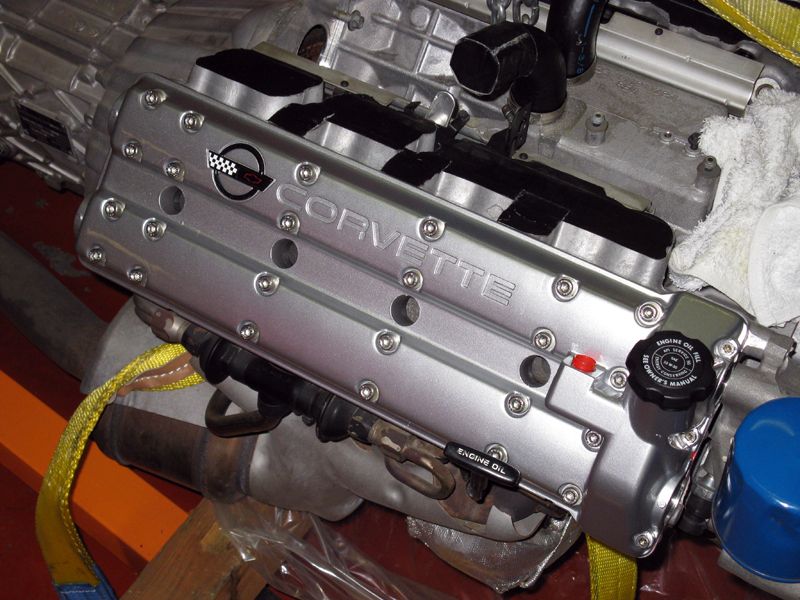
To start off this update, here is a picture of the painted cam covers. I will start working on getting these installed once I'm done installing the front and rear lowering kit. They have clear painted over the silver coats.
I've been working on getting the front spring out. Everything on the lower control arms has to come off (on one side anyway, but you can do both sides just to have more room to work or to clean) to allow the spring to slide out, including the metal covers that are covering the spring bolts holding the spring on. I also had to remove the power-steering rack to get the forward two bolts on the front spring out. With the LT5 in the car, this job would have been a LOT harder which is why I wanted to do it now before putting the engine back in.
The FSM says you need this special tool to get the spring out, but you don't really need it. With the car on jack stands, I just put a jack underneath one of the lower control arms (Evan has a small metal round adapter pad with a hole in it to fit around the grease fitting on the bottom of the control arm, but I still had to remove part of the grease fitting because the hole was too small to fit over it with that part on) and jacked up the control arm to take the tension off of the bolts that hold the spring on.
I then unbolted the spring bolts on that side until the nut was right at the end of the bolt, but not removed. I repeated for the other side. Then pushed the control arms all the way down to make way for the spring to come out. The spring bolts can now be removed all the way as well as the shims. The aluminum brackets at the mounting points of the spring have to be removed as well at this point, but they are very difficult to remove because of the rubber. You just have to keep carefully prying at them with a prybar (curved at the end) and they will come off.
The spring was then ready to be removed, but I had to jack up the front of the car more to get more room to remove the spring since it has to move downward because of the curve in it.
Front spring removed from the car and cleaned up.
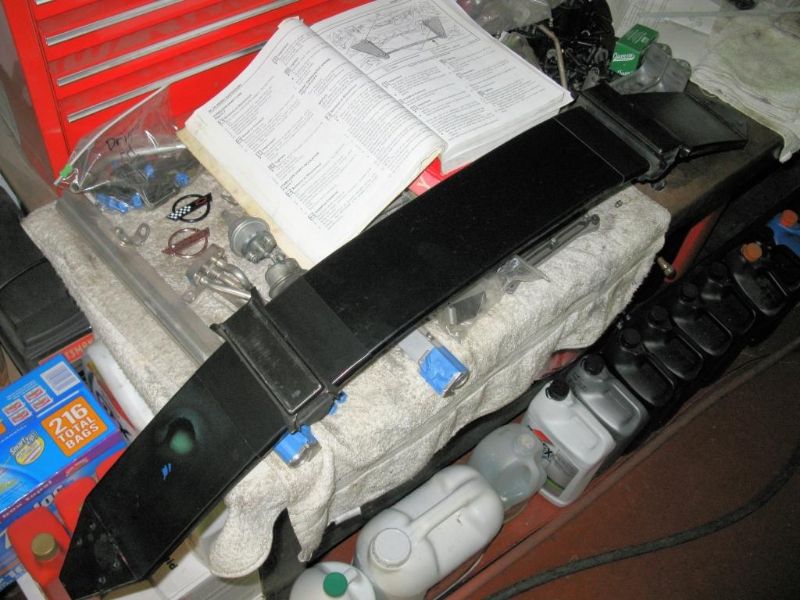
Now it's time to remove the thick rubber piece with the metal plate on it on top of the spring. Only the top part of the rubber piece that surrounds the spring is removed. The bottom and side pieces stay on. I put Gorilla tape on each side of each rubber piece to protect the spring. I first used a hacksaw blade (just the blade by itself) to cut with and put a vise grips on the metal portion so I could pull up on the area I was cutting so the blade could move more freely. I worked my way around the edges and corners, pulling with the vise grips until I was able to pull it completely off.
Spring with top rubber pieces removed.
To get the remains of the rubber & glue off, I used a heat gun on the area while very carefully scraping with a scraper. Don't scrape too hard or fast though, as you don't want to gouge the surface of the spring. Remove the tape before doing this though, otherwise the tape will melt and become very messy and difficult to get off.
Spring with rubber/glue completely cleaned off.
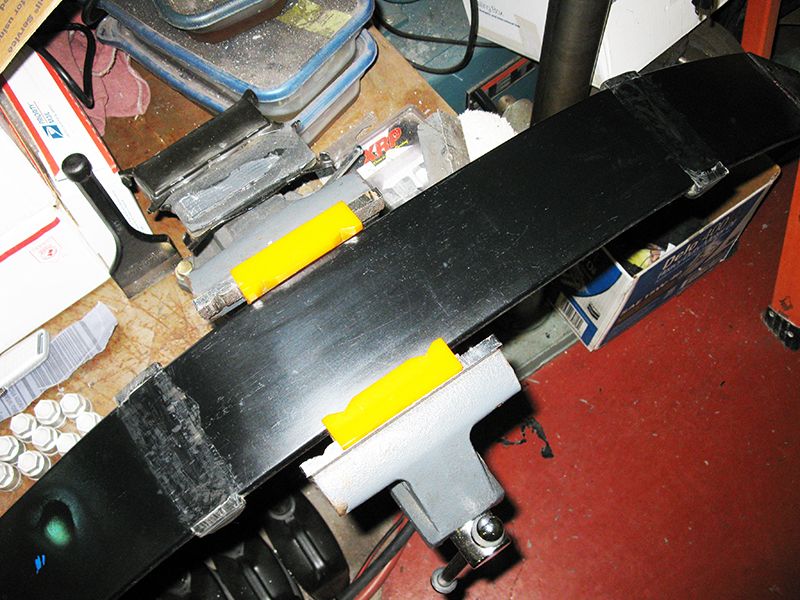
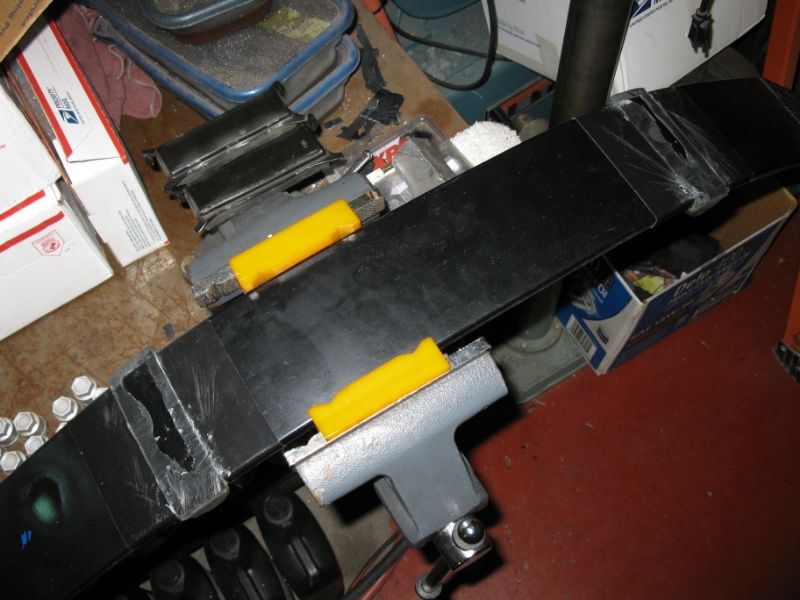
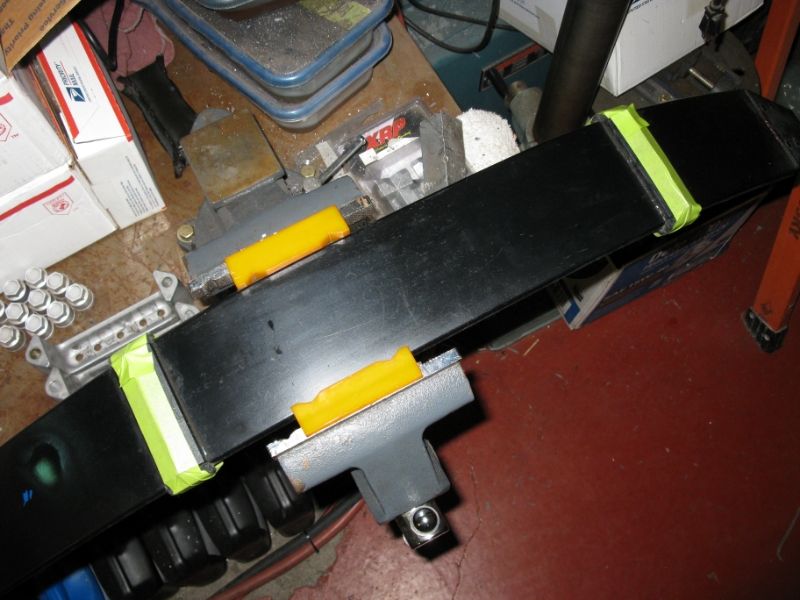
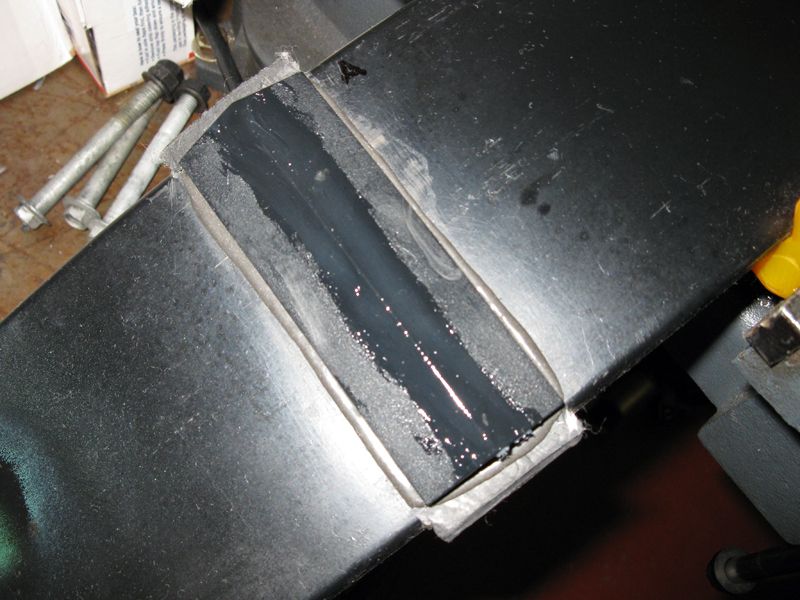
Now the spring is ready to have the new lowering wedges glued on. I used some marine type epoxy glue called "Gray Marine-Tex". JB-Weld or other similar epoxy would work fine as well. Before gluing the wedges on though, sand the area to be glued with some fine-ish emery cloth or sandpaper (maybe around 200-300 grit) so that the glue will be able to adhere properly.
Spring with lowering wedges glued in and held in place with some masking tape.
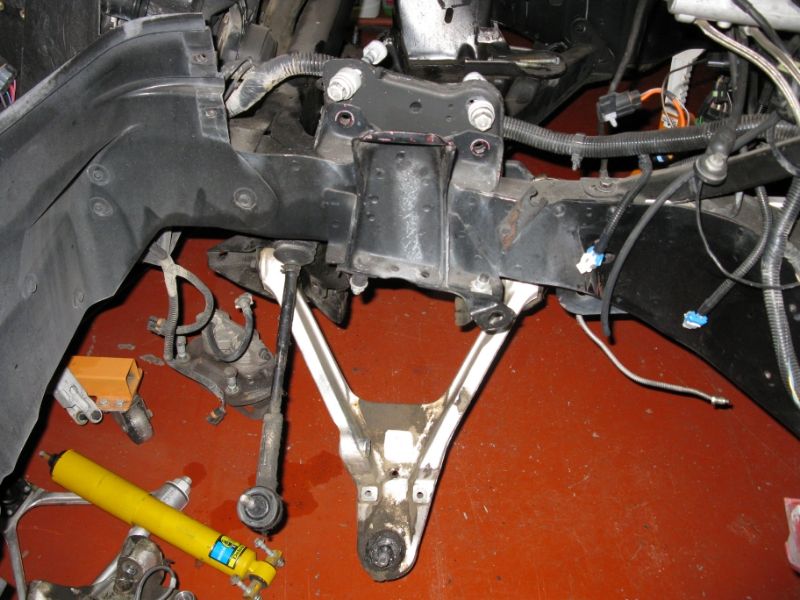
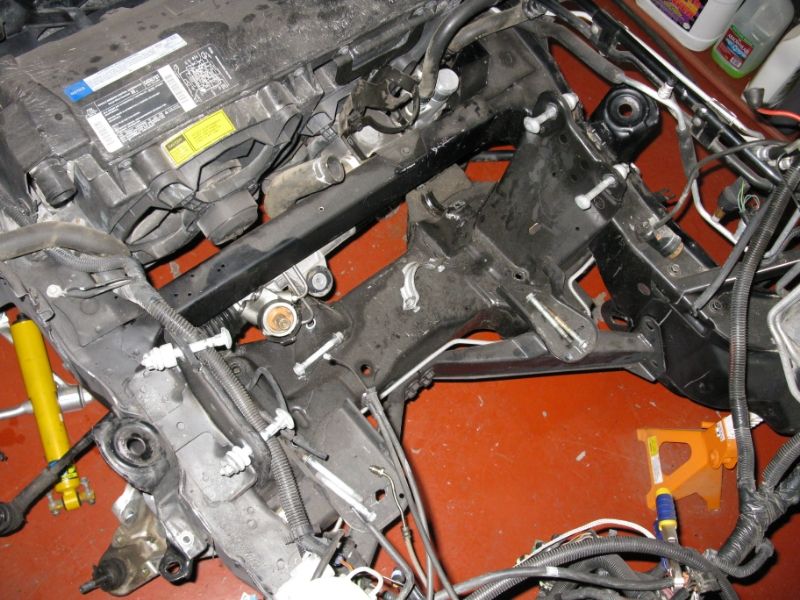
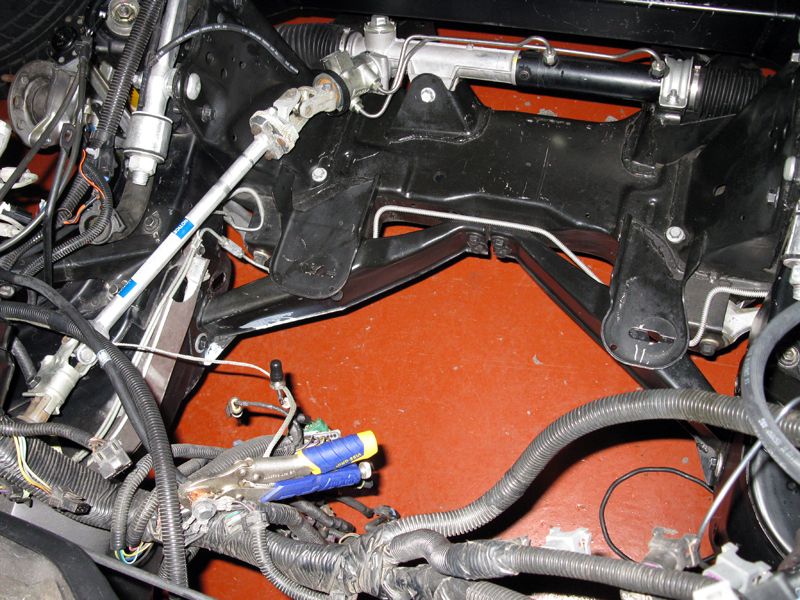
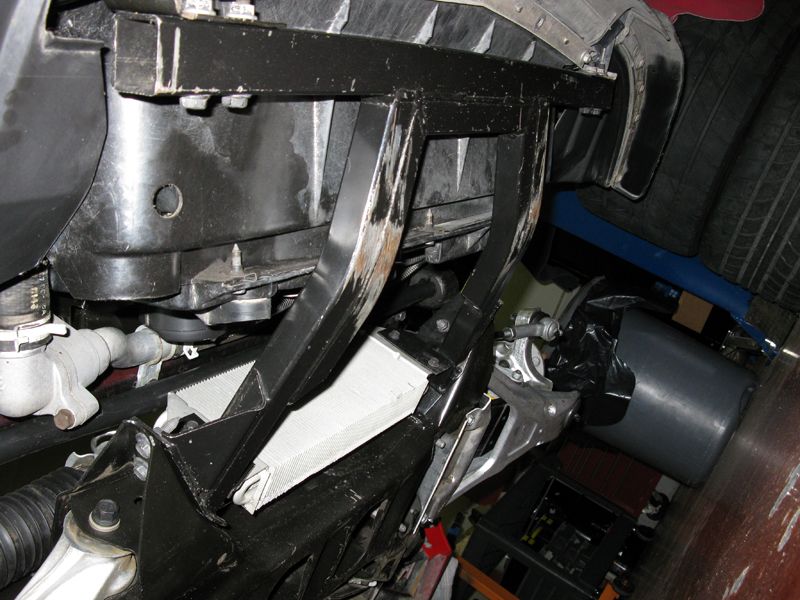
Here are some pictures of the engine bay area with the front spring removed.

That's it for this update! On Friday, I'm going to clean all the front suspension parts before getting started on reinstalling the front spring.
.
I've been working on getting the front spring out. Everything on the lower control arms has to come off (on one side anyway, but you can do both sides just to have more room to work or to clean) to allow the spring to slide out, including the metal covers that are covering the spring bolts holding the spring on. I also had to remove the power-steering rack to get the forward two bolts on the front spring out. With the LT5 in the car, this job would have been a LOT harder which is why I wanted to do it now before putting the engine back in.
The FSM says you need this special tool to get the spring out, but you don't really need it. With the car on jack stands, I just put a jack underneath one of the lower control arms (Evan has a small metal round adapter pad with a hole in it to fit around the grease fitting on the bottom of the control arm, but I still had to remove part of the grease fitting because the hole was too small to fit over it with that part on) and jacked up the control arm to take the tension off of the bolts that hold the spring on.
I then unbolted the spring bolts on that side until the nut was right at the end of the bolt, but not removed. I repeated for the other side. Then pushed the control arms all the way down to make way for the spring to come out. The spring bolts can now be removed all the way as well as the shims. The aluminum brackets at the mounting points of the spring have to be removed as well at this point, but they are very difficult to remove because of the rubber. You just have to keep carefully prying at them with a prybar (curved at the end) and they will come off.
The spring was then ready to be removed, but I had to jack up the front of the car more to get more room to remove the spring since it has to move downward because of the curve in it.
Front spring removed from the car and cleaned up.
Now it's time to remove the thick rubber piece with the metal plate on it on top of the spring. Only the top part of the rubber piece that surrounds the spring is removed. The bottom and side pieces stay on. I put Gorilla tape on each side of each rubber piece to protect the spring. I first used a hacksaw blade (just the blade by itself) to cut with and put a vise grips on the metal portion so I could pull up on the area I was cutting so the blade could move more freely. I worked my way around the edges and corners, pulling with the vise grips until I was able to pull it completely off.
Spring with top rubber pieces removed.
To get the remains of the rubber & glue off, I used a heat gun on the area while very carefully scraping with a scraper. Don't scrape too hard or fast though, as you don't want to gouge the surface of the spring. Remove the tape before doing this though, otherwise the tape will melt and become very messy and difficult to get off.
Spring with rubber/glue completely cleaned off.
Now the spring is ready to have the new lowering wedges glued on. I used some marine type epoxy glue called "Gray Marine-Tex". JB-Weld or other similar epoxy would work fine as well. Before gluing the wedges on though, sand the area to be glued with some fine-ish emery cloth or sandpaper (maybe around 200-300 grit) so that the glue will be able to adhere properly.
Spring with lowering wedges glued in and held in place with some masking tape.
Here are some pictures of the engine bay area with the front spring removed.
That's it for this update! On Friday, I'm going to clean all the front suspension parts before getting started on reinstalling the front spring.
.
Last edited by bdw18_123; 11-03-2013 at 12:37 AM.
10-31-2013, 09:57 PM
#26
Drifting
Awesome work fellow! That car will mean so much after your finished with it because your doing it yourself, you know what you have in the end!
One funny story about a front spring! In about 1996, i decided to have a friend come over and we would lower my 94 polo roadster.
Went to my dads garage and began taking the spring out ( dads garage has many restored cars inside, one being a 1937 chevy pickup that had just been painted Torch Red three weeks prior.) Once the spring was out we had to remove the rubber perches for install of the lowering shims. We grinded, cut, chewed, plasma cut....na no plasma cutter, but we had a huge grinder on them, and they were melting away slowly but surely!
What i didnt know was the rubber was slinging all over that brand new paint job on the 37 truck.....the entire hood, front fenders, grill, grill shell was covered with dang black speck!
Look over my shoulder and here comes dad to see what we were doing, he saw the truck first thing and went off the deep end.....you have ruined a 3k dollar paint job doing a 20 dollar job to that vette!
Needless to say we wiped the truck down with pre-kleeno and presto like new. Best part of the whole deal is thinking back now at how I would do things different. The truck still sits in the same spot and has never been moved since that day.
Also in the garage.
2 x 1955 chevrolet belairs
1939 chevrolet coupe
1935 chevrolet master town sedan
1965 Furd Mustang conv
1950 chevrolet 5 window pickup
1967 camaro ss350
1963 Corvette Roadster
1969 camaro Z28
And last but not least 1937 chevrolet pickup that almost cost my life!
11-02-2013, 11:53 PM
#27
Drifting
Thread Starter
Member Since: Jun 2007
Location: Prather, California -1990 ZR-1 White/Flame Red- -SOLD!!-
Posts: 1,261
Likes: 0
Received 2 Likes
on
2 Posts
On Friday, I decided to get the rear lowering bolts installed before starting on cleaning suspension parts like I mentioned in the previous update.
The rear lowering bolts are much easier to install than the front lowering wedges. Jack up the car and remove the rear wheels to gain access to the rear spring bolts. Before unbolting a rear spring bolt, position a jack near the end of the spring and jack it up just enough to take the spring load off of the bolt (using a piece of wood on the jack pad as a cushion to avoid damaging the spring). Then remove the rear bolt and large washers/hard rubber pads on the top and bottom of the bolt. The pads are a tight fit on the bolt, so they will probably be a bit tough to get off.
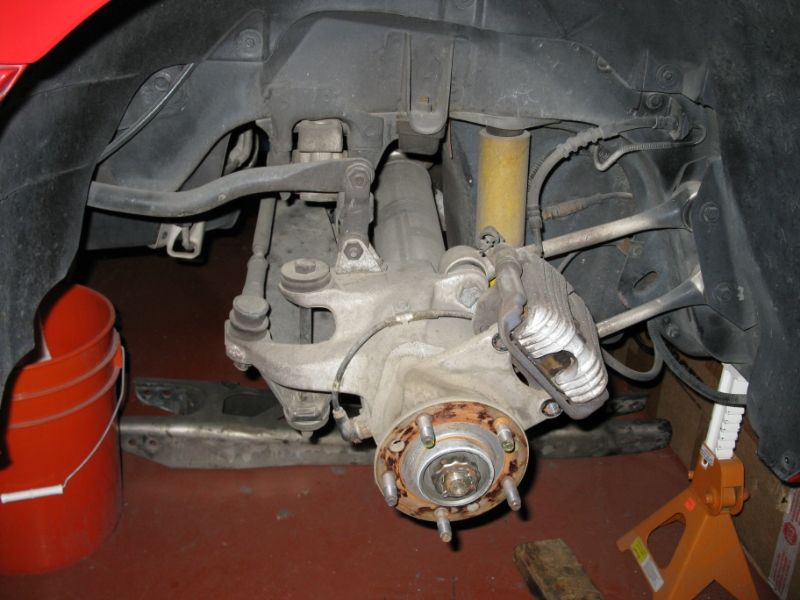
Driver side before cleaning and installing the new lowering bolt.
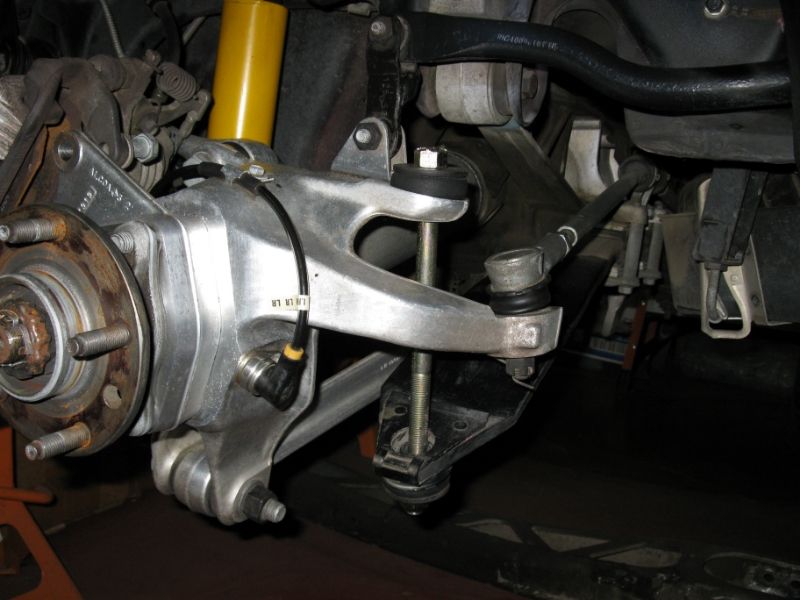
Passenger side before cleaning and installing the new lowering bolt.
Transfer the pads to the new, longer lowering bolt. The lowering bolts in the kit Evan got seem to be just slightly thicker than the stock bolts because the pads were harder to put on them than they were to get off of the stock ones. Try to get the pads (top & bottom) positioned the same way they came off because they will have taken a 'set' at the angle/position they were at. Then install the nut. As a starting position, I tightened the nut until only about 2-3 threads were showing at the end of the bolt. Then, when the car is on the ground, we'll check to see where the ride height is at and re-adjust from there if needed.
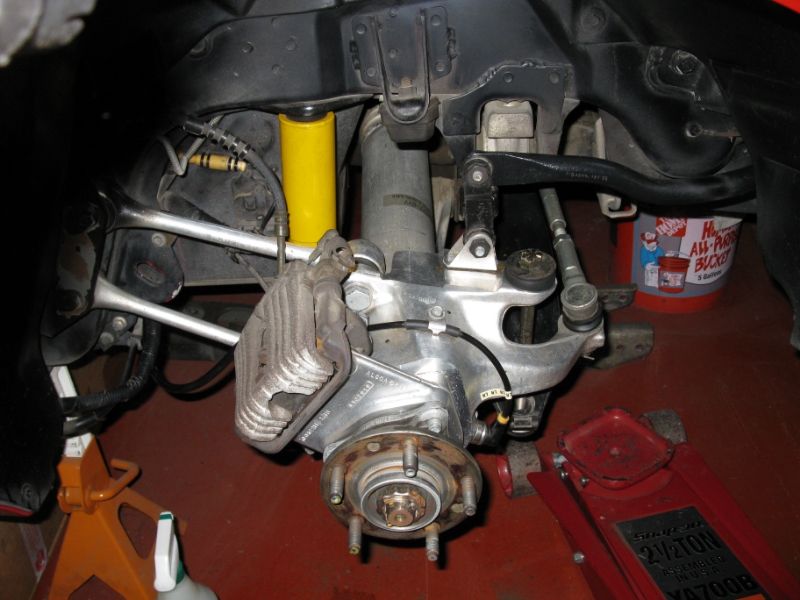
Driver side after cleaning and installation.
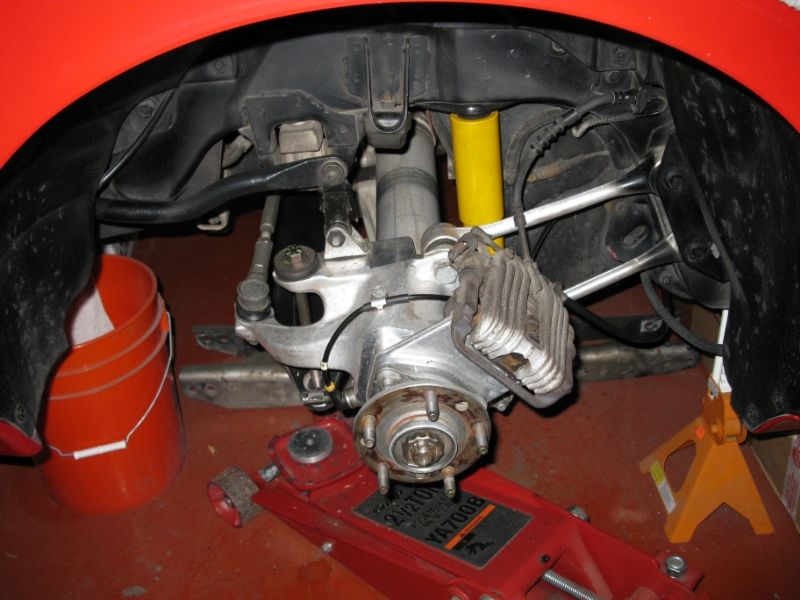
Passenger side after cleaning and installation.
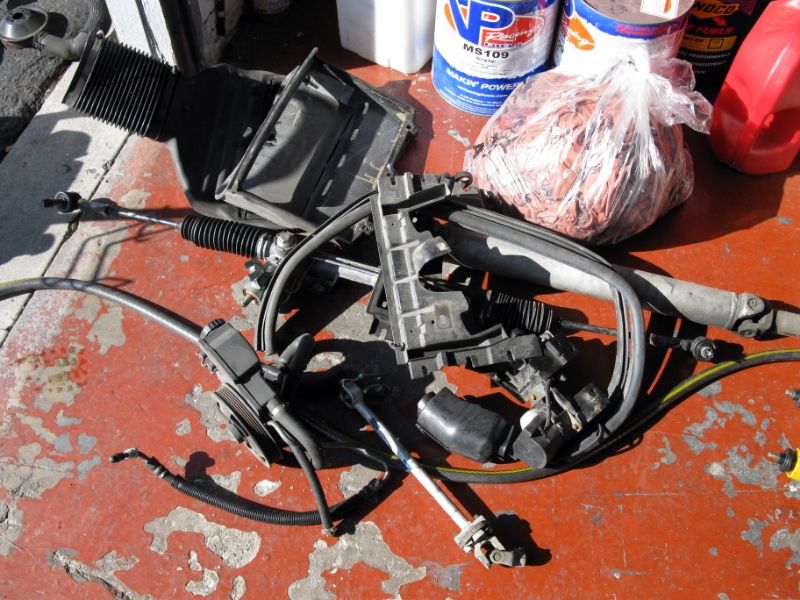
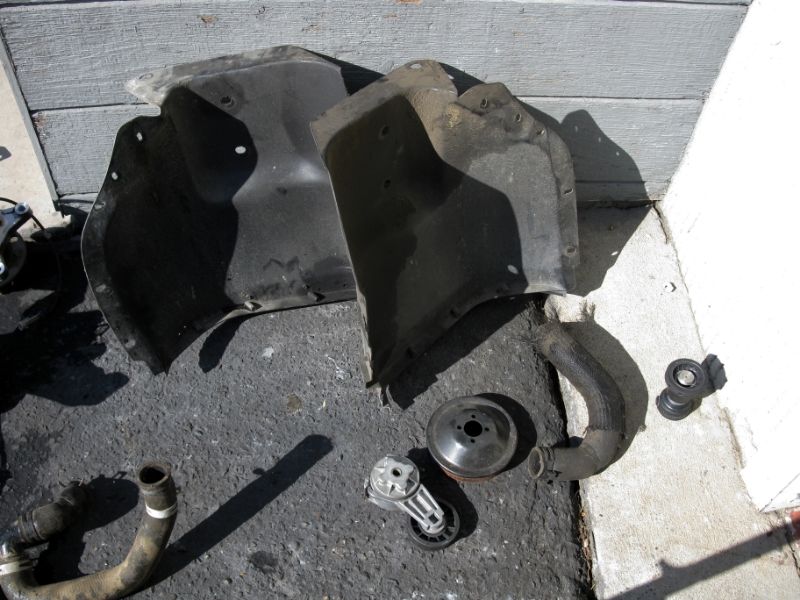
Then, on Saturday morning and into the early afternoon, I pressure-washed a bunch of front suspension parts and other misc parts that needed cleaning.
Couple of 'before cleaning' pics (didn't get pics of all the parts I cleaned).
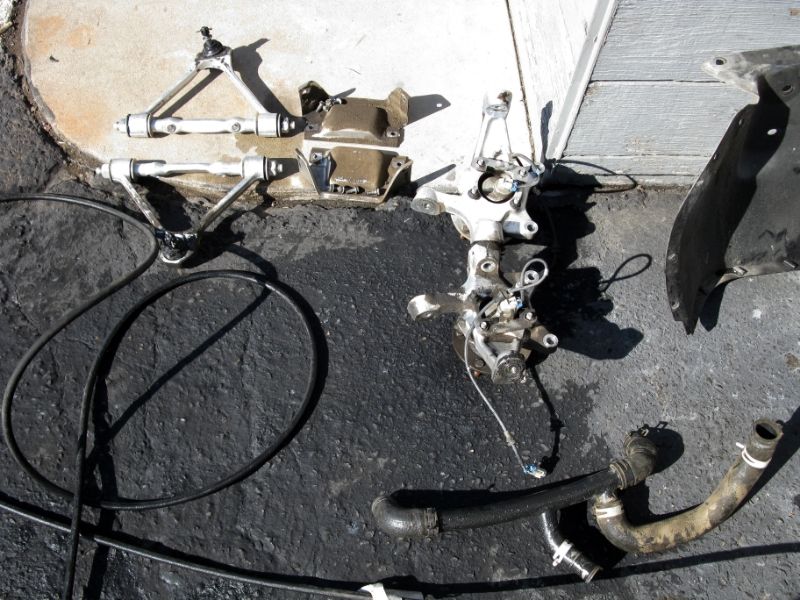
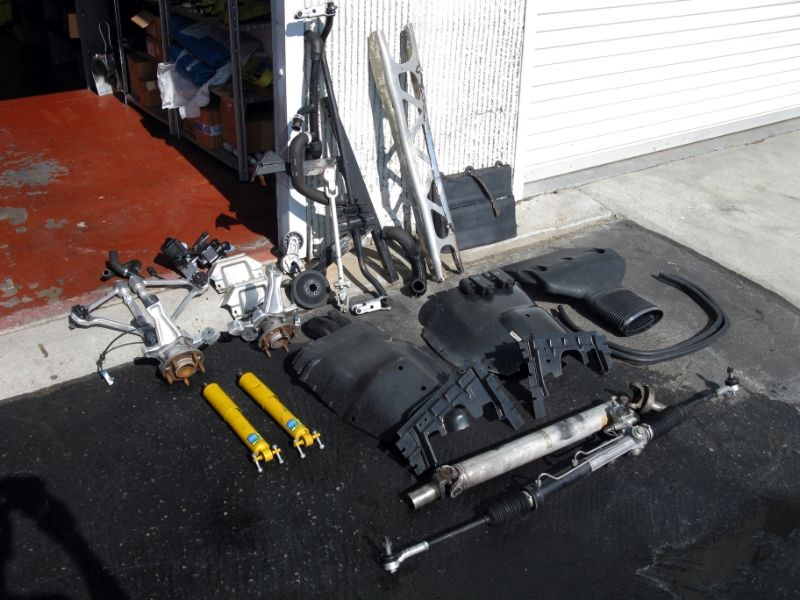
After cleaning.
Monday evening I'll finish cleaning the front suspension cradle and lower control arms (by hand, with simple green and rags). Then if I have some time left, I'll probably get started on getting the front spring back in and front suspension back together.
The rear lowering bolts are much easier to install than the front lowering wedges. Jack up the car and remove the rear wheels to gain access to the rear spring bolts. Before unbolting a rear spring bolt, position a jack near the end of the spring and jack it up just enough to take the spring load off of the bolt (using a piece of wood on the jack pad as a cushion to avoid damaging the spring). Then remove the rear bolt and large washers/hard rubber pads on the top and bottom of the bolt. The pads are a tight fit on the bolt, so they will probably be a bit tough to get off.
Driver side before cleaning and installing the new lowering bolt.
Passenger side before cleaning and installing the new lowering bolt.
Transfer the pads to the new, longer lowering bolt. The lowering bolts in the kit Evan got seem to be just slightly thicker than the stock bolts because the pads were harder to put on them than they were to get off of the stock ones. Try to get the pads (top & bottom) positioned the same way they came off because they will have taken a 'set' at the angle/position they were at. Then install the nut. As a starting position, I tightened the nut until only about 2-3 threads were showing at the end of the bolt. Then, when the car is on the ground, we'll check to see where the ride height is at and re-adjust from there if needed.
Driver side after cleaning and installation.
Passenger side after cleaning and installation.
Then, on Saturday morning and into the early afternoon, I pressure-washed a bunch of front suspension parts and other misc parts that needed cleaning.
Couple of 'before cleaning' pics (didn't get pics of all the parts I cleaned).
After cleaning.
Monday evening I'll finish cleaning the front suspension cradle and lower control arms (by hand, with simple green and rags). Then if I have some time left, I'll probably get started on getting the front spring back in and front suspension back together.
11-05-2013, 12:18 AM
#28
Le Mans Master

Member Since: Jan 2000
Location: Georgetown TX
Posts: 8,424
Received 1,864 Likes
on
1,081 Posts
C5 of Year Finalist (appearance mods) 2019

Very nice work! I've learned a lot from this thread.
11-07-2013, 03:23 PM
#29
Drifting
Thread Starter
Member Since: Jun 2007
Location: Prather, California -1990 ZR-1 White/Flame Red- -SOLD!!-
Posts: 1,261
Likes: 0
Received 2 Likes
on
2 Posts
Just a small update today.
The cleaning has taken longer than I thought, seems there is always something else I find that needs cleaning. I still haven't gotten to getting the front suspension back together, but hopefully I'll get to that either today or tomorrow (Friday).
The driver side cam cover is installed now, with the new stainless bolts and new sealing washers from Jerry's Gaskets.
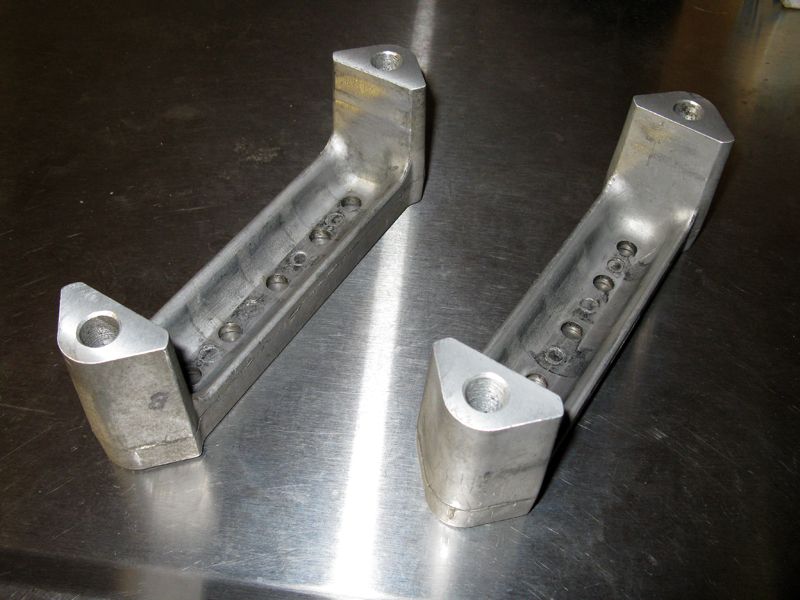
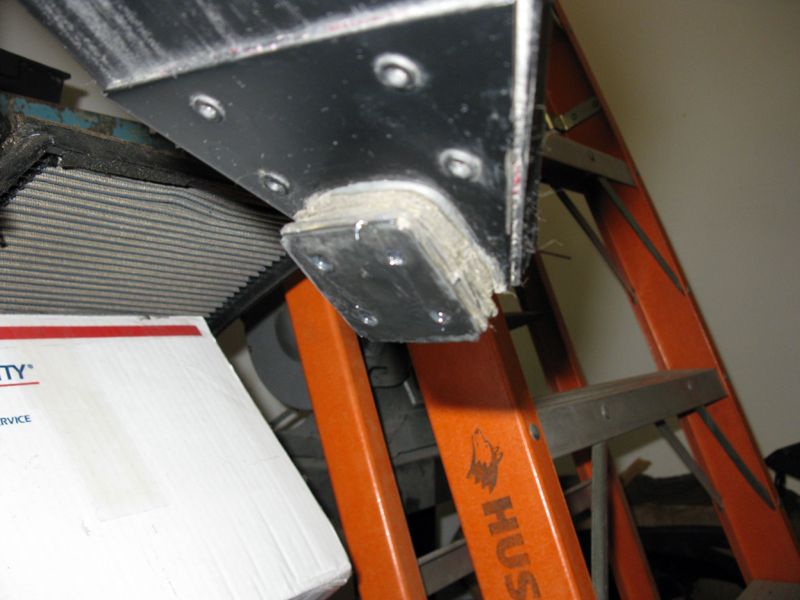
The ends of the two aluminum brackets that hold the front spring on have to be cut down about a 1/4 of an inch when you install the lowering wedges. Evan has a milling machine, so the cuts turned out really nice and professional looking.
The cleaning has taken longer than I thought, seems there is always something else I find that needs cleaning. I still haven't gotten to getting the front suspension back together, but hopefully I'll get to that either today or tomorrow (Friday).
The driver side cam cover is installed now, with the new stainless bolts and new sealing washers from Jerry's Gaskets.
The ends of the two aluminum brackets that hold the front spring on have to be cut down about a 1/4 of an inch when you install the lowering wedges. Evan has a milling machine, so the cuts turned out really nice and professional looking.
 11-08-2013, 01:01 PM
#31
Safety Car


 11-10-2013, 05:26 PM
#32
Drifting
Thread Starter
Member Since: Jun 2007
Location: Prather, California -1990 ZR-1 White/Flame Red- -SOLD!!-
Posts: 1,261
Likes: 0
Received 2 Likes
on
2 Posts
Thanks for the comments guys, I appreciate it!
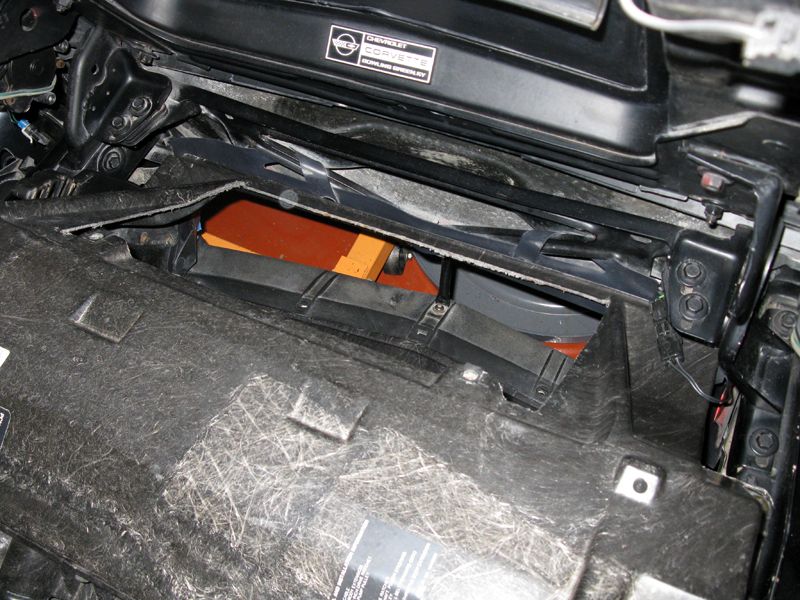
I decided I wanted to clean up the radiator/oil cooler/A/C condenser area. So I removed the whole radiator shroud, fans, etc and cleaned them up.
See the 3 pictures at the end of this post for before pictures:
http://forums.corvetteforum.com/1585316787-post25.html
And now with rad shroud, etc reinstalled; looks a lot better.

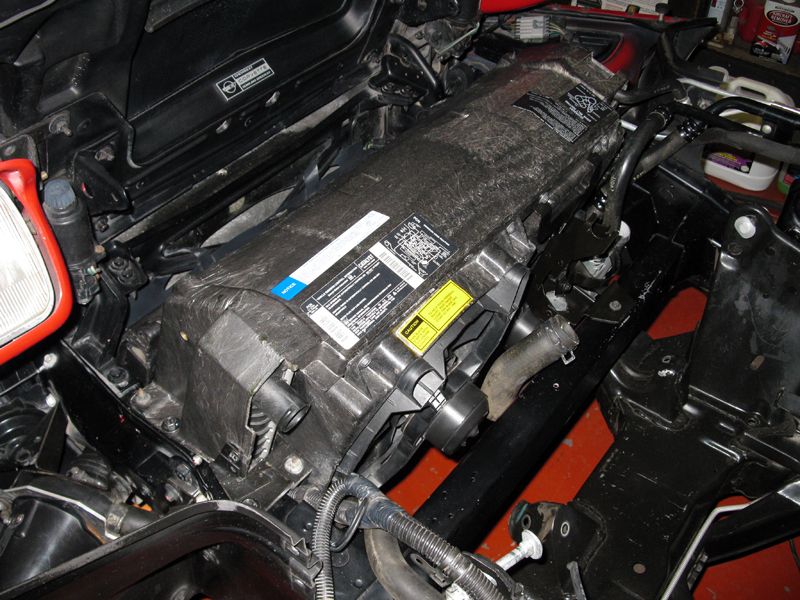
The area of the radiator shroud where the air filter box sits has been cut out because this Z has had one of those 'reverse' air filter boxes installed.
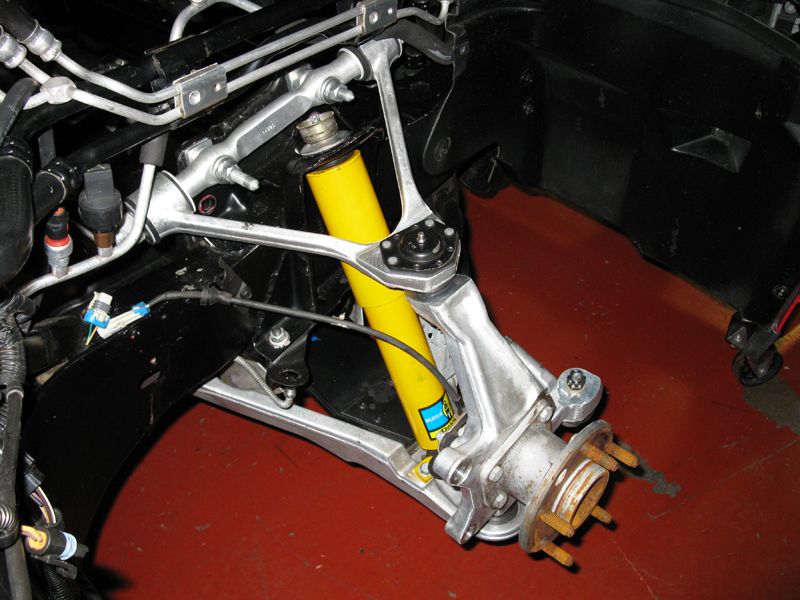
Then, finally I got onto getting the front spring back in and the front suspension back together. Before putting the spring back in, lubricate the top of the installed lowering wedges and the pads on the bottom of the ends of the spring with some suspension bushing lube. We used some little packets of lube that Evan had saved from various Energy Suspension kits he's bought in the past.
Front spring and suspension back together, passenger side.
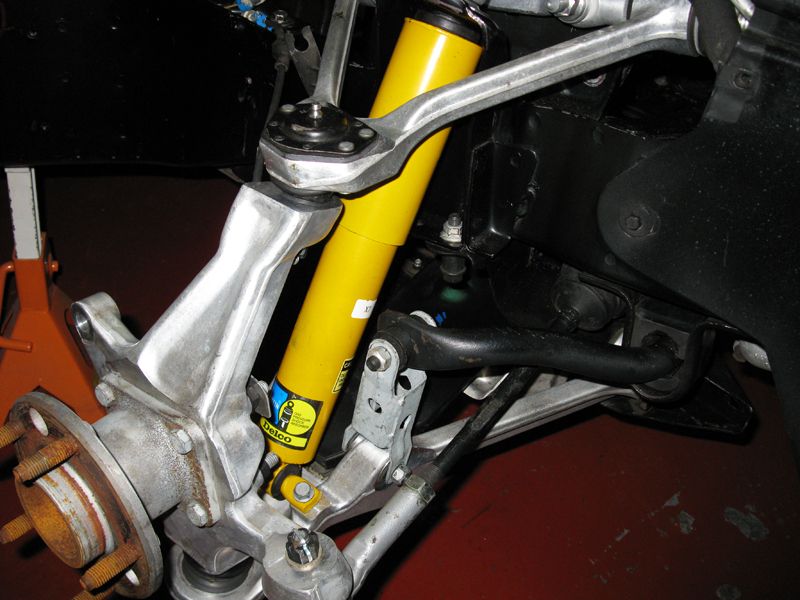
Driver side.
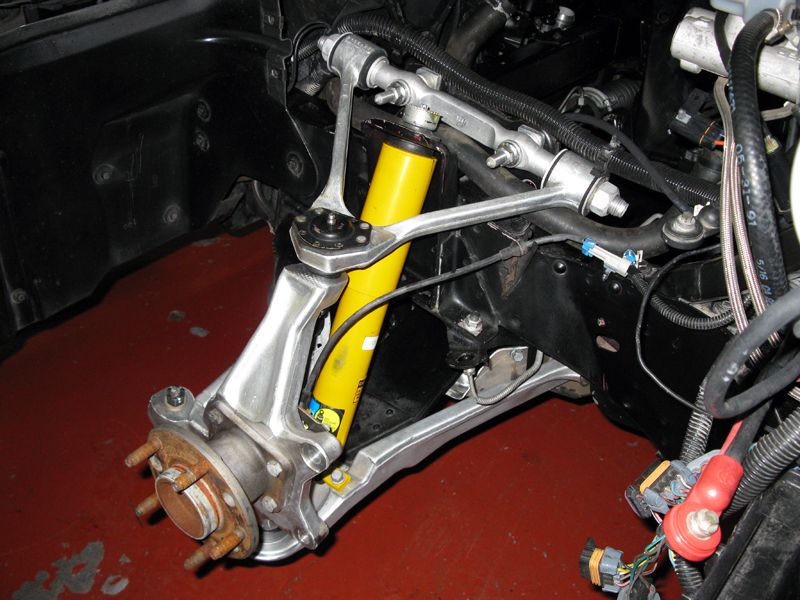
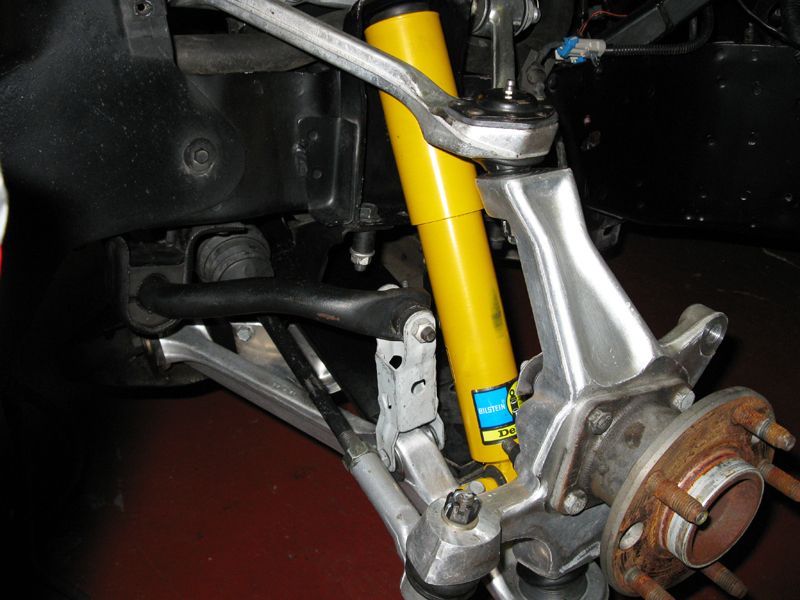
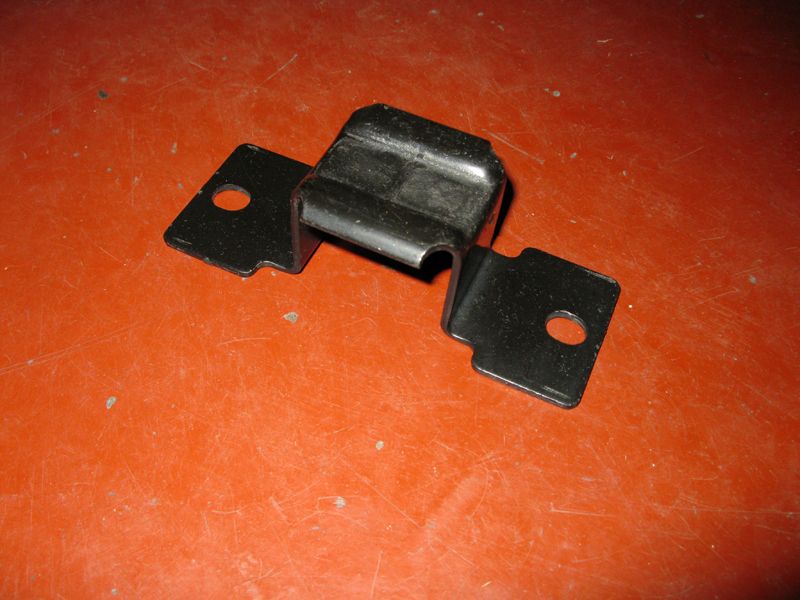
I wasn't able to completely tighten some of the front suspension bolts because I couldn't find one of the inner front sway bar brackets (see pic below). Since the front suspension and engine was removed by Evan's body shop friend (the guy he bought the car from), it might still be at his shop somewhere. If we can't find it, we'll have to buy one from a salvage yard or something.
I'm getting close now to being able to put the LT5 back in.
I decided I wanted to clean up the radiator/oil cooler/A/C condenser area. So I removed the whole radiator shroud, fans, etc and cleaned them up.
See the 3 pictures at the end of this post for before pictures:
http://forums.corvetteforum.com/1585316787-post25.html
And now with rad shroud, etc reinstalled; looks a lot better.
The area of the radiator shroud where the air filter box sits has been cut out because this Z has had one of those 'reverse' air filter boxes installed.
Then, finally I got onto getting the front spring back in and the front suspension back together. Before putting the spring back in, lubricate the top of the installed lowering wedges and the pads on the bottom of the ends of the spring with some suspension bushing lube. We used some little packets of lube that Evan had saved from various Energy Suspension kits he's bought in the past.
Front spring and suspension back together, passenger side.
Driver side.
I wasn't able to completely tighten some of the front suspension bolts because I couldn't find one of the inner front sway bar brackets (see pic below). Since the front suspension and engine was removed by Evan's body shop friend (the guy he bought the car from), it might still be at his shop somewhere. If we can't find it, we'll have to buy one from a salvage yard or something.
I'm getting close now to being able to put the LT5 back in.
11-15-2013, 10:41 PM
#33
Le Mans Master
11-17-2013, 12:17 AM
#34
Drifting
Thread Starter
Member Since: Jun 2007
Location: Prather, California -1990 ZR-1 White/Flame Red- -SOLD!!-
Posts: 1,261
Likes: 0
Received 2 Likes
on
2 Posts
Passenger side cam cover installed (I just set the emblem in place for the picture, I haven't installed it yet).
Steering shaft and rack installed.
Front bumper brace and power steering cooler installed.
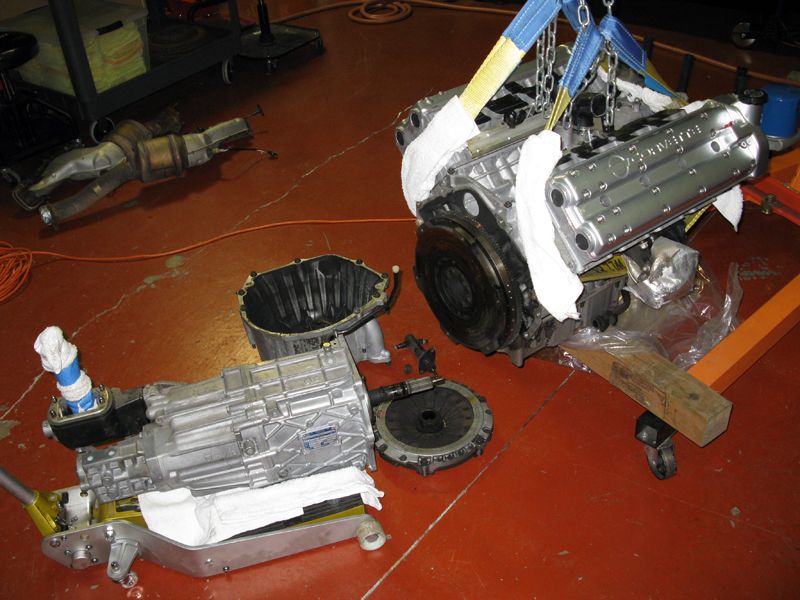
ZF6, bellhousing, pressure plate/clutch disc and exhaust manifolds all removed for installing the LT5 back in through the top. Back when Evan first bought this Z, we had planned on installing the engine from the bottom with the car on a hoist like GM did it, but a customer's C6 Z06 has been sitting on the hoist for the past several years (yeah, it's a loooong project!) so we couldn't do it that way.
I replaced the gaskets for the oil filter adapter and the crankcase vent cover because they came in the gasket kit Evan got from Jerry. The originals seemed ok still, but since we had new ones, I figured may as well use them.
On the crankcase vent cover, I used loctite on the bolts even though the FSM doesn't call for any since the bolts on that cover are notorious for becoming loose over time which I think is one of the main reasons a lot of LT5's get so greasy/dirty under the plenum. And in fact, I found that 5 of the bolts were just finger tight and this Z only has 42K miles. So if you have your plenum off, it is worth it to at least check that the bolts are tight, but it's better to remove the bolts and reinstall them with loctite. You have to clean the oil out of the bolt holes first though otherwise the loctite won't work.
I also decided to check the front cover/water pump bolts and oil pan bolts because I have heard that they can become loose sometimes too. I found that pretty much all of them were not at their specified torques. They weren't as loose as some of the ones in the crankcase vent cover, but they did need some tightening.
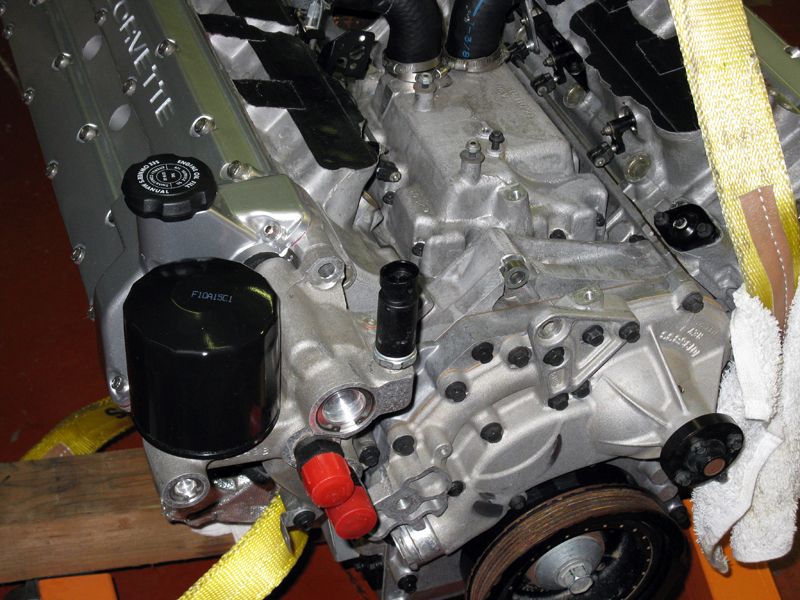
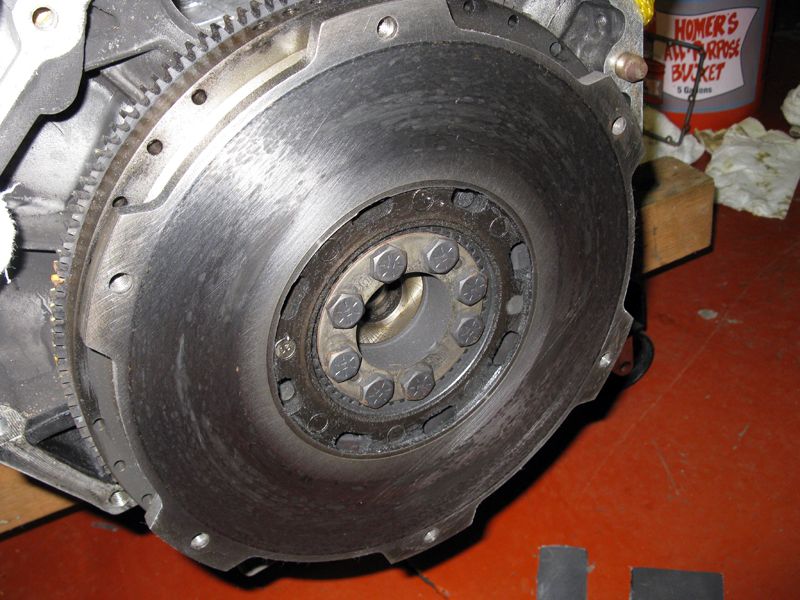
After that, I cleaned up the gasket surfaces of the exhaust ports on the cylinder heads and used some emery cloth on the DM flywheel clutch surface. From the looks of the flywheel surface, the previous owner of this Z did a lot of clutch-slipping.
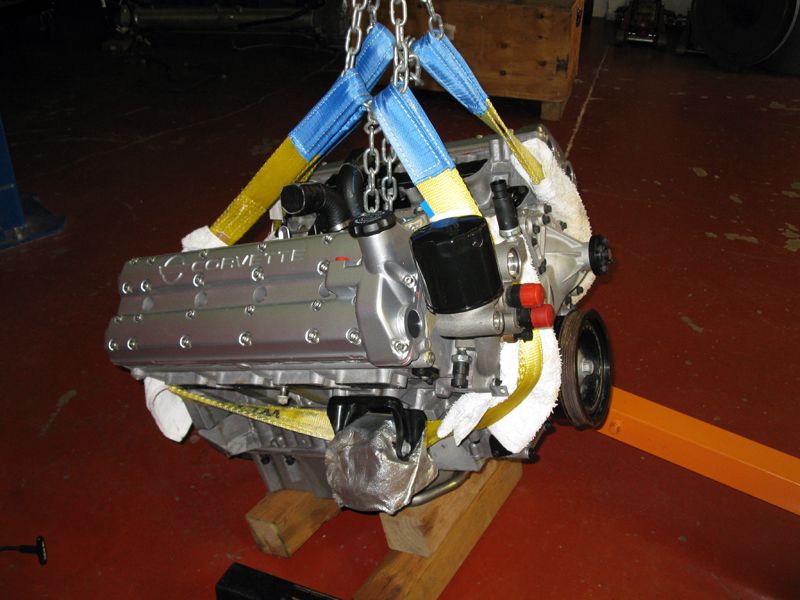
It was then time to get the engine ready to drop back in the car. I used some 4x4 blocks of wood to help me get the engine tilted in the lifting straps so that it would be easier to get it into the car.
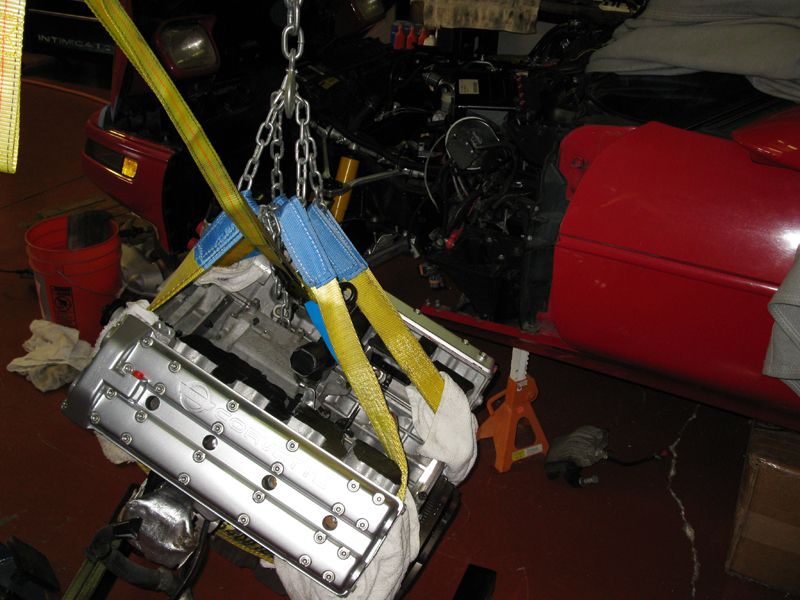
Getting the engine in position to lift up and then drop down into the engine bay.
And now, finally after 3+ years of being out of the car (I've actually never seen this ZR-1 with the engine in it and neither has Evan, it had already been removed by his body shop friend when he bought it) the LT5 is finally back where it belongs!
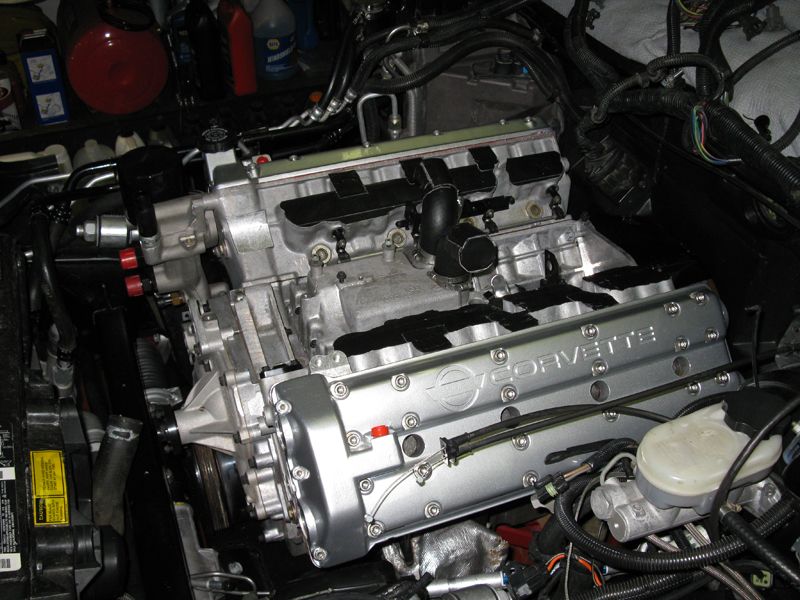
Time to get the rest of the LT5 put together!
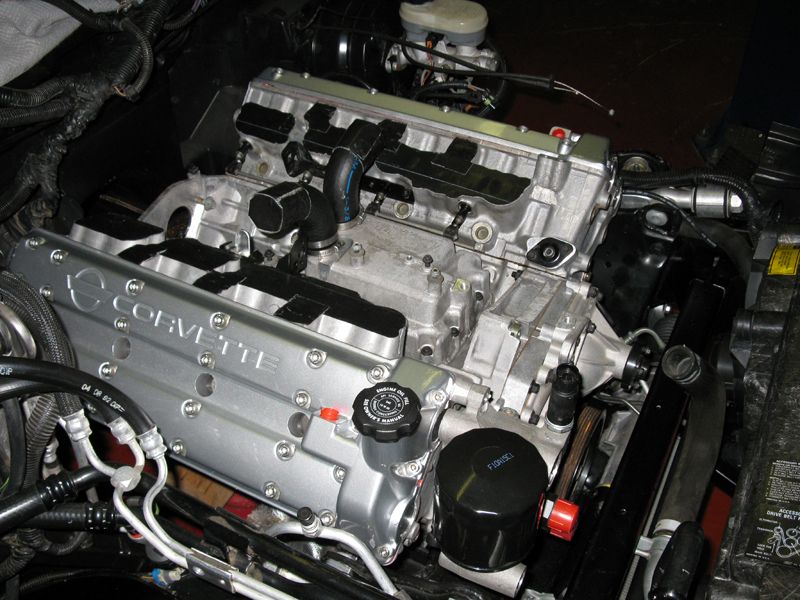
Starter installed.

Positive cable from battery to starter and starter solenoid control wire installed. Covers for the secondaries' linkage also installed.
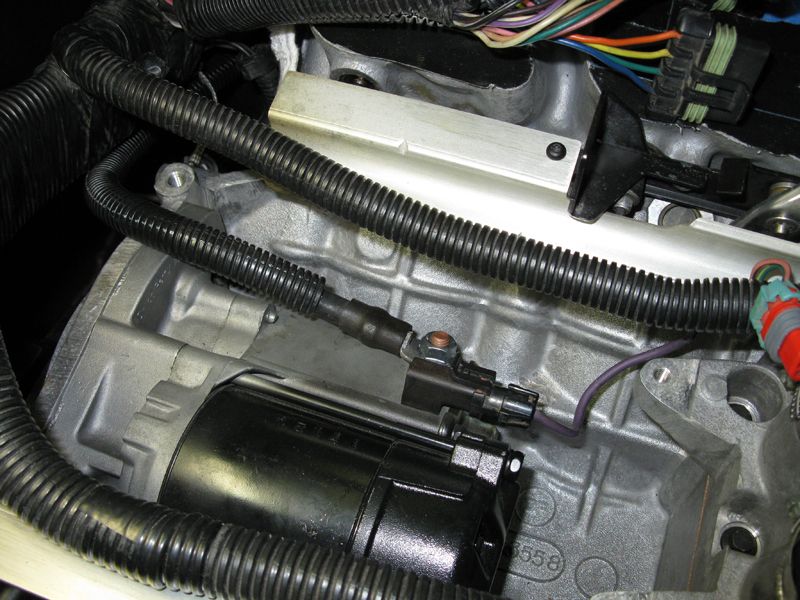
This picture shows where the two upper grounding bolts are for the engine harness ground wires. There is also a metal holder (not shown in the pic) for the engine wire harness that uses the bellhousing bolt that is just under the driver side grounding bolt (right side grounding bolt in the pic). The negative cable for the battery uses a third grounding bolt that is on the driver side at the rear of the engine under the cylinder head.
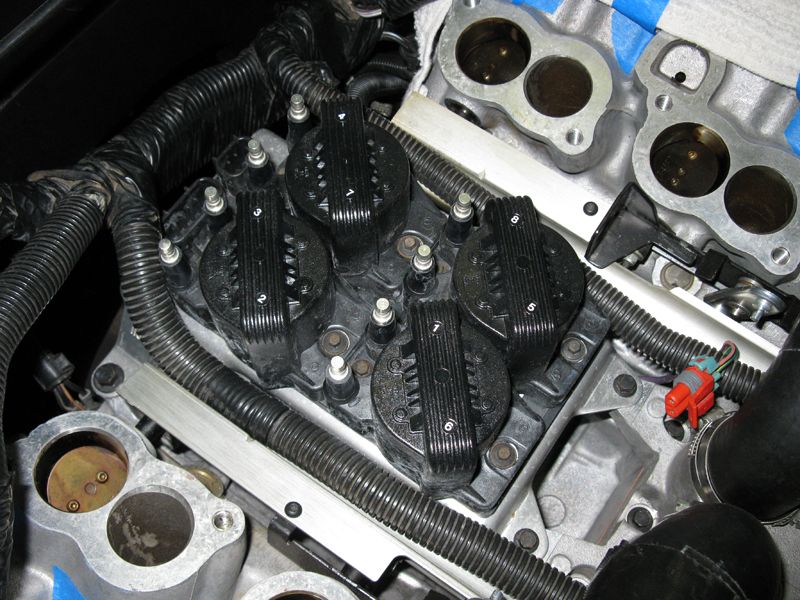
Coil pack mounting plate with new coil pack connector-base and new AC-Delco coil packs.
That's it for this update!
.
Steering shaft and rack installed.
Front bumper brace and power steering cooler installed.
ZF6, bellhousing, pressure plate/clutch disc and exhaust manifolds all removed for installing the LT5 back in through the top. Back when Evan first bought this Z, we had planned on installing the engine from the bottom with the car on a hoist like GM did it, but a customer's C6 Z06 has been sitting on the hoist for the past several years (yeah, it's a loooong project!) so we couldn't do it that way.
I replaced the gaskets for the oil filter adapter and the crankcase vent cover because they came in the gasket kit Evan got from Jerry. The originals seemed ok still, but since we had new ones, I figured may as well use them.
On the crankcase vent cover, I used loctite on the bolts even though the FSM doesn't call for any since the bolts on that cover are notorious for becoming loose over time which I think is one of the main reasons a lot of LT5's get so greasy/dirty under the plenum. And in fact, I found that 5 of the bolts were just finger tight and this Z only has 42K miles. So if you have your plenum off, it is worth it to at least check that the bolts are tight, but it's better to remove the bolts and reinstall them with loctite. You have to clean the oil out of the bolt holes first though otherwise the loctite won't work.
I also decided to check the front cover/water pump bolts and oil pan bolts because I have heard that they can become loose sometimes too. I found that pretty much all of them were not at their specified torques. They weren't as loose as some of the ones in the crankcase vent cover, but they did need some tightening.
After that, I cleaned up the gasket surfaces of the exhaust ports on the cylinder heads and used some emery cloth on the DM flywheel clutch surface. From the looks of the flywheel surface, the previous owner of this Z did a lot of clutch-slipping.
It was then time to get the engine ready to drop back in the car. I used some 4x4 blocks of wood to help me get the engine tilted in the lifting straps so that it would be easier to get it into the car.
Getting the engine in position to lift up and then drop down into the engine bay.
And now, finally after 3+ years of being out of the car (I've actually never seen this ZR-1 with the engine in it and neither has Evan, it had already been removed by his body shop friend when he bought it) the LT5 is finally back where it belongs!
Time to get the rest of the LT5 put together!
Starter installed.
Positive cable from battery to starter and starter solenoid control wire installed. Covers for the secondaries' linkage also installed.
This picture shows where the two upper grounding bolts are for the engine harness ground wires. There is also a metal holder (not shown in the pic) for the engine wire harness that uses the bellhousing bolt that is just under the driver side grounding bolt (right side grounding bolt in the pic). The negative cable for the battery uses a third grounding bolt that is on the driver side at the rear of the engine under the cylinder head.
Coil pack mounting plate with new coil pack connector-base and new AC-Delco coil packs.
That's it for this update!
.
Last edited by bdw18_123; 11-17-2013 at 12:42 AM.
11-24-2013, 05:52 PM
#35
Drifting
Thread Starter
Member Since: Jun 2007
Location: Prather, California -1990 ZR-1 White/Flame Red- -SOLD!!-
Posts: 1,261
Likes: 0
Received 2 Likes
on
2 Posts
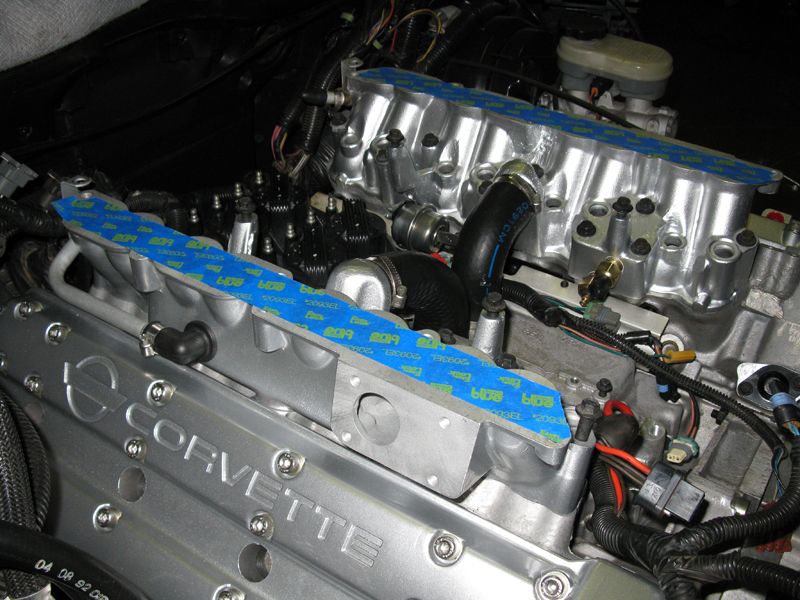
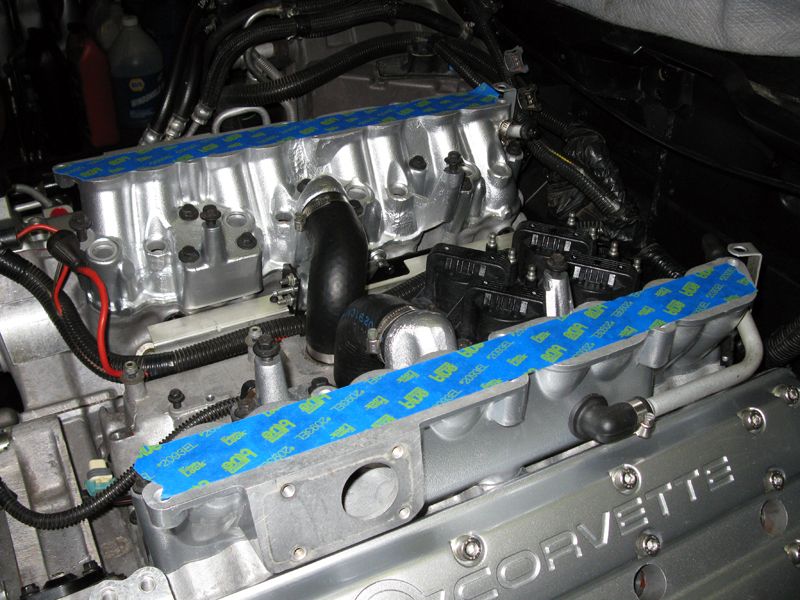
Injector housings installed with new gaskets, PCV system hoses & grommets installed and also the two coolant temp sensors with thread sealant into the driver side IH. The FSM says to tighten the bolts to the specified torque value starting from the center and working your way outward.
One thing to remember is that the bolt closest to the front of the car in the passenger IH also holds the bracket for the cam cover vent tube on that side and the small bracket that bolts to the rear of the alternator. They need to be in place under that bolt before you put on the fuel rails because that bolt won't come out fully with the rails bolted down. Also, I waited to torque that bolt until I was ready to install the alternator so I could make sure that the bracket would be in the right place to line up with the bolt hole in the alternator.
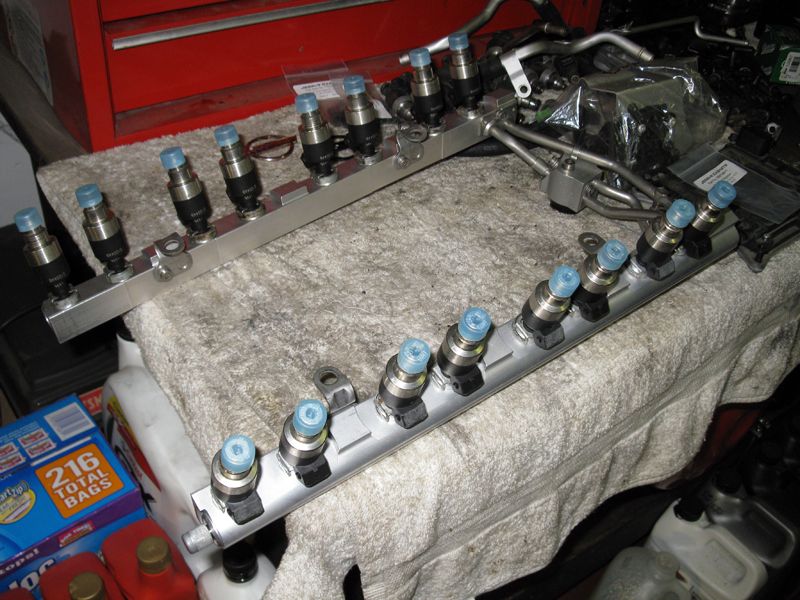
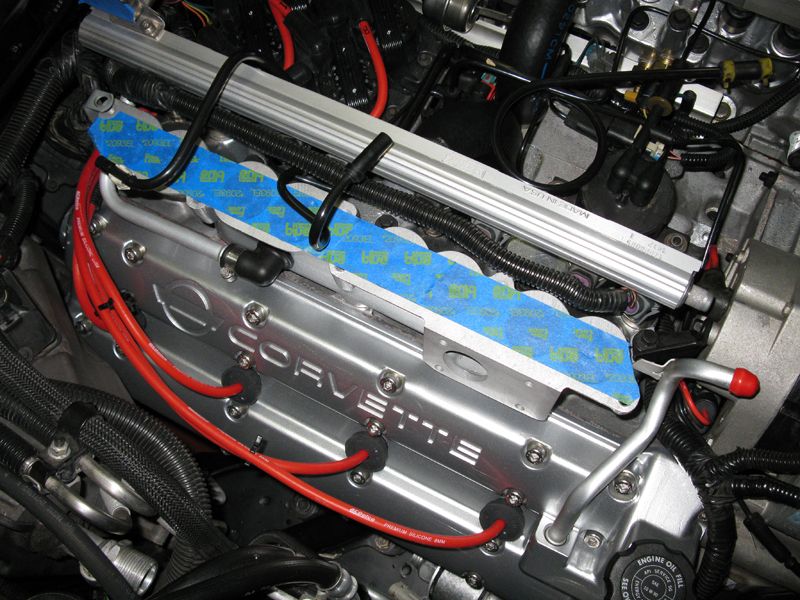
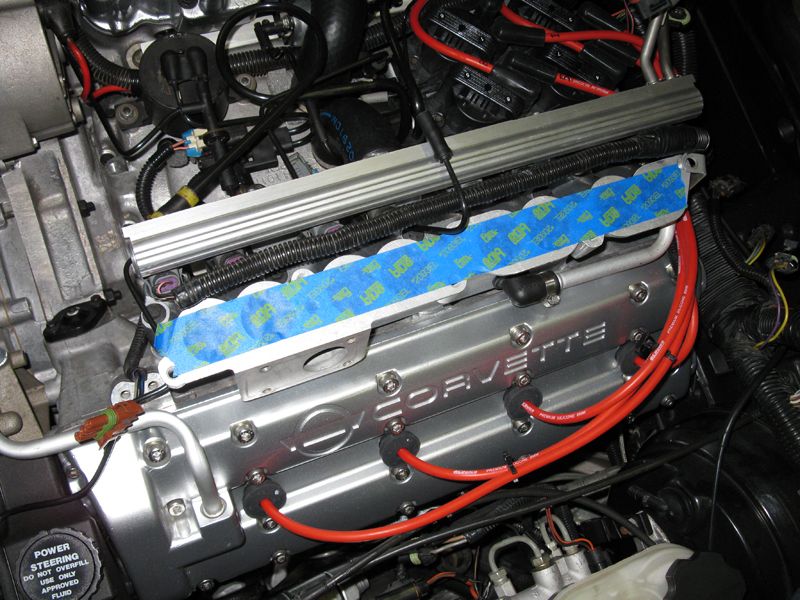
Fuel rails assembled with new fuel injectors. The primary and secondary injectors had o-rings on them, but they weren't the brown Viton ones like Evan had already bought from Jerry, so I removed the black ones and installed the Viton ones.
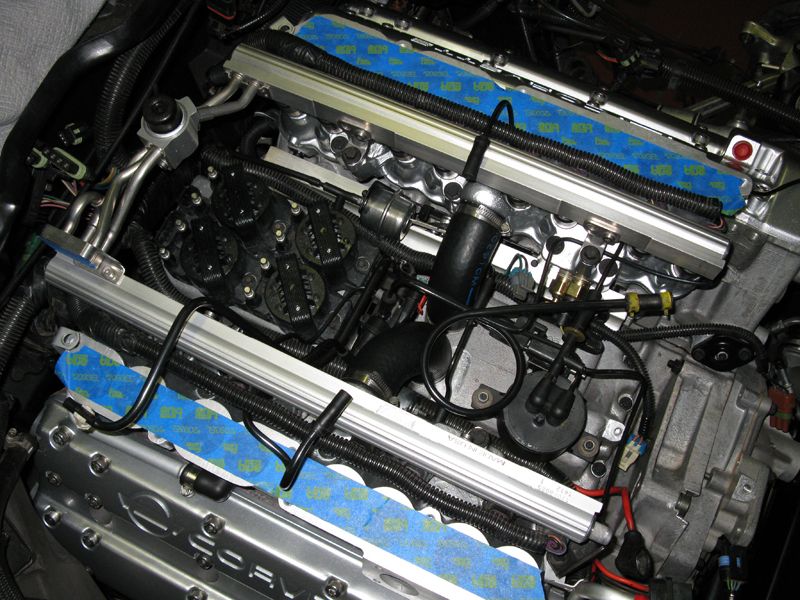
Fuel rail/injectors assembly installed on engine.

Under-plenum vacuum system installed.
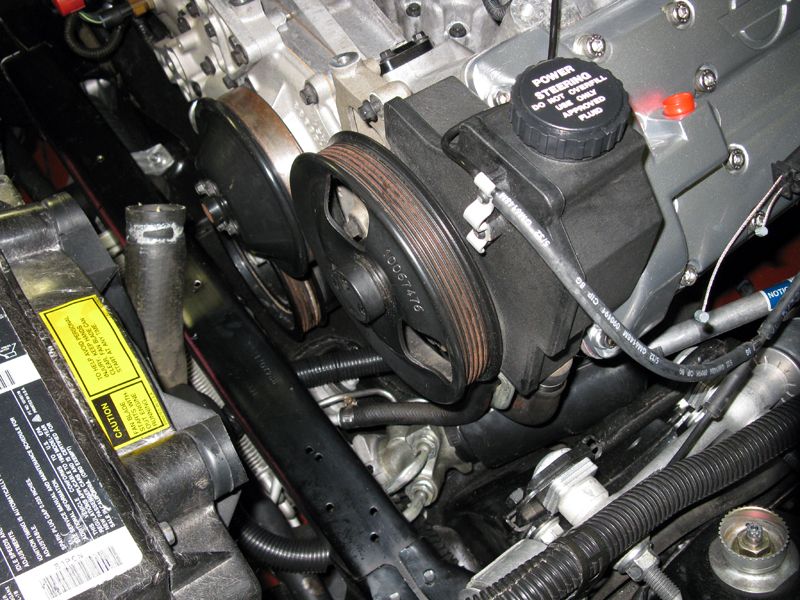
Power steering reservoir & pump assembly installed.
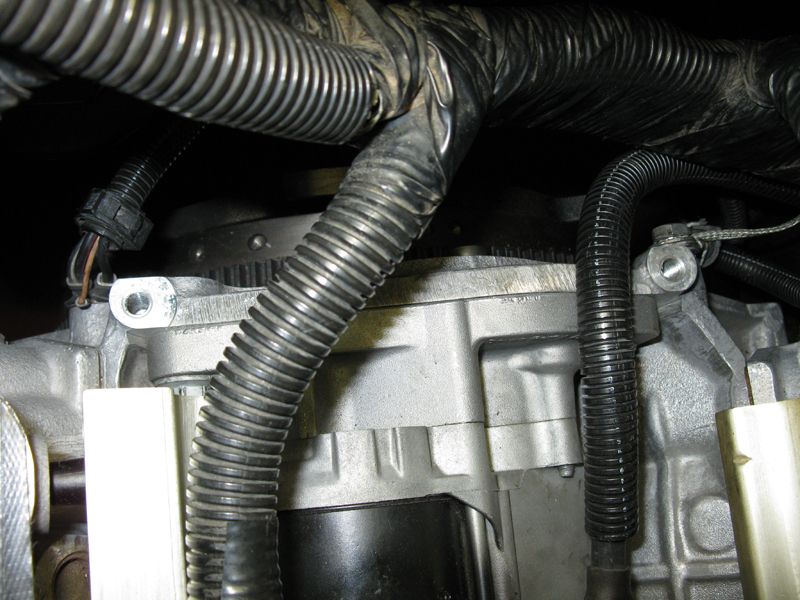
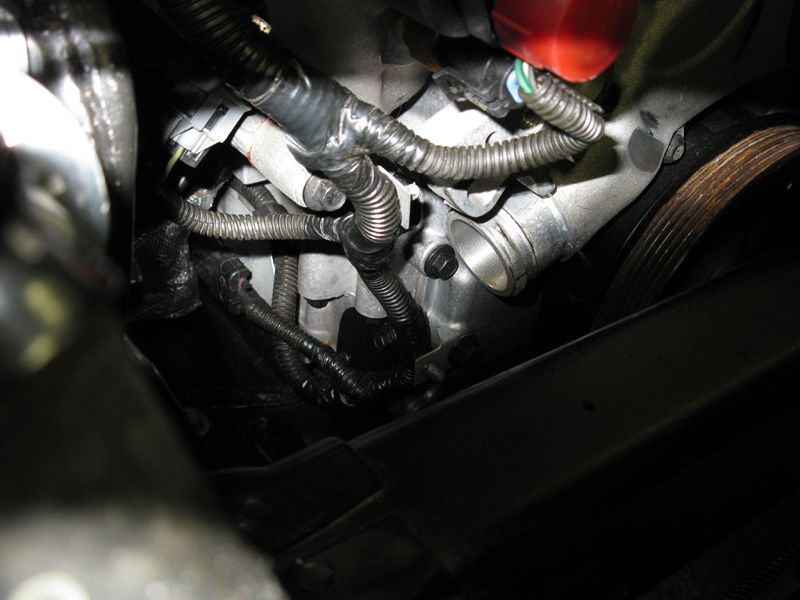
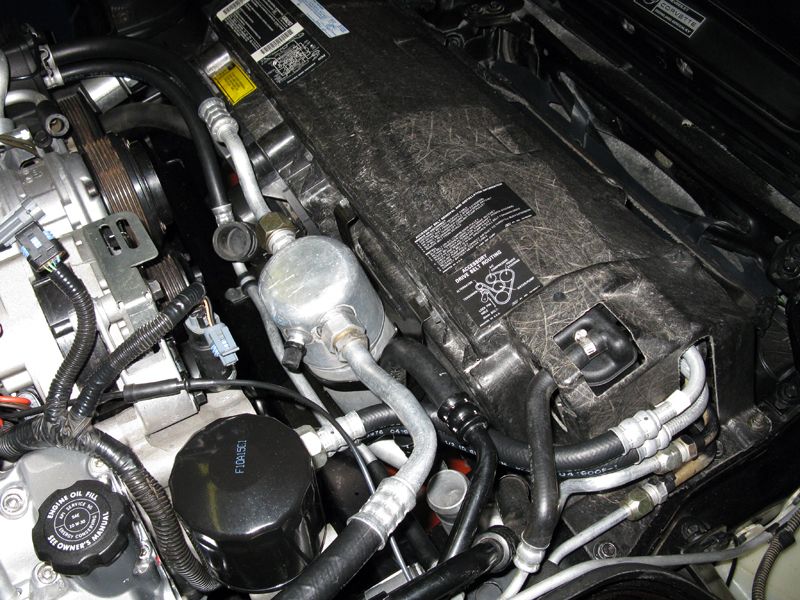
This is a picture showing the routing of the wire harness that goes down the passenger side of the engine. There are two metal tabs that hold the harness, the L-shaped one goes on the outboard bolt on the oil filter adapter assembly (there is a thick washer that has to be under this tab so it can be put in the right position) and the lower, flat one goes on a bolt on the front cover (second from bottom on passenger side). There are diagrams in the FSM that show how this and many other wire harnesses are supposed to be routed.
The O2 sensor harness connector on the passenger side of the engine is very, very difficult to get to if you put the connector in the factory location behind that little metal bracket that is bolted to the front, passenger side of the oil pan (can be partially seen in the below pic). I'm going to leave the O2 sensor connector sitting on the other side of that bracket next to the motor mount (like how it is sitting in the pic) so it will be a little bit easier to get to if needed.
New AC-Delco spark plug wires and new NGK spark plugs installed. There is also a diagram in the FSM to show how the plug wires route to the coils under the plenum.
Alternator & A/C compressor installed. I replaced all the o-rings on the A/C compressor.
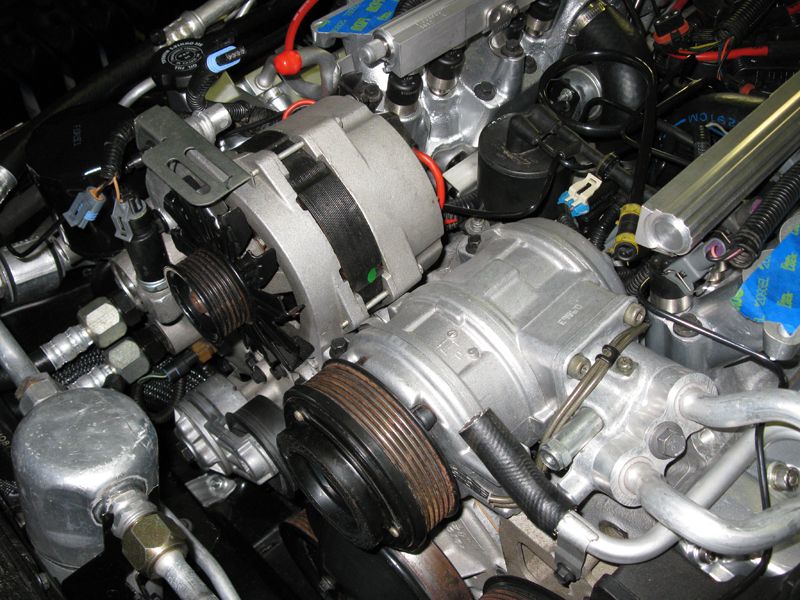
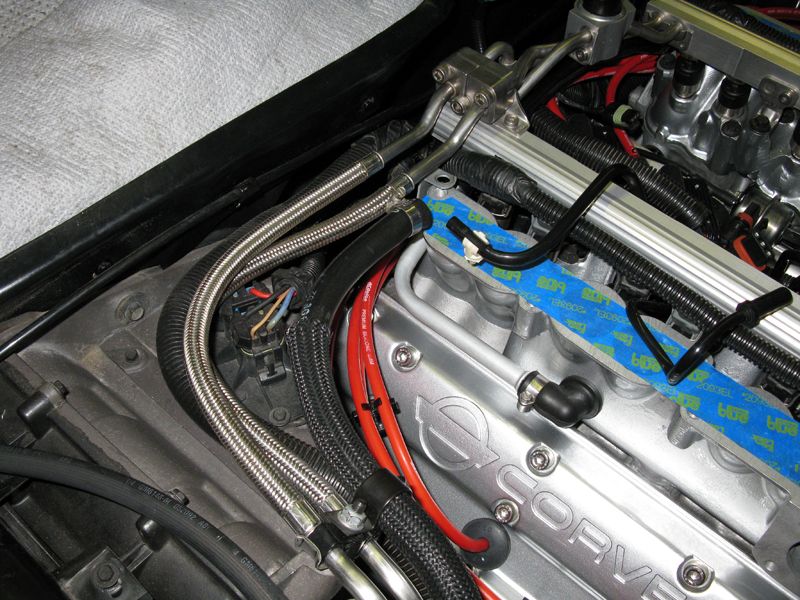
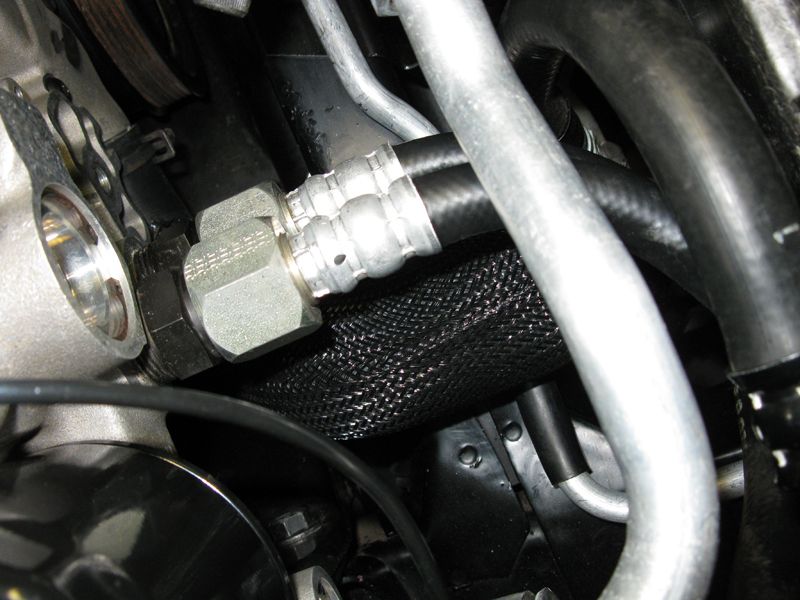
A/C & oil cooler lines installed with new o-rings.
Fuel lines bolted to the rails with new o-rings and stainless hardware (for some reason, these 3 bolts are not included in the stainless hardware kit from Jerry).
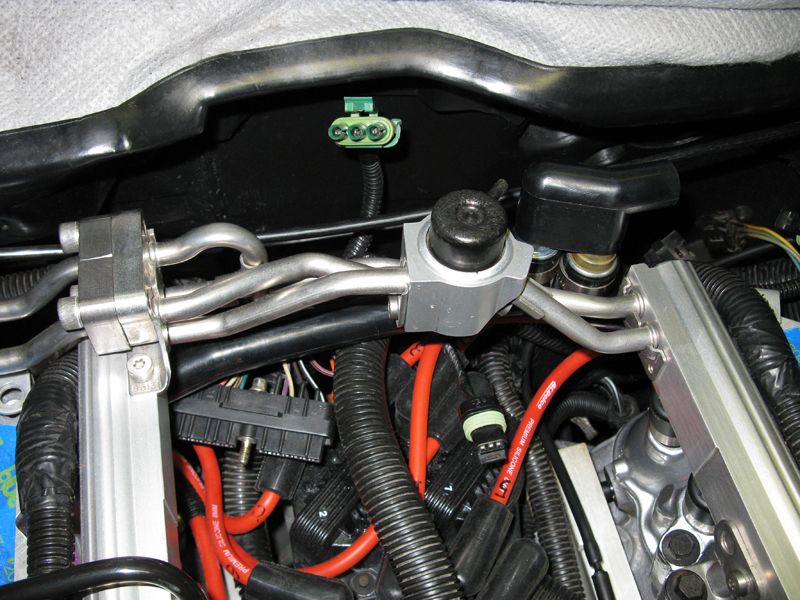
New F-tube assembly (looks just like the original GM versions) and new PCV valves from Jerry's Gaskets installed.
As I was about to install the big lower coolant hose from the thermostat assembly to the water pump, I noticed that it had somehow gotten a big cut in it. It didn't go all the way through, but obviously had to be replaced anyway.
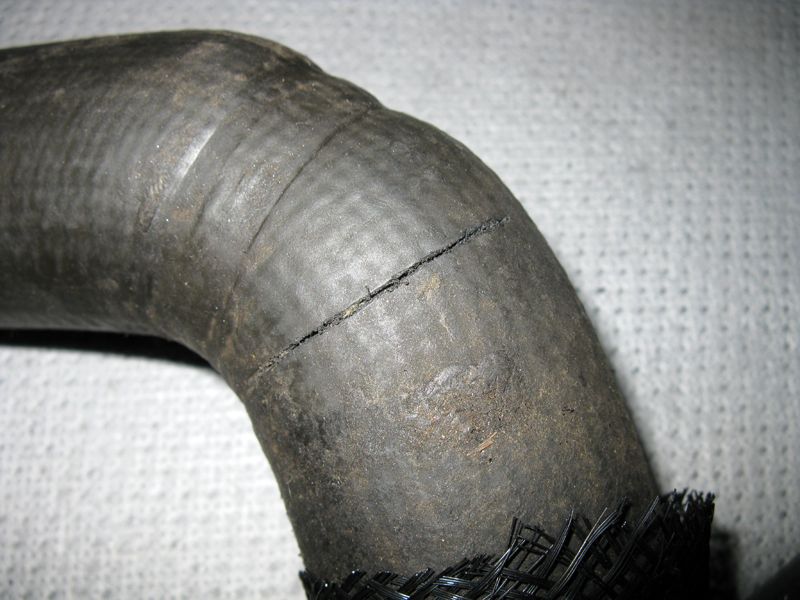
Evan got the new Goodyear replacement hose (part number: 66057) that surprisingly is still available from various places online and as a special order from some auto parts stores. It comes with the protective cover on the outside, but not the spring on the inside, so you have to use the one from the original hose. The spring is a little hard to install in the new hose, you have to keep twisting it (in the direction that would tighten the coils of the spring) and pushing it until it is centered in the hose.
New hose installed.
End of update!
One thing to remember is that the bolt closest to the front of the car in the passenger IH also holds the bracket for the cam cover vent tube on that side and the small bracket that bolts to the rear of the alternator. They need to be in place under that bolt before you put on the fuel rails because that bolt won't come out fully with the rails bolted down. Also, I waited to torque that bolt until I was ready to install the alternator so I could make sure that the bracket would be in the right place to line up with the bolt hole in the alternator.
Fuel rails assembled with new fuel injectors. The primary and secondary injectors had o-rings on them, but they weren't the brown Viton ones like Evan had already bought from Jerry, so I removed the black ones and installed the Viton ones.
Fuel rail/injectors assembly installed on engine.
Under-plenum vacuum system installed.
Power steering reservoir & pump assembly installed.
This is a picture showing the routing of the wire harness that goes down the passenger side of the engine. There are two metal tabs that hold the harness, the L-shaped one goes on the outboard bolt on the oil filter adapter assembly (there is a thick washer that has to be under this tab so it can be put in the right position) and the lower, flat one goes on a bolt on the front cover (second from bottom on passenger side). There are diagrams in the FSM that show how this and many other wire harnesses are supposed to be routed.
The O2 sensor harness connector on the passenger side of the engine is very, very difficult to get to if you put the connector in the factory location behind that little metal bracket that is bolted to the front, passenger side of the oil pan (can be partially seen in the below pic). I'm going to leave the O2 sensor connector sitting on the other side of that bracket next to the motor mount (like how it is sitting in the pic) so it will be a little bit easier to get to if needed.
New AC-Delco spark plug wires and new NGK spark plugs installed. There is also a diagram in the FSM to show how the plug wires route to the coils under the plenum.
Alternator & A/C compressor installed. I replaced all the o-rings on the A/C compressor.
A/C & oil cooler lines installed with new o-rings.
Fuel lines bolted to the rails with new o-rings and stainless hardware (for some reason, these 3 bolts are not included in the stainless hardware kit from Jerry).
New F-tube assembly (looks just like the original GM versions) and new PCV valves from Jerry's Gaskets installed.
As I was about to install the big lower coolant hose from the thermostat assembly to the water pump, I noticed that it had somehow gotten a big cut in it. It didn't go all the way through, but obviously had to be replaced anyway.
Evan got the new Goodyear replacement hose (part number: 66057) that surprisingly is still available from various places online and as a special order from some auto parts stores. It comes with the protective cover on the outside, but not the spring on the inside, so you have to use the one from the original hose. The spring is a little hard to install in the new hose, you have to keep twisting it (in the direction that would tighten the coils of the spring) and pushing it until it is centered in the hose.
New hose installed.
End of update!


 06-03-2014, 08:42 PM
#39
Team Owner


Member Since: Aug 2005
Location: Riverside County Southern California
Posts: 34,988
Received 501 Likes
on
342 Posts
Co-winner 2020 C4 of the Year - Modified
2018 Corvette of Year Finalist
2017 C4 of Year
2016 C7 of Year Finalist
St. Jude Donor '09-'10-'11-'12-'13-'14-'15-'16-'17-'18-'19-'20


Looking good Ben 
09-03-2014, 08:35 PM
#40
Drifting
Thread Starter
Member Since: Jun 2007
Location: Prather, California -1990 ZR-1 White/Flame Red- -SOLD!!-
Posts: 1,261
Likes: 0
Received 2 Likes
on
2 Posts
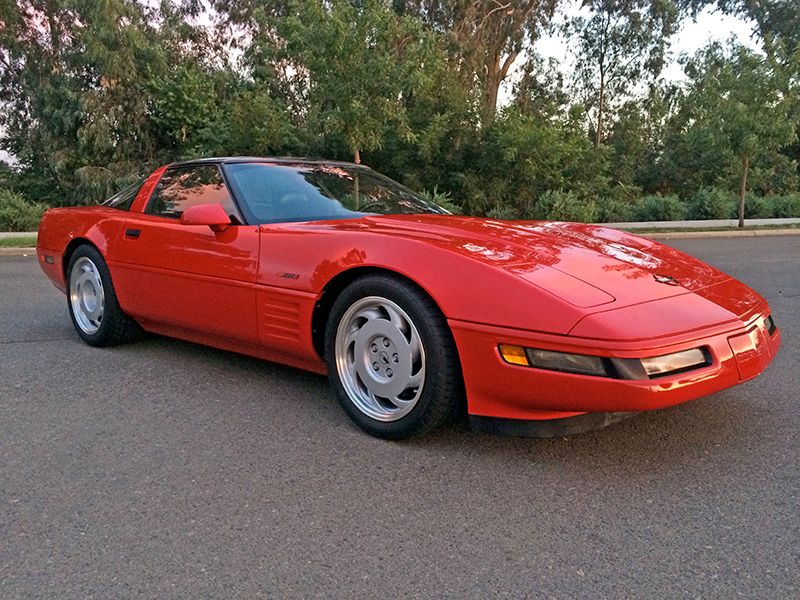
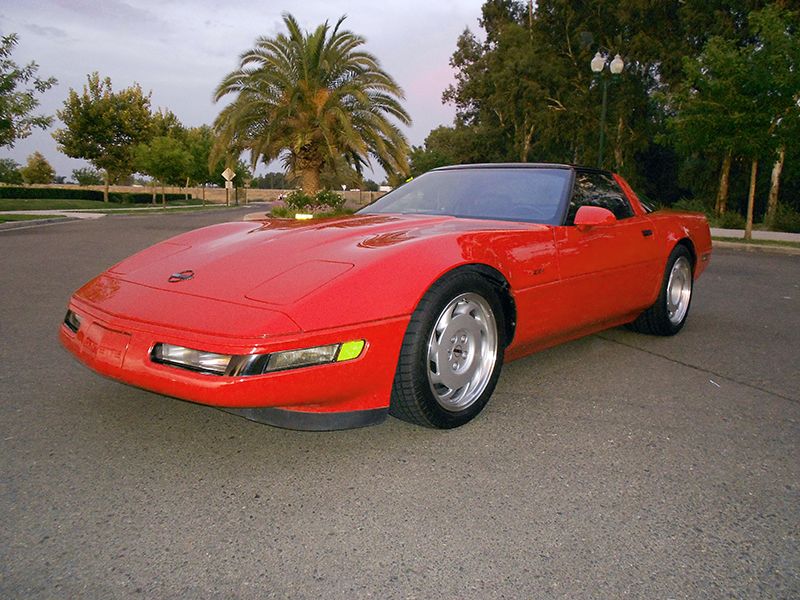
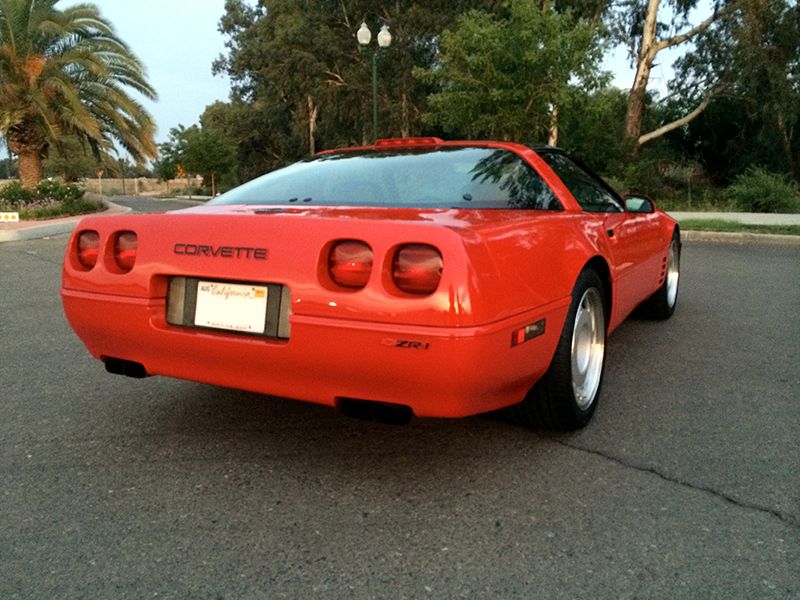
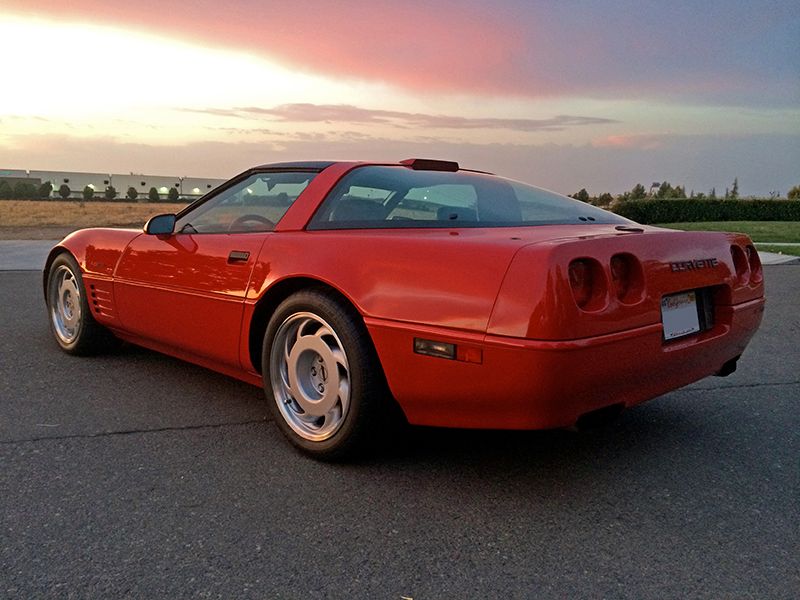
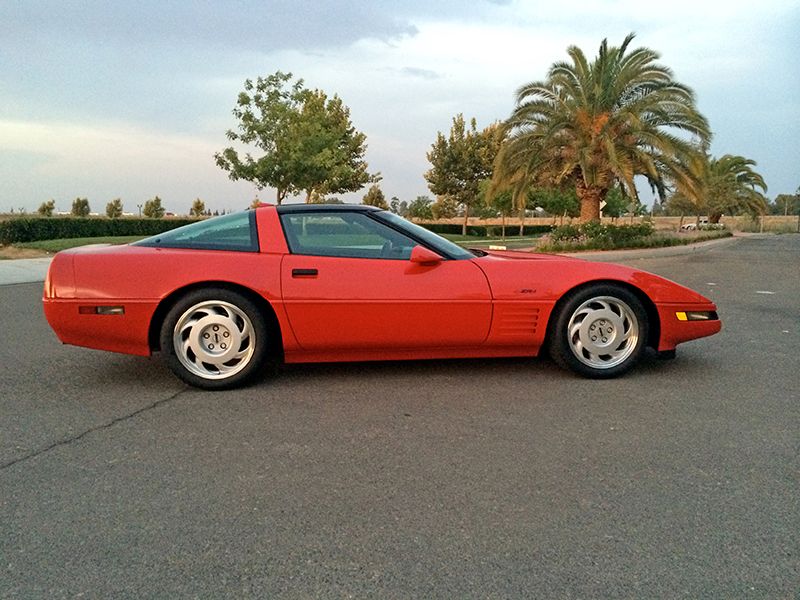
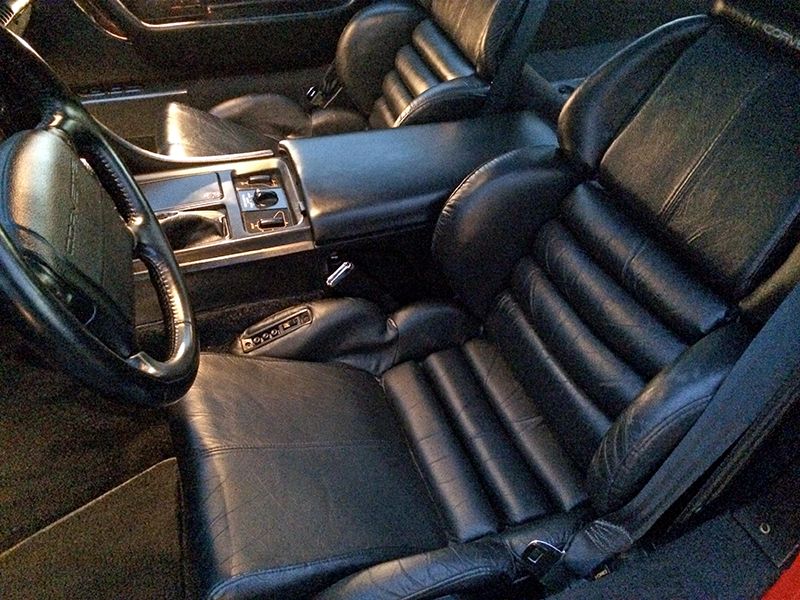
Time to finish off this thread.
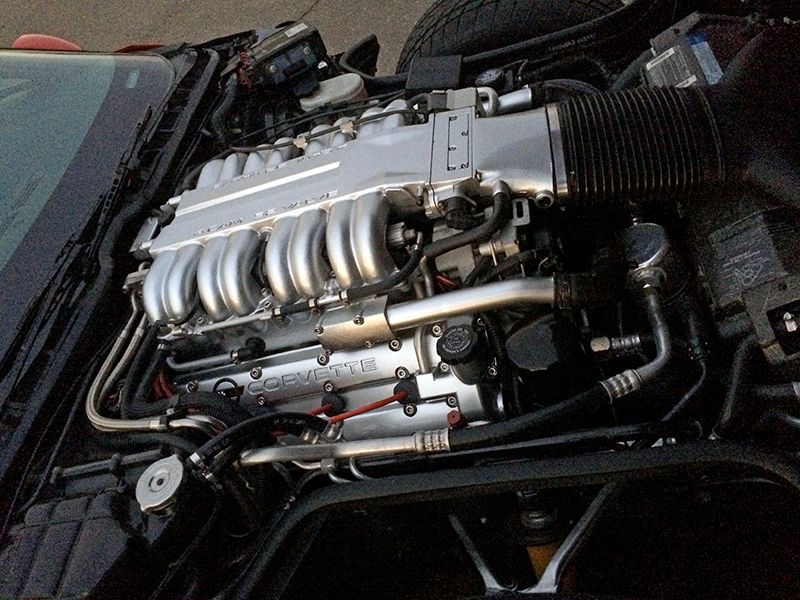
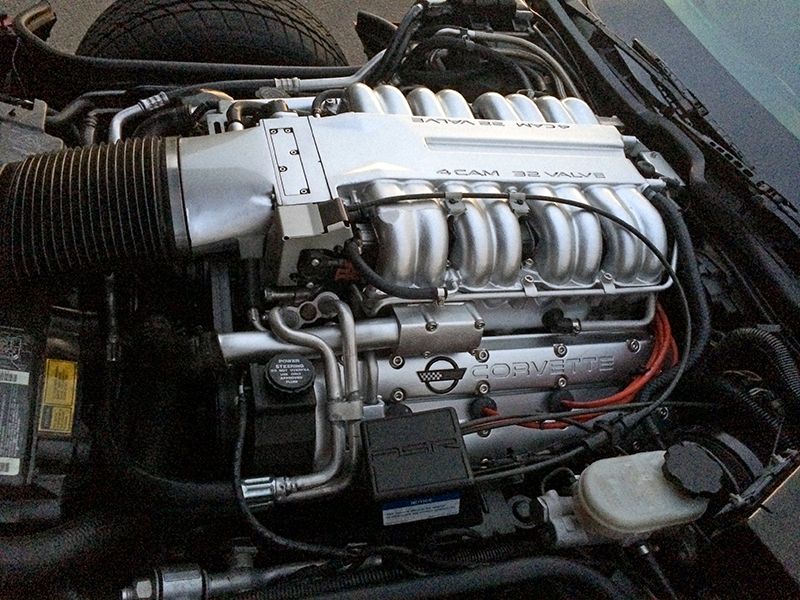
The car is pretty much done now, runs and drives excellently. The only things left to do is get the engine lettering airbrushed on & install the new front spoiler. I'll add new pictures of the engine once the lettering is done.
Paint has been polished. The paint is original except for the hood & top of the front bumper, which have been professionally repainted to eliminate scratches/paint chips/etc. The two 'ZR-1' emblems on the hood were also replaced with genuine GM OEM NOS versions because the originals were destroyed during removal to repaint the hood.
The windshield also had to be replaced with a regular C4 version due to very bad delamination across the whole thing. Probably the worst cast of delam I've ever seen, not sure how it got so bad.
Tires are brand new, they are Sumitomo's.
Also, this ZR-1 is up for sale. Evan is going to do a 'for sale' post soon with all the relevant details.
Now for the pictures: