Admiral 94 comes home. Finally ! :). Let the mods begin !!
 08-23-2014, 08:18 PM
#261

No I dont hate at all. I really like that colour of blue.....Dwight sold it to you for a fair price.
I didnt know I said re-paint in a prior message. This thread has gone on so long that I suppose I totally forgot what I said.
I didnt know I said re-paint in a prior message. This thread has gone on so long that I suppose I totally forgot what I said.
 09-28-2014, 11:24 PM
#262
Safety Car

Thread Starter
Goodies have been back for a while. Sorry for not updating this thread I keep posting on facebook and not here  . Anyhow I have lots of high quality wire for the stereo install. Ill also be doing a big 4 upgrade running 4 ga from alt to bat, alt to ground alt neg to neg bat and the last I forget.. block to neg battery? will google before I get to that. The stereo doesn't need it, but a better ground and pos connection is better for all systems in the car so that was my reasoning.
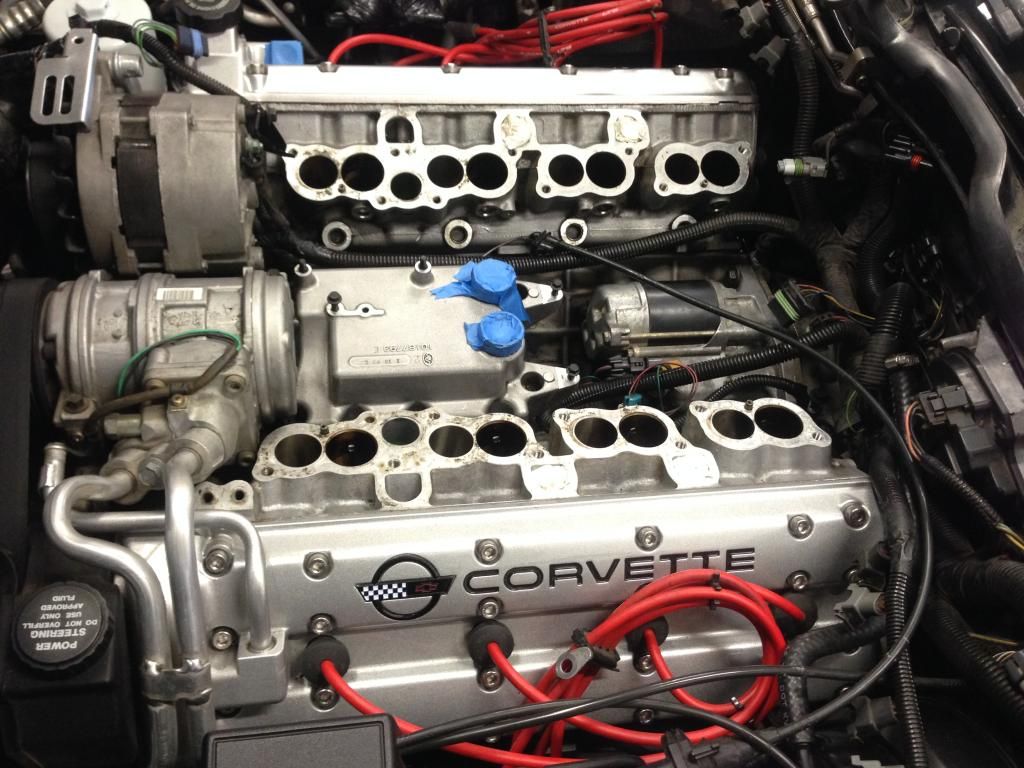
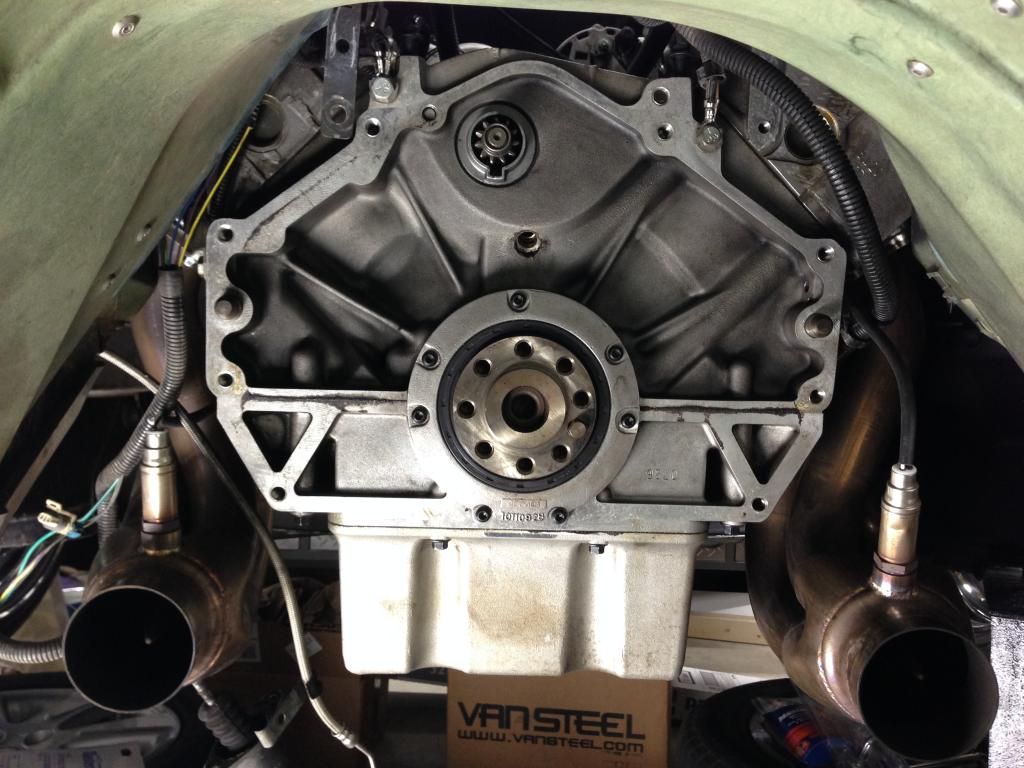
Started cleaning under the plenum a bit.
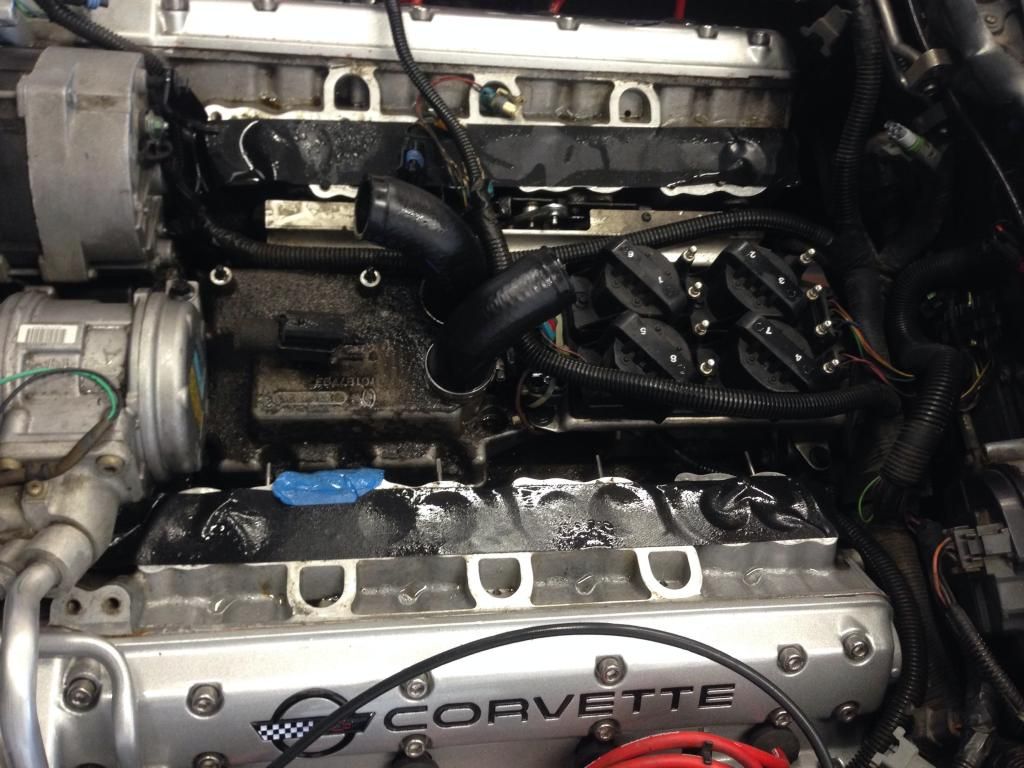
Got the secondaries, shafts and blades out of the runners. Just have to plug the holes with the freeze plugs then I can start reassembly a little before moving on to the clutch.
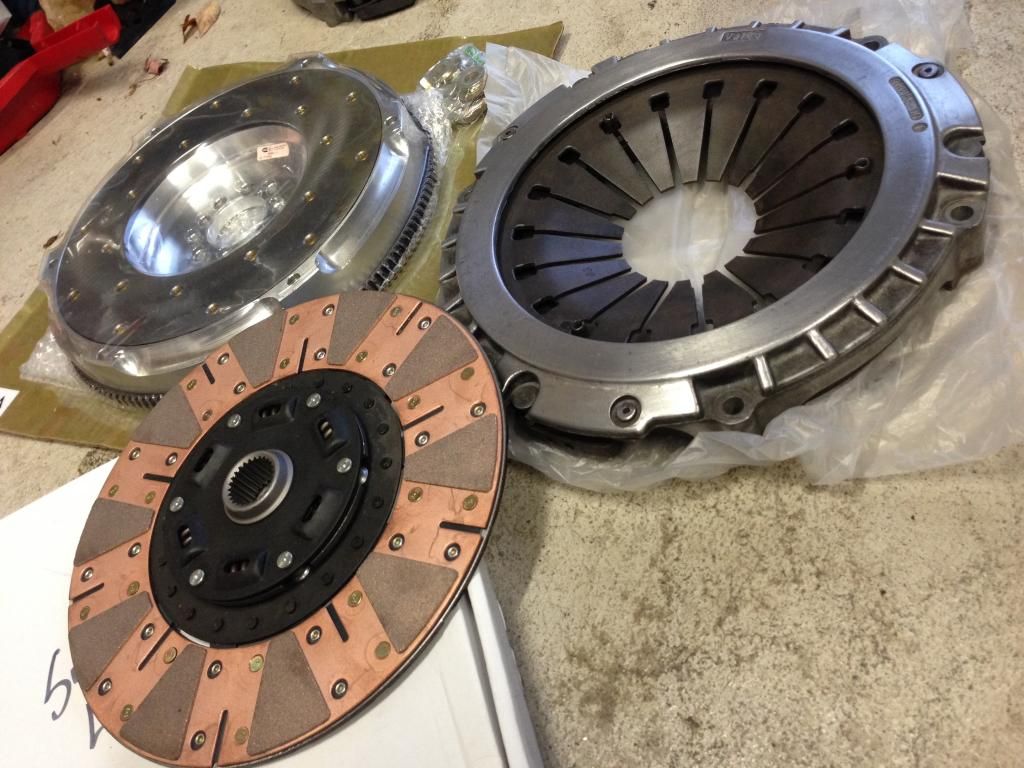
With regards to the clutch. I decided to replace the stage 2 disc with a dual friction disc from CC. There were many recent photos of failures of the cc stage 1 disc breaking apart. I was assured the stg2 wouldn't have that problem but I decided to go ahead with the dual friction anyways. I have a McLeod twin disk and its aggressive in the 93 and I love it so a dual disc shouldn't be an issue for me.
More pics to come !
. Anyhow I have lots of high quality wire for the stereo install. Ill also be doing a big 4 upgrade running 4 ga from alt to bat, alt to ground alt neg to neg bat and the last I forget.. block to neg battery? will google before I get to that. The stereo doesn't need it, but a better ground and pos connection is better for all systems in the car so that was my reasoning. Started cleaning under the plenum a bit.

Got the secondaries, shafts and blades out of the runners. Just have to plug the holes with the freeze plugs then I can start reassembly a little before moving on to the clutch.

With regards to the clutch. I decided to replace the stage 2 disc with a dual friction disc from CC. There were many recent photos of failures of the cc stage 1 disc breaking apart. I was assured the stg2 wouldn't have that problem but I decided to go ahead with the dual friction anyways. I have a McLeod twin disk and its aggressive in the 93 and I love it so a dual disc shouldn't be an issue for me.
More pics to come !
09-29-2014, 02:44 AM
#263
Le Mans Master

Member Since: Jan 2000
Location: Georgetown TX
Posts: 8,433
Received 1,869 Likes
on
1,085 Posts
C5 of Year Finalist (appearance mods) 2019

Glad to see you tinkering with your car again,Mike. Good inspiration for a lot of us.
09-29-2014, 05:34 AM
#264
Le Mans Master

how is the pedal feel and streetability on the dual disk?
I'm looking to not go any stiffer than stock on the pedal (bad knee) and get more holding power
the LSV can overwhelm the clutch after a few runs
I'm looking to not go any stiffer than stock on the pedal (bad knee) and get more holding power
the LSV can overwhelm the clutch after a few runs
10-16-2014, 06:09 PM
#265
Safety Car
Thread Starter

I should have been more careful with my words I think ! Its a dual friction single disc.. not a dual disc. I was going to go with the RAM setup from Jerry but some unkowns so I decided Ill stick with the fidanza setup for now. The RAM setup has a dual disc organic option that should hold quite a bit more power with stock like pedal feel. I think something like that would be perfect for a high hp/torque z.
My disc is a dual friction. Its metallic on one side and organic on the other. It should grip more and therefore will hold more power but be a little more 'catchy' . Im waiting on the correct flywheel still as I had a LS flywheel in a proper LT5 packaging

During the downtime Ill be refreshing all the orings on the injectors I got from Jerry and Ill be doing some heat reflective shielding on the tunnel and base of the firewall (ordered today
 ).
).some pics coming !
10-16-2014, 06:34 PM
#266
Safety Car
Thread Starter
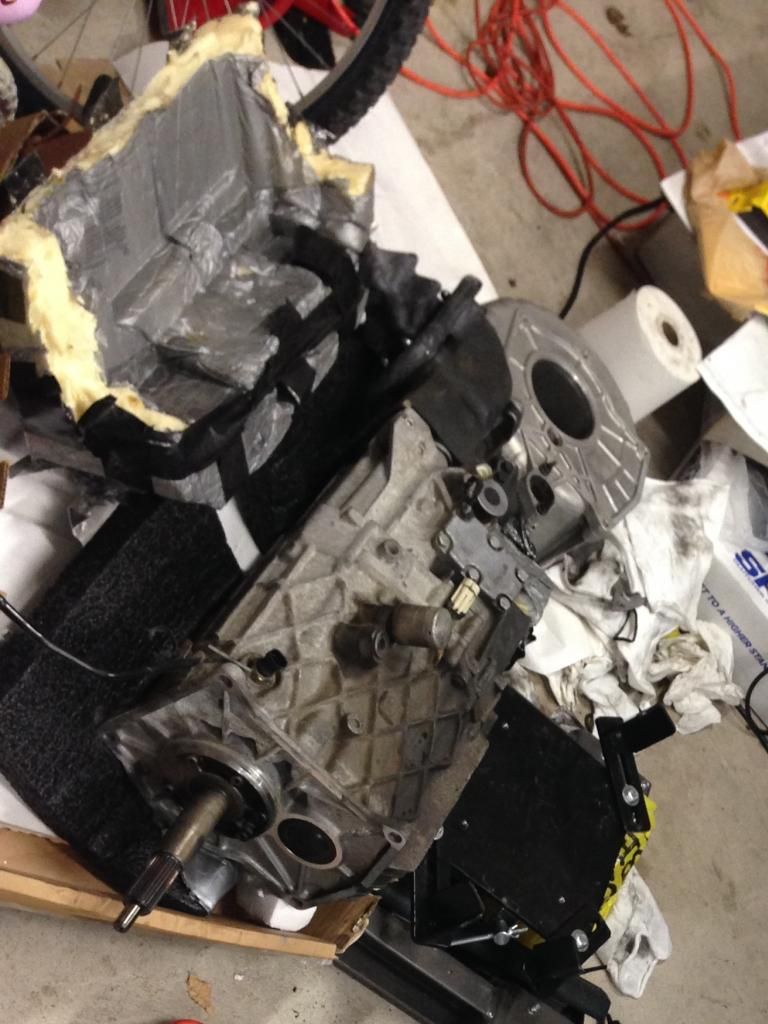
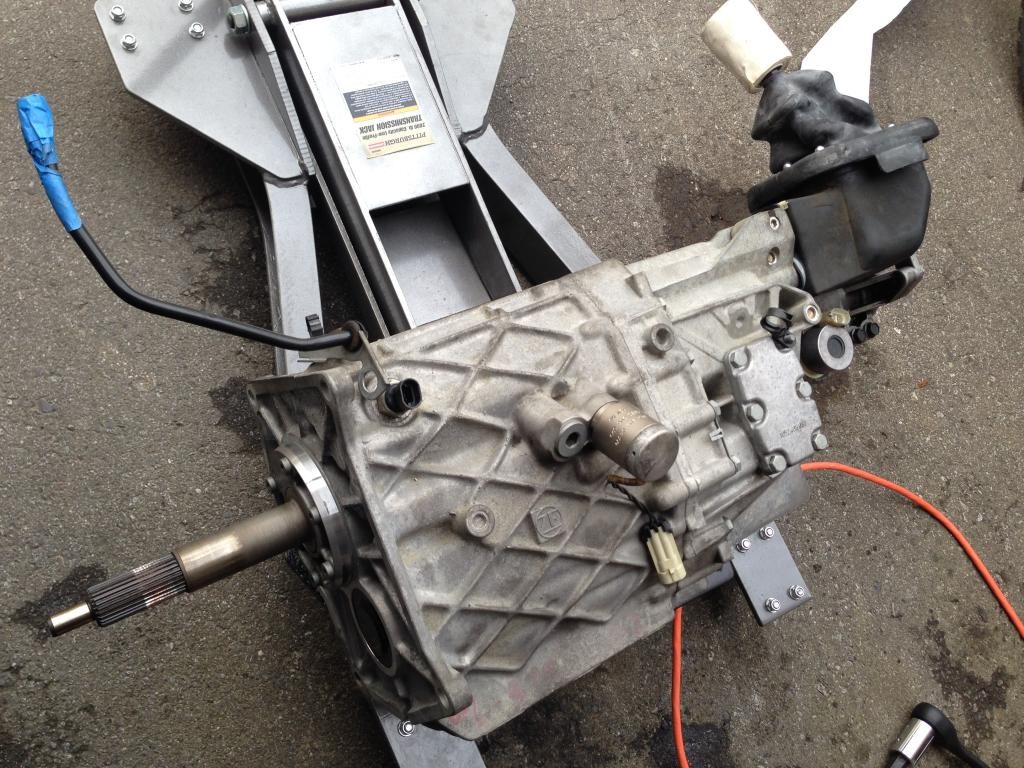
Shot I took with my new lens... trans out and waiting on the flywheel .
Back of the LT5
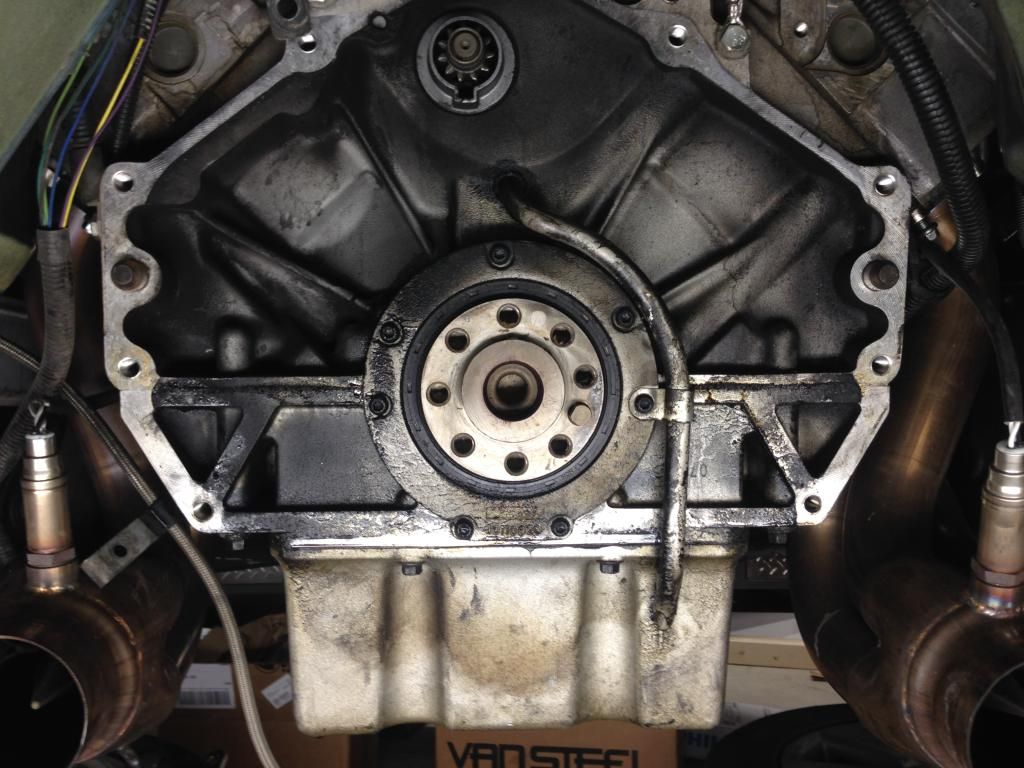
Getting there. Couldn't find my brushes so more to go still (valley drain tube wasn't on yet I know).. Oil pan and rear main seal bolts all cleaned blue loc tited and retorqued (first time using a fsm lol- came in handy for torque specs !)
Shot of the wrong flywheel (9 holes but dowel hole is small.. lsx?)

Back of the LT5

Getting there. Couldn't find my brushes so more to go still (valley drain tube wasn't on yet I know).. Oil pan and rear main seal bolts all cleaned blue loc tited and retorqued (first time using a fsm lol- came in handy for torque specs !)

Shot of the wrong flywheel (9 holes but dowel hole is small.. lsx?)
 10-16-2014, 07:11 PM
#267
Safety Car
Thread Starter
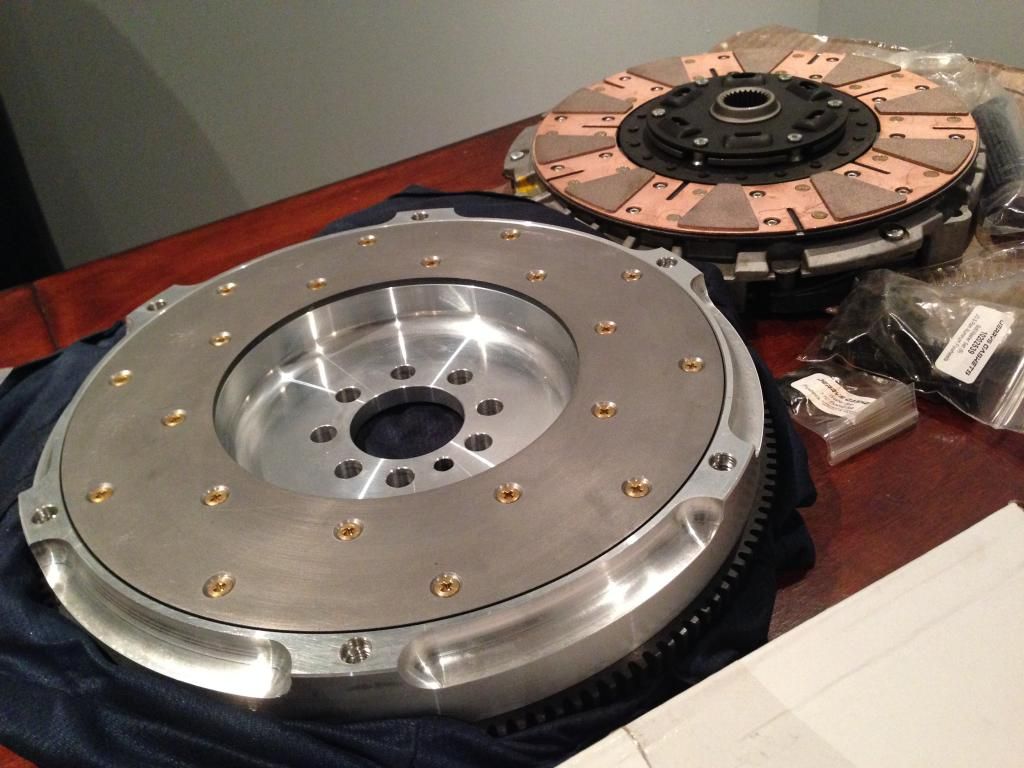
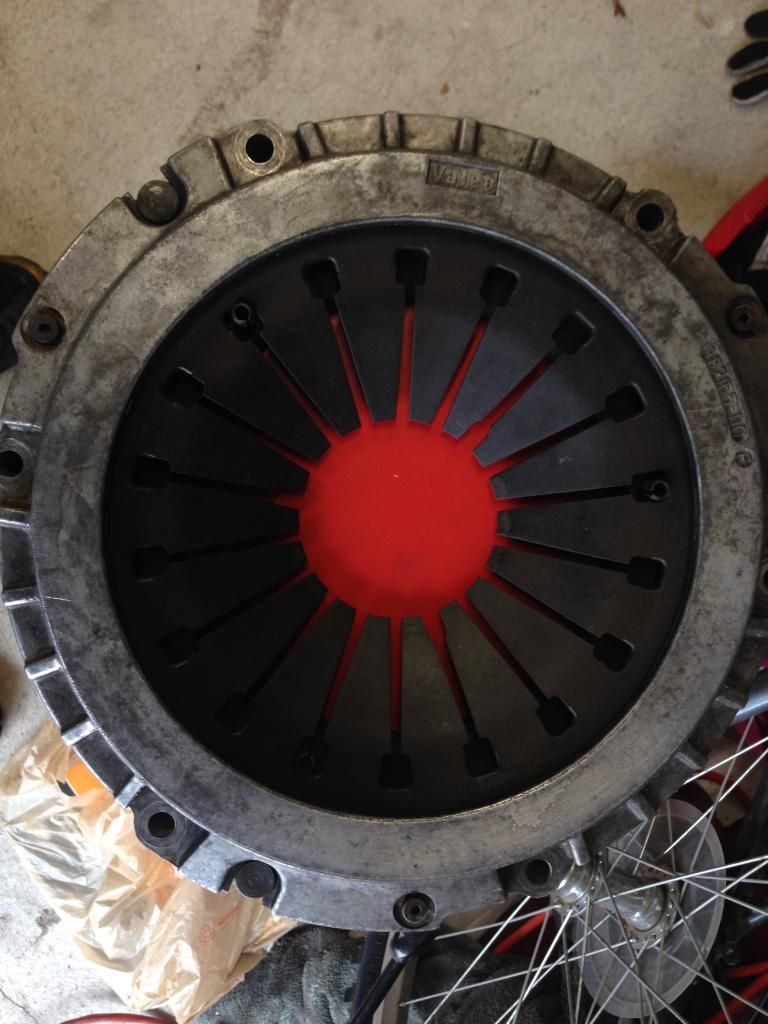
I upgraded to this disc because I had concerns over the stage 2 disc exploding. After speaking with Tom at Carolina I was told the stg2 disc had no issues at all. He told me he had a more aggressive disc that was bulletproof at high rpm but would be grippier.. I told him I wish I had heard of the option before !!
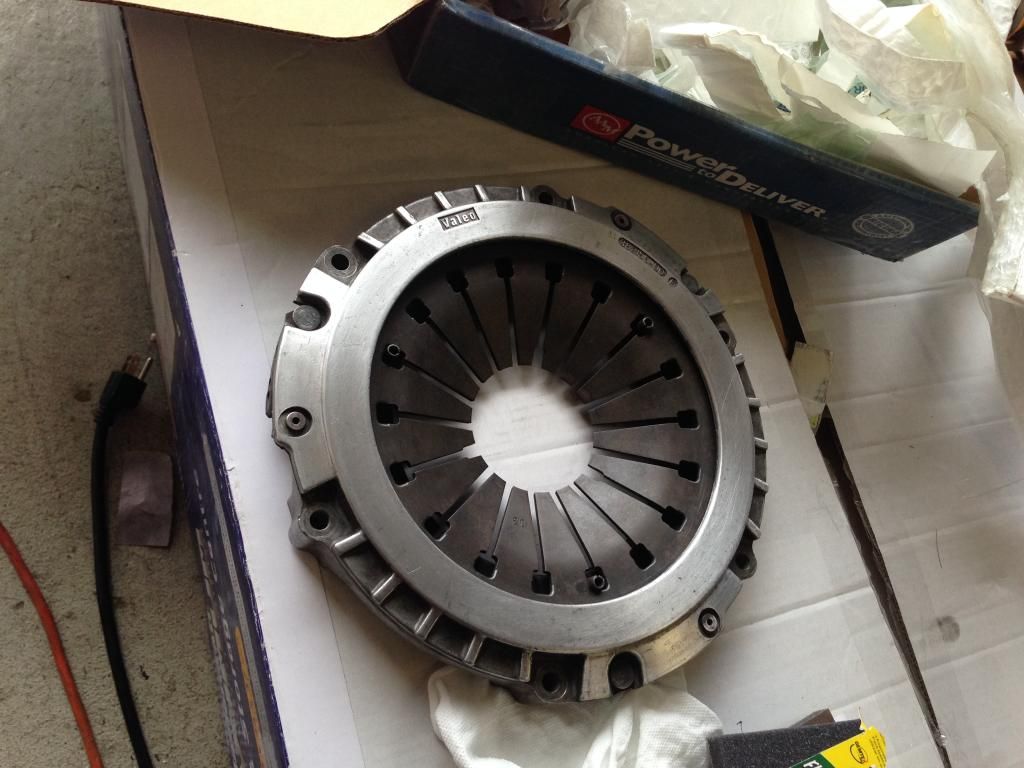
pressure plate side
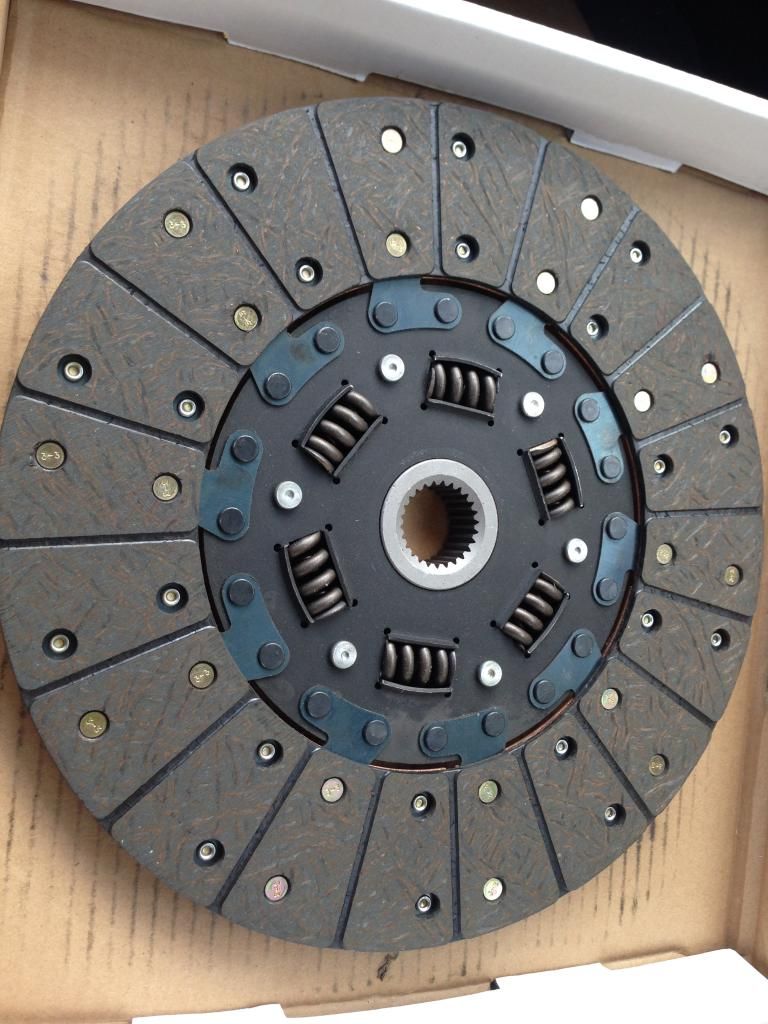
Flywheel side
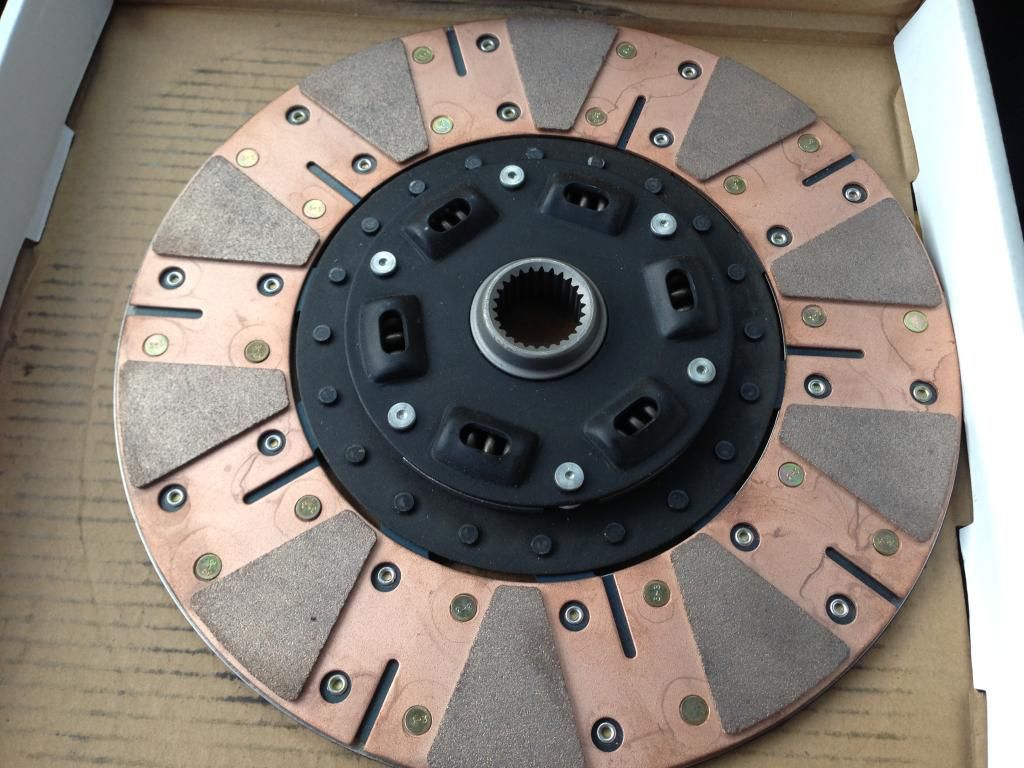
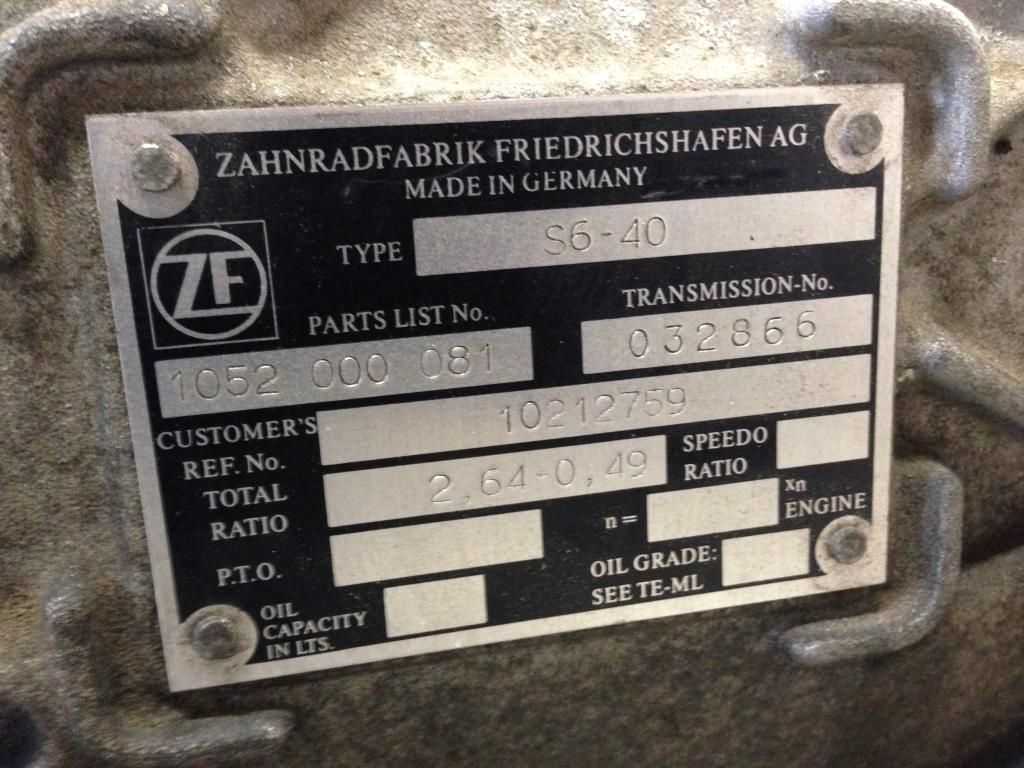
94 black tag. After some confusion it turns out the color of the tag correlates with country of assembly. Early 94s were black tags.. but later style cut gears with the lower torque rating and quieter operation. I ordered both throwout bearings because I saw the black tag and got confused...and the later style is the one that fits.
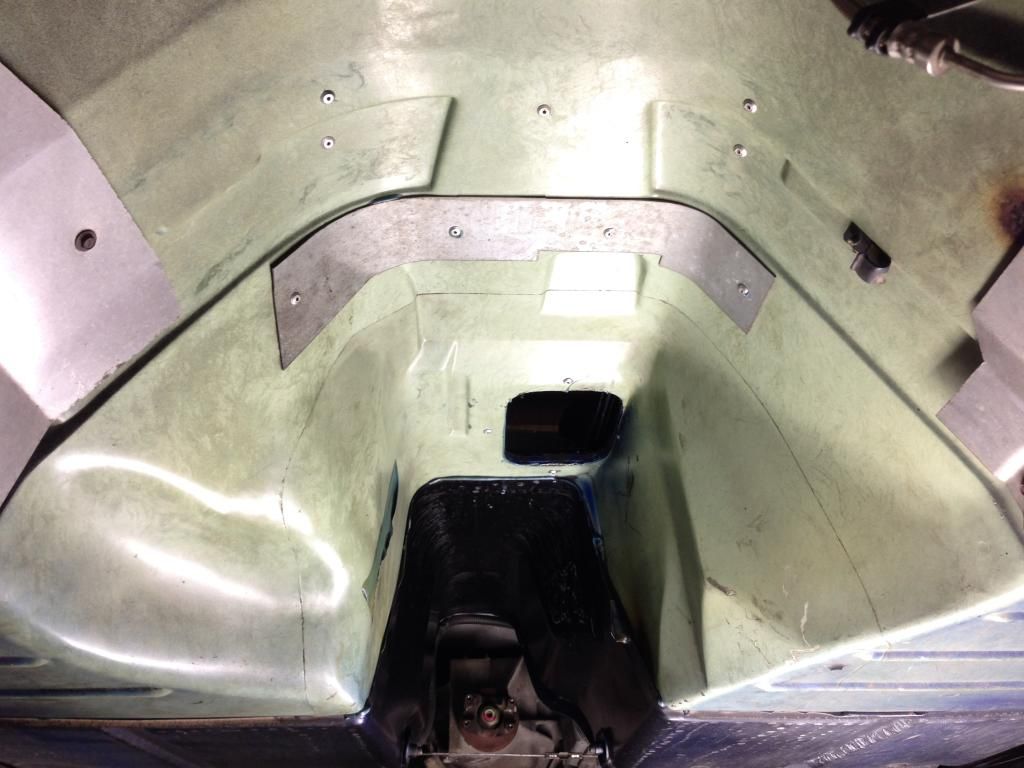
Cleaned up the tunnel but still some to go. Ill be lining this whole tunnel..
pressure plate side

Flywheel side

94 black tag. After some confusion it turns out the color of the tag correlates with country of assembly. Early 94s were black tags.. but later style cut gears with the lower torque rating and quieter operation. I ordered both throwout bearings because I saw the black tag and got confused...and the later style is the one that fits.

Cleaned up the tunnel but still some to go. Ill be lining this whole tunnel..
 10-17-2014, 07:29 AM
#268


I upgraded to this disc because I had concerns over the stage 2 disc exploding. After speaking with Tom at Carolina I was told the stg2 disc had no issues at all. He told me he had a more aggressive disc that was bulletproof at high rpm but would be grippier.. I told him I wish I had heard of the option before !!
pressure plate side
Flywheel side
94 black tag. After some confusion it turns out the color of the tag correlates with country of assembly. Early 94s were black tags.. but later style cut gears with the lower torque rating and quieter operation. I ordered both throwout bearings because I saw the black tag and got confused...and the later style is the one that fits.
Cleaned up the tunnel but still some to go. Ill be lining this whole tunnel..
What kind of condition was the Shiftboot in?
10-25-2014, 09:16 AM
#269
Safety Car
Thread Starter

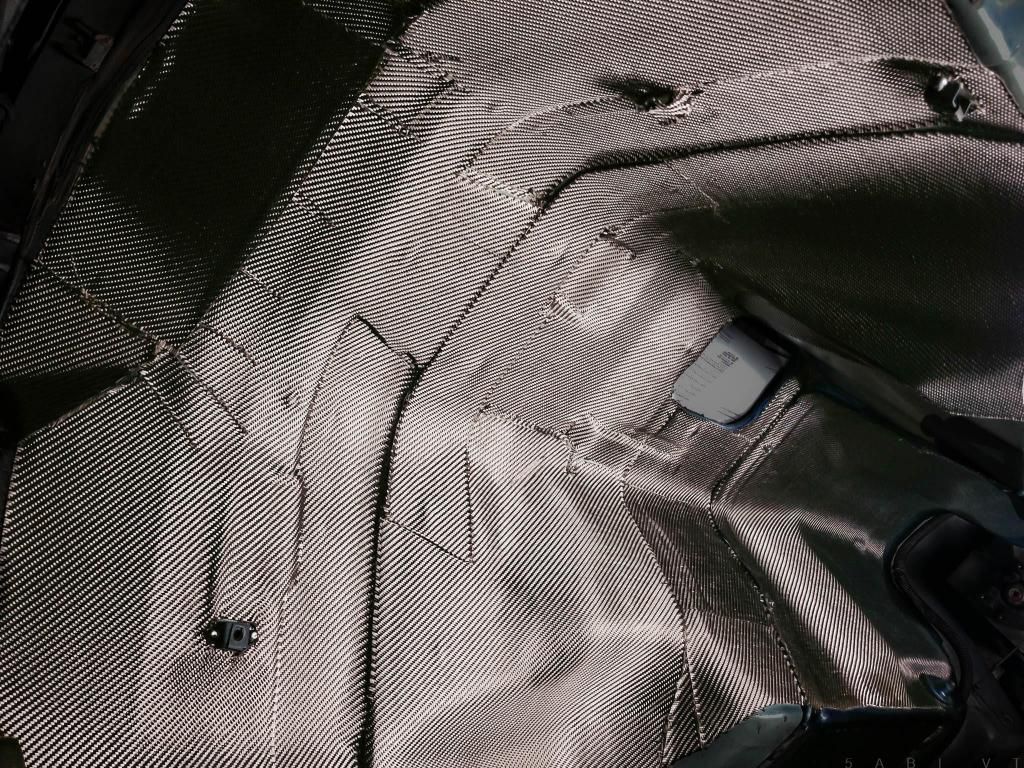
Has to be done in sections this stuff doesn't stretch with heat like the wrap .
Made a template for general sizing


This section done

 10-26-2014, 02:11 PM
#271
Safety Car
Thread Starter
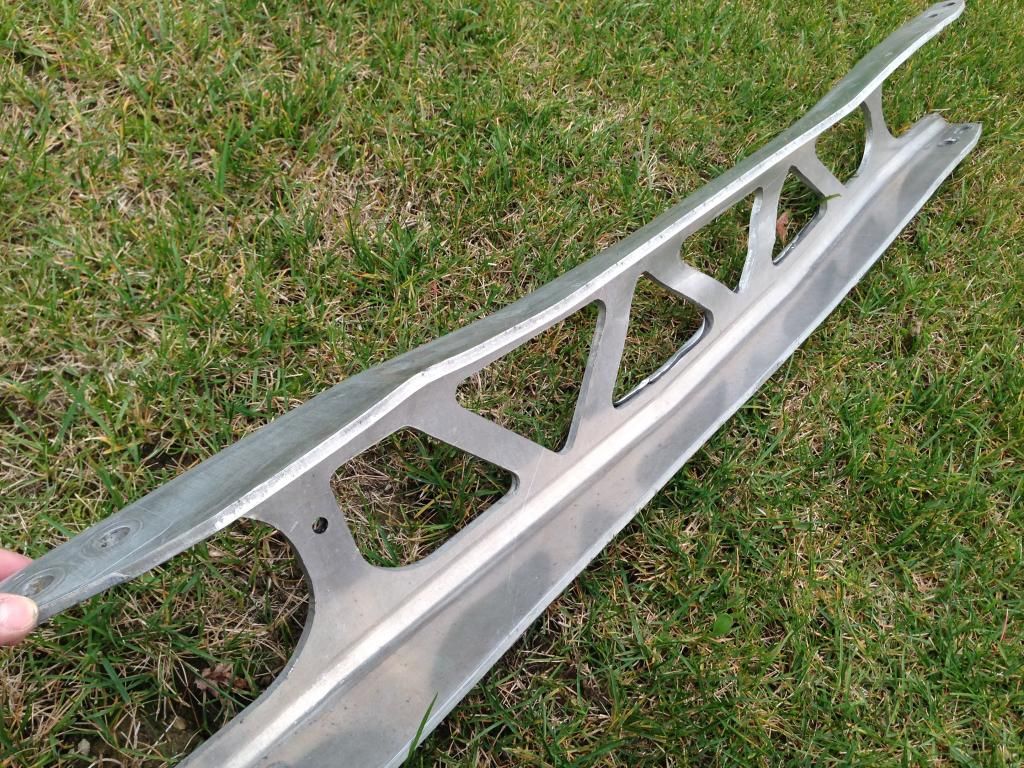
The trans/bellhousing area of the tunnel is quite difficult with this stuff. it doesn't stretch and mold like a carbon wrap does so It needed a lot of cuts to mold to the floor as there are a lot of depressions and the shape is very curvy around the bellhousing area. in many parts. In retrospect I would consider using a single piece along the top of the tunnel lengthwise and then use multiple pieces to do the sides. If I had more sheeting I might have done that but I didn't want to upset the glue by peeling it and doing it another way so I left it as is for now. The Lava mat sheds a LOT of fibre and its itchy as well. Even comes with a warning to use a face mask. Using scissors if definitely a must where possible as a knife frays the edges quite a bit more. Still some more to do at the bottom of the footwells. and one side of the tunnel. The header collectors are quite close to that area so Im sure there will be a heat reduction there if anything.
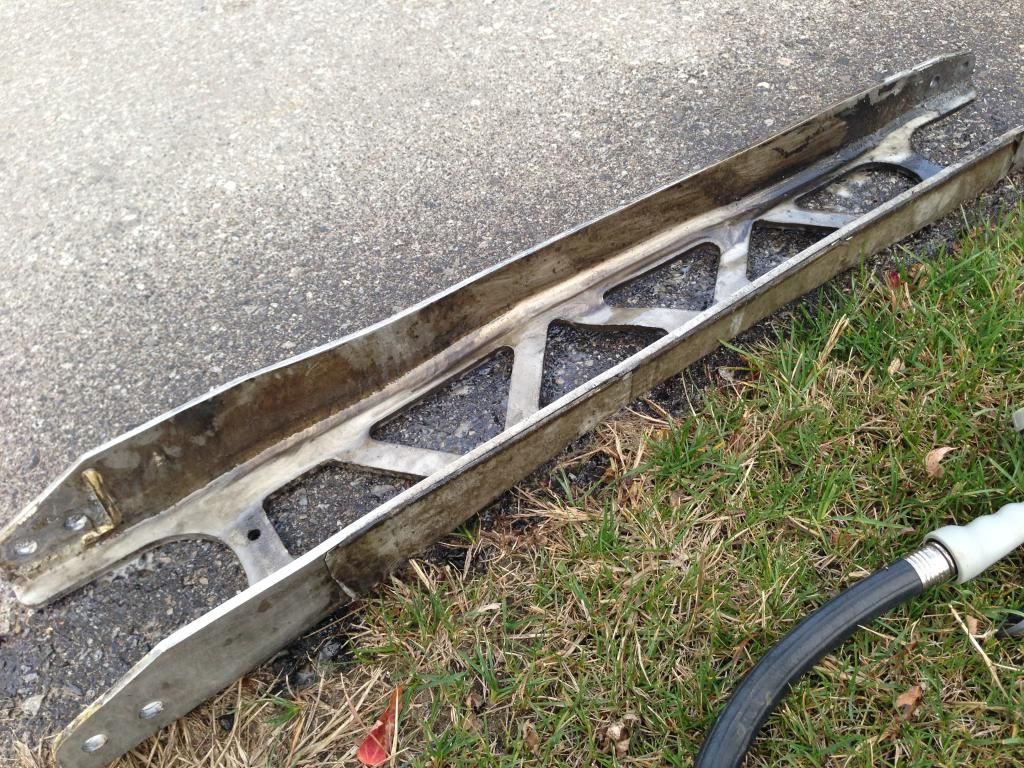
Got my clutch all sorted out too. Will be polishing my pressure plate and cleaning the zf trans, bellhousing and components and c beam (might use lava mat on the c beam ) and then its time for install. My ETA is possibly 2 weeks to get the trans and clutch all buttoned up and the intake plenum and injector housings back on and ready to fire. For the clutch I sold my oem Components and wish I didn't but I re-bought an LT5 pressure plate that had been resurfaced with very low miles (claimed but it does look relatively new), I found a late zf INA throwout bearing brand new and Ill be using the Carolina dual friction steel backed disc on the ALuminum flywheel. I also got the drain plug out of the zf finally that was a celebration in itself
things are looking good for now ! Hopefully I still have a few weeks to drive the car and I also bought a gopro hero 3+ black. So get ready to see some roll racing videos on youtube !!
Before and after just for effect..
Got my clutch all sorted out too. Will be polishing my pressure plate and cleaning the zf trans, bellhousing and components and c beam (might use lava mat on the c beam
) and then its time for install. My ETA is possibly 2 weeks to get the trans and clutch all buttoned up and the intake plenum and injector housings back on and ready to fire. For the clutch I sold my oem Components and wish I didn't but I re-bought an LT5 pressure plate that had been resurfaced with very low miles (claimed but it does look relatively new), I found a late zf INA throwout bearing brand new and Ill be using the Carolina dual friction steel backed disc on the ALuminum flywheel. I also got the drain plug out of the zf finally that was a celebration in itself things are looking good for now ! Hopefully I still have a few weeks to drive the car and I also bought a gopro hero 3+ black. So get ready to see some roll racing videos on youtube !!
Before and after just for effect..
 10-29-2014, 12:48 PM
#272
Safety Car
Thread Starter
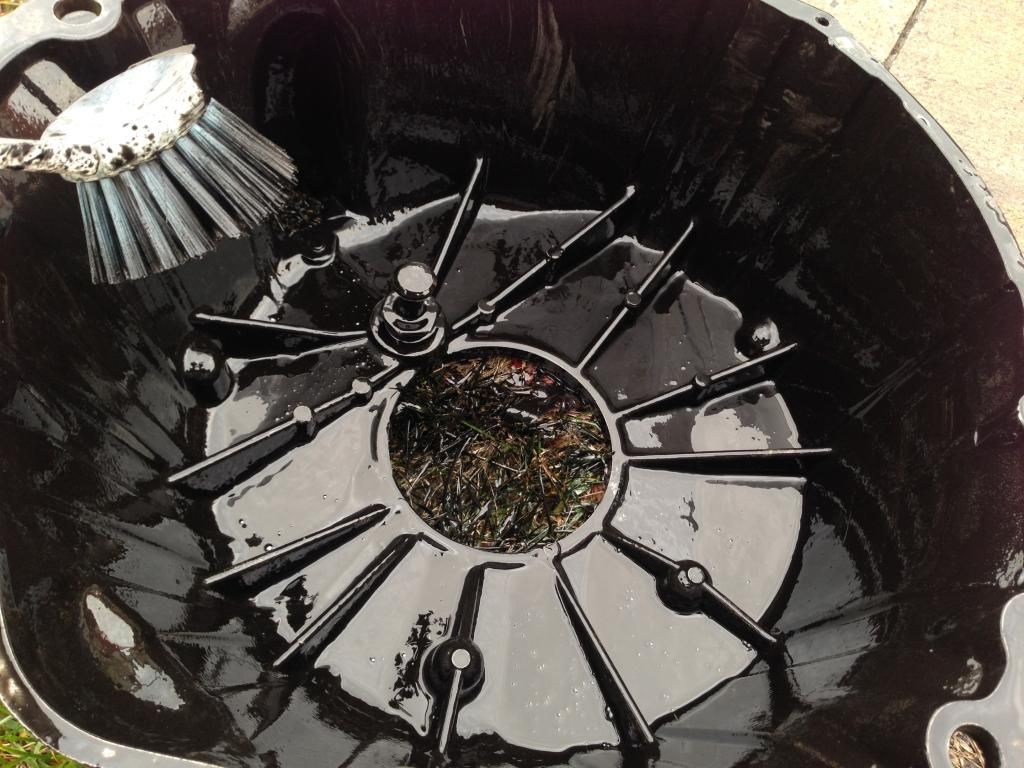
Some progress/ cleanup. Wrapped the ends of the footwells in heat reflection and that stuff is done. moving on to cleaning...
Bellhousing
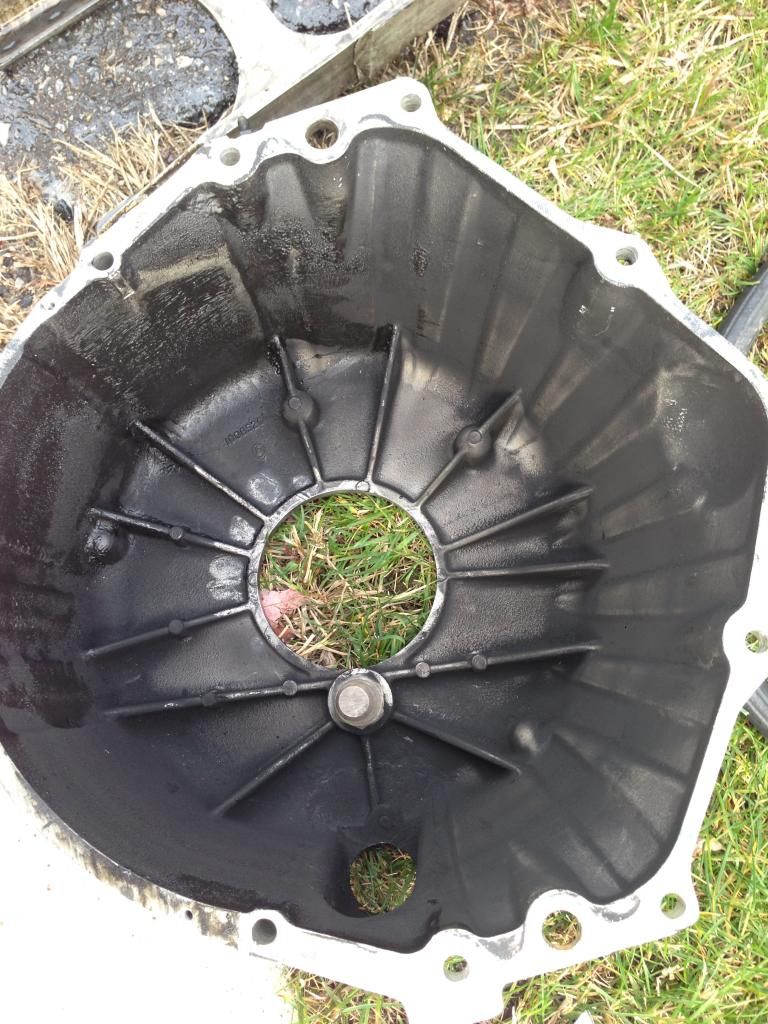
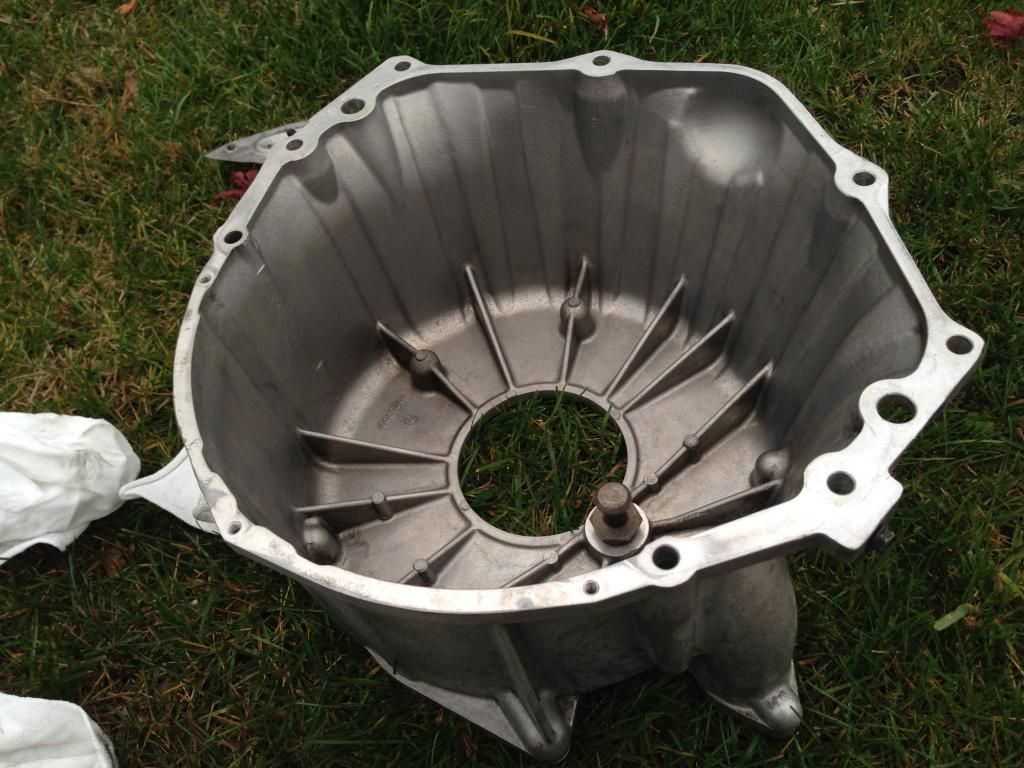
ZF was pretty dirty
I sold my oem stuff and regretted it.. but it worked out in the end. Got a balanced and resurfaced LT5 deep hat PP. I decided to go the oem route considering these have higher clamp load than the LT1 replacements. Found an oem INA bearing, so with the dual friction Carolina disc that is metal backed and explosion proof Im happy with this setup. Possibly step up to the ram setup just for fun next year just for fun but we'll see. I couldn't help but want to clean up the pressure plate. I had to force myself to stop since its obviously not a visible item but It made me feel so much better than it looks all pretty now.
A little time and effort...
Ready to install !!


Bellhousing


ZF was pretty dirty


I sold my oem stuff and regretted it.. but it worked out in the end. Got a balanced and resurfaced LT5 deep hat PP. I decided to go the oem route considering these have higher clamp load than the LT1 replacements. Found an oem INA bearing, so with the dual friction Carolina disc that is metal backed and explosion proof Im happy with this setup. Possibly step up to the ram setup just for fun next year just for fun but we'll see. I couldn't help but want to clean up the pressure plate. I had to force myself to stop
since its obviously not a visible item but It made me feel so much better than it looks all pretty now. 
A little time and effort...

Ready to install !!
 11-07-2014, 11:26 PM
#273
Safety Car
Thread Starter
CLutch job completely done ! Just have to add fluid to the trans and screw in the new drain plug. Moving on to the Plenum/IH again !
Alum flywheel bolted up with arp bolts.

CLutch on.
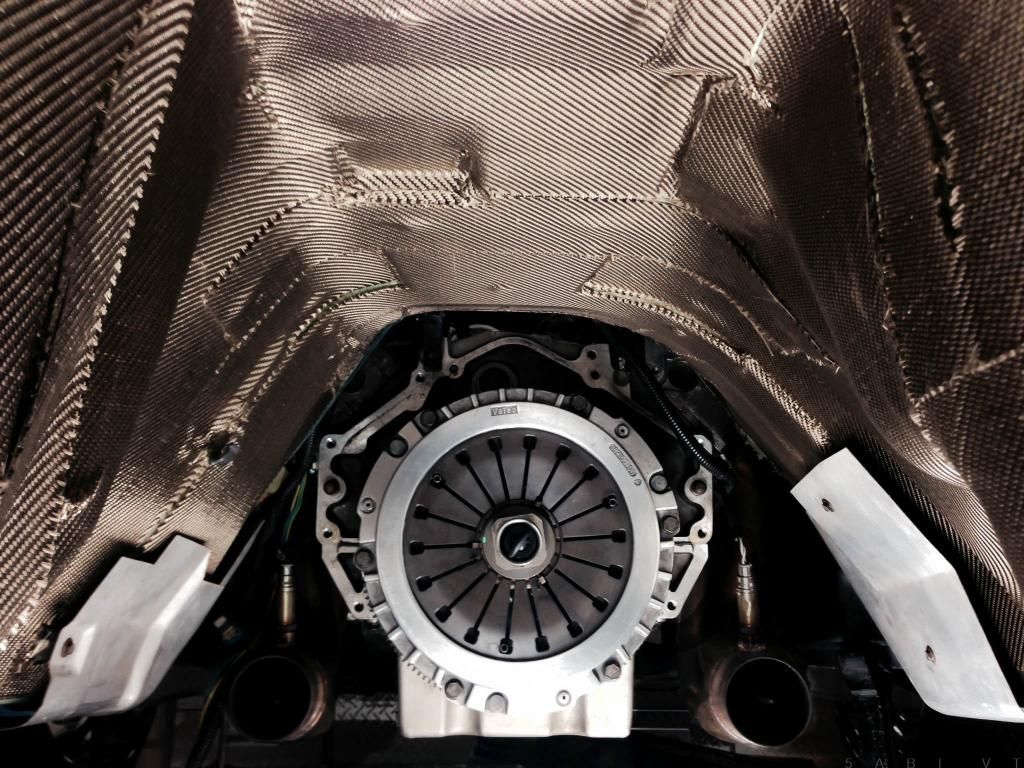
Trans bolted up quite easy. Got it close with a few pushes myself in about 10 mins. then had a friend puch the clutch in and it fit right up to the bellhousing. I had marked up all the exhaust parts to remember how I had it all fit. made it easy to put back together.
The feeling of doing it all yourself.
! Just have to add fluid to the trans and screw in the new drain plug. Moving on to the Plenum/IH again !Alum flywheel bolted up with arp bolts.

CLutch on.

Trans bolted up quite easy. Got it close with a few pushes myself in about 10 mins. then had a friend puch the clutch in and it fit right up to the bellhousing. I had marked up all the exhaust parts to remember how I had it all fit. made it easy to put back together.

The feeling of doing it all yourself.


 11-13-2014, 09:14 PM
#277
Race Director


What are you using to clean up everything.
Just wondering if maybe your using something I haven't before.
Used to use simple green, now usually brake cleaner.
thanks
jp
Just wondering if maybe your using something I haven't before.
Used to use simple green, now usually brake cleaner.
thanks
jp
11-14-2014, 10:09 PM
#278
Safety Car
Thread Starter
Thanks !
most definitely am excited to fire it up with it all done. I feel totally different now having done all this so far and staring at the motor. Will be pleasing to stare at it after its running that's for sure !!
ty !
jp The bottle Ive used most is just realy diluted simple green and water. Ive topped it up a few times with water and the other bottle I think has dawn with water that I used a little on the floor under the car because it was closer to reach. For the trans, c beam and bellhousing etc I used engine degreaser gel and a brush.
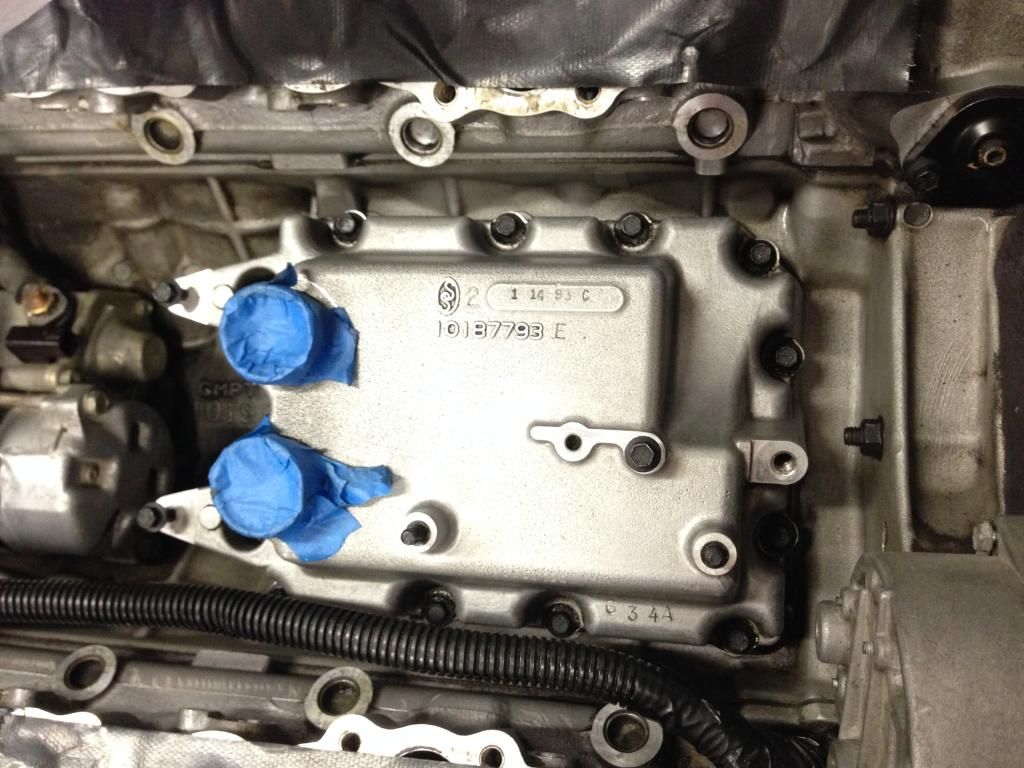
Little update for now. Tapped in the freeze plugs so the heads are sealed up. Don't think I posted here yet but I did clean up around the crankcase vent box. took a while but I got it cleaned up pretty nice then pulled it and with a new gasket sealed it back up. I don't think it HAD to come out to tap in the plugs but it definitely helped get the angle right.
Super gunky. Wasn't as bad as I thought once I started wiping but I did use a lot of cloths that I have.
Cleaned up around the box
taped it off where it was clean first and then wiped around so not to drop dirt inside the crankcase

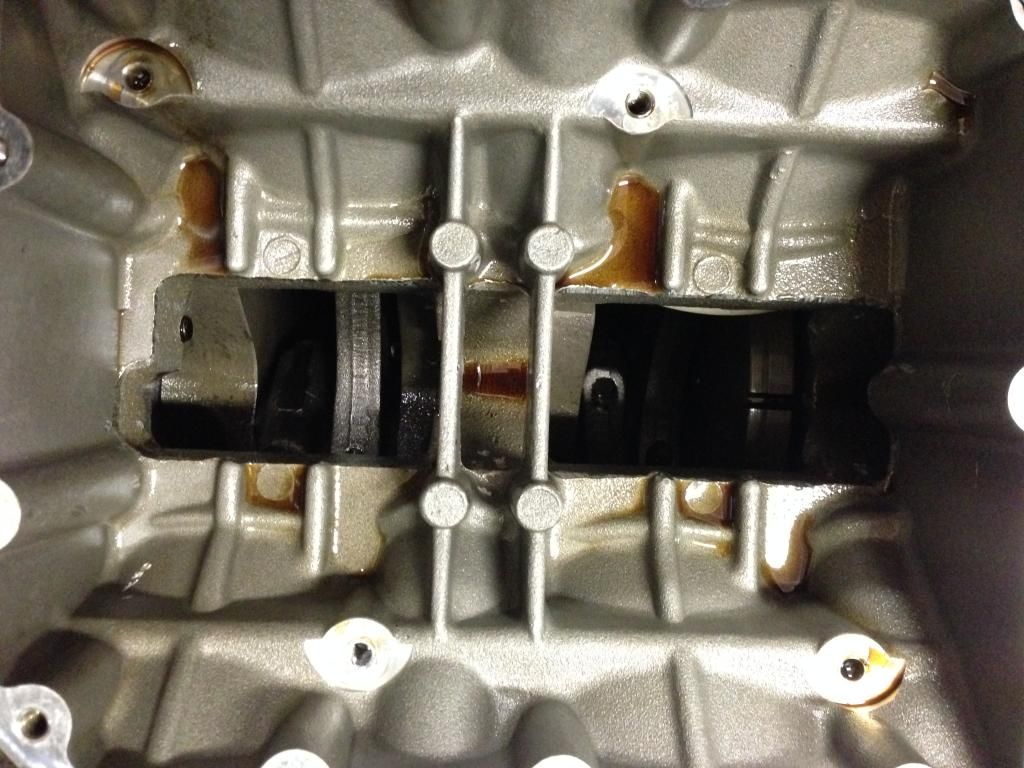
had to get a shot of the crank and rods
I tried to pull the alternator power nut off and the bolt was rotating. So I pulled the alternator and had to get a insulator for the bolt as well. Ended up ordering a new brush kit from gm which they had in stock so I replaced that and put it back up. In the meantime I started researching alternators and am in contact with mechman to make me a billet replacement. It will be a 170 amp and is speed balanced and of a much much higher quality and design than the cs144. I don't need it for my mild stereo but its just kick *** looking and performing so Ill probably order it tomorrow.
Cleaned up the surfaces a bit while it was open
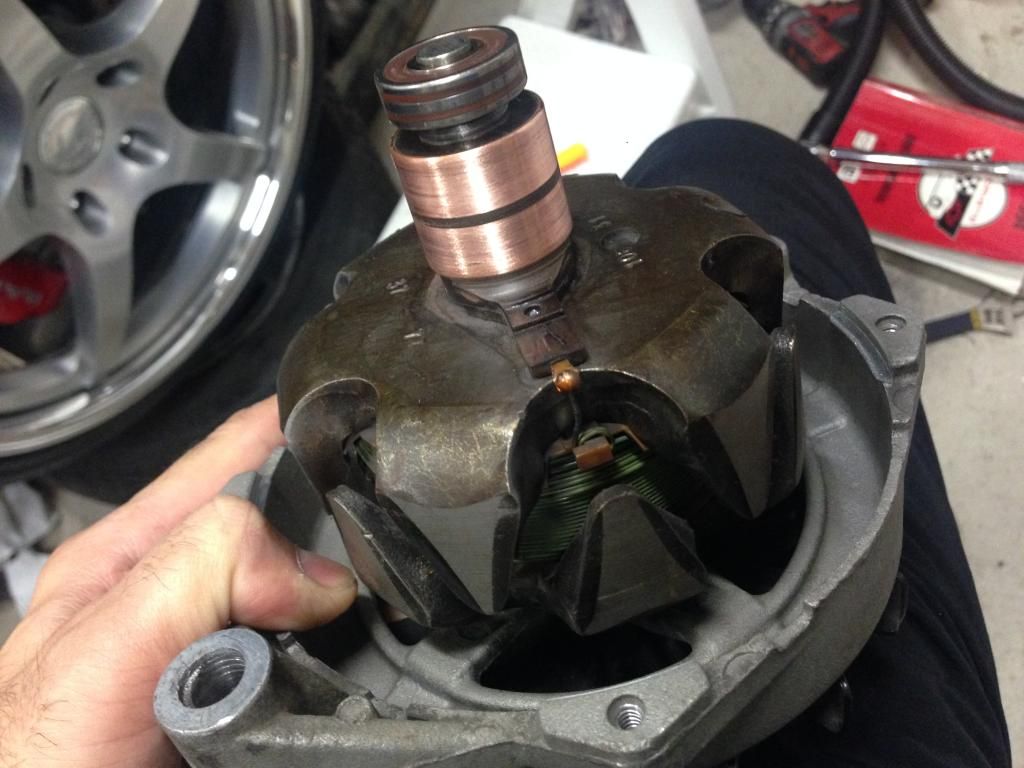
new brush kit installed

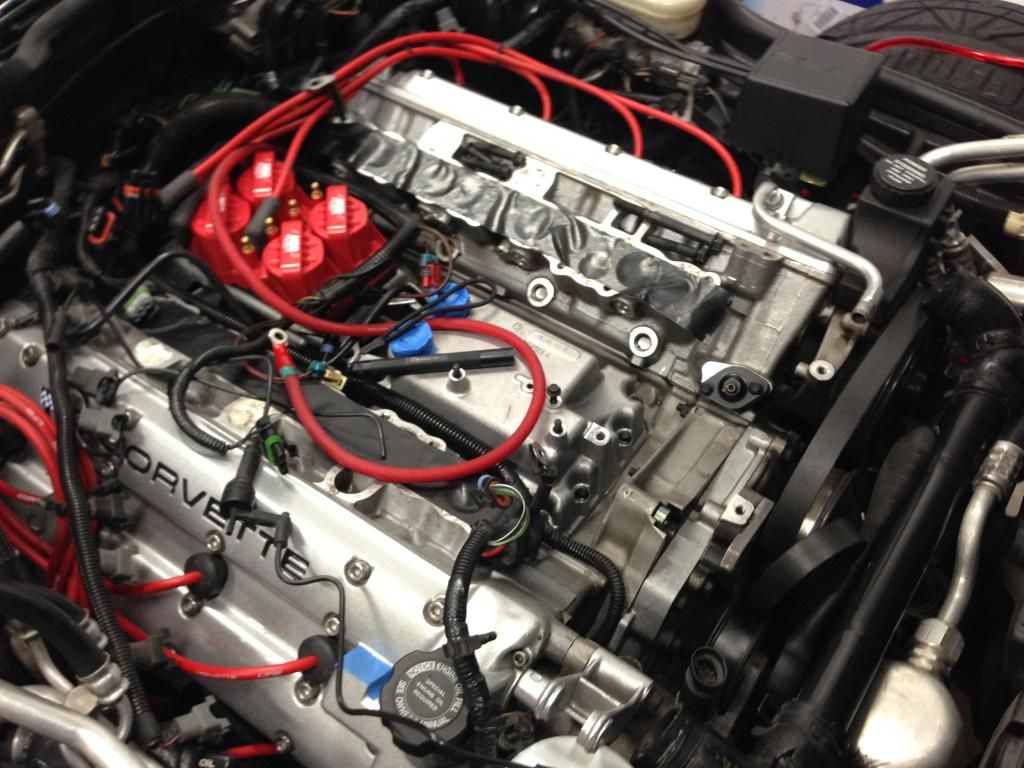
And the reason I wanted the power nut off the back of the alternator is Im running a power and ground right to the battery to increase efficiency of the system and help the alt run cooler etc. Ill also be adding grounds from the cylinder heads and block to the neg on the battery as well as a new battery neg to frame.
ty !
jp The bottle Ive used most is just realy diluted simple green and water. Ive topped it up a few times with water and the other bottle I think has dawn with water that I used a little on the floor under the car because it was closer to reach. For the trans, c beam and bellhousing etc I used engine degreaser gel and a brush.
Little update for now. Tapped in the freeze plugs so the heads are sealed up. Don't think I posted here yet but I did clean up around the crankcase vent box. took a while but I got it cleaned up pretty nice then pulled it and with a new gasket sealed it back up. I don't think it HAD to come out to tap in the plugs but it definitely helped get the angle right.
Super gunky. Wasn't as bad as I thought once I started wiping but I did use a lot of cloths that I have.

Cleaned up around the box

taped it off where it was clean first and then wiped around so not to drop dirt inside the crankcase

had to get a shot of the crank and rods

I tried to pull the alternator power nut off and the bolt was rotating. So I pulled the alternator and had to get a insulator for the bolt as well. Ended up ordering a new brush kit from gm which they had in stock so I replaced that and put it back up. In the meantime I started researching alternators and am in contact with mechman to make me a billet replacement. It will be a 170 amp and is speed balanced and of a much much higher quality and design than the cs144. I don't need it for my mild stereo but its just kick *** looking and performing so Ill probably order it tomorrow.
Cleaned up the surfaces a bit while it was open

new brush kit installed

And the reason I wanted the power nut off the back of the alternator is Im running a power and ground right to the battery to increase efficiency of the system and help the alt run cooler etc. Ill also be adding grounds from the cylinder heads and block to the neg on the battery as well as a new battery neg to frame.
11-14-2014, 10:11 PM
#279
Safety Car
Thread Starter
started wiping.. and wiping... under the ac and looks like the waterpump area cleaned up a bit as im deciding which way to route these fat wires.
The idea so far to go under the ps. shortest route


The idea so far to go under the ps. shortest route
