
Write Up Alert: FLIP-DRIVE Install Complete W/Pictures
 03-24-2009, 07:18 AM
#1
Team Owner


Thread Starter
Well first off I'd like to thank CARTEK for making a great piece for our Vettes and being innovative too - Sweeeeeeeet!
It certainly was a journey and I'll do the best to make it as understandable as possible and give credit along the way where I can to individuals as well as my frustrations and heartaches and issues that I experienced along the way so all will be able to look out for any problems they to may have when they do it.
I will say that I would do it "ALL" over again - but of course it'd be easier now that I have done it and know any obstacles to hurdle over
Steps I took along the way: (Remember I did this over a period of a week so I might have to edit and fix details during the week)
EDIT: Remove the front tires too, it helps tremendously - ohhhh yeah it does!
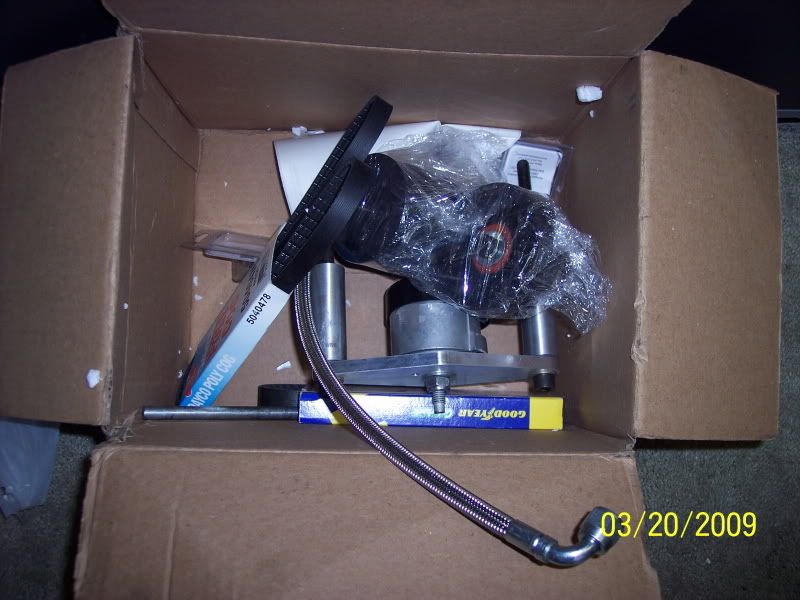
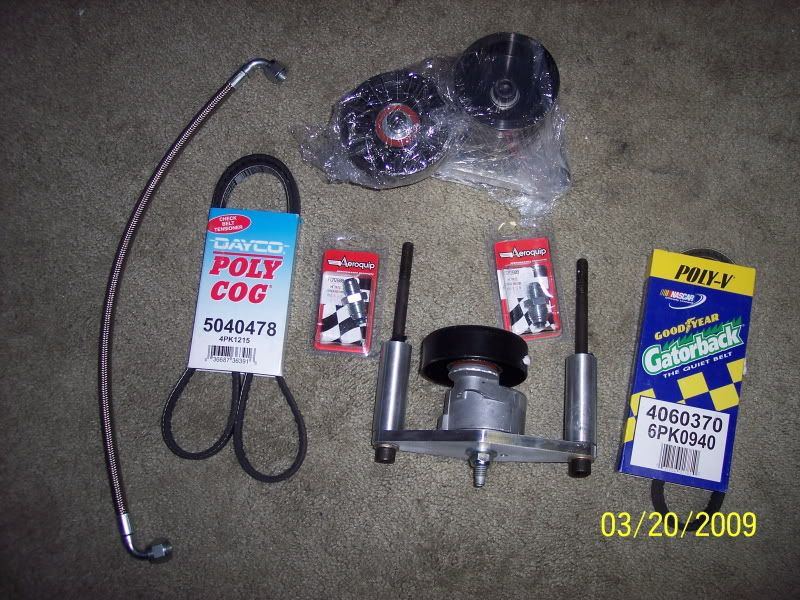
1. Unpackage the kit and check out the parts ang get some tools together for the journey
2. Put the Vette on 4 Jackstands (This certainly makes it easier to get in and out from under the Vette) and start the tear down process of removing the uptop stuff: Un-Hook the Negative Battery terminal, Airbridge, tubing for the ProCharger, detach the Methanol line, radiator cover and anything necessary in order to make room.
3. Then underneath, remove the tubing for the ProCharger and drop the Sway Bar (Yes this helps tremendously)
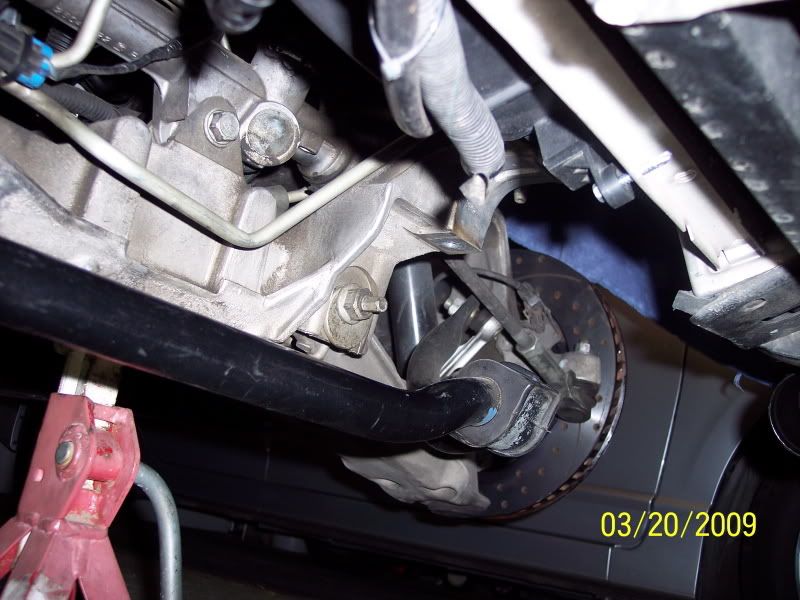
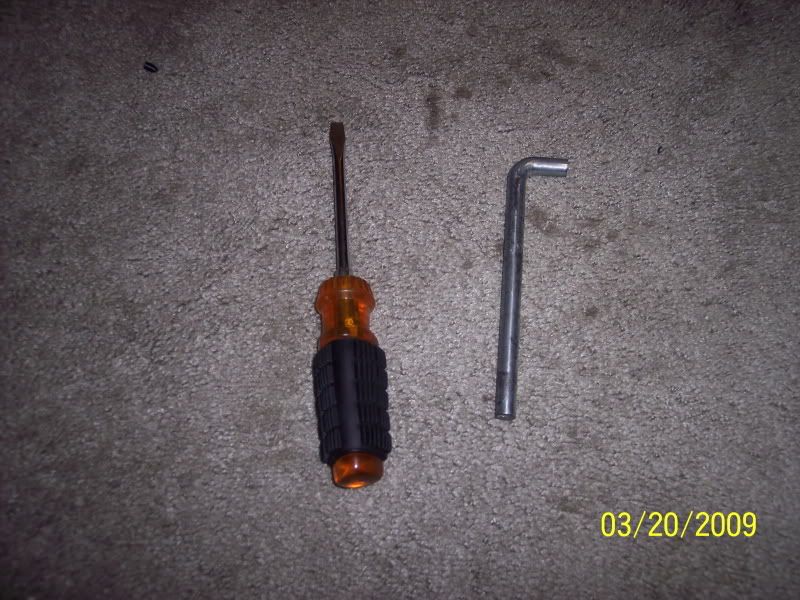
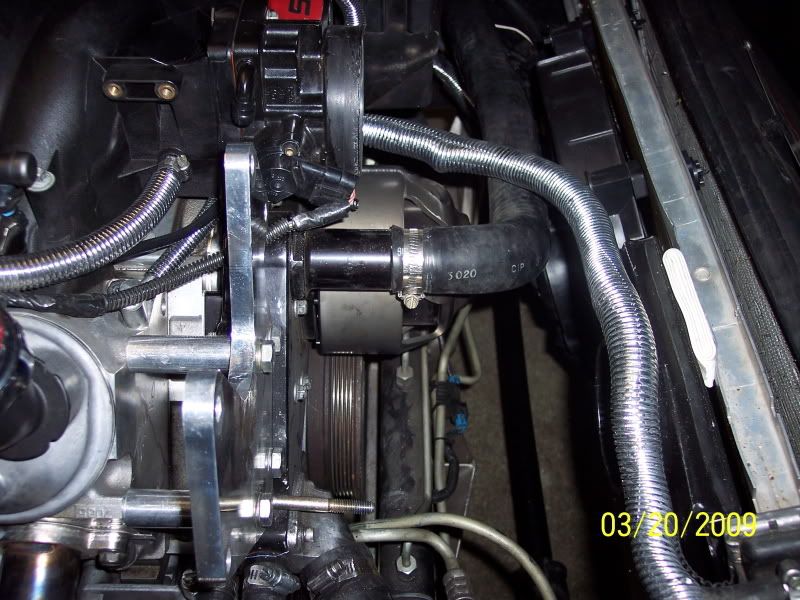
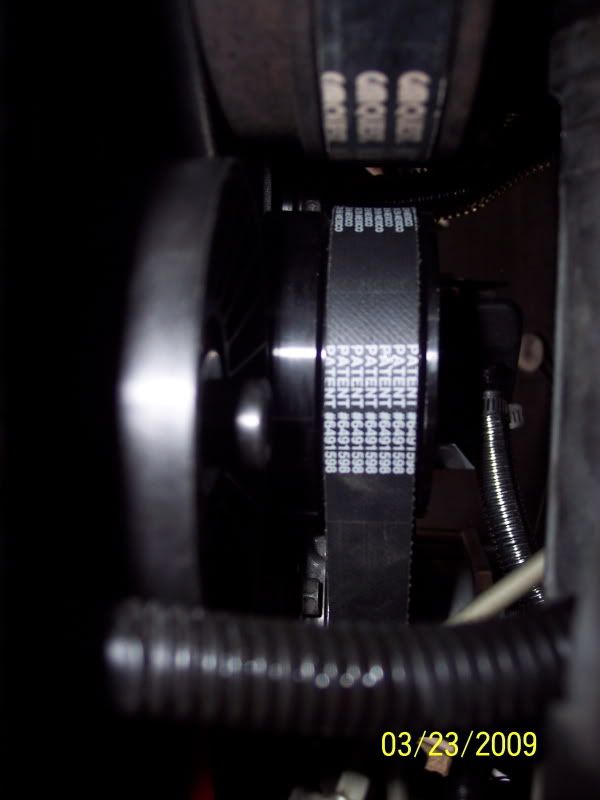
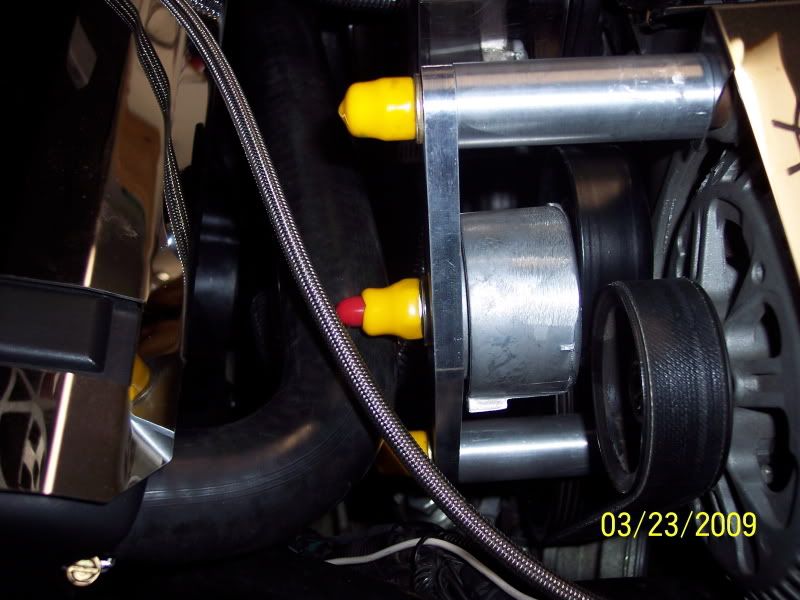
4. Now remember I have the A&A 2nd Generation Bracket and I had to release the Tensioner down below in order to remove the Belt. I found a tool in the shape of an "L" and was able to use it to release the Tensioner with no issues (As you can see in the pic I was able to use the tool and a flat driver to keep it there in position)
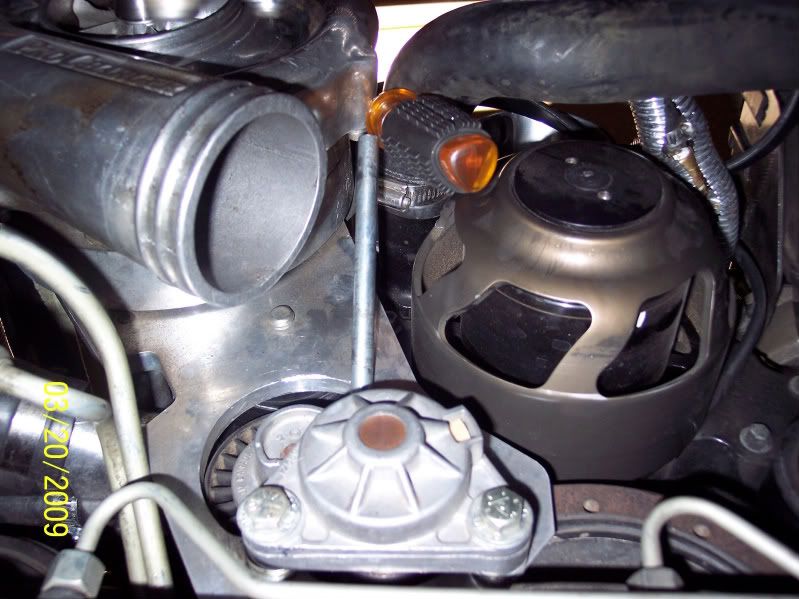
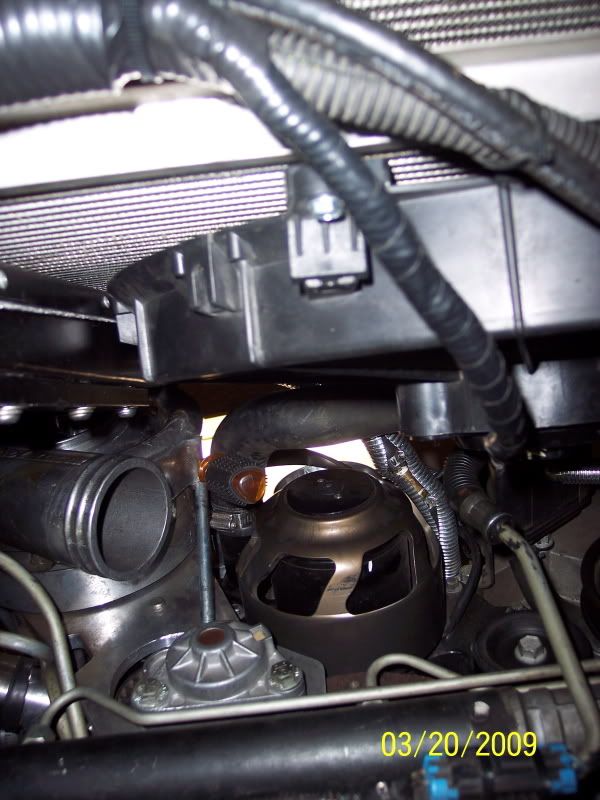
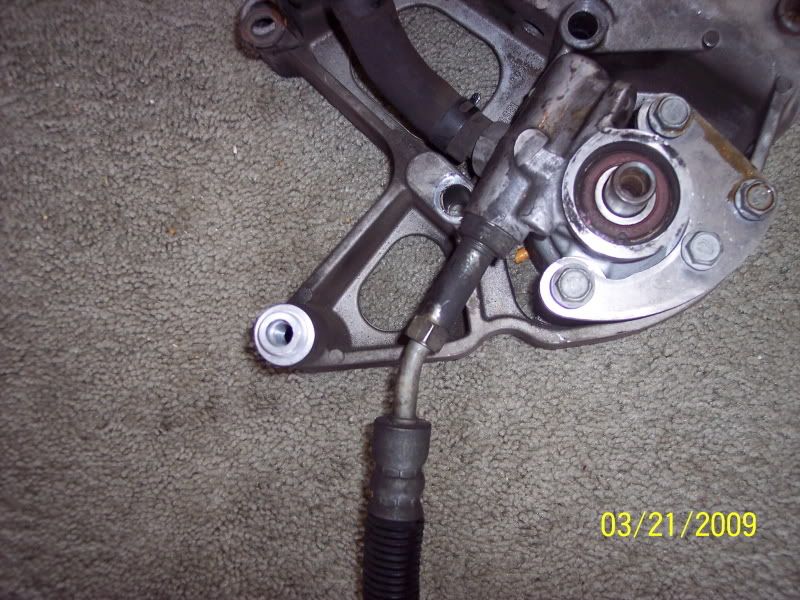
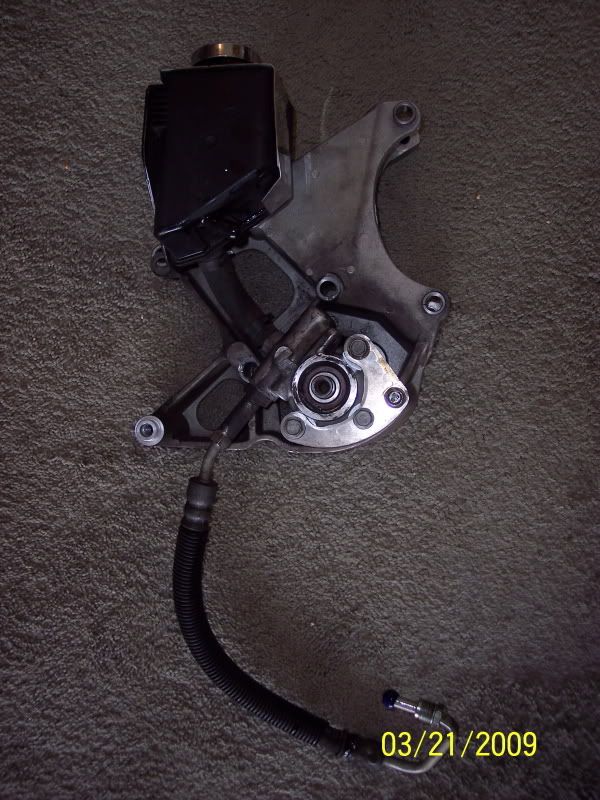
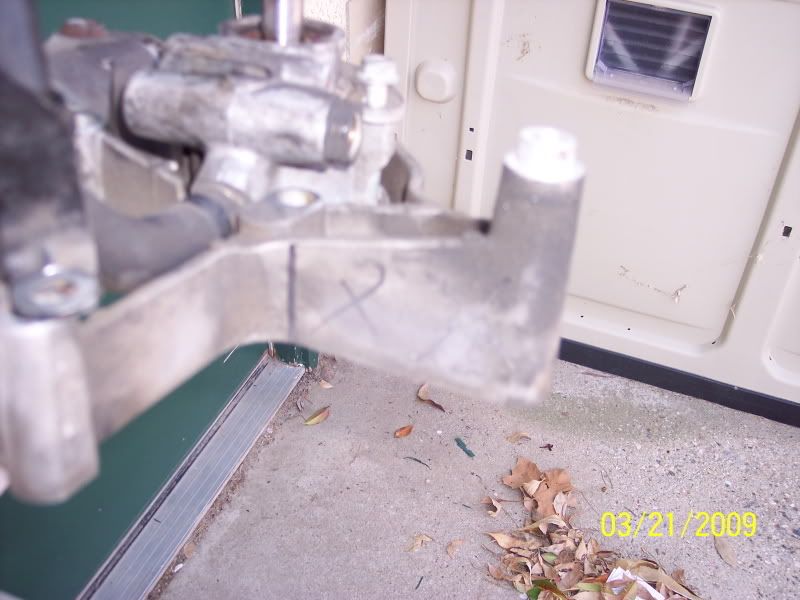
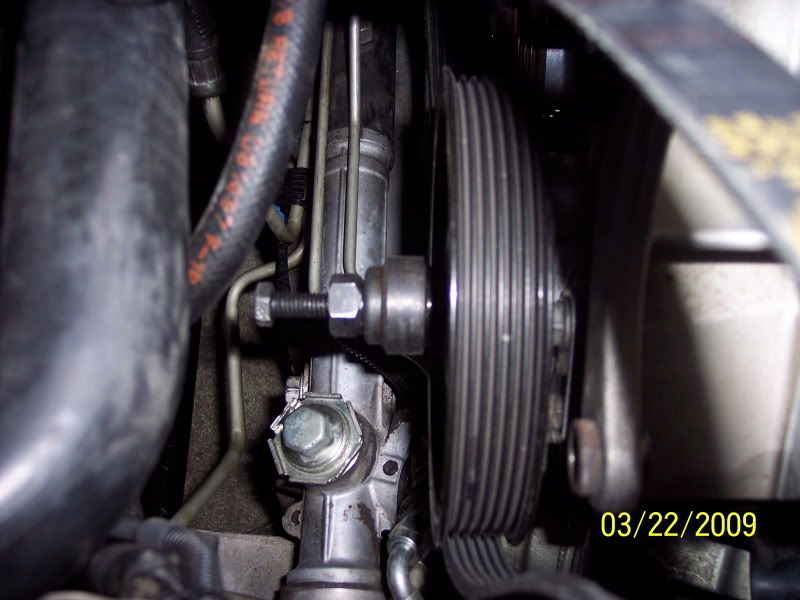
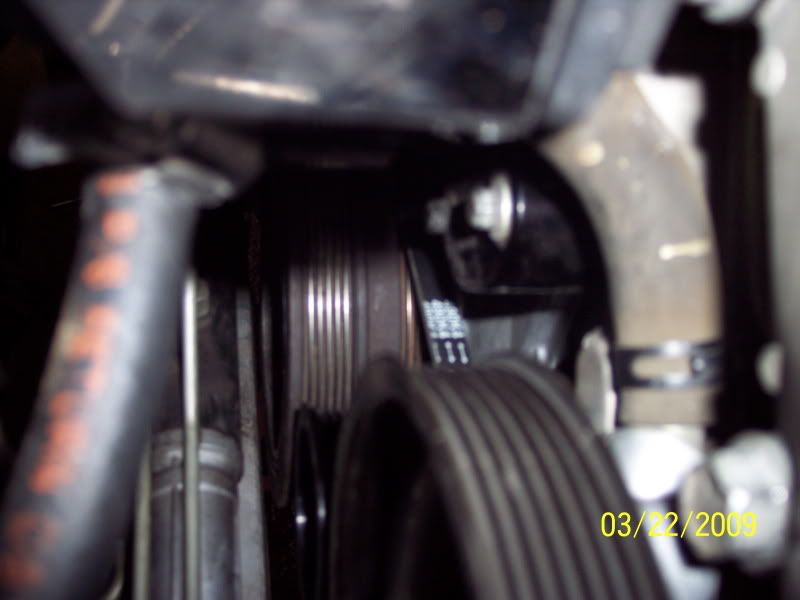
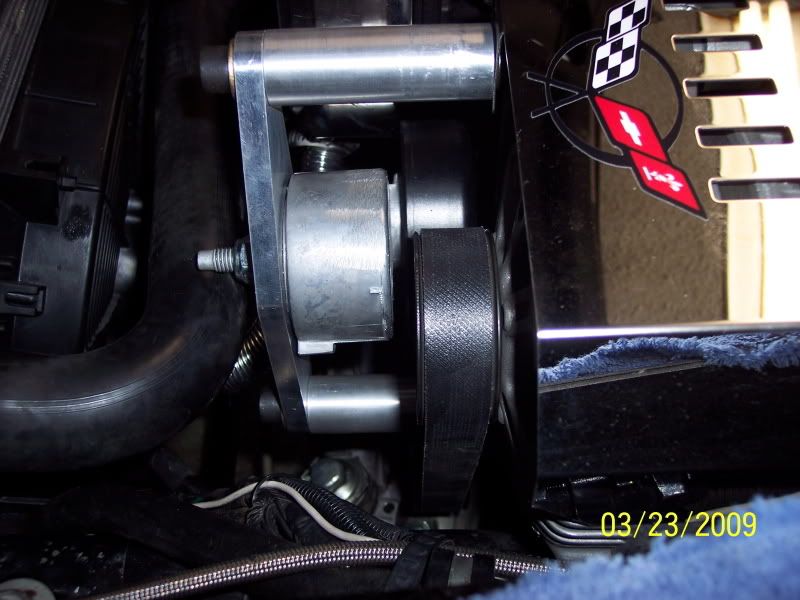
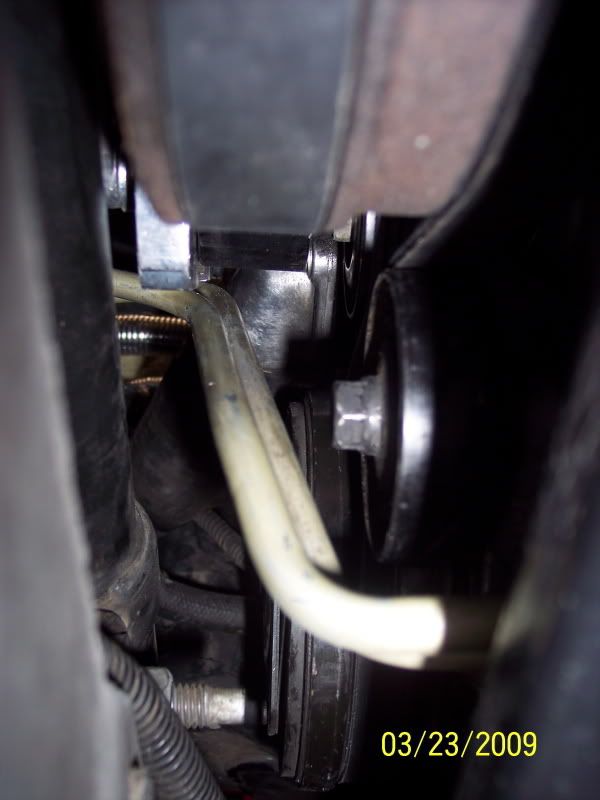
5. Now with all that out of the way I am able to see clearly what everyone is talking about when it comes to having to "CHOP" off a piece of the Power Steering Bracket - You can see the Pulley at the tip or bottom of the Bracket and then the second pic with it removed:
6. Now with the belt released from the from the rest of the accessories I wrapped it around the crank (Since it was still in the original position, meaning it was wound through the A&A bracket's pulley's) and up to the top where I could make a measurement for the 3.2" pulley belt that I'll need, since this one is not supplied in the kit, so I wedged my "NEW" trusty Tensioner release tool against the Tensioner and propped it with the screw driver so I can get a measurement.
7. Pulled the Belt up marked the pulley and brought the top piece of the belt to the mark and marked it with a "SHARPIE" and then did the same with the bottom piece.
What this did was make it so when I removed the belt all I had to do was measure from mark to mark and get my size belt I needed!
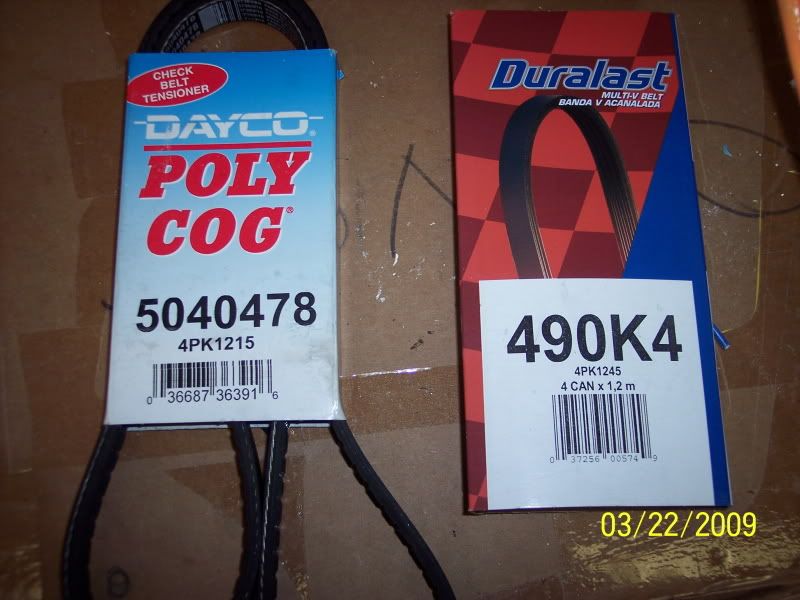
Which turned out to be: (Now I had talked to ARUN from CDN Performance - one of our Vendors and he said with the size pulley and the 2nd Gen. A&A Bracket that according to his formula and my belt size what I would need to do is subtract 36" form the original size - Now mind you this was a formula he came up with and do you know it was only 1" off from my measurement) Here's the pic of my belt and for the "Just In Case" purpose I bought one size smaller too - I'll take it back and get an extra of the right size to have on the shelf
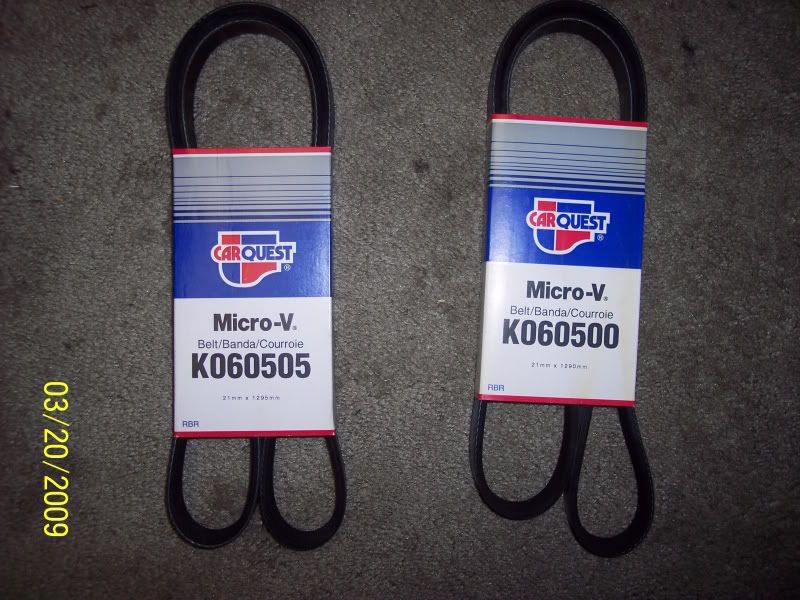
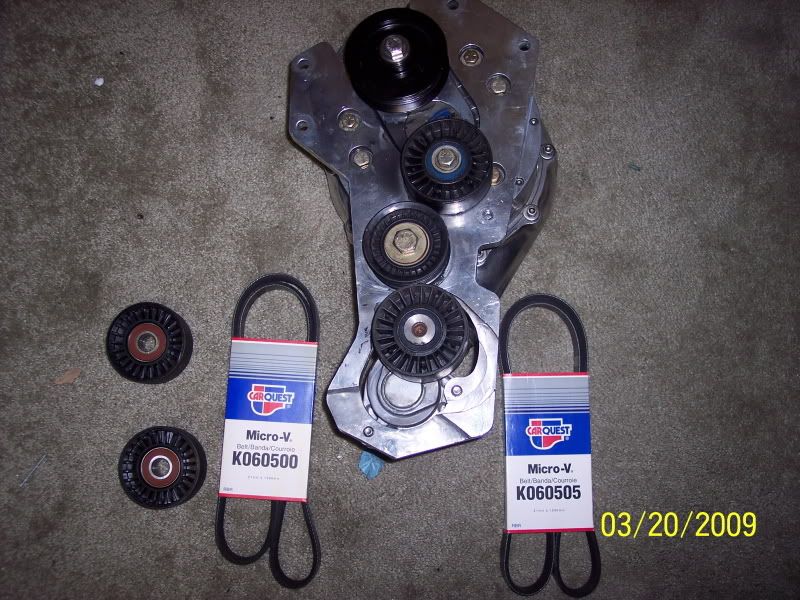
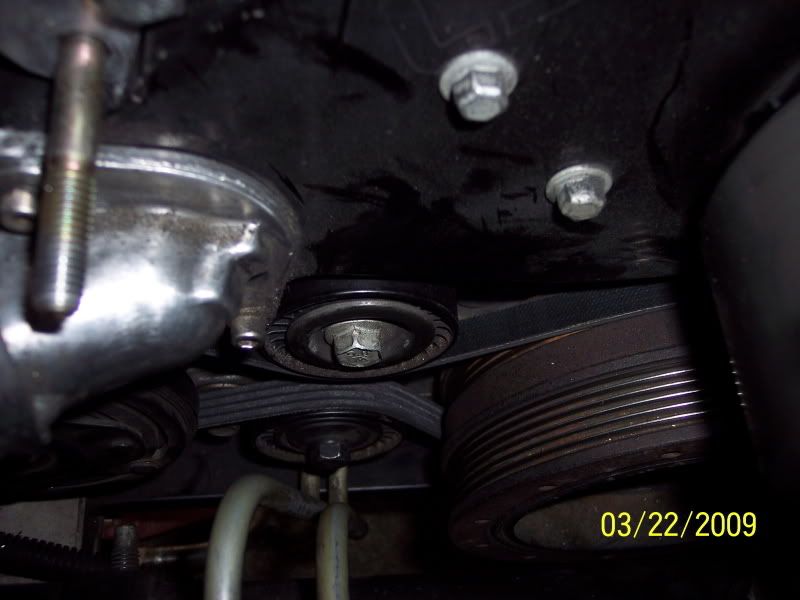
8. It turned out to be the 1295 mm belt and not the 1290 mm(51" and ARUN's formula made it 52" - WOW! awesome - YES! I'd say) ARUN had some extra A&A pulleys that I got from him a while back in prep for my install so I installed them on the tensioner and the Idler pulley:
Now with the Bracket and ProCharger out of the way:
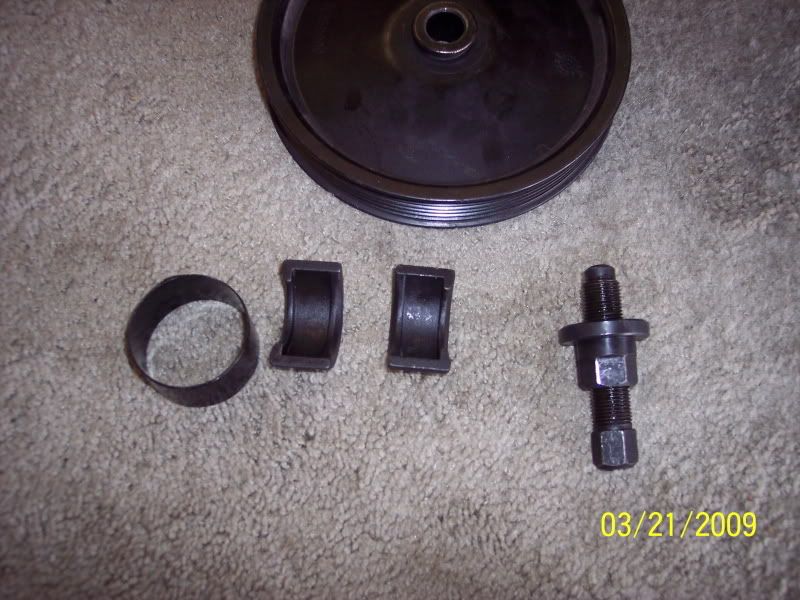
9. Now for the hardest part, I had to buy a Power Steering Pulley "PULLER" (Got it at PEP Boys for $24) this was so I could access the bolt right behind the pulley in order to remove the Alternator/Power Steering Bracket to cut down: (This was the biggest PITA of the whole project - that is REMOVING the PS Pulley and the RE-Installing the PS Pulley)
Removal tool installed (Used a 9'16" socket on the end and a 13/16" wrench on the nut closest to the pulley)
With it off the Vette:

The Tool:
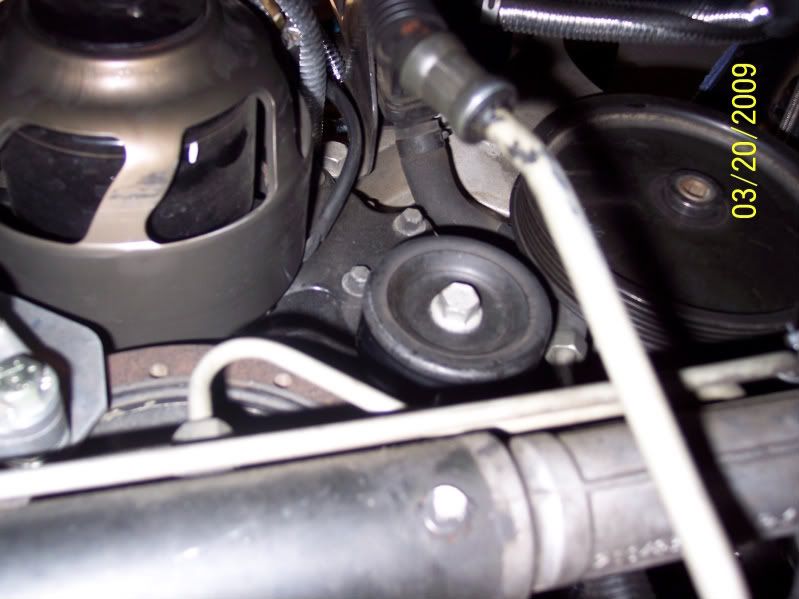
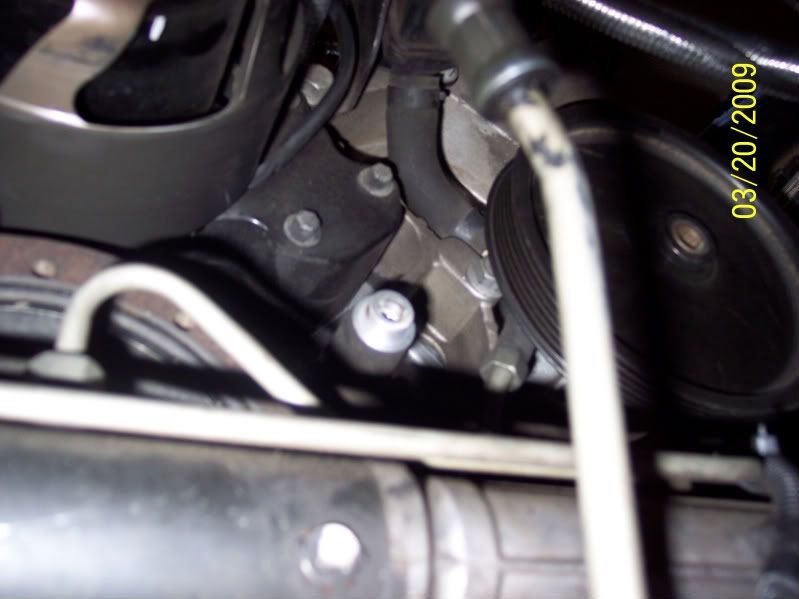
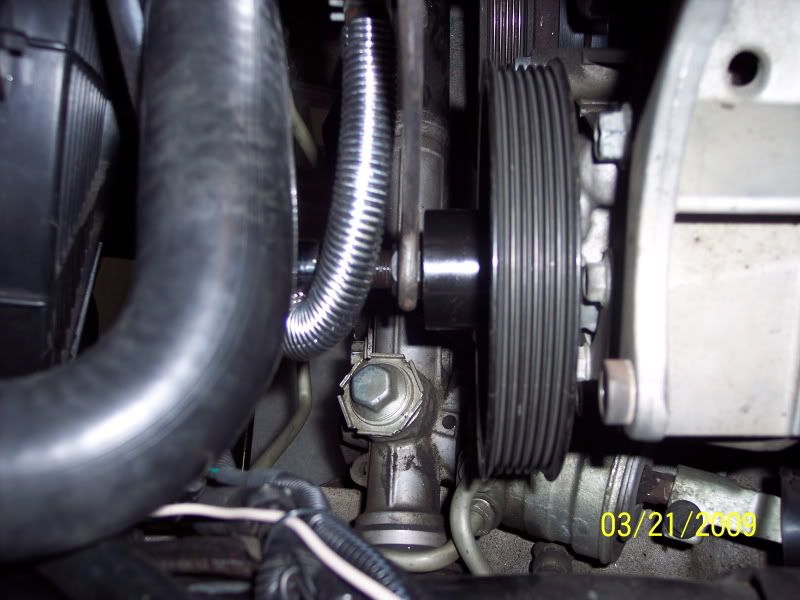
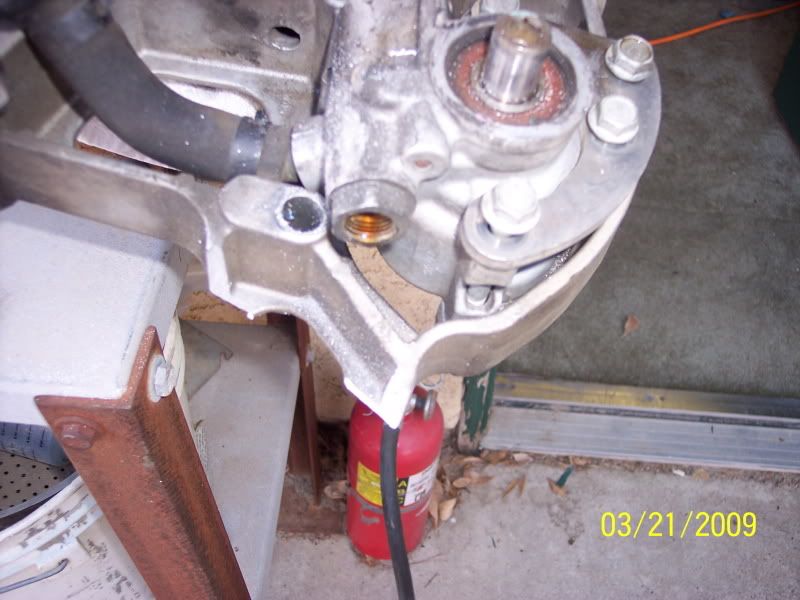
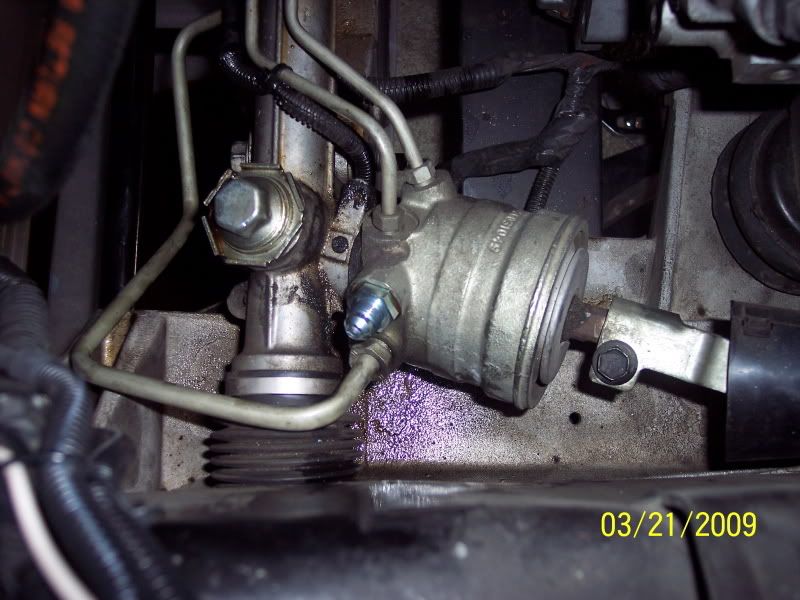
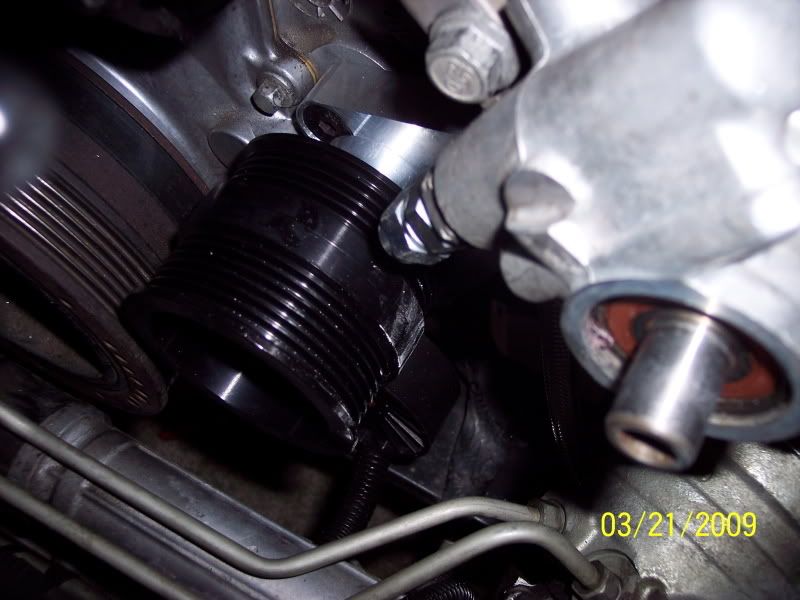
10. Before you can get the one bolt behind the pulley you will need to loosen the bolts holding the PS Pump on to help it clear the socket for the last bolt, unless you have a very "THIN" wall 9/16" socket (You can see the bracket and the little bolts, 13mm)
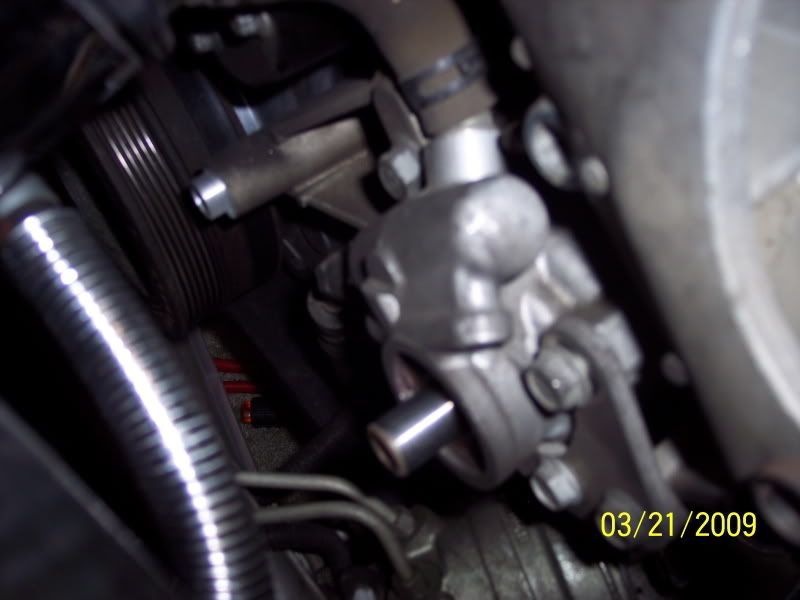
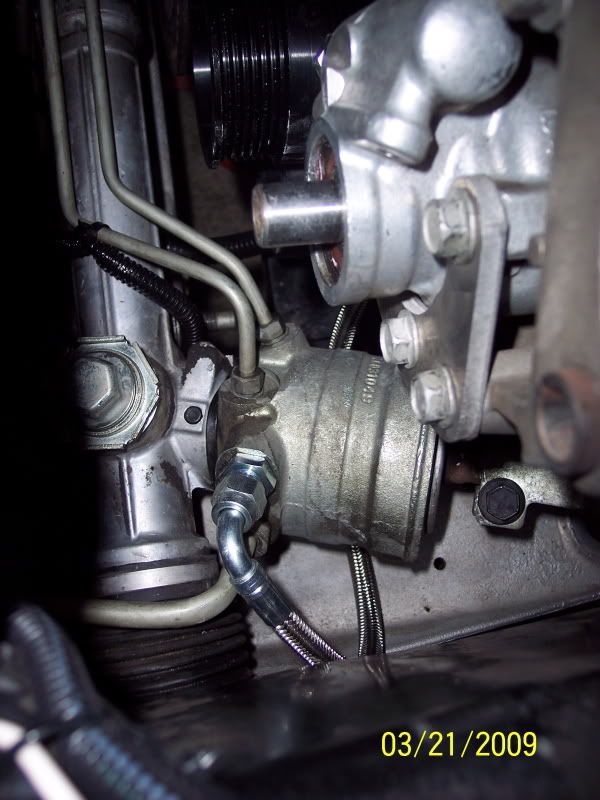
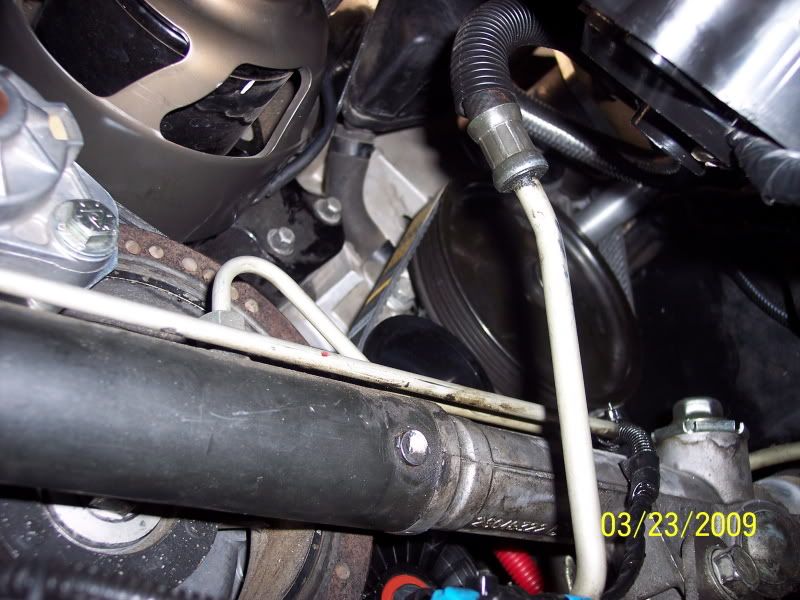
11. Remove the PS Line at the Rack from the PS Pump (Use a 18mm for this) and then I took it out of the Vette and laid it on the ground for removal of the line:
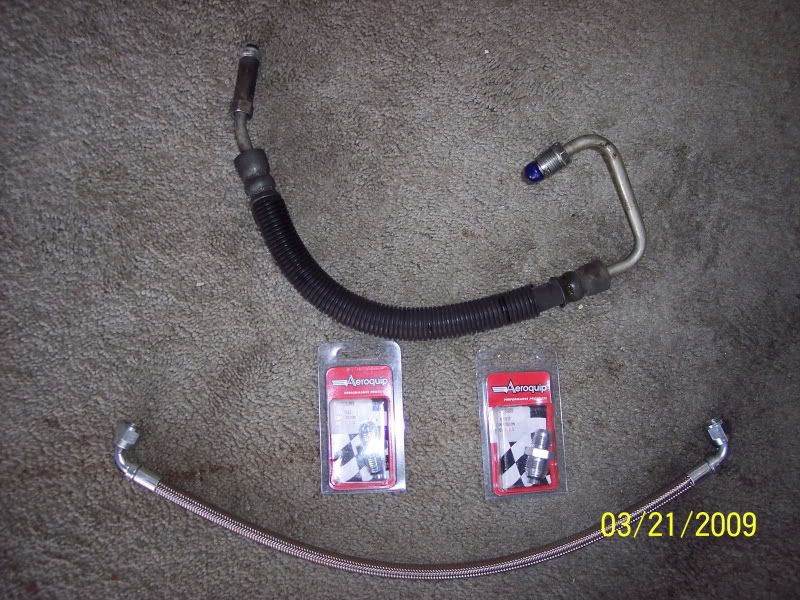
This is the piece that runs into the pulley on the New FLIP-DRIVE, so they supply an better one with a short 90*
Removed
New Piece: It's a -6 AN Line between the two fittings.
PNs are:
FCM2608 = -6AN x 18M x 1.5 http://aeroquip.cc/fcm2609fbm2609-06xm18x15.aspx
FCM2609 = -6AN x 18M x 1.5 http://aeroquip.cc/fcm2608fbm2608-06xm16x15.aspx
Continued Below!
It certainly was a journey and I'll do the best to make it as understandable as possible and give credit along the way where I can to individuals as well as my frustrations and heartaches and issues that I experienced along the way so all will be able to look out for any problems they to may have when they do it.
I will say that I would do it "ALL" over again - but of course it'd be easier now that I have done it and know any obstacles to hurdle over
Steps I took along the way: (Remember I did this over a period of a week so I might have to edit and fix details during the week)
EDIT: Remove the front tires too, it helps tremendously - ohhhh yeah it does!
1. Unpackage the kit and check out the parts ang get some tools together for the journey
2. Put the Vette on 4 Jackstands (This certainly makes it easier to get in and out from under the Vette) and start the tear down process of removing the uptop stuff: Un-Hook the Negative Battery terminal, Airbridge, tubing for the ProCharger, detach the Methanol line, radiator cover and anything necessary in order to make room.
3. Then underneath, remove the tubing for the ProCharger and drop the Sway Bar (Yes this helps tremendously)
4. Now remember I have the A&A 2nd Generation Bracket and I had to release the Tensioner down below in order to remove the Belt. I found a tool in the shape of an "L" and was able to use it to release the Tensioner with no issues (As you can see in the pic I was able to use the tool and a flat driver to keep it there in position)
5. Now with all that out of the way I am able to see clearly what everyone is talking about when it comes to having to "CHOP" off a piece of the Power Steering Bracket - You can see the Pulley at the tip or bottom of the Bracket and then the second pic with it removed:
6. Now with the belt released from the from the rest of the accessories I wrapped it around the crank (Since it was still in the original position, meaning it was wound through the A&A bracket's pulley's) and up to the top where I could make a measurement for the 3.2" pulley belt that I'll need, since this one is not supplied in the kit, so I wedged my "NEW" trusty Tensioner release tool against the Tensioner and propped it with the screw driver so I can get a measurement.
7. Pulled the Belt up marked the pulley and brought the top piece of the belt to the mark and marked it with a "SHARPIE" and then did the same with the bottom piece.
What this did was make it so when I removed the belt all I had to do was measure from mark to mark and get my size belt I needed!
Which turned out to be: (Now I had talked to ARUN from CDN Performance - one of our Vendors and he said with the size pulley and the 2nd Gen. A&A Bracket that according to his formula and my belt size what I would need to do is subtract 36" form the original size - Now mind you this was a formula he came up with and do you know it was only 1" off from my measurement) Here's the pic of my belt and for the "Just In Case" purpose I bought one size smaller too - I'll take it back and get an extra of the right size to have on the shelf
8. It turned out to be the 1295 mm belt and not the 1290 mm(51" and ARUN's formula made it 52" - WOW! awesome - YES! I'd say) ARUN had some extra A&A pulleys that I got from him a while back in prep for my install so I installed them on the tensioner and the Idler pulley:
Now with the Bracket and ProCharger out of the way:
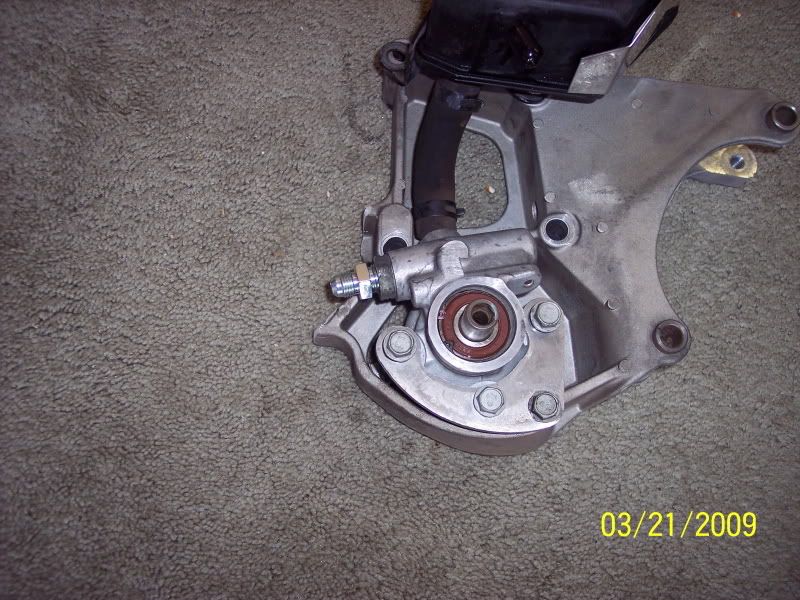
9. Now for the hardest part, I had to buy a Power Steering Pulley "PULLER" (Got it at PEP Boys for $24) this was so I could access the bolt right behind the pulley in order to remove the Alternator/Power Steering Bracket to cut down: (This was the biggest PITA of the whole project - that is REMOVING the PS Pulley and the RE-Installing the PS Pulley)
Removal tool installed (Used a 9'16" socket on the end and a 13/16" wrench on the nut closest to the pulley)
With it off the Vette:
The Tool:
10. Before you can get the one bolt behind the pulley you will need to loosen the bolts holding the PS Pump on to help it clear the socket for the last bolt, unless you have a very "THIN" wall 9/16" socket (You can see the bracket and the little bolts, 13mm)
11. Remove the PS Line at the Rack from the PS Pump (Use a 18mm for this) and then I took it out of the Vette and laid it on the ground for removal of the line:
This is the piece that runs into the pulley on the New FLIP-DRIVE, so they supply an better one with a short 90*
Removed
New Piece: It's a -6 AN Line between the two fittings.
PNs are:
FCM2608 = -6AN x 18M x 1.5 http://aeroquip.cc/fcm2609fbm2609-06xm18x15.aspx
FCM2609 = -6AN x 18M x 1.5 http://aeroquip.cc/fcm2608fbm2608-06xm16x15.aspx
Continued Below!
Last edited by madmatt9471; 04-29-2012 at 09:04 PM. Reason: fix word: did, journey, then, Pulley, tensioner, steering
 03-24-2009, 07:21 AM
#2
Team Owner
Thread Starter
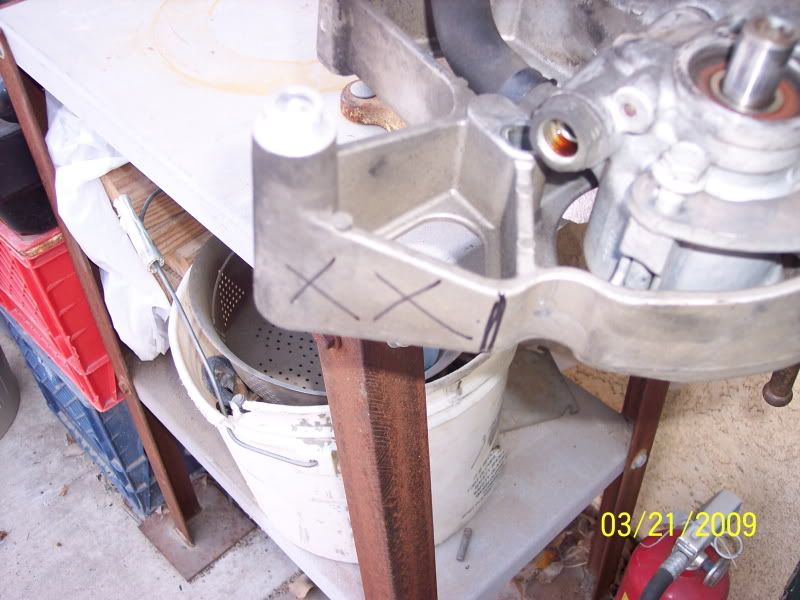
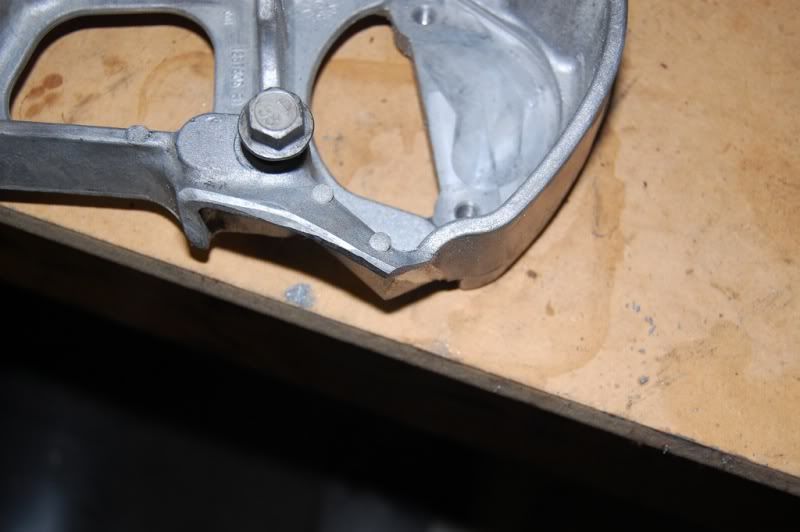
12. Now take it outside and get to cutting the bracket to clear the new Flip-Drive
This is what you need to remove, plus you "WILL" need to remove the point as I had to remove it again and again to get it perfect, just be patient because at this point it's just going back and forth and no major work:
I used my 19 Volt Cordless Sawzall for the Project then my 3 1/2" grinder to do the finishing:
Removed piece:
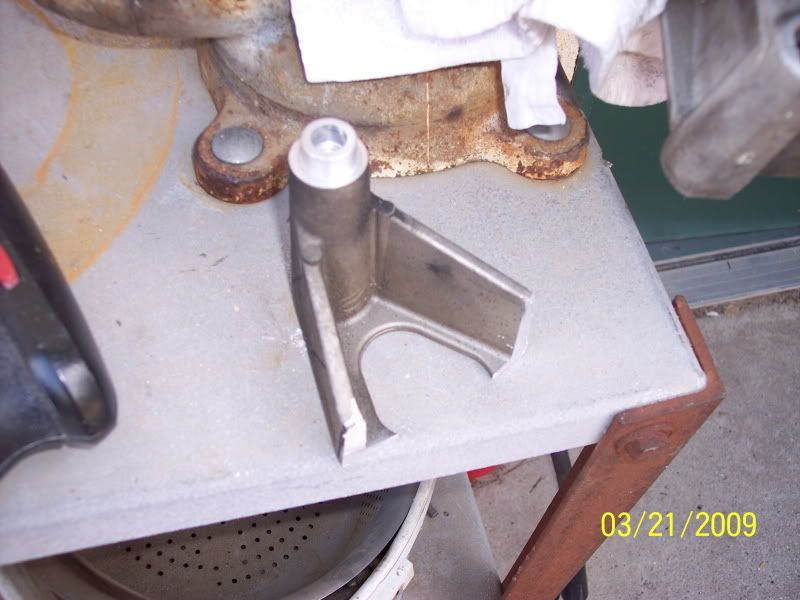
The point that "MUST" be removed:
Borrowed this pic from another member's to show how it "MUST" be rounded, forgot to snap a pic
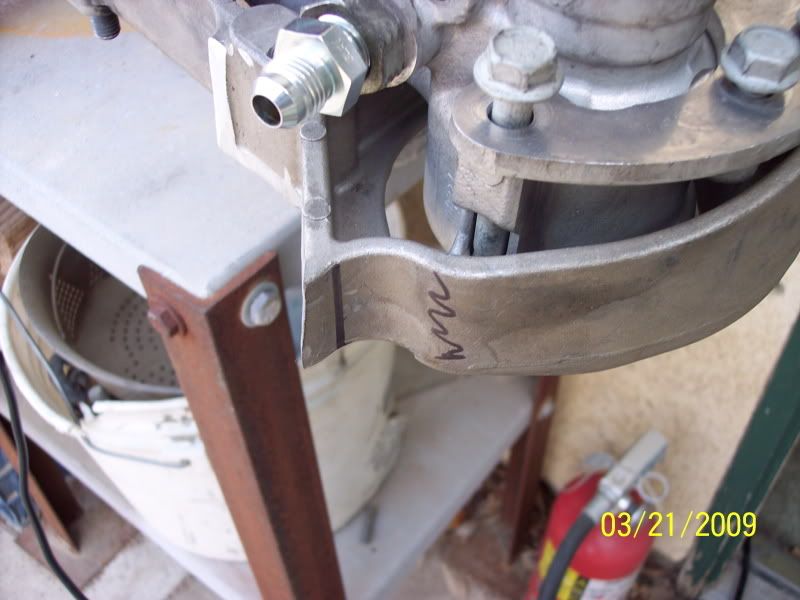
13. Put in the fittings for the new PS hose (You get a 16mmx1.5 and a 18mmx1.5) the 16mmx1.5 goes on the PS Pump
18mmx1.5 goes on the Rack (Yes I cleaned up this area with some parts cleaner)
14. Install the FLIP-DRIVE New Bracket and tighten down the PS Pump/Alternator Bracket:

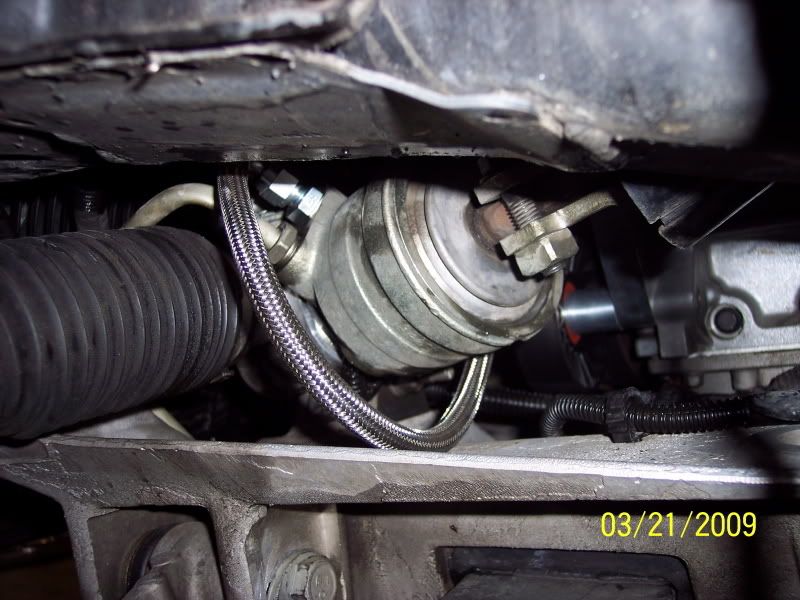
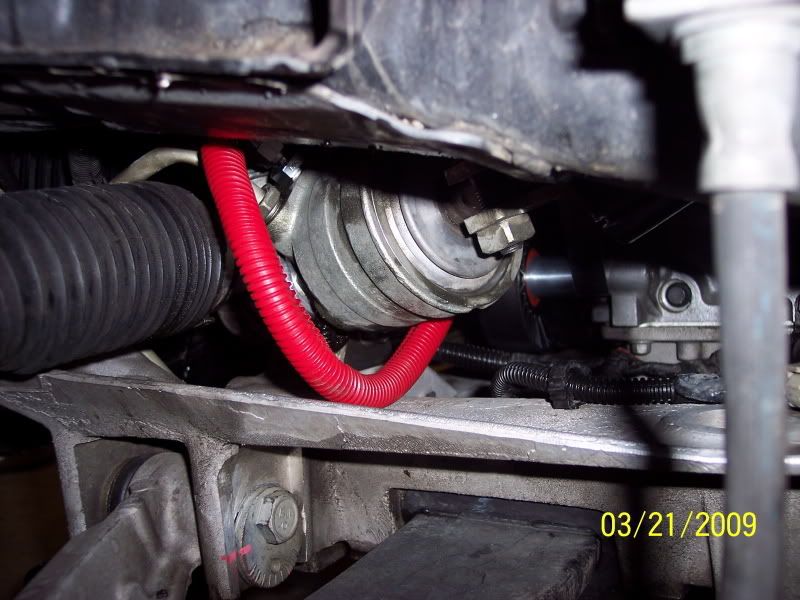
15. Install PS Hose, Although it was steel braided I still put a Plastic loom over it for protection:
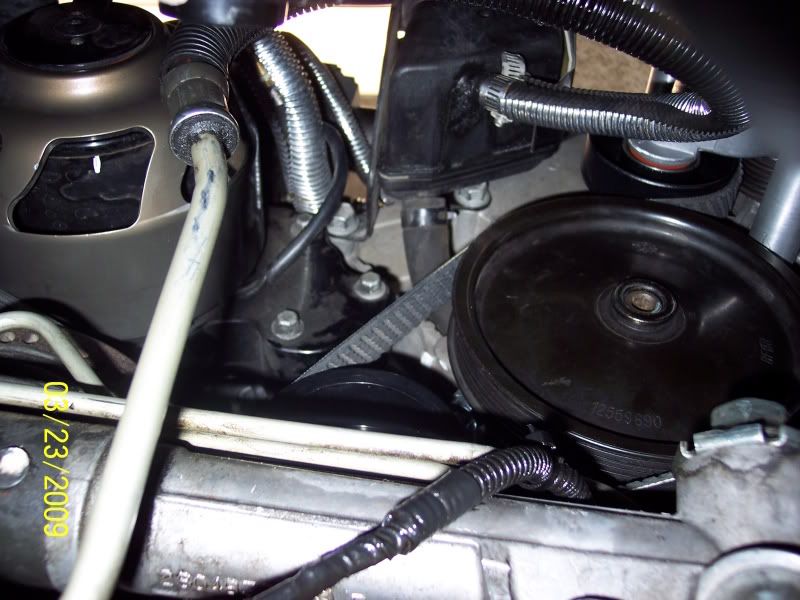
16. Put the PS Pulley back on (With install tool from new kit from PEP Boys) 2nd biggest PITA - jeeeez what a pain it was - man all you here, as well as trying to crank on this thing, was crack, crack, crack, pop, pop, then finally it seats and I mean "FINALLY" - (Pressed on and not screwed on):
IF I HAD KNOWN BEFORE HAND ABOUT THE C6 PULLEY I WOULD HAVE BOUGHT ONE AND INSTALLED IT BACK ON AS OPPOSED TO THE SOLID ONE I HAVE - THE C6 ONE IS IN A 3 STAR PATTERN MAKING IT OPEN TO EXPOSE THE BOLTS!!!!!!!!!!!!
All lined up:
17. Now I installed the AC 4 Rib belt supplied by CARTEK (Turned out to be 1 1/2"too SHORT" 47 1/2" so I had to buy a longer one the next day $13 49" Long) One on left (47 1/2") is too short one on right (49") is perfect:
Installed:
18. Install ProCharger and Belt and Bracket (No Pic needed)
EDIT: it looked like it did before, with the exception of a shorter belt. Remember you can install the SuperCharger before you do the Alternator side- WHY? because the main belt which is the 4 RIB belt is the necessary one, the other two Alternator and Supercharger do not need eachother, they are seperate! You can actually change either of these at any time. "BUT" if you needed to change the 4 ribber then both these belts will need to be removed(Alternator and Supercharger in order to access the 4 Rib AC/Drive belt)
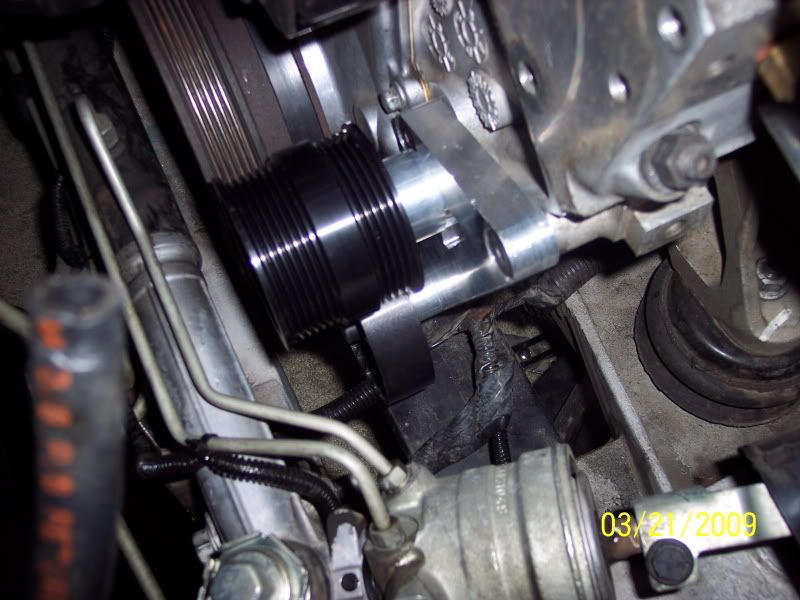
19. Here is where things got tricky again, I have the Alternator with the LONG SNOUT and had to go to the Alternator Shop and they had a pulley at the shop to put on my Alternator, cost $25, the long SNOUT will not clear the Alternator Tensioner Bracket from the FLIP-DRIVE system:
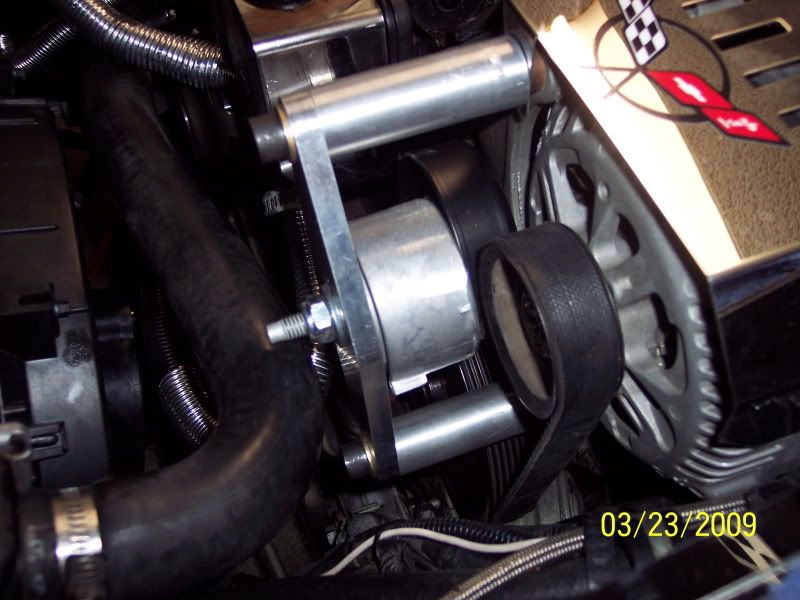
Install last belt (6 RIB) and tensioner
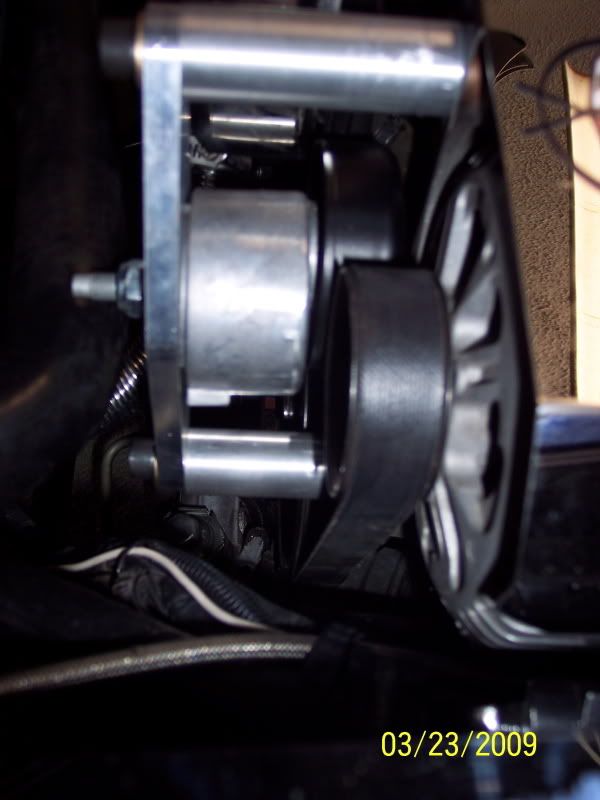
Old ALTERNATOR w/long snout (Clutch nose)
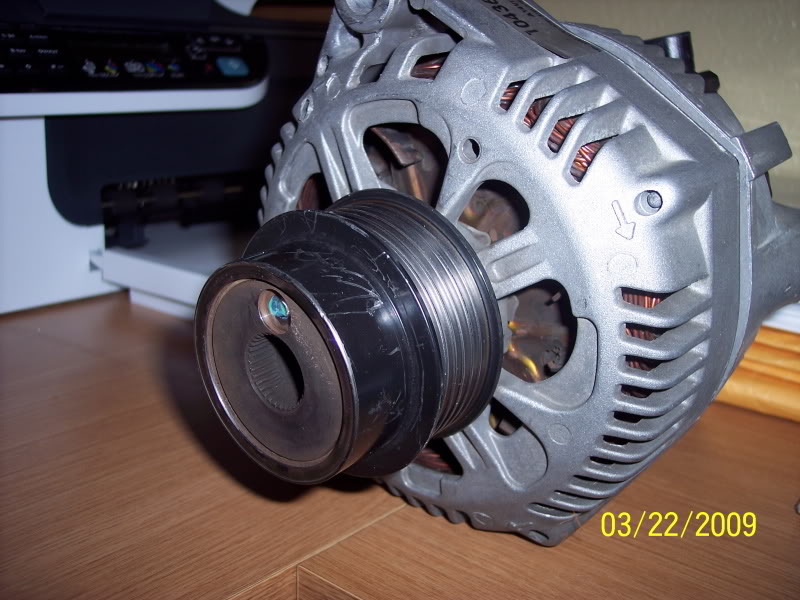
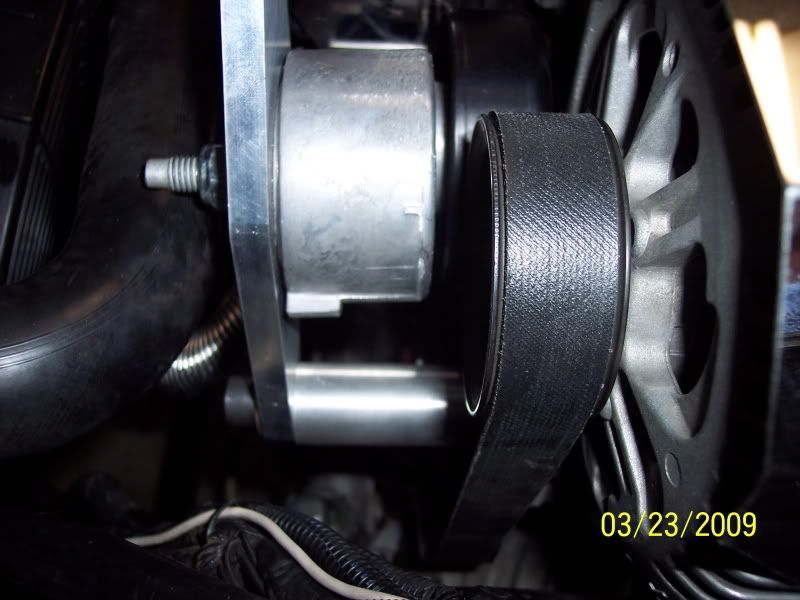
As you can see that there is now way the NOSE or SNOUT would clear the tensioner of the FLIP-DRIVE Alternator tensioner.
Clearance Pics:
Continued below!
This is what you need to remove, plus you "WILL" need to remove the point as I had to remove it again and again to get it perfect, just be patient because at this point it's just going back and forth and no major work:
I used my 19 Volt Cordless Sawzall for the Project then my 3 1/2" grinder to do the finishing:
Removed piece:
The point that "MUST" be removed:
Borrowed this pic from another member's to show how it "MUST" be rounded, forgot to snap a pic
13. Put in the fittings for the new PS hose (You get a 16mmx1.5 and a 18mmx1.5) the 16mmx1.5 goes on the PS Pump
18mmx1.5 goes on the Rack (Yes I cleaned up this area with some parts cleaner)
14. Install the FLIP-DRIVE New Bracket and tighten down the PS Pump/Alternator Bracket:
15. Install PS Hose, Although it was steel braided I still put a Plastic loom over it for protection:
16. Put the PS Pulley back on (With install tool from new kit from PEP Boys) 2nd biggest PITA - jeeeez what a pain it was - man all you here, as well as trying to crank on this thing, was crack, crack, crack, pop, pop, then finally it seats and I mean "FINALLY" - (Pressed on and not screwed on):
IF I HAD KNOWN BEFORE HAND ABOUT THE C6 PULLEY I WOULD HAVE BOUGHT ONE AND INSTALLED IT BACK ON AS OPPOSED TO THE SOLID ONE I HAVE - THE C6 ONE IS IN A 3 STAR PATTERN MAKING IT OPEN TO EXPOSE THE BOLTS!!!!!!!!!!!!
All lined up:
17. Now I installed the AC 4 Rib belt supplied by CARTEK (Turned out to be 1 1/2"too SHORT" 47 1/2" so I had to buy a longer one the next day $13 49" Long) One on left (47 1/2") is too short one on right (49") is perfect:
Installed:
18. Install ProCharger and Belt and Bracket (No Pic needed)
EDIT: it looked like it did before, with the exception of a shorter belt. Remember you can install the SuperCharger before you do the Alternator side- WHY? because the main belt which is the 4 RIB belt is the necessary one, the other two Alternator and Supercharger do not need eachother, they are seperate! You can actually change either of these at any time. "BUT" if you needed to change the 4 ribber then both these belts will need to be removed(Alternator and Supercharger in order to access the 4 Rib AC/Drive belt)
19. Here is where things got tricky again, I have the Alternator with the LONG SNOUT and had to go to the Alternator Shop and they had a pulley at the shop to put on my Alternator, cost $25, the long SNOUT will not clear the Alternator Tensioner Bracket from the FLIP-DRIVE system:
Install last belt (6 RIB) and tensioner
Old ALTERNATOR w/long snout (Clutch nose)
As you can see that there is now way the NOSE or SNOUT would clear the tensioner of the FLIP-DRIVE Alternator tensioner.
Clearance Pics:
Continued below!
Last edited by madmatt9471; 03-24-2009 at 12:20 PM. Reason: EDITing
03-24-2009, 07:21 AM
#3
Team Owner
Thread Starter
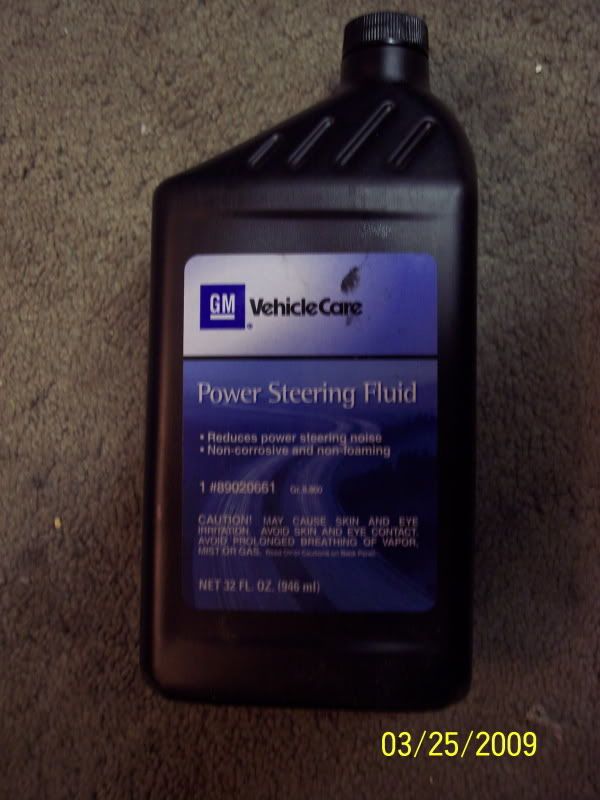
19A. Make sure you add POWER STEERING FLUID and follow the instructions of turning the steering 20 times back and forth (It is in our Drivers Handbook on how to do this)- - Our manuals call for a Synthetic PS Fluid, I could not find any anywhere so I went over to the local GM Parts dealer and got a Pint for $13 

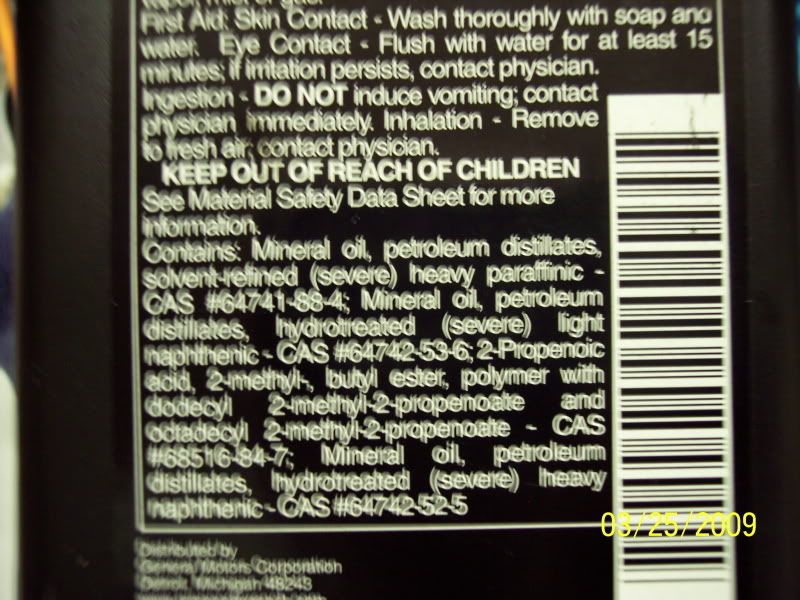
GM Part # 89020661
FRONT-
BACK-
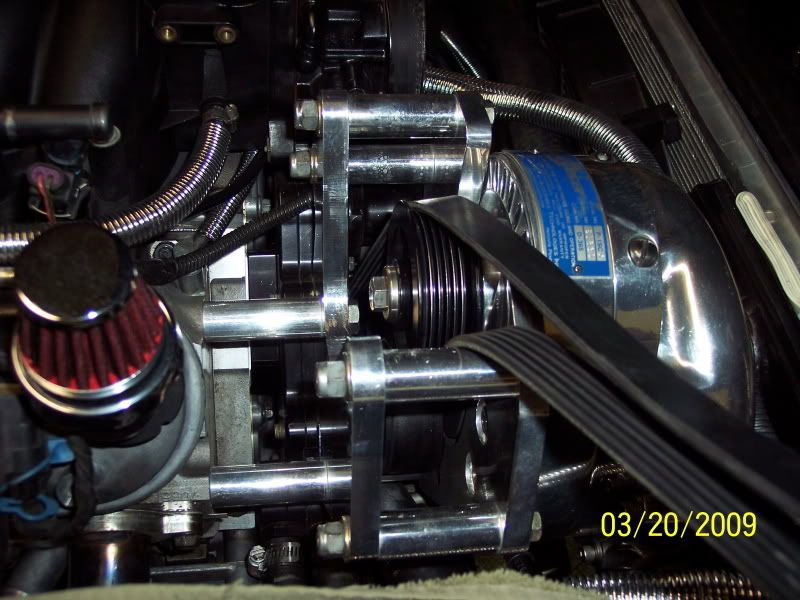
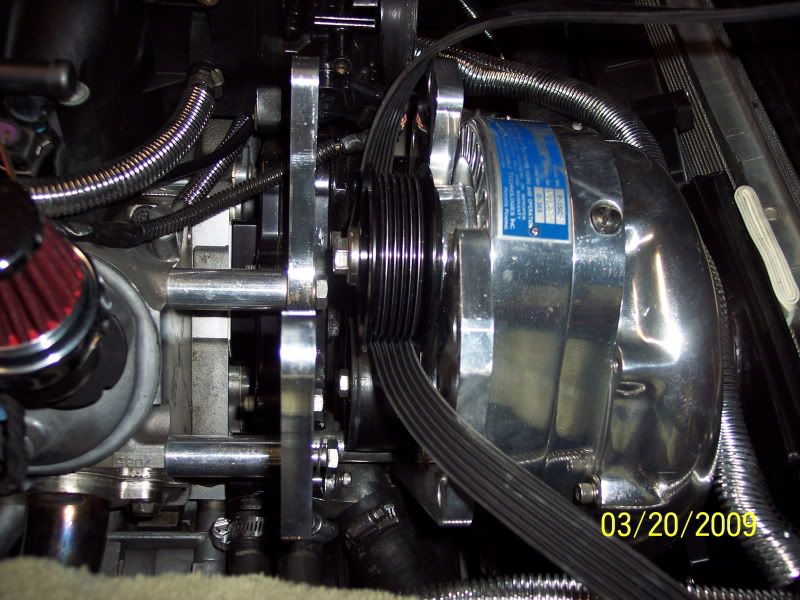
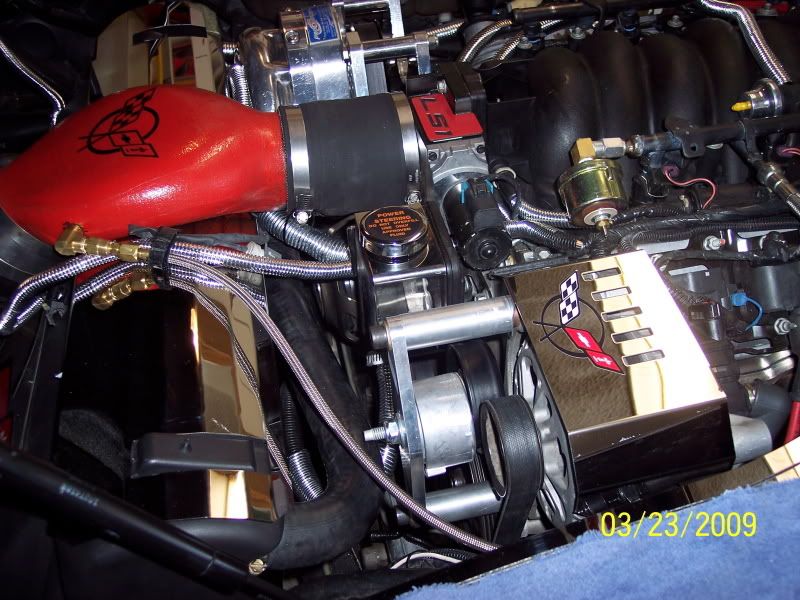
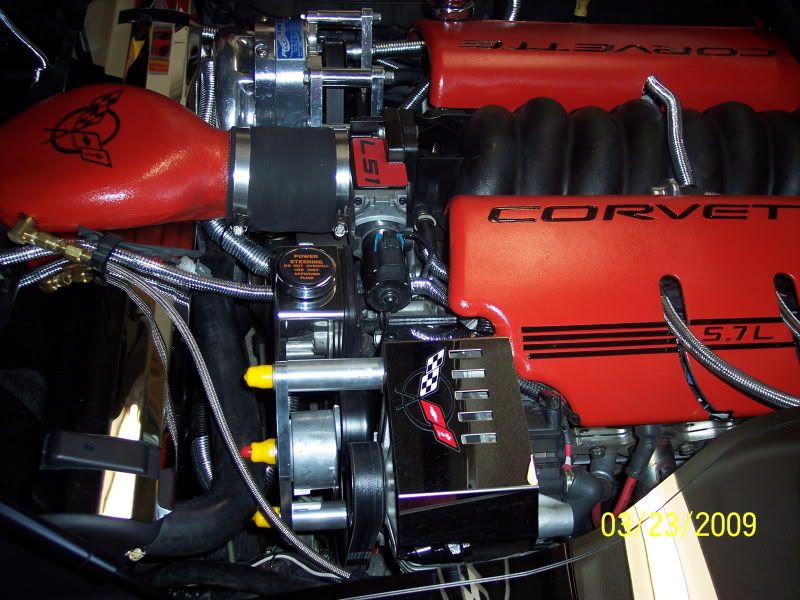
20. Take some pics of finished product:
21. Put all tubing and everything back together and connect the Battery and give it the turn key treatment to make sure no belt comes off and start:
Ran it up to 5000 RPM's when it was warmed up, a few times:

22. Put some TETA's on the bolts (I thought they looked ugly w/out) - I think I might need to change the one in the MIDDLE kinda looks like a Dog's *****  (I am thuroughly busting up right now - man I crack myself up sometimes
  )
)
23. Took it out for a test run and ran it up to 70 MPH to 145 MPH about 6 times and it was perfect!
No issues at all and very smooth!
I actually mean it feels smoother for some reason, perhaps because the single belt caused vibration (Not that it was noticable but it does seem smoother)!
My overall impression - Love it - Buy it! it's worth the money and it sure makes it easy to change the belt!
Very good product and excellent made product!
I hope this helps I will add and edit as I remember and re-read it!
DID some editing today - so go check it out
Thanks,Matt
GM Part # 89020661
FRONT-
BACK-
20. Take some pics of finished product:
21. Put all tubing and everything back together and connect the Battery and give it the turn key treatment to make sure no belt comes off and start:
Ran it up to 5000 RPM's when it was warmed up, a few times:
22. Put some TETA's
on the bolts (I thought they looked ugly w/out) - I think I might need to change the one in the MIDDLE kinda looks like a Dog's ***** (I am thuroughly busting up right now - man I crack myself up sometimes )23. Took it out for a test run and ran it up to 70 MPH to 145 MPH about 6 times and it was perfect!
No issues at all and very smooth!
I actually mean it feels smoother for some reason, perhaps because the single belt caused vibration (Not that it was noticable but it does seem smoother)!
My overall impression - Love it - Buy it! it's worth the money and it sure makes it easy to change the belt!
Very good product and excellent made product!
I hope this helps I will add and edit as I remember and re-read it!
DID some editing today - so go check it out
Thanks,Matt
Last edited by madmatt9471; 03-26-2009 at 01:14 AM.
03-24-2009, 07:51 AM
#4
Race Director

Thanks for the post. I am in the same boat as you as I have an auto tranny alternator in my car, so I guess I'll need to get another pulley.
BTW, if you ever have to work on the PS Pump again get the C6 pulley, it's made of steel and has slots in it so that you don't have to remove it to access the PS pump bolts.
BTW, if you ever have to work on the PS Pump again get the C6 pulley, it's made of steel and has slots in it so that you don't have to remove it to access the PS pump bolts.


 03-24-2009, 12:30 PM
#9
Team Owner
Thread Starter
Thanks for the post. I am in the same boat as you as I have an auto tranny alternator in my car, so I guess I'll need to get another pulley.
BTW, if you ever have to work on the PS Pump again get the C6 pulley, it's made of steel and has slots in it so that you don't have to remove it to access the PS pump bolts.
BTW, if you ever have to work on the PS Pump again get the C6 pulley, it's made of steel and has slots in it so that you don't have to remove it to access the PS pump bolts.
That is one of the reasons I did this write up so you and all the other fella's can learn from my mistakes and trials along the way
Take some pics when you do yours aswell
Thanks,Matt
03-24-2009, 12:31 PM
#10
Team Owner
Thread Starter
03-24-2009, 12:36 PM
#11
Team Owner
Thread Starter
Thanks Peter. No I did not pulley down to up the B@@ST 
But I did talk to Charlie while my Alternator was being done and I will be taking it to him in two weeks from yesterday (My next monday off) to do a clean-up tune and I told hime I'd like to see 660 RWHP if we could and he said it should not be a problem since we have not even pushed my motor as the tune is "VERY" safe
So a little more Meth and NO belt slip - I hope it'll all turn out good
Thanks,Matt
03-24-2009, 12:38 PM
#12
Team Owner
Thread Starter
03-24-2009, 12:39 PM
#13
Team Owner
Thread Starter
03-24-2009, 12:43 PM
#14
Race Director
Yeah! I know and had I known before I would of made arrangements to have the C6 style on hand as well as the different pulley for my Alternator
That is one of the reasons I did this write up so you and all the other fella's can learn from my mistakes and trials along the way
Take some pics when you do yours aswell
Thanks,Matt
That is one of the reasons I did this write up so you and all the other fella's can learn from my mistakes and trials along the way
Take some pics when you do yours aswell
Thanks,Matt

I didn't even realize that there was a difference in the alternators (manual vs automatics).
I'm wondering if this is causing my low voltage problems
 I converted the car from an automatic to a six speed back in 2007 and started getting a low voltage error.
I'm going to convert it back to an auto tranny again along with C6 Z06 differential option that RPM has when I do the Motor (416) Ls3 swap later this year.
Great post and pictures. I'll due most of the knuckle busting before I drop the motor back in.
03-24-2009, 12:49 PM
#15
Team Owner
Thread Starter
Yeah, I hear ya
I didn't even realize that there was a difference in the alternators (manual vs automatics).
I'm wondering if this is causing my low voltage problems I converted the car from an automatic to a six speed back in 2007 and started getting a low voltage error.
I'm going to convert it back to an auto tranny again along with C6 Z06 differential option that RPM has when I do the Motor (416) Ls3 swap later this year.
Great post and pictures. I'll due most of the knuckle busting before I drop the motor back in.
I didn't even realize that there was a difference in the alternators (manual vs automatics).
I'm wondering if this is causing my low voltage problems
I converted the car from an automatic to a six speed back in 2007 and started getting a low voltage error.I'm going to convert it back to an auto tranny again along with C6 Z06 differential option that RPM has when I do the Motor (416) Ls3 swap later this year.
Great post and pictures. I'll due most of the knuckle busting before I drop the motor back in.
Many who have swapped out the pulleys have had no issues at all and actually my pulley that the Alternator guy gave me is a hair smaller and it is perfect
The alternator fella asked GM about the clutch style and they really had no answer to it and said all would be fine as it is on the majority of Vettes!
Thanks,Matt
03-24-2009, 07:09 PM
#16
Melting Slicks


Great write up and pics! It seems cars with the clutch style alternator will need to replace the pulley or complete alternator. A small price to pay if everything works out in the end. Looking forward to your results!
03-24-2009, 08:34 PM
#17
Team Owner

Member Since: Jan 2007
Location: cookeville tennessee
Posts: 28,846
Received 1,762 Likes
on
1,529 Posts

Matt, as all ways great pic,s and one hell of a write up on the job. Man very well done.....
03-24-2009, 08:45 PM
#18
Le Mans Master

It looks like your abs in the in the rear of the car? For people with the newer modles with the abs in front it might be easier just to pull the entire bracket with the PS pump and pulley still attached and take the pulley off once its out of the car?
03-24-2009, 09:27 PM
#19
Team Owner
Thread Starter
Which should be around $25 for a pulley for the alternator
Thanks,Matt
03-24-2009, 09:30 PM
#20
Team Owner
Thread Starter
Other than that it near impossible
Believe me I am sooooo glad my ABS is in the rear of the Vette

Thanks,Matt