
Installing UPP fuel set up. Pics inside
 06-15-2014, 03:04 PM
#1
Race Director

Thread Starter

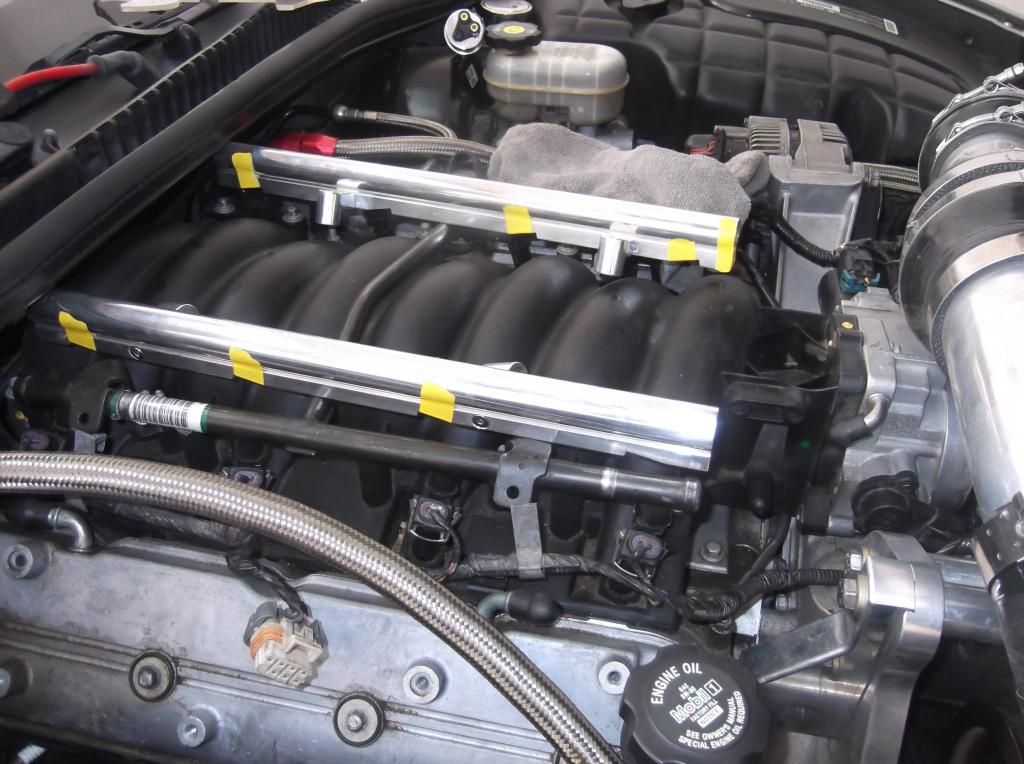
Well now that my boy is in Florida for the summer visiting family I can hammer this fuel system out. I started the other day so it won't be done for a week or so but I like documenting all this crap.(see http://forums.corvetteforum.com/c5-t...pics-soon.html for an example) I also have these fuel rails I want to install I need to get the find out what size they are before I order them..I don't know what brand they are
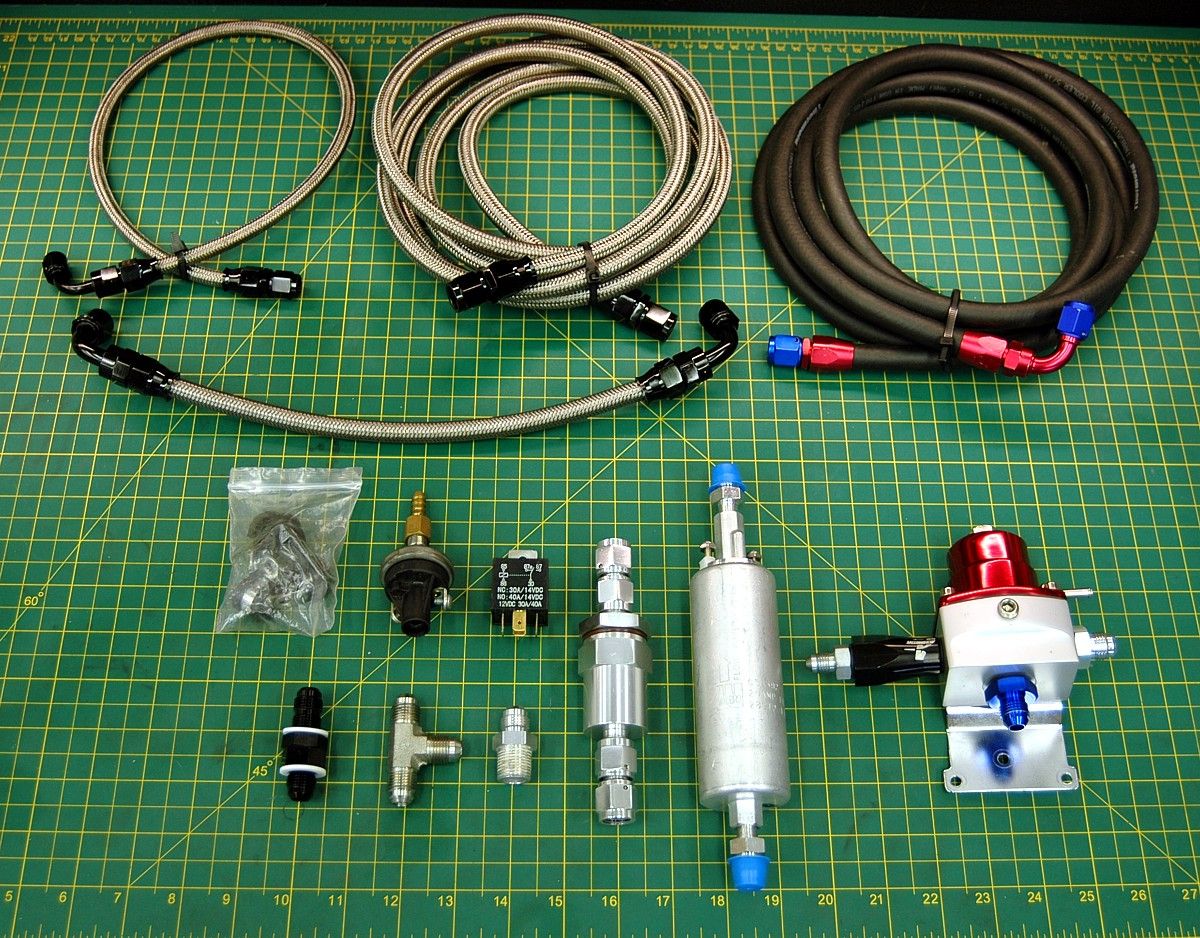
here is the kit and again if Ed(Patches) for hooking me up
I removed my fuel senor gauge and jumped the fp relay to get as much fuel out as I could. There was still almost 2 gallons when I pulled the pump out( I am putting my aem 320 back in)
Once I drained all the fuel out Ill be honest I know people say the tank is a pain but it's actually simple. really only a few things to disconnect and unbolt. Not sure what the big deal is...
Anyways your first disconnect will be this worm clamp from this guy and move the hose out of the way. the second disconnected item will be the fuel line with a fuel disconnect tool..
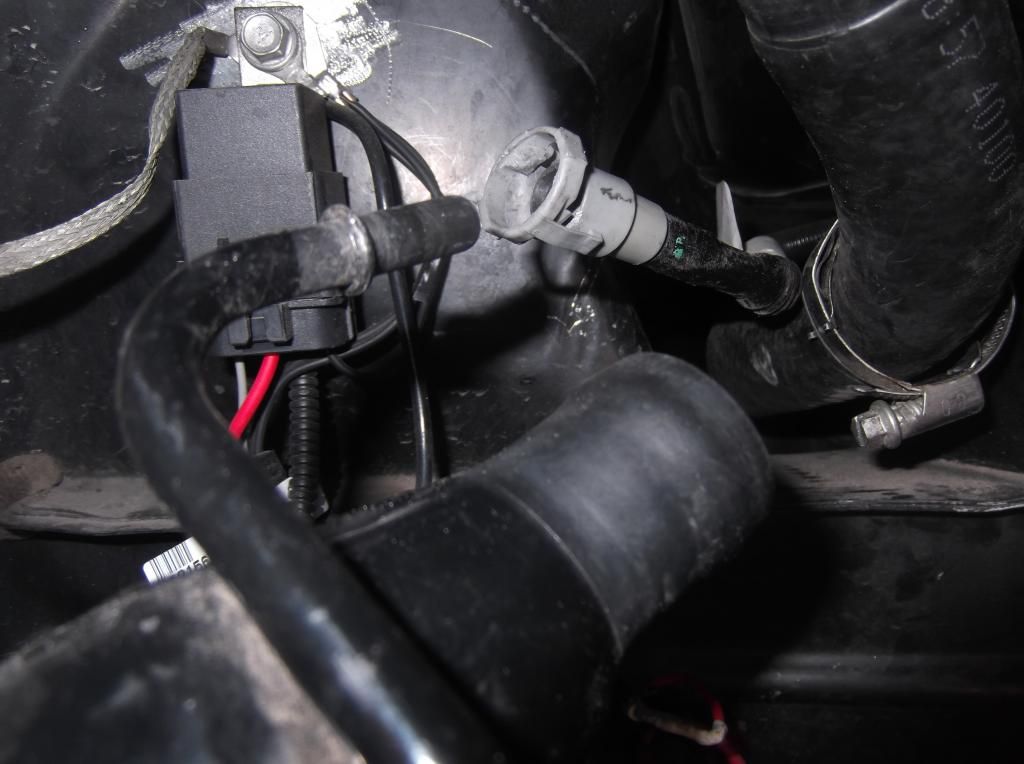
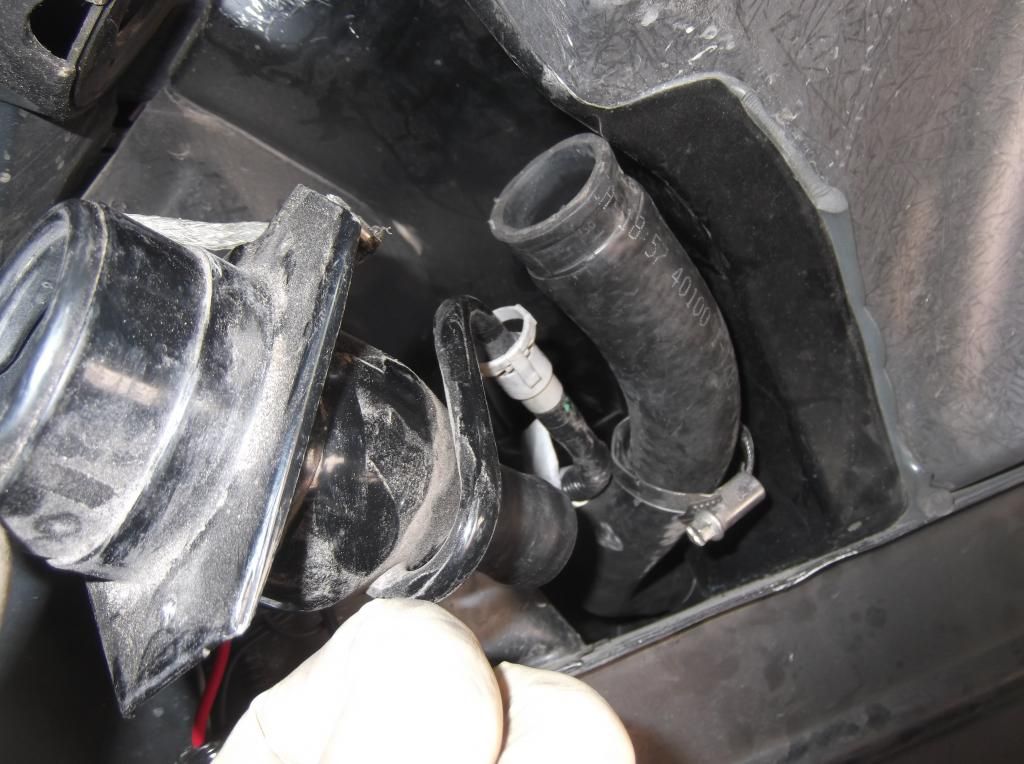
this is the third item that you need to disconnect. It's right above the fuel filter on my 01..It's the big fuel hose again it's just a worm clamp..
here it is out of the way and disconnected
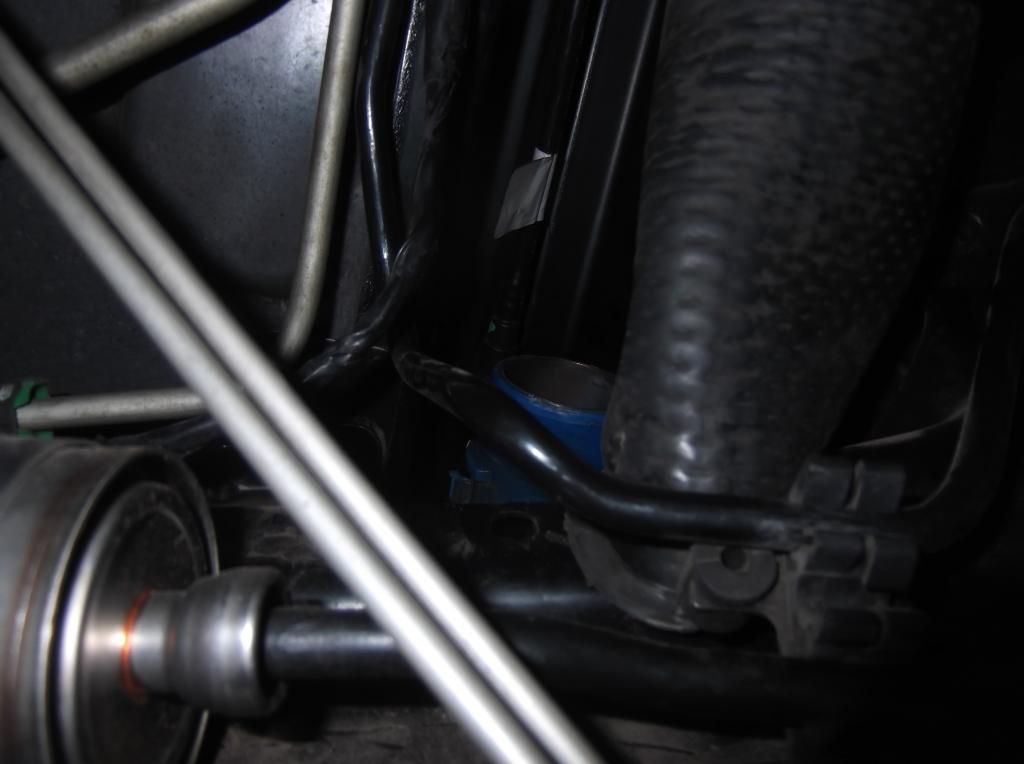
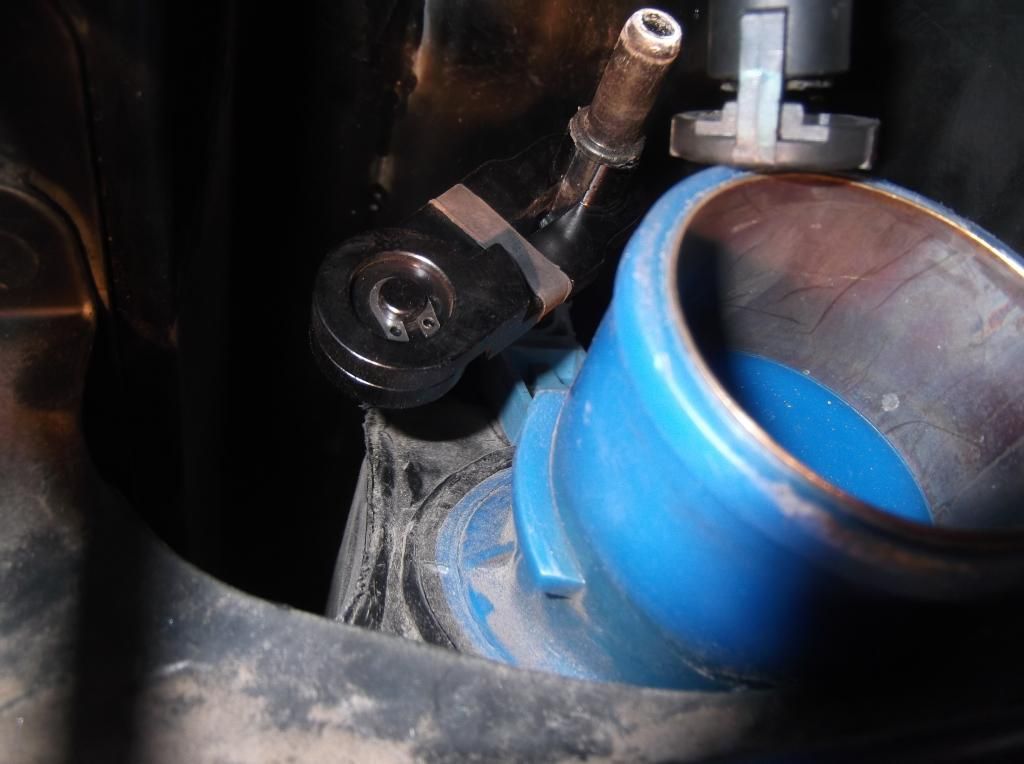
Now directly above that blue plastic part you will see the fuel fitting that needs to come off . BUT before you do that here is a trick that someone told me and is what I think people get hung up on. Drop the tank down on your stomach which makes for sooo much room to get that tool in there to disconnect that fuel line.. So the 4th thing you want to take out are the 5 or 6 13mm bolts that hold the tank to shield/frame..Once you do this the tank drops down but don't worry it wont come out due to that first rubber hose you took off by the gas cap is making it hang up.
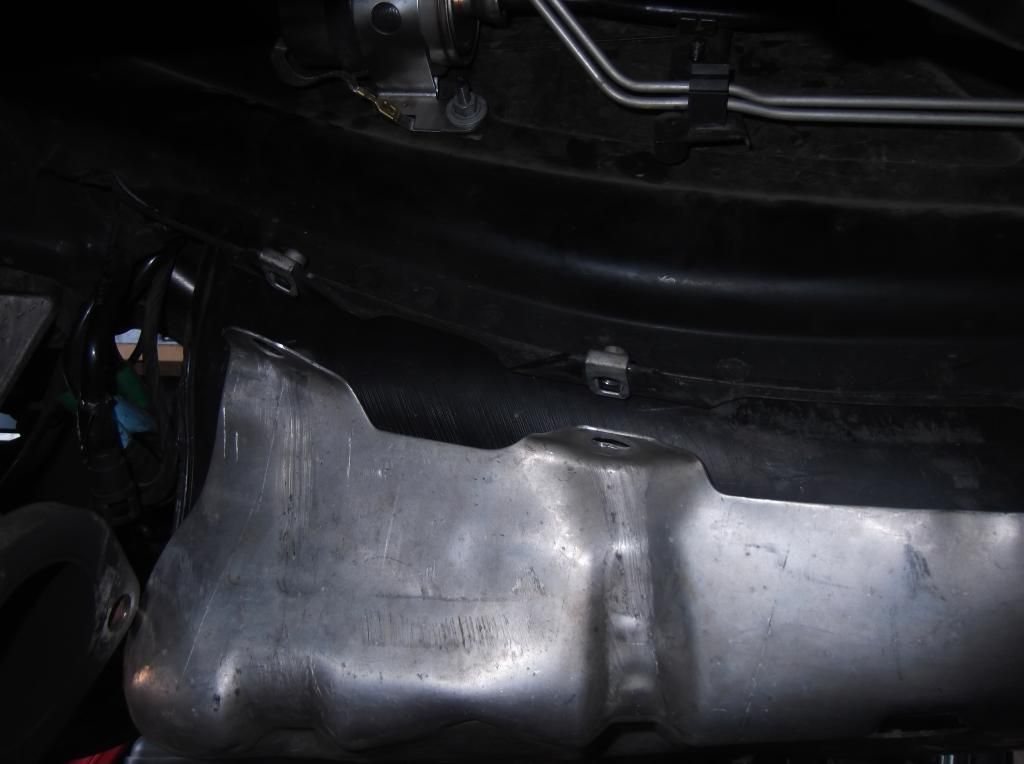
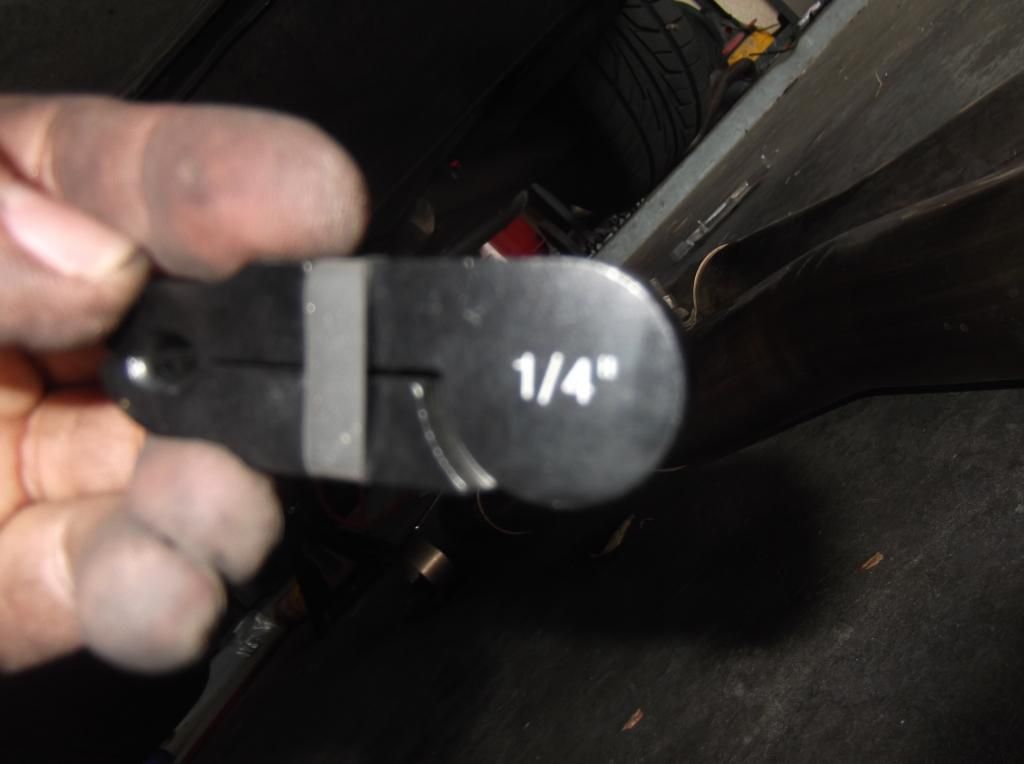
Now drop it on your stomach or chest and you should have plenty of room to work in that area. Don't worry it wont go anywhere or fall on you just don't yank it down since it's still connected on that fuel line we are going to take out. Now for the 5th and final step Just insert a 1/4" disconnect fuel to push the tool in and push the line out and voila she's out..


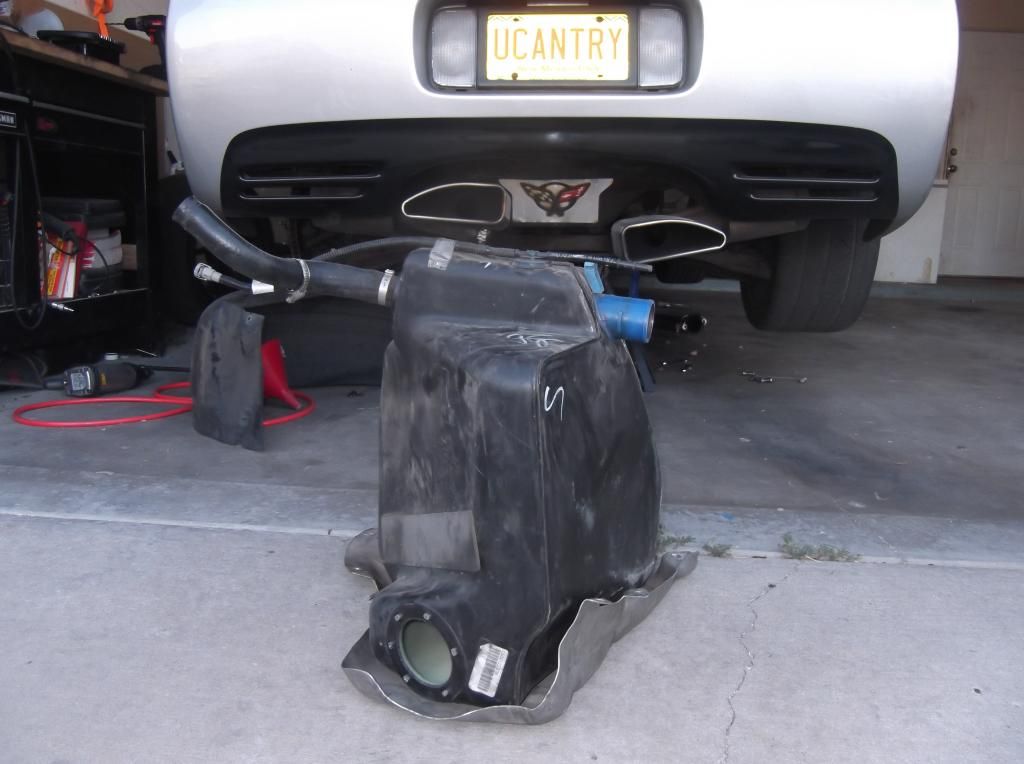
Once that's done just pull her out. You may have to use some muscle since that upper hose will still be attached but it should just come out and you are done. Once the fuel is out it should take you maybe 30 to 40 minutes to do this I think it's simple and not a pain at all so not sure what I am missing as it being a pain as I keep reading. Don't mind the exhaust I had to pull the header to replace the starter solenoid and I wanted to change out the gaskets on the header and axle back
This is all until Wednesday

here is the kit and again if Ed(Patches) for hooking me up
I removed my fuel senor gauge and jumped the fp relay to get as much fuel out as I could. There was still almost 2 gallons when I pulled the pump out( I am putting my aem 320 back in)

Once I drained all the fuel out Ill be honest I know people say the tank is a pain but it's actually simple. really only a few things to disconnect and unbolt. Not sure what the big deal is...
Anyways your first disconnect will be this worm clamp from this guy and move the hose out of the way. the second disconnected item will be the fuel line with a fuel disconnect tool..


this is the third item that you need to disconnect. It's right above the fuel filter on my 01..It's the big fuel hose again it's just a worm clamp..

here it is out of the way and disconnected

Now directly above that blue plastic part you will see the fuel fitting that needs to come off . BUT before you do that here is a trick that someone told me and is what I think people get hung up on. Drop the tank down on your stomach which makes for sooo much room to get that tool in there to disconnect that fuel line.. So the 4th thing you want to take out are the 5 or 6 13mm bolts that hold the tank to shield/frame..Once you do this the tank drops down but don't worry it wont come out due to that first rubber hose you took off by the gas cap is making it hang up.

Now drop it on your stomach or chest and you should have plenty of room to work in that area. Don't worry it wont go anywhere or fall on you just don't yank it down since it's still connected on that fuel line we are going to take out. Now for the 5th and final step Just insert a 1/4" disconnect fuel to push the tool in and push the line out and voila she's out..


Once that's done just pull her out. You may have to use some muscle since that upper hose will still be attached but it should just come out and you are done. Once the fuel is out it should take you maybe 30 to 40 minutes to do this I think it's simple and not a pain at all so not sure what I am missing as it being a pain as I keep reading. Don't mind the exhaust I had to pull the header to replace the starter solenoid and I wanted to change out the gaskets on the header and axle back

This is all until Wednesday
Last edited by Chicago1; 06-15-2014 at 03:10 PM.


 06-15-2014, 04:12 PM
#4
Team Owner


Very nice! 
I love a good write-up and read!
Looking forward to seeing more progress!
Thanks,Matt
I love a good write-up and read!
Looking forward to seeing more progress!
Thanks,Matt
06-15-2014, 07:44 PM
#7
Race Director
Thread Starter
bwahahahaha I'm a idiot I didn't need to drop the tank. So scratch that it's only for the 03 and later cars you need to drop the tank. it may help if I don't fast forward the install video and only listen to bits and pieces. I do have to drop the exhaust and tunnel plate so that saved some time since it was off for the gasket work I wanted to do..how this car is still running with me working on it is beyond me...
Last edited by Chicago1; 06-15-2014 at 07:57 PM.
 06-15-2014, 08:16 PM
#9
Race Director
Thread Starter
It's gonna get creative once I get the lines up front and want to run those fuel rails and my fuel sensor for my fp is car. Ill figure out what fittings I need when I get there. I want it to work and look clean at the same time
06-15-2014, 08:37 PM
#10
Instructor

I'm just finishing up my install of the UPP fuel system myself. Was also wondering why you dropped the tank! 
On the positive note, if you plan on tapping the tank with a fitting then this will make it much easier for sure. I believe that the the worse part for me. I routed the lines and pump a little different from what the video said as well. Was wondering how you plan on mounting the FPR as well. I made a bracket from aluminum & mounted it on the driver side. I have some pics if it can help. Looking forward to your progress.
On the positive note, if you plan on tapping the tank with a fitting then this will make it much easier for sure. I believe that the the worse part for me. I routed the lines and pump a little different from what the video said as well. Was wondering how you plan on mounting the FPR as well. I made a bracket from aluminum & mounted it on the driver side. I have some pics if it can help. Looking forward to your progress.
06-15-2014, 08:44 PM
#11
Team Owner

Shant, you may want to consider having a shop weld in a fitting on the bulkhead plate for the supply line so you don't have to use that bulkhead fitting in the plastic tank wall. If you trash the pump/sender connector with the welding heat, it's a cheap replacement. The fittings you install in the tank wall are notorious for leaking.
Also, you may also think about replacing your fuel filter with a 97-98 filter to eliminate the built-in regulator so it doesn't interfere with your Aeromotive FPR. I swapped one of these in place of my '02 filter and eliminated the return line. I still need to cap that line off on the bulkhead plate but you can use it as your return. I have the ECS adapter ring which has a -6 AN port for the return line so I used that.
Also, you may also think about replacing your fuel filter with a 97-98 filter to eliminate the built-in regulator so it doesn't interfere with your Aeromotive FPR. I swapped one of these in place of my '02 filter and eliminated the return line. I still need to cap that line off on the bulkhead plate but you can use it as your return. I have the ECS adapter ring which has a -6 AN port for the return line so I used that.
06-15-2014, 08:44 PM
#12
Race Director
Thread Starter
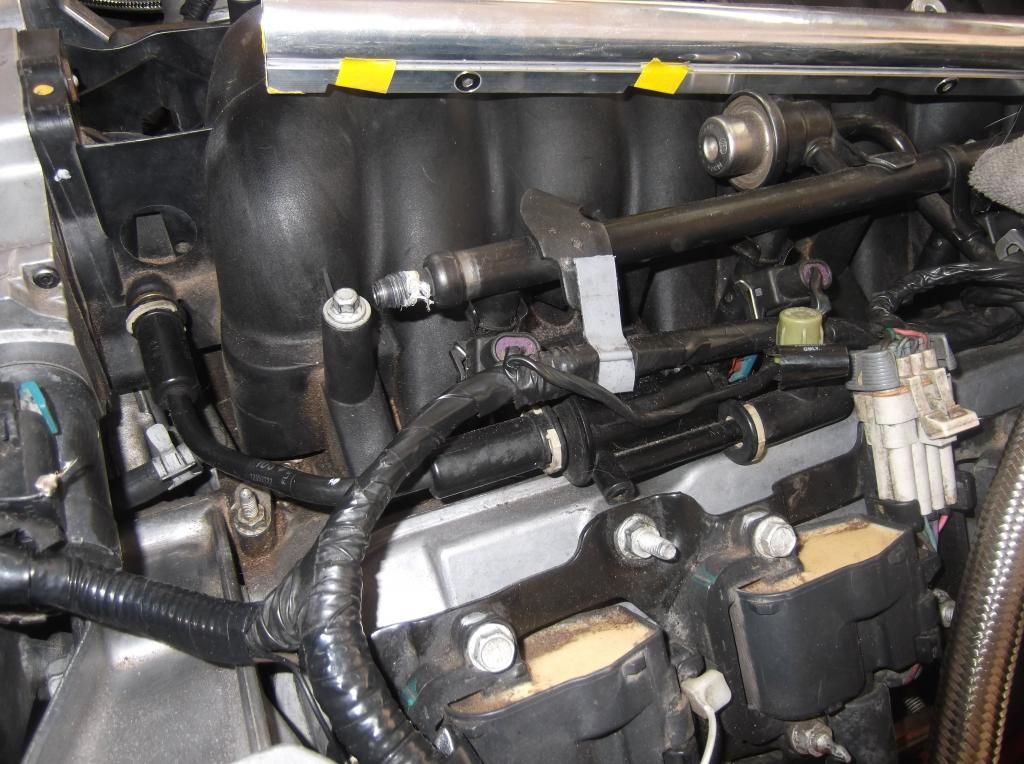
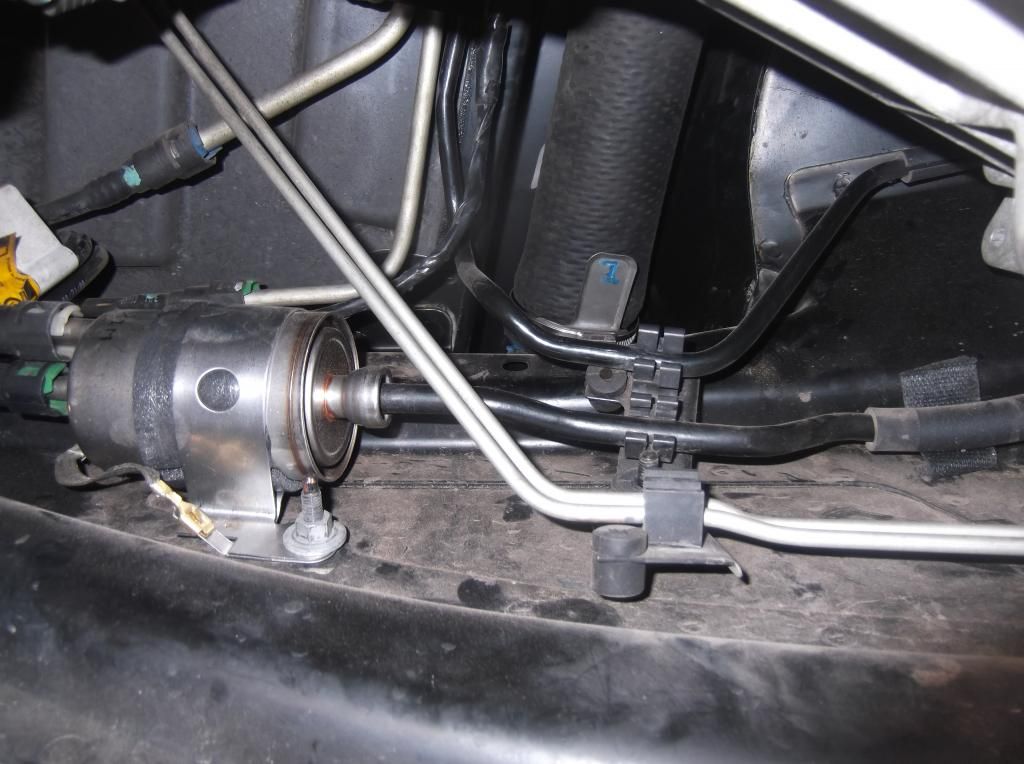
JT yes I have been emailing ck he is going to help with some fitting because I want the fp gauge on the drivers side and I will need others fittings so my fuel pressure gauge works this is what it looks like now with that sensor..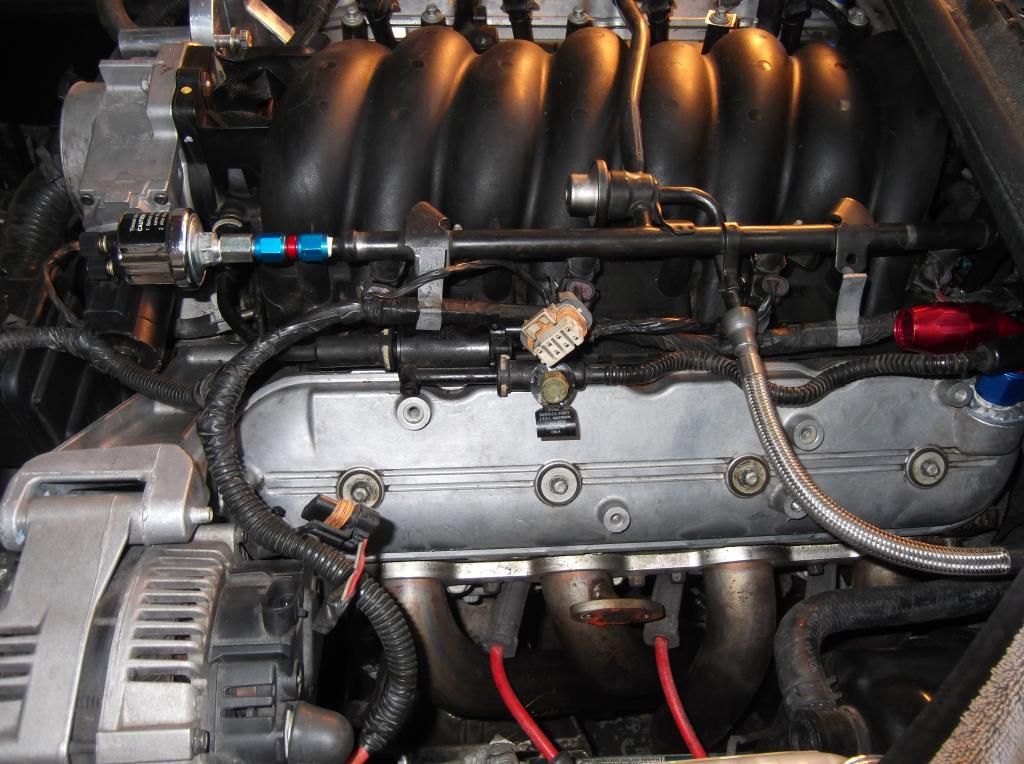
if you could post up pics that would be great. you are the 3rd person that asked why I dropped the tank lol. man what a bonehead move lol

if you could post up pics that would be great. you are the 3rd person that asked why I dropped the tank lol. man what a bonehead move lol
06-15-2014, 08:51 PM
#14
Race Director
Thread Starter
Shant, you may want to consider having a shop weld in a fitting on the bulkhead plate for the supply line so you don't have to use that bulkhead fitting in the plastic tank wall. If you trash the pump/sender connector with the welding heat, it's a cheap replacement. The fittings you install in the tank wall are notorious for leaking.
Also, you may also think about replacing your fuel filter with a 97-98 filter to eliminate the built-in regulator so it doesn't interfere with your Aeromotive FPR. I swapped one of these in place of my '02 filter and eliminated the return line. I still need to cap that line off on the bulkhead plate but you can use it as your return. I have the ECS adapter ring which has a -6 AN port for the return line so I used that.
Also, you may also think about replacing your fuel filter with a 97-98 filter to eliminate the built-in regulator so it doesn't interfere with your Aeromotive FPR. I swapped one of these in place of my '02 filter and eliminated the return line. I still need to cap that line off on the bulkhead plate but you can use it as your return. I have the ECS adapter ring which has a -6 AN port for the return line so I used that.
 .
. So you have a pic of the bulkhead that you are capping. I though the aeromotive will still work with the stock stuff and will still be boost referenced?
06-15-2014, 09:05 PM
#17
Team Owner
Ed, I thought that bulkhead fitting goes into the hat? not the plastic tank wall? According to the video it's the hat or am missing something? I already messed up the sending unit so I have to get another so no worries about that .
So you have a pic of the bulkhead that you are capping. I though the aeromotive will still work with the stock stuff and will still be boost referenced?
. So you have a pic of the bulkhead that you are capping. I though the aeromotive will still work with the stock stuff and will still be boost referenced?
I was discussing the regulator function with Doug at ECS and he recommended putting in a 97-98 filter to eliminate my '02 regulator and allow the Aeromotive to control FP alone. I actually already had one ready to install as I'd been planning on it.
The return line on the plate I'm capping off is the one with the green connector lock on it.
06-16-2014, 11:43 AM
#18
Melting Slicks


I think you work on this more than you drive it......The struggle is real huh? High HP problems are just the worst.
Lol looking good so far man. The pics are great. Keep us posted!
Lol looking good so far man. The pics are great. Keep us posted!
06-16-2014, 11:53 AM
#19
Race Director
Thread Starter
thanks for the pics gents. Ed I may pm you for some more info..
Peety yeah lately it seems like it but I keep adding stuff lol I think this is it for a bit...I don't think I need to do anything else but yeah my jackstands have been getting a workout. usually it's the DSM that is a jsb (jack stand baller) but the vette is taking first now. 4g63 and ls1..I screwed myself.
Peety yeah lately it seems like it but I keep adding stuff lol I think this is it for a bit...I don't think I need to do anything else but yeah my jackstands have been getting a workout. usually it's the DSM that is a jsb (jack stand baller) but the vette is taking first now. 4g63 and ls1..I screwed myself.
06-16-2014, 12:58 PM
#20
Melting Slicks
thanks for the pics gents. Ed I may pm you for some more info..
Peety yeah lately it seems like it but I keep adding stuff lol I think this is it for a bit...I don't think I need to do anything else but yeah my jackstands have been getting a workout. usually it's the DSM that is a jsb (jack stand baller) but the vette is taking first now. 4g63 and ls1..I screwed myself.
Peety yeah lately it seems like it but I keep adding stuff lol I think this is it for a bit...I don't think I need to do anything else but yeah my jackstands have been getting a workout. usually it's the DSM that is a jsb (jack stand baller) but the vette is taking first now. 4g63 and ls1..I screwed myself.
Yours will be up soon and will be a nice upgrade to the fuel system.

