
Write-Up: LS Overheating Fix, Trapped Air In Block Fix - LS Rear Water Ports Fix
 09-02-2014, 07:14 PM
#1
Team Owner


Thread Starter
You have air trapped in the block - it needs to be burped and you just can't get it all out since we have the rear plugs in the back of the heads - well you can do this!
WITH THE MANIFOLD ON!!!!!!!
Here are Parts you will need:
(2 ea.) http://s41657.storefront-solutions.c...l.aspx?ID=3289
(2 ea.) http://cgi.ebay.com/ws/eBayISAPI.dll?ViewItem&item=360869686162&ssPageName=ADME:L:OC:US:3160(1 ea.) http://cgi.ebay.com/ws/eBayISAPI.dll?ViewItem&item=370990740222&ssPageName=ADME:L:OC:US:3160(1 ea.) http://cgi.ebay.com/ws/eBayISAPI.dll?ViewItem&item=371002092316&ssPageName=ADME:L:OC:US:3160(1 ea.) Approx 5' of 1/4 fuel line
(9 ea.) Hose clamps
(1) Roll electrical Tape (choice of your color)
3' feet convoluted tubing
Remember that I had already bypassed the front cross over tube from going to the radiator and re-routed it to go into the return of the expansion tank -
Now! I am doing the same thing with the rear ports, which have plugs -
All the pictures are pretty much self explanitory but I will add some comments, here goes:
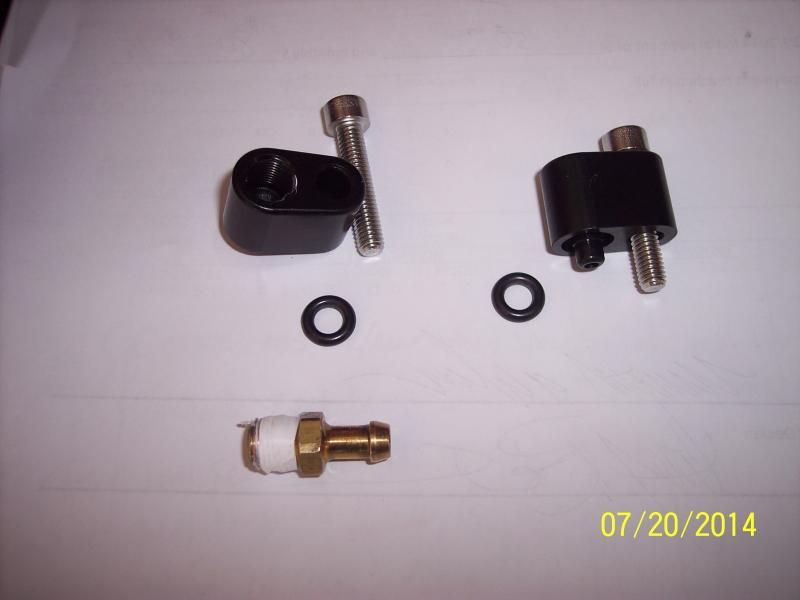
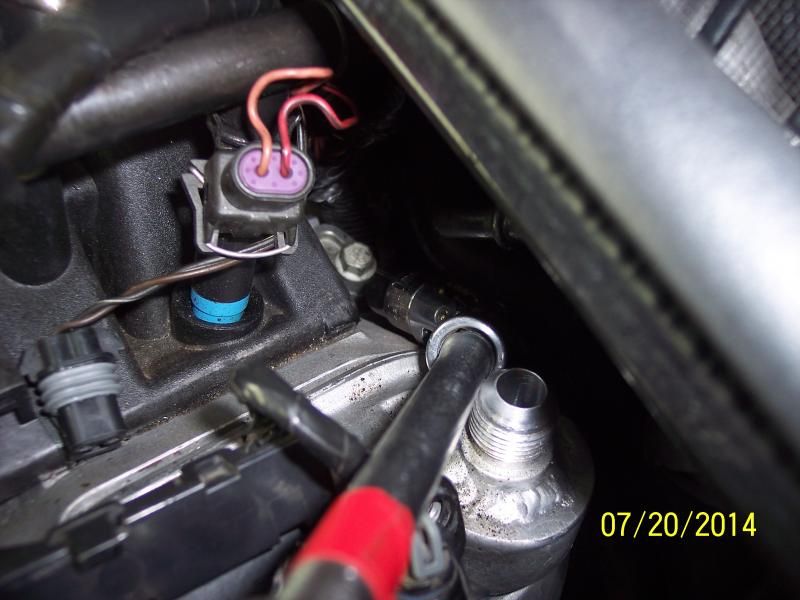
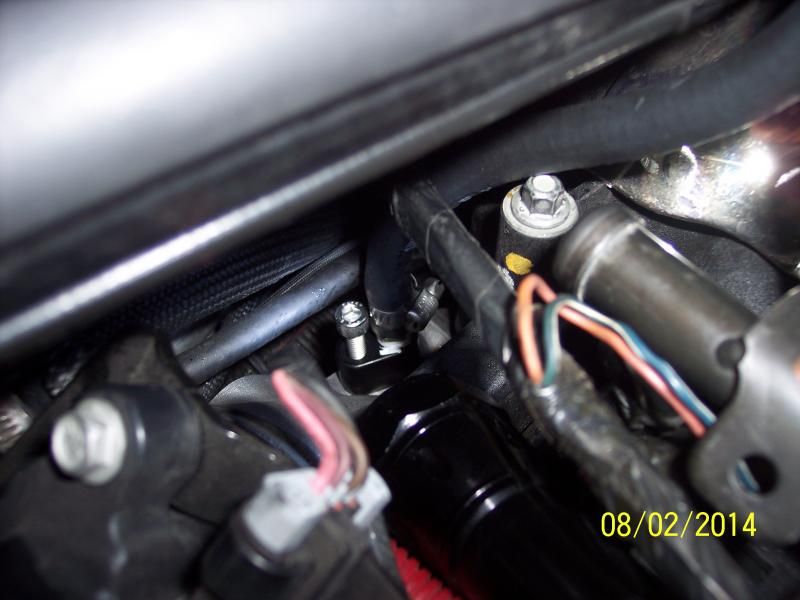
Install the 1/8NPT x 1/4" Nipple in the water fitting block:

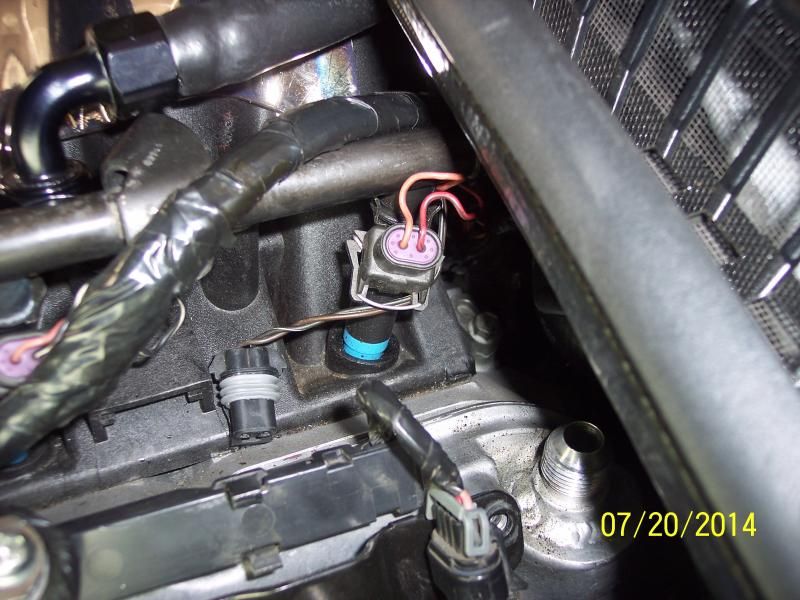
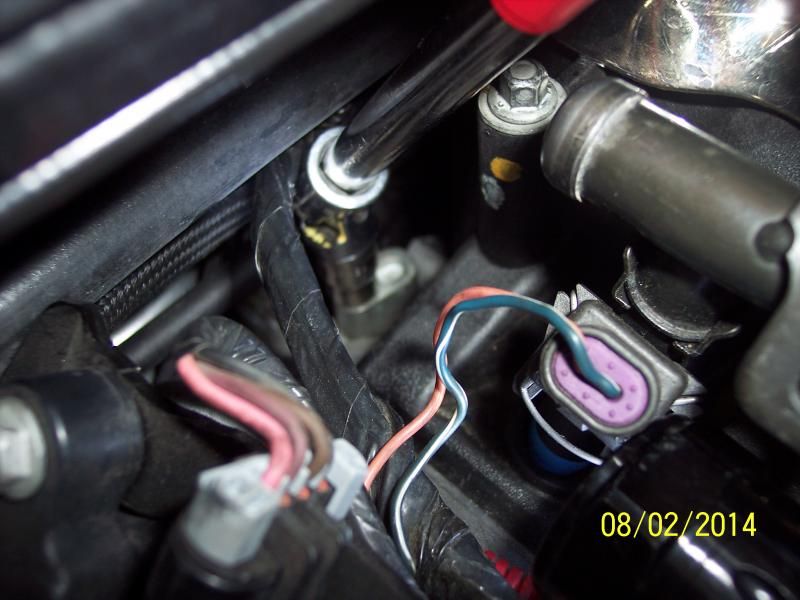
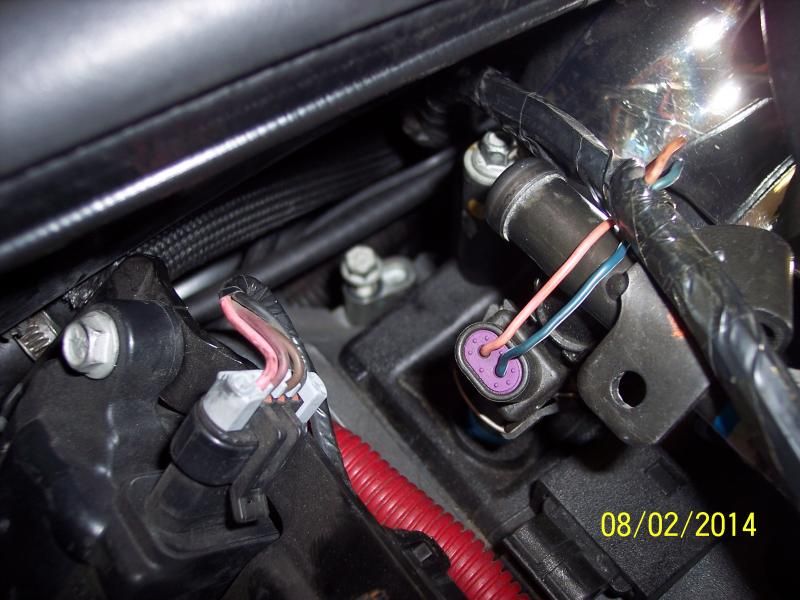
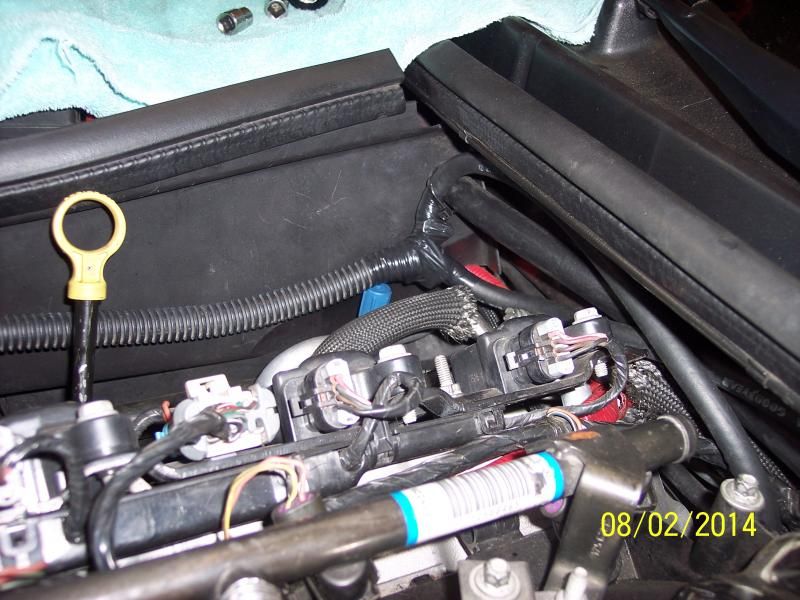
Pull a few things out of the way, you can even pull the coil packs to make it even simpler, but just pull up the harnesses over the rail and you will be good:
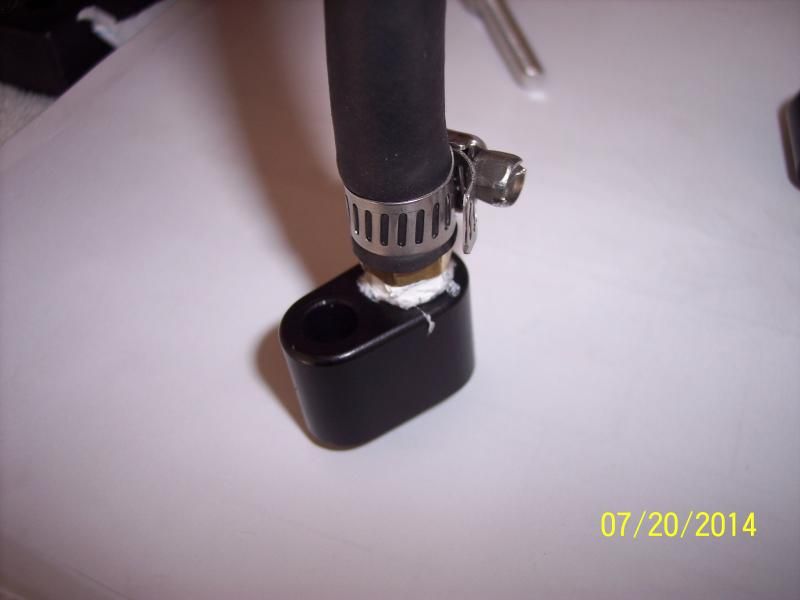
Install the hose on the nipple and make sure the o-ring stays on the bottom, you can use a little silicone grease to help keep it in place, I did not have to but you can:
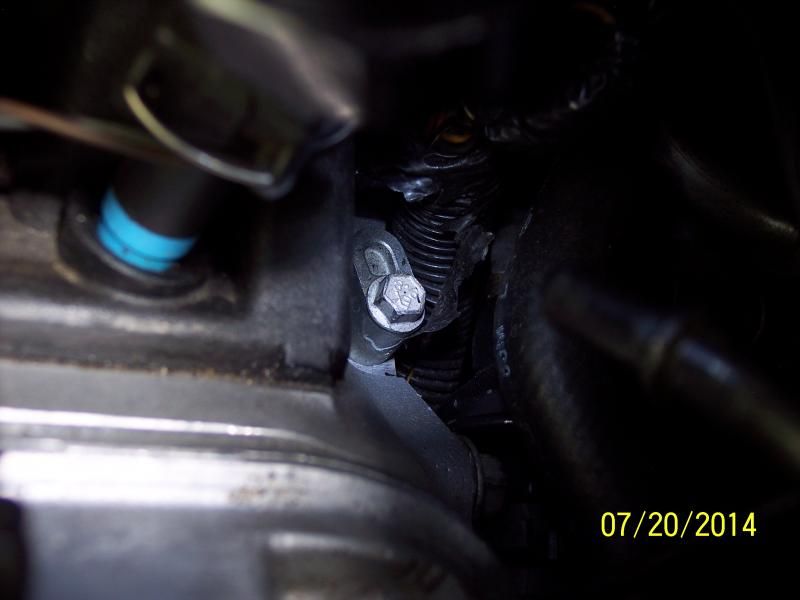
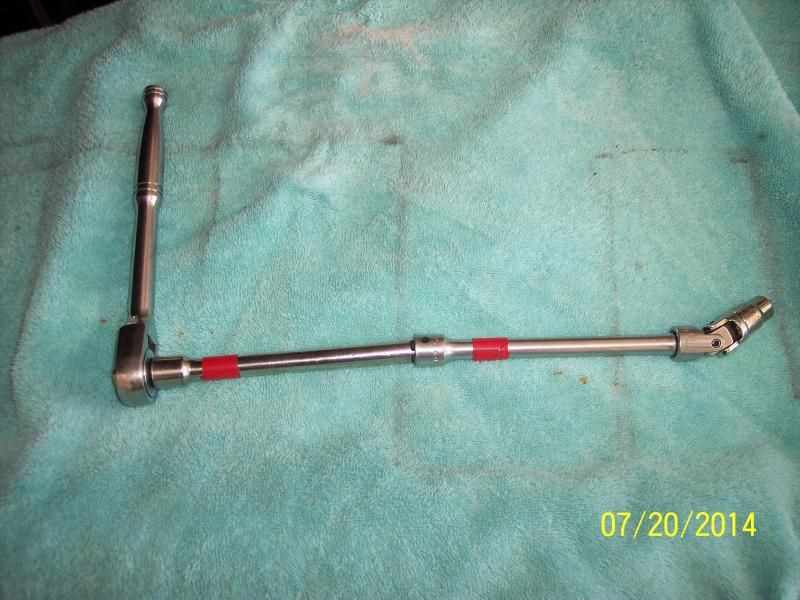
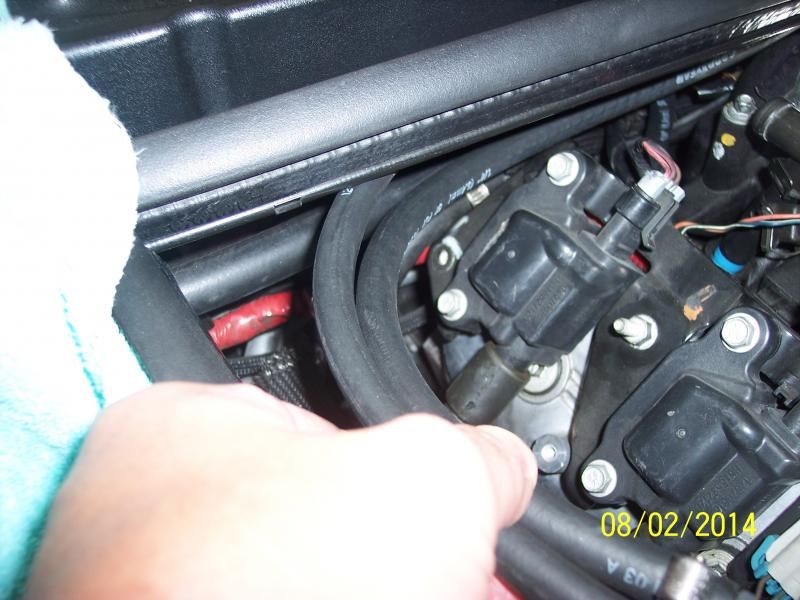
Use a 10mm socket with a couple of extensions and a swivel and ratchet:

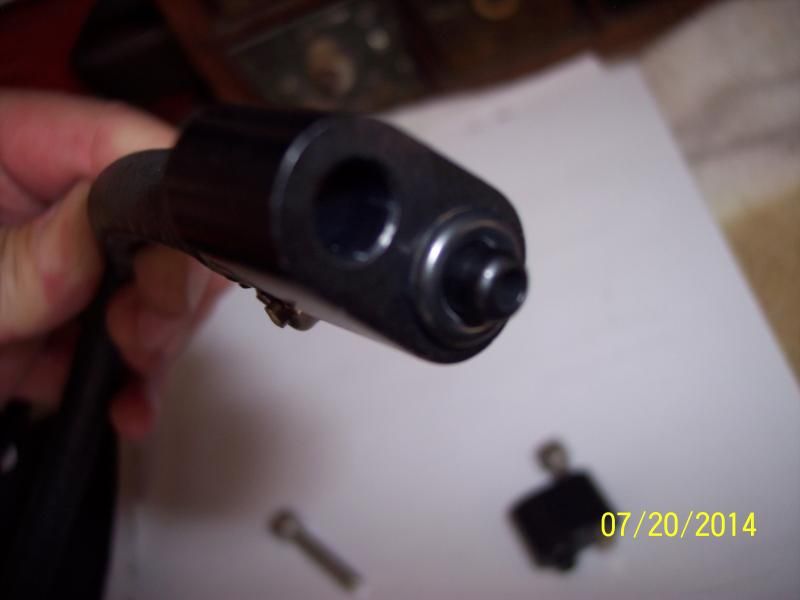
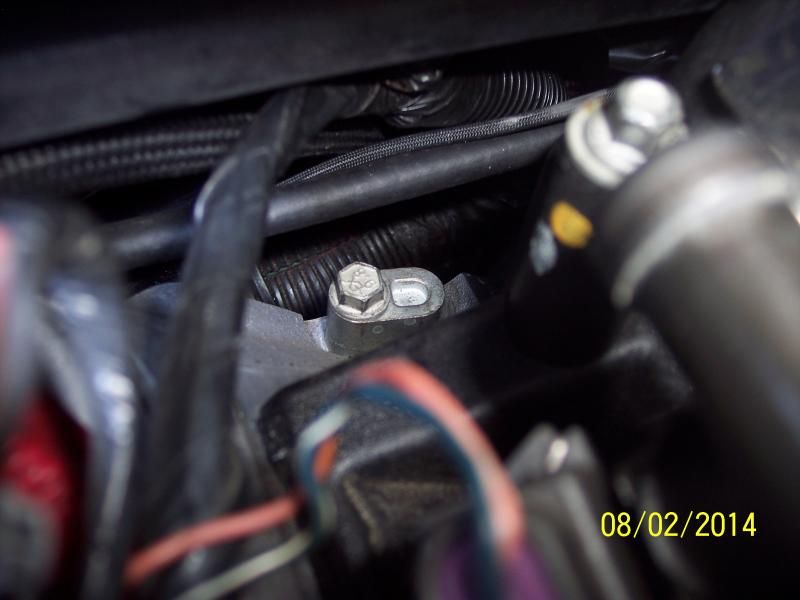
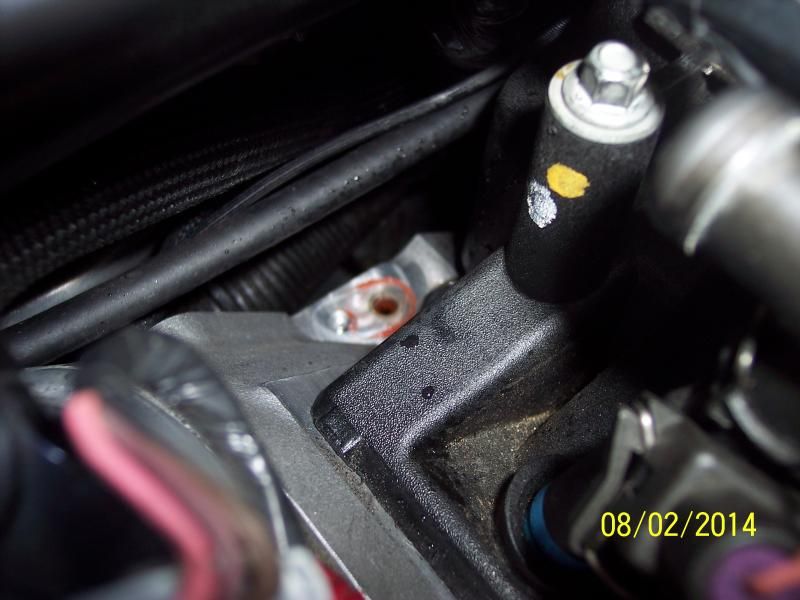
Removed the rear block, also good to take some compressed air and blow all that off in the back:
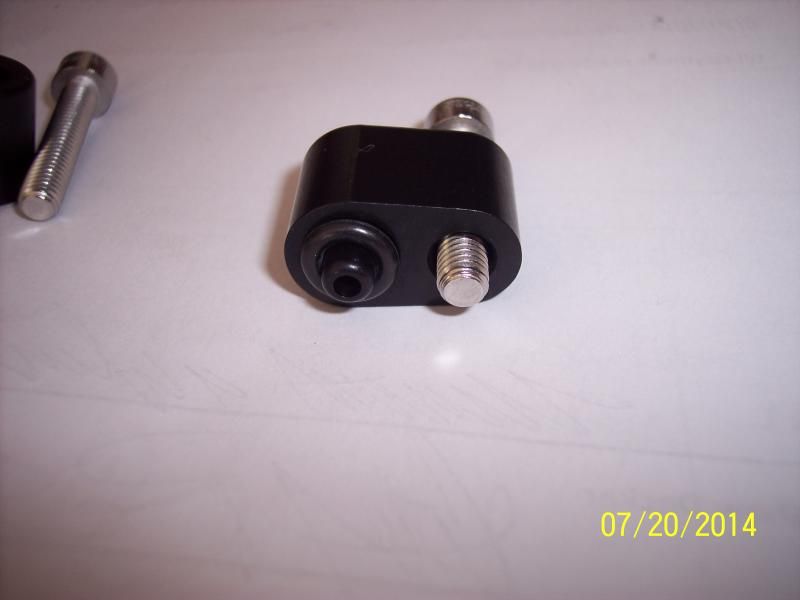
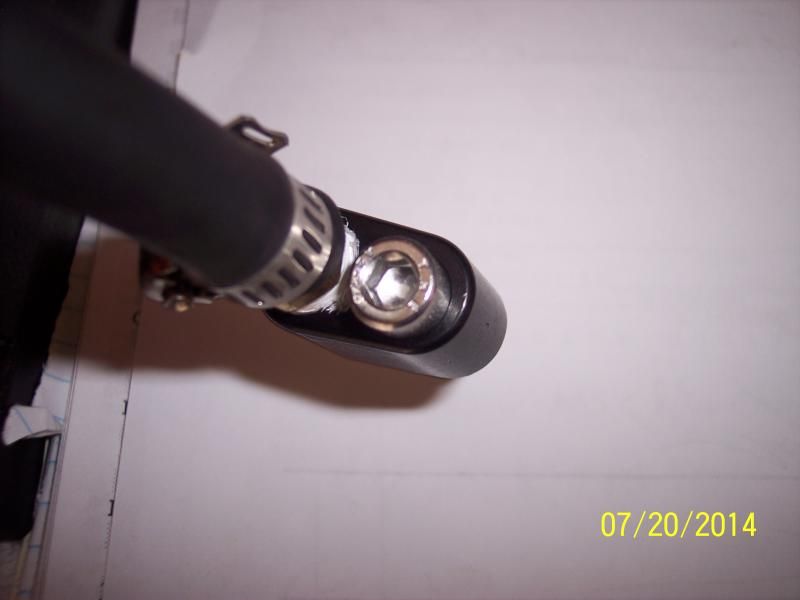
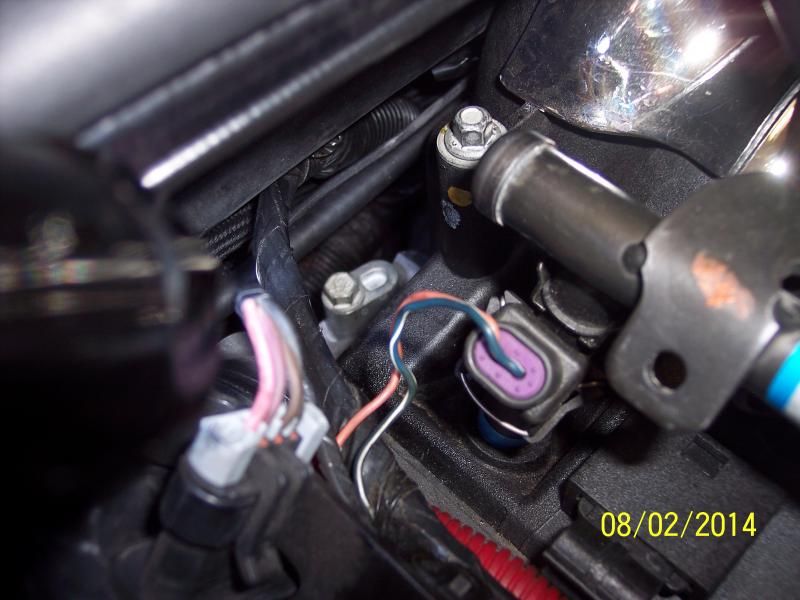
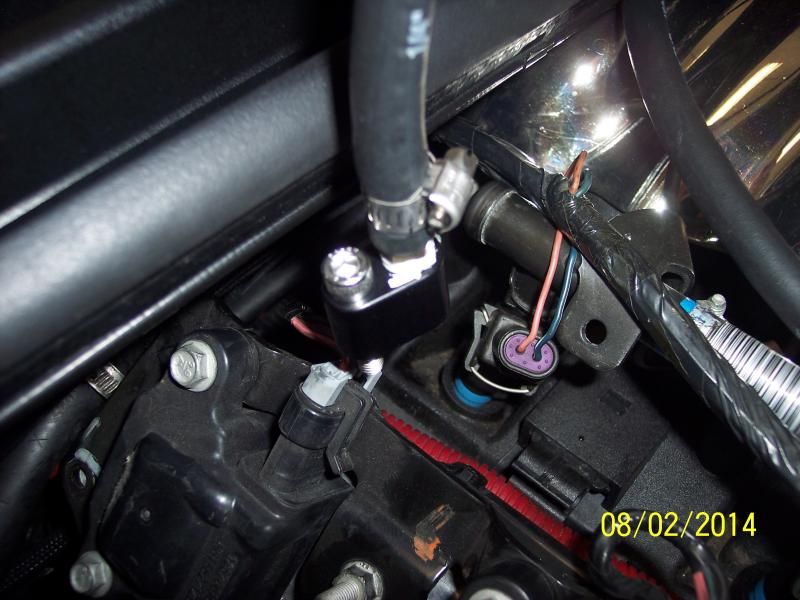
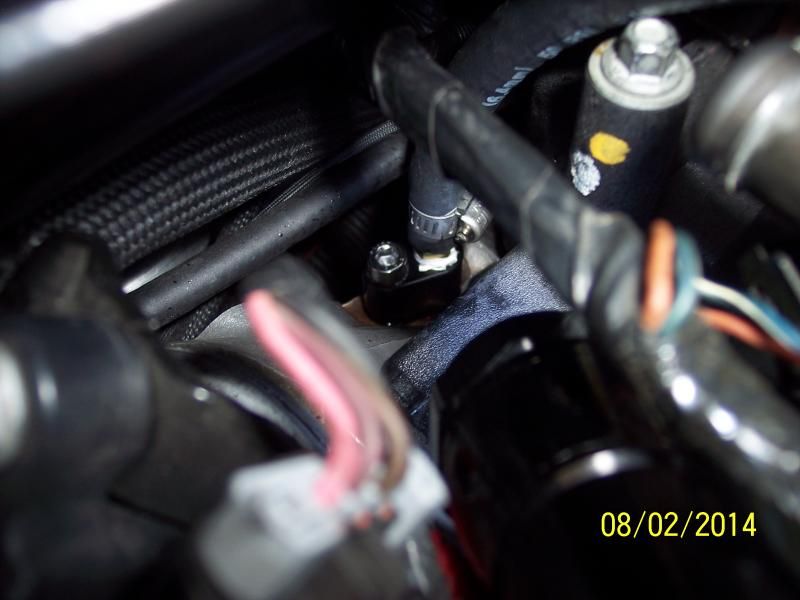
Now install the new set-up, having the sose already connected allows you to handle it and hold it during installation - NOTE: the way the clamp is so as not to interfer with the allen bolt head -
Tools: Extensions, 5mm allen socket head, ratchet and swivel -

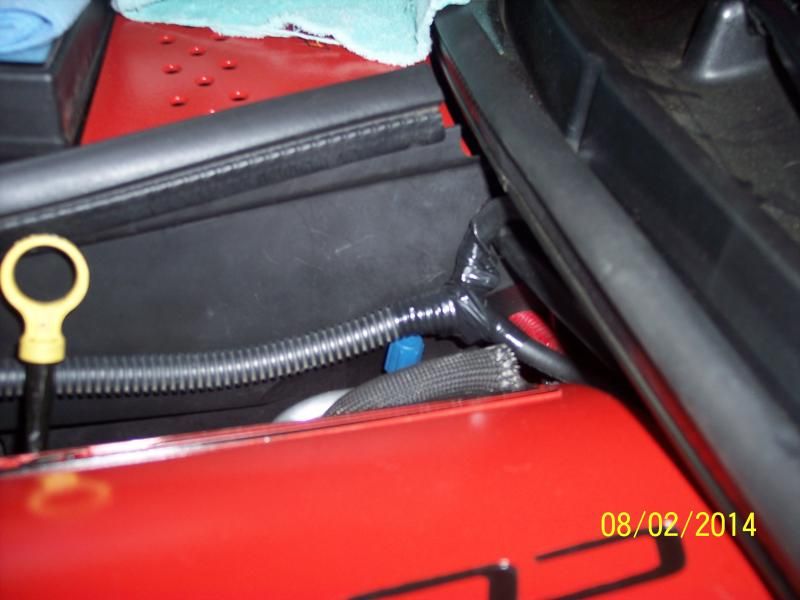
Once done and installed, run the 1/4" line behind the manifold and over towards the battery compartment!
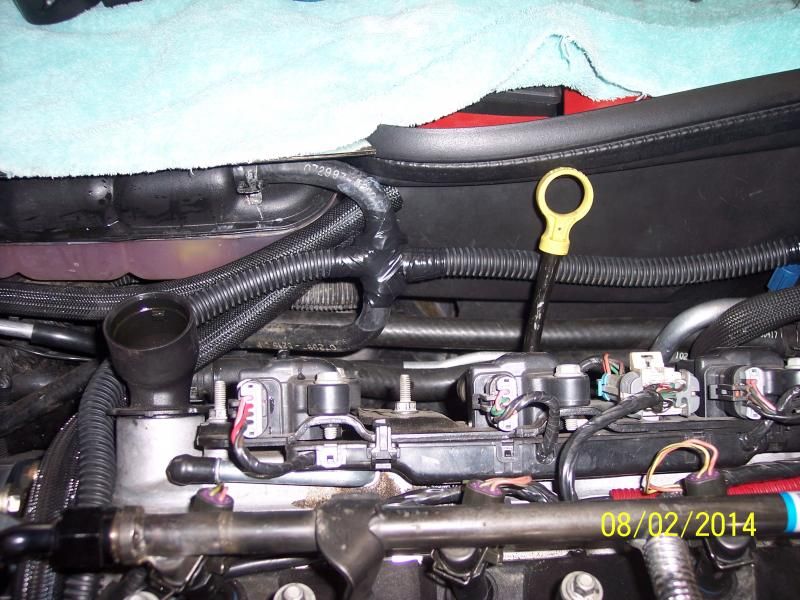
Now here is the passenger side, repeat the same steps for this side as you did for the drivers side - I am going to put all the pics in a row as I performed the steps:
Now run this piece over towards the battery compartment as well!
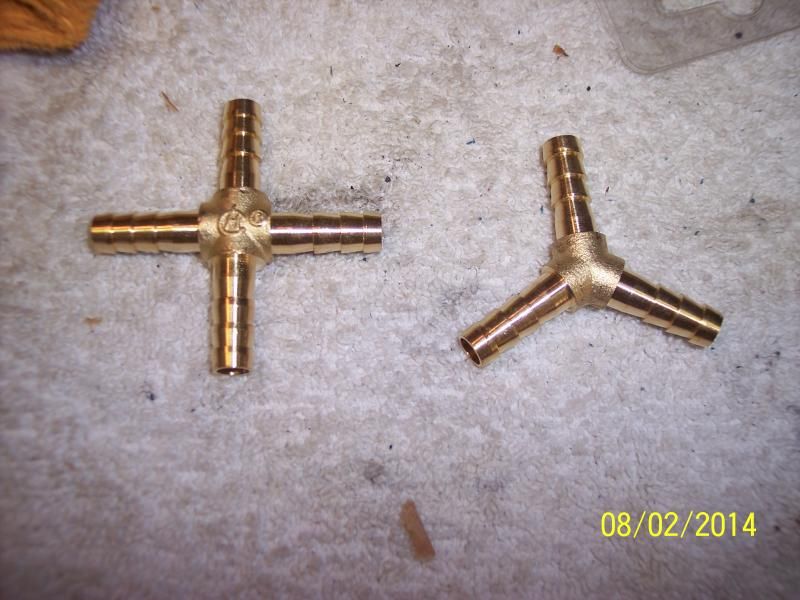
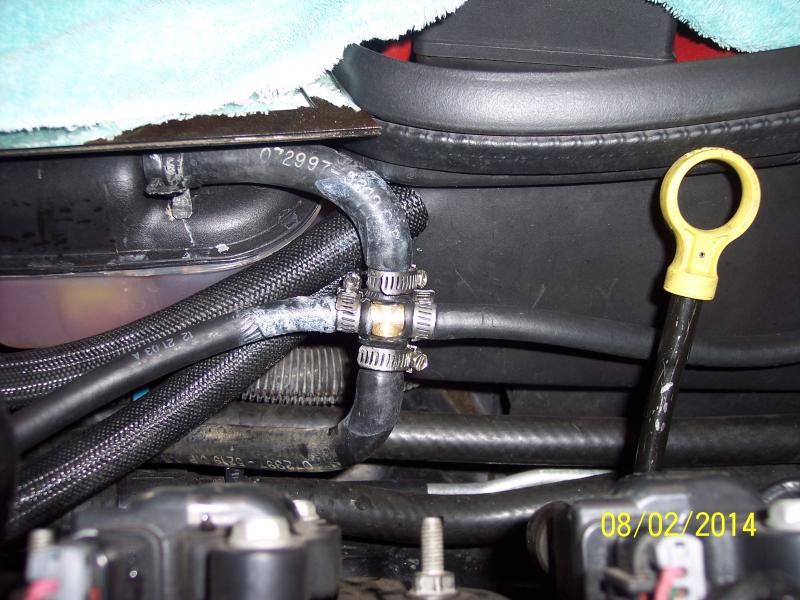
Get your Y Fitting:
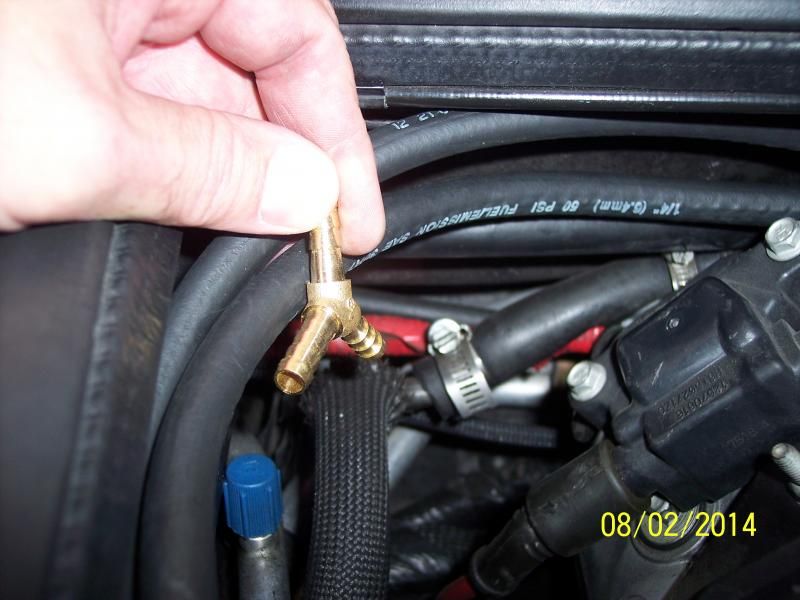
Add a straight piece to reach to the return line going to the Expansion tank:

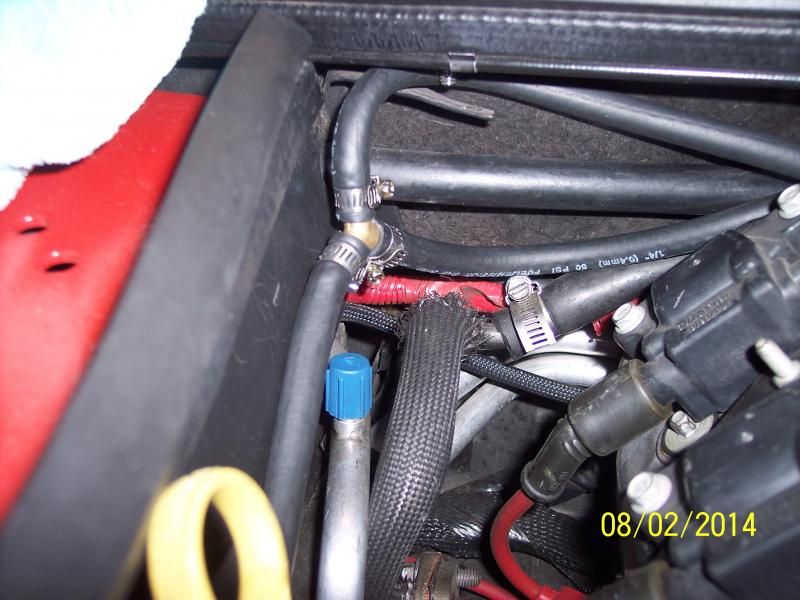
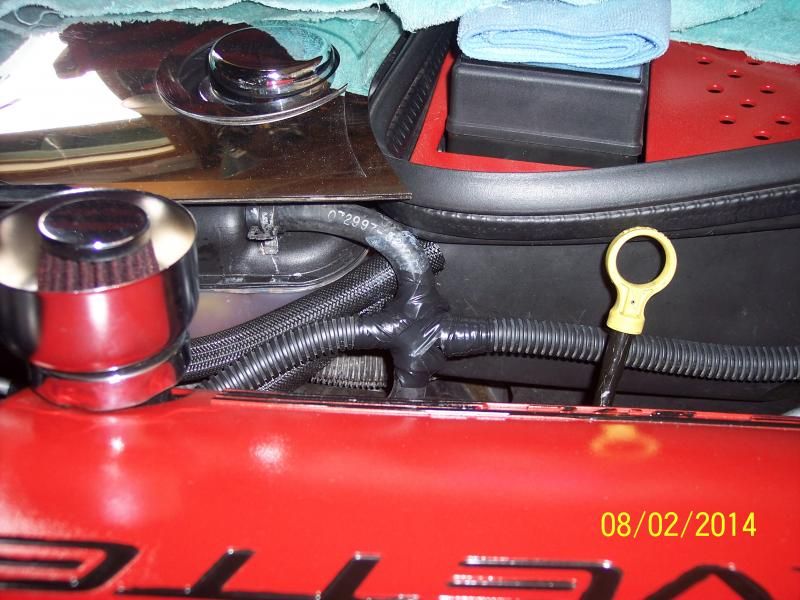
Once all done, it will look like this - and again remember I had taken my front one and re-routed it to the expansion tank return line and capped off the radiator side - hence the one to the left in the picture:
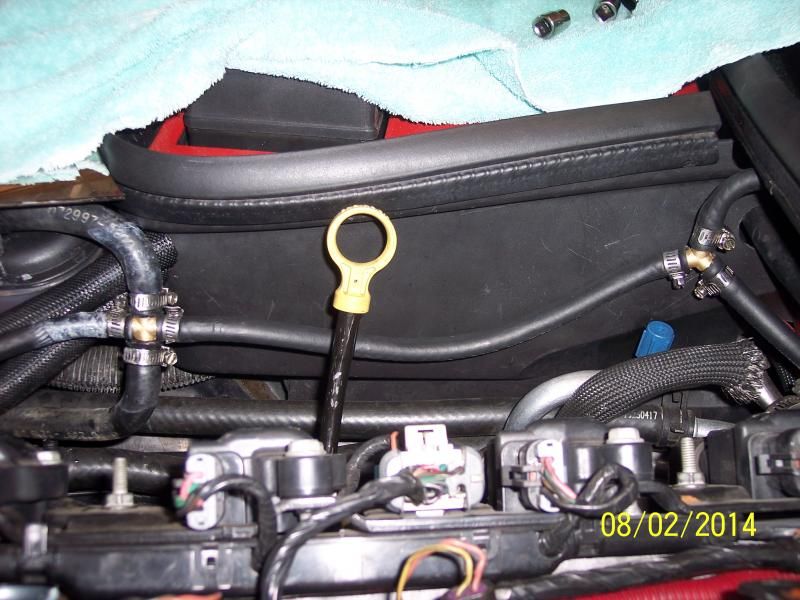
A little cleaned up here, I am not fully satisfied with how this looks, but it is okay for now:
This will allow all the air in front and back of the motor to be bled out and burped fully so you DO NOT have that overheating problem - believe me this will help and it is very inexpensive too!
Thanks,Matt
661-406-7516
WITH THE MANIFOLD ON!!!!!!!
Here are Parts you will need:
(2 ea.) http://s41657.storefront-solutions.c...l.aspx?ID=3289
(2 ea.) http://cgi.ebay.com/ws/eBayISAPI.dll?ViewItem&item=360869686162&ssPageName=ADME:L:OC:US:3160(1 ea.) http://cgi.ebay.com/ws/eBayISAPI.dll?ViewItem&item=370990740222&ssPageName=ADME:L:OC:US:3160(1 ea.) http://cgi.ebay.com/ws/eBayISAPI.dll?ViewItem&item=371002092316&ssPageName=ADME:L:OC:US:3160(1 ea.) Approx 5' of 1/4 fuel line
(9 ea.) Hose clamps
(1) Roll electrical Tape (choice of your color)
3' feet convoluted tubing

Remember that I had already bypassed the front cross over tube from going to the radiator and re-routed it to go into the return of the expansion tank -
Now! I am doing the same thing with the rear ports, which have plugs -
All the pictures are pretty much self explanitory but I will add some comments, here goes:


Install the 1/8NPT x 1/4" Nipple in the water fitting block:

Pull a few things out of the way, you can even pull the coil packs to make it even simpler, but just pull up the harnesses over the rail and you will be good:


Install the hose on the nipple and make sure the o-ring stays on the bottom, you can use a little silicone grease to help keep it in place, I did not have to but you can:


Use a 10mm socket with a couple of extensions and a swivel and ratchet:


Removed the rear block, also good to take some compressed air and blow all that off in the back:
Now install the new set-up, having the sose already connected allows you to handle it and hold it during installation - NOTE: the way the clamp is so as not to interfer with the allen bolt head -
Tools: Extensions, 5mm allen socket head, ratchet and swivel -

Once done and installed, run the 1/4" line behind the manifold and over towards the battery compartment!
Now here is the passenger side, repeat the same steps for this side as you did for the drivers side - I am going to put all the pics in a row as I performed the steps:


Now run this piece over towards the battery compartment as well!

Get your Y Fitting:

Add a straight piece to reach to the return line going to the Expansion tank:


Once all done, it will look like this - and again remember I had taken my front one and re-routed it to the expansion tank return line and capped off the radiator side - hence the one to the left in the picture:


A little cleaned up here, I am not fully satisfied with how this looks, but it is okay for now:


This will allow all the air in front and back of the motor to be bled out and burped fully so you DO NOT have that overheating problem - believe me this will help and it is very inexpensive too!
Thanks,Matt
661-406-7516
Last edited by madmatt9471; 09-02-2014 at 07:19 PM.

 09-04-2014, 07:08 AM
#4
Team Owner
Thread Starter
 09-04-2014, 11:51 AM
#5
Team Owner

Member Since: Jan 2007
Location: cookeville tennessee
Posts: 28,846
Received 1,762 Likes
on
1,529 Posts

Matt, buddy as always nice write up and pic,s. Great work.


 09-04-2014, 12:27 PM
#7
Melting Slicks


Very nice write up as always Matt!
I've never had any cooling issues with the stock routing and plugs etc. Is this only if you have air pockets you can't release? Does it offer better cooling overall even without air pockets?
I've never had any cooling issues with the stock routing and plugs etc. Is this only if you have air pockets you can't release? Does it offer better cooling overall even without air pockets?
09-04-2014, 12:55 PM
#8
Team Owner
Member Since: Jan 2007
Location: cookeville tennessee
Posts: 28,846
Received 1,762 Likes
on
1,529 Posts
09-04-2014, 06:23 PM
#9
Team Owner
Thread Starter
This just ensures there is no trapped air in the back of the heads or the block that we can get out causing hot spots and fluctuating temps.
I have had trapped air before and it took quite a few attempts to get all the air out and I had seen fluctuating temps, drive they would go up and sit at a light they would drop - Perfect case of trapped air around the cylinders -
This is just a simple easy way to use the back ports again the way they were originally being used by GM -
I can't say 100% if it would make it run cooler, "BUT" I can say that there is free flow through the whole block allowing coolant to cool equally around the whole block -
I however have seen cooler temps since I did this - so take that for what it might be worth - Either way I do know I don't have any air stuck (in mine or even my buddies Vette) in my block
I did this too to show that others who choose to do it do not have to remove them manifold in order to do this modification!

Anyone who has high temps or fluctuating temps or rising temps can do this and it will be worthwhile - plus later you really won't have to sweat or worry about burping the system so much if you have to open it up -
It's a simple cheap win win situation and worth doing either way!
I hope this helps answe some of your question!

Thanks,Matt
09-04-2014, 06:30 PM
#10
Team Owner
Thread Starter
 (I think I might of seen it before just don't have the link)
However I do like the "FLEXIBILITY" I have with this set-up, I can remove a hose if need be and the rubber line is up and out of the way!
The OE Truck steam cross-over tube is for the very same reason why I did mine - because GM uses it on other vehicles for a reason and did so on the earlier models - To keep coolant flowing and air pockets from forming!
The plugs were simple (stupid IMHO) fixes to the new manifold -

Thanks,Matt
09-04-2014, 06:52 PM
#11
I was unaware of this part - I'd love to see a link to it or something! (I think I might of seen it before just don't have the link)
However I do like the "FLEXIBILITY" I have with this set-up, I can remove a hose if need be and the rubber line is up and out of the way!
The OE Truck steam cross-over tube is for the very same reason why I did mine - because GM uses it on other vehicles for a reason and did so on the earlier models - To keep coolant flowing and air pockets from forming!
The plugs were simple (stupid IMHO) fixes to the new manifold -
Thanks,Matt
(I think I might of seen it before just don't have the link)However I do like the "FLEXIBILITY" I have with this set-up, I can remove a hose if need be and the rubber line is up and out of the way!
The OE Truck steam cross-over tube is for the very same reason why I did mine - because GM uses it on other vehicles for a reason and did so on the earlier models - To keep coolant flowing and air pockets from forming!
The plugs were simple (stupid IMHO) fixes to the new manifold -
Thanks,Matt
I run a hose to a Y up front where I tie in the other forward facing steam vent

Last edited by turbotuner20v; 09-04-2014 at 06:55 PM.

 09-05-2014, 07:00 AM
#13
Team Owner
Thread Starter
See GM knows it is needed, therefore this part on their other vehicles - I wonder if the new C7 has it on their block!
I know the LS2/3/7 did not!

Thanks,Matt
09-05-2014, 08:55 AM
#14
That's on the front ports on a truck, they still block the rear from the factory. I just used it on my rear ports so I could vent all 4
 11-15-2014, 07:10 PM
#16

excellent
11-16-2014, 12:11 PM
#17
Team Owner
Thread Starter