
Recycled forum parts: 347 F1R build
 12-12-2014, 04:06 PM
#1
Pro

Thread Starter

I finally decided to get my car back together after being down for 5 years now. I pulled the engine (NA 383 AFR G5X4, etc.) 5 years ago with plans of building something big, but ended up with way too much stuff going on. I collected a bunch of parts and changed direction several times. I've had a TTIX kit and a PTK kit, but ended up not installing either of them. I've moved twice, with most of the car being in boxes.
I finally have a little bit of time to throw this thing back together. The immediate goal it to just get it running by mid Feb., when I start travelling for work again. I'll tweak it later, but just need it back together by then.... or I'm getting rid of it and donating to charity. So here's all the parts I had laying around for a while. These are mostly used parts from the forum, so you may see some of your old junk put to good use!
Here's the basics:
98 Coupe, Mn6, Spec super twin, 3.90 gears.
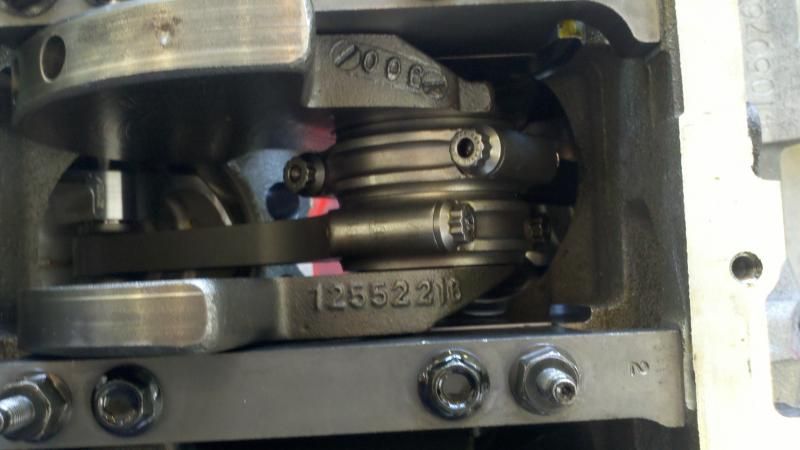
A&A 347 LS6 block. Stock Crank, with -8cc diamond pistons and eagle rods, ARP fasteners.
Dart Pro 1 225's. PRC gold extreme springs. ARP studs, LS9 gaskets. ~9.8:1
23x/24x .605"/.600" 115 cam. Roll master chain. Jesel shaft rockers. Comp Hi-tech .105 wall 5/16 PR's.
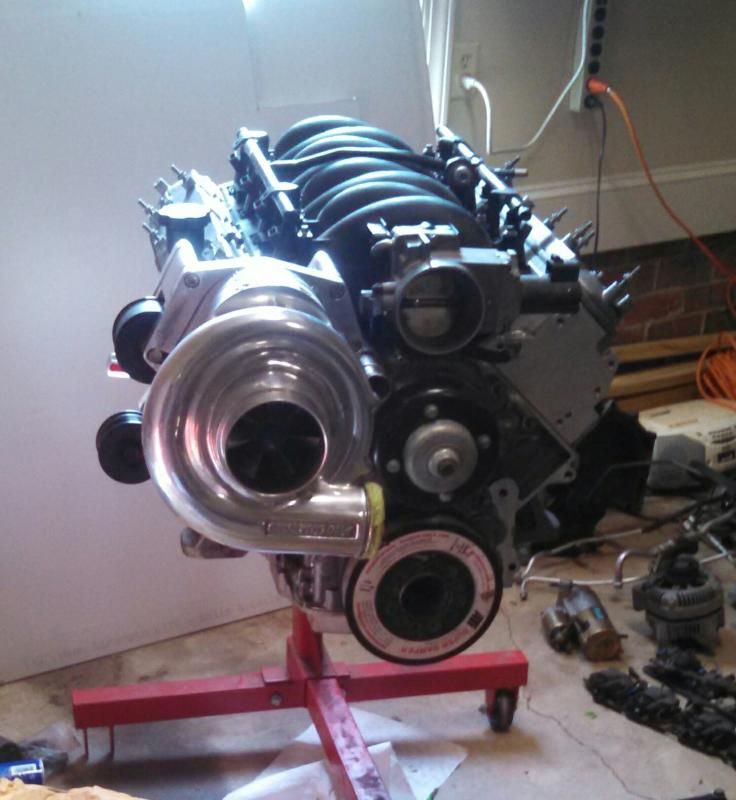
Procharger F1R with 5:1 ratio. Procharger bracket. 4.5/7.5 pulleys, 8 rib. DP direct drive. Vortech Mondo BOV.
FMIC intercooler (27 x 6 x 3.5 core)...A&A aprox sized
ARH 1 7/8" headers, GHL exhaust.
HP tuners, stock ECU for now. Probably go to 99+ ECU and 2+bar OS.
Planned:
RSD 3" cut rad.
Alky control
Fuel system (UPP style?)
ID1000's?
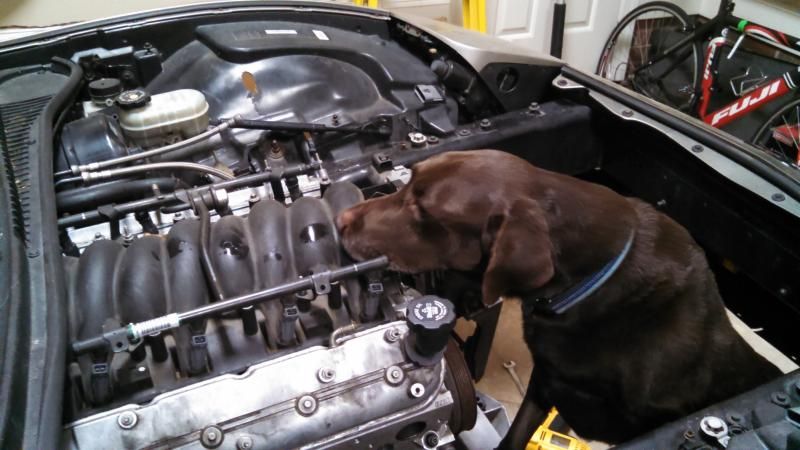
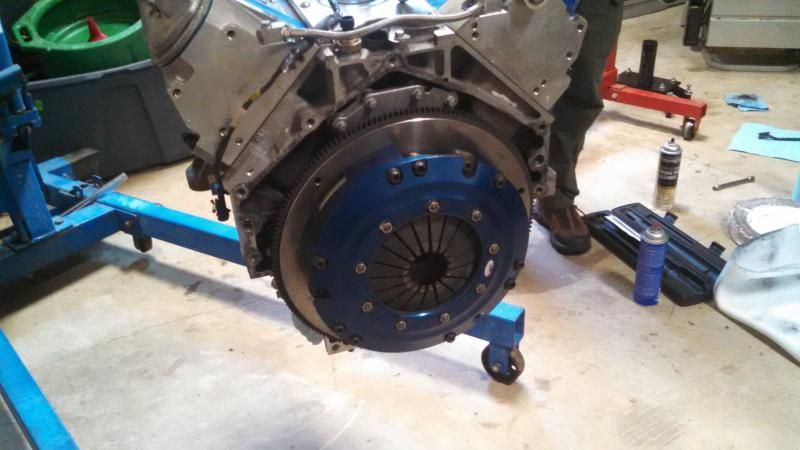
Had my engine sitting in the car for transportation/storage. Had my buddy Zac help pull it out so we could get to work.
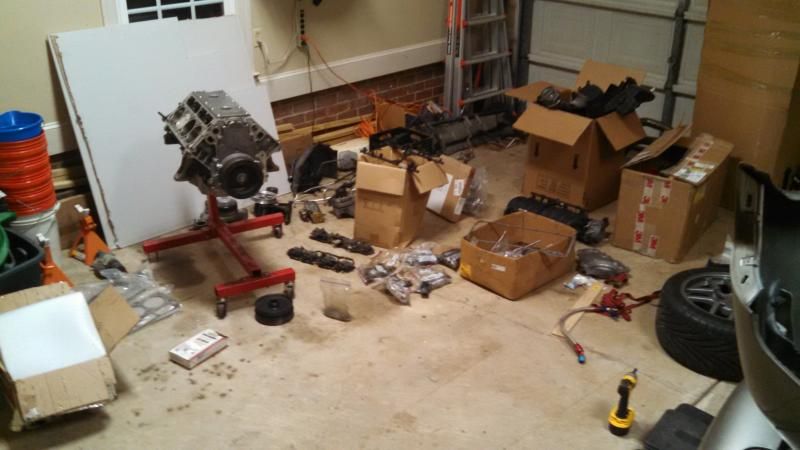
Boxes full of car, getting ready to put together:

For this weekend:
Work on reconnecting wiring harness.
Just got the headers in the mail yesterday, going to get those installed this weekend.
PR's should come in the mail today, so I need to get them installed so I can sign off on the engine internally. After that, I can get all the accessories and direct drive put together, figure out what belt length to get.
I know I said I wanted to get this done ASAP, but I hate doing things twice. So rather than just throw the IC in there, I'm going to install the intercooler way up in the nose. I'm going to cut most of the front bar out. Similar to what (Shoaf95?) did for his treadstone intercooler install, but my core is only 6", rather than 9", so I will be able to have the IC more vertical. I am also going to modify the intercooler outlet to have a 45-60* outlet, instead of straight.
***Does anyone have any advice on intercooler pipe routing??? I have a hard pipe that goes over to the driver's side. Looking at A&A's newer set ups, they have it on the pass side. I assume they made that change for a reason... does it make a difference? I need to know before I modify my intercooler, so I know what side to have the inlet on.***
The end goal is just to have a car that is fun to screw around with. I'm not looking to be competitive. Should be able to get 800rwhp out of it pretty easily. Thanks for all the helpful info everyone posts here. I haven't been on the forum much in the last 3 years, but was able to catch up pretty quickly. Any advice or tips welcome.
I finally have a little bit of time to throw this thing back together. The immediate goal it to just get it running by mid Feb., when I start travelling for work again. I'll tweak it later, but just need it back together by then.... or I'm getting rid of it and donating to charity. So here's all the parts I had laying around for a while. These are mostly used parts from the forum, so you may see some of your old junk put to good use!
Here's the basics:
98 Coupe, Mn6, Spec super twin, 3.90 gears.
A&A 347 LS6 block. Stock Crank, with -8cc diamond pistons and eagle rods, ARP fasteners.
Dart Pro 1 225's. PRC gold extreme springs. ARP studs, LS9 gaskets. ~9.8:1
23x/24x .605"/.600" 115 cam. Roll master chain. Jesel shaft rockers. Comp Hi-tech .105 wall 5/16 PR's.
Procharger F1R with 5:1 ratio. Procharger bracket. 4.5/7.5 pulleys, 8 rib. DP direct drive. Vortech Mondo BOV.
FMIC intercooler (27 x 6 x 3.5 core)...A&A aprox sized
ARH 1 7/8" headers, GHL exhaust.
HP tuners, stock ECU for now. Probably go to 99+ ECU and 2+bar OS.
Planned:
RSD 3" cut rad.
Alky control
Fuel system (UPP style?)
ID1000's?
Had my engine sitting in the car for transportation/storage. Had my buddy Zac help pull it out so we could get to work.

Boxes full of car, getting ready to put together:


For this weekend:
Work on reconnecting wiring harness.
Just got the headers in the mail yesterday, going to get those installed this weekend.
PR's should come in the mail today, so I need to get them installed so I can sign off on the engine internally. After that, I can get all the accessories and direct drive put together, figure out what belt length to get.
I know I said I wanted to get this done ASAP, but I hate doing things twice. So rather than just throw the IC in there, I'm going to install the intercooler way up in the nose. I'm going to cut most of the front bar out. Similar to what (Shoaf95?) did for his treadstone intercooler install, but my core is only 6", rather than 9", so I will be able to have the IC more vertical. I am also going to modify the intercooler outlet to have a 45-60* outlet, instead of straight.
***Does anyone have any advice on intercooler pipe routing??? I have a hard pipe that goes over to the driver's side. Looking at A&A's newer set ups, they have it on the pass side. I assume they made that change for a reason... does it make a difference? I need to know before I modify my intercooler, so I know what side to have the inlet on.***
The end goal is just to have a car that is fun to screw around with. I'm not looking to be competitive. Should be able to get 800rwhp out of it pretty easily. Thanks for all the helpful info everyone posts here. I haven't been on the forum much in the last 3 years, but was able to catch up pretty quickly. Any advice or tips welcome.
Last edited by TimbrSS; 05-05-2020 at 10:24 AM.


 12-13-2014, 02:19 PM
#3
Team Owner


Member Since: Jan 2007
Location: cookeville tennessee
Posts: 28,846
Received 1,762 Likes
on
1,529 Posts

Buddy looking good that set up will make that for sure, Plus should run dam good in on the track and a ton of fun...


 12-14-2014, 03:56 PM
#6
Pro
Thread Starter
12-15-2014, 10:14 AM
#7
Pro
Thread Starter
Updates:
Didn't get the pushrods from mail until Sunday. This really held me up since I wanted to leave the front of the balance open to turn the engine over... so steering rack and front drive accessories were delayed from install.
I got the wiring harness all sorted out. After not messing with this car for 5 years, it took me some time to figure out how to run everything. I was able to re-route the wires to the starter through the wheel-well, around the motor mount and down the block. I had an incident in the past where that part of the harness melted against a header.
Got the ARH 1 7/8's in. From my memory, these seem to have much more clearance around them than the LG 1 3/4's I had in the past, but it's been 5 years.
I'm pretty sure I'm going to just relocate the coils. My new Katech valve covers are too nice to cover up. Just need to find out my best option there.
12-17-2014, 10:13 AM
#8
Pro
Thread Starter
Installed the DP direct drive. I didn't get the 6AN power steering line that comes with the kit. Anyone have a part number, or how long it needs to be? I think I am going to use the aeroquip fittings. FCM2608, -9.
12-19-2014, 06:43 PM
#9
Instructor

Katech sent me a recent email with new valve covers with the coils relocated on top closer to the intake. Looks ****. Are you on Columbus Racing by chance?
 12-21-2014, 07:14 AM
#12
Pro
Thread Starter
I just redid the coil connector wiring to go to the fender location. Just need to get a set of long plug wires now.
Last 2 major projects:
Working on putting together a Magnafuel setup and ditching stock fuel lines.
fabbing up the front end mods for the intercooler.
DP is helping me the parts needed.
01-15-2015, 12:03 AM
#13
Pro
Thread Starter
Update: Didn't get much done over the Holidays. Took a couple weeks off to go Snowboarding in Colorado for my honeymoon. Now back and ready to get after it. Got the ps line from DP today. Good people there. Have a bunch of stuff ready to install. ALKY control showed up today too, so I'll get that started this week. Fuel system with Magnafuel 4303 is on the way.
Been mocking up the FMIC. I did a good amount of cutting to get it where I wanted it. I decided to feed the IC from the passenger side, mostly cause it would be a shorter run. I'm going to drop the IC off to get some welding done later this week. I need to get the outlet modified and have some mounting tabs added. I'm going to modify that front leg of the cradle to get him out of the way too. Hopefully it will be ready to install next week. I also Have an RSD 3" short rad on the way to go with it
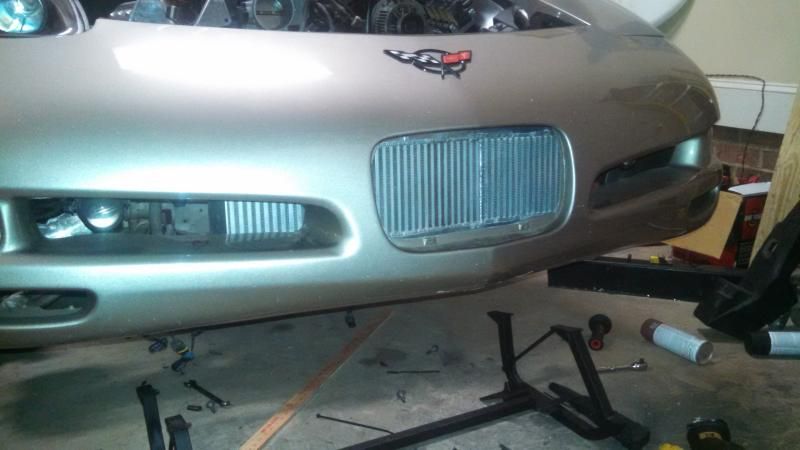
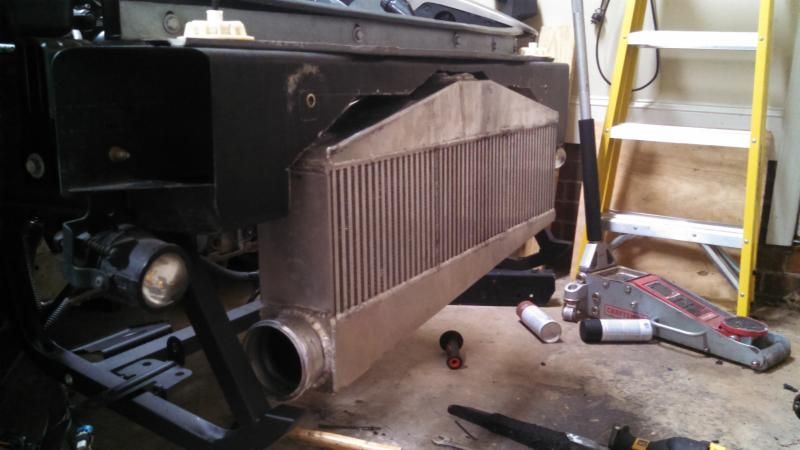
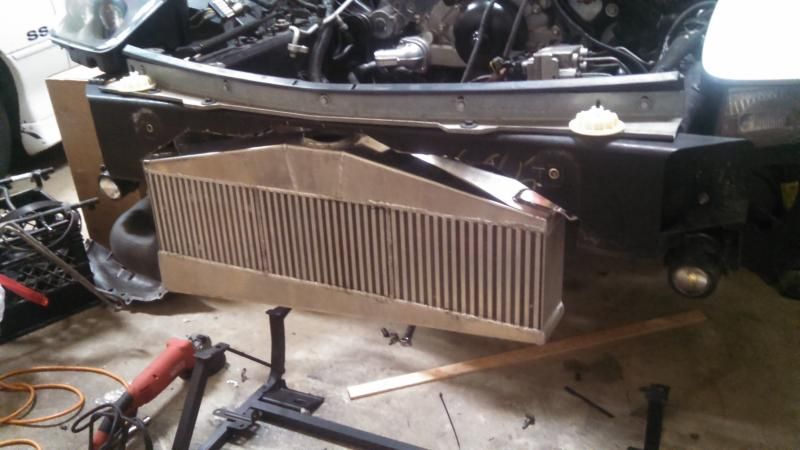
Been mocking up the FMIC. I did a good amount of cutting to get it where I wanted it. I decided to feed the IC from the passenger side, mostly cause it would be a shorter run. I'm going to drop the IC off to get some welding done later this week. I need to get the outlet modified and have some mounting tabs added. I'm going to modify that front leg of the cradle to get him out of the way too. Hopefully it will be ready to install next week. I also Have an RSD 3" short rad on the way to go with it


 01-21-2015, 10:12 AM
#14
Pro
Thread Starter
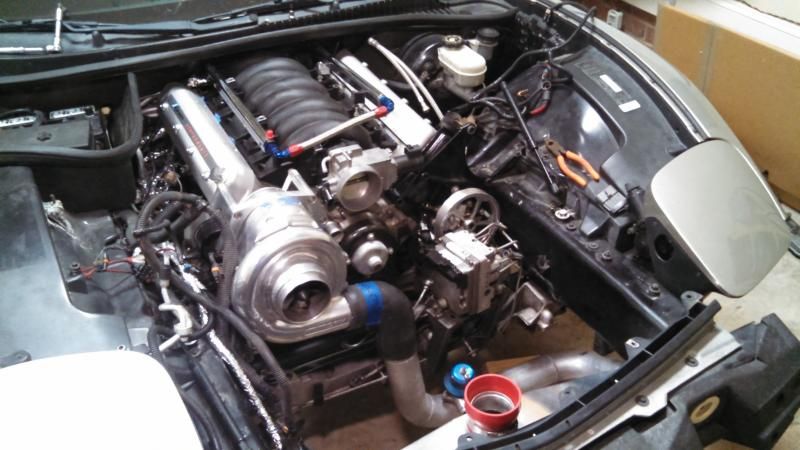
Alky pump installed. Still need to install the controller. You can see where the coils ended up too.
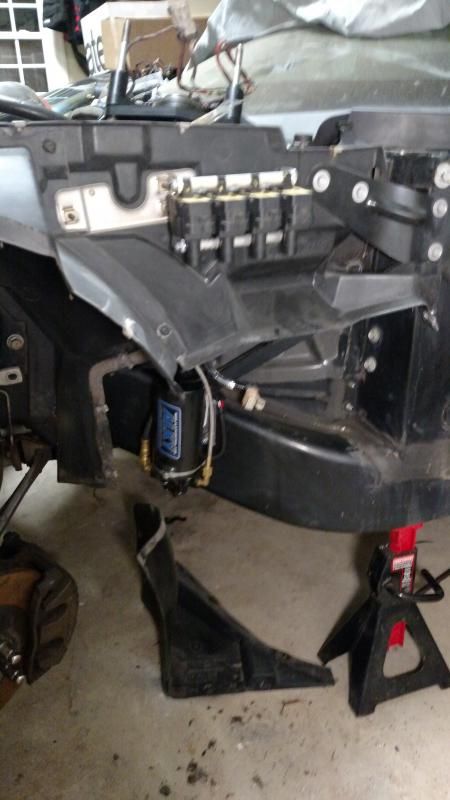
I did some fiberglass repair to the inner fenders. Previous owner must have dropped the car off jackstands or something while changing shocks and put both of them through the inner fenders. It always bothered me, but never got around to fixing it till now. If I need to notch a hole in the fire wall for fuel rail adapter clearance, I know its no big deal now.
I calibrated my laser belt tool last night and made sure the DP direct drive was good to go.
I saw a 4.00" 8 rib pulley for sale on the forum and decided to get it. It showed up yesterday, so I took off the 4.5" that came with the F1R and put the new on the blower. I'll make sure that's all lined up correctly tonight.
So a 4.00" pulley, with 7.5" crank pulley and 5.00:1 (older unit) setup ratio puts F1r at 63,750 at 6800 rpm. If I need more later, I will go to an 8" crank pulley, that will put me at 68,000 rpm at 6800 rpm, which is max rated speed for blower. (it was 56,666 with 4.5" x 7.5"). I'm guessing that pulley swap is about 100hp difference. Don't know which pulley I'll start with. Pretty sure I know which one I'll end up running.
I'm going to vent the valve covers to a catch can with breather, so looking into the best way to do that.
Also looking to make the hard pipe from supercharger to intercooler on passenger side. Anyone have tips on where to get 3" aluminum bends? I think it needs a 135* coming out of the blower and under the sway bar... then to a 45*, then a 90* into the intercooler. Does anyone have a single solid piece? Just wondering if it's too hard to install w/o a coupler in the middle.
Getting close to having this thing ready. Just a lot of small details to cover.
01-21-2015, 10:24 AM
#15
Tech Contributor

You're going to lose significant power with that tight radius bend coming straight out of the volute. I would highly recommend either coming down at a 45 or going more straight down, cutting that pipe on the straight away and putting a coupler in it to get it back together if you don't have the ability to weld it up.
PM me if you need a drawing and i'll give you my cell# and text you a drawing.
01-21-2015, 11:00 AM
#16
Pro
Thread Starter
You're going to lose significant power with that tight radius bend coming straight out of the volute. I would highly recommend either coming down at a 45 or going more straight down, cutting that pipe on the straight away and putting a coupler in it to get it back together if you don't have the ability to weld it up.
PM me if you need a drawing and i'll give you my cell# and text you a drawing.
I decided to move the intercooler inlet to passenger side. My Volute points down now like the standard install location. I will be doing something like this:

 01-22-2015, 12:43 AM
#17
Pro
Thread Starter
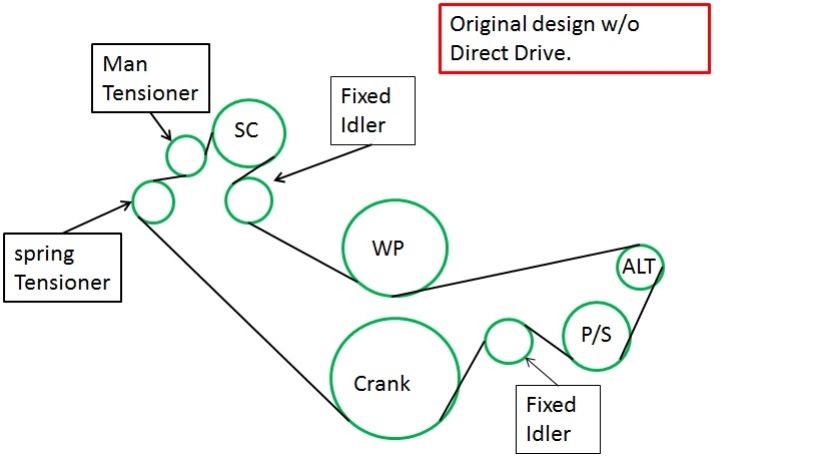
Decided to use the laser on the supercharger pulleys.
I'm using this old Procharger? bracket, and the DP direct drive:
This is the setup on the SC:
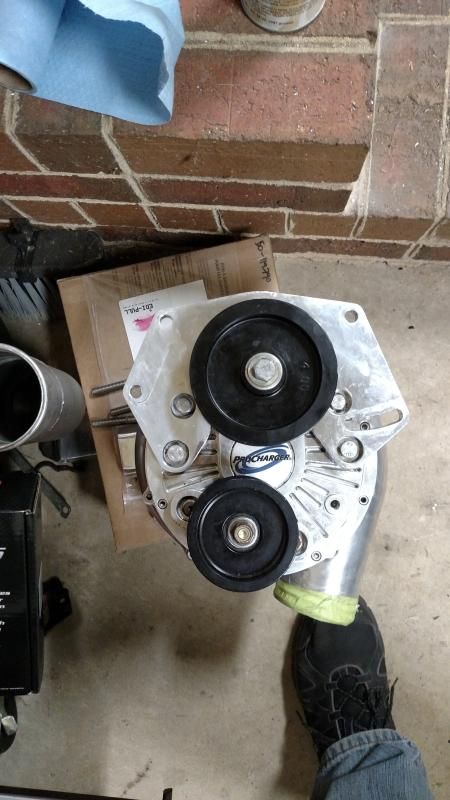
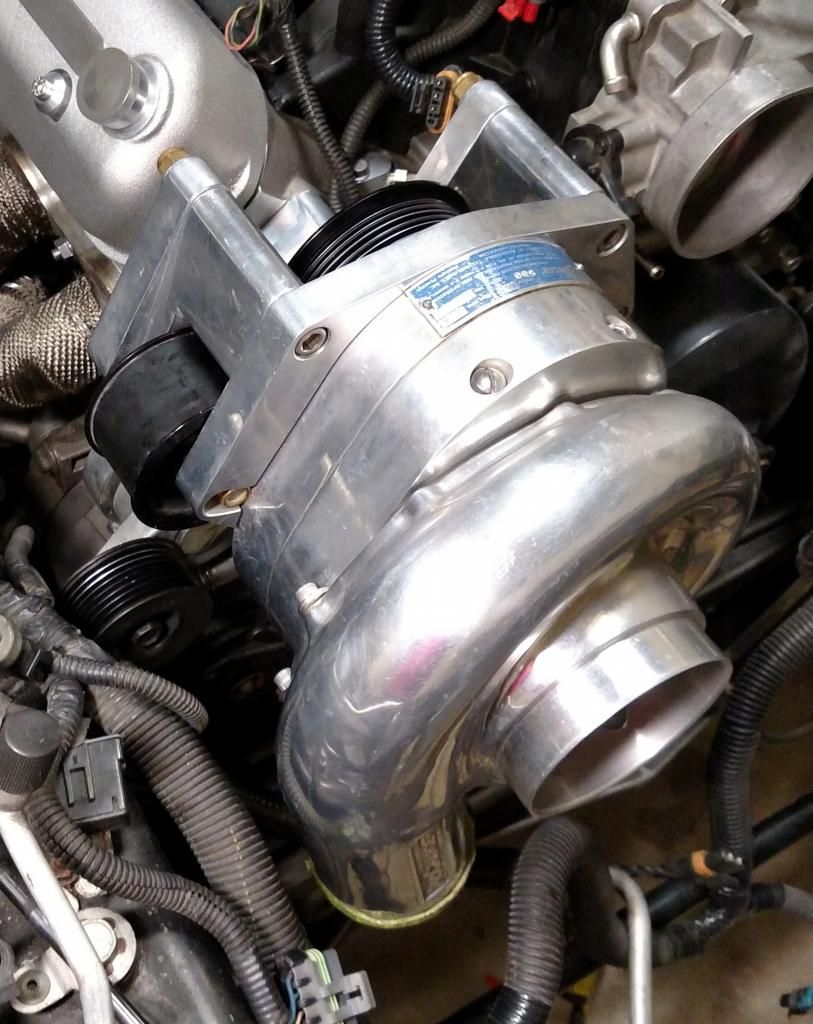
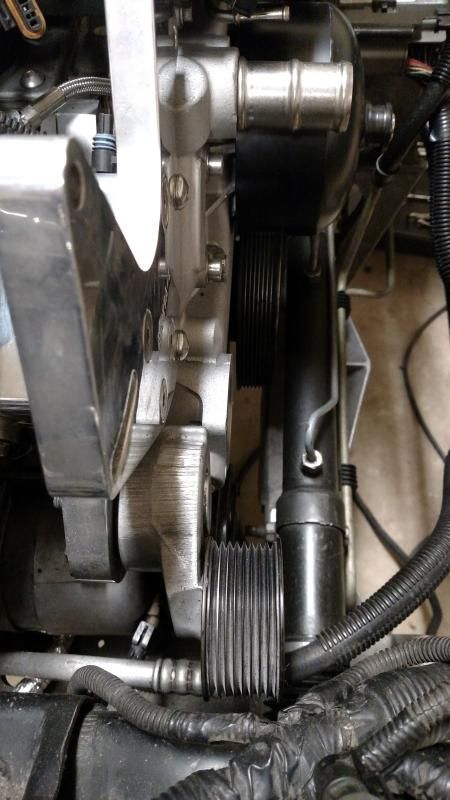
The supercharger pulley looks to be half a rib too far in towards the motor, but lined up vertically:
The tensioner is a Gates 38113. $40 part. This sucker is way off, and you can tell just by looking at it. Should I get a new one, or is there a better replacement?
I'm using this old Procharger? bracket, and the DP direct drive:

This is the setup on the SC:


The supercharger pulley looks to be half a rib too far in towards the motor, but lined up vertically:

The tensioner is a Gates 38113. $40 part. This sucker is way off, and you can tell just by looking at it. Should I get a new one, or is there a better replacement?

 01-22-2015, 09:03 AM
#18
Pro
Thread Starter
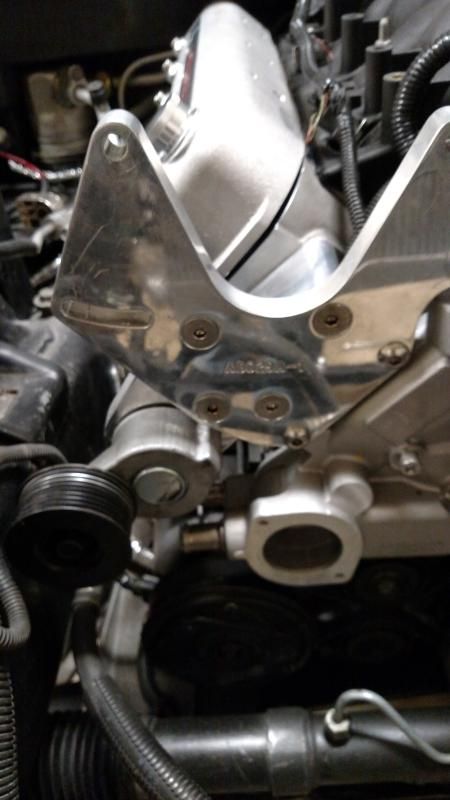
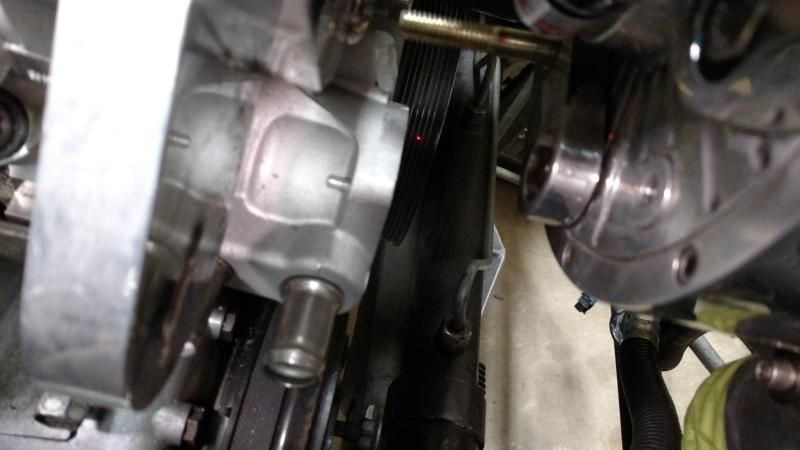
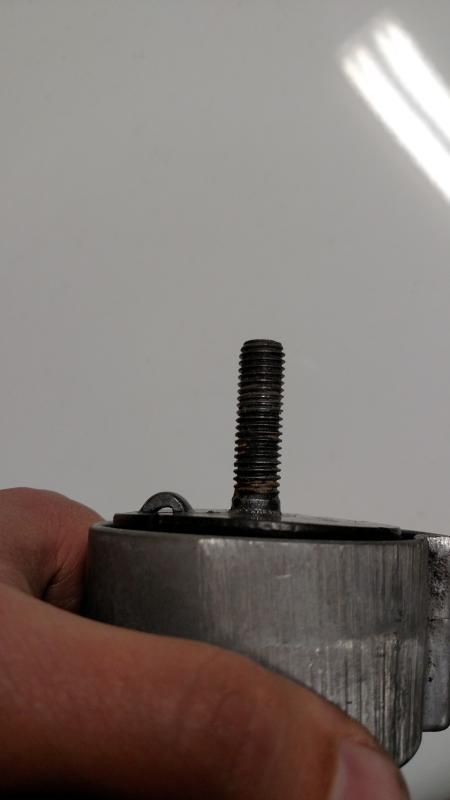
Having this issue, don't know if this bracket will work with the direct drive:
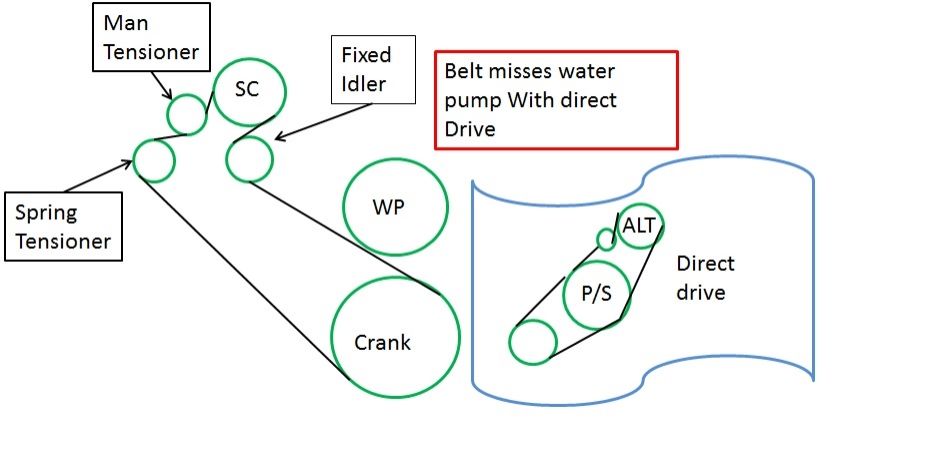
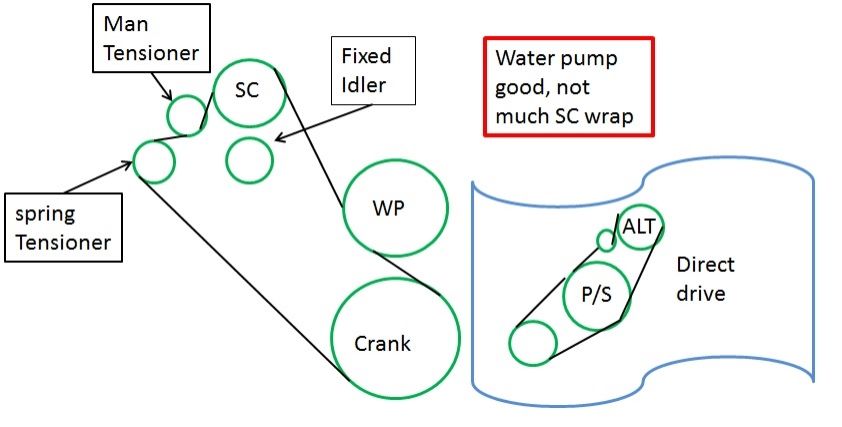
Any advice here? I hope I'm not missing something obvious.
I'm getting the idea that I might save myself a lot of frustration down the road if I just switch to a modern bracket design. If anyone has a newer A&A, DP, Procharger, etc bracket they don't need, let me know.


Any advice here? I hope I'm not missing something obvious.
I'm getting the idea that I might save myself a lot of frustration down the road if I just switch to a modern bracket design. If anyone has a newer A&A, DP, Procharger, etc bracket they don't need, let me know.
01-22-2015, 08:41 PM
#20
Le Mans Master

Just buy an A&A or ECS bracket for that F1R and save yourself a ton of trouble.
I use the A&A bracket with my F1R and it works great.
You may as well get you a 10 rib setup now... You'll need it. Along with a Flip Drive.
I use the A&A bracket with my F1R and it works great.
You may as well get you a 10 rib setup now... You'll need it. Along with a Flip Drive.