
ecs instal
 07-23-2015, 10:26 AM
#81
Race Director

Member Since: May 2004
Location: Raleigh, NC
Posts: 16,664
Received 1,194 Likes
on
1,053 Posts
St. Jude Donor '15

Getting there!
Have you pinned the crank yet?
Have you pinned the crank yet?
 07-23-2015, 01:20 PM
#82
Drifting

Thread Starter

no, i want to do it properly, i could have because i was able to lift the rack and i could have gotten there with the long drill they suply, but i want to drill it out to 6 mm and then get there with the 1/4" drill to make sure the hole is tight. actually the proper procedure is to ream.
well, no, the bolt would not have come out like that.
well, no, the bolt would not have come out like that.
07-23-2015, 01:47 PM
#83
Race Director
Member Since: May 2004
Location: Raleigh, NC
Posts: 16,664
Received 1,194 Likes
on
1,053 Posts
St. Jude Donor '15
On C6's you can lower the front cradle an inch or so, raise the engine, and it will get you enough clearance to get the crank bolt out and pin the crank
I can't promise this works on a C5, though... but I can tell you, pulling the steering rack sucks.
I can't promise this works on a C5, though... but I can tell you, pulling the steering rack sucks.
08-02-2015, 08:35 AM
#84
Drifting
Thread Starter
i got the honeywell fuel pressure sensor from mouser. i also invested $40 into a pigtail, being to lazy to mess with the connector (what a rippoff). however the sensor doesnt fit the schrader valve on the c5. it worked on the jeep, but on the vette the actuator is recessed by over 1 mm, so the senor didnt open the valve. so i made a 1.5 mm thick cap for the actuator (on the fuel rail) and the contraption works now. i polished the mating surface with 1200 gritt and no leaks.
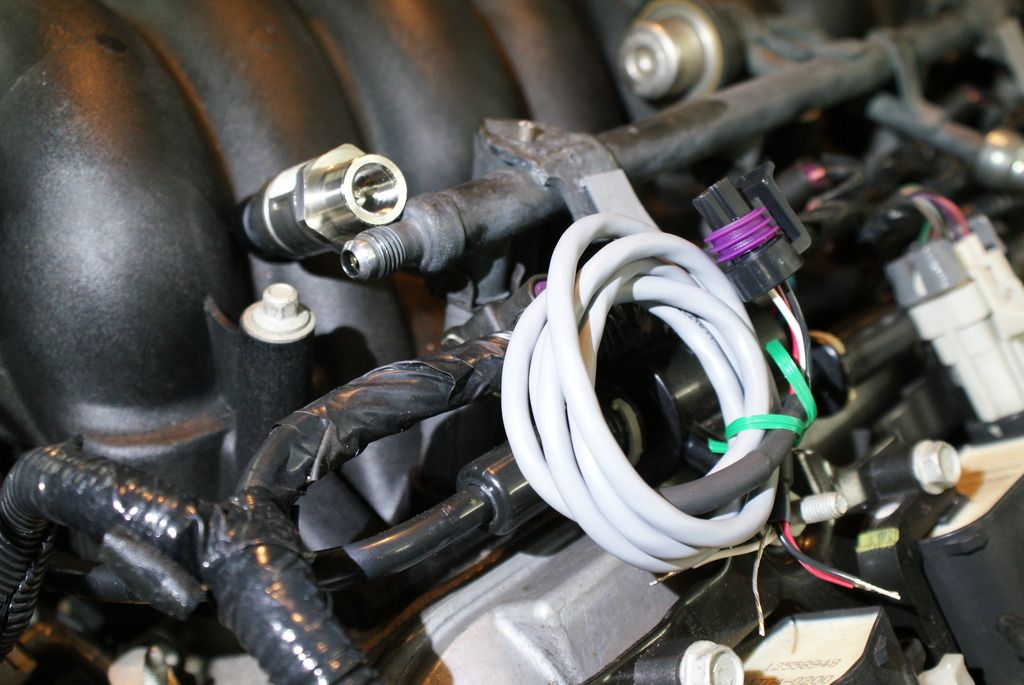
the part number is px2af1xx150psaax btw, 150p meaning 150 psi. actually i should have ordered 006b instead of 150p. that is a 0-6 bar sensor, but i found out about it only later. thanks spenxel for having mentioned it in your thread.
how did you configure the sensor. im not sure i understand correctly, will it output 0.5 v at zero pressure and 4.5 v at 150 psi? that would be 2.05 v at 58 psi?
Last edited by romandian; 08-02-2015 at 08:38 AM.
08-02-2015, 10:10 AM
#85
Race Director
Member Since: May 2004
Location: Raleigh, NC
Posts: 16,664
Received 1,194 Likes
on
1,053 Posts
St. Jude Donor '15
I'm glad to see it worked on yours. I couldn't get it to seal on my C6 
I had the same problem with another pressure sensor and just thought it was from trying to use a cheapo sensor. Either something is wrong with the fitting on my fuel rail or it's different than I expected
I'll try to look at the equations sometime today. You should end up with two x,y points based on the 5%/95% #'s and then have to come up with y=mx+b equation to fit that line.
08-02-2015, 10:17 AM
#86
Race Director
Member Since: May 2004
Location: Raleigh, NC
Posts: 16,664
Received 1,194 Likes
on
1,053 Posts
St. Jude Donor '15
I'm coming up with y=37.5*x - 18.75
Plug in 0.5V for x and you get 0 psi
Plug in 4.5V for x and you get 150 psi
Plug in 0.5V for x and you get 0 psi
Plug in 4.5V for x and you get 150 psi
Last edited by schpenxel; 08-02-2015 at 10:40 AM. Reason: minus
08-02-2015, 10:40 AM
#88
Race Director
Member Since: May 2004
Location: Raleigh, NC
Posts: 16,664
Received 1,194 Likes
on
1,053 Posts
St. Jude Donor '15
oops. Yeah that's what I meant, lol
08-02-2015, 11:10 AM
#89
Drifting
Thread Starter
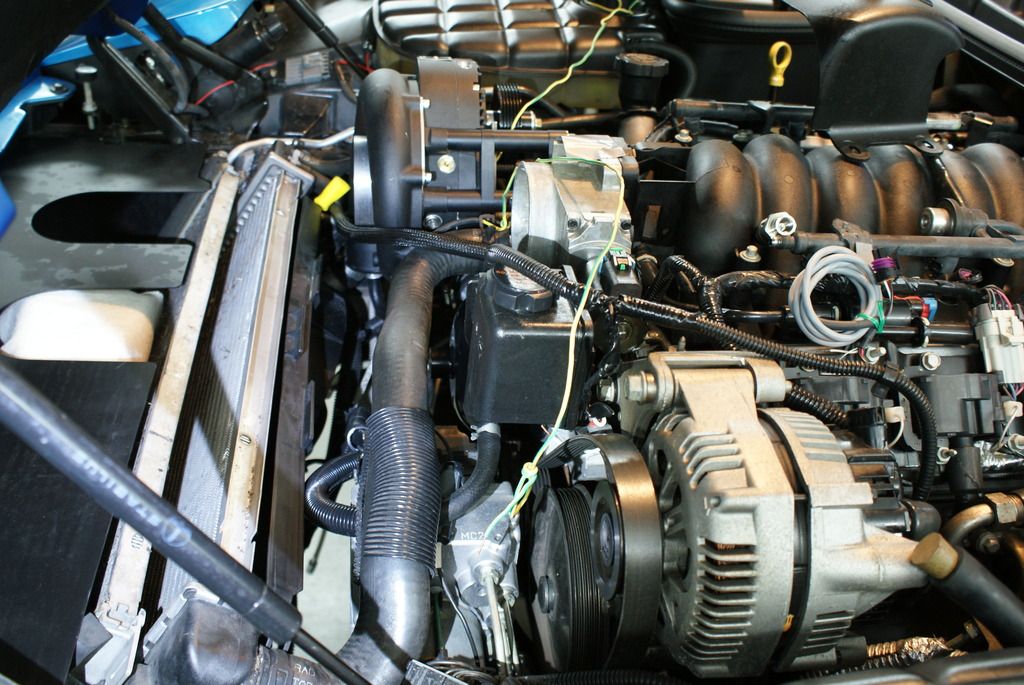
the base bracket touched the new waterpump where it pinches the paper:
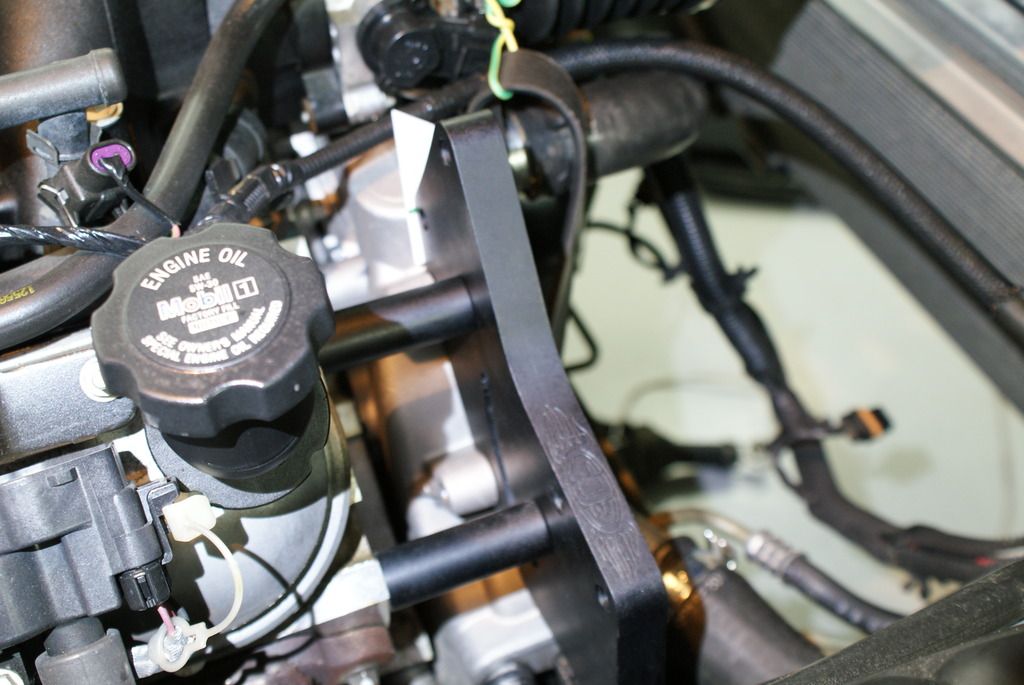
no big deal really, i could have tightened the bolts anyway, but i thought it might influence the geometry. so for peace of mind i notched it a little:
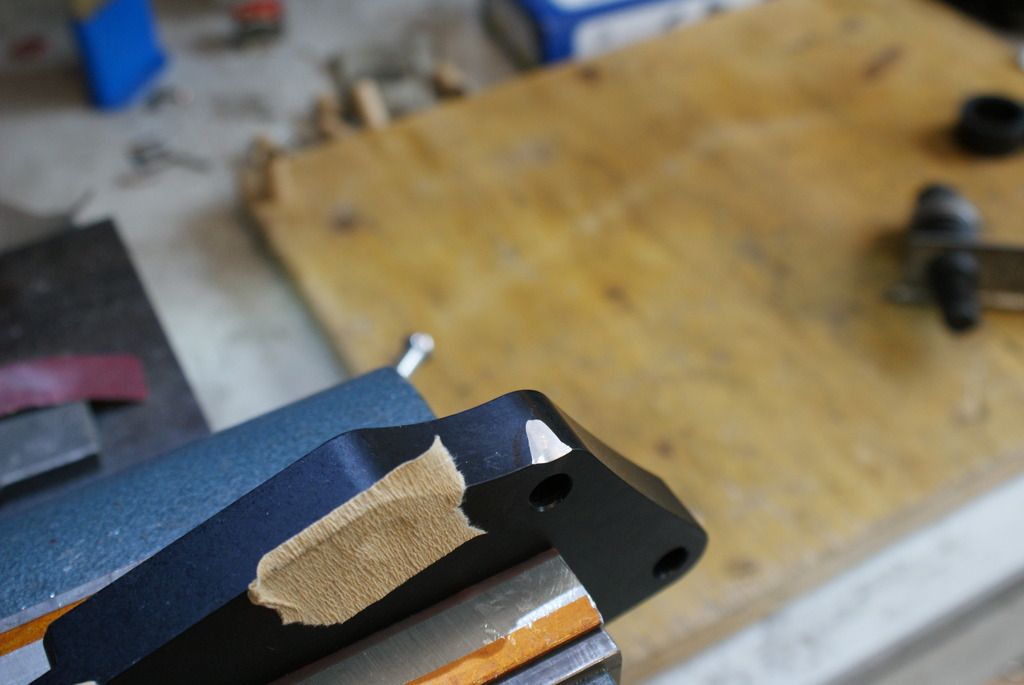
blower goes on:
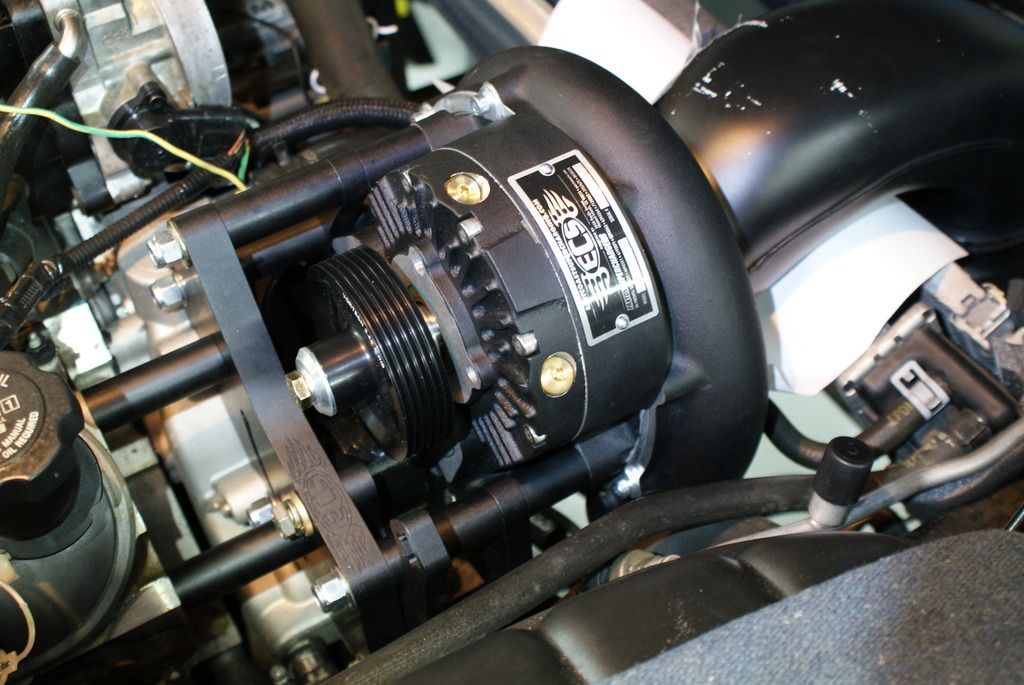
my measurements with a straight edge (that i filed in using a granite plate) make me believe the blower pulley is set back 0.5 mm towards the engine. did i read somewhere that 1/2 a ribb over one foot was o.k.? the pk belt is specified at 3.56 mm from ribb to ribb, so over two feet i would be allowed to be off 7 times 0.5 mm. i could always shim it but ill be good as is, i guess. right?
i think my lower a/c lines are not installed properly, they cross. thats why i had so much trouble straightening them.
do you think the top of the radiator/condenser is in the right spot?

i have around 35 mm between fan shroud and blower (where the yellow marker is) and 5 mm between ecs top cover and condenser (sorry, camera focuses wrong).
another view:

and another:

Last edited by romandian; 08-02-2015 at 11:17 AM.

 08-02-2015, 01:05 PM
#91
Drifting
Thread Starter
so now the problem. i cant get on the bridge. it goes on without the filter, but touches the condensor. the filter neeeds another 20 mm at least.
this is weird, lokking at 34, 39 pics in instructions and at nullpointers picts i am lost. even with the bridge touching the condensor without the filter, there is a gap of 1 mm at the bottom on blower inlet. the filter sits paraller to the condensor. no idea whats happening. just to close the gap i need to move the condensor back 1 x 450 :100 = 4.5 mm. that means i need to tilt back the top 4.5 x 40 : 13 = 13.8 mm. plus 20 mm in to seat the bridge on the blower.
well forget all the math, i must be missing something:
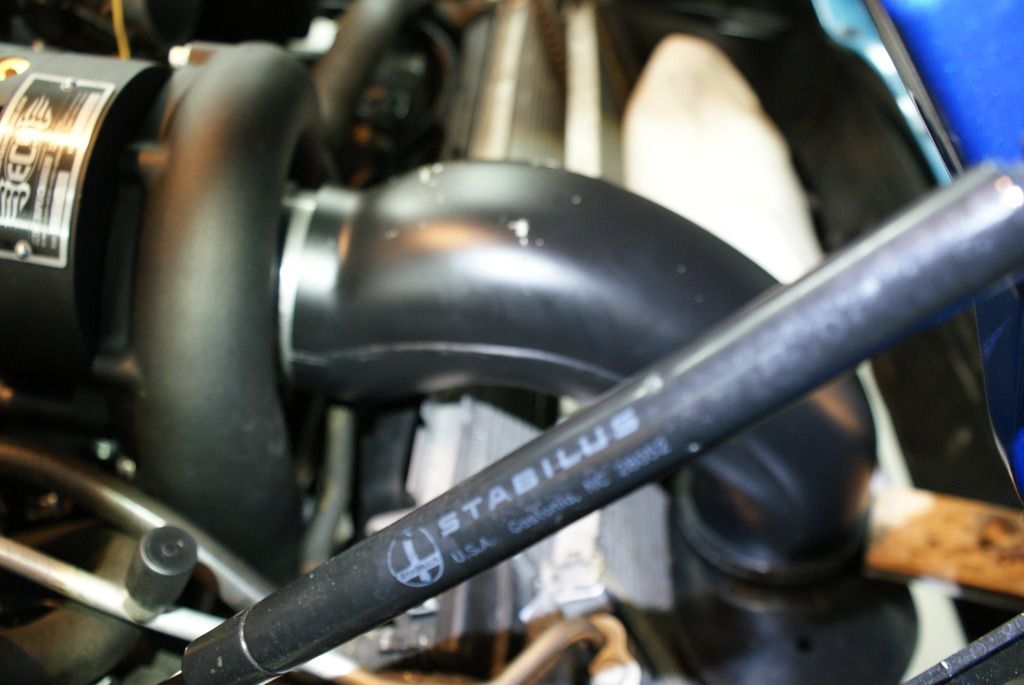
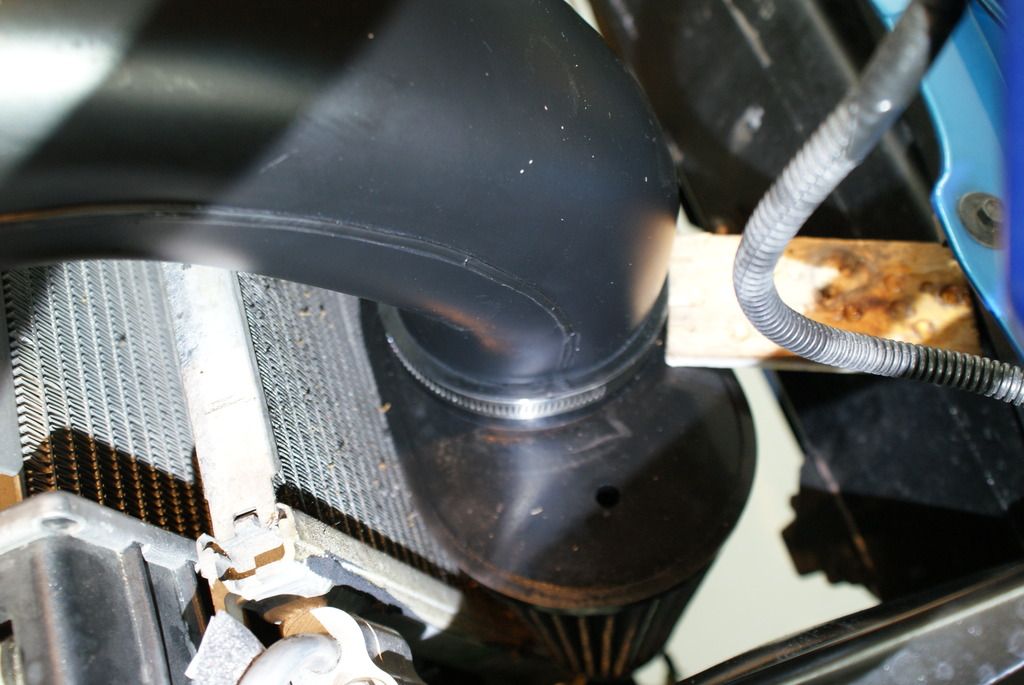

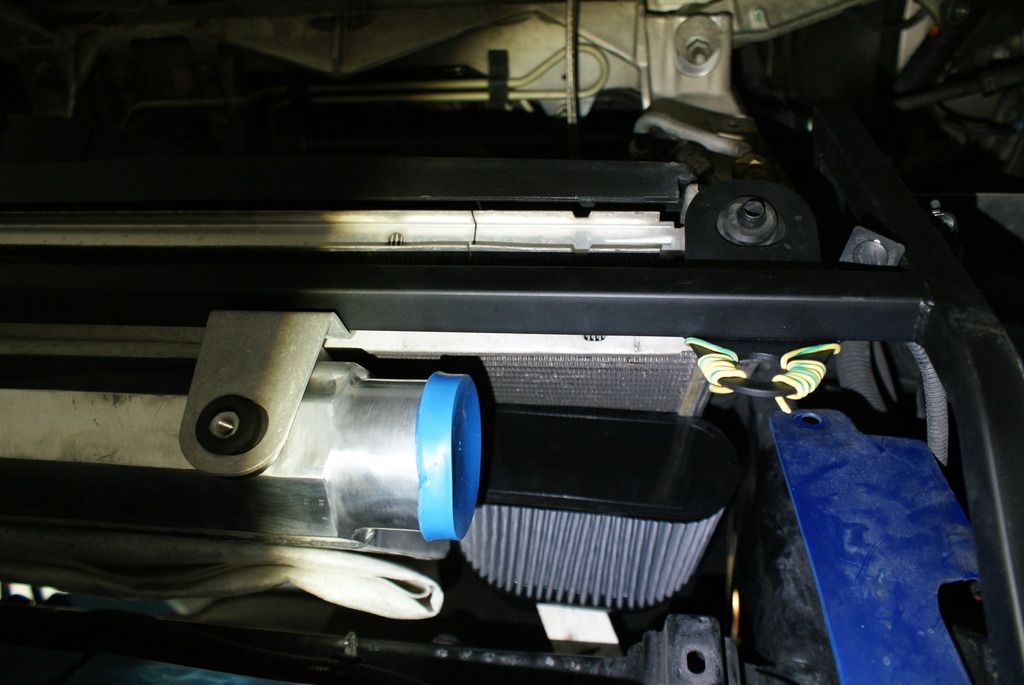
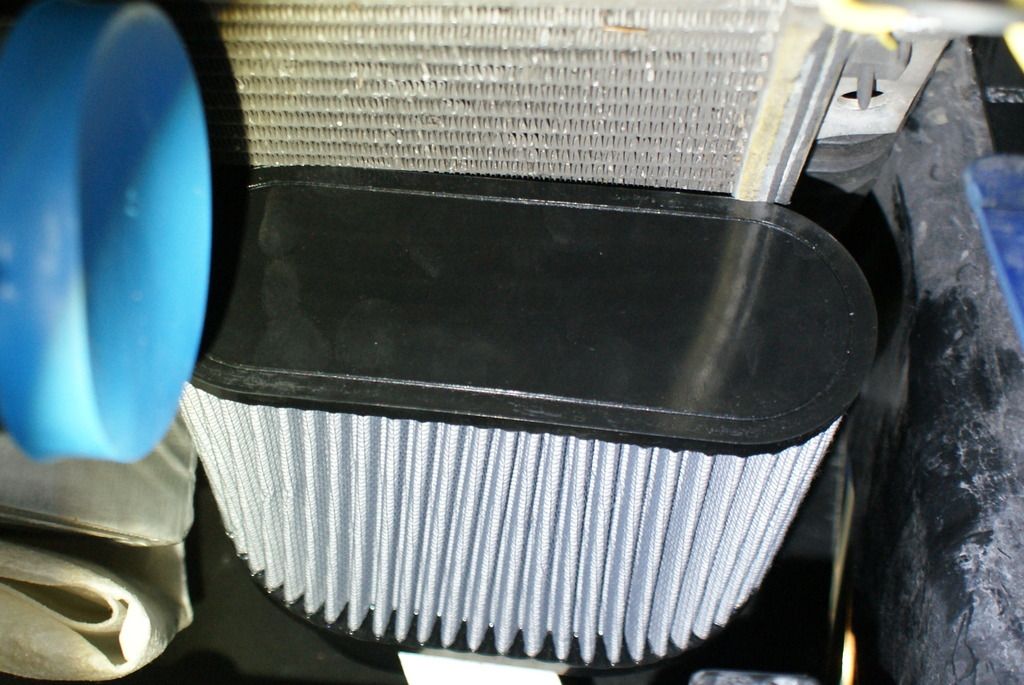
so, somehow there is no room between condensor and filter. the included angle of the bridge is 78�. if it were closer to 60� everything would be fine. there is 100 mm in front of the fiter. so what do i do? move the cradle back 30 mm and lower it? id rather find another solution for the bridge.
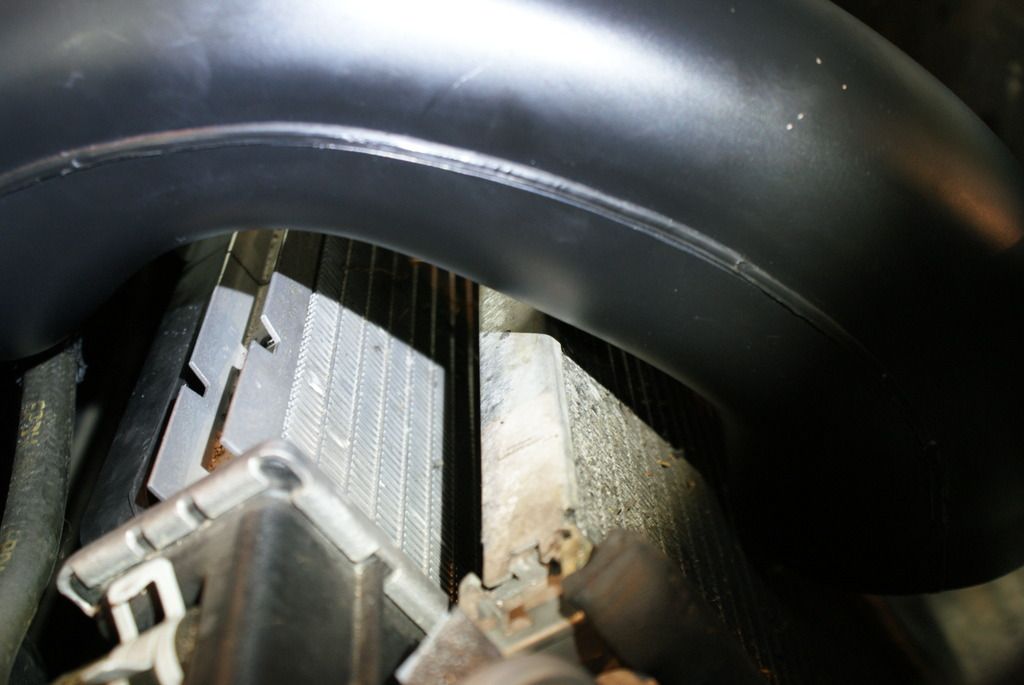
what am i missing? on the other builds it seems to fit! there is at least 10 mm between radiator, condensor top and bridge. why bend the fins on top of rad?
oh, btw, i remember somebody having a similar problem with the angle of the bridge to blower inlet. if your reading this, mate, let me know how it got resolved.
this is weird, lokking at 34, 39 pics in instructions and at nullpointers picts i am lost. even with the bridge touching the condensor without the filter, there is a gap of 1 mm at the bottom on blower inlet. the filter sits paraller to the condensor. no idea whats happening. just to close the gap i need to move the condensor back 1 x 450 :100 = 4.5 mm. that means i need to tilt back the top 4.5 x 40 : 13 = 13.8 mm. plus 20 mm in to seat the bridge on the blower.
well forget all the math, i must be missing something:


so, somehow there is no room between condensor and filter. the included angle of the bridge is 78�. if it were closer to 60� everything would be fine. there is 100 mm in front of the fiter. so what do i do? move the cradle back 30 mm and lower it? id rather find another solution for the bridge.
what am i missing? on the other builds it seems to fit! there is at least 10 mm between radiator, condensor top and bridge. why bend the fins on top of rad?
oh, btw, i remember somebody having a similar problem with the angle of the bridge to blower inlet. if your reading this, mate, let me know how it got resolved.
Last edited by romandian; 08-02-2015 at 01:54 PM.
08-03-2015, 05:28 AM
#94
Drifting
Thread Starter
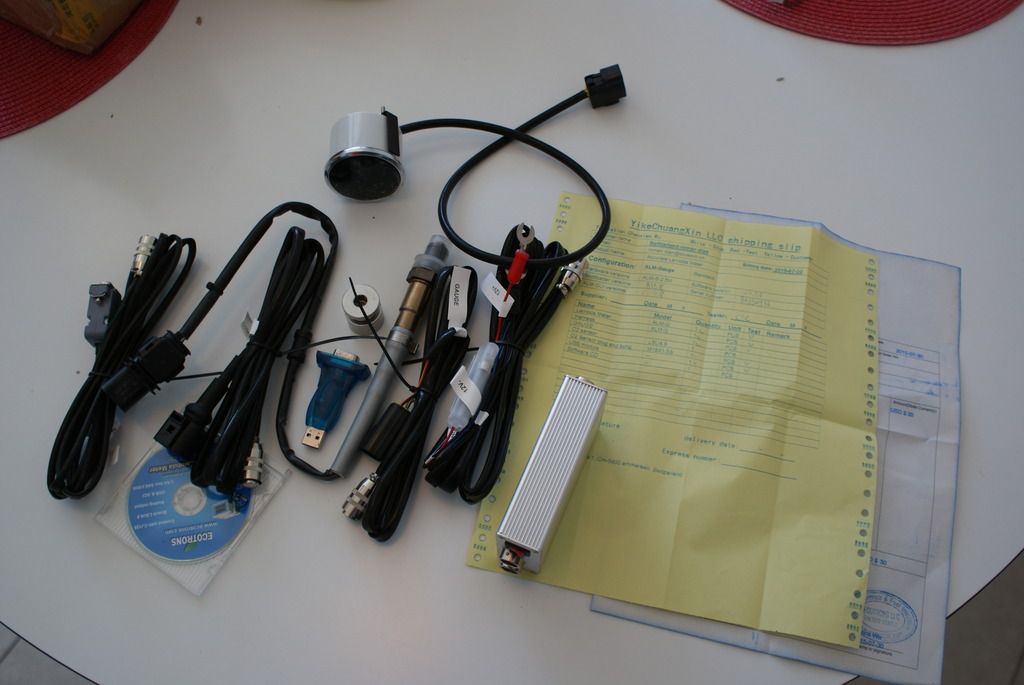
my ecotrons stuff just came in. i paied for it last wendesday. its comming from china and its here. i had dhl tracking but tnt delivered. weird.
anyways, if this works its probably the best deal out there at $199. the bung and plug seem to be stainless. why so many cables? i will have to figure that out. as efilive doesnt directly support it, i will have to program it somehow. i gave them my business becauce i liked their site, where they explain about the original bosch chip. maybe all other ones use it as well, but they dont mention it and i like to get educated. the price was right also.
http://www.ecotrons.com/products/wid...ler-alm-gauge/
edit: the sensor is bosch 0258 017 270/271. i hope its no fake. i will be able to get the round connector through a 16 mm hole without taking it appart, thats good. why does it have 5 wires comming out?
btw, these guys know how to do business: they only put $30 on the bill, which saves me a flat customs fee of $20 and 8% vat.
anyways, if this works its probably the best deal out there at $199. the bung and plug seem to be stainless. why so many cables? i will have to figure that out. as efilive doesnt directly support it, i will have to program it somehow. i gave them my business becauce i liked their site, where they explain about the original bosch chip. maybe all other ones use it as well, but they dont mention it and i like to get educated. the price was right also.

http://www.ecotrons.com/products/wid...ler-alm-gauge/
edit: the sensor is bosch 0258 017 270/271. i hope its no fake. i will be able to get the round connector through a 16 mm hole without taking it appart, thats good. why does it have 5 wires comming out?
btw, these guys know how to do business: they only put $30 on the bill, which saves me a flat customs fee of $20 and 8% vat.
Last edited by romandian; 08-03-2015 at 10:14 AM.
08-05-2015, 11:52 AM
#95
Drifting
Thread Starter
this week has been like christmas. this came in yesterday from summit:
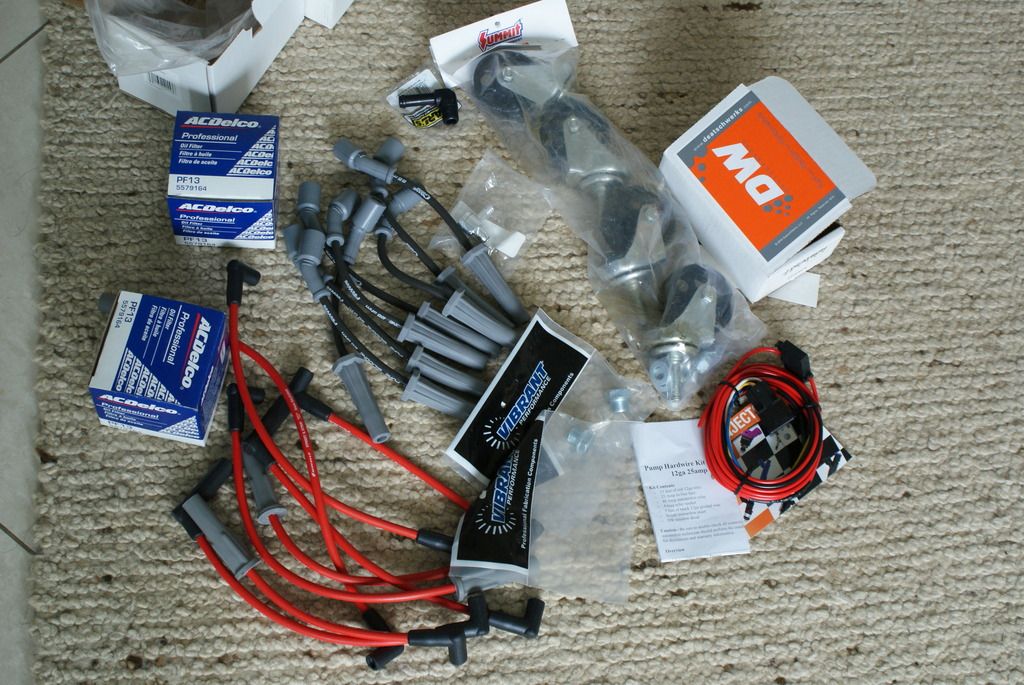
the red wires are for a cherokee as are the oil filters. the crane "8.5 mm" wires are 8 mmm (what a joke), but they look quality (25 ohms, although i dont get exited about that) and hopefully theyll fit. its a crazy world, i save money buying from summit, shipping cost was $130 including the new muffler for a cherokee (not shown). i paied $400 and saved $1000.
this came in from ecs as well:
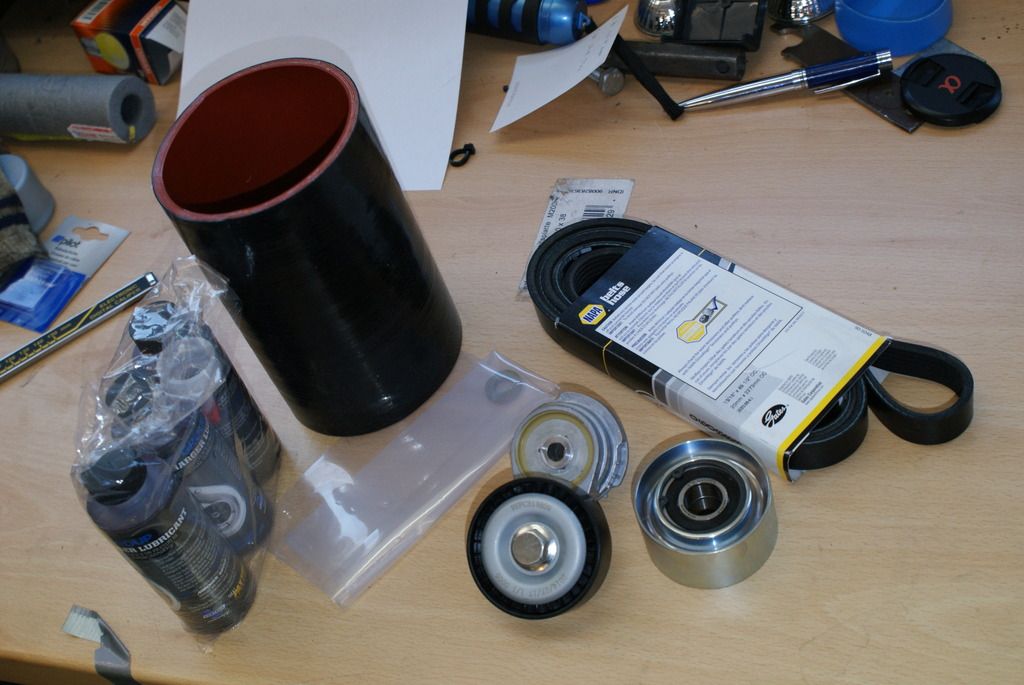
they shipped me an a/c idler and tensioner apparently for free. i was able to include some "spares" in the shippment. thanks ecs.
however, the idler seems to be replacement of the tensioner idler on the main belt. no big deal, i have got an a/c spare idler that should work.
the tensioner is similar as the one got before (acd 38196/gm890493). i still dont know how its supposed to fit the profiled nut.
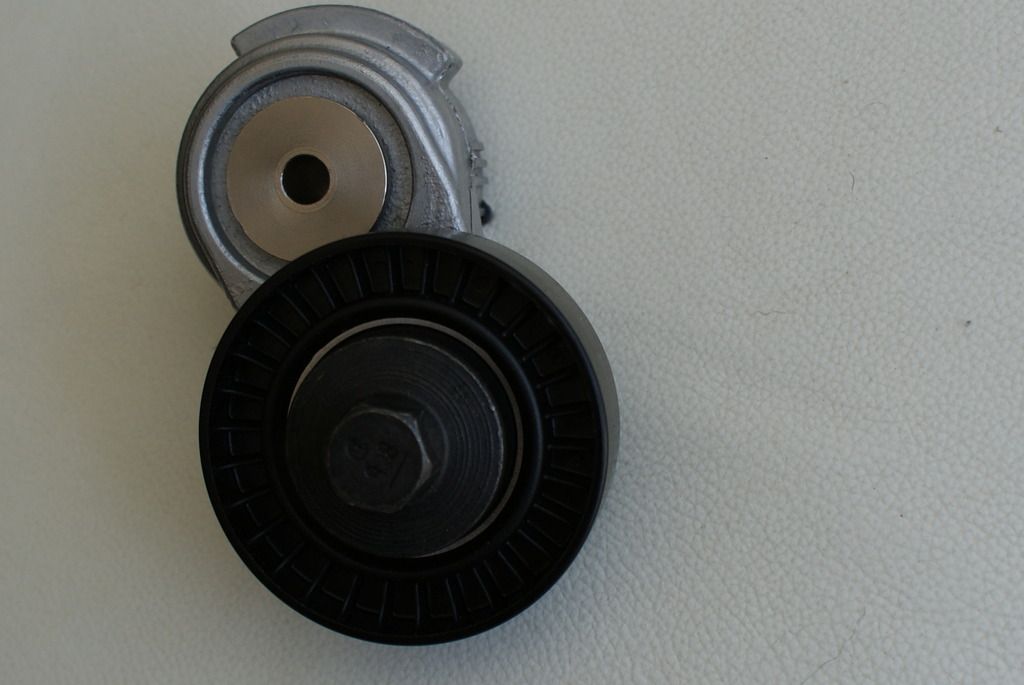
ecs tensioner:
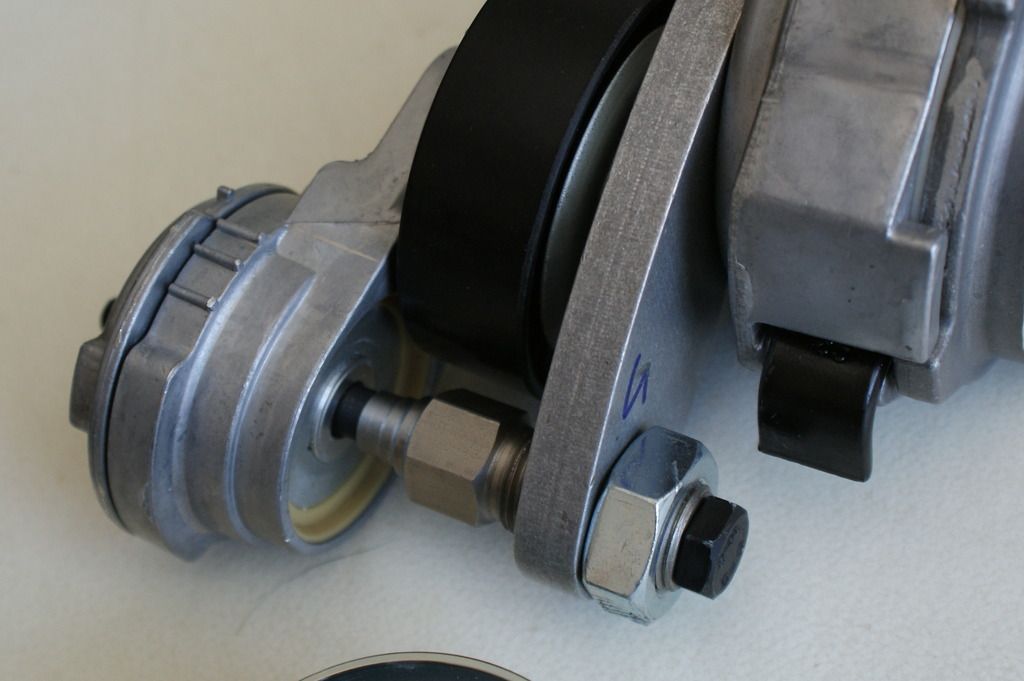
gm tensioner:
gm tensioner has a bore of 8.2 mm, ecs tensioner has 8.4 mm. first od of nut is 9.45 mm (id 8.2 mm).
greatfull if anybody could enlighten me, how/if this will work.
thanks.
btw, the four 250 lbs castors were $8, what a shame not to get them.

the red wires are for a cherokee as are the oil filters. the crane "8.5 mm" wires are 8 mmm (what a joke), but they look quality (25 ohms, although i dont get exited about that) and hopefully theyll fit. its a crazy world, i save money buying from summit, shipping cost was $130 including the new muffler for a cherokee (not shown). i paied $400 and saved $1000.
this came in from ecs as well:

they shipped me an a/c idler and tensioner apparently for free. i was able to include some "spares" in the shippment. thanks ecs.
however, the idler seems to be replacement of the tensioner idler on the main belt. no big deal, i have got an a/c spare idler that should work.
the tensioner is similar as the one got before (acd 38196/gm890493). i still dont know how its supposed to fit the profiled nut.
ecs tensioner:

gm tensioner:

gm tensioner has a bore of 8.2 mm, ecs tensioner has 8.4 mm. first od of nut is 9.45 mm (id 8.2 mm).
greatfull if anybody could enlighten me, how/if this will work.
thanks.
btw, the four 250 lbs castors were $8, what a shame not to get them.
Last edited by romandian; 08-05-2015 at 12:06 PM.
08-22-2015, 02:55 PM
#98
Drifting
Thread Starter
this is the state of affairs:
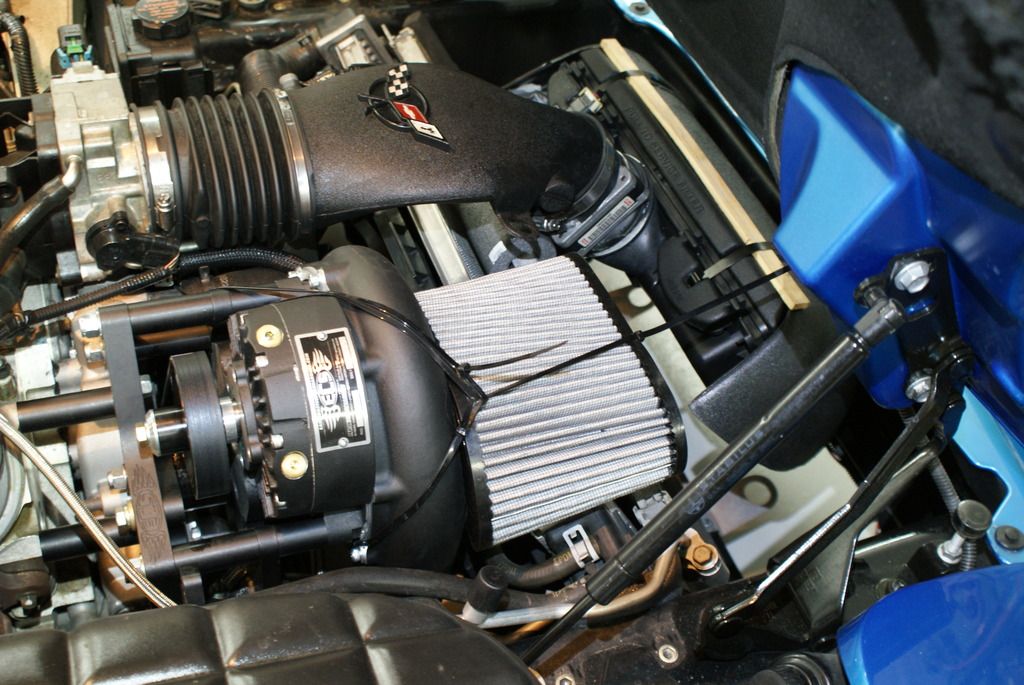
blower is installed and running, blowing down on the road. i found a professional, apparently a procharger and paxton dealer and had him do the pinning and installation of idlers and tensioners and of the blower (which took me about 15 min.), nothing else. the sway bar was off too. he charged me 10 hours labor and had a helper. so this install on a c5 is not a piece of cake. i drove the car for 80 miles and the belt is still there and looks good.
now the problem. the engine sounds good when driving and in park or neutral. in drive or reverse, however, it starts rattling/buzzing quite badly. has anybody experienced this as well?
i hope its just the additional load bogging the engine down and nothing else, without the pcm being able to adjust as it does with a/c. what do you think?
08-22-2015, 03:11 PM
#99
Drifting
this is the state of affairs:
blower is installed and running, blowing down on the road. i found a professional, apparently a procharger and paxton dealer and had him do the pinning and installation of idlers and tensioners and of the blower (which took me about 15 min.), nothing else. the sway bar was off too. he charged me 10 hours labor and had a helper. so this install on a c5 is not a piece of cake. i drove the car for 80 miles and the belt is still there and looks good.
now the problem. the engine sounds good when driving and in park or neutral. in drive or reverse, however, it starts rattling/buzzing quite badly. has anybody experienced this as well?
i hope its just the additional load bogging the engine down and nothing else, without the pcm being able to adjust as it does with a/c. what do you think?
My intake touches my ac condensor, it takes a little bit of working with it to fit it properly.
With the tune not adjusted, and the blower installed (its parasitic), the car may not run correctly.
08-22-2015, 05:46 PM
#100
Race Director

Member Since: Dec 2010
Location: Atlanta, GA
Posts: 10,426
Received 1,261 Likes
on
1,056 Posts
2020 Corvette of the Year Finalist (performance mods)
C5 of Year Winner (performance mods) 2019

why is your filter directly on the blower inlet and you don't have an inlet pipe?... where is your charge pipe, intercooler, etc???... and someone charged you 10 hours labor for that, wow!... the install may not be a "piece of cake" so to speak but it isn't that hard for someone who knows their way around a car... it looks like they half *** did the job and sent you on your way