
Single Turbo FRC Build
 01-09-2017, 10:33 AM
#61
AMP Racing

Member Since: Aug 2006
Location: Washington TWP NJ
Posts: 10,446
Received 466 Likes
on
352 Posts
2023 C5 of the Year Finalist - Modified
2017 C5 of Year Finalist
St. Jude Donor '09-'10-'11-'12

I'm still following along. I appreciate the updates and am looking forward to the finished car.
I don't have an answer for your question though.
I don't have an answer for your question though.

The following users liked this post:
Turpid porpoise (01-09-2017)
01-09-2017, 10:38 AM
#62
Melting Slicks

Thread Starter

I think I came up with an alternative. I'm going to use the stock feed line from the tank to the firewall(switching to the 97-98 style filter), run my 8AN line from the AEM pump through the rocker panel, tee them both together at the firewall and run a completely independent 6AN return line back to the fuel hat. That way I get the benefit of more volume in my lines while retaining the Y that goes to the passenger side tank.
01-09-2017, 04:11 PM
#63
Drifting

The stock feed has a Y then check valve and the side of the Y that feeds the passenger fuel tank is restricted down to a small orifice. I would do what you can to keep the stock feed line up until the point of where it connected to the old filter.
Last edited by slow ride; 01-09-2017 at 04:12 PM.
01-10-2017, 05:56 AM
#64
Melting Slicks
Thread Starter
Thats what I came up with too, thanks. Ill be using the stock feed line with a 97-98 filter.
01-11-2017, 07:50 AM
#65
Melting Slicks
Thread Starter
Anybody have a good recommendation for a boost reference FPR? Looking for -8 Inlet/outlet and -6 return ports at a minimum.
 01-11-2017, 09:37 AM
#67
Melting Slicks
Thread Starter
01-16-2017, 01:47 PM
#68
Melting Slicks
Thread Starter

Got the Viking coils mounted up temporarily with only one hitch.... They come with 3/8" mounting bolts for the shock to lower a arm and the instructions provided tell you to drill the mounting holes out for the larger bolts.... Well the bolts aren't long enough and I drilled before checking and when I asked Viking I was told that C5s do not require the larger hardware and to use the stock bolts or source my own properly sized hardware since I already drilled my A arms. Ended up using grade 10.9 M10x1.5x2.25" bolts sourced through Fastenal but hopefully this saves some of you some trouble in the future.
 01-16-2017, 03:16 PM
#71
Melting Slicks
Thread Starter
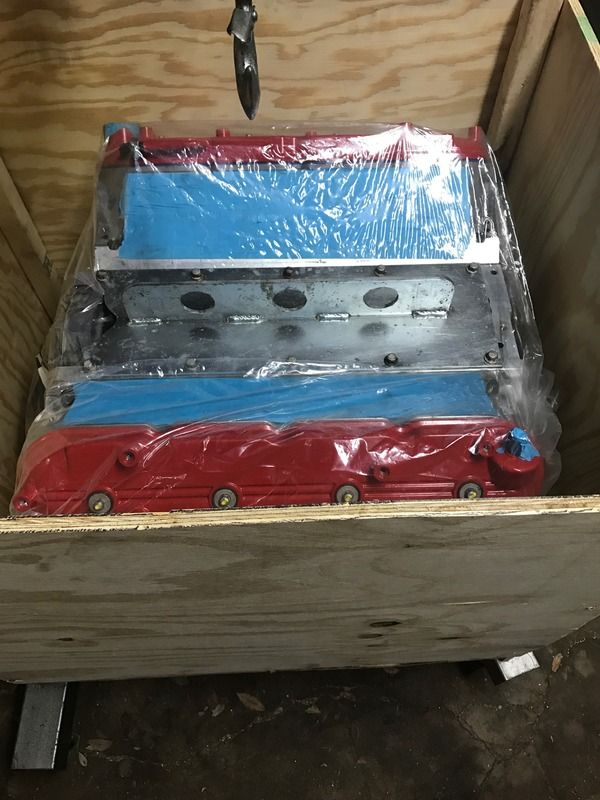
Getting there. I'm expecting the long block back within 7 days so I can really get moving.
Right? It was a bit surprising to me that I was told to source my own hardware after following the instructions provided assuming I was to use the hardware provided; granted I should have compared them before drilling. Either update the instructions or include the proper hardware
01-17-2017, 09:19 AM
#72
AMP Racing
Member Since: Aug 2006
Location: Washington TWP NJ
Posts: 10,446
Received 466 Likes
on
352 Posts
2023 C5 of the Year Finalist - Modified
2017 C5 of Year Finalist
St. Jude Donor '09-'10-'11-'12
Other than this "dropping the ball" by Viking, how do you like the quality of the shocks and springs, etc...
01-17-2017, 12:48 PM
#73
Melting Slicks
Thread Starter
Quality seems to be great, the ***** move with finger strength and there is a very noticeable click when you find the next setting. Assembly is very straight forward. From what I can tell its a very high quality product that just needs the right instructions.
01-19-2017, 12:12 PM
#74
Melting Slicks
Thread Starter
Has anybody tried these Fore Innovations low profile fittings for the back of the drivers side rail? I am wanting to feed both rails from the rear and I was hoping this may fit without having to cut out the firewall.
http://www.foreinnovations.com/product_p/33-015.htm
http://www.foreinnovations.com/product_p/33-015.htm
Last edited by Turpid porpoise; 01-19-2017 at 12:16 PM.
01-23-2017, 09:24 AM
#75
Melting Slicks
Thread Starter
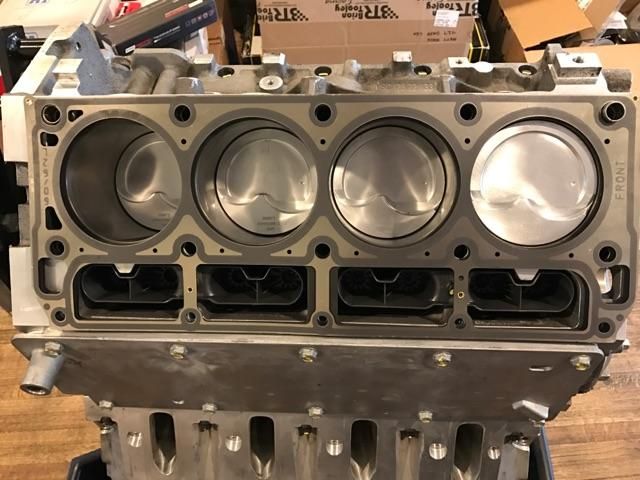
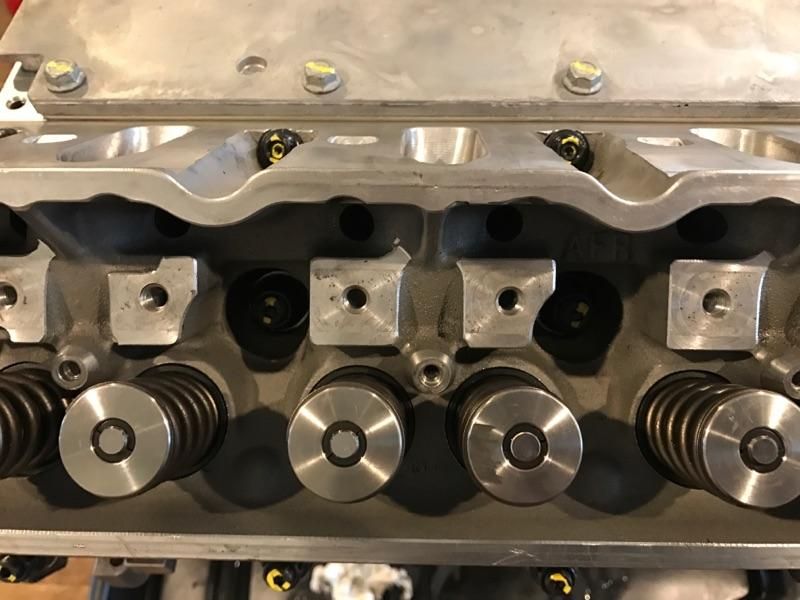
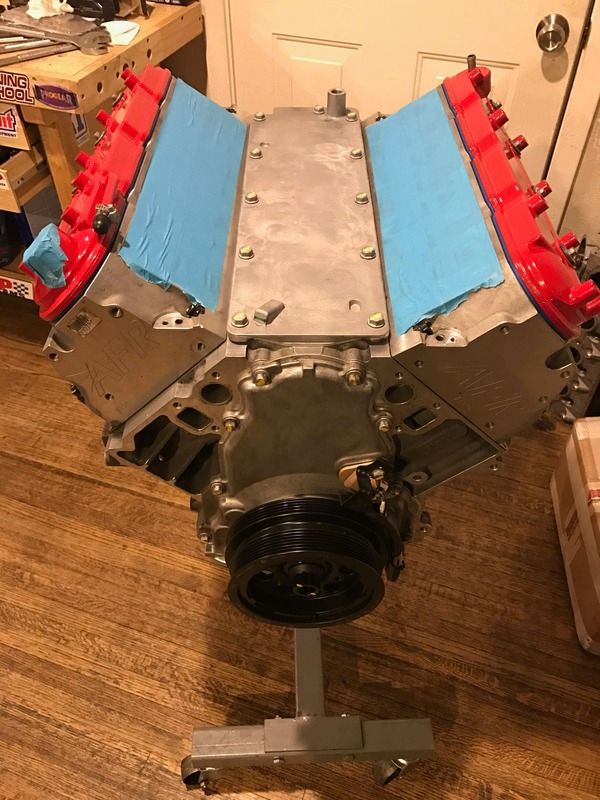
My LS2 is on it's way home, big thanks to Mike (MVP Z06). Now I can really start getting things put back together.


 01-26-2017, 11:14 AM
#76
Melting Slicks
Thread Starter
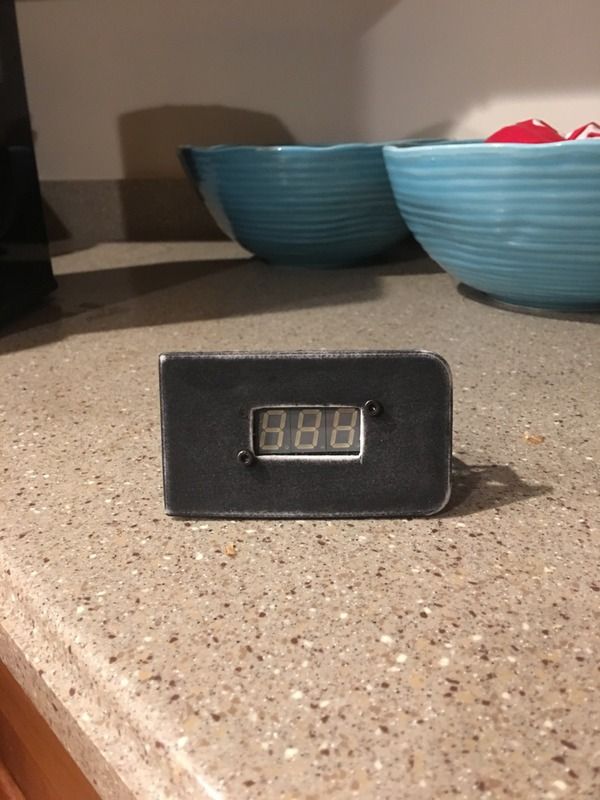
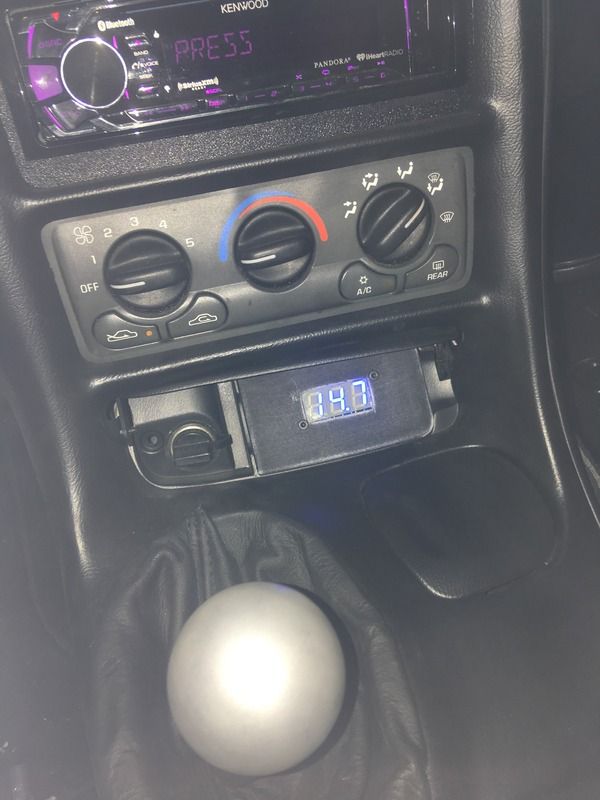
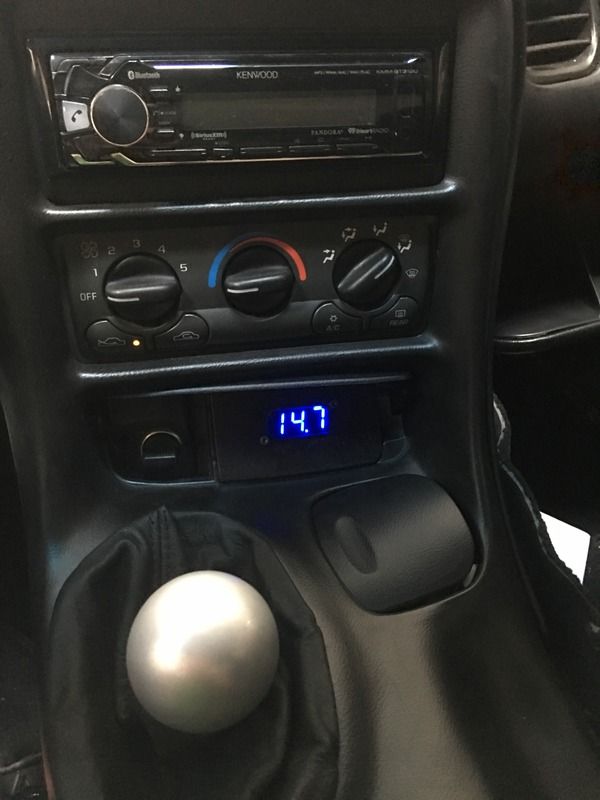
Finished up my new wideband display. It's just a 3d printed ashtray plate, some lexan and a "Dim It" tint strip. It's not perfect but it looks good enough to be hidden in the console.
Rough mock up.
Rough mock up mounted with no tint.
Painted and tinted lense finally installed.
Rough mock up.

Rough mock up mounted with no tint.

Painted and tinted lense finally installed.

Last edited by Turpid porpoise; 01-28-2017 at 02:22 PM.
The following users liked this post:
FourG63 97GST (01-26-2017)


 01-26-2017, 03:05 PM
#78
Melting Slicks
Thread Starter
01-26-2017, 04:11 PM
#79
Cool thanks. One more question - do you know how wide your coolant overflow tank is now and approximately how much you had to trim off the width? Looks like there are not may options out there and I'm not sure the Canton will fit without touching my turbine housing.
01-27-2017, 10:57 AM
#80
Melting Slicks
Thread Starter
When I get a few minutes I'll go measure it for you. Not sure how much they had to trim but I can atleast tell you how wide it is now.